Showing posts with label Asian. Show all posts

March 08, 2013

Green Vermicelli Noodle Bowl with Tofu


Like my last post, today's recipe is light and vibrant, leading the way into Spring, which I hope will come soon! After all, March did come in like a lion so that should mean it will go out like a lamb, right?

The inspiration for this green noodle dish came from Yotam Ottolenghi's Plenty cookbook, where I saw a recipe for warm glass noodles with edamame and green onions. I liked the idea of thin Asian style noodles full of edamame, so I turned that idea into my own dish.

I used brown rice vermicelli for the noodles (since glass noodles are hard to find). Then along with the edamame, I also added barely cooked snow peas for some crunch, and lightly sauteed tofu cubes for extra protein and texture.


Instead of using the green onions in the dish itself, I decided to pair the noodles with a recipe for green onion miso vinaigrette from Appetite for Reduction.  I made a couple of changes to the original recipe, like using white miso instead of red and reducing the amount of water to make a thicker, creamier dressing.

I have to say, the dressing surprised me - miso and green onions aren't typically ingredients that I tend to favour, but they came together to make a bold and flavourful dressing with just the right amount of bite from the onion, garlic and ginger!

I didn't intend for it to turn out this way, but with the brilliant green dressing, the edamame and the snow peas, this turned out to be a very green bowl - just in time for St. Patrick's Day!  You can also add extra green onions as a garnish for one more green component, which I forgot to do for these photos.

Hope you all have a great weekend, and don't forget to Spring forward on Sunday!


Green Vermicelli Noodle Bowl with Tofu
Inspired by Plenty; sauce adapted from Appetite for Reduction


Sauce
1/4 cup white miso
1.5 cups chopped scallions (white and green parts)
2.5 tsp minced fresh ginger
1 clove garlic, minced
3 tbsp rice vinegar
2 tsp agave nectar (or honey for non-vegan option)
2 tsp sesame oil
2 tbsp fresh lemon juice
1/4 cup water

Noodles
175g firm tofu
7 oz brown rice vermicelli
2 cups frozen edamame
6-7 oz snow peas
1 tbsp vegetable oil
2-3 cloves garlic, peeled
1 fresh green chili, minced
1/4 cup chopped fresh cilantro
Sesame seeds for garnish
Green onions for garnish (optional)

First, prepare the sauce by placing all ingredients in a blender and pureeing until smooth. Keep refrigerated until ready to use.

Press the water out of the tofu (press between paper towels under a heavy book for 15-30 minutes). Slice tofu into small cubes. Heat a large skillet over medium heat and spray with a bit of cooking spray. Add tofu pieces and cook until lightly browned on the bottom, then flip pieces and cook for a couple more minutes on the other side. Set aside.

Soak the vermicelli in boiling water for 2 minutes (or follow package directions). Drain and set aside.

Bring a pot of water to a boil. Add the edamame and cook for 5 minutes (or according to package directions). Drain and set aside. Wash the peas and trim the ends, removing the strings if desired.

Heat oil in a large skillet over medium heat.  Crush the garlic cloves with the flat part of a knife, then roughly chop them. Add garlic to the heated pan and cook for about 1 minute, until lightly browned. Add the chili and the snow peas and sauté for about one more minute. Add the cooked noodles and cilantro, stirring to mix. Pour in the sauce and toss everything with tongs or large spoons until the noodles are all coated and separated (Note: If your skillet isn’t large enough to hold all the noodles, you may have to transfer everything to a larger saucepan).  Add the tofu pieces and toss to combine. Once everything is warmed through, remove from heat.

Serve warm. Garnish each serving with a sprinkle of sesame seeds and a handful of chopped green onion if desired.

Makes 4 servings. 

Note: I found this was best eaten on the day it's made. If you plan on having leftovers, I would recommend only adding enough sauce for the portion that you are going to eat now, and then store the leftover noodles separately from the sauce in the fridge, only adding the sauce to each serving as you eat them.  Otherwise, the noodles will get a bit soggy (as I learned!).

February 15, 2013

Edamame Mushroom Wontons with Dipping Sauce


After making my baked banana, chocolate and strawberry wontons, I still had a lot of leftover wonton wrappers that I didn't want to go to waste, so I decided to come up with a savory recipe to use them with. I had seen a couple of recipes for edamame filled wontons online, and when I consulted my Vegan Eats World cookbook for more ideas, I saw a recipe for edamame gyoza with dipping sauce that sounded perfect!

Gyoza are typically made with round dumpling wrappers (like these ones from The Fig Tree), so I used a slightly different method to adapt the recipe as wontons instead.  I also changed up the filling ingredients from the original recipe a bit and added some mushrooms for more bulk and flavour. I couldn't decide what kind of mushrooms to get when I was at the Asian mart, but I ended up going with fresh enoki mushrooms because of their delicate texture and slightly sweet flavour that I thought would pair well with the edamame (plus they looked so cute!).

The filling for the wontons is blended up in a food processor until you get a slightly chunky, thick mixture that will hold together well inside the wontons. It also has a vibrant green colour, as you can see here:


Making the filling is the easy part, and then comes the somewhat tedious process of forming the wontons and cooking them. I made the wontons following the same method as last time - place a dollop of filling in the center, then fold over one corner to make a triangle shape and seal tightly.

Instead of boiling or frying the filled wontons, I decided to steam them because it seemed like the safest option to avoid having them break apart while cooking. That method seemed to work really well - they held together (for the most part) and I liked how the texture of the wontons became soft but chewy like pasta.


I found that the wontons themselves had a lot of flavour from the mixture of bold ingredients inside - although the green chili was almost too overpowering for my tastes, so I would probably leave that out next time.

The best way to eat these though was dipping them into a sweet and sour sesame-soy-lime dipping sauce.  I thought the flavours of the dipping sauce really complemented the wontons and helped to balance out the spicier edamame filling.

These would be a great appetizer to serve as part of as Asian meal, or eat them as a light meal on their own. Feel free to make a double batch of the dipping sauce and use it with other small bites or appetizers too, like sushi, spring rolls, dumplings, or scallion pancakes. 

Hope you all enjoy the weekend!


Edamame Mushroom Wontons with Dipping Sauce
Adapted from Vegan Eats World

1 cup frozen shelled edamame
~200 g fresh enoki mushrooms
1 clove garlic, peeled and minced
2 tsp minced fresh ginger
3 green onions, minced
1 small Thai green chili, minced (optional)
1/2 tsp kosher salt
1 tbsp mirin
1/2 tsp sesame oil
~30 wonton wrappers

Bring a large pot of water to a boil. Add a dash of salt, then add the frozen edamame. Boil for about 5 minutes, then drain, reserving as much of the cooking water as you can. Rinse the edamame with cold water, then transfer to a food processor.

Wash the mushrooms well, and chop off the woody stems (I cut off almost half of the entire bunch). Chop the rest of the mushrooms and add to food processor (you should end up with about 1 ¼ cups chopped mushroom).

Add the remaining ingredients (except wonton wrappers) to the food processor and pulse or process briefly until all the ingredients are combined (it’s okay to leave it a bit chunky).  Transfer mixture to a bowl.

To make the wontons, lay out one wrapper and keep the rest of the wrappers covered with a damp cloth or paper towel.  Place 1 heaping teaspoon of the filling mixture in the center of the wrapper. Wet the edges of the wrapper with water using your fingers, then fold over one corner to make a triangle. Press the edges of the wrapper together firmly, pinching with your fingers to seal well. Set the filled wontons on a greased baking sheet and keep covered with a damp cloth or paper towels. Continue making the wontons until your filling is used up.

Put the reserved edamame cooking water in a large pot and add more water if necessary to get about 3 cups. Bring to a simmer and add a steamer basket. Steam the wontons by placing about 7 or 8 wontons (as many as can fit in the steamer without overlapping) in the basket and cover the pot with a lid (Note: I found it easier to spray my steamer basket first with cooking spray, otherwise the wontons got a bit stuck). Steam each batch for 3-4 minutes, until the wonton wrappers are cooked like al dente pasta. Carefully remove wontons and transfer to a plate.  Continue steaming in batches.

Serve immediately with dipping sauce.

Makes about 30 wontons.

Dipping Sauce
3 tbsp tamari (or low sodium soy sauce)
4 tsp fresh lime juice
2 tsp mirin
1 tsp agave nectar
1 tbsp finely minced green onion
1 tsp finely minced fresh ginger
1/2 tsp sesame seeds

Place all ingredients in a small bowl and whisk to mix well.  Store in the refrigerator.

May 29, 2012

Pad Thai with Scrambled Tofu


Has anyone tried shirataki noodles? I've seen a few bloggers post about these "zero calorie" noodles, which are a chewy, translucent noodle made from japanese yams that can be added to soups and other dishes in place of regular noodles.  Even though I'm not on a diet, I was still curious about these noodles so I finally bought a package (the Miracle Noodle brand) so that I could try them myself.

A few weeks ago, I had a craving for pad thai.  Then I remembered the package of shirataki noodles sitting in my cupboard, and I figured they would be perfect to use instead of the usual rice noodles!

The noodles come packaged in a watery solution that can have a very strong "funky" smell, according to other people who have tried them.  I was pretty nervous when I opened mine up, but they actually didn't smell that bad, and once you rinse them off, they're quite easy to prepare since they're precooked.

To complete my pad thai, I wanted to make it as authentic as possible.  So I thought back to the amazing pad thai I ate in Thailand a couple months ago and tried to remember as best as I could exactly what was in it.  I knew it had to have a spicy component from chilies, but since I couldn't find Thai chilies, I just used a jalapeno.  I also remembered my pad thai having shallots, bean sprouts and green onions, so I included those as well.  And for presentation, the authentic dish that I had was served with lime wedges and a handful of crushed peanuts on the side, which were mixed in to the noodles as you ate, so I tried to replicate that on my own plate.


Next came the sauce.  I've seen versions of pad thai that use ketchup in the sauce, but I think the real key ingredient to get the pad thai flavour is tamarind paste, which you should be able to find for a cheap price from an Asian food mart.  I ended up using this recipe for pad thai sauce but I replaced the peanut flour with peanut butter and used sriracha sauce instead of chili powder.

The final component that I would need to create a pad thai that matched the one I had eaten in Thailand would have been to add scrambled eggs to the dish.  But since I don't usually eat eggs or have them around, I decided to just leave that part out.  But then I came up with a new idea -  why not use scrambled tofu instead?

I've actually never made scrambled tofu before, but I've seen lots of recipes for it and I knew that the texture  and consistency would be very similar to eggs. So I added some crumbled tofu to the pan and stirred it around as you would with scrambled eggs, and luckily, my little experiment turned out perfectly! The tofu had just the right texture that I wanted, and it really soaked up the extra sauce, giving it lots of flavor. The addition of the tofu also helped give the dish a bit more substance and protein, since the noodles didn't provide any calories or nutrition.

Overall, my vegan pad thai may not have been truly authentic, but I thought the mixture of flavours and textures was pretty close to the original version that I tried in Thailand! I especially loved the extra dimensions of flavour from the lime juice and peanuts, so you definitely shouldn't leave those out!

I also really liked the thick, chewy shirataki noodles, but you could easily replace them with rice noodles if you prefer - just follow the cooking instructions on the package.


Pad Thai with Scrambled Tofu

Sauce:
Adapted from The Wannabe Chef

2 tbsp peanut butter
2 tbsp tamarind paste
2 tsp soy sauce
1/2 tbsp rice vinegar
1/2 tbsp sesame oil
1/2-1 tsp sriracha (to taste)

Pad Thai:

1 package (7 oz) shirataki noodles (can substitute rice noodles)
1 tbsp vegetable oil
1 shallot, diced
1 clove garlic, minced
1/2 a jalapeno pepper, minced
~4 oz firm tofu, crumbled
2 green onions, minced
1/2 cup bean sprouts
Lime wedges and crushed peanuts for serving

To make the sauce, whisk or stir all ingredients together in a small bowl. Set aside.

Drain the shirataki noodles from their package and rinse under cold water.  Let the noodles soak in a bowl of water for about 10-15 minutes.

Meanwhile, heat the vegetable oil in a large skillet over medium heat.  Add the shallots and cook, stirring, for about 1 minute. Add the garlic and jalapeno and cook for another 30 seconds.  Add the crumbled tofu and cook, stirring occasionally, for about 5 minutes, until the tofu is softened and lightly browned. (You can leave the tofu in larger chunks, or break it up into smaller pieces using a wooden spoon as you cook).

Drain the noodles and add to the skillet.  Add the sauce and a splash of water and stir the sauce into the noodles. Once the sauce and noodles are hot, add the green onions and bean sprouts.  Stir for about 1 minute, until everything is heated through and coated in the sauce.

Transfer the contents to two plates. Garnish each plate with a handful of crushed peanuts and additional bean sprouts if desired.  Serve with lime wedges.

Makes 2 servings. 


This was submitted to Wellness Weekend at Diet, Dessert and Dogs. 

May 16, 2012

Tofu Banh Mi


I don't post a lot of sandwich recipes on my blog because the ones I eat are usually pretty simple, like hummus and veggies on a bagel, tofu salad in a pita, or even plain old peanut butter and jam.

Up until now, my favourite sandwich combination was this pumpernickel sandwich with avocado, sprouts and a white bean spread.  But now there's a new sandwich in town and its ready to take over the number one spot - the banh mi!  Whereas the pumpernickel was soft, creamy, and comforting, this one is sharp, spicy, and in-your-face!

If you haven't heard of banh mi, it's a Vietnamese baguette that is usually made with some kind of meat filling and topped with pickled carrot and daikon radish, cucumber slices, fresh cilantro and a spicy mayonnaise and chili spread.  I had seen recipes for both vegetarian and non-vegetarian versions of this sandwich online, but I had never tried one until a few months ago, when I came across a small take-out restaurant nearby that actually specializes in these popular sandwiches.

They offered a lot of different kinds of banh mi, and luckily there was one vegetarian option on the menu! I watched as the bun was toasted and spread with mayonnaise, then topped with a layer of tofu, followed by pickled vegetables, and whole sprigs of cilantro.  When I got my sandwich home and tried it, I fell in love with the flavour combination.  Even though my mouth was on fire from the spiciness, I couldn't stop eating!


Ever since then, I've wanted to recreate the banh mi myself.  So when I read through the new Vegetarian Times special edition ("Healthy recipes from around the globe") that I received for my birthday and saw a recipe for a tofu bahn mi, I knew I had to make it!

The recipe does require a bit more work than your typical sandwich, because you have to prepare a lot of ingredients and marinate both the tofu and the veggies, but I promise it's worth the effort!  The tofu is marinated in soy sauce and ginger, then sauteed on the stove.  While the tofu is marinating, the carrot and daikon are soaked in a rice vinegar mixture to make them pickled. For the rest of the toppings, you need a large section of cucumber that you can peel lengthwise, and some fresh cilantro with the stems on (this may be the only time I've ever eaten the stems!)

Once all the components are ready, you just need to assemble the sandwich and spread on a layer of mayonnaise (or vegenaise) and as much spicy chili sauce as you like!


I have to say, I definitely enjoyed my homemade version better than the one I got from the restaurant (as is usually the case with homemade vs fast food).  I loved the way each of the flavours played off each other with every bite - the spice from the chili sauce and red pepper flakes, sourness from the pickled veggies, the bite from the fresh cilantro, and even a touch of sweetness.  The tofu had a nice texture and really soaked up the flavours of the marinade.

This was definitely not your ordinary or everyday sandwich, but it was so refreshing to try a new combination of ingredients and toppings!  I made a big batch of each of the components so that I could make a fresh sandwich for dinner three nights in a row, and I enjoyed them just as much each time!

Just make sure you use a sturdy bun because you don't want it get too soggy from the sauces - Vietnamese subs would be best if you can find them, but I just used a French baguette from the grocery store.  You can also toast the bread before hand, but I liked mine soft - it's up to you!


Tofu Banh Mi
Adapted from Vegetarian Times


Per sandwich:
4 oz firm tofu
3/4 tbsp soy sauce
1/2 - 1 tsp minced fresh ginger
1/4 cup rice vinegar
1/2 tsp kosher salt
2 tsp sugar
1/2 tsp red pepper flakes
1/4 cup grated or julienned carrot
1/4 cup grated daikon radish
1/2 tbsp vegetable oil
Vietnamese sub or French baguette
1 tbsp vegenaise or low-fat mayonnaise
1 tsp chili sauce (sriracha), or to taste
~ 6 sprigs of fresh cilantro (including stems)
2 thin slices of cucumber, about 6 inches long

Drain the tofu and slice lengthwise into 1/2 inch thick slices (I used a 12 oz package and got three rectangular slices – enough for three large sandwiches). Press tofu strips between layers of paper towel with a heavy book on top.  Let sit for about 20-30 minutes.

Mix the soy sauce and ginger in a shallow pan or bowl.  Lay the tofu strips in the pan and let marinate for at least 30 minutes, flipping halfway through to coat all sides.

Mix the rice vinegar, salt, sugar, and red pepper flakes in a small bowl and add the grated carrot and daikon. Let sit for about 30 minutes, stirring occasionally.

When the tofu is ready, heat the oil in a large skillet over medium heat. Add the tofu and cook for 3-4 minutes per side.  Remove from heat and transfer to a paper-towel lined plate.

To arrange the sandwich, slice the bun or baguette in half (*Note: you can toast the baguette first if desired by placing it under the broiler for about 5 minutes). Spread the vegenaise on the top half and dot with the chili sauce.  Place the cilantro on the top half.

Place the tofu slice on the bottom half of the baguette. Lay the cucumber slices over the tofu.  Drain the carrot-daikon mixture and place on top of the cucumber. Close sandwich and enjoy!

Makes 1 large sandwich.

April 15, 2012

Thai Green Curry with Tofu and Eggplant


After my daikon radish cakes, the next Asian dish that I wanted to try making at home was a Thai green curry.  Before my trip to Thailand, I would usually stick with red curry at restaurants but now I know that the other types of Thai curries, including the green and yellow varieties, are just as complex and delicious, if not more!

When I first set out to recreate a green curry at home, I planned on buying a jar of premade curry paste.  I had always assumed that making your own curry paste would be too difficult or that I would never be able to find the right ingredients. But after looking at a few recipes for homemade green curry paste, I realized that it wouldn't be too hard to make, and the result would probably taste much more authentic!

So I made a visit to the nearest Asian food market and picked up all of the ingredients that I would need, including some that I'd never bought before like fresh lemongrass, kaffir lime leaves and Thai basil.  Finding all the right ingredients was probably the hardest part of the whole process because none of the herbs were labelled and I had no idea what anything was, but eventually I got everything that I needed and couldn't wait to get home and start cooking with them!


I made the curry paste the day before I made the actual curry.  I didn't want to try tasting it on its own, but I could tell that it would have a lot of flavour just by its smell.  (Actually, I did try a tiny taste, but I don't recommend doing that - it does not taste good and my tongue was practically on fire!)

For the curry itself, I followed a recipe from my Canadian Living cookbook, which called for tofu, eggplant, grean beans and okra.  I changed the vegetables a bit my replacing the green beans with Chinese long beans and adding some bok choy instead of okra.  Then the broth is made by simmering the green curry paste with coconut milk and vegetable broth, with some lime juice and Thai basil added at the end.

When I finally got to try the curry, I was not disappointed! I thought the broth definitely tasted authentic, and had such a complex flavour - spicy, herbal, and slightly sweet from the coconut milk.  I really liked the pieces of soft tofu, but I wasn't crazy about the long beans - next time I would just use regular green beans like the recipe called for, or leave them out.

Now that I've learned how to make green curry, I can't wait to try some other kinds - I would love to find a good recipe for Panang curry since that was one of my favourite meals that I ate in Thailand, so if anyone has a recipe, let me know!


Thai Green Curry with Tofu and Eggplant
*I followed the recipe from Canadian Living: The Vegetarian Collection pretty closely, so rather than rewriting it out here, I will link to the recipe online and list the changes that I made.

Green Curry Paste
Recipe can be found here
- the only change I made was to replace the lime zest with 5 kaffir lime leaves, minced first before adding to the food processor

Curry
Recipe can be found here
- Used 8 oz of regular eggplant because I had already bought some, but next time I would try the Japanese eggplant
- Replaced the green beans with 1 cup of Chinese long beans (although next time I would use regular green beans)
- Left out the okra
- Added 2 stalks of Shanghai bok choy, thinly sliced and added to the pot during the last 2 minutes of cooking time
- Added two kaffir lime leaves, sliced in half lengthwise, added to the pot at the same time as the tofu
- Used 1/4 cup of chopped fresh Thai basil instead of the coriander

Makes 4 servings.

April 11, 2012

Daikon Radish Cakes


After eating so many new and delicious dishes on my trip to Singapore and Thailand, I knew that I would have to try to recreate some of them once I got home!

I loved all of the curries that I ate, but one of the first dishes on my list to try was the radish cakes that I tried in the airport on my way home from Singapore (pictured below).  They were pan-fried and served hot, and had a soft texture similar to potato with a subtle but noticeable radish flavour that I really liked.


All I knew about them was that they were made with white radish (daikon), so I got to work searching for more information about how to make them at home.  I came up with a wide variety of recipes, many of which contained dried shrimp or other non-vegetarian ingredients.  So I went with the simplest approach I could find and the least number of ingredients to come up with a version that I thought would be the most similar to what I had eaten.

It took me a couple of tries until they turned out the way I wanted, mainly because I don't own an actual steamer so it was a bit difficult to cook them properly with my makeshift steamer!  But in the end, I came up with this version that I was really happy with!  The texture wasn't quite as soft and tender as the authentic version, but I thought the taste was just right - the radish wasn't too overpowering, and I liked the subtle flavour from the white pepper and the cilantro.

I liked eating them on their own, but my mom thought they were a bit plain, so you could try serving them with a dipping sauce, or some plain yogurt (I liked them this way too).  I also served mine as a meal along with an Asian pineapple slaw.

You do need to set aside a good chunk of time to prepare these, but the steps are pretty simple and most of the time is hands-off.  I think these would be a great appetizer to serve as part of an Asian meal, plus they are vegan and gluten-free, so everyone can try them!


Daikon Radish Cakes
Adapted from various sources, including this recipe 

1.5 cups grated daikon
3/4 cup water
1 cup rice flour
1 tbsp corn starch
1/2 tsp kosher salt
1/4 tsp sugar
a dash or two of white pepper (can substitute ground black pepper if you can't find white pepper)
1 tbsp chopped fresh cilantro

Place grated daikon and water in a small saucepan and bring to a boil. Reduce heat to low and simmer, stirring occasionally, for about 15 minutes.  Remove from heat and let cool.

Meanwhile, mix the remaining ingredients together in a large bowl. Add the radish and cooking water and stir to form a dough.

Transfer dough to a greased 8x8 pan and press down with a spatula to smooth the top (the dough should be about ½ inch high and will only fill about two-thirds of the pan).

Place the baking pan in a steamer and steam for 35-45 minutes.  Remove the dough from the pan and slice into squares. 

Heat about 1-2 tsp vegetable oil in a large skillet over medium heat. Transfer squares to the skillet and sauté for about 3-4 minutes per side, until they are lightly browned.

Serve immediately.

Makes 8 squares.


January 04, 2012

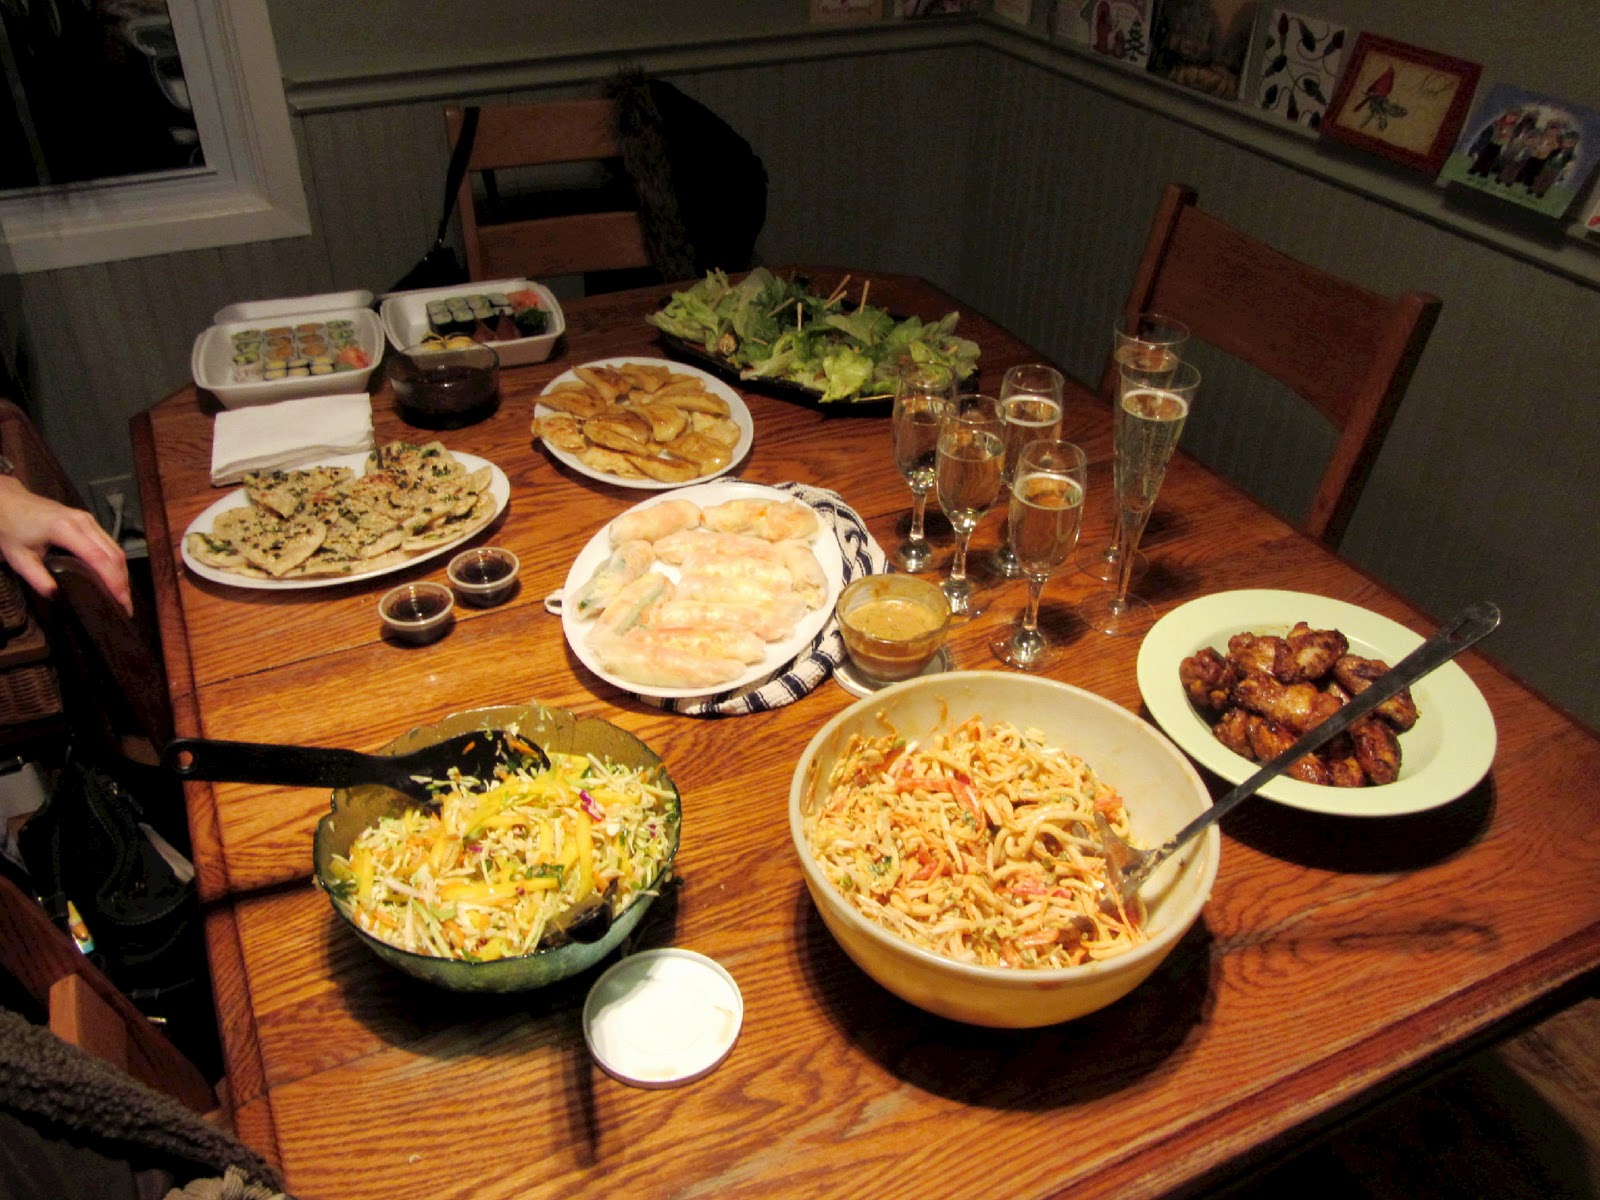
New Year's Eve Asian Feast & Liebster Award

I don't typically make New Year's resolutions but if I had to make one this year, it would be to use my cookbooks more often.  And now that I've received two new vegan cookbooks this Christmas full of recipes that I want to make (Vegan Planet and Appetite for Reduction), it won't be hard to keep that resolution!

I've already tried over eight recipes from the two books, and all of them turned out so well!

I actually made six of those recipes (plus two dipping sauces) from Vegan Planet all in one day for our New Year's Eve dinner, and since I loved everything so much, I wanted to share the meal on my blog!

I was inspired to create an Asian style appetizer feast after remembering a fun NYE a couple years ago with my older sister when we ate sushi.  And since I found so many delicious-sounding recipes in Vegan Planet that would suit the theme, I decided to make them all!

I was a bit worried that I was too ambitious in taking on such a big task by myself and that I wouldn't finish everything on time for dinner, but I worked pretty much non-stop all day long and had everything on the table by about 7pm in time for us to eat.


Even though it was a LOT of work to prepare everything, I actually enjoyed the process and the end result was definitely worth it (not to mention all the praise I received from everyone who ate it!)  We all thought the food tasted better than take-out, plus it was a lot cheaper!

I won't reprint all the recipes here, but I do encourage you to buy the book - I'm sure you will get a lot of use out of it! And if you already own Vegan Planet but haven't tried these recipes, I hope you'll bookmark them to make soon!

(Sorry for the dark photos, I didn't have time to take proper pictures in better lighting before we ate everything!)


Ginger-Scented Vegetable Pot Stickers


These were easier than I thought to make - I prepared the filling ahead of time (tofu, cabbage, carrots and some other flavouring ingredients processed together), then assembled the dumplings using storebought round wonton wrappers and stored them in the freezer until it was time to cook them.


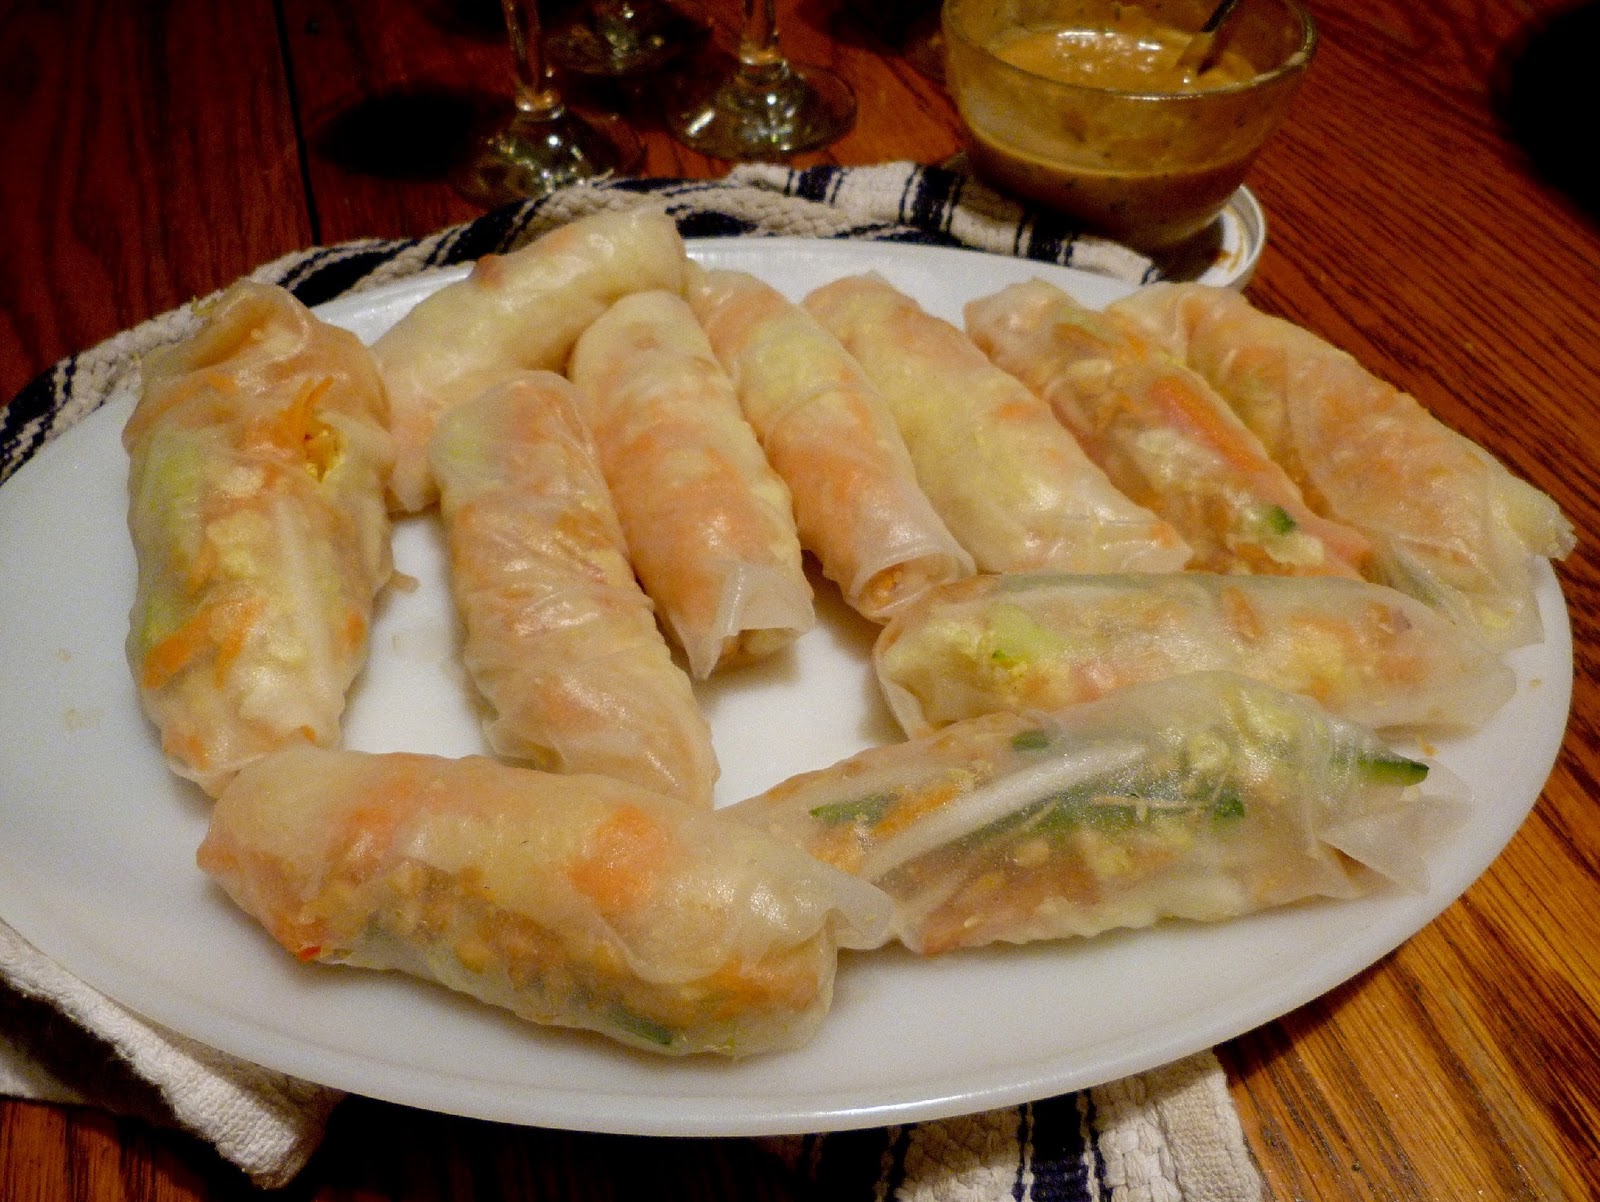
Vegetable Spring Rolls with Spicy Peanut Dipping Sauce


This was my first time making fresh rolls and took took a couple tries to get the hang of it (as you can see, the one on the left was my first attempt). I filled them with cabbage, carrot, red pepper, cucumber, bean sprouts and chopped peanuts. And you have to make the peanut sauce for dipping them in!


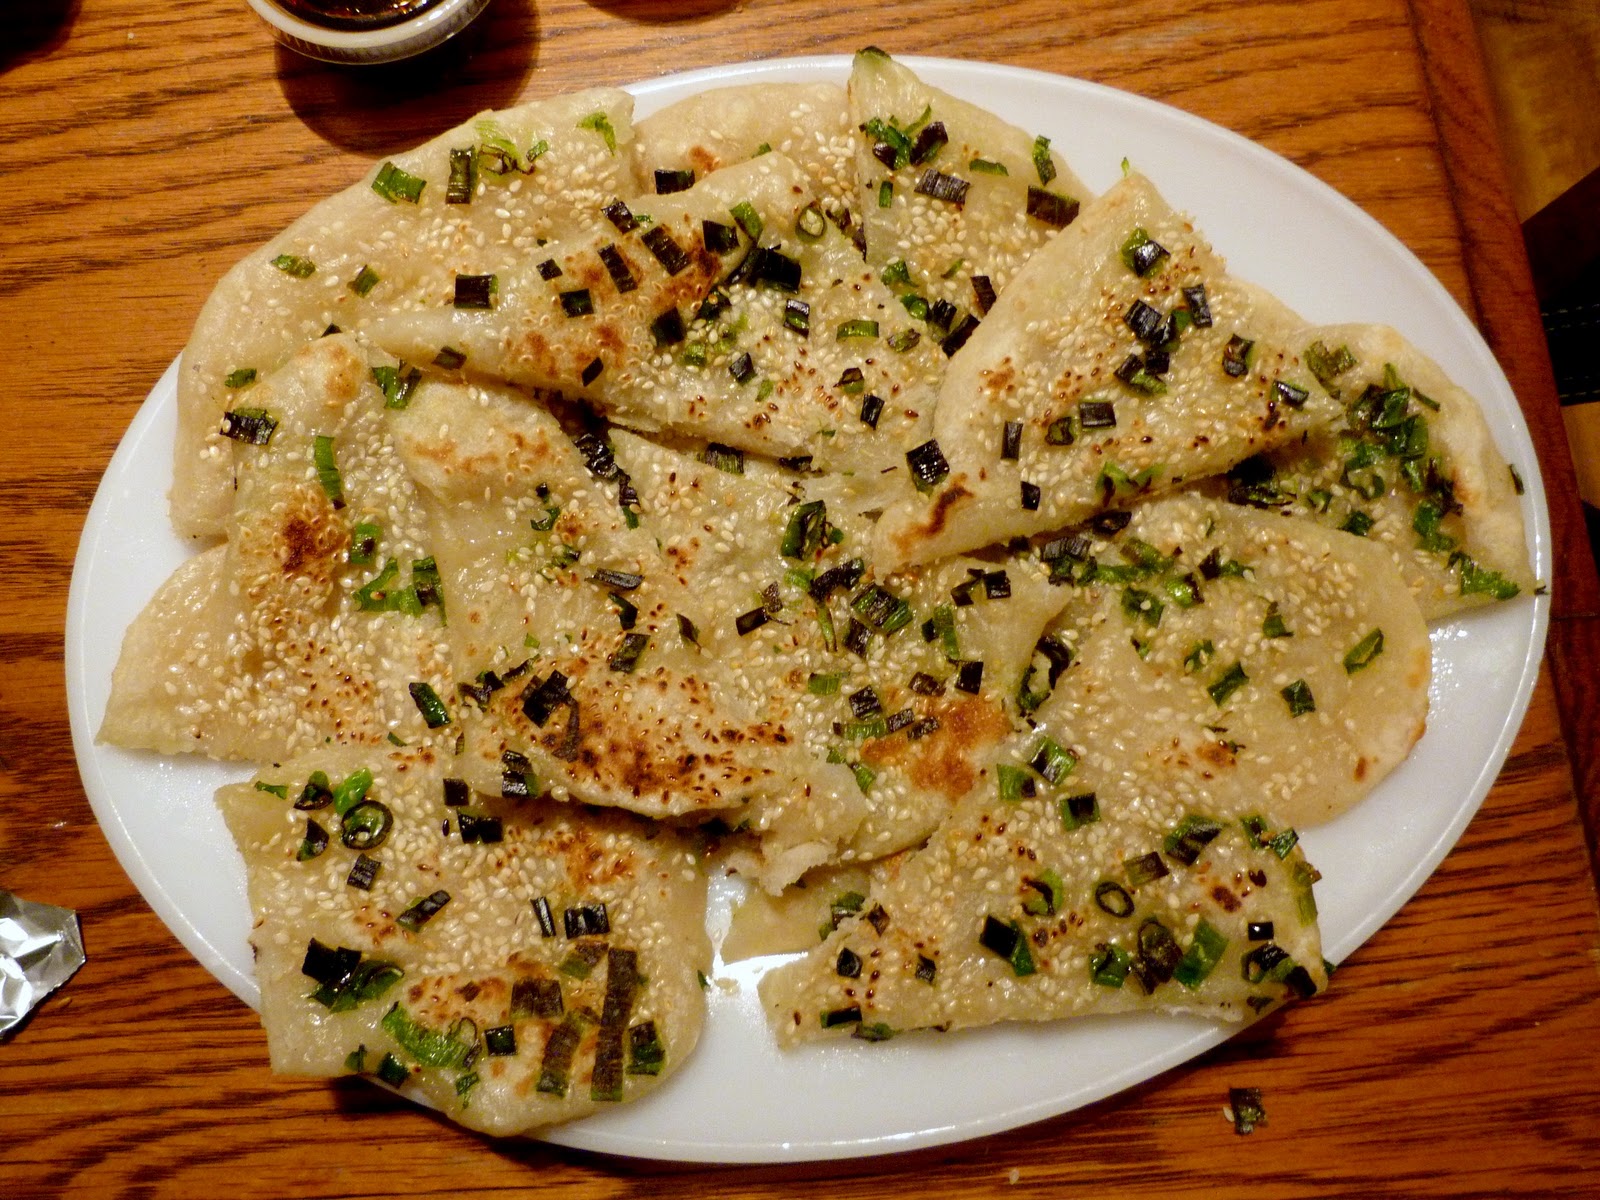
Scallion Pancakes with Ginger-Lime Dipping Sauce


These pancakes are made from a simple flour-water dough and coated with sesame oil, scallions and sesame seeds. As there are no pictures in the cookbook, I wasn't quite sure how these were supposed to turn out, but I'm pretty sure they aren't supposed to look like this. Even though they didn't brown as much as I wanted them too, they had a nice texture and tasted great, especially with the dipping sauce.


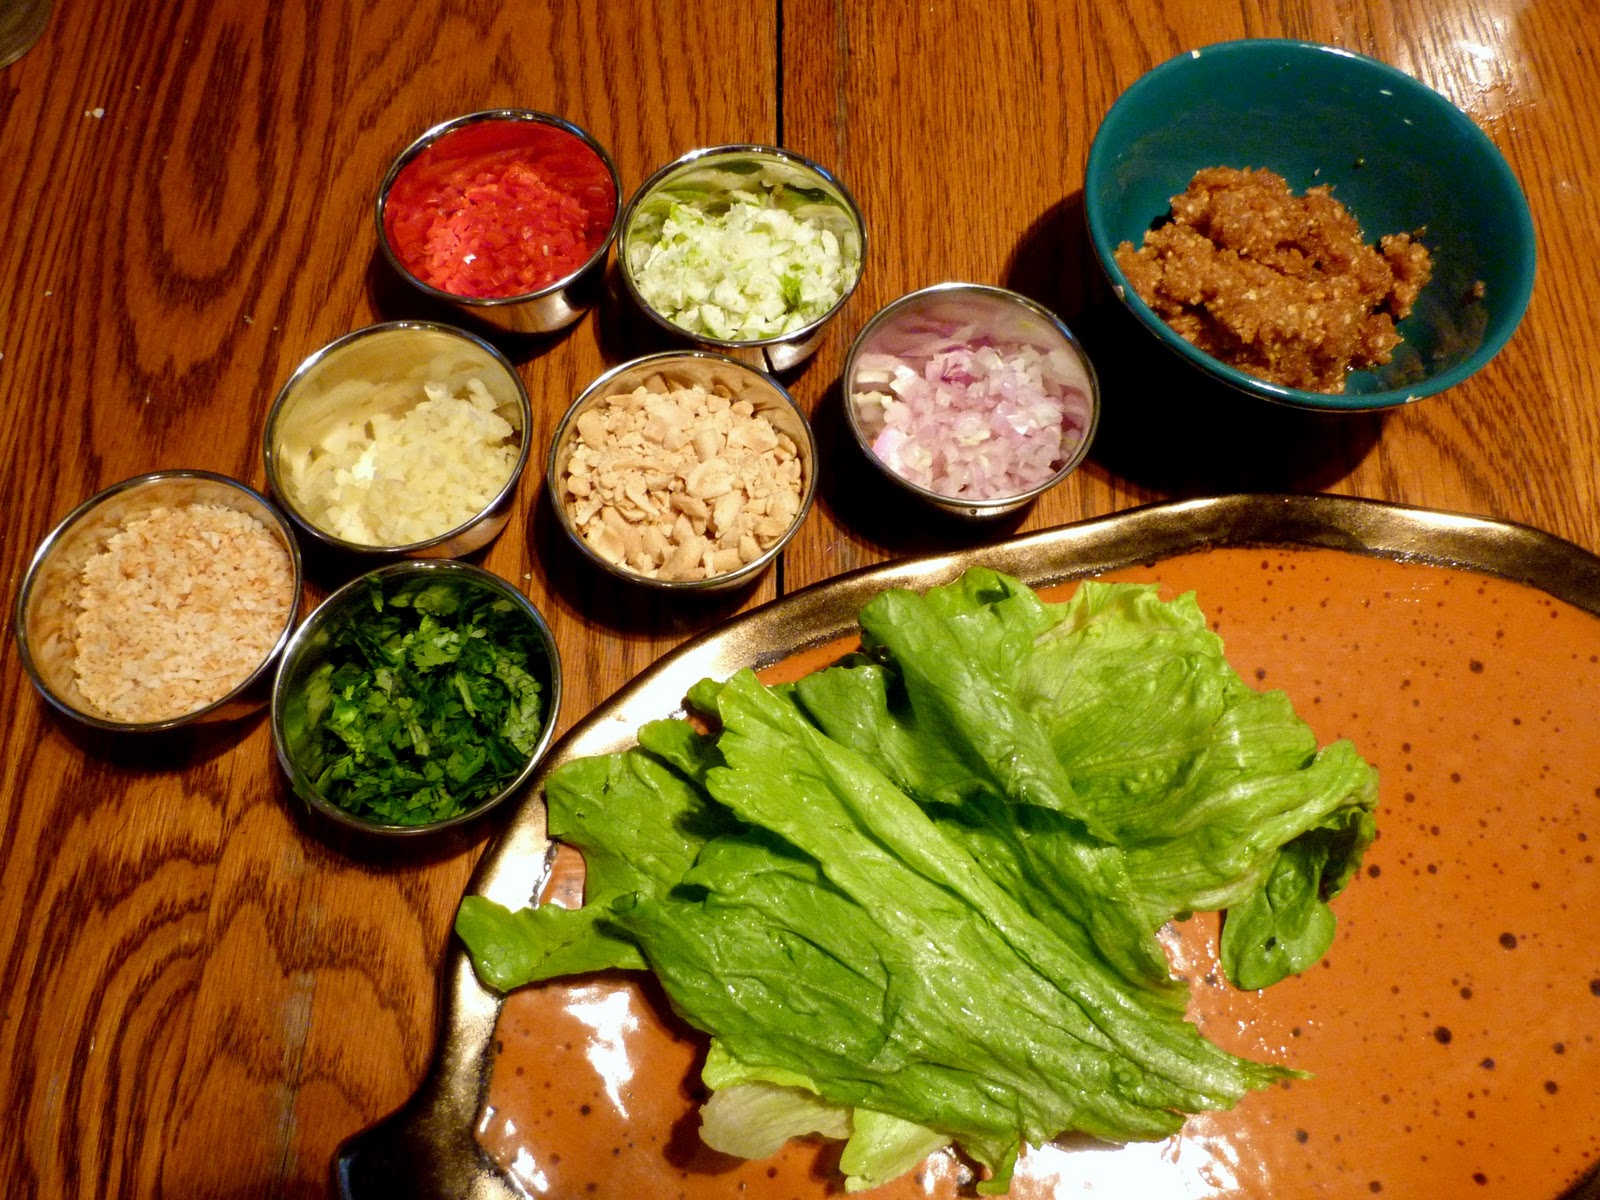
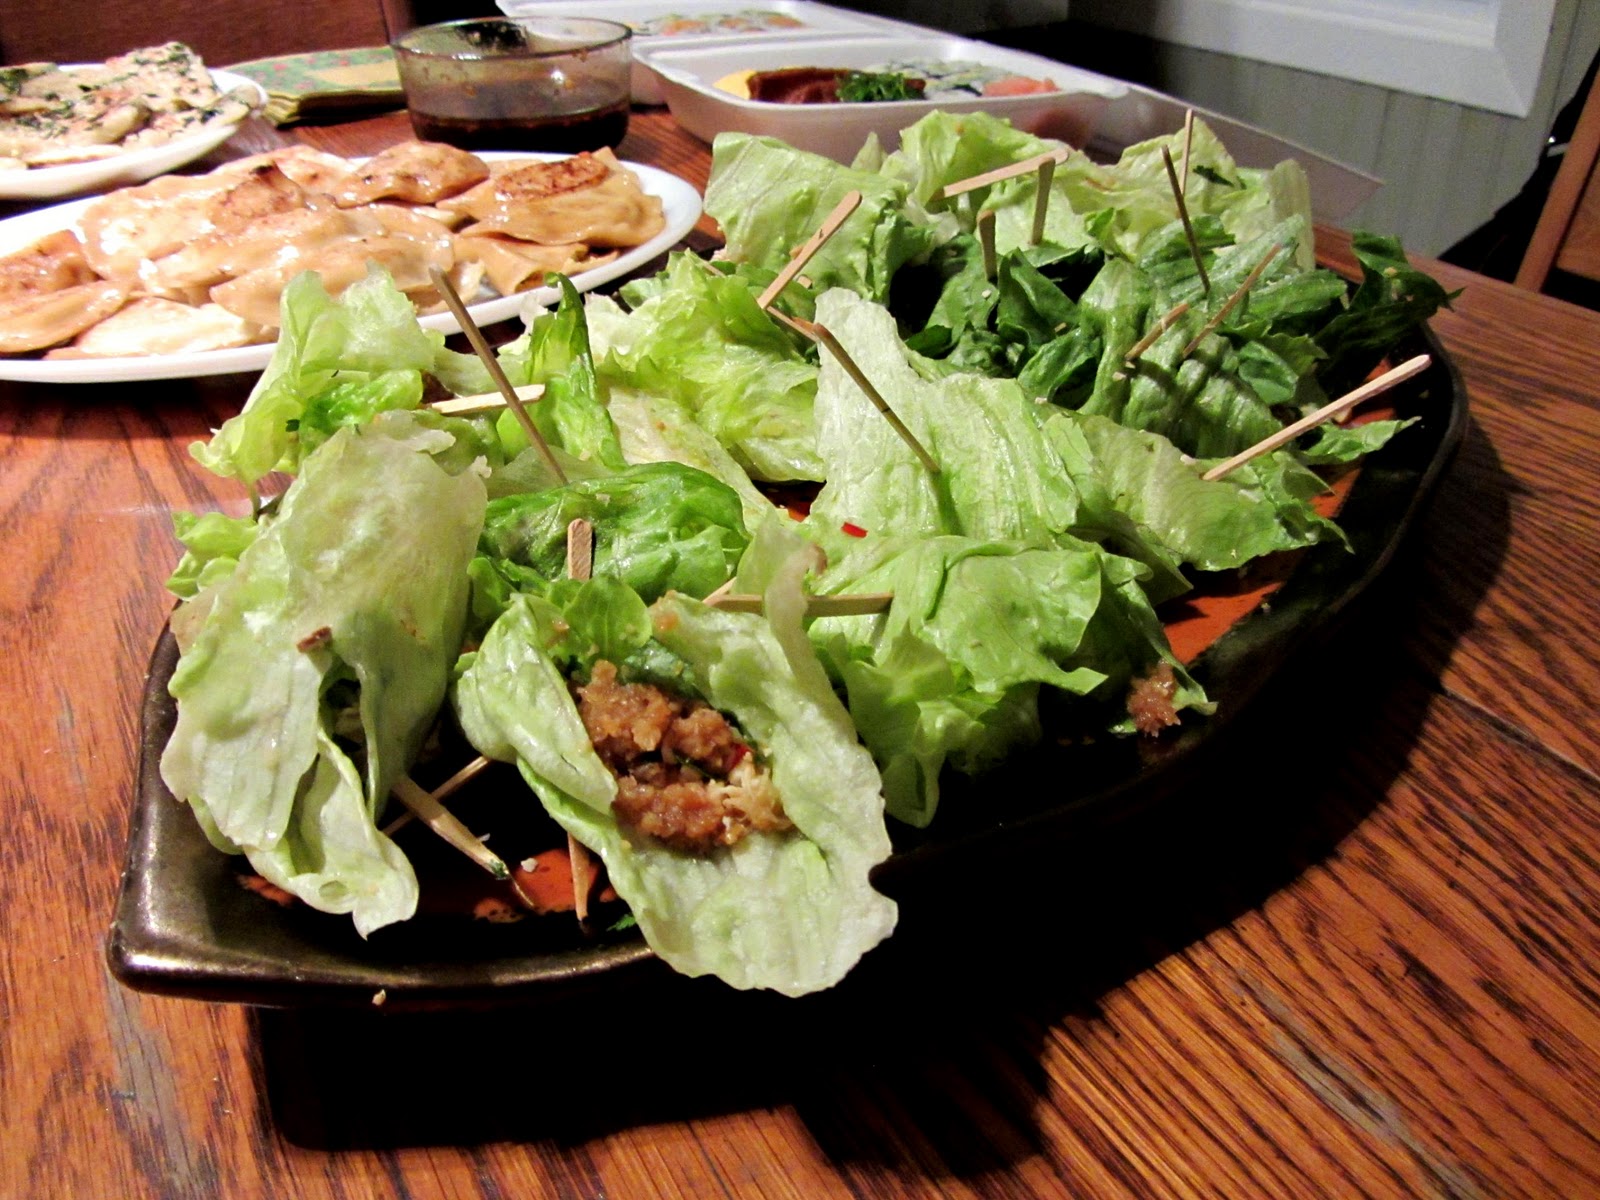
Thai-Style Leaf-Wrapped Appetizer Bites


These lettuce wraps were fun to put together, although there were a lot of components to prepare. To make them, I just took a large piece of lettuce, filled it with a bit of each ingredient from the bowls (peanuts, toasted coconut, thai chilis, shallots, ginger, cilantro, limes and a peanut-coconut chutney), wrapped it up and secured with a toothpick. You could also let guests make these themselves, but I wanted to have everything prepared ahead of time.


Here are the lettuce rolls once they were already prepared. All of the filling ingredients combine to create an explosion of flavour when you pop them in your mouth!


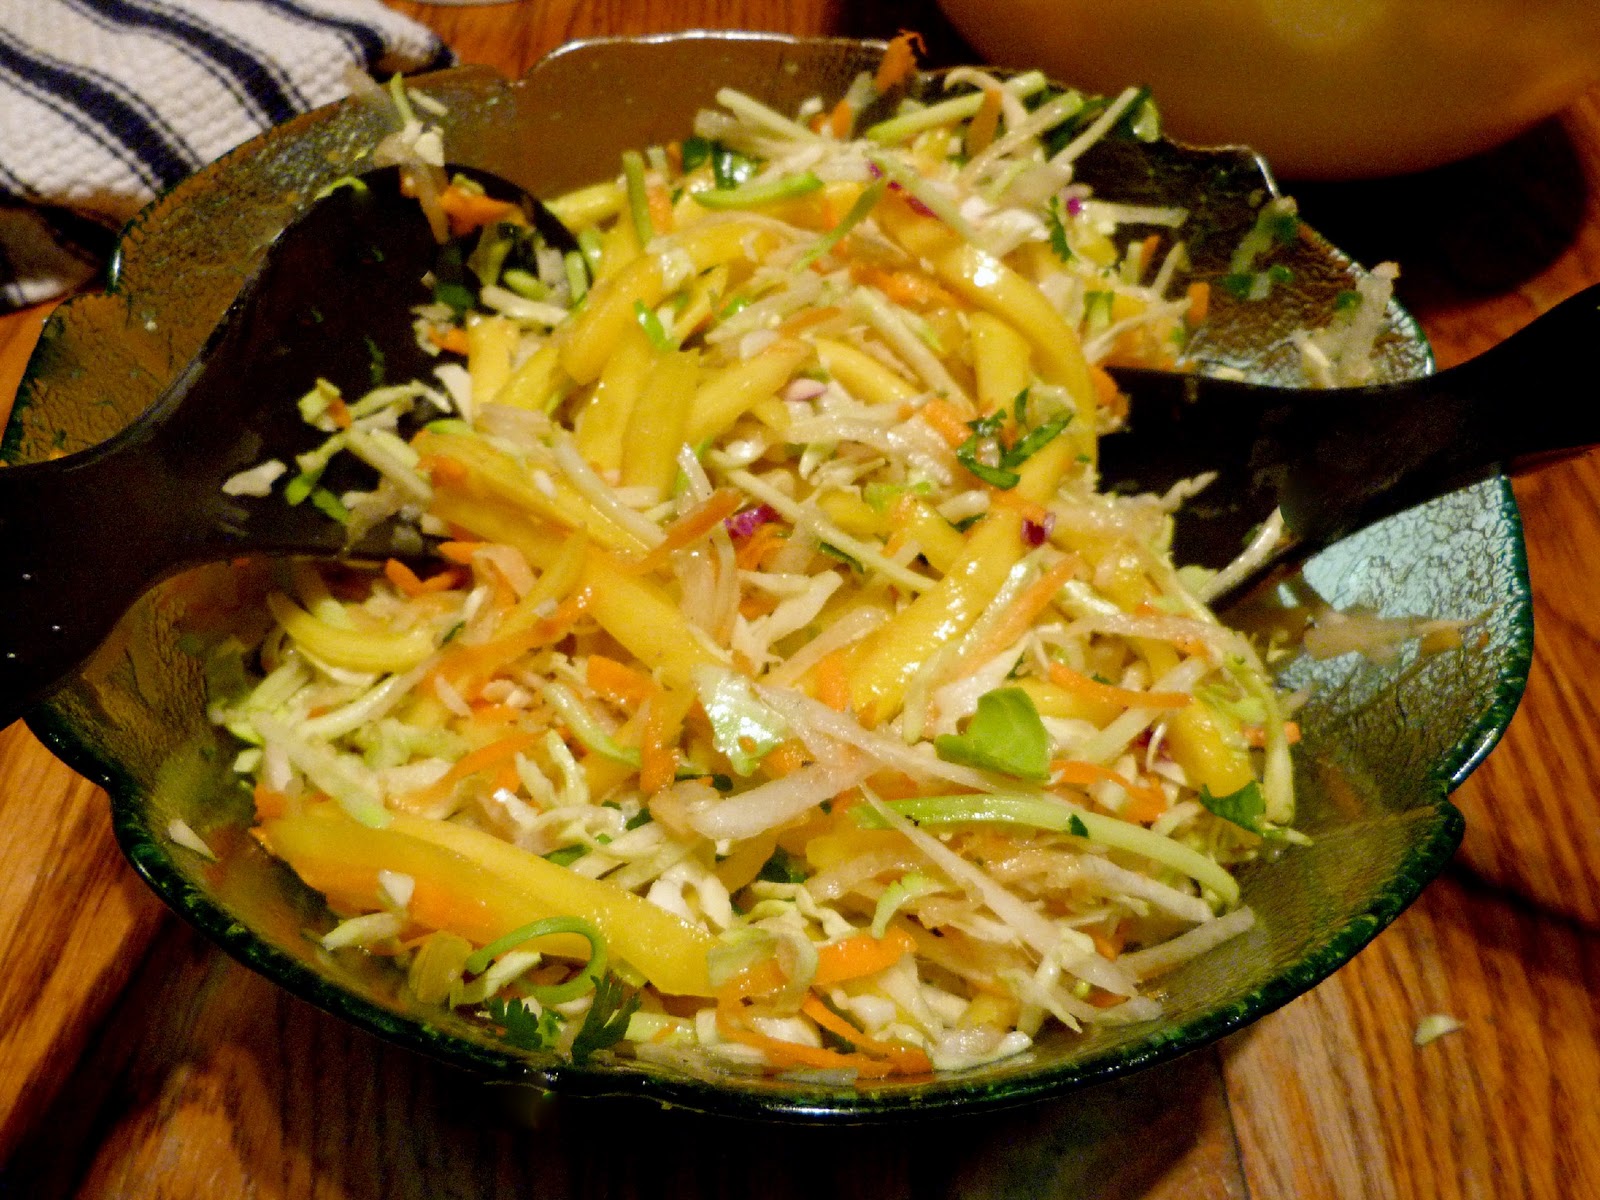
Mango Slaw

I used the recipe in the book for Asian Cole Slaw, which includes shredded cabbage, carrot and daikon radish in an asian style dressing, and added one sliced mango to create a fusion of thai mango salad and coleslaw. The mango was my favourite part, so I recommend adding it!


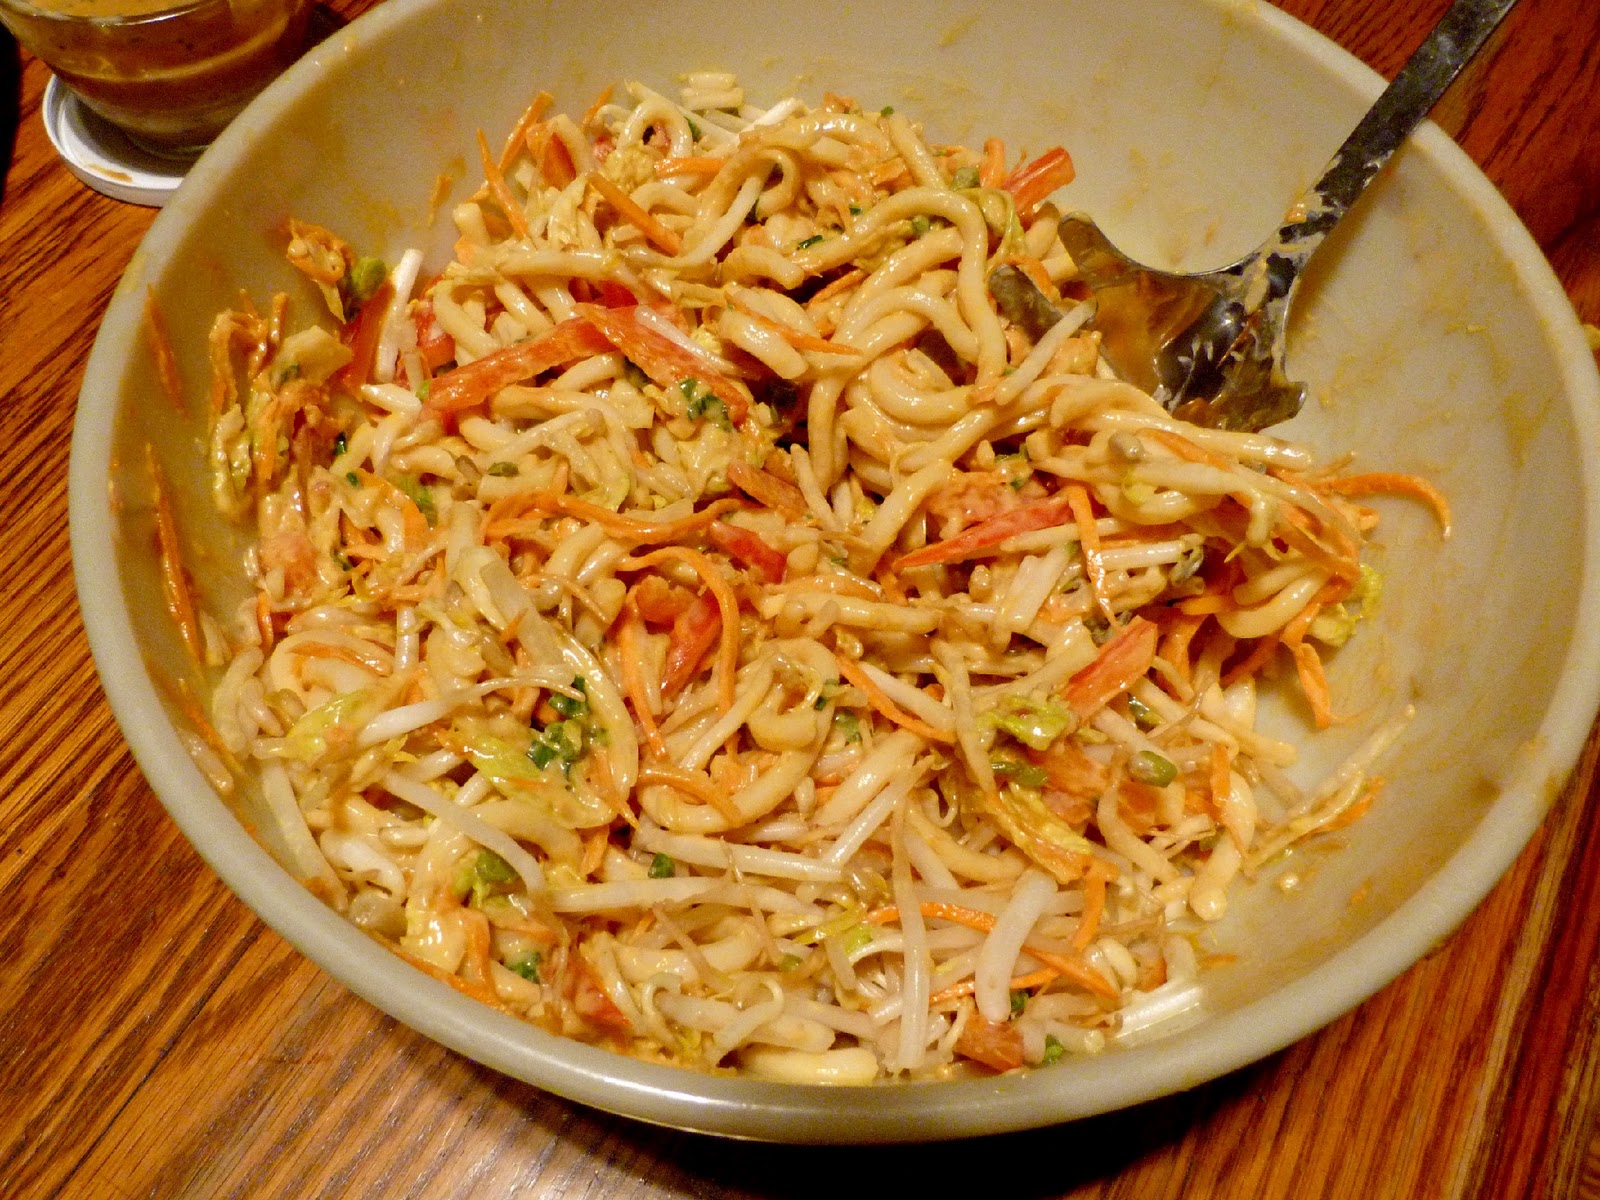
Asian Noodle Salad with Spicy Peanut Sauce


Thick udon noodles tossed with shredded carrot, cabbage, red pepper and bean sprouts (my own addition), coated in a creamy peanut dressing. I was very happy to have leftovers of this to eat the next day!


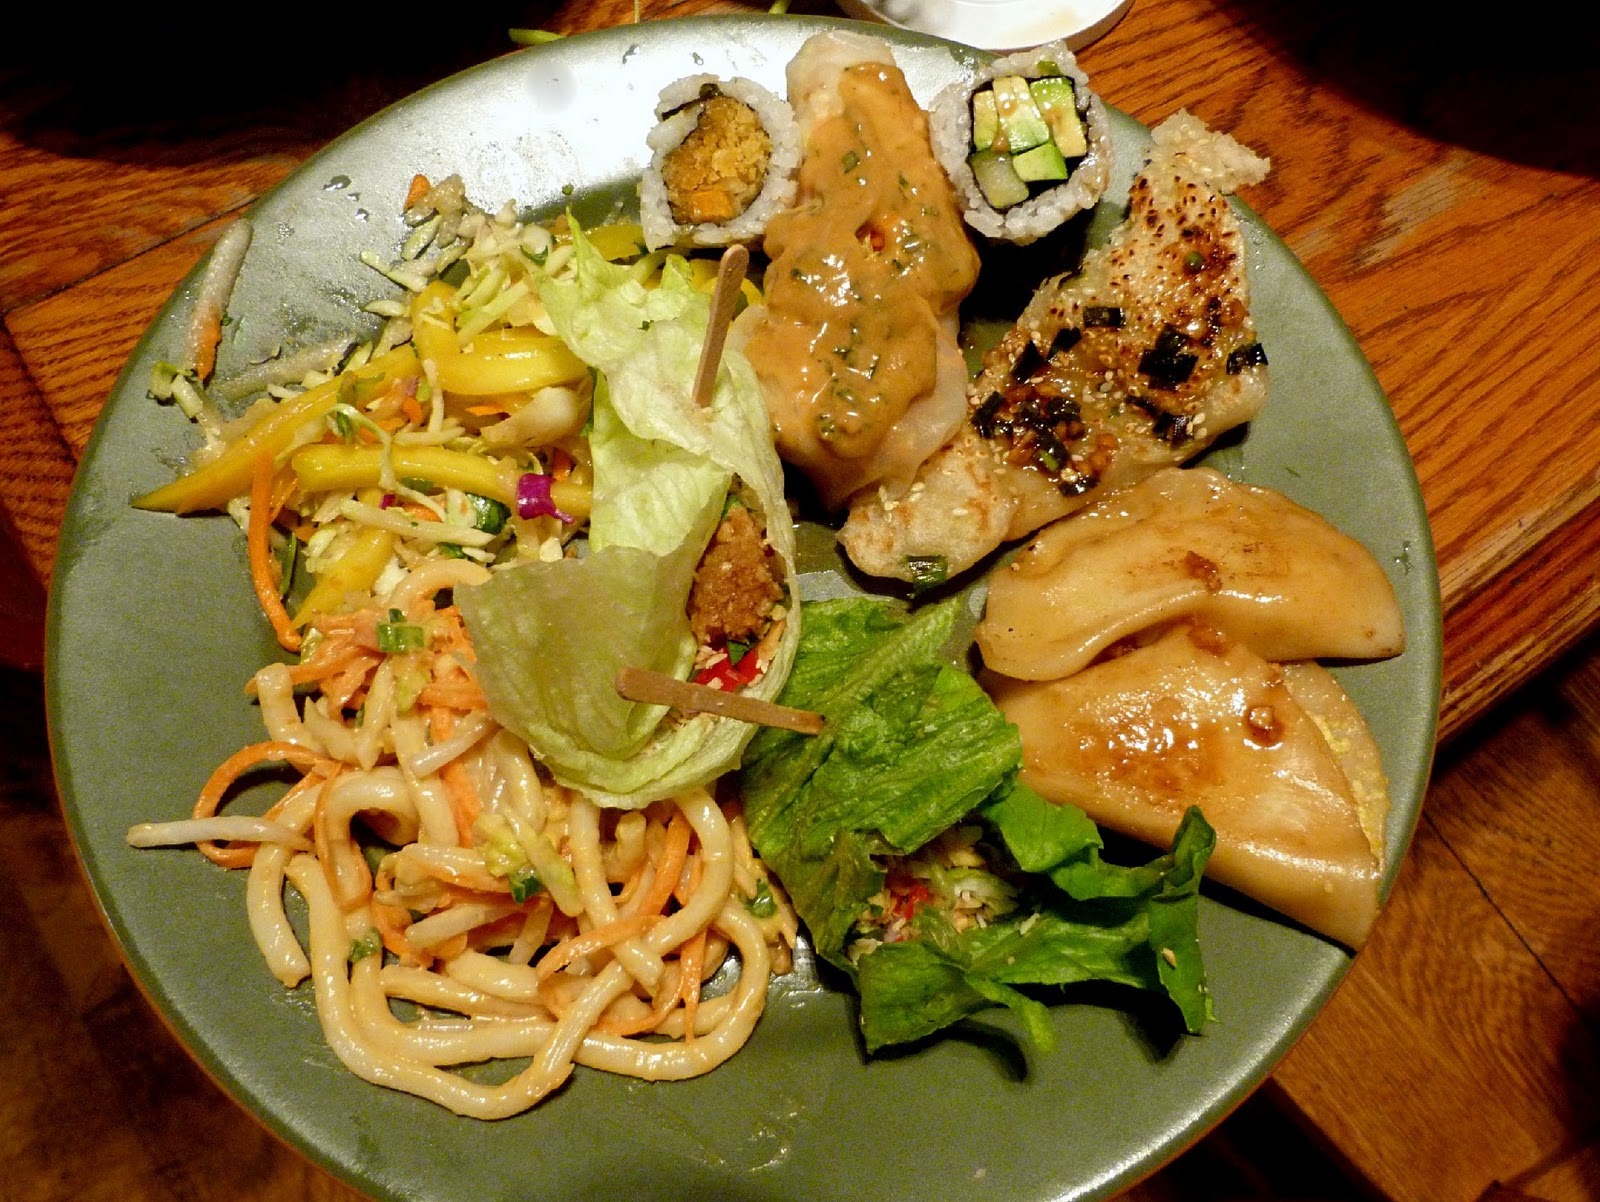
My first helping of food and a great way to end the year!


And now, a note about the Liebster Blog Award...

I was so happy to hear that Heather from Sunday Morning Banana Pancakes (I always smile when I say the name of her blog!) nominated me for this award. The Liebster award is a way of giving recognition to newer blogs or those that have fewer than 200 followers. The recipient of the award then has to select five other such blogs to pass the award on to. 


To accept the Liebster Blog Award nomination one must:
~ thank your Liebster Blog Award presenter on your blog.
~ link back to the blogger who awarded you.
~ copy & paste the blog award on your blog
~ reveal your 5 blog picks.
~ let them know you choose them by leaving a comment on their blog.

Since I love to read other blogs but don't always leave them comments, I thought this was a great way to show my appreciation for some of the blogs that inspire me! 

In no particular order, here are my five picks:
Sunday Morning Banana Pancakes - I couldn't leave Heather out of my own list! I'm happy I found her blog  - she posts so many recipes that suit my tastes perfectly, and always leaves nice comments too :)
Fork and Beans - I discovered Cara's blog in October when she was posting daily Halloween-inspired recipes and I loved her creativity and entertaining writing style. She is a genius at turning any recipe into a gluten-free and vegan version!
The First Mess - I was hooked from the very first post on Laura's blog and I still get excited each time she makes a new post - I love her unique vegetarian recipes and gorgeous photos!
The Fig Tree - Courtney (a fellow Canadian blogger) posts lots of sweet treats and delicious vegetarian recipes and her presentation is always beautiful!
K's Veg Recipes - with a new name (previously called Not Another Cookbook) and a transition to more vegan recipes, I am definitely looking forward to seeing more recipes on this blog this year! K's posts are always so informative and helpful too! 

LinkWithin

Related Posts Plugin for WordPress, Blogger...