Showing posts with label tomato. Show all posts

May 29, 2014

Roasted Veggie Spaghetti with Balsamic & Basil


This past week has been a bit crazy for me, as I've had to pack up over three years worth of my belongings and move into a new place (I know three years isn't that long, but somehow I've accumulated a lot of stuff - mostly junk haha). Not surprisingly, I've been relying on quick and easy meals that don't involve much cooking to get me through the process!

Now that I'm finally settled into my new place, I'm looking forward to getting back into a routine and testing out my new kitchen!  Although I'm not sure how my baking is going to turn out with a stove that currently only has one oven rack that appears to be stuck in the lower half of the oven...


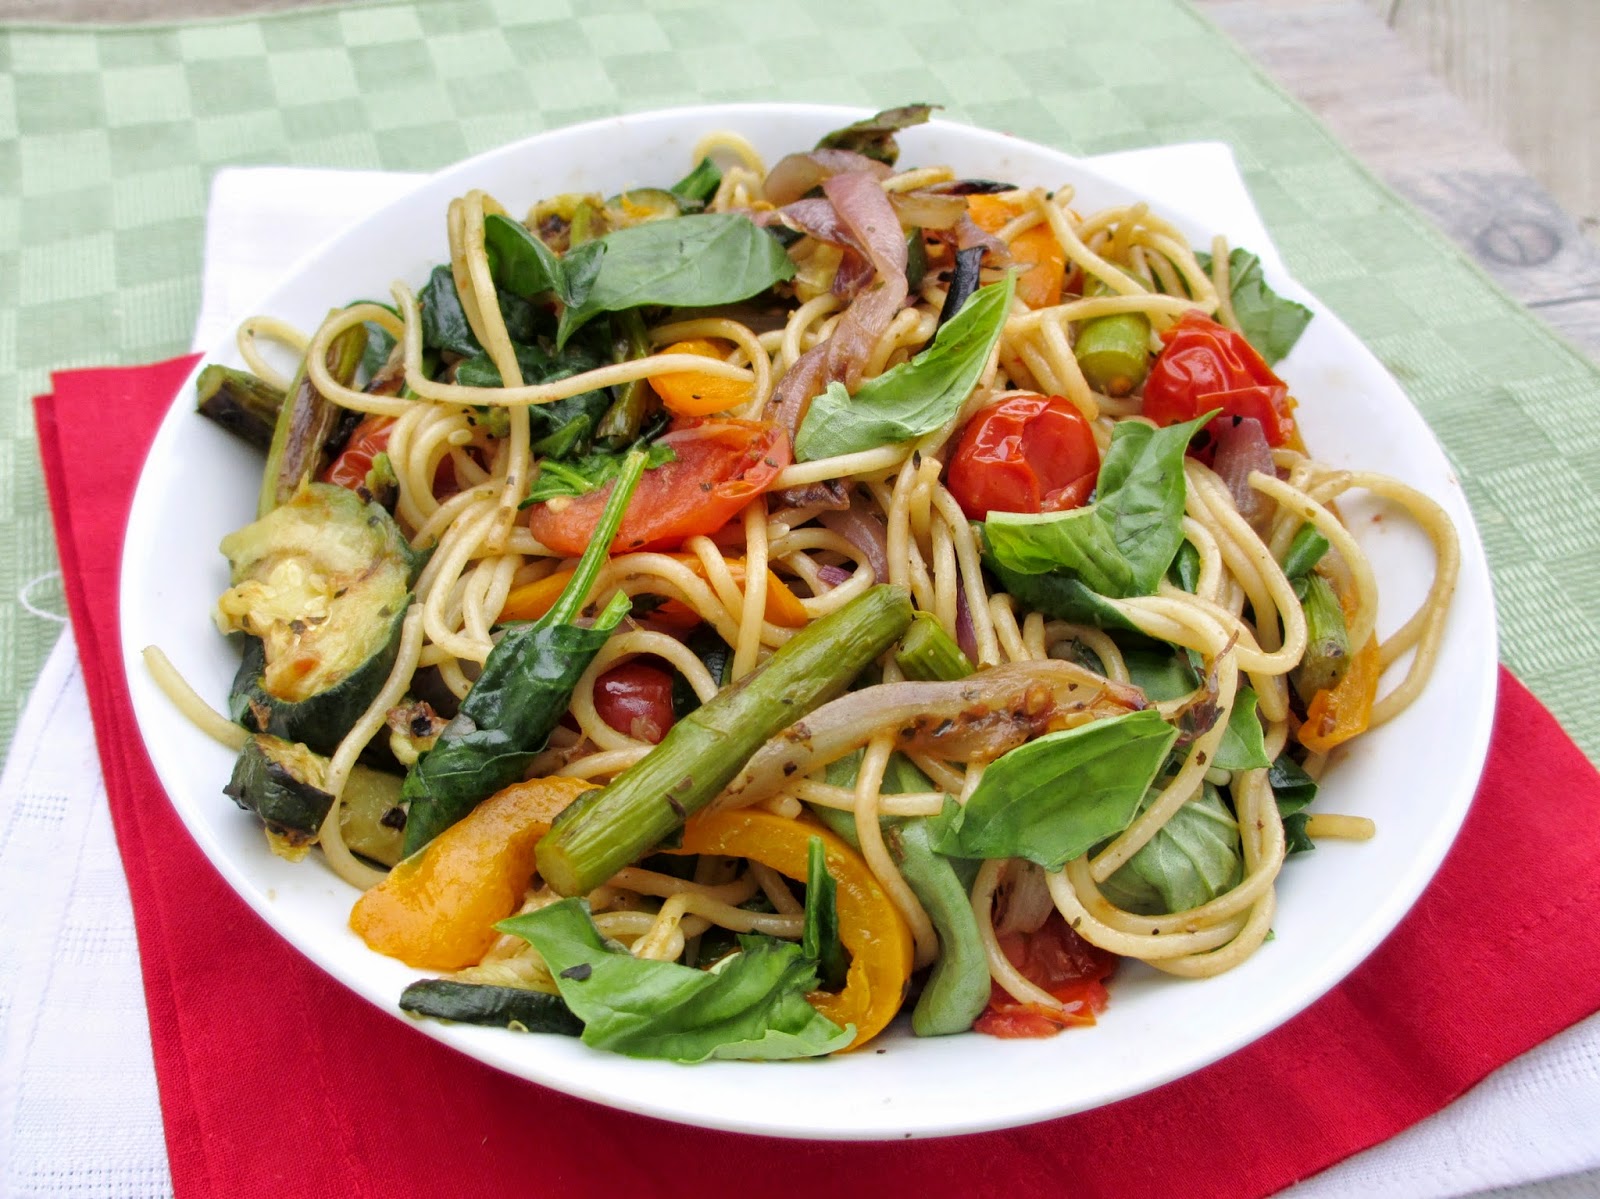
The first actual meal that I cooked for myself after moving in was this simple summery pasta dish of thin spaghettini noodles tossed with a variety of colourful roasted veggies and balsamic vinegar, and topped with some fresh basil.

This dish was inspired by a recipe from the cookbook Appetite for Reduction, which used fusilli pasta and a slightly different mix of vegetables (I left out the yellow squash and added spinach and basil). The original recipe was called a pasta primavera, but to me primavera usually implies pasta with veggies in a creamy white sauce, and this dish is quite different!
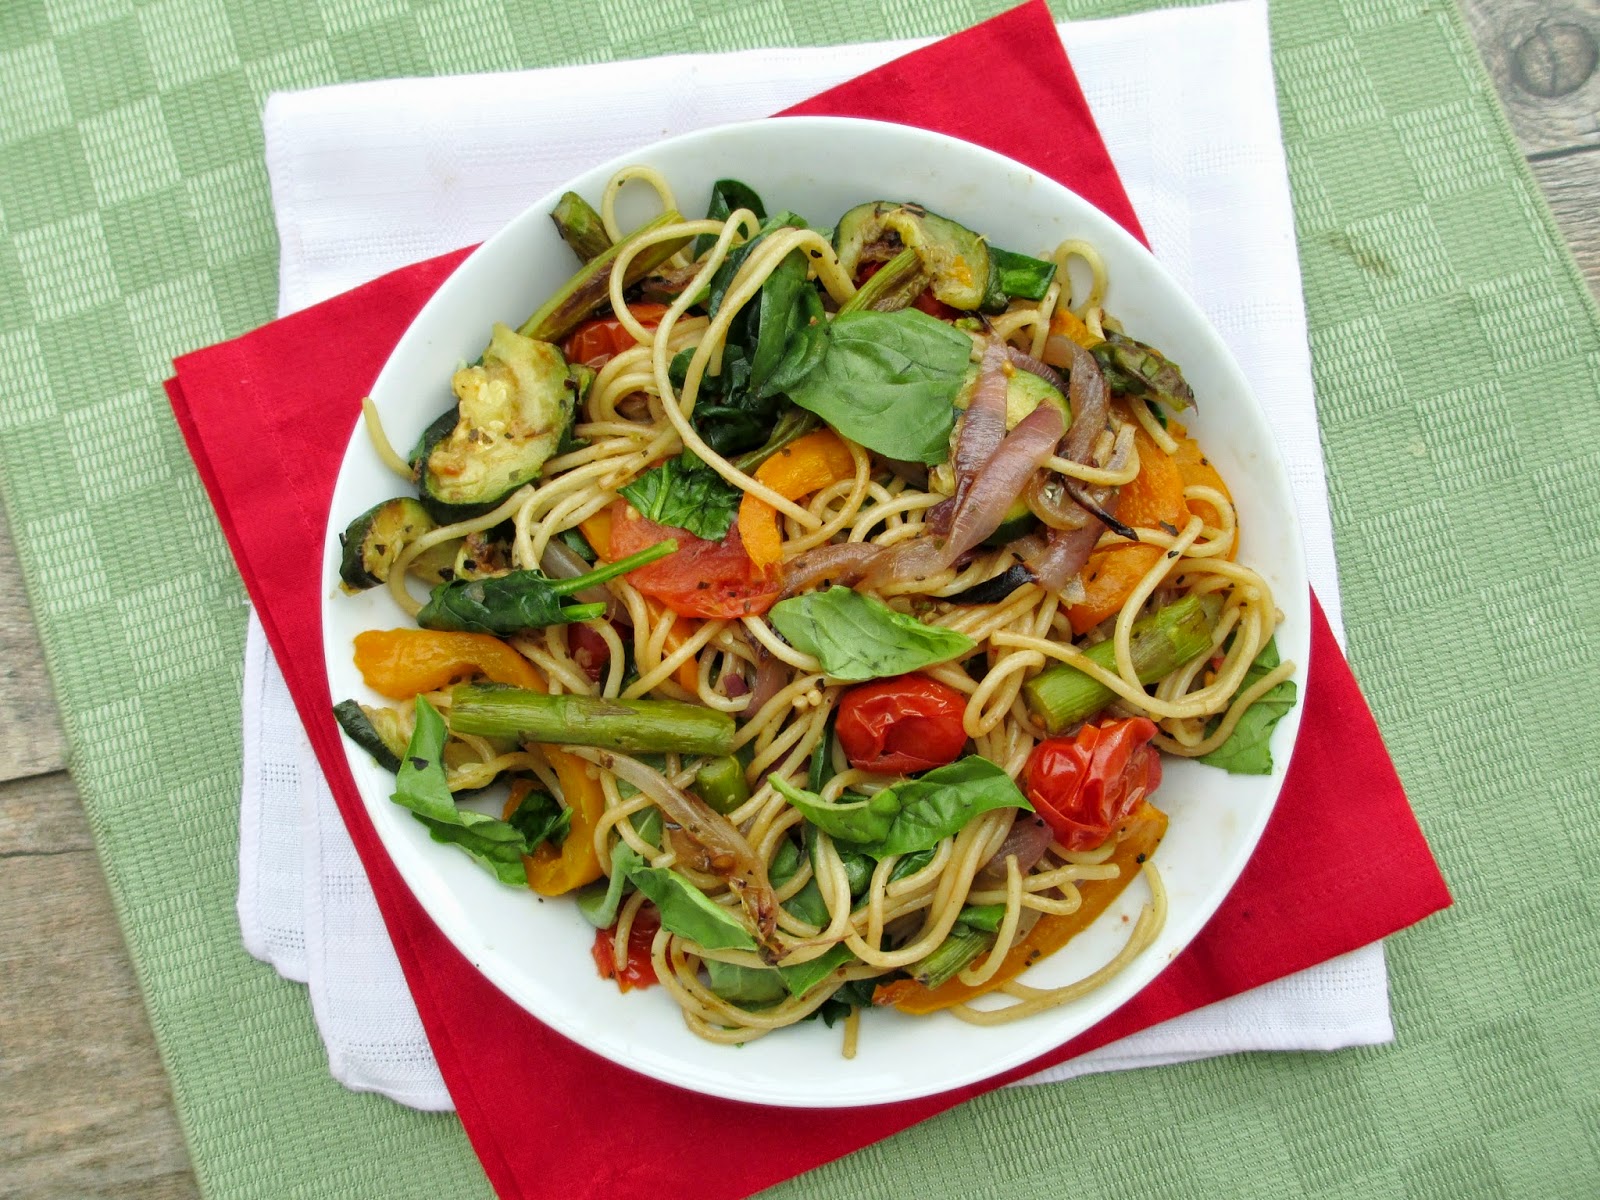

Instead of adding a sauce, the vegetables are simply roasted until tender with lots of herbs and garlic, then tossed with the noodles in balsamic vinegar for a nice light meal that really highlighted the veggies - perfect for summer evenings!

The basil was a nice addition, and feel free to add other toppings you like, such as parmesan cheese, toasted pine nuts, or maybe even a touch of pesto!


Roasted Veggie Spaghetti with Balsamic & Basil
Adapted from Appetite for Reduction

1/2 bunch asparagus
1 large zucchini
1 small red onion
1 pint grape or cherry tomatoes
1 bell pepper (I recommend orange, red, or yellow)
4-6 cloves garlic (4 large or 6 smaller)
1-2 tbsp olive oil
2 tsp dried oregano
2 tsp dried thyme or basil (I used basil because I didn’t have thyme)
Salt and pepper
1/2 lb spaghettini (or another pasta)
2 cups packed baby spinach leaves
2 tbsp balsamic vinegar
A few handfuls of fresh basil


Preheat oven to 450°F and line two baking sheets with aluminum foil.

Prepare the veggies: snap the woody ends off the asparagus and slice the stalks into smaller pieces (3-4 pieces per stalk). Slice the zucchini into half-inch slices. Peel the onion and cut in half, then slice each half into thin slices. Cut the bell pepper in half, remove the seeds and core, and thinly slice. Peel the garlic and cut into thin slices as well.

Divide the veggies among the baking pans and toss with the olive oil. Sprinkle the dried herbs over top and season generously with salt and pepper. Toss to mix. Place in preheated oven for 15 minutes, then remove pans and give the veggies a toss. Return to oven for another 10-15 minutes, until tender and browned.

Meanwhile, bring a large pot of salted water to a boil. Cook pasta according to package directions, then drain.

Add the pasta and roasted veggies to a large bowl. Stir in the spinach so that it wilts. Add balsamic vinegar and toss well to mix. Divide into serving bowls, top with some fresh basil and season to taste with salt and pepper. You might want to add another drizzle of balsamic vinegar as well.

Makes 4 servings.


April 16, 2014

Greek Pasta Salad with Tofu Feta


With the Easter holiday coming up this weekend, normally I would be posting an Easter-themed recipe on my blog this week. But for some reason, my Easter inspiration just wasn't there this year - I couldn't come up with anything that hasn't already been done!

So if you're looking for a cute Easter idea, check out these peanut butter bunnies and raw cookie chicks that I made last year. Or if you're just here for the recipes, I've got a great pasta salad to share with you today!

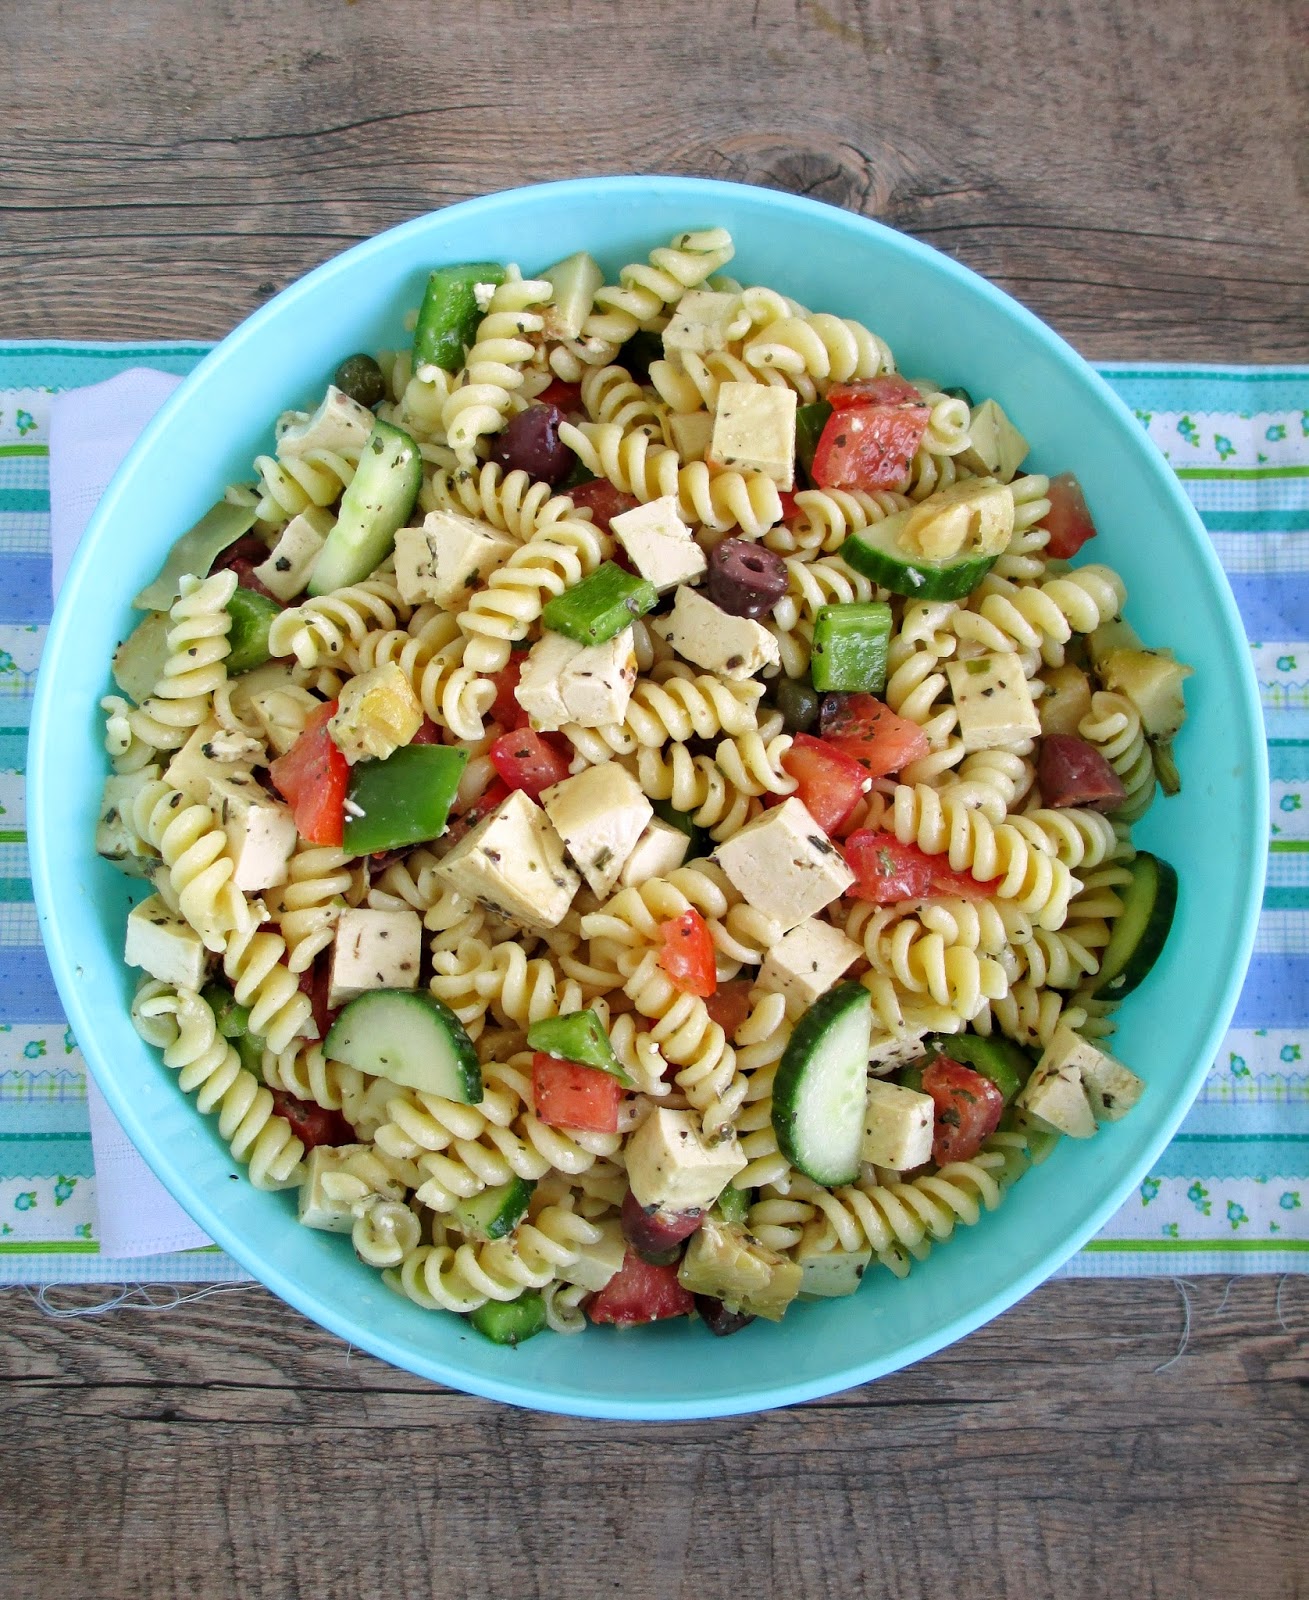
I'm not typically a huge fan of pasta salad, as it can sometimes be a bit boring. For me, the keys to a memorable pasta salad are to add lots of veggies, some kind of protein, and a flavourful dressing - all of which are included in this recipe!

This dish is like a bulked-up Greek salad - besides the usual veggies that you would find in a Greek salad (tomatoes, cucumber, and peppers - I left out red onion based on personal preference), I added olives, artichokes, and capers for lots of salty, briny flavour, and rotini pasta to help soak up the dressing.


Instead of using traditional feta cheese, I decided to make "tofu feta". If you've never heard of this idea, you can mimic the flavour and texture of a salty cheese by marinating uncooked firm tofu in a dressing made with lots of lemon juice, miso, a bit of olive oil, and lots of herbs.

The tofu was actually my favourite part of this dish - I love the chewy texture and it really soaked up the marinade so it didn't just taste like bland tofu! I also loved how each bite was full of ingredients - the ratio of pasta to veggies was a bit skewed towards the veggie side, which is how I prefer my salads!

This makes a lot of pasta - enough to feed yourself for lunches for the week, or it would make a great potluck or BBQ dish to share with a group!


Greek Pasta Salad with Tofu Feta
Inspired by Katy's Kitchen; tofu adapted from Keepin' it Kind

Tofu
350g/12 oz package extra firm pressed tofu, drained and water squeezed out
1/4 cup fresh lemon juice
1 tbsp olive oil
1 tbsp white miso paste
1 tsp dried basil
1 tsp dried oregano
1/2 tsp salt
Ground pepper

Salad
~450g dried pasta (I used rotini)
1 green pepper, seeded and chopped
2 tomatoes, diced (I removed most of the seeds as I chopped)
1/2 an English cucumber, sliced into half-moons
1/2 cup pitted Kalamata olives, sliced in half
6 oz jar of artichoke hearts, drained and chopped (*save the oil for the dressing)
2 tbsp capers, drained
1/2 cup chopped fresh parsley

Dressing
2 tbsp fresh lemon juice
2 tbsp red wine vinegar
2 tbsp oil (I used the oil from the jar of artichoke hearts, but you could use olive oil)
1 large clove garlic, finely minced
Salt and pepper


First, start marinating the tofu. If you don’t have already pressed tofu, press it between layers of paper towel with a heavy object on top for at least 15 minutes to remove excess water. Slice tofu into small cubes (about ½”). Whisk together the remaining ingredients to make the marinade. Place tofu slices in a shallow container and pour marinade over top. Let sit for at least 30 minutes, tossing occasionally to make sure all the tofu pieces get coated.

Bring a large pot of salted water to a boil and add pasta. Cook for length of time specified by package directions, then drain and rinse with cold water.

Meanwhile, prepare the veggies (green pepper, tomatoes, and cucumber) and place in a large bowl. Add the olives, artichokes, and capers. When the pasta is done, add it to the bowl as well.

Make the dressing by whisking all ingredients together. Add salt and pepper to taste. Pour dressing over pasta salad and toss to mix.

Add tofu to the bowl, including any leftover marinade. Add parsley and toss well to mix.

Chill until serving time. 


Makes 4-6 servings.

August 30, 2013

Sweet Corn "Polenta" with Peach & Tomato Salsa


I've been trying to make the most of the local corn season this month, eating corn at every opportunity. I always love eating it right off the cob with some salt and pepper, but I also like to change things up sometimes, whether its eating the kernels hot off the cob, or adding them raw to a salad.

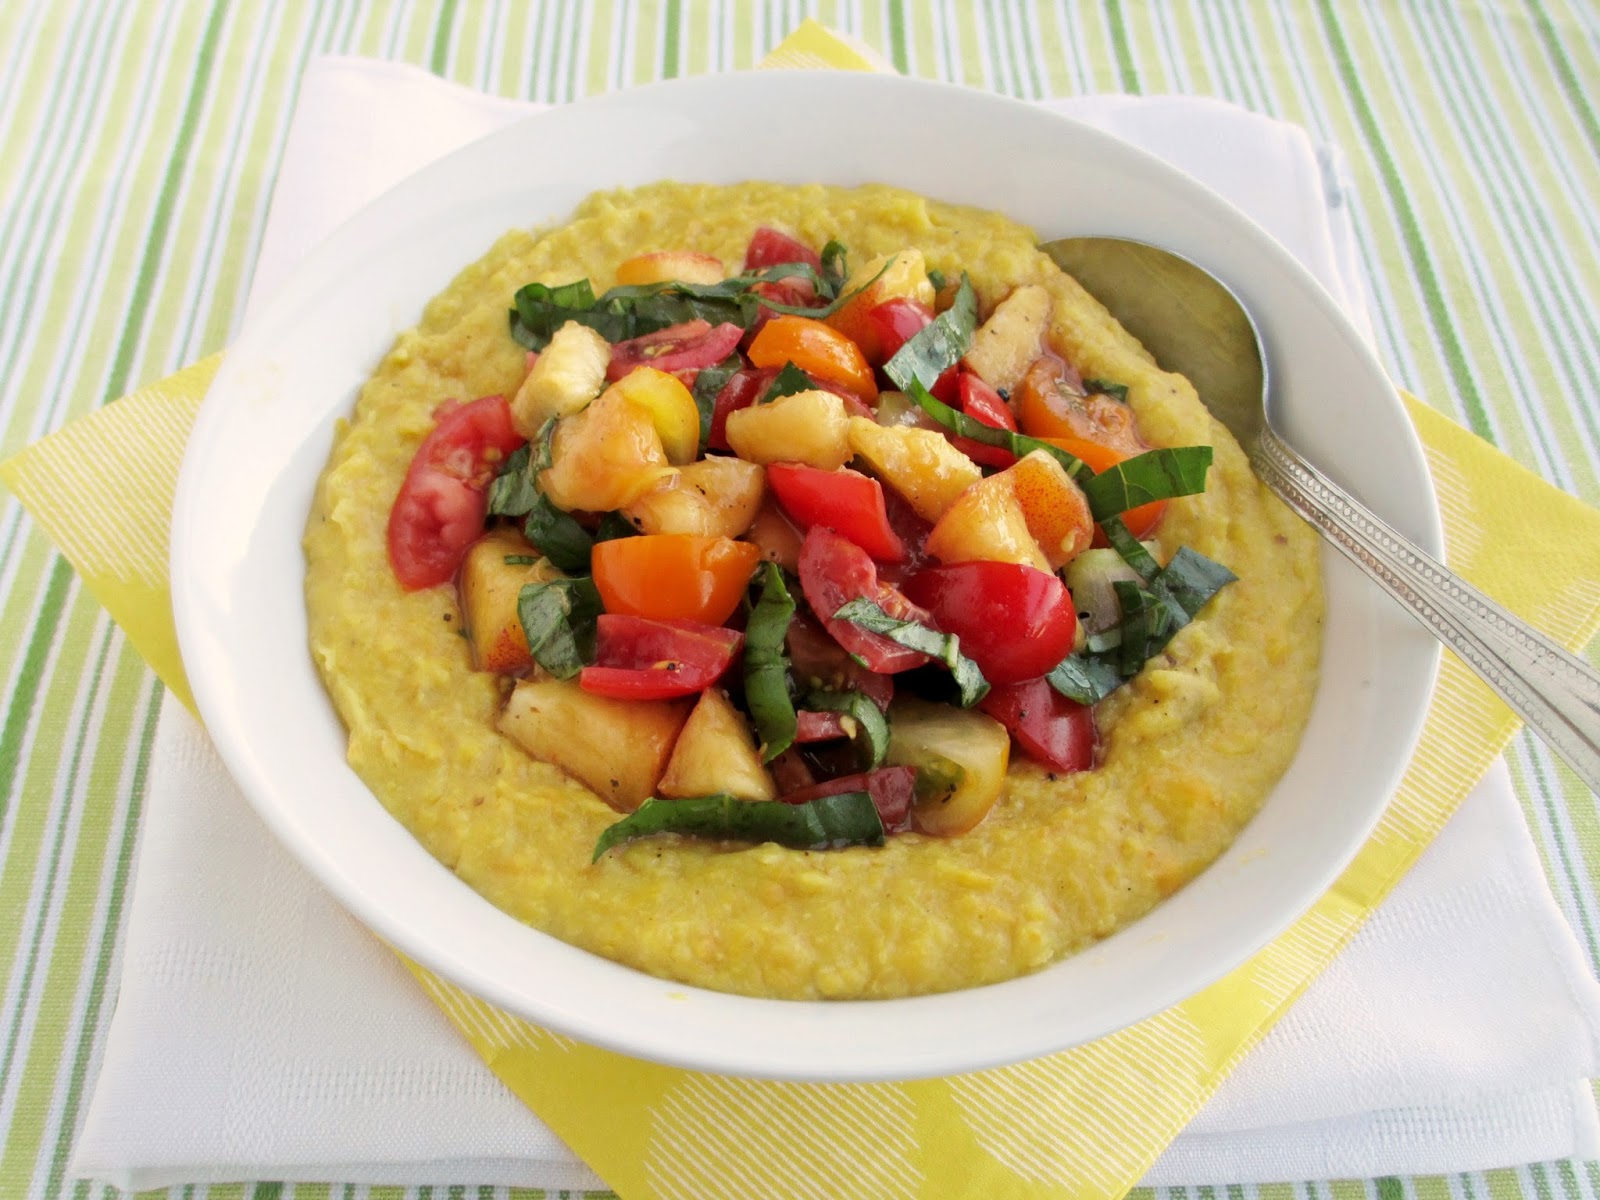
This corn "polenta" is a new method of eating corn that I just discovered last summer. Usually when you hear of corn polenta, it refers to cornmeal polenta with some corn kernels mixed in. This recipe, however, is actually polenta made purely of corn.

It turns out that if you cook corn kernels, blend them up, and then keep cooking the mixture on the stovetop, it eventually turns into a thick, porridge-like mixture just like polenta.


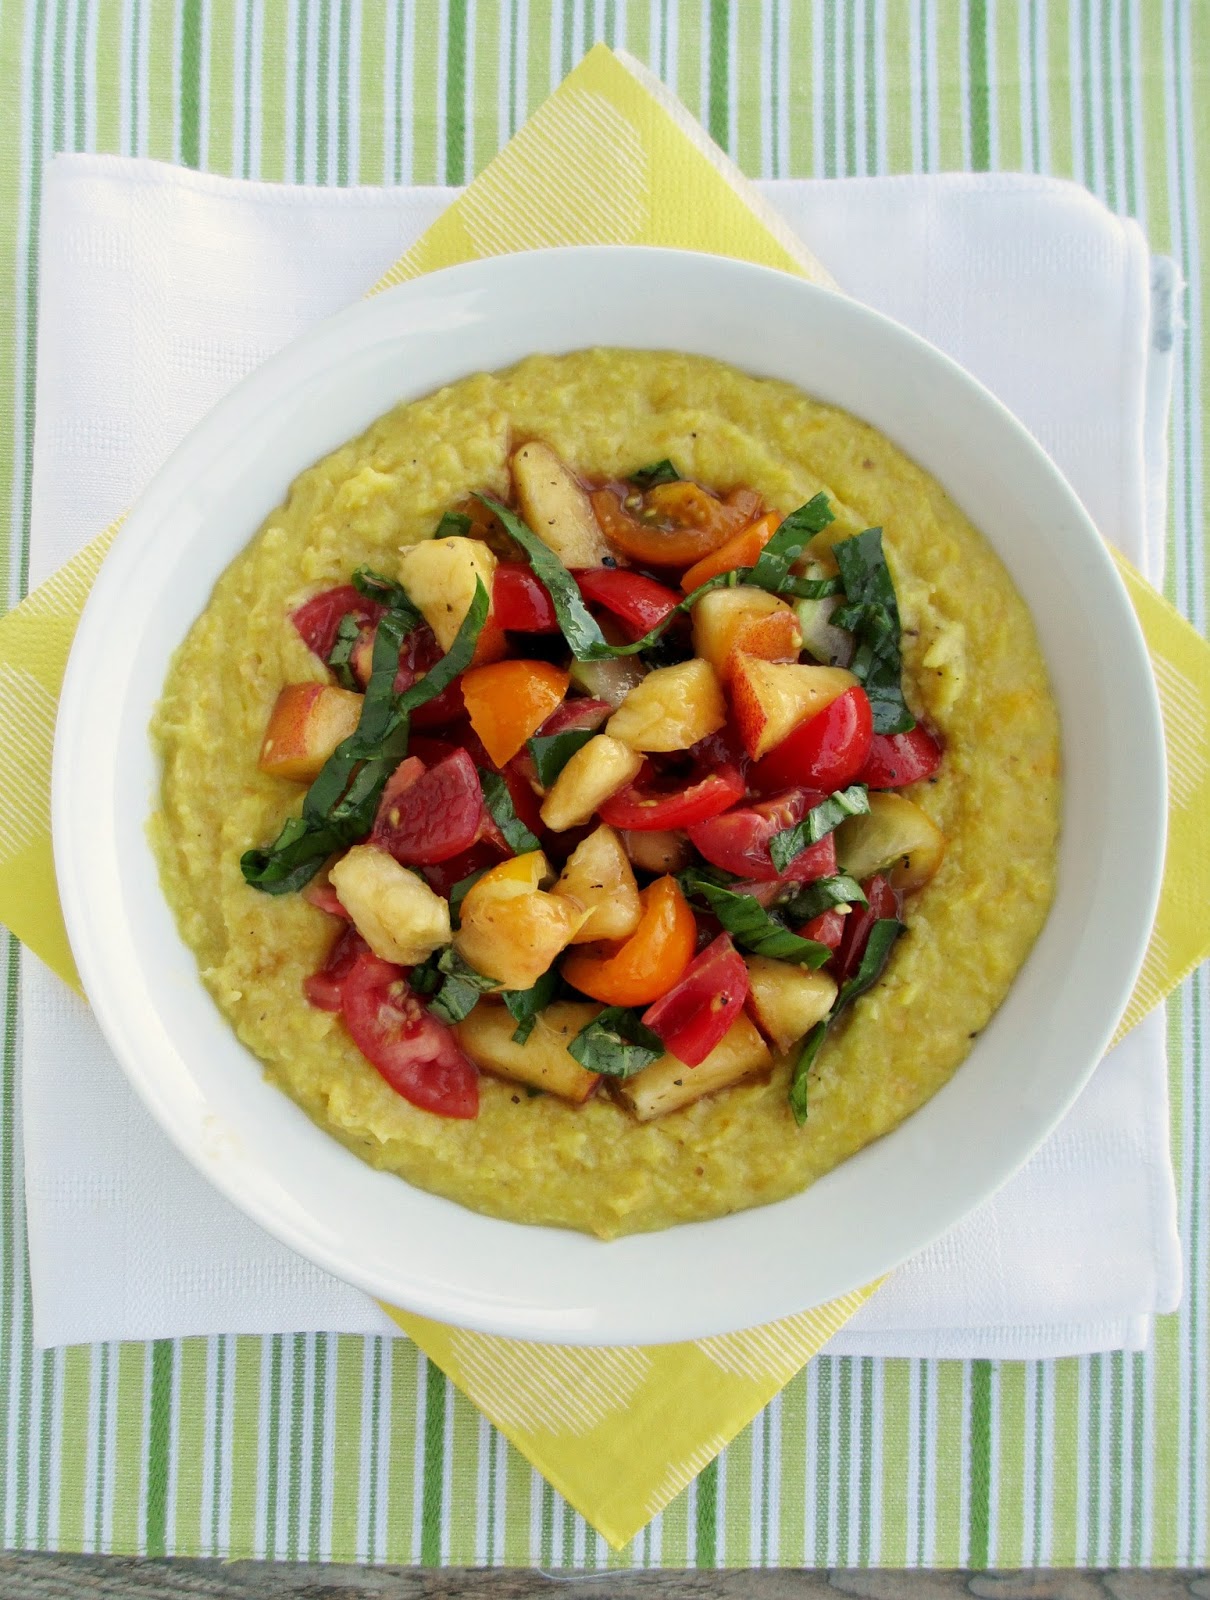
To round out the dish, I wanted to make some kind of tomato topping. Since I also had some local peaches on hand from the market, I thought that peach and tomato would make a good combination as a fresh salsa to mix into the polenta.

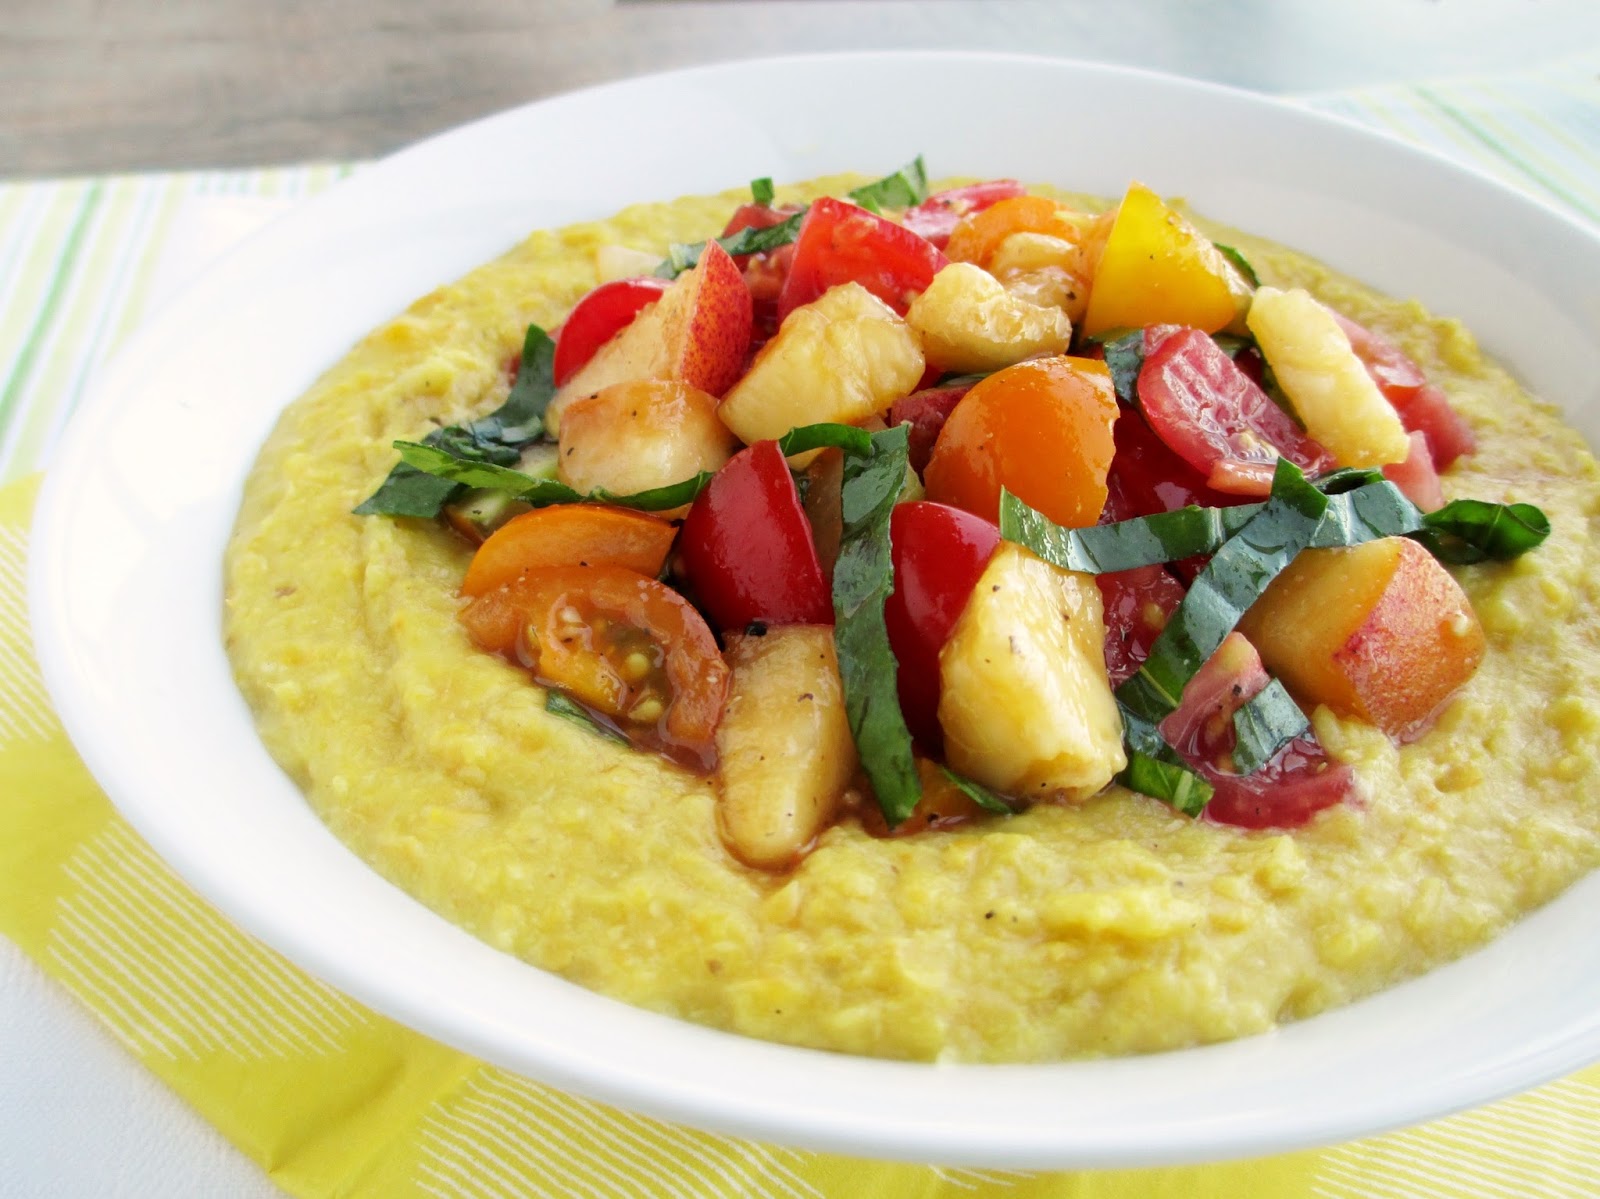
A handful of fresh basil and some balsamic vinegar added even more flavour, making this such a fresh and summery meal! The corn flavour really comes through in the polenta, and I liked that it was a bit lighter than regular polenta, which tends to be made with milk, butter, and cheese.

This was a bit on the sweet side overall, especially if you use a sweet corn, but I love sweet and fruity meals in the summer so it wasn't a problem for me! Feel free to add a sprinkle of cheese if you want a savory dimesion - I think goat cheese or feta would work well.

Hope you all enjoy the last long weekend of the summer! I'm sure mine will involve more corn :)


Sweet Corn “Polenta” with Peach and Tomato Salsa
Inspired by Five and Spice

2 ears sweet corn
3/4 cup water
1 tbsp olive oil
Salt and pepper

1/2 cup chopped cherry tomatoes
1/2 cup diced peach
~2 tbsp chopped fresh basil
1 tsp balsamic vinegar
Salt and pepper

Remove the husks from the corn and slice off the kernels into a large bowl using a knife. Run the dull edge of the knife down the sides of the corn afterwards to get all of the corn “milk” off of the cob. Place kernels and liquid in a medium sized saucepan and cover with ¾ cup water. Bring to a simmer over medium heat, then continue to simmer for about 5 minutes, stirring occasionally. Remove the corn kernels with a slotted spoon and transfer to a blender (do not discard the cooking liquid). Puree until smooth, then return to the pot. Cook on medium-low for another 10-15 minutes, stirring often, until the mixture is thickened and starting to pull away from the sides of the pan. Remove from heat and stir in olive oil, salt, and pepper to taste.

Meanwhile, prepare the topping by stirring together the diced tomato, peaches, basil, and balsamic vinegar. Season to taste with salt and pepper.

Transfer corn puree to a bowl and top with the salsa.

Serve warm.

Makes 1 serving.


July 30, 2013

Tabouli Hummus


It's been a while since I've posted a hummus recipe, probably because the last few times I've made it, I end up just throwing a bunch of ingredients into the food processor without bothering to measure anything. I usually find that some combination of chickpeas, lemon juice, garlic and tahini makes a tasty dip!

More often than not though, I still end up buying containers of hummus from the store, even though I know how easy it is - not to mention cheaper - to make at home. The last hummus that I bought was worth the extra expense though because it inspired me to make my own homemade version of it!

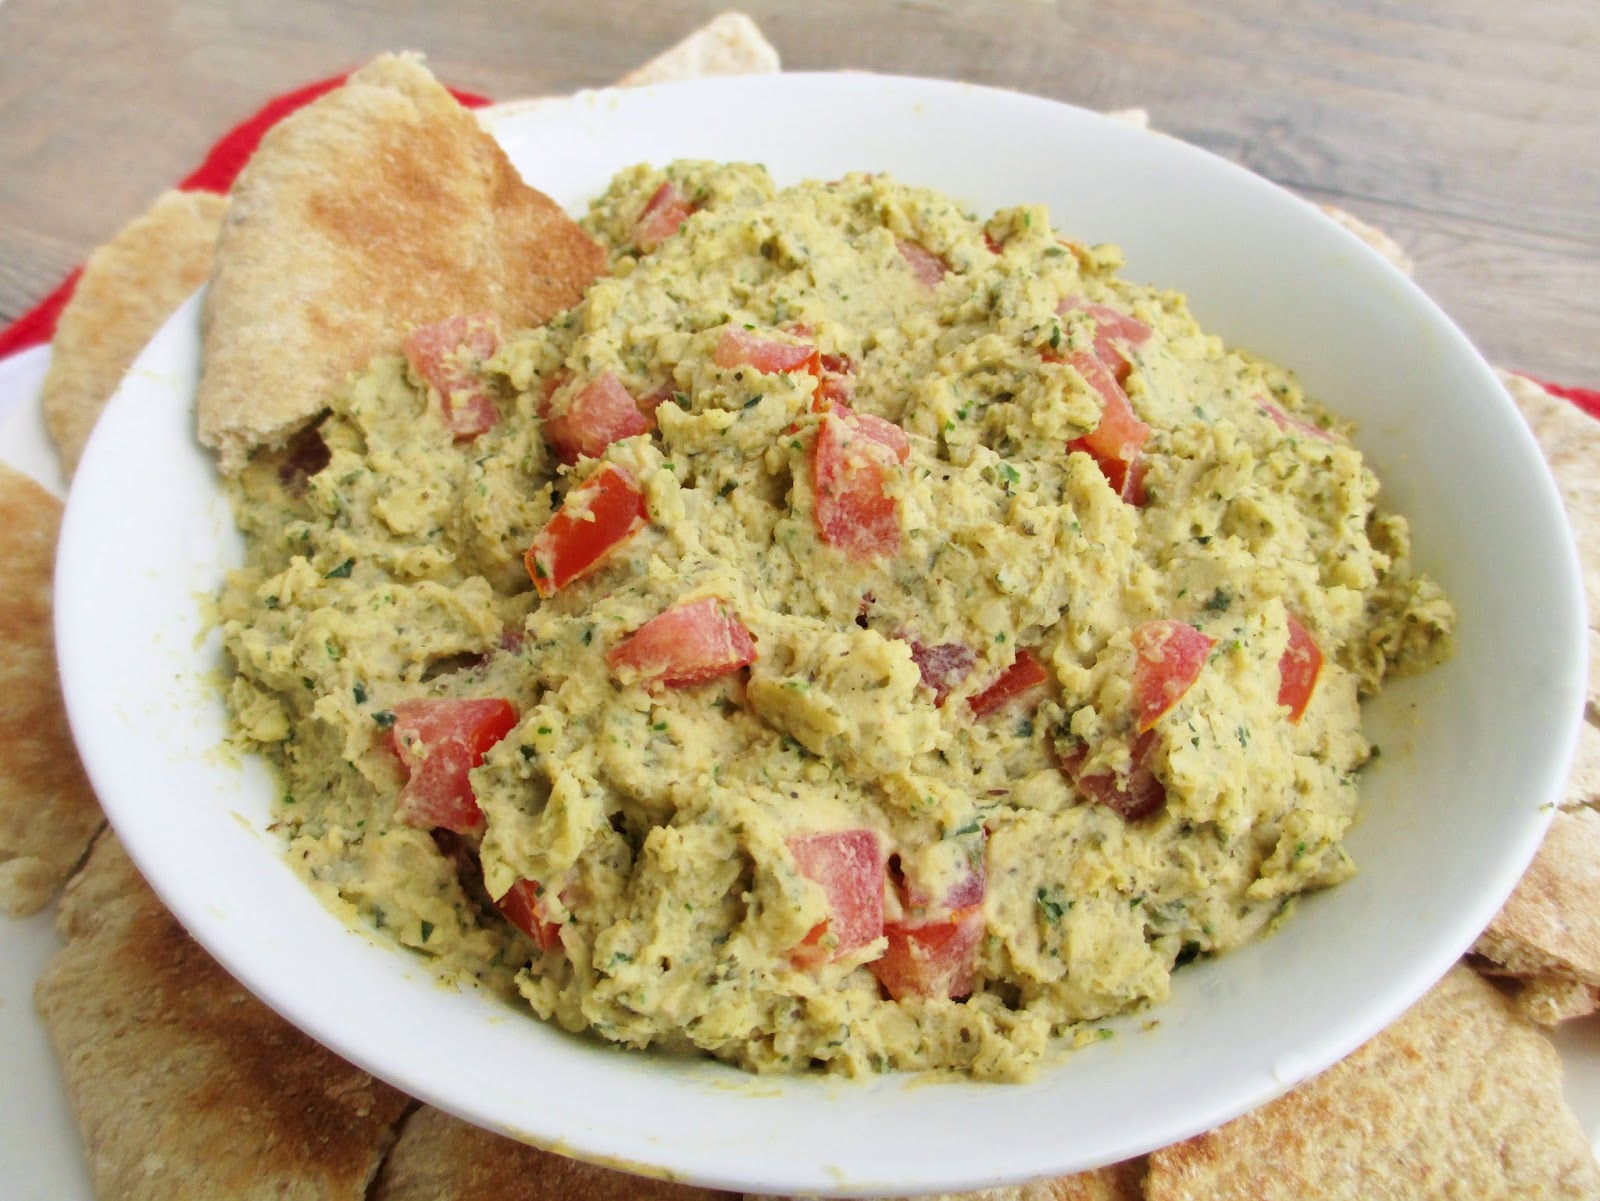
The brand of hummus that I bought was Garden Fresh Naturals, and it was a flavour I had never seen from other brands before - tabouli hummus.  The ingredients listed herbs like parsley and mint, along with tomato and bulgur to resemble actual tabouli.

When I tasted the hummus, I got all of the flavour of tabouli, but there were no distinguishable ingredients like fresh herbs, I couldn't see any sign of tomato, and I would never have guessed there was any bulgur in it.

So I decided to make my own version of tabouli hummus with more pronounced flavours and fresh ingredients.


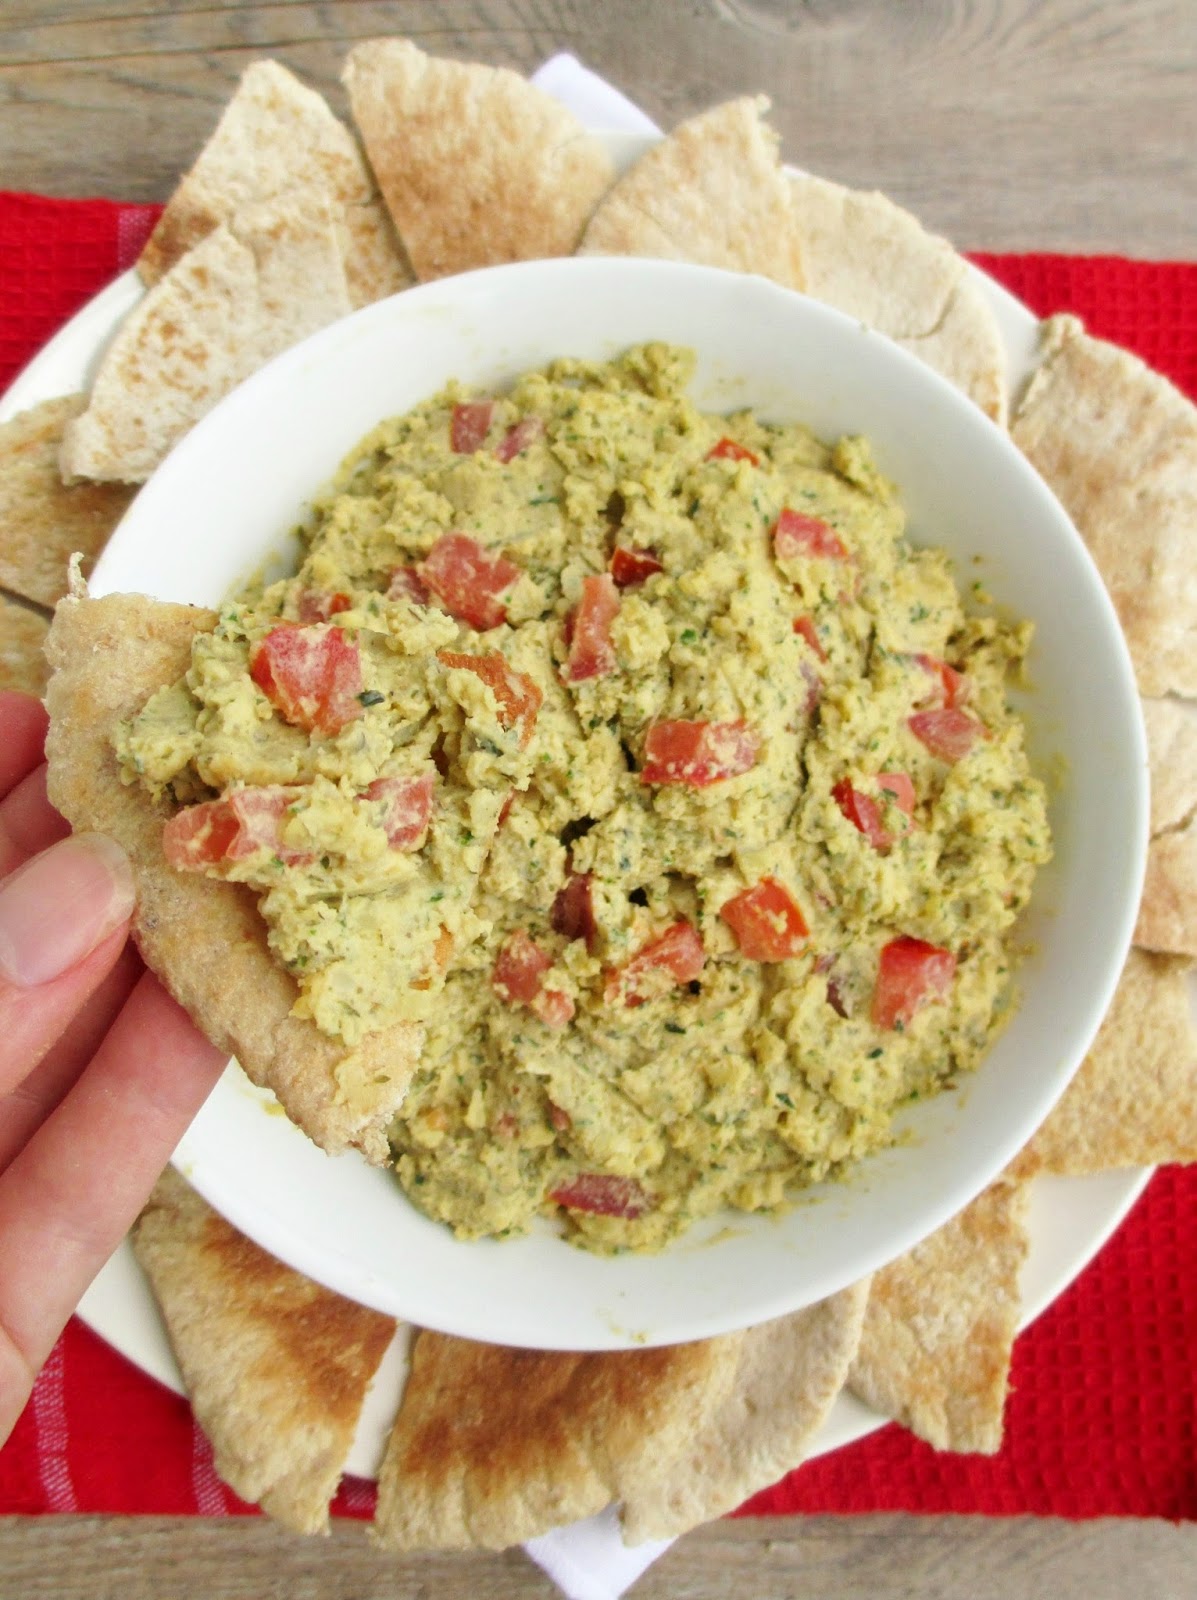
I started with the usual hummus ingredients of chickpeas, tahini, lemon juice, and garlic. Next, I tossed in some fresh herbs typically found in tabouli (parsley and mint), and I even stirred in some diced tomato at the end.

The key ingredient in this version though, the one that really takes it beyond plain hummus, was the addition of actual prepared tabouli. I cheated a little bit by using a boxed mix instead of making my own tabouli from scratch, because I didn't want to make things overly complicated.  The prepared tabouli added a lot more of those same flavours I was going for, and it bulked up the hummus while completely blending in at the same time.

This was definitely a thick, chunky, and spreadable type of hummus rather than the smooth and creamy varieties that you usually get from storebought brands. It makes a great dip for pita chips on its own, or you can use it as a spread in a wrap or sandwich. Actually, my favourite way to eat it was to spread a thick layer of the hummus inside a pita and then stuff the pita with some of the leftover tabouli - like a double tabouli meal in a pita!


Tabouli Hummus

1 box tabouli mix (such as this one)
1 can chickpeas, drained and rinsed (save the liquid)
3-4 tbsp tahini
Juice of one lemon
2 tbsp olive oil
2 tbsp chopped parsley
2 tbsp chopped fresh mint
1 clove garlic, minced
1/4 tsp salt (or more if desired)
ground pepper
1-2 tbsp reserved liquid from the can of chickpeas
1 medium tomato, seeded and diced


Prepare the tabouli mix according to package directions and set aside.

Place the chickpeas in a food processor and add tahini, lemon juice, oil, parsley, mint, and garlic. Season to taste with salt and pepper. Process until the mixture is as smooth as possible. Add some of the reserved chickpea liquid (or water) one tablespoon at a time to thin out the mixture if necessary. Add half a cup of the prepared tabouli and process again until the tabouli is incorporated.

Transfer hummus to a container or bowl and stir in another half a cup of tabouli, and the diced tomato. Save the remaining tabouli for another use.

Store in the refrigerator. Serve with pita chips or crackers, or use as a spread in wraps or sandwiches.

Makes 1 large batch.


July 11, 2013

Summer Pasta Salad with Roasted Pepper Dressing


I've been wanting to make a summery pasta salad for a few weeks now, especially after my sister Natalie made this tasty looking arugula pasta salad with chickpea, veggies, olives, and goat cheese. 

So when I finally managed to make a trip to my local farmers' market this past weekend, I filled my bags with all the summer veggies I could find and brought them home to use in this pasta salad.

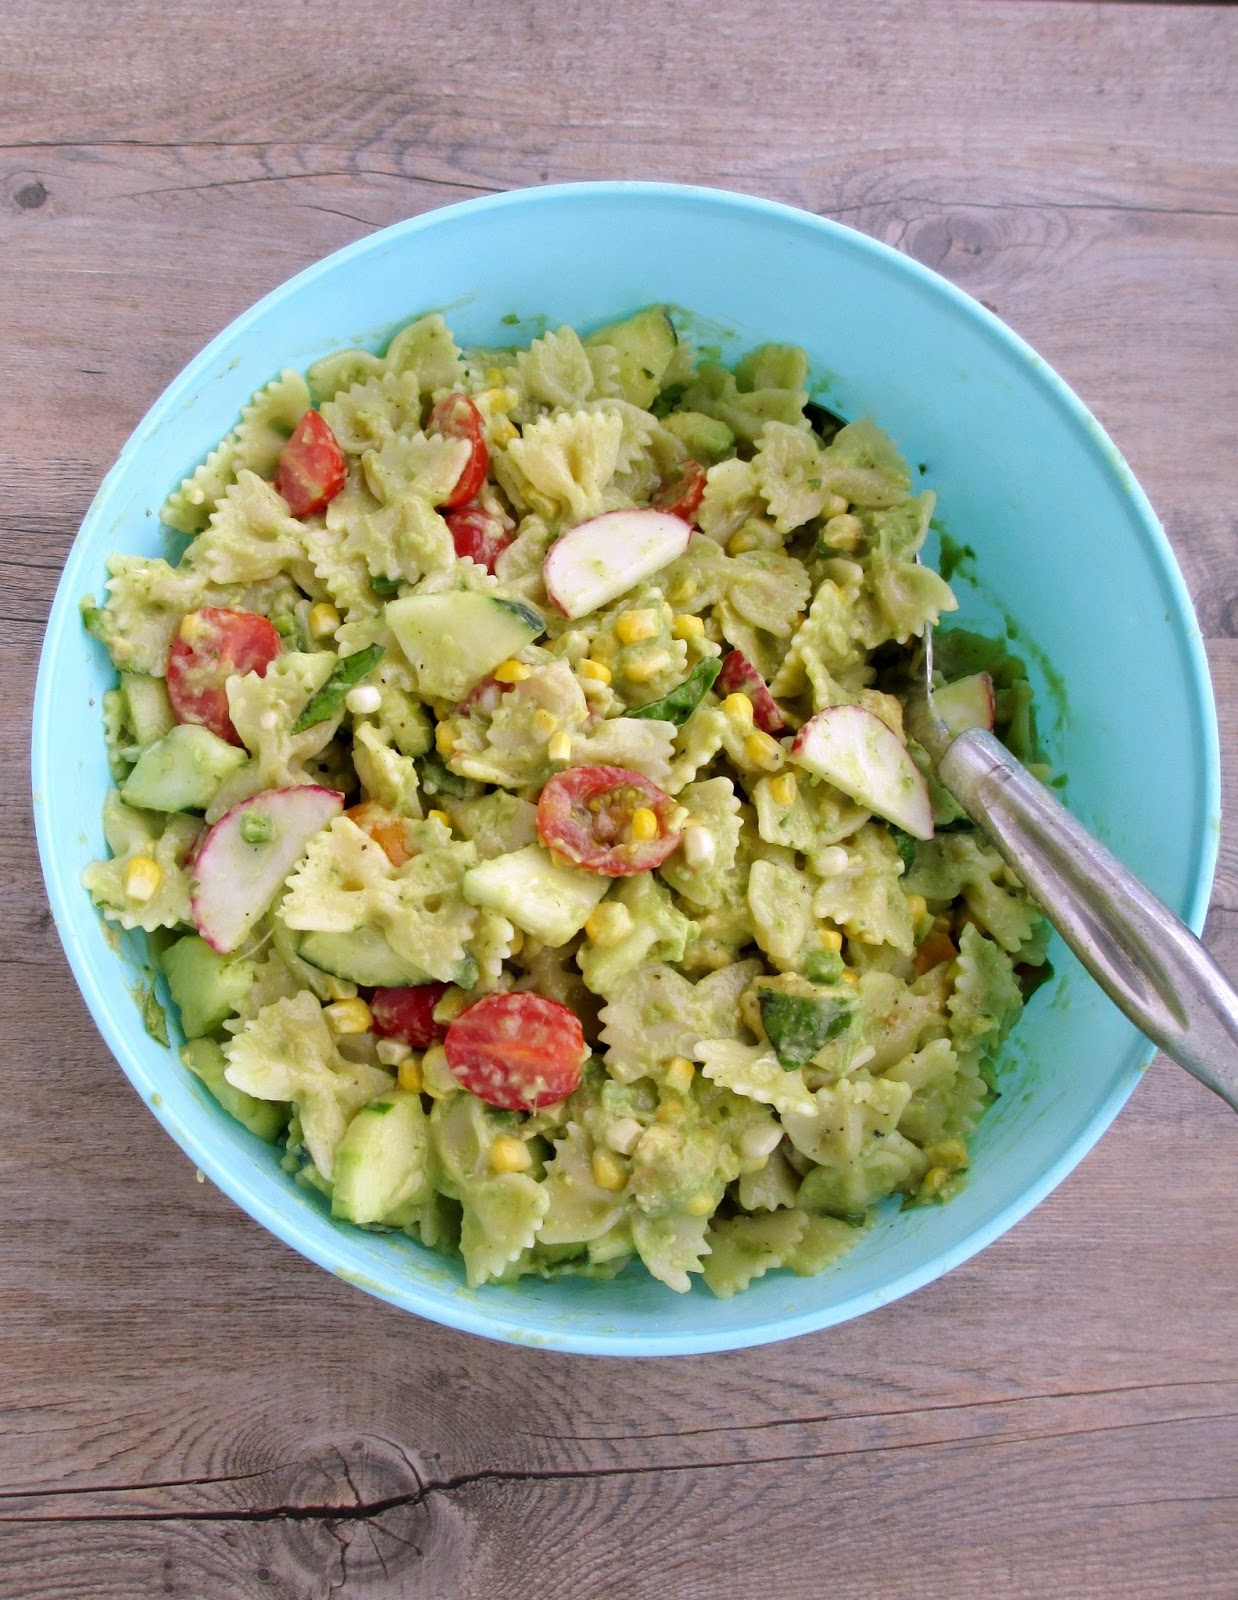
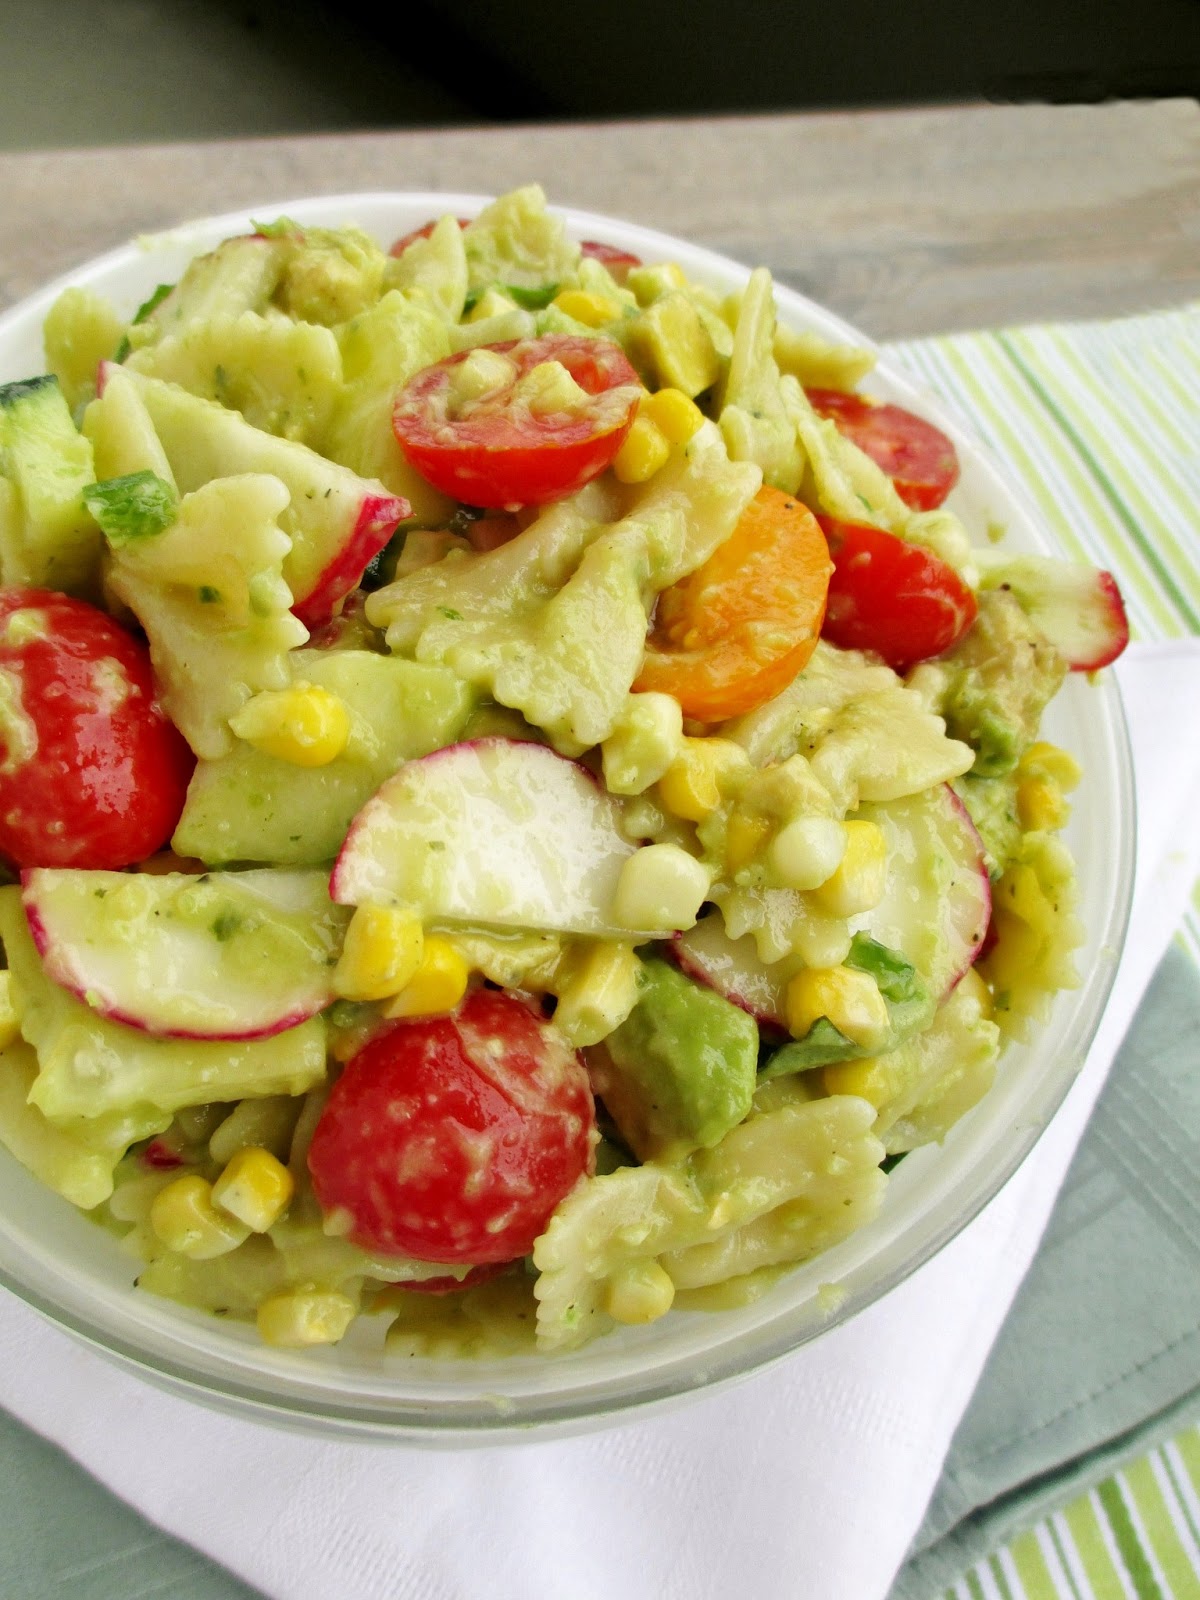
Besides pasta (obviously), this salad has heirloom tomatoes, corn off the cob, field cucumber, Ontario radishes, and fresh basil, plus avocado (not local) and jalapeno. 


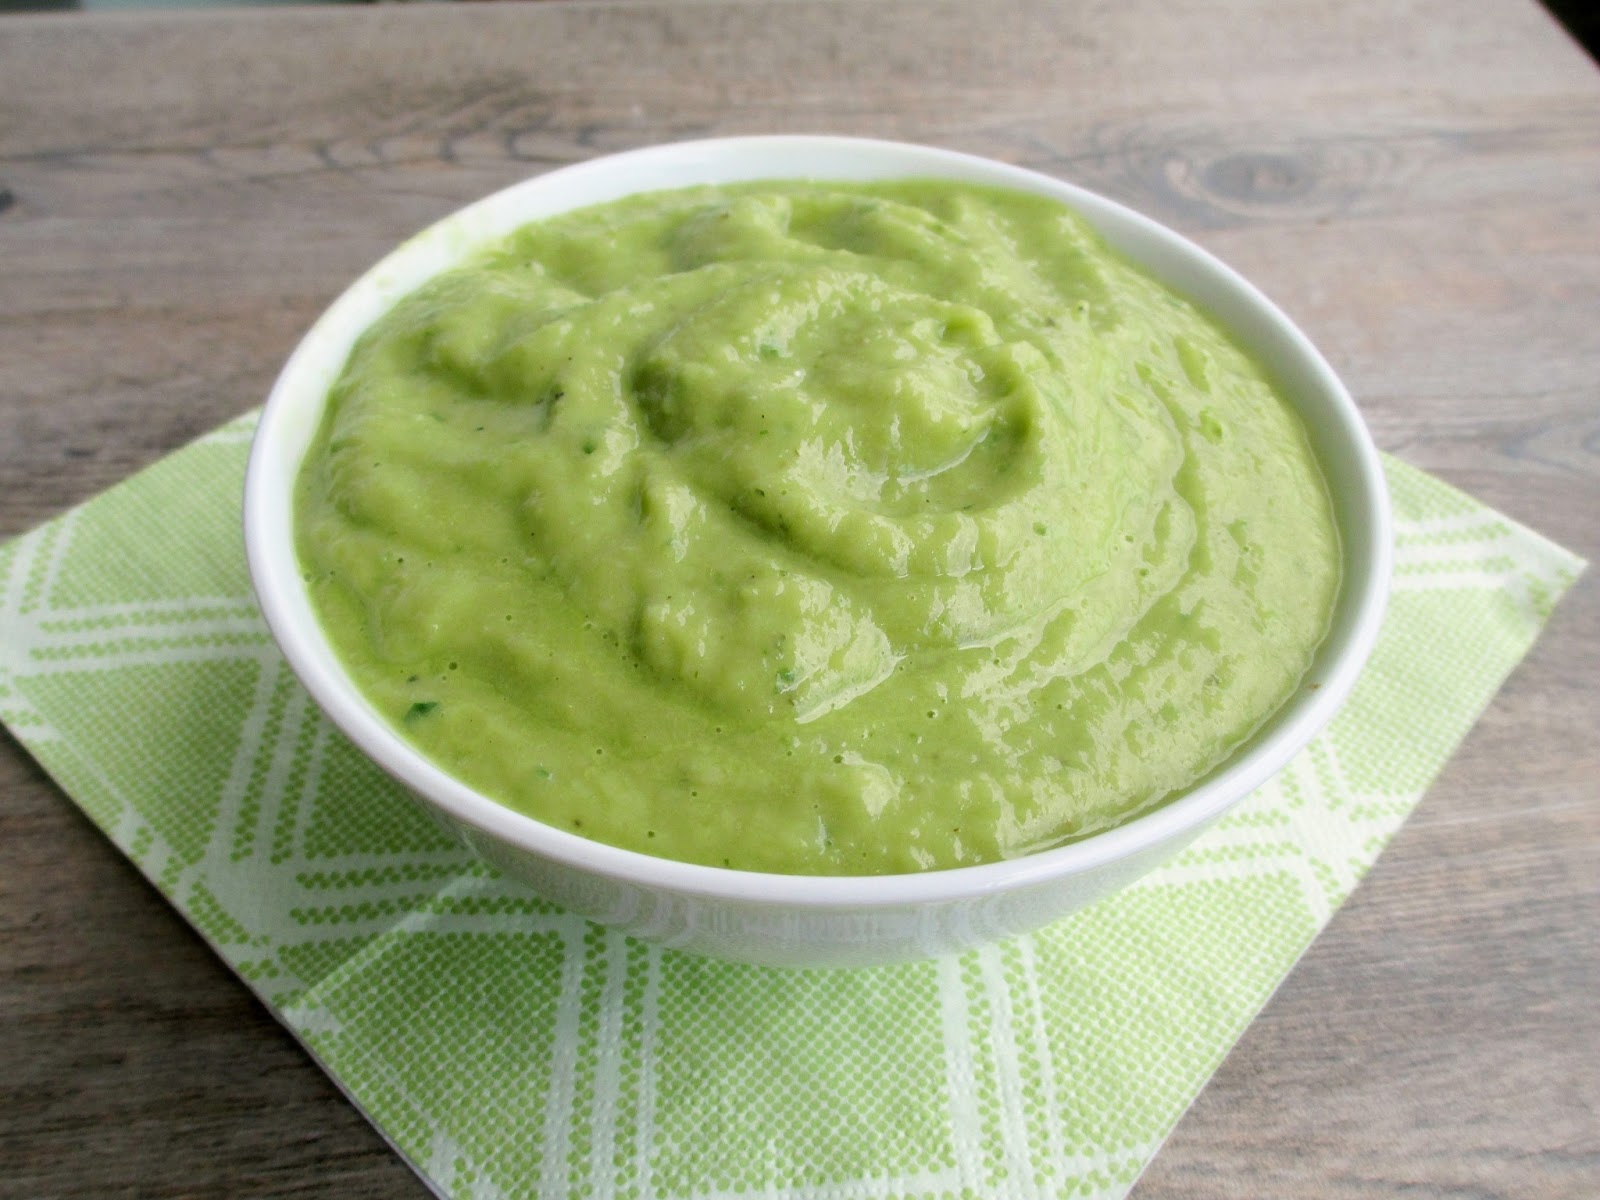
And as if that wasn't enough, I tossed everything in a creamy green dressing made with roasted cubanelle peppers and avocado. I actually meant to use poblano peppers, but when I couldn't find those, I took my chances on the milder cubanelles and the dressing still turned out wonderful.  

The original recipe that I adapted the dressing from was meant to be a salad vinaigrette, so I reduced the amount of water to make it thicker and doubled all of the amounts to make sure I had enough to coat a large amount of pasta. I loved the tang from white wine vinegar and lime juice, and it still had a bit of a bite from jalapeno, garlic, and shallots. 


This big batch of pasta salad was enough to last me through meals all week, and I looked forward to eating it for lunch every day!

You can't really go wrong with all those fresh summer ingredients, but I really loved the combination of veggies and bowtie pasta noodles coated in the creamy dressing.

And if the long list of ingredients scares you off, don't worry - you can easily adapt the recipe to your whatever fresh veggies you have on hand. I'm thinking red or yellow peppers, green beans, or fresh peas would work well in this salad, and feel free to add more herbs besides the basil.


Summer Pasta Salad with Roasted Pepper Dressing
Inspired by a recipe from Crazy Sexy Kitchen

Dressing
4 medium sized cubanelle peppers (can substitute poblano peppers if you can find them)
1 tsp olive oil
1 large shallot, minced
2 large cloves garlic, minced
1 ripe avocado, peeled and diced
1 large jalapeno, minced
2 tbsp chopped fresh basil
1/2 tsp dried parsley
1/4 cup white wine vinegar
3-4 tbsp fresh lime juice
~2 tbsp water
Salt and pepper to taste

Pasta
1lb (one box) dried farfalle pasta
2 cobs of cooked corn, kernels removed
2 cups halved cherry or grape tomatoes
2 cups halved (or quartered) cucumber slices
1 cup halved radish slices
2 avocados, diced
1 large jalapeno, minced (optional)
1/4 cup chopped fresh basil
Salt and pepper to taste

First, make the dressing: Preheat oven to broil. Place the whole peppers on a baking sheet and broil until slightly blackened on all sides, turning occasionally to broil all sides. Remove from oven and place peppers in a bowl of water for a couple of minutes to loosen the skin. Carefully peel off as much of the thin outer layer of skin as you can, then slice off the stems and remove the seeds. Roughly chop the peppers into pieces.

Heat olive oil in a small skillet over medium heat. Add shallot and garlic and sauté until the onion is softened, about 3-4 minutes. Remove from heat.

Transfer the cooked peppers, shallot and garlic to a blender. Add the avocado, jalapeno, basil, parsley, vinegar and lime juice and puree until smooth. Add water to thin out a bit (you can add more if needed, but you want a thick dressing). Season to taste with salt and pepper.  Transfer dressing to a bowl and refrigerate until needed.

Fill a large pot with water and heat on the stove until boiling. Add pasta to the water and boil according to directions on the box. Drain and rinse with cold water.

Place cooked pasta in a large bowl. Add the remaining pasta ingredients and toss to combine. Pour dressing over the salad and stir until thoroughly mixed. Season to taste with additional salt and pepper.

Serve chilled or at room temperature.

Makes 4-6 servings.

July 03, 2013

Avocado, Mango & Orange Salad


Who doesn't love a refreshing, juicy fruit salad in the summer? I love adding fruit to my salads, whether it's a leafy salad or a grain-based salad, like this quinoa version.

This fruit salad is a bit different, in that it doesn't really have a base ingredient like lettuce or quinoa. Instead, it's just a simple combination of ripe fruits with fresh herbs, all marinated in a dressing made with freshly squeezed citrus juice.

I had made a version of the original recipe for my family recently as a way to use up some ripe fruits that were lying around, and we all loved it so much that I had to make it again. I changed things up a bit this time, adding some grape tomatoes and chopped cashews for a bit of crunch.

This salad had a lot of bright flavours, and I loved the creaminess of the avocado and mango with the juicy bursts of orange.

This would make a great side dish for a summer BBQ, or you can also eat it like a salsa on top of chips or quesadillas. And if you're in Canada with a Sobeys store nearby, I recommend picking up some of their "light and airy pop crisps" and using them as a base to eat this salad with!


Avocado, Mango & Orange Salad
Adapted from Saveur 

1 ripe mango, diced (I recommend using a champagne/Ataulfo mango)
1/2 cup chopped grape or cherry tomatoes
1 ripe avocado, diced
1/2 a jalapeno, minced
1/4 cup chopped cilantro
1 medium orange (I used a navel orange)
1.5 tbsp fresh lime juice
1/2 tbsp olive oil
Salt and white pepper
1/4 cup chopped roasted cashews

Combine the diced mango, tomatoes, and avocado in a bowl. Add the minced jalapeno and chopped cilantro and stir to combine. Peel the orange, using a knife to slice off all of the white parts of the skin. Carefully slice the orange into wedges.  Take 2 slices and squeeze all of the juice out of them into a small bowl. Measure 1 tbsp of orange juice and set aside (if you don't get 1 tbsp, use another orange slice until you have enough juice). Chop the remaining orange slices into pieces and add them to the salad (you should have about ¾ cup).

Add the lime juice and olive oil to the bowl with the orange juice. Season with salt and white pepper to taste. Stir or whisk to combine, then pour dressing over the salad, tossing to mix.

Let salad chill in the refrigerator until serving time. Sprinkle chopped cashews over the salad when you are ready to serve.

Makes 2 servings. 

May 17, 2013

Gnocchi with Sauteed Vegetables


I'm sure a lot of you have stand-by "emergency dinners" - something you keep in your pantry that can be whipped up for an easy meal on those days when you have no plans for dinner, no time to visit the grocery store, and nothing substantial left in the fridge.

I sometimes keep a boxed soup in the pantry for such occasions, although if I have leftovers of something stored in the freezer (veggie burgers are a great option) then that's my first choice!

Recently I was at an Italian grocery store and decided to pick up a package of spinach gnocchi to have around just in case as an emergency dinner. The problem was that I didn't have any sauce around to go with it, and what good is plain gnocchi if you don't have a sauce?


So this week I sacrificed my emergency dinner gnocchi and stopped at the grocery store so that I could make a planned meal with it using fresh vegetables and herbs instead of a jarred sauce.

Rather than making an actual vegetable sauce, I took the easier route and just made a sauté out of zucchini, carrots, spinach and grape tomatoes to eat along with my gnocchi. Seasoned only with salt and pepper and topped with some fresh basil, this was a really easy meal to put together and still tasted fresh, since it was full of actual vegetables rather than a processed sauce (not that there's anything wrong with that occasionally too!).

Feel free to change up the vegetables with whatever is in season, and parmesan cheese on top would go really well here too!

Hope you all enjoy the weekend - especially Canadian readers who have a long weekend - yay!


Gnocchi with Sauteed Vegetables
Inspired by Martha Stewart and Australian Good Taste

1 (500g) package gnocchi (I used a spinach flavoured gnocchi)
2 tbsp olive oil
2 cloves garlic
1 small onion (or half a large onion), diced
2 medium zucchini, sliced into half-moons
1-2 small carrots, diced (about ½ cup)
1 pint cherry or grape tomatoes
2-3 cups packed spinach
Salt and pepper
1/3 cup sliced fresh basil
Parmesan cheese for serving (optional - I didn't use any)

Bring a large pot of water to a boil. Add the gnocchi and let cook until they float to the surface of the water, then remove with a slotted spoon and drain.

Meanwhile, heat olive oil in a large skillet over medium heat. Add garlic and sauté for about 30 seconds, stirring often. Add onion, zucchini, and carrot and season with a bit of salt and pepper. Cook, stirring occasionally, for about 5 minutes.

Add tomatoes and spinach and cover the pan with a lid. Cook, covered, for about 2 minutes, until the spinach is wilted. Remove lid and continue to cook for another minute or two, until the tomatoes have softened a bit. Add the drained gnocchi and toss to combine.

Season well and top with basil and parmesan (if using – I left it out). Serve warm.

Makes 3-4 servings. 

May 07, 2013

Scrambled Tofu with Pesto, Tomatoes & Fava Beans


I know I'm a bit late to the game with this recipe since scrambled tofu is nothing new, but this was my first time actually making it, so I wanted to post my own recipe on my blog. Plus, it turned out so pretty and colourful that I just had to share it!

If you've never heard of or tried scrambled tofu, the basic idea is to take firm tofu, crumble it up into uneven pieces, add some seasonings and cook it on the stovetop. The appearance, taste and texture resemble scrambled eggs, but only to a certain degree - I'm not sure if you'd be able to trick anyone into believing they were eating eggs instead of tofu!


This is one of the easiest ways to cook tofu, as it can be ready in about 10 minutes! I've actually used this method once before when I made a version of pad thai with scrambled tofu, but I've been wanting to try it with a more breakfasty type of recipe that highlighted the tofu as the main component.

For this version, I flavoured the tofu with a bit of nutritional yeast and garlic, and mixed in some homemade basil pesto for an even stronger boost of flavour. I also added some heirloom cherry tomatoes and fresh fava beans at the end to round out the dish with a colourful vegetable component.


I loved how fresh and seasonal this tasted from the combination of the earthy fava beans, juicy tomatoes and nutty basil pesto. A handful of pea shoots on the side was a welcome addition to the plate to lighten it up a bit more!

While I enjoyed the scramble on its own, my favourite way to eat it was wrapped up in a tortilla - kind of like a breakfast burrito but much lighter and healthier tasting! I also liked how the tortilla held all the ingredients together really well - unlike a piece of toast, which tasted good with the scramble on top but was a bit messy to eat!

Now that I know how easy it is to make scrambled tofu, and how adaptable the basic recipe is by adding flavour with different spices, sauces, and seasonal vegetables, I'll definitely have to start making it more often!


Scrambled Tofu with Pesto, Tomatoes & Fava Beans
Adapted from Vegetarian Ventures and An Endless Road

Small package (175g) firm tofu
1/4 tsp turmeric (optional for a brighter yellow colour)
1 tbsp nutritional yeast
Salt and pepper
2 tsp olive oil
1 clove garlic, minced
~1/2 cup sliced cherry or grape tomatoes (I used heirloom tomatoes)
2-3 tbsp shelled fava beans*
2-3 tbsp pesto (I used this basil pesto recipe)
Handful of pea shoots (optional)
Tortillas for serving (I made my own using this recipe, cut in half to make two tortillas)

Remove tofu from package, squeezing out any excess water. Crumble tofu using your hands or a fork into a bowl. Add the turmeric and nutritional yeast and stir until mixed. Season with salt and pepper.

Heat olive oil in a large skillet. Add garlic and sauté for about 30 seconds. Add tofu and cook, stirring often, for about 7 minutes. Add the tomatoes and fava beans and cook for another minute or two. Stir in the pesto and let cook until the pesto is heated through and evenly mixed into the tofu.

Serve warm, with pea shoots on top and tortillas for making wraps if desired (you could also just serve this with a side of toast). Season with additional salt and pepper if desired.

Makes 2 servings. 

*I started with fresh fava beans (in the pods), then removed the whole beans inside, steamed them briefly and then squeezed the actual beans out of the skin encasing them. Here are a couple of links that explain how to shell fava beans. 

April 02, 2013

Roasted Cauliflower & Antipasto Panzanella with Pomegranate Dressing


One of my favourite single-serving meals to throw together is a panzanella salad.  For anyone who hasn't heard of panzanella, it's basically a salad with bread, fresh herbs, and an olive oil-vinegar dressing. The bread is the key ingredient, and you can be as creative as you like with the rest of the components!

I've always had a preference for a summer panzanella with the best garden tomatoes, fresh basil, cucumber, and even corn, but I've learned that you can still make delicious and unique panzanellas any time of the year - check out my versions of winter panzanella and spring panzanella that I've posted on the blog!

I recently saw a recipe for a panzanella with olives and artichokes on Kitchen Confidante, and since I've finally learned to like olives, I was inspired to give this idea a try.


For my version, I used a mixture of black and green olives, marinated artichoke hearts and roasted red pepper for an antipasto base (I realize this isn't exactly authentic antipasto, but it was close enough for me!). I also roasted some cauliflower and grape tomatoes to round out the salad, and of course, a good crusty baguette!

For the herbs, I went with both fresh basil and mint, and finally, I made a simple red wine vinegar dressing with the addition of pomegranate molasses for a burst of sweetness.

It seems that you can't really go wrong with a panzanella because I always love every version that I come up with, and this one was no different! I loved the mixture of flavours, from the sweet and tangy dressing to the salty olives and briny artichokes. The warm roasted cauliflower and juicy tomatoes added a nice contrast to the antipasto ingredients, and the bread soaked up all of the flavours while keeping a bit of its crunch.

If you're a panzanella fanatic like me, I hope you'll give this version a try!


Roasted Cauliflower & Antipasto Panzanella with Pomegranate Dressing
Inspired by Kitchen Confidante

Approximate amounts per serving: (feel free to adjust to your liking)
1/4 head cauliflower, chopped
1/2 tbsp olive oil
7-8 grape tomatoes
7-8 pitted olives (I liked the small kalamatas best)
1 clove garlic, peeled and smashed
~50 grams of crusty bread, sliced or torn into small bite-sized pieces
~3 pieces of quartered artichoke hearts, sliced in half (the marinated jarred kind)
1 whole roasted red pepper (I used the jarred kind), sliced into thin strips
3-4 large leaves of fresh basil
1 tbsp chopped fresh mint
1.5 tbsp red wine vinegar
1 tbsp pomegranate molasses
1 tsp whole grain mustard
1/2 tbsp olive oil (optional – I left it out when I made the salad fresh, but added it to my leftovers the next day)
Salt and pepper

Preheat oven to 425°F.

Place the chopped cauliflower in a large roasting pan and drizzle with 1/2 tbsp olive oil, salt and pepper, tossing to coat. Roast in the preheated oven for 25-30 minutes total.

After 10 minutes of roasting, add the tomatoes, olives, and garlic to the pan and return to the oven (for another 15-20 minutes). Place the bread chunks on a small baking sheet and spray with a bit of cooking spray. Add to the oven for the last 5 minutes of cooking time so they are lightly toasted (or longer if you like them extra crispy).

When everything is done roasting, combine in a large bowl (cauliflower, tomatoes, olives, garlic, and bread). Add the sliced artichokes and red pepper, basil, and mint, and toss to combine.

Whisk together the vinegar, pomegranate molasses and mustard. Pour dressing over salad and toss well. Drizzle with the extra 1/2 tablespoon of olive oil if desired.

Serve warm. Season with additional salt and pepper.

Makes 1 serving. 

Note: Leftovers of the fully assembled salad will not keep well, but you can roast a double portion of the veggies and keep leftovers of each portion separate in the fridge. The next day, heat up the veggies, toast your bread, chop up the herbs, and toss in the dressing. 

January 24, 2013

West African Vegetable Stew


For those of you living in areas that have been hit by the arctic cold weather this past week, I think you'll appreciate today's post for a big pot of healthy vegetable stew!  I made this on Sunday night and with six servings to enjoy, it's been getting me through the deep freeze this week (although I sadly just ate up my last serving for lunch today).

Ever since my trips to Zambia and Kenya this past year, I've been wanting to try cooking more African-inspired dishes.  So I was intrigued when I noticed a recipe for "mafe" in one of my new cookbooks and learned that it is a West African peanut stew traditionally made with meat, but this version was adapted to be vegetarian.

I combined that recipe with a similar one in another cookbook to come up with this variation on mafe.  The base of the stew is a flavourful blend of onion, garlic, ginger, and hot peppers.  Next, you add a mixture of vegetables - I used sweet potato, green pepper, okra, tomatoes and cabbage, which are cooked in vegetable broth and apple juice. Finally, you stir in some cilantro and a generous amount of peanut butter to thicken the broth a bit.


I was a bit nervous adding the cabbage and okra to this dish because I'm not really used to cooking with them. I also know that okra has kind of a bad reputation for being a slimy vegetable, but I had tried it in Zambia and loved it, so I was willing to give it a chance here!

And I was glad that I did - the okra basically blended in to mix with the other vegetables, adding some mild taste and texture without being too noticeable.  Actually, the okra and cabbage ended up being my favourite bits to eat in this stew!

This was definitely the kind of hearty dish that I needed this week - it both warmed me up and filled me up, and had a nice spicy heat to it that wasn't overpowering but still left me with a runny nose! Serve with some rice or couscous to help soak up the broth, and you've got a nice winter meal to enjoy!


West African Vegetable Stew
Adapted from Ripe From Around Here and Vegan Eats World

1.5 tbsp vegetable oil
2 small yellow onions, diced
2 cloves garlic, minced
2 jalapenos, minced
1-inch piece of ginger, peeled and minced
1 large sweet potato, peeled and diced into ½” cubes (about 3 cups)
1 tsp cumin
1 green pepper, diced
1/2 a small head of cabbage, chopped and core removed
2 medium tomatoes, chopped
3 cups vegetable broth
1 cup unsweetened apple juice
1/2 tsp salt
1.5-2 cups chopped fresh okra
1/2 cup peanut butter
1/4 cup chopped fresh cilantro, plus more for serving
4-6 tbsp chopped peanuts
Cooked rice or couscous for serving

Heat the oil in a large sauce pan over medium heat.  Add the onions and cook for about 10 minutes, stirring occasionally, until softened and starting to brown. Add garlic, jalapenos, ginger, and sweet potato. Stir in the cumin. Cover and cook for about 3 minutes.

Add the green pepper, cabbage, tomatoes, broth, apple juice, and salt. Simmer on medium heat, covered, for about 15 minutes, stirring occasionally. Add the okra and cook for 5 more minutes.

Place the peanut butter in a small bowl. Take about ½ cup of the hot broth and add it to the bowl. Stir until mixture is smooth, then transfer back to the pot and stir to mix it in.

Remove from heat and stir in cilantro.  Let cool slightly.  Serve over rice or couscous. Top each serving with a sprinkle of chopped peanuts, chopped cilantro and season with additional salt and pepper if desired.

Makes 5-6 servings

January 17, 2013

"PLT" Sandwich (Paneer Sandwich)


After our Indian Feast on New Year's Eve recently, I seem to have rediscovered my love of paneer - a soft and mild-tasting cottage cheese that is featured in many popular Indian dishes like saag paneer. If you have a well-stocked grocery store or an ethnic food shop in your local area, then you should be able to buy paneer to use in your own homemade Indian-inspired dishes, like this sandwich!

The recipe, which comes from British chef Anjum Anand, is modelled after a BLT sandwich.  Of course, it's not quite the same as a BLT as it has paneer cheese instead of bacon (hence the name PLT), but I think this vegetarian version is much tastier anyway!

The basic components are slices of paneer that have been marinated in a spiced yogurt mixture, fresh tomato, lettuce, and (vegan) mayo.  I decided to replace the lettuce with spinach, since spinach and paneer pair so well together, and I added some curry powder to the mayo spread to give it more flavour.


Even though it looks like a pretty simple sandwich, all of the spices and textures made it much more exciting than the name "PLT" implies! The paneer is broiled so that it has a chewy texture that reminded me a lot of firm tofu (actually, you could probably confuse the two if you didn't know it was paneer!).

I loved the mild Indian flavours that the paneer soaked up, and the curried mayo added a nice creamy and tangy element.

I made my sandwich with a thin sandwich bun, but you could also use toasted bread if you prefer a more traditional sandwich. The recipe makes enough for two sandwiches, but you could easily double the amount of paneer and keep it in the fridge to put together more "PLT"s throughout the week!


"PLT" (Paneer, Lettuce & Tomato) Sandwich
Adapted from Anjum's Indian Vegetarian Feast

For the paneer (makes enough for 2 sandwiches):
~150g paneer cheese, sliced into 1” thick slices (I cut two long slices, then cut each slice in half for 4 pieces)
1/3 cup plain low-fat yogurt
2 tsp fresh ginger, minced
2 cloves garlic, minced
1/2 tsp each paprika, chili powder and cumin
1/4 tsp Indian curry paste (optional for more flavour)
1 tbsp + 1 tsp fresh lemon juice
Salt to taste

For each sandwich (double amounts if you are making two sandwiches):
Sandwich bun or 2 pieces of toasted bread
2 tsp vegan mayonnaise or regular mayo
1/4 tsp curry powder
1 tsp lemon juice
Half of the cooked paneer slices
Handful of spinach leaves, stems removed
2 slices of tomato, seasoned with salt and pepper


First, make the marinade for the paneer.  In a bowl, whisk together the yogurt, ginger, garlic, spices, curry paste and lemon juice. Add a dash of salt.  Coat the paneer slices in the marinade and let sit in a ziplock bag or a shallow bowl or container for at least 30 minutes.

Preheat the oven broiler. When broiler is ready, transfer the paneer with marinade to a small baking dish and cook in the top half of the oven for 8-10 minutes. Flip paneer pieces and cook the other side for about 8 more minutes, until the edges are starting to brown. Remove from oven and let cool slightly.

To assemble sandwich, mix together the mayo, curry powder, and lemon juice until smooth. Spread mixture on the top side of your bread or bun. Lay some spinach on the bottom half, and place two pieces of paneer on top. Next, add the tomato slices and top with a bit more spinach. Close sandwich and serve immediately.

Makes enough for 2 sandwiches. 

January 11, 2013

Eggplant, Chickpea & Pomegranate Stew


It seems like this week flew by - It was my first week back at school after the holidays, so I had extra work to catch up on. I also decided to try out a couple of workout classes at the school gym because they were offering a free fitness week, so that kept me at school later than usual too (not that I'm complaining - it felt great to squeeze in some exercise during the workday)!

With less time and energy left over to cook meals for myself this week, I was happy that I had made a big batch of this stew on Monday to get me through!

I saw this recipe in a magazine that my older sister got for me in Ireland before Christmas, and I was drawn in by the beautiful photo of the dish as well as the ingredients.  In particular, I was intrigued by the addition of both pomegranate seeds and pomegranate molasses - an ingredient that I've been meaning to try out for a while, after reading about it on Janet's blog!

The recipe was pretty easy to follow, although I made a few tweaks and changed the amounts of certain ingredients. Basically, you cut thin slices of eggplant and saute them on the stovetop to get them nice and brown, then you layer the slices in a casserole dish like a lasagna with a mixture of chickpeas, tomatoes, onion, garlic and spices.  The chickpea mixture is also enriched by the pomegranate molasses, which is thick and syrupy with a sweet and tangy flavour.

I have to say, this is probably my favourite eggplant dish that I've tried so far. By slicing it thin and browning it well, it loses some of its spongy texture and paired well with the other ingredients.

I also loved how the pomegrante seeds took this from a simple eggplant and chickpea stew to something a bit more interesting and flavourful!  And now that I've finally tracked down a bottle of pomegranate molasses, I can't wait to start trying it out in more recipes!

Have a good weekend everyone!


Eggplant, Chickpea & Pomegranate Stew
Adapted from Cook Vegetarian magazine (online version here)
Note: I called this a stew but unlike a typical stew, it does not have a lot of liquid, so it's more of a dry stew (for lack of a better term)!

2 medium eggplants (about 1 lb each), sliced lengthwise into ½” thick slices
3 tbsp olive oil
1 medium yellow onion, peeled and finely chopped
3 cloves garlic, peeled and minced
1 tsp minced fresh ginger
1 green chili pepper (or other small pepper), minced
2 tsp paprika
1 tsp cumin
1/4 tsp ground coriander
Dash of cinnamon
1 can chickpeas, rinsed and drained
1 28 oz can chopped tomatoes (I used the no-salt added kind)
2 tbsp pomegranate molasses
Pinch of chili flakes (optional for a spicier stew, depending on how hot your chili pepper is - mine wasn't very hot)
Salt and pepper to taste
~1/4 cup chopped fresh parsley
4-6 tbsp pomegranate seeds

Sprinkle the eggplant slices with salt and lay in a colander (I divided them into two colanders). Let sit for about 20 minutes, then rinse the salt off with water and dry the slices with paper towel.

Preheat oven to 350°F.  Heat 2 large skillets over medium-high heat.  Pour 2 tbsp of olive oil in a small bowl and use it to brush the eggplant slices. Brush one side of each eggplant slice and lay the oiled side face down in the skillet.  Repeat with as many eggplant slices as you can fit in the two pans without overlapping. Once the slices are in the pan, brush the top side with oil.  Cook each side for 3-5 minutes, until well browned, then flip over and cook the other side.  Transfer cooked slices to a plate and repeat process with the remaining eggplant slices until they are all cooked.

Bring one pan back to medium heat with 1 tbsp olive oil.  Add the onion, garlic, ginger, chili, and spices. Cook, stirring often, for about 4-5 minutes, until the onion is translucent.

Add the chickpeas and tomatoes to the pan. Stir in the pomegranate molasses and chili flakes (if using) and season with salt and pepper.

Layer half of the eggplant slices over the bottom of a greased 13x9” baking dish. Pour about half of the chickpea mixture over the slices, spreading with a spoon or spatula to distribute evenly.  Cover with the remaining eggplant slices, then top with the rest of the chickpea mixture. Place in the preheated oven for 15 minutes.

When ready to serve, sprinkle the parsley and pomegranate seeds over top of the dish, or you can serve each portion and then add about 1 tbsp parsley and 1 tbsp pomegranate seeds (or more if desired) as a garnish to each plate. (Note: Before eating, you might want to use a knife to cut the eggplant into smaller slices; otherwise, you can just use your fork to break it up as you eat).

Makes 4-5 servings.

August 27, 2012

Vegan Posole ( Mexican Hominy Soup)


A few months ago, I ordered a Mexican corn soup from a local cafe and I was surprised to see that the corn came as large, white, chewy kernels instead of the small, crunchy yellow corn I was used to. I later learned that the corn used in my soup was actually hominy, also known as white corn posole, made by removing the outer layers of corn kernels and drying them.  Then when I visited Zambia in July, I noticed the same type of corn appearing in many of the dishes, where it was called maize.

After tasting hominy in a few different ways, I really came to love its hearty, firm texture and I wanted to cook with it myself.  You can find cans of hominy in the grocery store, but rather than starting off with the canned variety, I decided to use the dried kernels.

The first recipe I made with my new ingredient was this soup called posole.  Mexican posole is traditionally made with hominy and meat, but I made a vegan version inspired by the soup I had at the cafe, and adapted from a recipe for tortilla soup that I found in Appetite for Reduction.  The cookbook recipe called for fresh corn and pinto beans, but I replaced both with an extra portion of hominy instead.

Along with the hominy, the soup is filled with onions, peppers and tomatoes, and flavoured with lime juice, cilantro, garlic and jalapeno.  I also added some cubed avocado at the end to bulk up the soup a bit more with a healthy fat. Finally, both the soup I had eaten at the cafe and the recipe in my cookbook included pieces of tortilla chips as a garnish. Since I didn't want to buy a whole bag of tortilla chips just for this recipe, I used broken up taco shells as a substitute.


As you can see,my tortillas/taco shells started to get soggy immediately after adding them to the hot soup, so I would suggest only adding them right when you want to eat, or leaving them out (personally I enjoyed my soup just as much without the tortillas, although I might have had a different opinion if I used actual tortilla chips, so I'll leave the option up to you!)

The big chewy kernels of corn were my favourite part of the soup, and I loved how hearty it was between the hominy and the avocado.  Even without the crisp tortilla strips that I was hoping for, there were still lots of textures going on that made this more like a chunky stew than just a soup.

For a non-vegan version, you could also try adding shredded cheese and sour cream as a garnish to make this more like a taco soup, but I liked it just fine without!

The only difficult part about this recipe is having to soak the hominy ahead of time, but as long as you plan ahead, the rest of the dish is pretty easy and doesn't take too long to put together. Or you could even skip the soaking step and just used canned hominy  - although I haven't tried that myself, so I can't vouch for the results!


Vegan Posole
Adapted from Appetite for Reduction

1 cup dry white corn posole (or 2 cups cooked hominy) - I used this brand
1 tsp olive oil
1 small yellow onion, thinly sliced
2 jalapenos, seeded and minced
1 poblano or Cuban pepper, seeded and diced
4 cloves garlic, peeled and minced
1/4 to 1/2 tsp red pepper flakes (to taste)
1 tsp kosher salt
28 oz can of whole tomatoes
28 oz vegetable stock
1 tbsp cumin
1/2 cup chopped fresh cilantro, plus more for topping
Juice of 1 lime
1 avocado, diced
hot sauce to taste (optional)
About 1 cup broken up corn tortilla chips (I used broken hard taco shells instead)

Soak the dry posole/hominy in water for at least 6 hours or overnight.  Drain and add to a pot filled about two-thirds full with water.  Bring to a boil with a couple pinches of salt, reduce heat and simmer for 1.5-2 hours, until softened (if the water runs out partway through, add some more so the hominy doesn’t dry up).

Heat the oil in a large pot over medium-high heat.  Add the onion, jalapeno and poblano pepper and sauté for 4-5 minutes, stirring occasionally.  Add the garlic, red pepper flakes and salt and sauté one more minute.

Add the tomatoes to the pot, breaking them up with your hands as you put them in (I also cut some up further with a knife).  Fill the empty tomato can with vegetable stock and add to the pot.  Stir in the cumin.  Cover and bring to a boil. Add the cooked hominy and cilantro and simmer, uncovered, for 5 minutes.  Remove from heat and stir in the lime juice.

To serve, ladle portions of soup into bowls and divide the avocado pieces among the bowls. Add a dash or two of hot sauce if you want more heat. Garnish each bowl with a handful of tortilla pieces and top with more cilantro.

Makes 4-6 servings.

August 14, 2012

Warm Veggie Sausage & Potato Salad


One of the standard summertime meals that my mom would often make for us at least a few times every summer was her sausage and potato salad.  I've mentioned before that I'm not a fan of gloopy potato salads that are coated in a thick mayonnaise-based dressing, and my mom's version was just the opposite - fresh and summery with green beans, diced potatoes and chopped sausages, tossed in a light mustard and vinegar dressing.

Since I became vegetarian, I've generally stayed away from "mock meat" products, including veggie dogs and veggie sausages.  Recently, however, my older sister (also a vegetarian) has been raving about the Field Roast brand of veggie sausages that come in an apple-sage flavour, so I was curious to try them out.

I can't get this particular brand anywhere locally, but on a recent trip across the border I was able to stop in at Whole Foods and spotted the sausages.  I was still a bit leery about buying them - not only were they a bit pricey, but I was also worried they would taste too much like meat and creep me out!  In the end, my sister convinced me they would be worth it, so I went ahead and got a package.

Rather than eating them on a bun, she recommended cutting the sausages up and eating them with roasted potatoes and salad.  That got me thinking back to my mom's sausage and potato salad, so I decided to make my own version!


For my potato salad, I steamed a few diced white potatoes, some green beans and mini mushrooms.  Along with the sauteed veggie sausages, I also added some diced tomatoes and fresh basil, and while everything was still warm, I tossed it in a delicious dressing made with whole grain mustard, red wine vinegar, olive oil, garlic and shallots.  Finally, I laid the salad on top of a bed of spinach that I lightly coated in the dressing.

This was definitely not a boring potato salad! I loved the combination of tender potatoes and veggies with the juicy tomatoes and crumbled sausages. The sausages had an appealing sweet-and-savory flavour and a texture that was more nutty than meaty, so I wasn't too creeped out by them!

The tangy dressing was probably my favourite part of the salad.  I'm not usually a fan of dijon mustard, but I found the sharp flavour mellowed out when combined with the other ingredients, and I loved the whole grain texture.   Even though the recipe makes a bit of extra dressing, I still ended up using the whole amount because I liked it so much, and it helps to add the spinach to the salad to soak up some of the extra dressing.

This was a great summer dish that I think would be welcome at a picnic or potluck.  I would recommend serving it warm if possible, although I never actually tried it cold, so it might be just as good that way!  It's also easily adaptable for any type of diet - you can use veggie sausages or meat sausages, although I think meat eaters would still like the Field Roast brand!


Warm Veggie Sausage & Potato Salad
Inspired by my mom's potato salad, as well as recipes found here and here


1.5 lbs white potatoes, cut into 1-inch pieces
white wine for cooking (optional)
6 oz green beans
6 oz mini bella mushrooms
1.5 cups diced tomatoes (including seeds)
2 veggie sausages (I like Field Roast smoked apple sage flavour - use 3 sausages for a heavier portion)
2 tbsp chopped fresh basil
4-5 cups spinach

Dressing
1.5 tbsp red wine vinegar
1.5 tbsp whole grain Dijon mustard
3 tbsp olive oil
1 clove garlic, peeled and minced
1 shallot, minced
Salt and pepper to taste

Bring about 1 inch of water to a boil in a large pot. Place the diced potatoes in a steamer basket, insert steamer in the pot and cover. Steam potatoes over the boiling water for 15-20 minutes, until potatoes are tender when pierced with a fork. 

Meanwhile, prepare the dressing by whisking all ingredients together in a small bowl.

When potatoes are done, remove from heat and transfer to a large bowl. Toss with a bit of the dressing.

Heat a small skillet over medium heat and spray with cooking spray.  Cook the veggie sausages according to package directions (mine took about 5 minutes, turning often, until browned on all sides). Remove from heat and cut into bite-sized pieces.

Meanwhile, add a bit more water and a splash of white wine (if desired) to the pot that was used to steam the potatoes and return to a boil.  Place the beans and mushrooms in the steamer basket and steam, covered, for 4-5 minutes. Immediately plunge the beans and mushrooms into a bowl of cold ice water to stop them from cooking further.  Drain and add to the bowl with the potatoes.

Add the tomatoes and diced sausages to the bowl. Pour most of the dressing over top, leaving a bit behind to toss with the spinach.  Toss the salad to distribute the dressing.  Stir in the chopped basil and season with additional salt and pepper to taste.

Serve as is, or to serve over top of spinach: Take however many servings you would like of chopped spinach and toss with the remaining dressing.  Divide among plates and top each serving of spinach with a generous helping of the potato salad.  Serve warm.

Makes 3-4 main servings. 


LinkWithin

Related Posts Plugin for WordPress, Blogger...