Showing posts with label appetizer. Show all posts

August 19, 2014

Roasted Strawberry & Goat Cheese Crostini


Yikes, how has it been over a month since my last post? Sorry I haven't been around here in awhile, but life has been pretty busy lately with trying to finish my degree and helping to plan my sister's wedding, and as much as I wanted to keep up with my blog, I just haven't had the time.

While I expect to still be busy over the next couple weeks, I wanted to at least squeeze in a quick recipe to say that I'm still here, for anyone who might still be reading!

I actually made this recipe at the end of July for a strawberry-themed potluck, and I wasn't planning on sharing it on my blog but it turned out so tasty that I changed my mind!

When I was trying to think of a strawberry recipe that I could make for the potluck, I remembered this roasted strawberry, basil and goat cheese crostini from Confections of a Foodie Bride that I had made once and loved. I took that idea but changed things up a bit this time, adding some lemon flavoured greek yogurt to the goat cheese to make a super creamy and lemony spread. Instead of making a basil syrup or using fresh basil as a garnish, I added some basil to the goat cheese mixture instead.


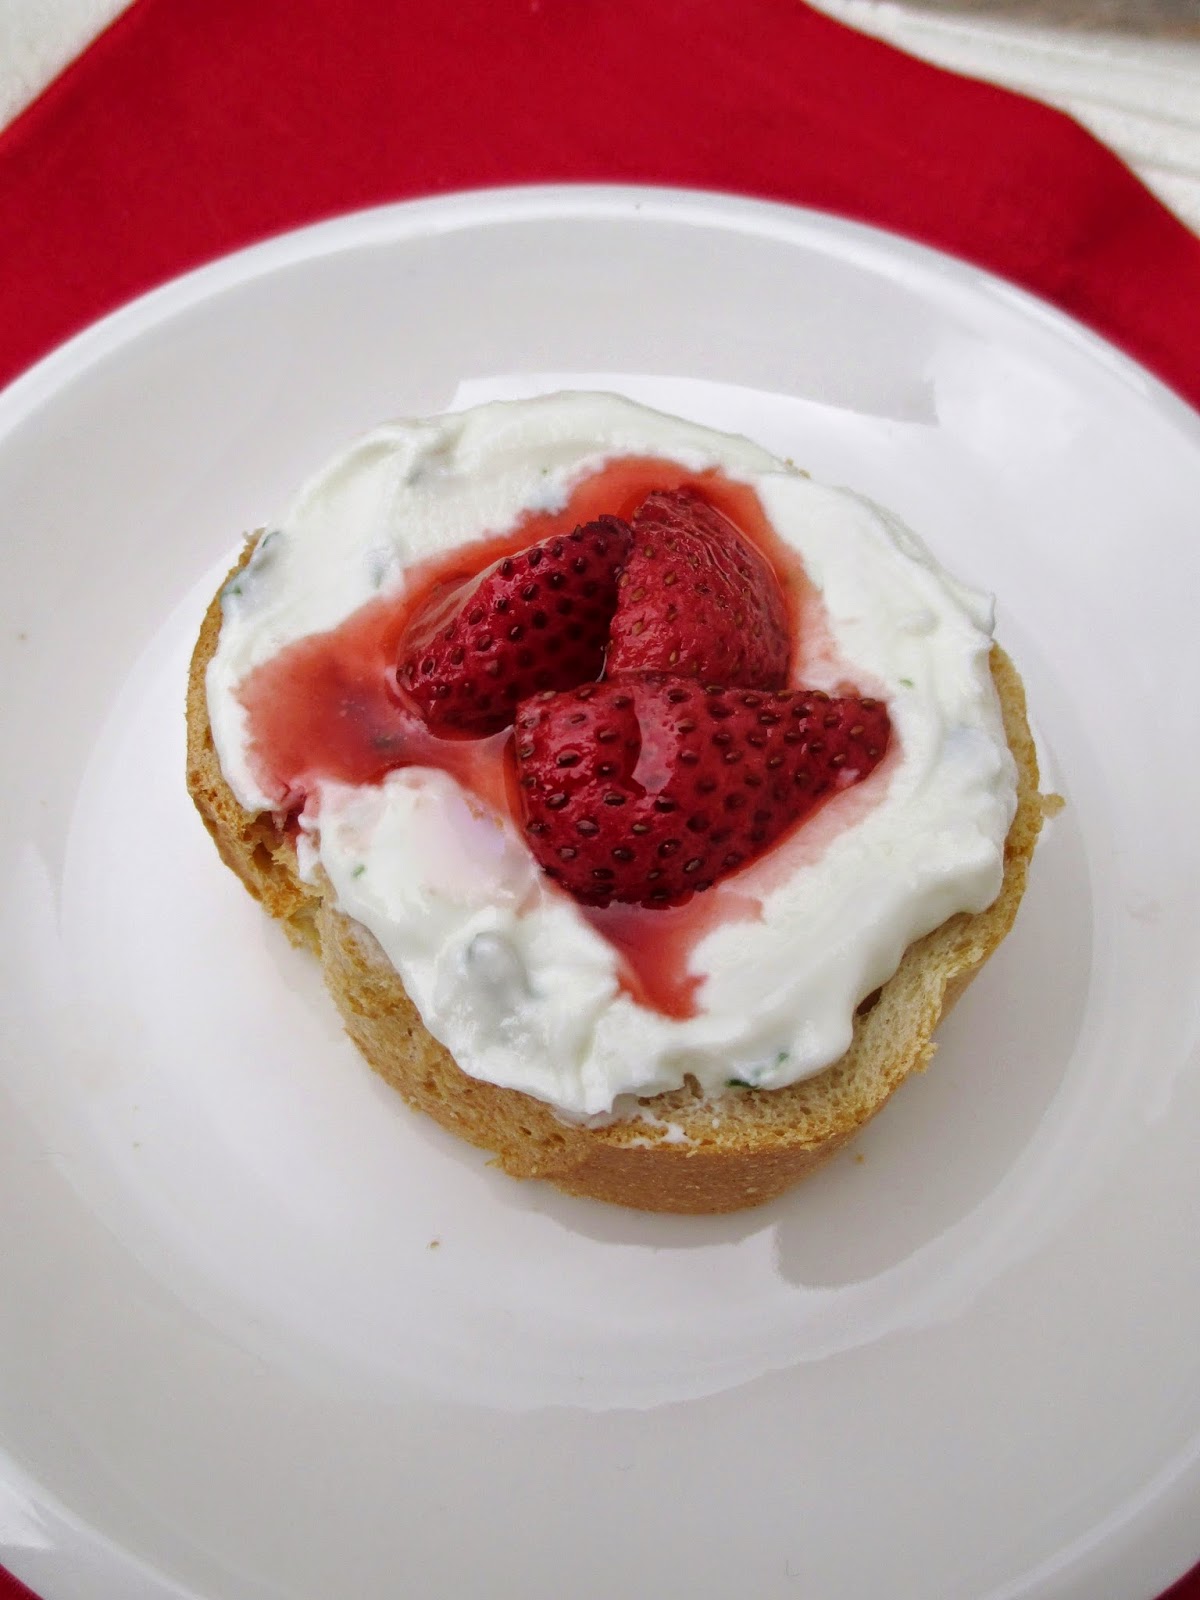
The strawberries are roasted in the oven with maple syrup and balsamic so they get nice and sweet and juicy. Since I was making this ahead of time, I combined both components (the goat cheese-yogurt spread and the strawberries) into one dip that I spooned onto slices of bread (pictured above). For a prettier presentation, you could keep the components separate and assemble individual crostini pieces to serve instead (which I did with one piece for photo purposes before taking the rest to the potluck!).

This almost tastes more like a dessert than an appetizer with the sweet strawberries, their juices and the yogurt, but I'm a fan of using fruit in my meals, so I loved this! If you did want to serve this as a dessert though, I think it would work well spread onto graham crackers or cinnamon sugar pita chips too!


Roasted Strawberry & Goat Cheese Crostini
Inspired by Confections of a Foodie Bride

2 cups chopped strawberries
1 tbsp pure maple syrup
1 tbsp balsamic
1 113g package plain goat cheese
2 100g containers lemon greek yogurt
2 tbsp chopped fresh basil
Baguette or crackers for serving


Preheat oven to 375°F. 

Place strawberries in a baking dish and toss with the maple syrup and balsamic. Roast in the preheated oven for 10-15 minutes, until the strawberries are soft. Remove from oven and let cool. 

Meanwhile, mix together the goat cheese, yogurt, and basil in a small bowl until smooth. 

Option 1: Transfer the goat cheese mixture to a shallow bowl or container and smooth out into an even layer. Top with the roasted strawberries (you can add some of the leftover juices if you like, but I left most of the liquid behind). Cover and refrigerate until serving time. When ready to serve, slice a baguette (you can toast it first in the oven if you prefer, but I just left mine untoasted and it was good that way too) and serve as a dip to spread onto slices.

Option 2: Slice your baguette and toast in the oven if desired. Spread some of the goat cheese mixture onto each slice and top with a spoonful of the strawberries.

Option 2 is a prettier presentation but both ways taste equally delicious!


June 17, 2014

Thai Peanut Cucumber Cups


This week is especially hot and humid here in Ontario, and when the weather is this warm, all I want for dinner is cold and refreshing meals, like chilled soups and salads full of fresh veggies. 

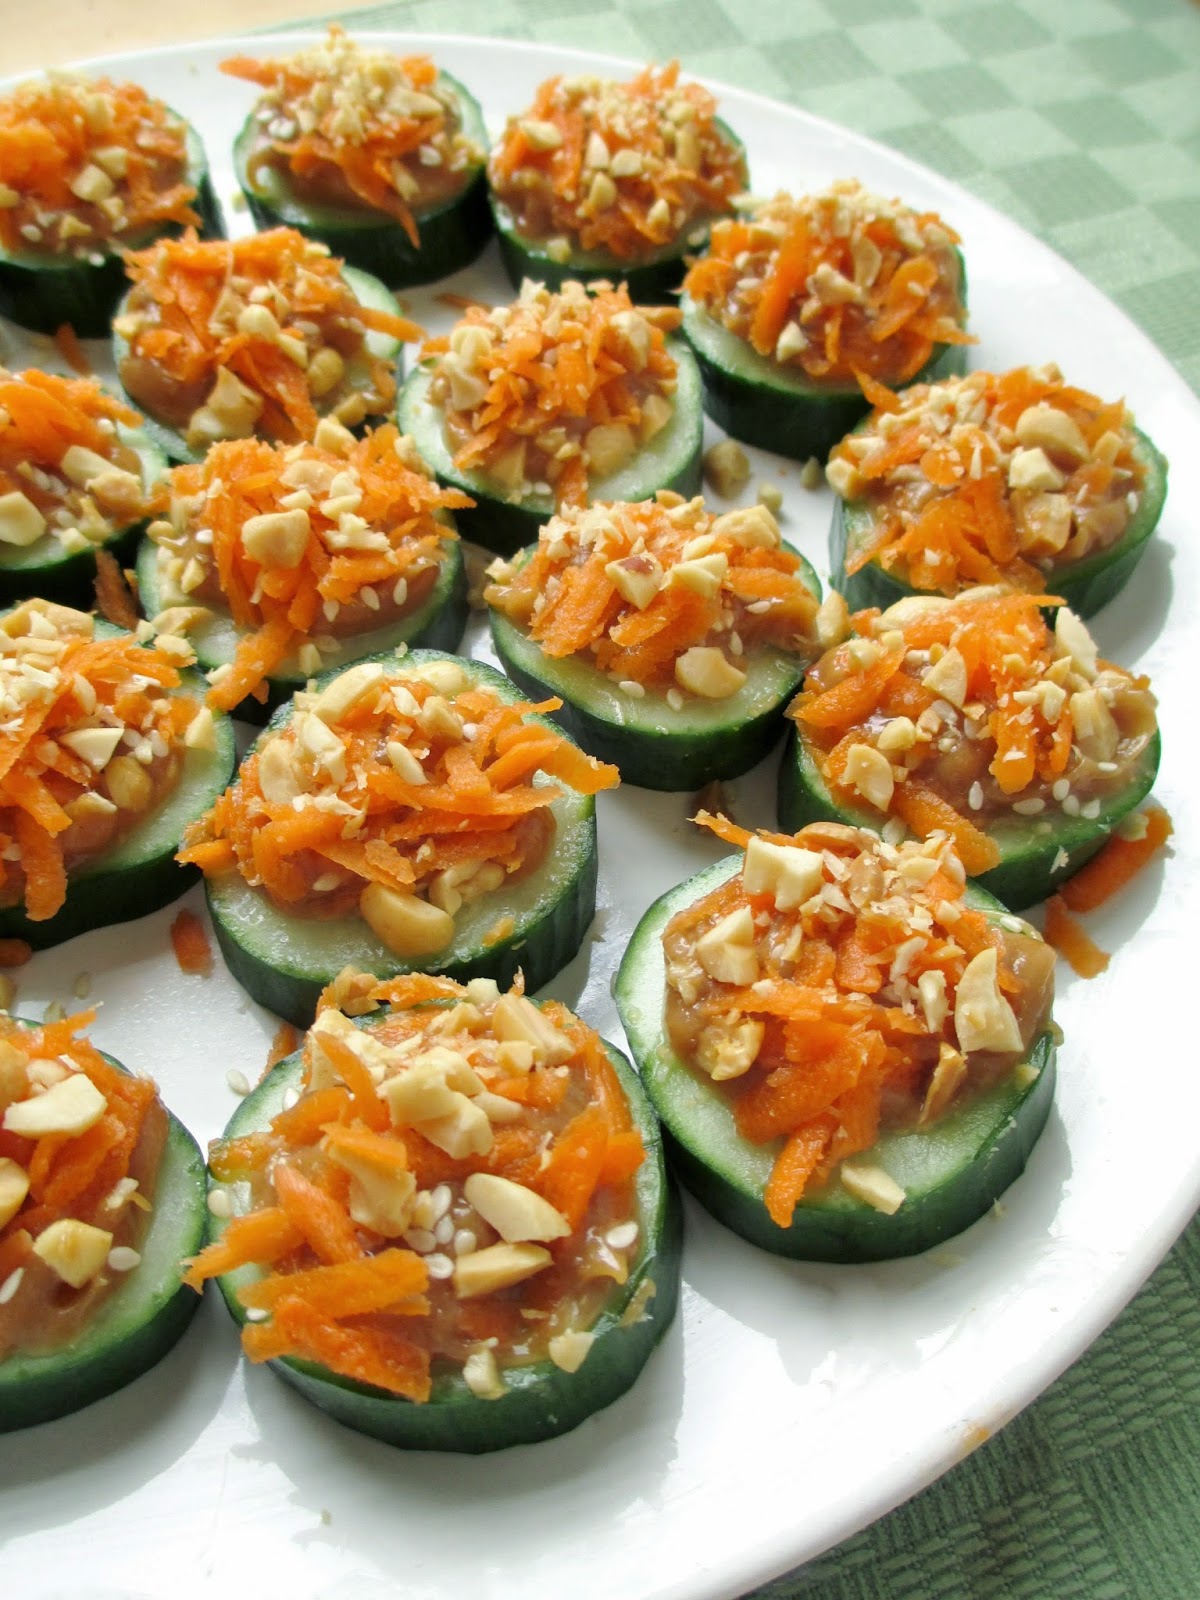
Of course, veggies can get a bit boring sometimes, so it helps to turn them into something more exciting, like these Thai peanut cucumber cups that I made as an appetizer last week!

The inspiration for these came from Courtney of The Fig Tree blog, who posted these peanut satay celery sticks a while back. I thought the idea of filling celery sticks with a peanut sauce, carrots, and sesame seeds sounded so creative!  I'm not a huge fan of celery though, and I knew that cucumbers go well with cold peanut noodle dishes, so I thought cucumber cups would work really well as a base instead.


I've actually made cucumber cup appetizers before and they're always a hit, but I usually fill them with hummus or tzatziki, so this was a fun twist! If you've never seen this idea before, you just slice your cucumber and then scoop out some of the middle so that you have a nice little cup to fill with sauce, and then you can add whatever toppings you like too. 

For these, I filled the cucumber cups with a thick peanut sauce, then sprinkled sesame seeds, chopped peanuts, and shredded carrot on top of each one (see above picture for a visual of the process). Everything comes together into one bite that's creamy, crunchy, a bit spicy, and refreshing all at once!

I shared these with a group of friends and everyone loved them, so I'm sure I'll be making them again whenever I need a light, veggie-based appetizer - which will probably be often this summer!


Thai Peanut Cucumber Cups
Inspired by The Fig Tree and Vegetarian Times

1/2 cup peanut butter
4 tsp sweet chile sauce
1.5 tbsp rice vinegar
2 tsp sesame oil
2 tsp soy sauce
1 clove garlic, minced
Dash of ground ginger (or fresh ginger, I just didn't have any!)
pinch of red pepper flakes
1 tbsp water
1 English cucumber
~1/3 cup shredded carrot
Sesame seeds
Chopped peanuts


To make the peanut sauce, stir together the peanut butter, chile sauce, rice vinegar, sesame oil, soy sauce, garlic, and ginger until smooth. Add the water to thin out a bit. Set aside or store in the fridge until needed.

Slice the cucumber into pieces about 1 inch thick. Use a melon baller or a ½ tsp measure to scoop out the middle seedy portion of each slice – don’t go all the way through, you still want a bit of cucumber at the bottom of each cup!

Lay out cucumber cups on a plate or serving dish. Spoon the peanut sauce into each cup (I just estimated how much to put in – you want a round mound in the middle of each cup but not too much that it overflows). 

Sprinkle a bit of sesame seeds on top of the peanut sauce in each cup, followed by a bit of shredded carrot and crushed peanuts – it might help to do the peanuts first so they stick to the peanut butter, then finish with the carrots, but the order doesn’t really matter!

Refrigerated finished cucumber cups until serving time.

Makes enough for about 20-22 cups.


February 11, 2014

Raspberry Salad or Flatbread with Cocoa Balsamic Vinaigrette


With Valentine's Day coming up this week, I've been trying to come up with a cute Valentines-themed recipe to celebrate the holiday with.

In the past, I've made this miniature raw beet cheesecake, these baked banana, chocolate and strawberry wontons, and this pretty pink beet pasta, but this year I just couldn't seem to come up with anything unique that hasn't already been done.

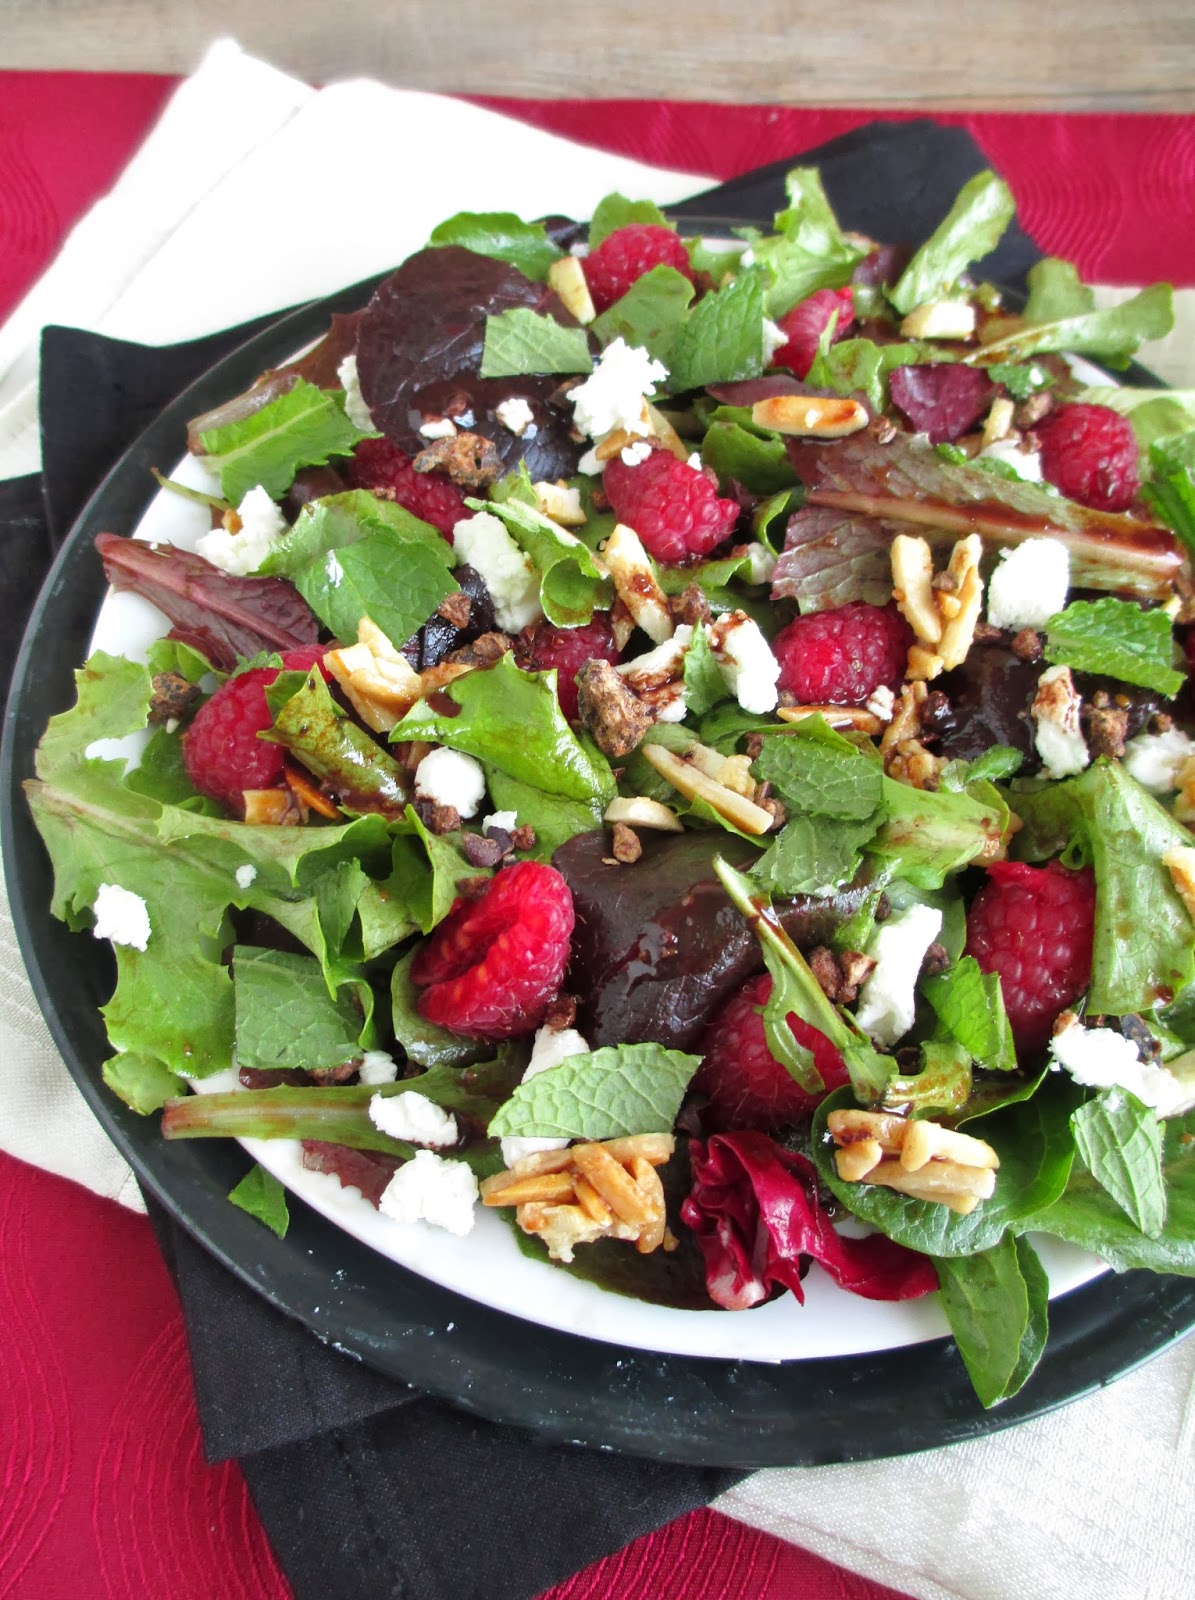
So I gave up on trying to think of a heart-shaped or red-coloured dessert and instead decided to make something to serve as part of your Valentine's dinner menu - this elegant and tasty salad!


I happened to remember Courtney from The Fig Tree's Valentine's Day post from last year when she shared a raspberry salad with cocoa-balsamic dressing. I thought it was such a creative idea to use cocoa powder in a salad dressing, and of course her salad looked gorgeous too!

For my version, I made a couple of slight modifications to the dressing, and for the salad itself I used candied almonds to add more sweetness, goat cheese instead of parmesan, and added some fresh mint and cacao nibs. It may sound like a strange combination of ingredients, but I thought everything worked really well together!

I loved the crunch from the almonds and cacao nibs, and the raspberries paired perfectly with the subtle chocolate notes in the dressing. It almost tasted like eating dessert, but in the form of a salad that you can start off your dinner with instead!


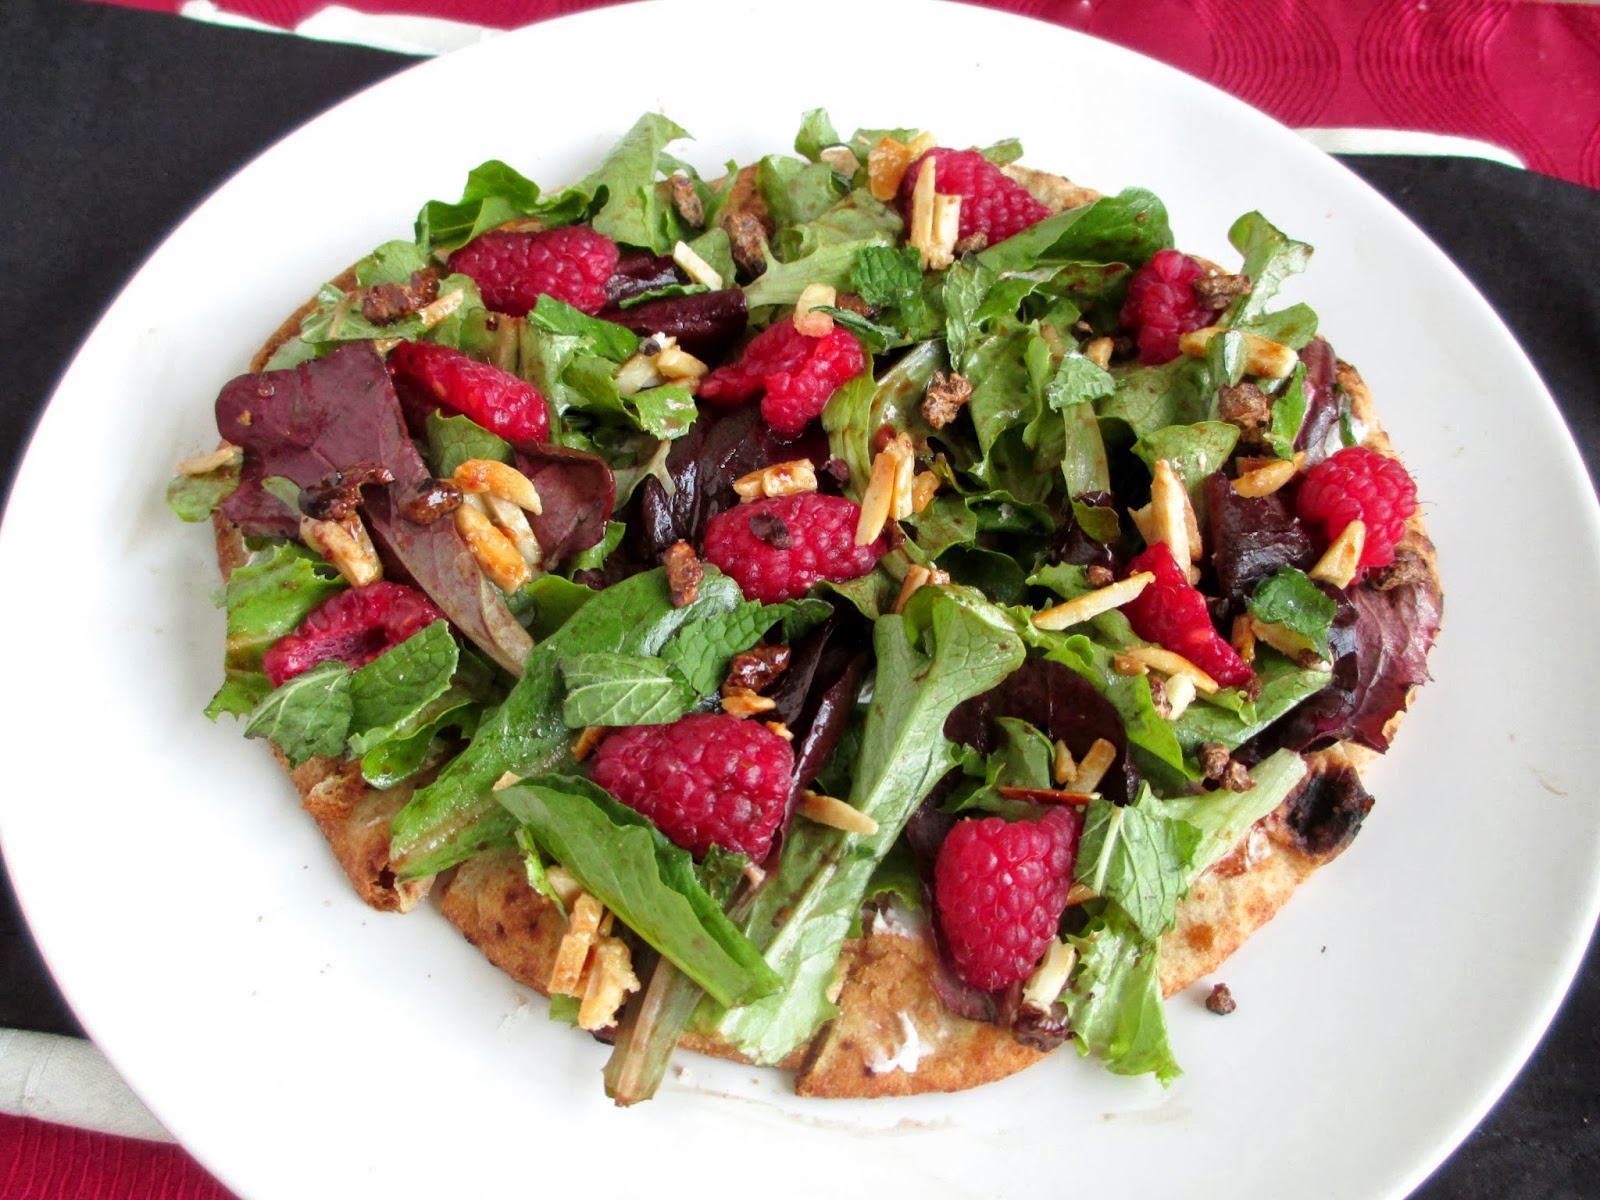
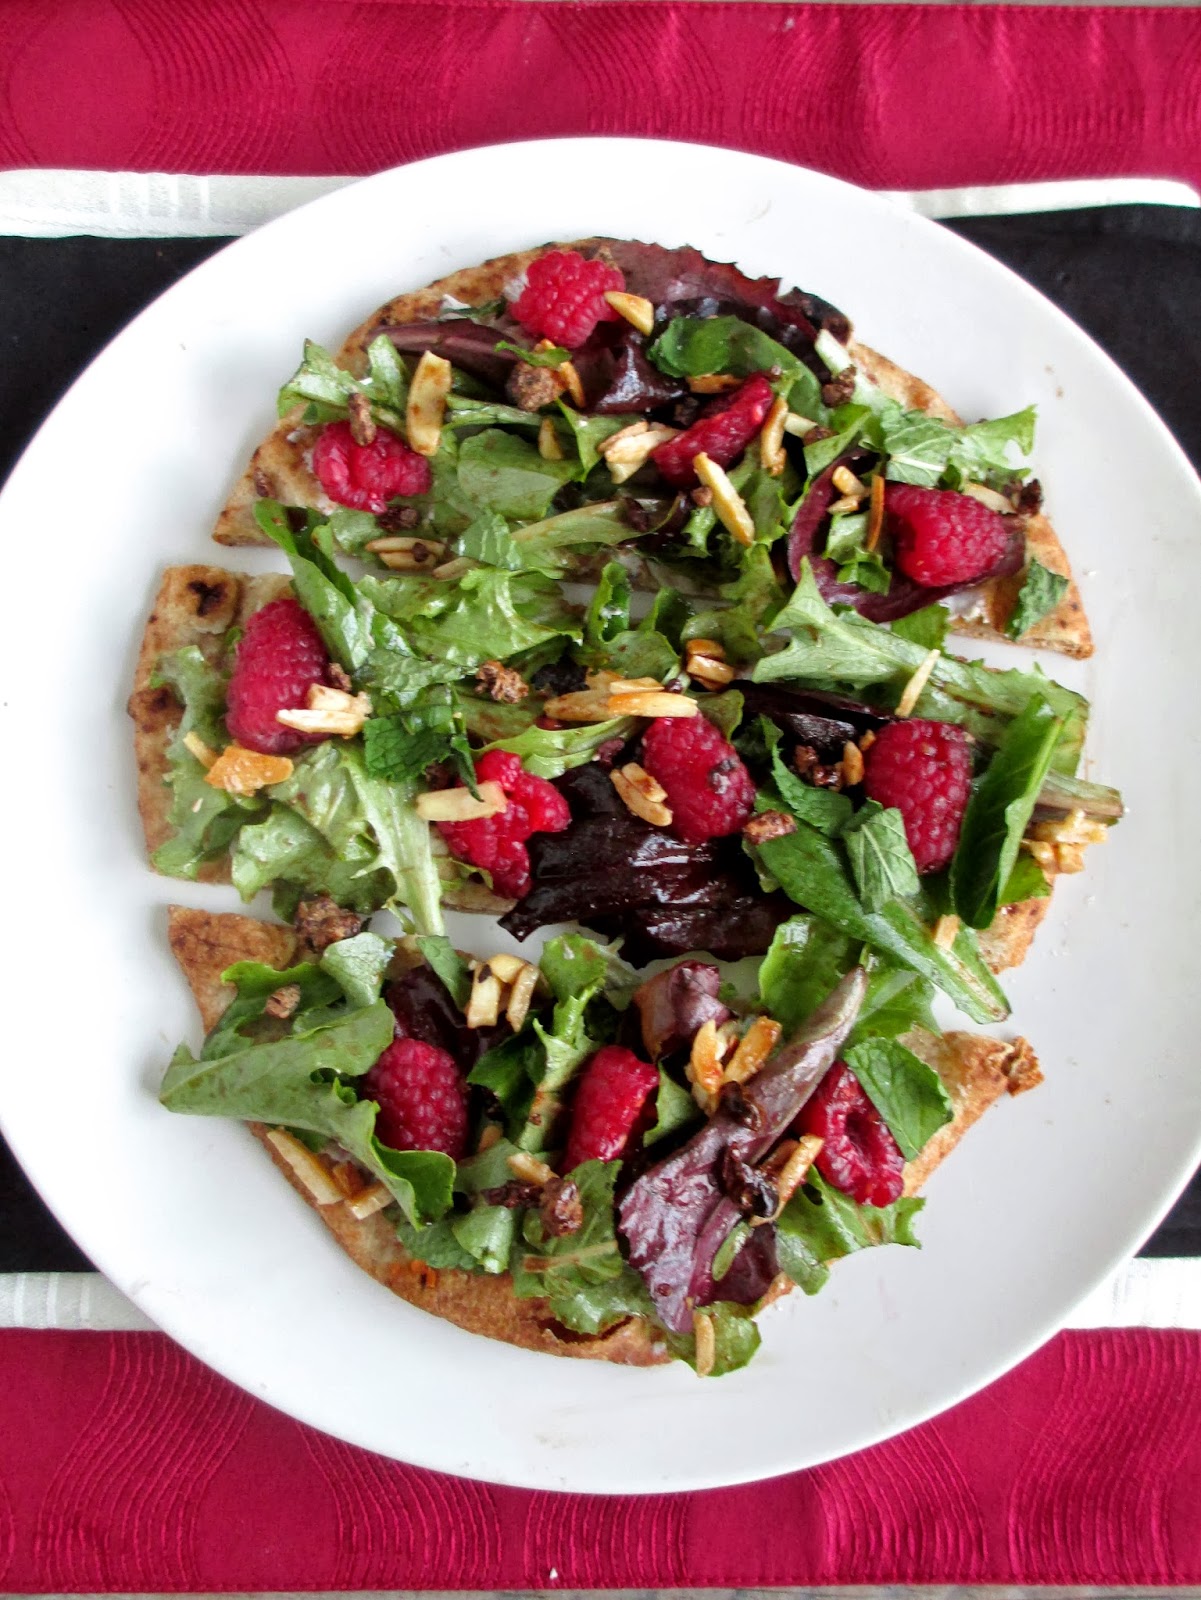
Or if a salad doesn't fit into your menu, another option is to turn this into an easy flatbread - just toast a piece of naan bread in the oven, spread some goat cheese on it, and top with the rest of the salad ingredients. I usually like to have bread with my salad anyway, so this was a fun way to eat both together!

After trying the recipe both ways, I couldn't decide whether I liked the salad version or the flatbread best!

Whether you plan on celebrating Valentine's Day or not, this would still be a nice appetizer to impress a date or to share with a friend or loved one. I actually haven't figured out what I'll be eating on the day itself, but I do plan on making cookies to share - after all, even if a lot of people hate Valentine's Day, most of them still like cookies!


Raspberry Almond Salad or Flatbread with Cocoa-Balsamic Vinaigrette
Adapted from The Fig Tree

2 tbsp slivered almonds
1 tsp sugar
~4 cups spring mix or baby greens
fresh raspberries
1-2 tbsp goat cheese, crumbled
2-3 tsp cacao nibs (I used these coconut cacao nibs)
2 tbsp chopped fresh mint
2 pieces of naan bread (optional for flatbread)

Dressing
1.5 tbsp balsamic vinegar
1 tbsp olive oil
3/4 tsp pure maple syrup
1/2 tsp cocoa powder
1/2 tsp balsamic Dijon mustard (or whole grain Dijon)
Salt and pepper


If making the flatbread, preheat oven to 400°F.

Heat a small skillet over medium heat. Add the almonds and sugar and toast for a few minutes, stirring often as the sugar starts to melt and coat the almonds. Keep a close eye on them and once the almonds are lightly toasted, remove from heat and transfer to a small bowl.

To make the dressing, whisk together the first five ingredients in a small bowl. Season to taste with salt and pepper.

Place salad greens in a large bowl and toss with about a couple tablespoons of the dressing.

For salad: arrange dressed greens on two plates. Top each serving with a handful of raspberries (cut them in half first if they’re large), the goat cheese, cacao nibs, mint, and candied almonds. Drizzle remaining dressing over top.

For flatbread: Place two pieces of naan on a baking sheet and bake in the preheated oven for about 10 minutes. Spread the goat cheese over the naan, then top with the dressed salad greens, the raspberries, cacao nibs, mint, and candied almonds. Drizzle remaining dressing over top. Slice into pieces (I found it easier to slice the naan before adding the toppings).


Makes 2 servings


September 26, 2013

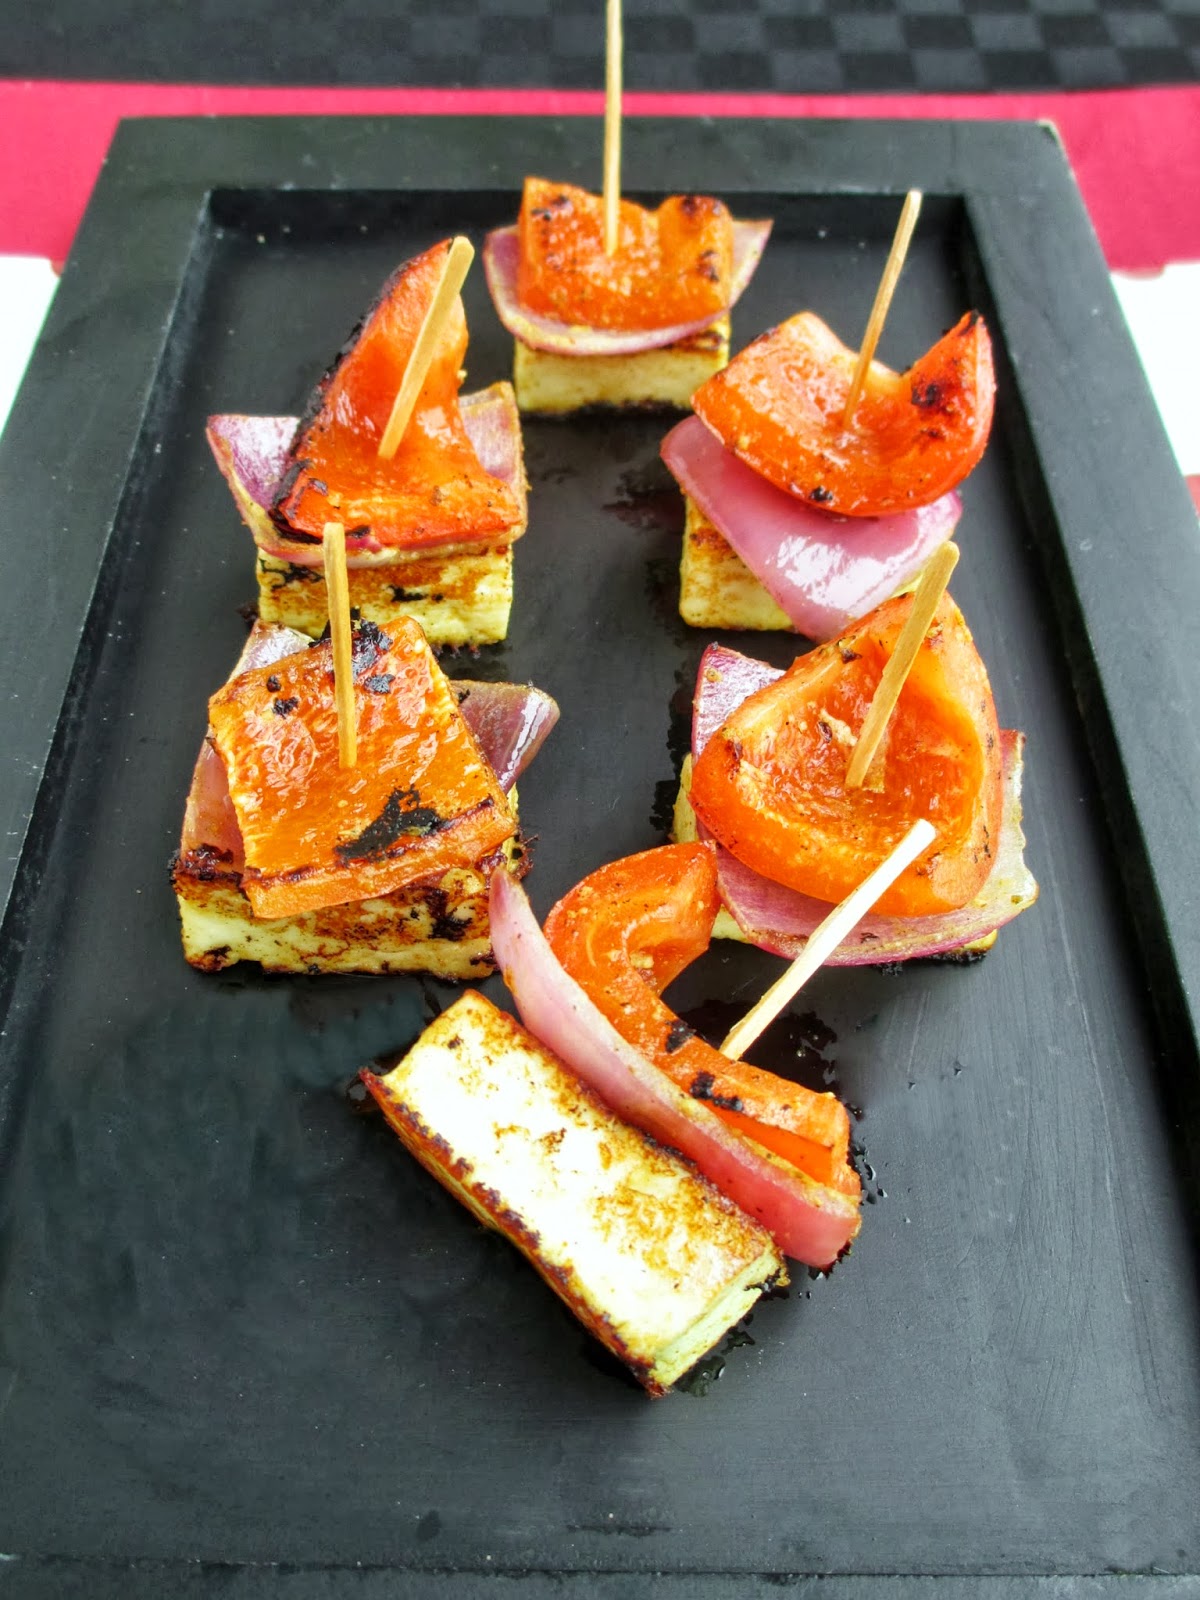
Mini Paneer Tikka Skewers


After my brief trip to New Delhi a couple of weeks ago, I was re-inspired to make another Indian recipe, since it's been a while since I've cooked Indian food for myself!

I know Indian cuisine has a reputation for being overly complicated and difficult to cook, but as long as you have a few key spices, you can make simplified versions of classic Indian dishes, like these miniature bites inspired by paneer tikka!

Paneer tikka is a vegetarian alternative to the popular dish of chicken tikka, and is basically just cubes of paneer cheese marinated in a creamy spiced sauce and grilled on a skewer with vegetables like onion and peppers.


For my version, I kept things pretty simple by making an easy marinade for the paneer out of yogurt and spices and cooking everything on the stovetop, since I don't have an authentic tandoor oven!

Once you've browned the paneer and cooked the pepper and onion, you just have to assemble one piece of each item and stick a toothpick through them to make these cute miniature skewer bites!

While these may not be perfectly authentic, I think they're a fun idea to serve as an appetizer at a party if you're looking for something new and different to bring. I brought these to a party last week and they all got eaten up, even though they were cold by the time I served them. They aren't too spicy so they're a good option to serve a crowd of people who have different levels of spice tolerance, although you could serve them with a bowl of spicy cilantro chutney for people who want an extra flavour kick!


Mini Paneer Tikka Skewers
Adapted from The Spice Tailor and Sanjeev Kapoor

1 (350g) package paneer cheese
1 cup plain yogurt
2 tbsp fresh lemon juice
2 cloves garlic, minced
1 tbsp minced fresh ginger or 1 tsp ground ginger (I used ground)
1 tsp garam masala
1 tsp cumin
1/2 tsp red chilli powder (the Indian spice, not the Mexican one)
1/4 tsp turmeric
Dash of salt (to taste)
1 tbsp chickpea flour (gram flour)
1 red or green pepper
1 medium red onion
1-2 tbsp olive oil
chaat masala (optional, if you have some)


Slice the paneer in half horizontally so that you get two bricks the same size as the original. Slice each brick into equal sized cubes (about 12 pieces per brick).

In a bowl or blender, mix the yogurt, lemon juice, garlic, ginger, spices, and chickpea flour until smooth. Pour some of the mixture into a shallow baking dish or a large ziplock bag. Add the paneer cubes, then pour on the rest of the liquid mixture. Let the paneer marinate in the fridge for at least 30 minutes.

Slice the pepper and onion into about 1” square pieces (you want approximately equal sized vegetables, and they should be about the same size as your paneer cubes).

Heat 1 tbsp oil in a large skillet on medium heat. Remove the paneer cubes from the marinade and add them to the pan. Let cook for about 2-3 minutes, then flip over and cook the other side, until all sides are lightly browned. Remove paneer cubes from pan and let sit.

Meanwhile, toss the pepper and onion pieces in the leftover marinade while the paneer is cooking. Once the paneer is done, add another tbsp of oil to the pan (or spray with cooking spray) and add the vegetables. Cook for about 8-10 minutes, stirring occasionally, until the peppers and onions are softened.

To assemble skewers, place one piece of pepper and one piece of onion on top of a paneer cube and skewer with a toothpick. Repeat until all the vegetables and paneer are used up. Sprinkle assembled skewers with a bit of chaat masala spice.

Serve warm or at room temperature. You can pour a bit of the leftover marinade over the skewers, or you can eat them dipped in a chutney (I would recommend a spicy green Indian chutney).


Makes about 24 mini skewers.

August 09, 2013

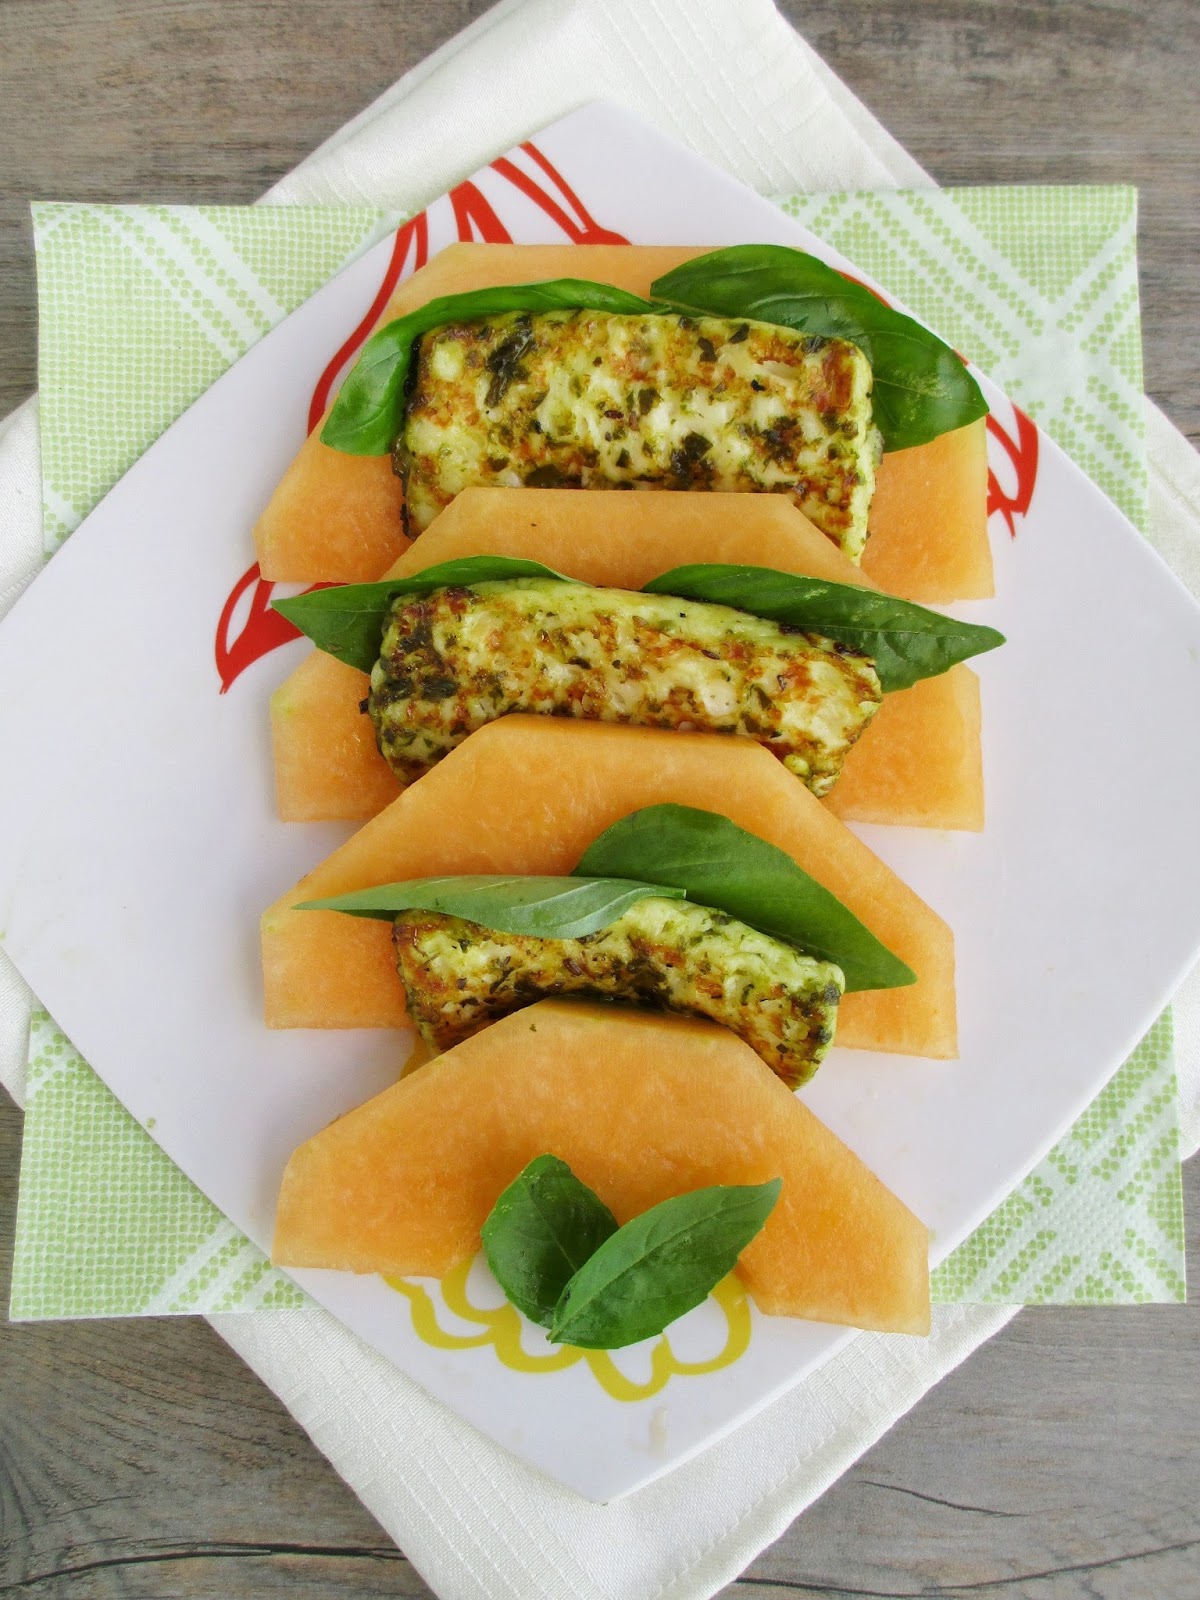
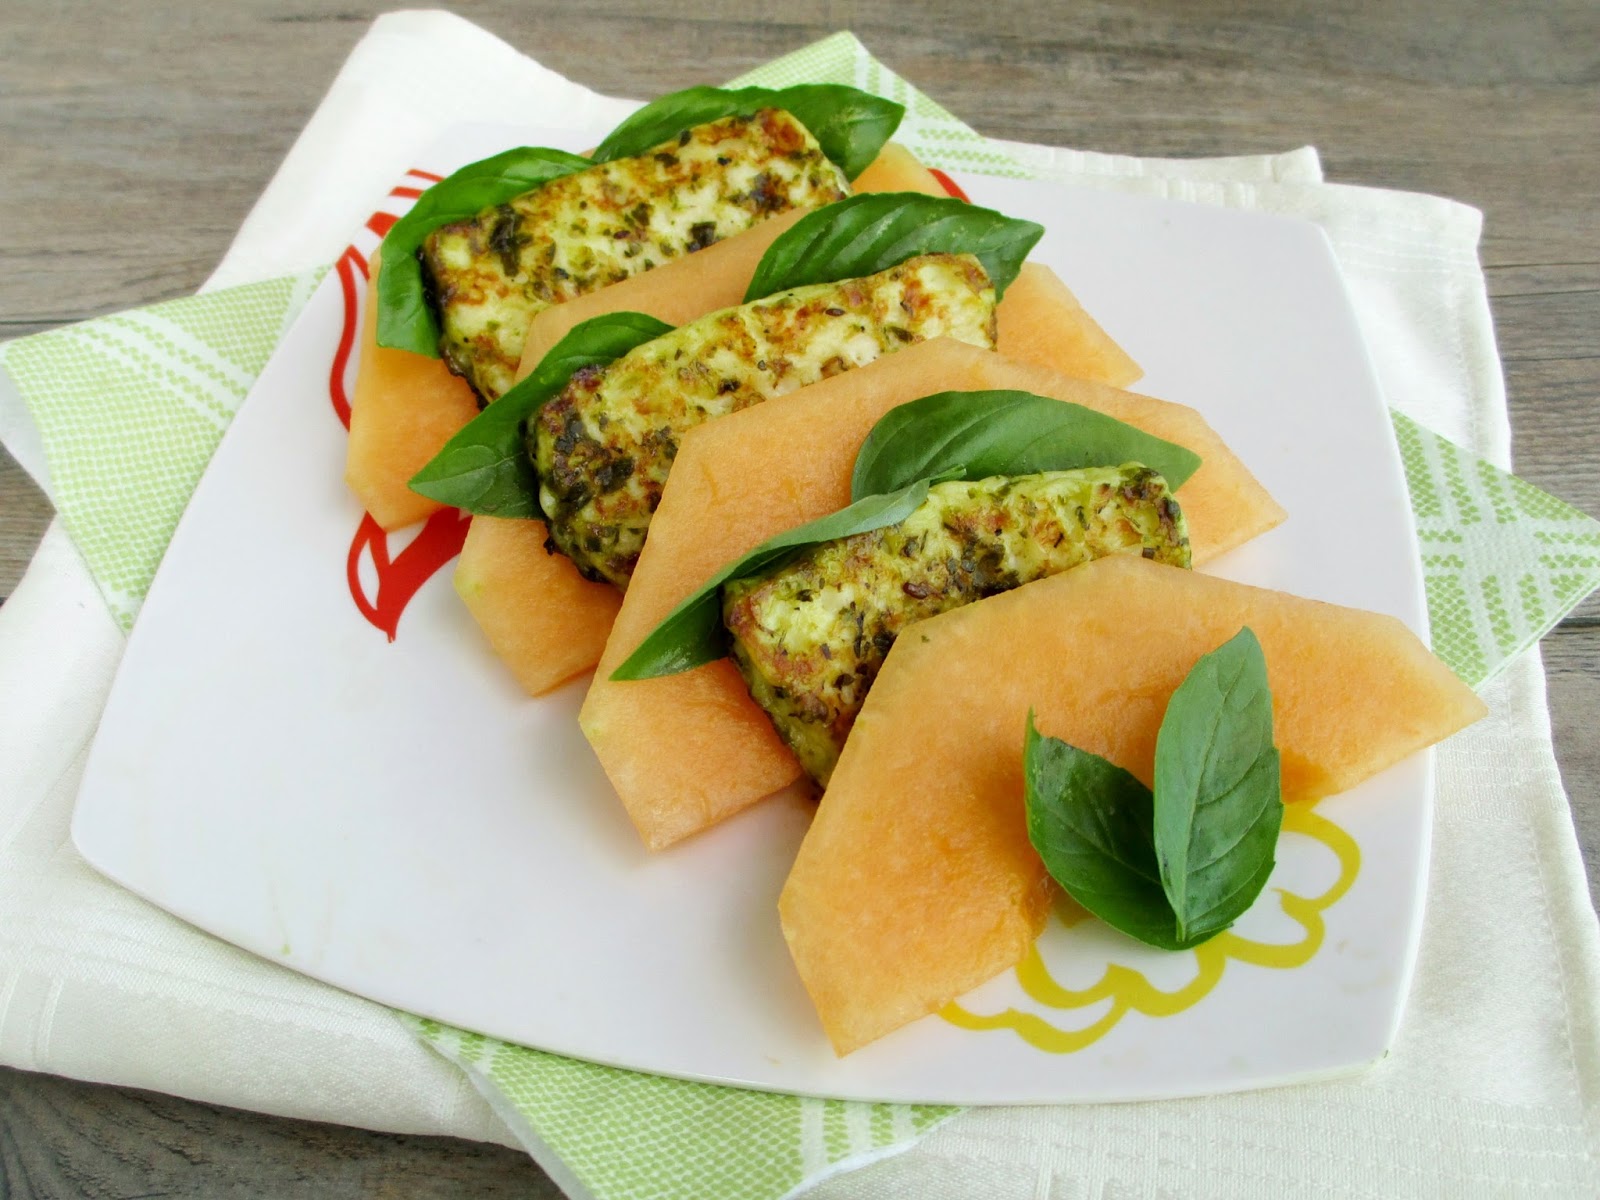
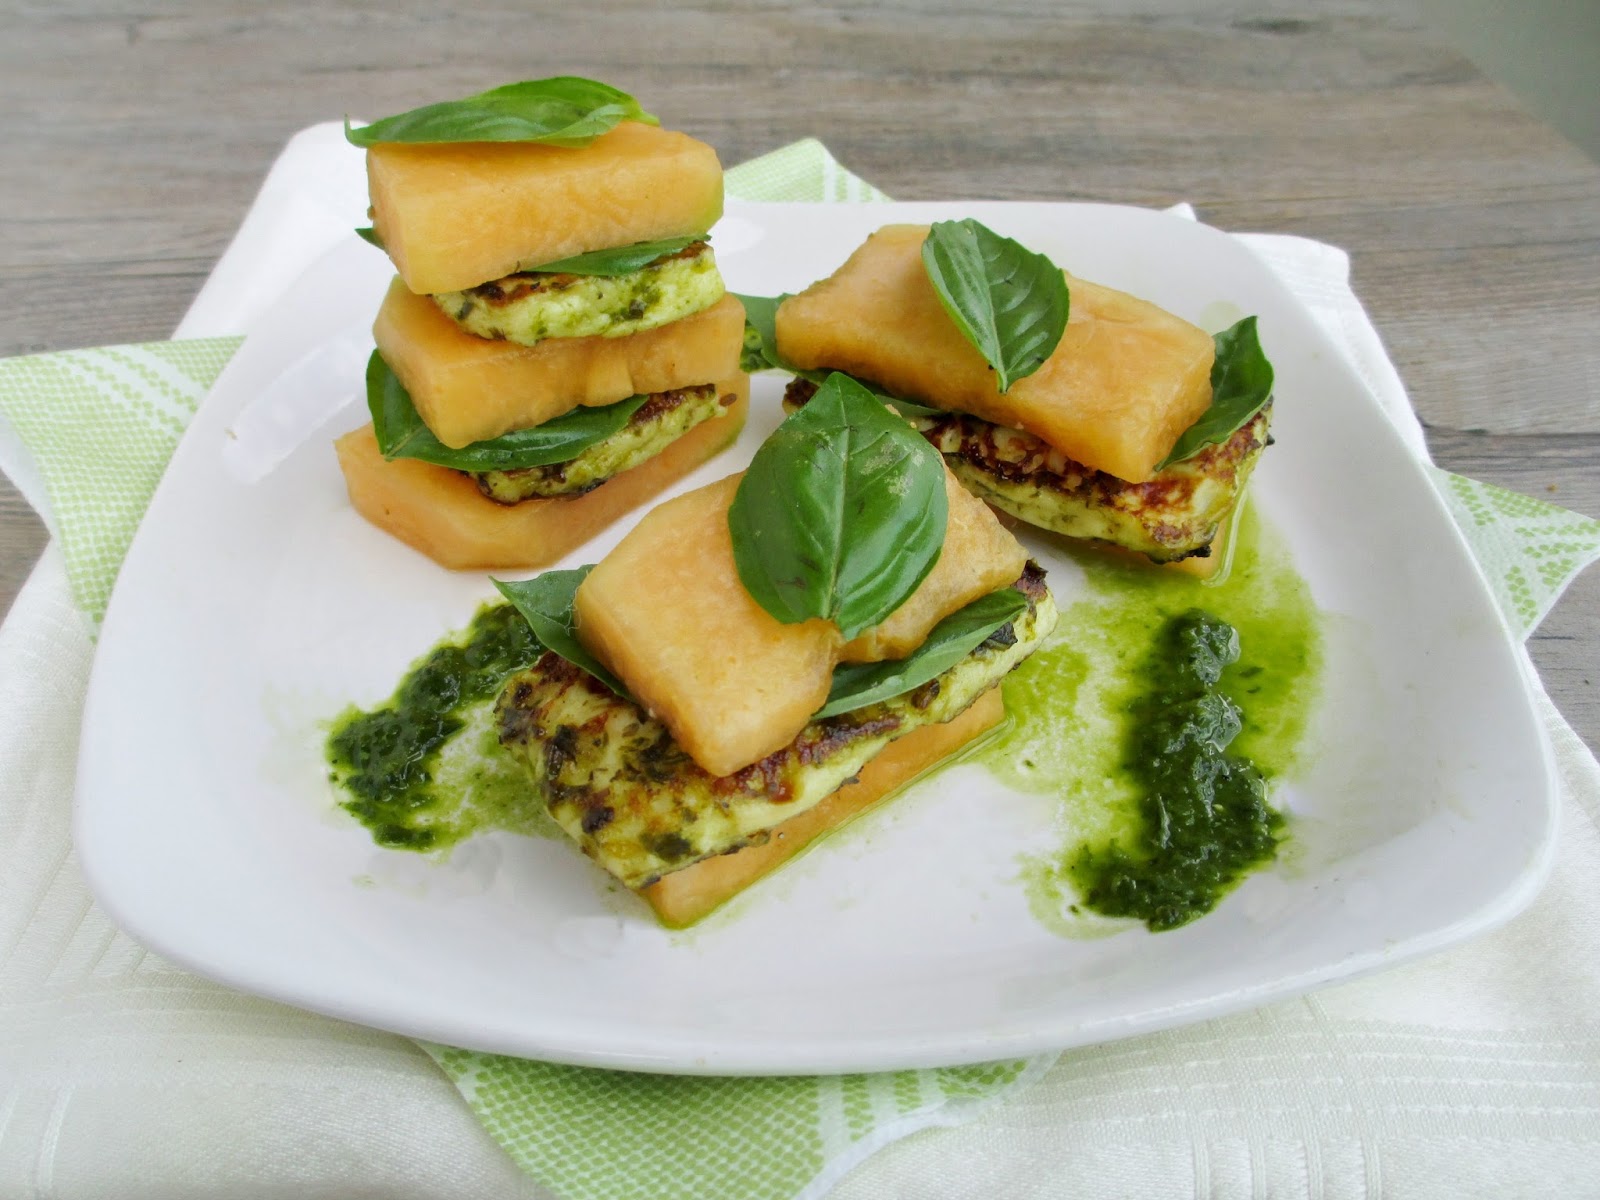
Cantaloupe, Halloumi & Basil Stacks


When it comes to shopping at my local farmers' market in the summertime, I've learned my lesson the hard way that the cheaper option is not necessarily the best choice!

It's so tempting to shop around and buy from the vendor offering fruits or veggies for the lowest price, but time and time again, I end up disappointed and wishing I had splurged on a nicer product from one of the organic farmers.


That was the case a couple weeks ago when I was on the lookout for a cantaloupe to make this dish. I saw a huge bin of cantaloupes for only $2 so I happily scooped one up, thinking I had found a great deal. Of course, about five minutes later I came across an organic stall selling local Ontario cantaloupes that looked much nicer and were only slightly more expensive.

My non-local cantaloupe turned out to be a bad one (not surprising) and ended up going to waste, but luckily I was able to get a beautiful local one a few days later so that I could make this recipe!


I've seen lots of recipes on the web this summer for watermelon and halloumi salads. Watermelon pairs really well with salty cheeses like feta or halloumi, so I wanted to try a similar combination using another type of melon - cantaloupe.

I kept this dish pretty basic, layering slices of ripe cantaloupe with pieces of sauteed halloumi (or grilled if you like!) and fresh basil. I also made a simple basil dressing to pour over everything to add even more flavour.

This was such a fresh and summery meal! Since the cheese is pretty rich, the melon really balanced it out, complementing the saltiness with some sweetness. I loved the basil dressing, so if you're lucky enough to have an abundance of basil growing in your garden, this would be a great way to use some of it up!

Hope you all enjoy the weekend - it's looking to be a beautiful one here!


Cantaloupe, Halloumi & Basil Stacks

Dressing
1 cup loosely packed fresh basil
1 tbsp olive oil
2 tbsp white balsamic vinegar (or white wine vinegar)
1 tsp agave or honey
Salt and pepper to taste

Salad
1 (160g) package halloumi cheese (I used a mediterranean flavoured brand)
~Half a ripe cantaloupe
Handful of fresh basil leaves


To make the dressing, place all ingredients in a blender or mini food processor and blend until it's as smooth as possible. Transfer to a small bowl.

Heat a skillet over medium heat and spray with cooking spray. Slice halloumi in half horizontally, then slice each half into three pieces. Brush one side of the tofu pieces with the basil dressing, then place face-down in the pan.  Let cook for about 2-3 minutes. Meanwhile, brush the other side (that’s facing up) with the dressing. Flip, then cook the other side another 2-3 minutes, until most of the sauce has cooked off and the cheese is browned on each side. Remove from heat and transfer to a plate.

Slice cantaloupe however you like – you can either do long, curving slices or rectangular pieces to match the shape of the cheese. Arrange the cantaloupe and halloumi slices with some fresh basil on the plate, either layered in between each other or stacked on top of each other (like the two different presentations in the photos above). Drizzle with the remaining basil dressing.


Makes 2 servings (or more as a bite-sized appetizer). 

July 19, 2013

Hummus & Salsa Stuffed Jalapenos


Another Friday has arrived and another start to a hot summer weekend with lots of outdoor festivals to enjoy!

This weekend there are two festivals that I plan on going to - one is the annual craft beer and rib festival (which I only go to so that I can try out some new drinks since I'm obviously not interested in the ribs!) and the other is the jazz festival, which I'm looking forward to checking out since it will be my first time going.

Since the food options at the festivals tend not to be very healthy or vegetarian-friendly, I still plan on cooking my own meals at home before heading out. That way, I don't have to worry about finding something I like to eat while I'm there, plus I can make the most of the summer produce that I plan on picking up from the farmer's market tomorrow morning!


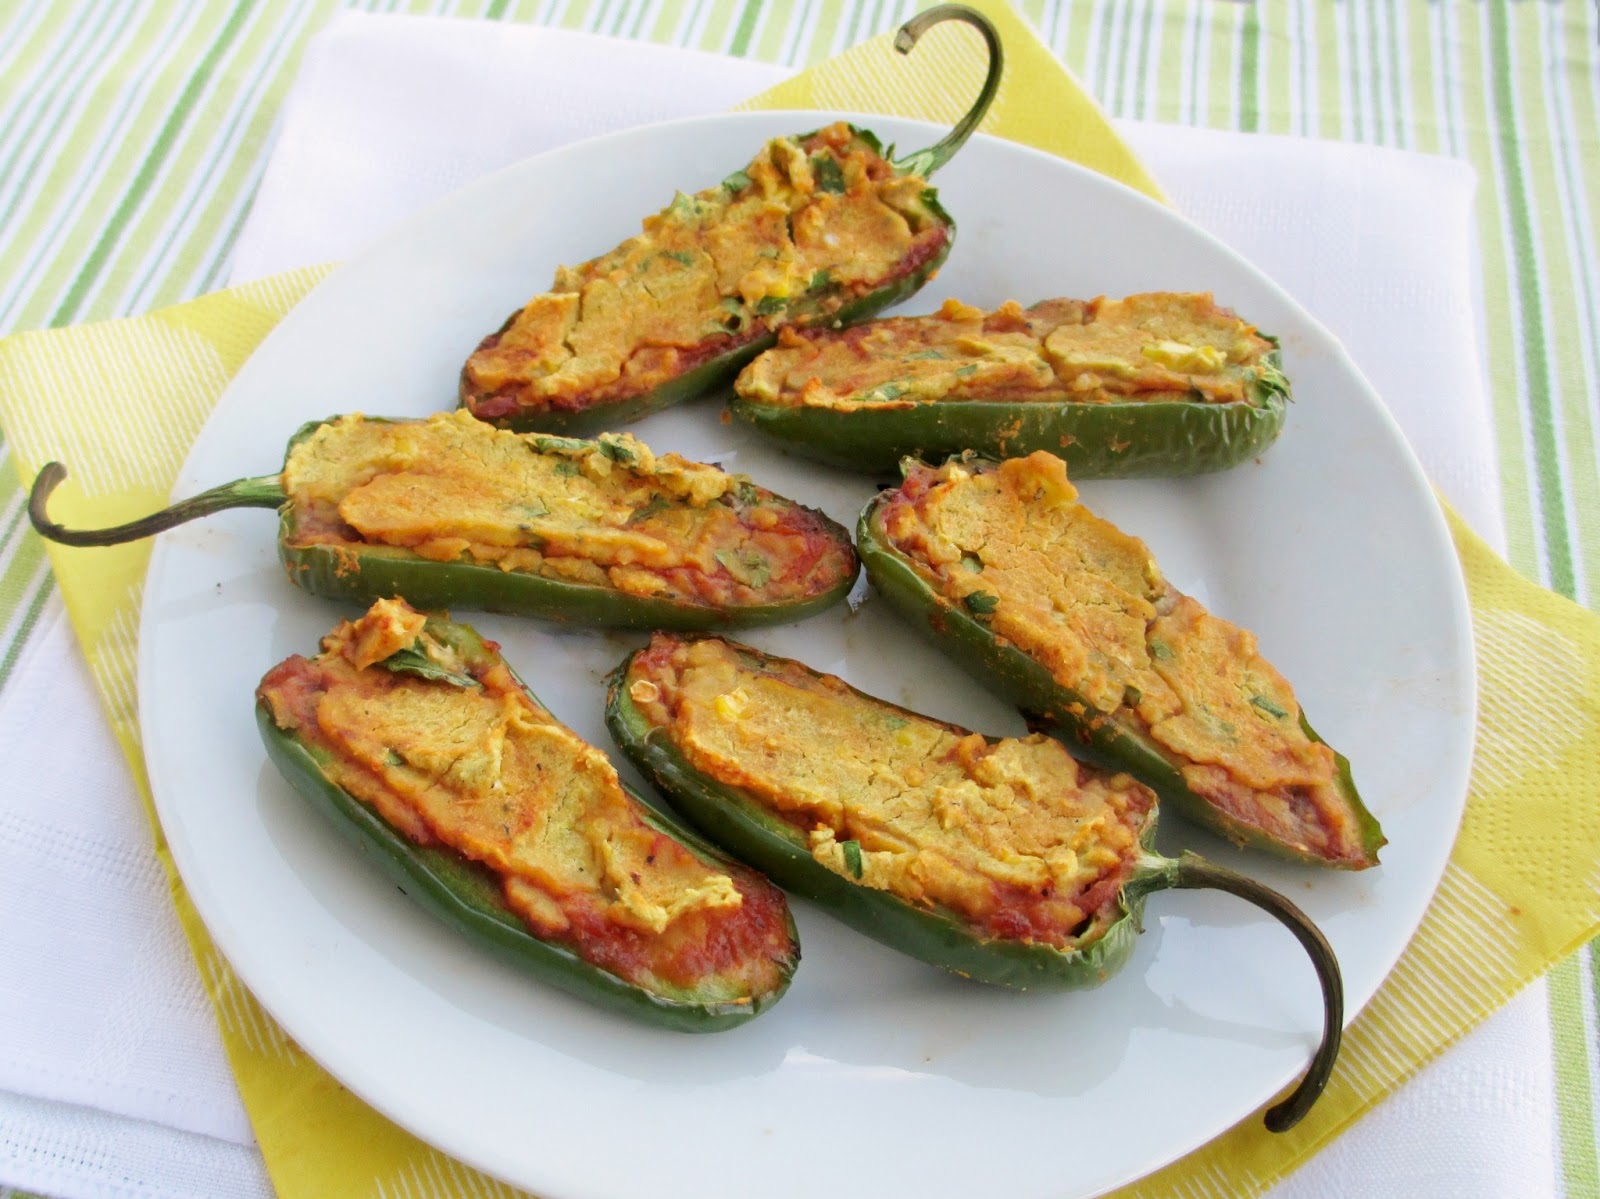
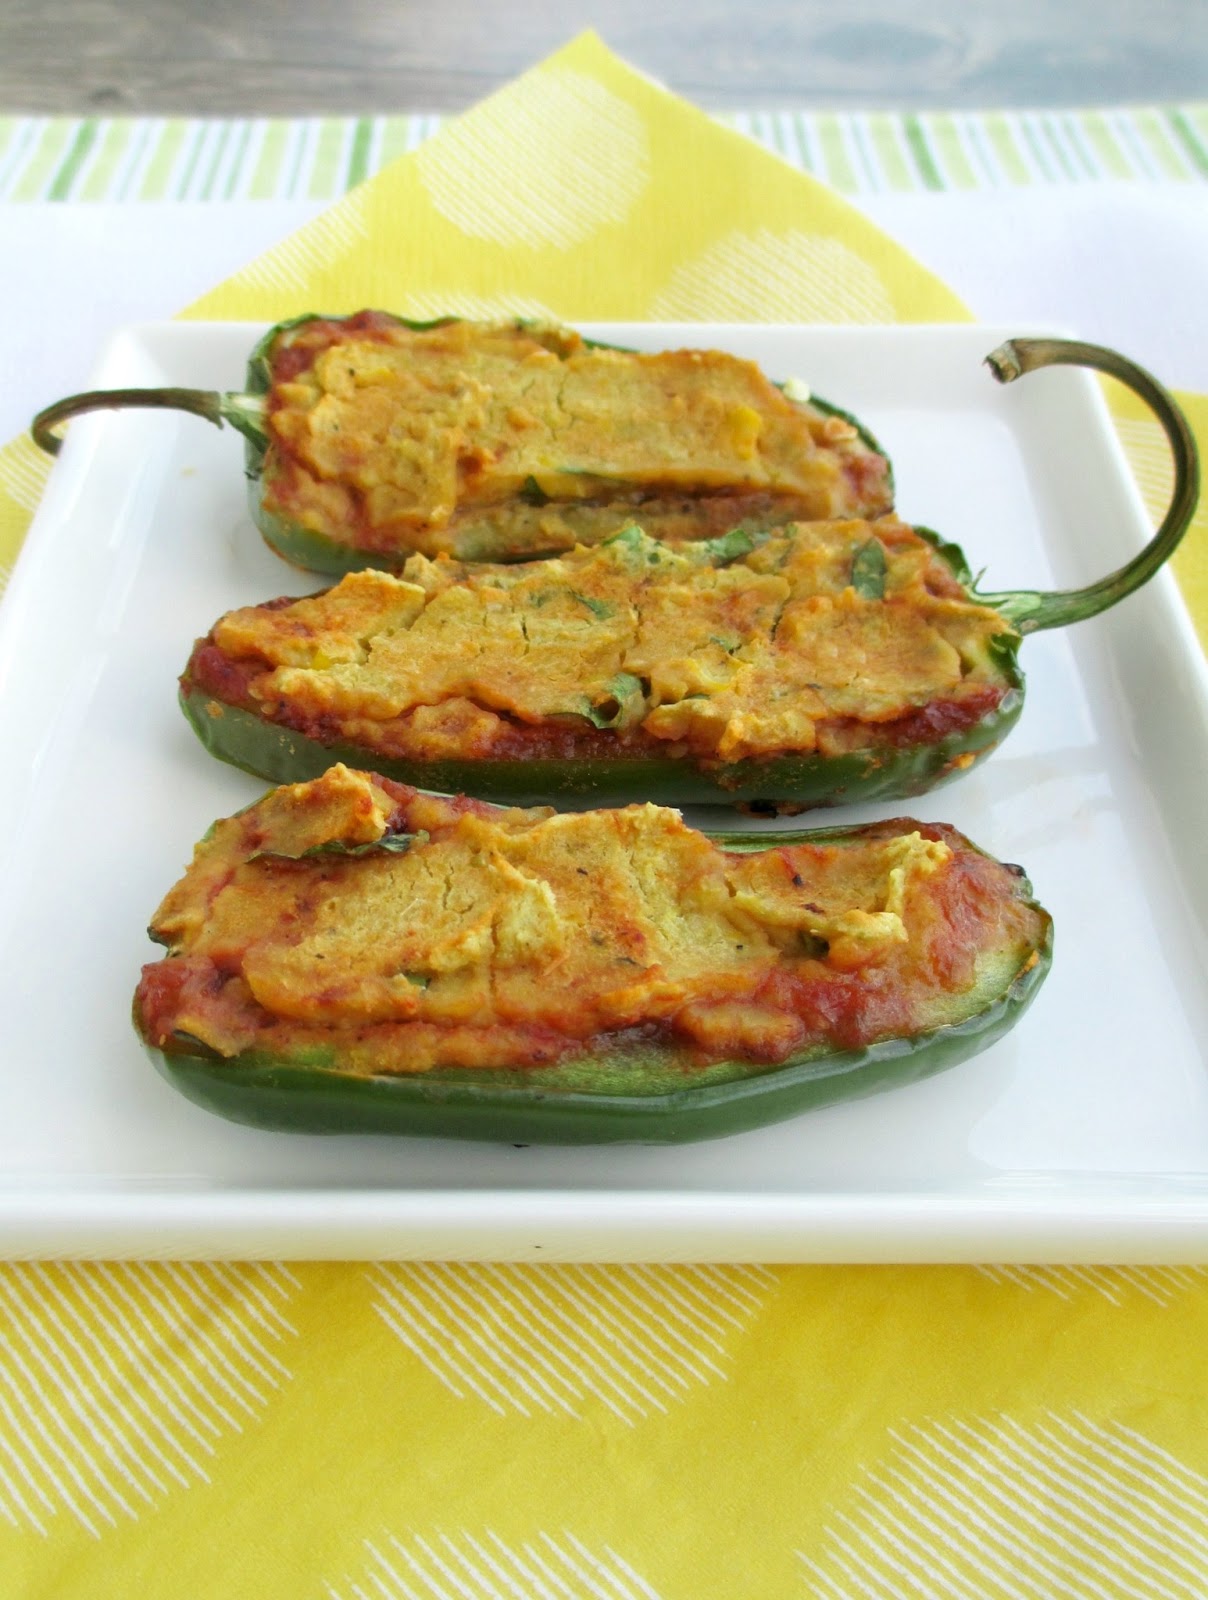
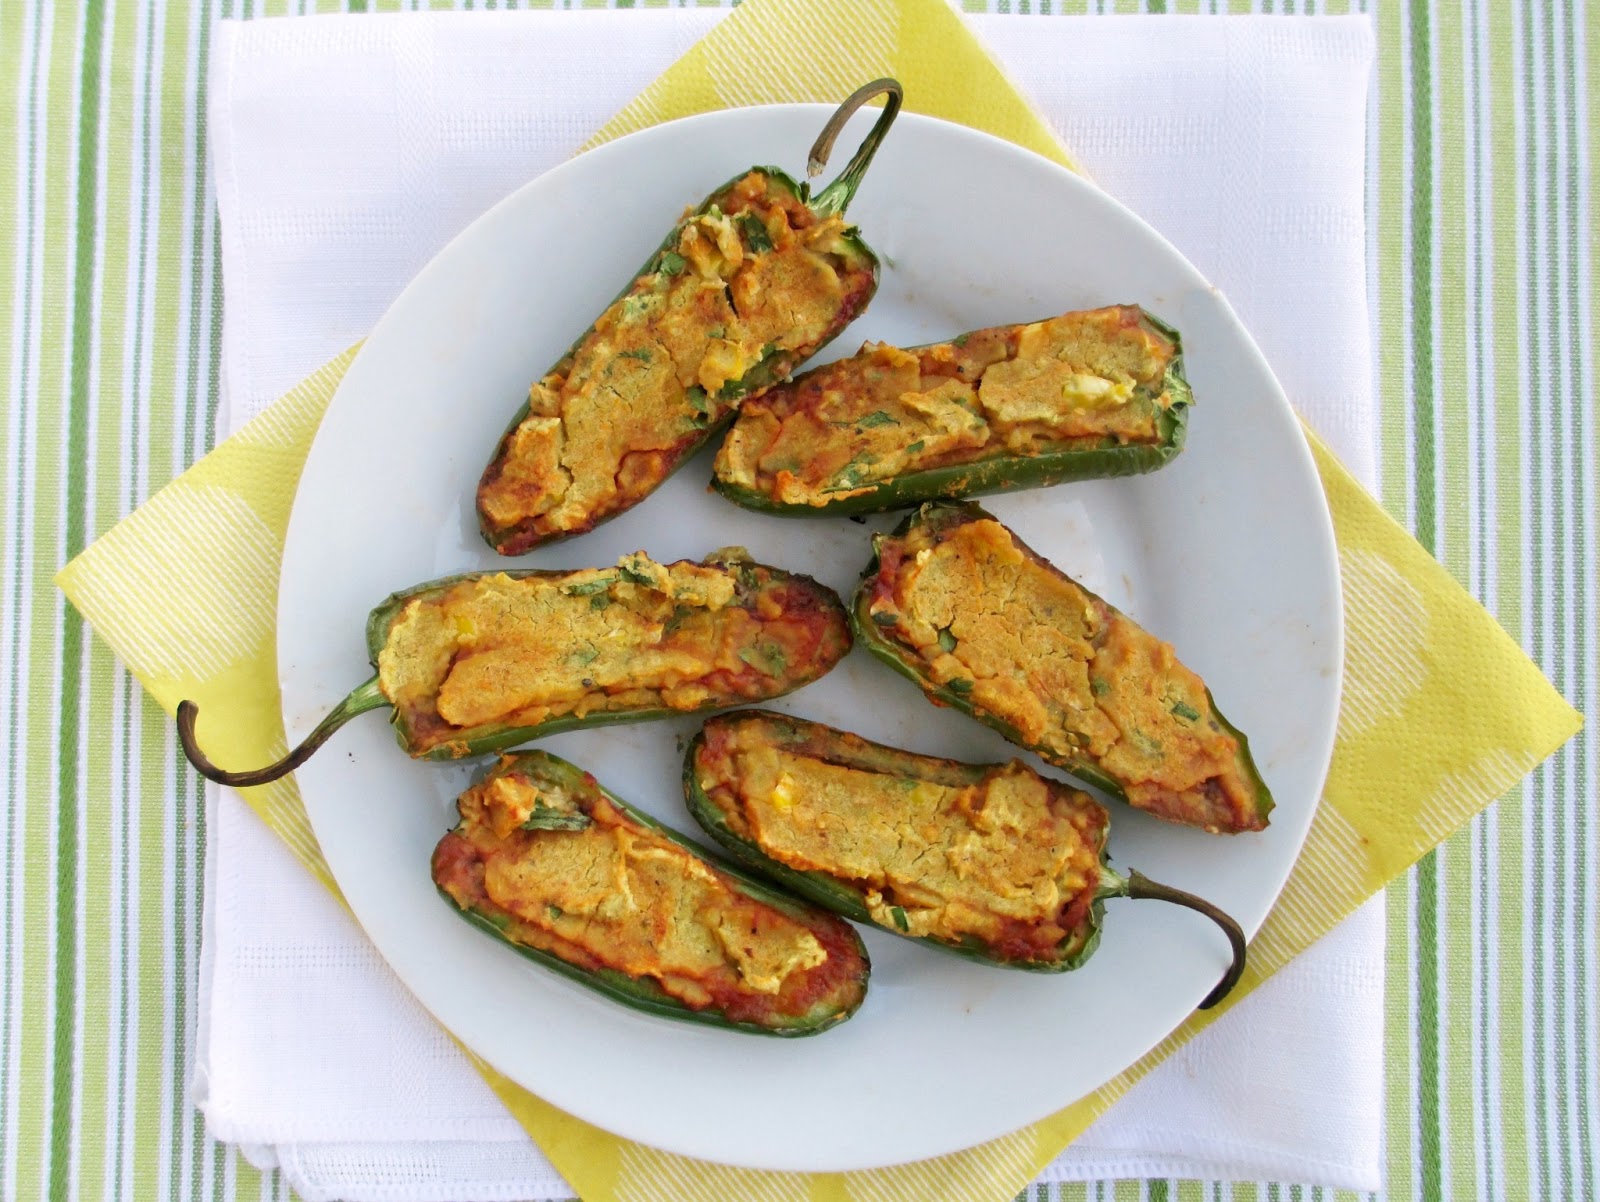
Last weekend, I came home from the market with a basket of gigantic jalapenos. Since I knew I wouldn't be able to use them all up quickly enough, I figured I would make a dish where whole jalapenos were the starring ingredient, which is how I came up with this idea for stuffed jalapenos!

My mom used to make a version of cheesy jalapeno poppers in the summer, and I always avoided them because I was afraid they would be too spicy for me.  Now that I'm much less afraid of spicy food, I'll happily indulge in a jalapeno popper and I'll laugh off the hiccups that result (hopefully I'm not the only one who gets hiccups from eating spicy food!).

For my new version of stuffed jalapenos, I wanted to come up with a vegan option for a filling that doesn't use tons of cheese.  I started wondering if hummus would work as a filling, and then I thought it would be even better to use a jalapeno flavoured hummus for even more heat!


My first attempt at stuffing hummus inside whole jalapenos didn't turn out so well - the jalapenos didn't soften enough and I found there wasn't enough filling for the amount of jalapeno. The next time, I sliced the jalapenos in half first so that I could over-stuff them with hummus, and I also decided to add a layer of salsa to the filling to cut down the richness of the filling a bit.

My second attempt turned out just how I wanted! The jalapenos were nice and soft and lightly charred, and I liked how the hummus formed a slightly hardened crust on top while staying soft and gooey underneath. I thought the corn-jalapeno hummus recipe from How Sweet It Is that I used was the perfect choice since it was full of flavour and I even added bits of corn kernels for a little texture.

This was definitely a hot and spicy dish from the combination of jalapenos, salsa, and jalapeno hummus. My mouth was on fire the whole time I was eating them (and for quite a while afterward), but I've heard that spicy food is the way to go when it's hot outside, so these would be the just the thing to make this weekend!


Hummus & Salsa Stuffed Jalapenos

4 large jalapenos
~3 tbsp of your favourite salsa
1 batch corn-jalapeno hummus* (can substitute another type of hummus if desired)
2 tbsp chopped fresh cilantro

*For the hummus recipe, I used one whole cob of corn. After cooking the corn, I measured out half a cup to puree in the hummus, and stirred in the remaining kernels.


Preheat oven to 375°F.

Slice jalapenos in half lengthwise. Carefully remove the inner stem and seeds with a knife so that you are left with eight hollow shell halves. Place on a baking sheet, hollow side facing up.

Measure about ½ cup of the hummus and stir in the chopped cilantro (save the remaining hummus to eat later). Spoon about 1 tsp of salsa into each jalapeno half.  Top with a spoonful of the hummus mixture, spreading it with a spoon to evenly cover the whole surface of the jalapeno. Add enough hummus so that it is slightly heaping over the jalapeno (you may not need to use the whole ½ cup of hummus, depending on how big your jalapenos are and how much filling you want to have in each one).

Bake in the preheated oven for 20-25 minutes, until the jalapenos are softened and browned on the bottom, and the hummus is slightly hardened and browned on top. Remove and let cool slightly.

Serve warm.

Makes 2-4 servings (8 jalapeno halves).

April 23, 2013

Layered Verrines with Coconut Quinoa, Avocado & Sauteed Plantains


It's a gorgeous day here in Ontario, so today's post will be a short one so that I can get outside and make the most of it before the rain returns tomorrow!

Plantains are one of my favourite things to eat, especially when combined with avocado and other tropical flavours like coconut. My plantain guacamole is one of my favourite recipes on the blog, and it also helped to inspire this dish.

The idea for layered quinoa avocado verrines first came from a recipe that I've made before from Vegetarian Times. While their recipe was more Mexican-flavoured and was topped with sprouts, I went for a tropical version topped with sauteed plantains.


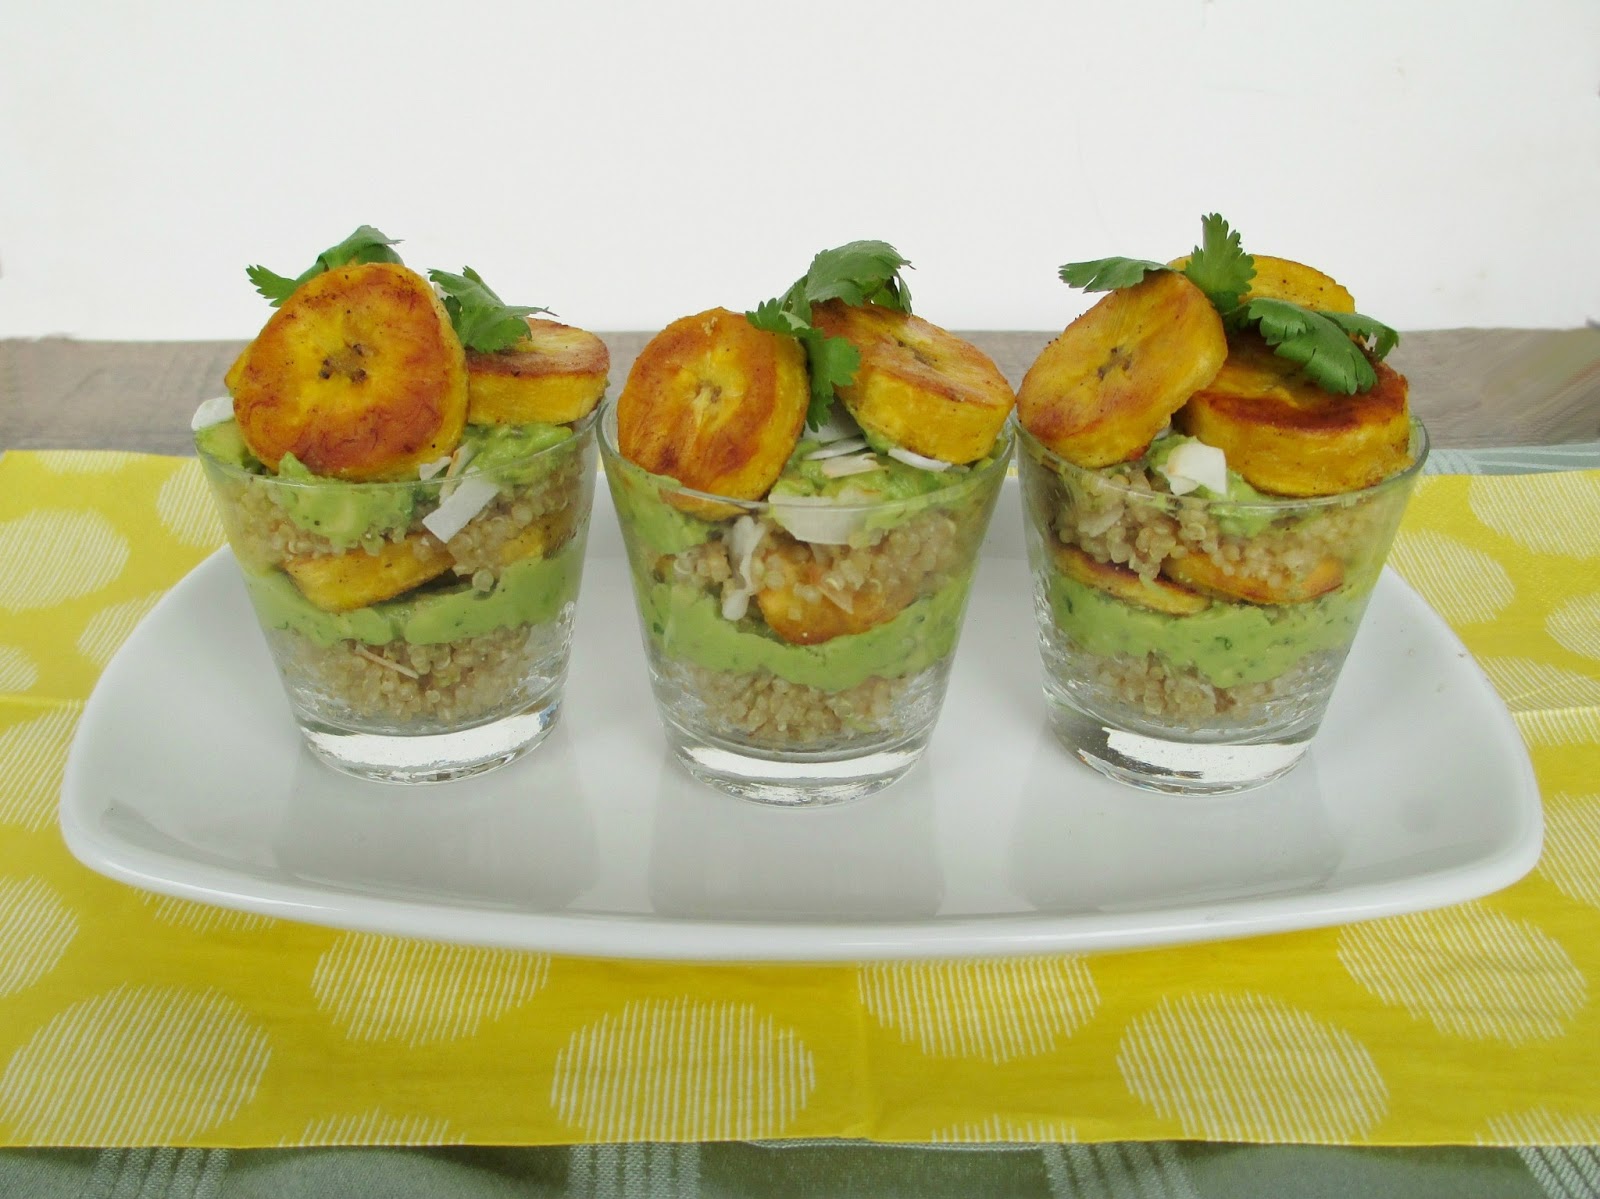
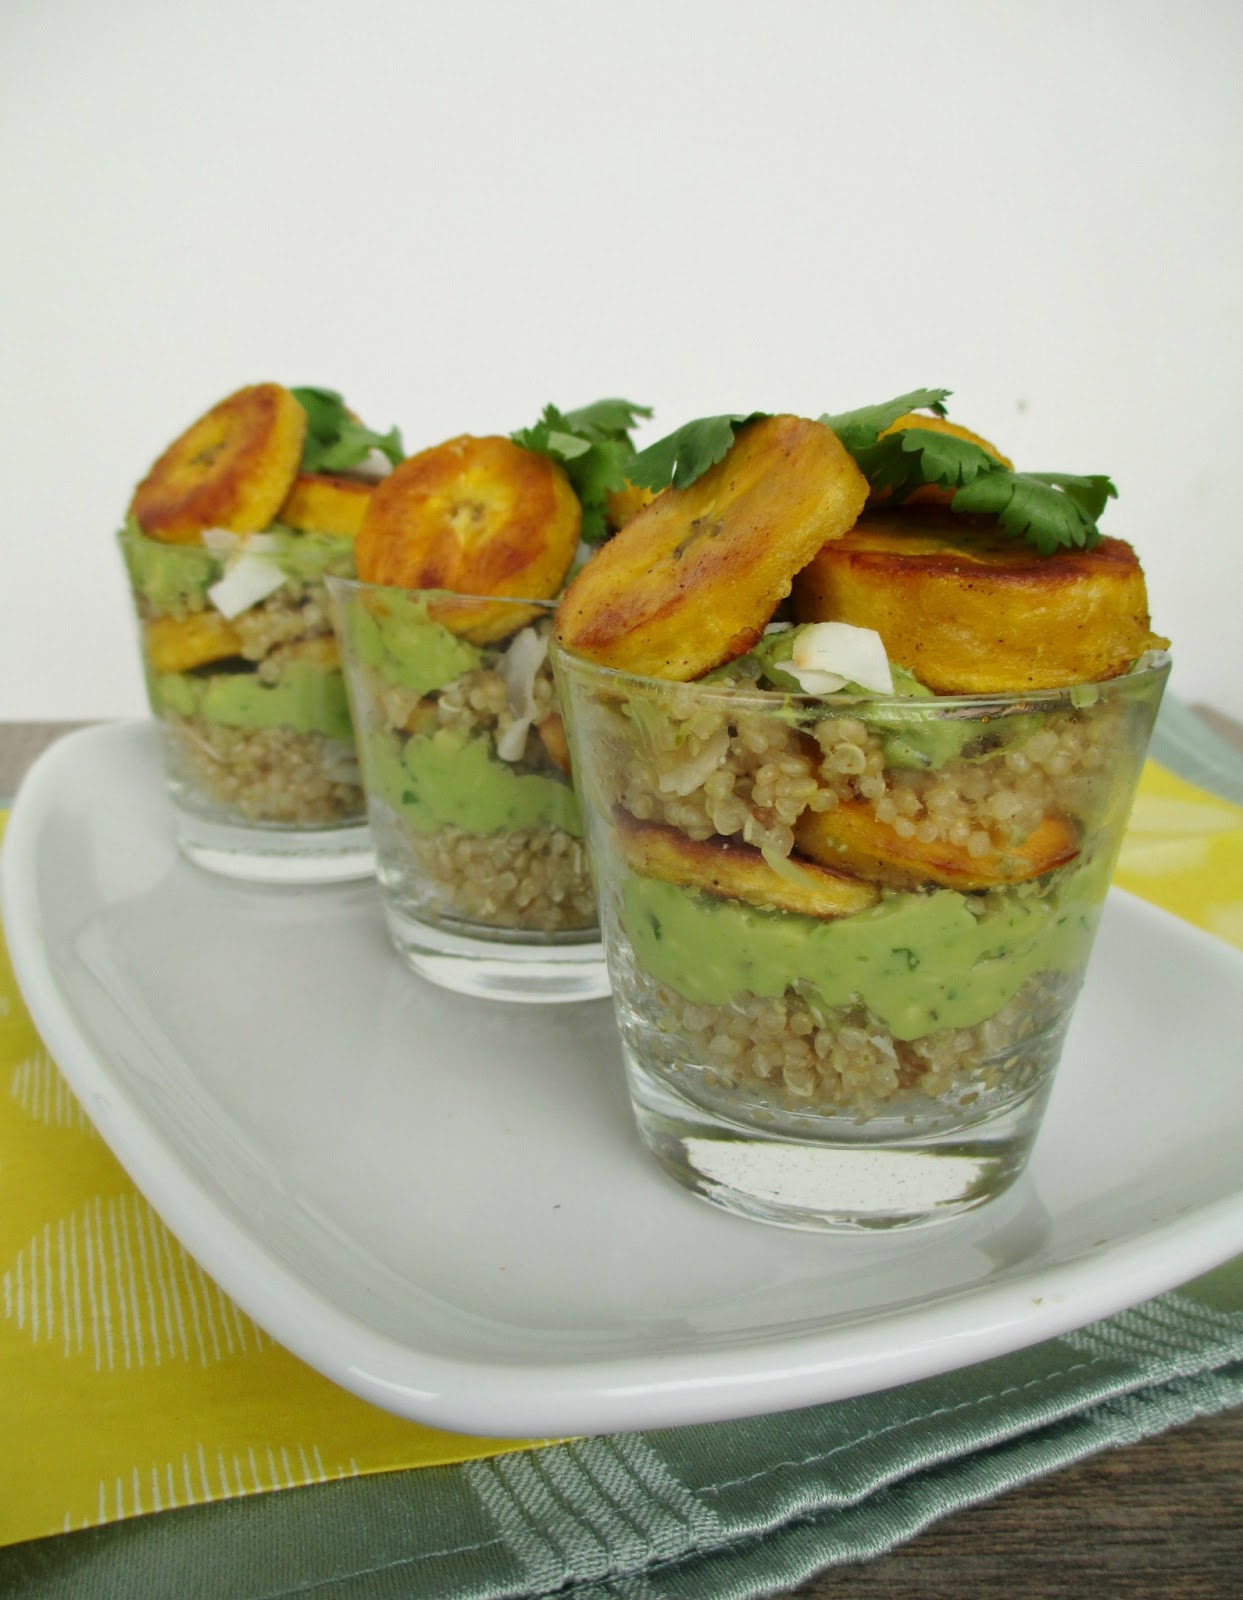
The three components to this recipe all have tropical notes: first is a coconut quinoa made by cooking the quinoa in coconut milk and stirring in a bit of lime zest and toasted coconut flakes; next is a layer of avocado pureed with lime juice and cilantro; and the final component is a layer of sweet ripe plantain slices cooked in coconut oil with a dash of spices.

I could happily eat any of the layers on their own, but they combine to make a creamy and flavourful dish that can either be served in small portions as an appetizer or in larger portions as a main dish. Layering each of the components into a little glass or cup makes for a fun presentation that you can even prepare ahead of time if you're serving them to a group.

Hopefully these tropical flavours will help you get through the last of the cold weather for those of you who are still seeing snow, and let's hope the warmer weather is here to stay!


Layered Verrines with Coconut Quinoa, Avocado and Sauteed Plantains
Inspired by Vegetarian Times

Quinoa:
2/3 cup canned coconut milk or coconut milk beverage
1/3 cup dry quinoa
1/4 tsp ground ginger
Pinch of salt
½ tsp lime zest
2 tbsp coconut flakes

1 ripe avocado
1.5 tbsp lime juice
2 tbsp chopped fresh cilantro
Salt and pepper
1 tbsp coconut oil
1 ripe yellow plantain, peeled and sliced
Dash of cumin
Dash of chili powder
Salt to taste

Heat the coconut milk in a small saucepan over medium-high heat. Once it starts to boil, stir in the quinoa, ginger, and a pinch of salt. Cover, reduce heat to low and simmer for about 15 minutes. Remove from heat and keep covered for 5 minutes. Remove lid, fluff quinoa with a fork and stir in the lime zest and coconut flakes. Keep aside.

Meanwhile, make the avocado sauce: Place the avocado, lime juice, and cilantro in a food processor. Season generously with salt and pepper. Puree until smooth. Set aside.

Heat a large skillet over medium heat. Add the coconut oil. Once the coconut oil is melted, add the sliced plantains and sprinkle them with cumin, chili powder, and salt to taste. Let cook for 5-6 minutes total, flipping the slices halfway through. Remove from the pan and let drain on a plate lined with paper towel.

To assemble, place a portion of the quinoa in the bottom of each glass (use about 2/3 of the quinoa for this layer). Top with a thick layer of the avocado puree. Next, add a few plaintain slices. Repeat the layers once more, ending with the rest of the plantains on top. Garnish with extra cilantro and coconut flakes if desired.

Makes 3 servings.

April 05, 2013

Recipe Round Up: Recipes I've Tried Lately

Before I get too caught up in posting Spring inspired recipes, I wanted to pause and do another post about recipes that I've tried from other blogs lately.

As I've mentioned before, I'm constantly bookmarking new recipes to try, and while I don't actually make nearly as many of them as I'd like to, I do try to devote a portion of my kitchen time to trying out recipes from blogs that I like without adapting the recipe to make my own.

This round-up has a variety of recipes from main dishes to an appetizer, snacks, breakfast and dessert! Hopefully you find at least one new recipe or blog here to inspire you too!

(Note: All photos are my own; please click through to see the original recipe)

Brown Rice Sunshine Burgers from The Vegan Chickpea


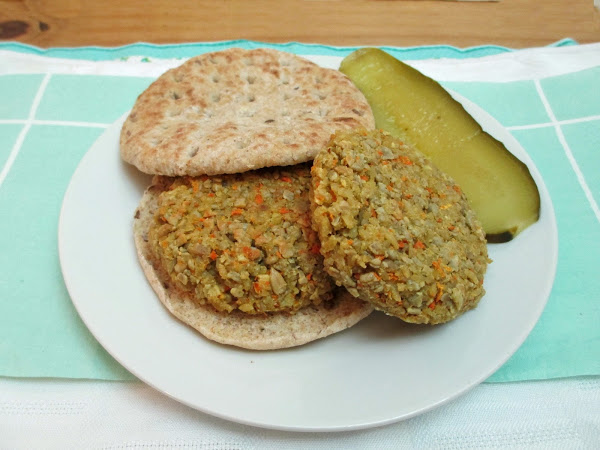
I've never had the original Sunshine Burger - a veggie burger made of brown rice, sunflower seeds, carrots and spices, but now that I've got Caitlin's easy and tasty recipe for a homemade version, that's all I need! I loved the texture of these burgers with the chewy rice that crisped up on the outside after baking in the oven. I think I ended up with slightly smaller burgers than I should have because I couldn't stop eating the unbaked burger mixture!


Carrot Soup with Tahini and Crisped Chickpeas from Smitten Kitchen


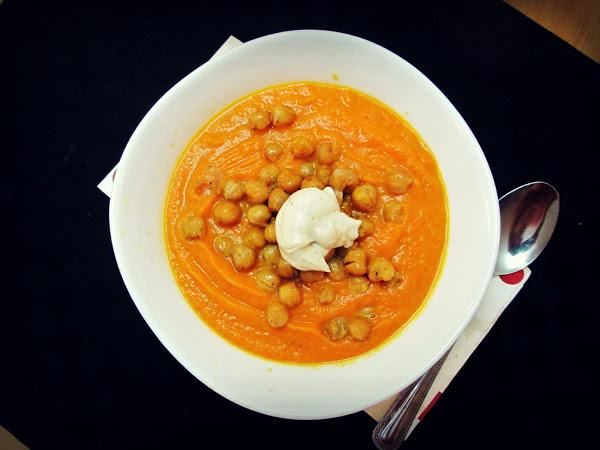
This recipe has been pretty popular in the blogosphere since it was posted in January, so I decided to try it for myself. Now I see why everyone who tries it raves about it! The soup itself, made from carrots, onion, garlic, and spices, is delicious but the garnishes really make it special. Crunchy roasted chickpeas add texture and substance, and the creamy lemon-tahini dollop blended in so well. Definitely a soup I will make again in the fall!


Lentil Nut Pate from The Lunchbox Bunch


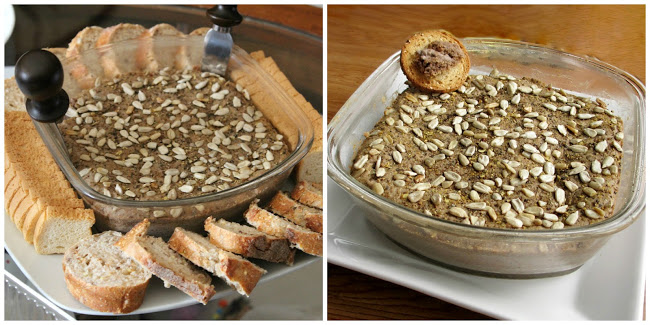
While I loved both of the previous recipes, this one may be my favourite of this post because it surprised me in how good it turned out! It's a vegan pate made from soaked cashews and walnuts, cooked lentils, nutritional yeast, peppercorns, and a few other flavouring ingredients, topped with seeds (I used sunflower seeds instead of the recommended pumpkin seeds). After baking for two hours, you end up with a firm yet creamy and spreadable pate that smells and tastes amazing. 

I served this on Easter with mini melba toasts and a baguette, and enjoyed the leftovers on toast the next day. It's been a long time since I've had the non-veg kind of pate, but everyone who tried this gave it good reviews and commented that it not only looked just like the real thing, but it tasted even better and is much healthier too!


Carrot Cake Chickpea Bites from Kiss my Broccoli


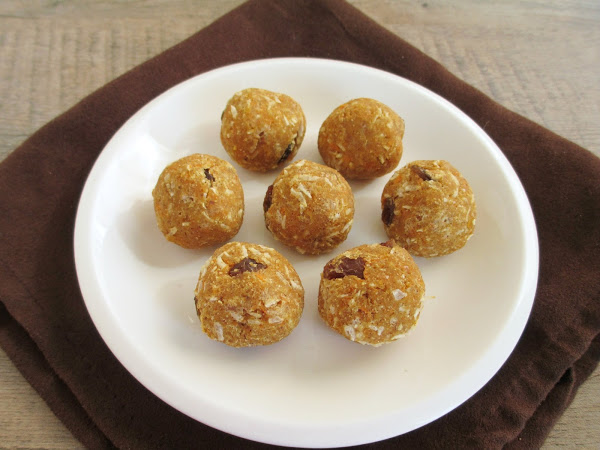
I had some leftover chickpeas sitting in my fridge last week and looked through my bookmarked recipes for some kind of treat or snack that I could use them in. After a failed attempt to make a chickpea based coffee cake (no matter how long I left it in the oven, it refused to cook and ended up in the garbage), I came across these carrot cake chickpea hummus bites and made them instead. They have a soft texture inside that reminded me of a similar chickpea recipe that I love, these rosemary apricot tahini bites, but with ingredients like carrots, raisins, and coconut to resemble carrot cake. 

I used shredded raw carrot instead of cooking the carrots first, and next time I would use the full amount of sweetener, but I liked these as a healthy afternoon snack! 


Chocolate Chip Banana Bread Bites from Minimalist Baker


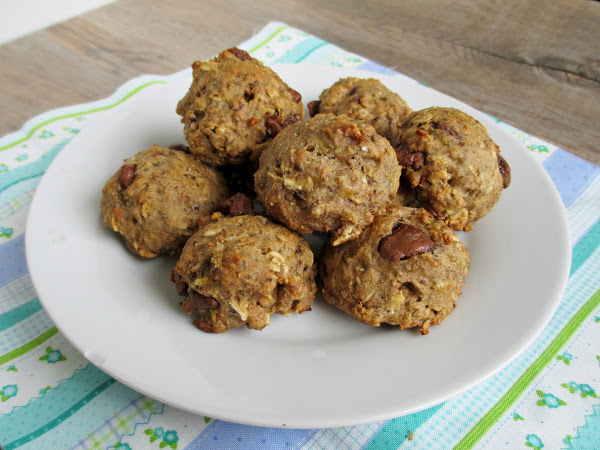
I have so many healthy banana cookie recipes bookmarked, but this was the latest one that I tried. These are a soft cakey cookie (more like a mini muffin) that really does taste like banana bread with the addition of almond butter, oats, and chocolate chips. Mine were a little on the plain side because I didn't have enough chocolate chips, but if you follow the recipe exactly and you love banana bread, then you won't be disappointed with these!


Raw Coconut Caramel Date Bars from Be Well by Jess


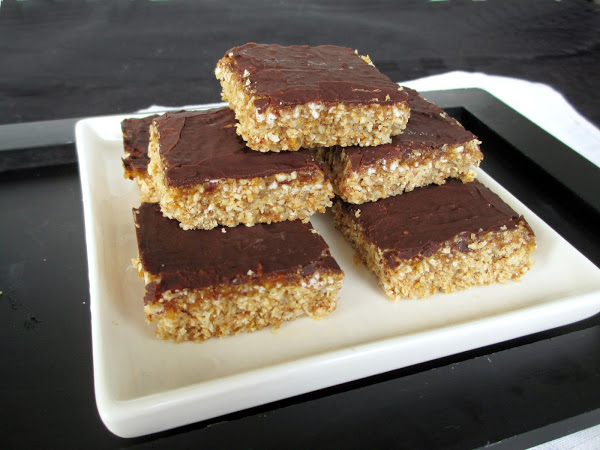
I made these as a treat to bring home to my parents recently but I ended up eating a lot of them myself because I liked them so much! The base of these bars is a raw "cookie" made of almonds, oats, coconut and dates. Next you spread on a thin layer of coconut "caramel" made from dates, almond butter and maple syrup with more coconut, and finally they're topped with a layer of chocolate (I covered them completely with chocolate rather than doing a drizzle like the original recipe).

I thought these tasted like a decadent chocolate bar, but I loved that they were actually pretty healthy! And of course, I love any dessert that has coconut!


Coffee Cacao Nib Scones from The First Mess


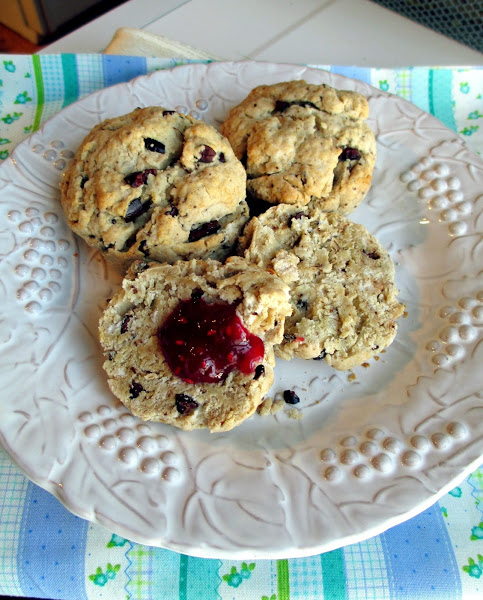
I don't make scones often, but I made a small batch of these for my Dad and I for breakfast as a treat when I was home recently. Instead of using espresso powder and dark chocolate, I used instant coffee and raw cacao nibs, and irish cream flavoured agave nectar since I happened to have some in the cupboard. Mine came out a bit too undercooked inside, which was too bad because they were really good otherwise - they were still a bit soft and not too dry or crumbly, and I loved the addition of crunchy cacao nibs and the hint of coffee flavour.

I love finding vegan scone recipes that actually turn out flaky and buttery tasting like real scones, so I will keep this recipe for future use and maybe try it with some other flavour combinations!l


That's all for this round-up! Have a great weekend and I'll be back with a new recipe next week!


February 15, 2013

Edamame Mushroom Wontons with Dipping Sauce


After making my baked banana, chocolate and strawberry wontons, I still had a lot of leftover wonton wrappers that I didn't want to go to waste, so I decided to come up with a savory recipe to use them with. I had seen a couple of recipes for edamame filled wontons online, and when I consulted my Vegan Eats World cookbook for more ideas, I saw a recipe for edamame gyoza with dipping sauce that sounded perfect!

Gyoza are typically made with round dumpling wrappers (like these ones from The Fig Tree), so I used a slightly different method to adapt the recipe as wontons instead.  I also changed up the filling ingredients from the original recipe a bit and added some mushrooms for more bulk and flavour. I couldn't decide what kind of mushrooms to get when I was at the Asian mart, but I ended up going with fresh enoki mushrooms because of their delicate texture and slightly sweet flavour that I thought would pair well with the edamame (plus they looked so cute!).

The filling for the wontons is blended up in a food processor until you get a slightly chunky, thick mixture that will hold together well inside the wontons. It also has a vibrant green colour, as you can see here:


Making the filling is the easy part, and then comes the somewhat tedious process of forming the wontons and cooking them. I made the wontons following the same method as last time - place a dollop of filling in the center, then fold over one corner to make a triangle shape and seal tightly.

Instead of boiling or frying the filled wontons, I decided to steam them because it seemed like the safest option to avoid having them break apart while cooking. That method seemed to work really well - they held together (for the most part) and I liked how the texture of the wontons became soft but chewy like pasta.


I found that the wontons themselves had a lot of flavour from the mixture of bold ingredients inside - although the green chili was almost too overpowering for my tastes, so I would probably leave that out next time.

The best way to eat these though was dipping them into a sweet and sour sesame-soy-lime dipping sauce.  I thought the flavours of the dipping sauce really complemented the wontons and helped to balance out the spicier edamame filling.

These would be a great appetizer to serve as part of as Asian meal, or eat them as a light meal on their own. Feel free to make a double batch of the dipping sauce and use it with other small bites or appetizers too, like sushi, spring rolls, dumplings, or scallion pancakes. 

Hope you all enjoy the weekend!


Edamame Mushroom Wontons with Dipping Sauce
Adapted from Vegan Eats World

1 cup frozen shelled edamame
~200 g fresh enoki mushrooms
1 clove garlic, peeled and minced
2 tsp minced fresh ginger
3 green onions, minced
1 small Thai green chili, minced (optional)
1/2 tsp kosher salt
1 tbsp mirin
1/2 tsp sesame oil
~30 wonton wrappers

Bring a large pot of water to a boil. Add a dash of salt, then add the frozen edamame. Boil for about 5 minutes, then drain, reserving as much of the cooking water as you can. Rinse the edamame with cold water, then transfer to a food processor.

Wash the mushrooms well, and chop off the woody stems (I cut off almost half of the entire bunch). Chop the rest of the mushrooms and add to food processor (you should end up with about 1 ¼ cups chopped mushroom).

Add the remaining ingredients (except wonton wrappers) to the food processor and pulse or process briefly until all the ingredients are combined (it’s okay to leave it a bit chunky).  Transfer mixture to a bowl.

To make the wontons, lay out one wrapper and keep the rest of the wrappers covered with a damp cloth or paper towel.  Place 1 heaping teaspoon of the filling mixture in the center of the wrapper. Wet the edges of the wrapper with water using your fingers, then fold over one corner to make a triangle. Press the edges of the wrapper together firmly, pinching with your fingers to seal well. Set the filled wontons on a greased baking sheet and keep covered with a damp cloth or paper towels. Continue making the wontons until your filling is used up.

Put the reserved edamame cooking water in a large pot and add more water if necessary to get about 3 cups. Bring to a simmer and add a steamer basket. Steam the wontons by placing about 7 or 8 wontons (as many as can fit in the steamer without overlapping) in the basket and cover the pot with a lid (Note: I found it easier to spray my steamer basket first with cooking spray, otherwise the wontons got a bit stuck). Steam each batch for 3-4 minutes, until the wonton wrappers are cooked like al dente pasta. Carefully remove wontons and transfer to a plate.  Continue steaming in batches.

Serve immediately with dipping sauce.

Makes about 30 wontons.

Dipping Sauce
3 tbsp tamari (or low sodium soy sauce)
4 tsp fresh lime juice
2 tsp mirin
1 tsp agave nectar
1 tbsp finely minced green onion
1 tsp finely minced fresh ginger
1/2 tsp sesame seeds

Place all ingredients in a small bowl and whisk to mix well.  Store in the refrigerator.

January 07, 2013

New Years Eve Indian Feast

Last year on New Years' Eve, my family and I enjoyed a huge spread of Asian inspired food, including peanut noodles, mango salad, fresh rolls, lettuce wraps, dumplings, and more.  We liked it so much that my sister suggested doing a similar thing this year, but changing the theme.

The theme we decided on this year was Indian food and since I love Indian cuisine so much, I claimed the right to plan out our menu, which I wanted to share on my blog with you!

After last year's experience of spending all day on New Year's Eve in the kitchen, I wanted to use purchased ingredients as much as possible this time to limit the amount of work I'd have to do!  A couple of trips to ethnic shops got me all of the ingredients I'd need, and we ended up with a delicious spread with a nice variety of dishes.

Appetizers


First, we had a round of drinks and cold snacks as appetizers.  My sister made the Indian-inspired drinks to start off the evening, which were these fruity mango bellinis made with fresh mango puree and champagne - delish!


For the food, I knew I wanted to include bhel puri, a savory and spicy snack of puffed rice, crushed papdis, peanuts and crispy sev noodles (shown below). All you have to do to prepare this is buy a packaged mix of bhel puri (although you can make your own if you feel like it!), and stir in two kinds of chutneys (the mix comes with little packets of sweet and spicy chutneys) to add even more flavour. I also added some chopped tomatoes and cilantro after this pic was taken.


This is a good snack mix for sharing with a group of people - although it should be eaten immediately before it starts getting soggy from the sauces.

Another easy snack to put together was this masala papad - crispy pappadum that I cooked on the stovetop, topped with a mixture of tomato, red onion, cucumber, green chili, cilantro and spices. Just break it into pieces and enjoy as a refreshing appetizer!


And now for the highlight of the appetizers round - these dahi batata sev puri (I'm not exactly sure of the proper name for them, as I've seen them called many different names!). I bought a package of premade puri shells and broke holes into each one so that I could add the filling. The filling was a simple mixture of boiled potato and chickpeas with finely chopped red onion and chaat masala spice.  Here's a picture of the filled puri shells:


Next, I poured in a spoonful of cool plain yogurt into each one, followed by a spicy cilantro chutney and sweet date-tamarind chutney. The final topping was a bit of chopped fresh cilantro, some sev, and another sprinkling of chaat masala.  It took longer than I planned for filling each one, but luckily my sister came along to help out with the last few steps!


These were definitely everyone's favourite appetizer - they've got the perfect balance of sweet and spicy flavours that explode once you pop the whole thing into your mouth! If you want to try making them yourself, here's one of the guides that I followed.

Finally, I also made a raita to serve along with the appetizers. I followed this recipe for rainbow raita from Vegetarian Times, except I replaced the mint with cilantro. This cool and soothing dip was much appreciated  once all of our mouths were set on fire from the spicy food!


Hot Food

After the appetizers, it was time for some cooked Indian food!

I considered making my own samosas, but figured I should save the time and effort by buying some fresh samosas from the local Indian food store instead (they were still homemade, but by someone else!)


I bought two kinds of vegetarian samosas - the smaller ones were filled with spinach and paneer cheese, and the bigger ones were the more traditional potato and pea filling. I thought both kinds were delicious, especially served with tamarind and cilantro chutneys!


For the homemade food, I put together two vegetarian main dishes. First were these skewers of paneer cheese and peppers, marinated in a creamy tikka masala sauce and cooked on the stovetop. They were pretty easy to make, especially since I cheated a bit by using a premade sauce, and they tasted great too - I loved the soft, crumbly paneer!


I also made a tofu dish using a recipe from one of my new cookbooks, Vegan Eats World.  Slices of pressed tofu were marinated in a yogurt sauce with lots of spices (this time I did make the sauce from scratch!)  and baked in the oven along with lots of sliced red onion on top.


I'm not sure if this dish is authentic tandoori, or if you could even find something similar in India, but all that mattered to me was that it tasted good! If I had to choose a favourite out of the hot dishes, this would be it. I thought the texture of the tofu was perfect, and I loved the flavours. Too bad I was already full by this point so I only ate a couple pieces of it (but I did get to enjoy the leftovers afterwards)!


Since this post is already getting long, I'll try to summarize the rest of our meal without pictures!  Along with the tofu, we had tandoori chicken kebabs for the non-vegetarians that were marinated in the same sauce as the tofu.

I also heated up some storebought naan bread (another time saver, although I would have preferred homemade!), and made some basmati rice that I ate with more raita mixed in.

Overall, it was a great meal and a delicious way to end 2012!  And if you have any questions about any of the dishes, feel free to leave a comment - I just didn't want to make this post too long by giving detailed instructions for each dish!

December 31, 2012

Goat Cheese & Pistachio Wrapped Grapes & Happy New Year


Happy New Years Eve! If you're celebrating tonight by hosting some friends or attending a party, you've probably already got your menu planned - I know I do!  But in case you're still looking for a small appetizer to add to the table, I've got the perfect idea for you!

I first saw the idea of wrapping grapes in goat cheese and nuts on a blog and I thought it sounded like the perfect bite-sized party treat.  It basically combines three elements of a typical cheese platter - grapes, cheese, and nuts, into one sweet and tasty bite!

While you only need three ingredients to make these, they are a bit time-consuming (although it will go faster if you can recruit a helper or two)! The results are worth the work though - I loved the combination of the crunchy pistachios with creamy goat cheese and a juicy grape inside. I served these to my family on Christmas Eve and they were definitely a hit, everyone loved them!

And for another easy hors d'oeuvre idea that also uses nuts and goat cheese, try these goat cheese and almond stuffed dates that I made last year during the holidays!

Have a great evening everyone!


Goat Cheese & Pistachio Wrapped Grapes
As seen on various sites, such as Squash Blossom Babies and Sandy a la Mode
Note: I realize you don't really need another recipe for these, but I just wanted to show the amounts that I used below. For more detailed step-by-step pictorial instructions, see the links above

40 small red seedless grapes
1 small log (113g) goat cheese
1/2 cup shelled unsalted pistachios

Wash and dry the grapes.  Take a small piece of goat cheese and squish it flat with your fingers. Wrap it around one end of a grape and press firmly so that the cheese sticks in a thin layer. Continue adding cheese until the whole grape is covered (Note: You want the cheese as thin as possible, but without holes or gaps).

Continue wrapping grapes in goat cheese until the cheese is used up - you should have enough for about 40 small grapes. 

Use a food processor to crush the pistachios into fine crumbs.  Place the crumbs in a shallow bowl.  Roll each goat cheese covered grape in the pistachios and press them in with your fingers so that they stick. 

Keep finished grapes refrigerated until serving time.

September 07, 2012

Round Up: End-of-Summer Eats

Before summer officially ends and I start posting about Fall goodies like pumpkin, apples, cinnamon and chai, I thought I would do one more round-up of summer recipes that I've tried lately, to follow up on my "summer eats so far" post from a couple months ago!


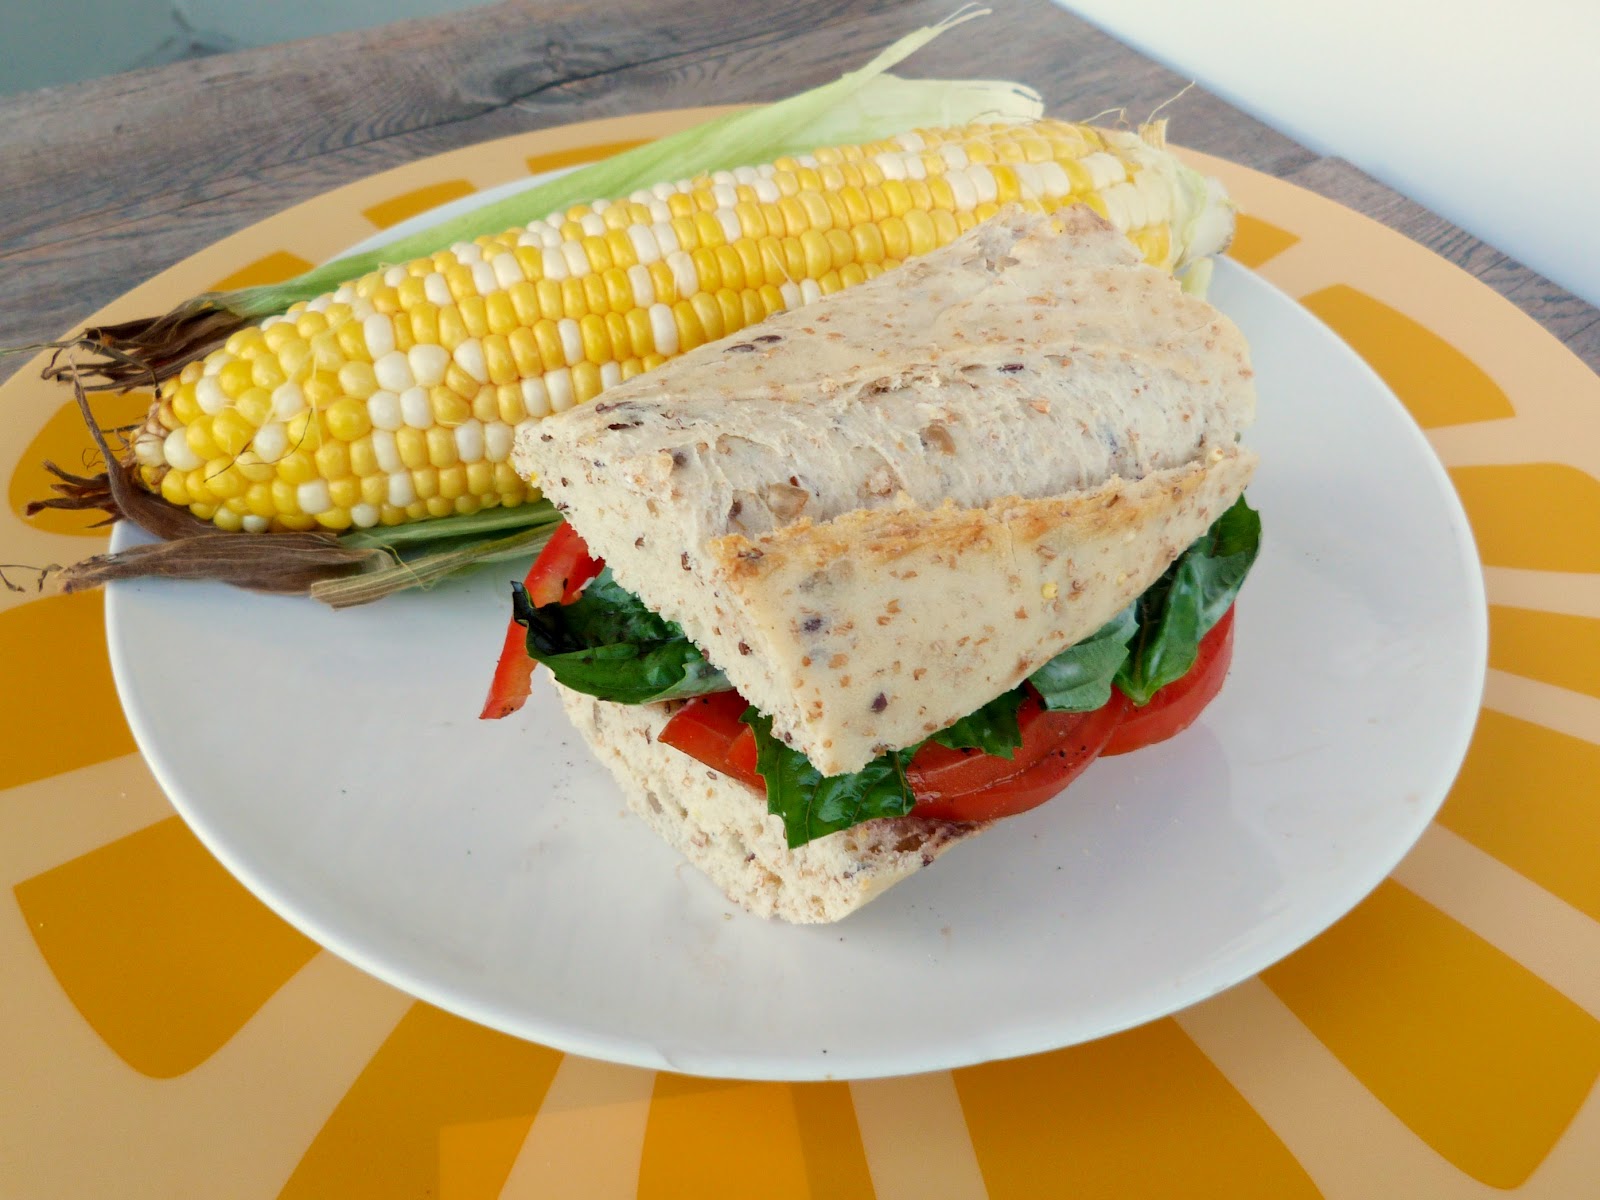
I'll start with two things that I've been eating a LOT of over the last month: corn on the cob and fresh tomato-basil sandwiches.  This has been my go-to meal when I don't have any other ideas prepared for dinner, or I don't feel like cooking.

It's super simple, but often that's the best way to highlight end-of-summer produce! Even though I feel like I've eaten too many tomato sandwiches and corn on the cobs to count lately, I never got sick of them!

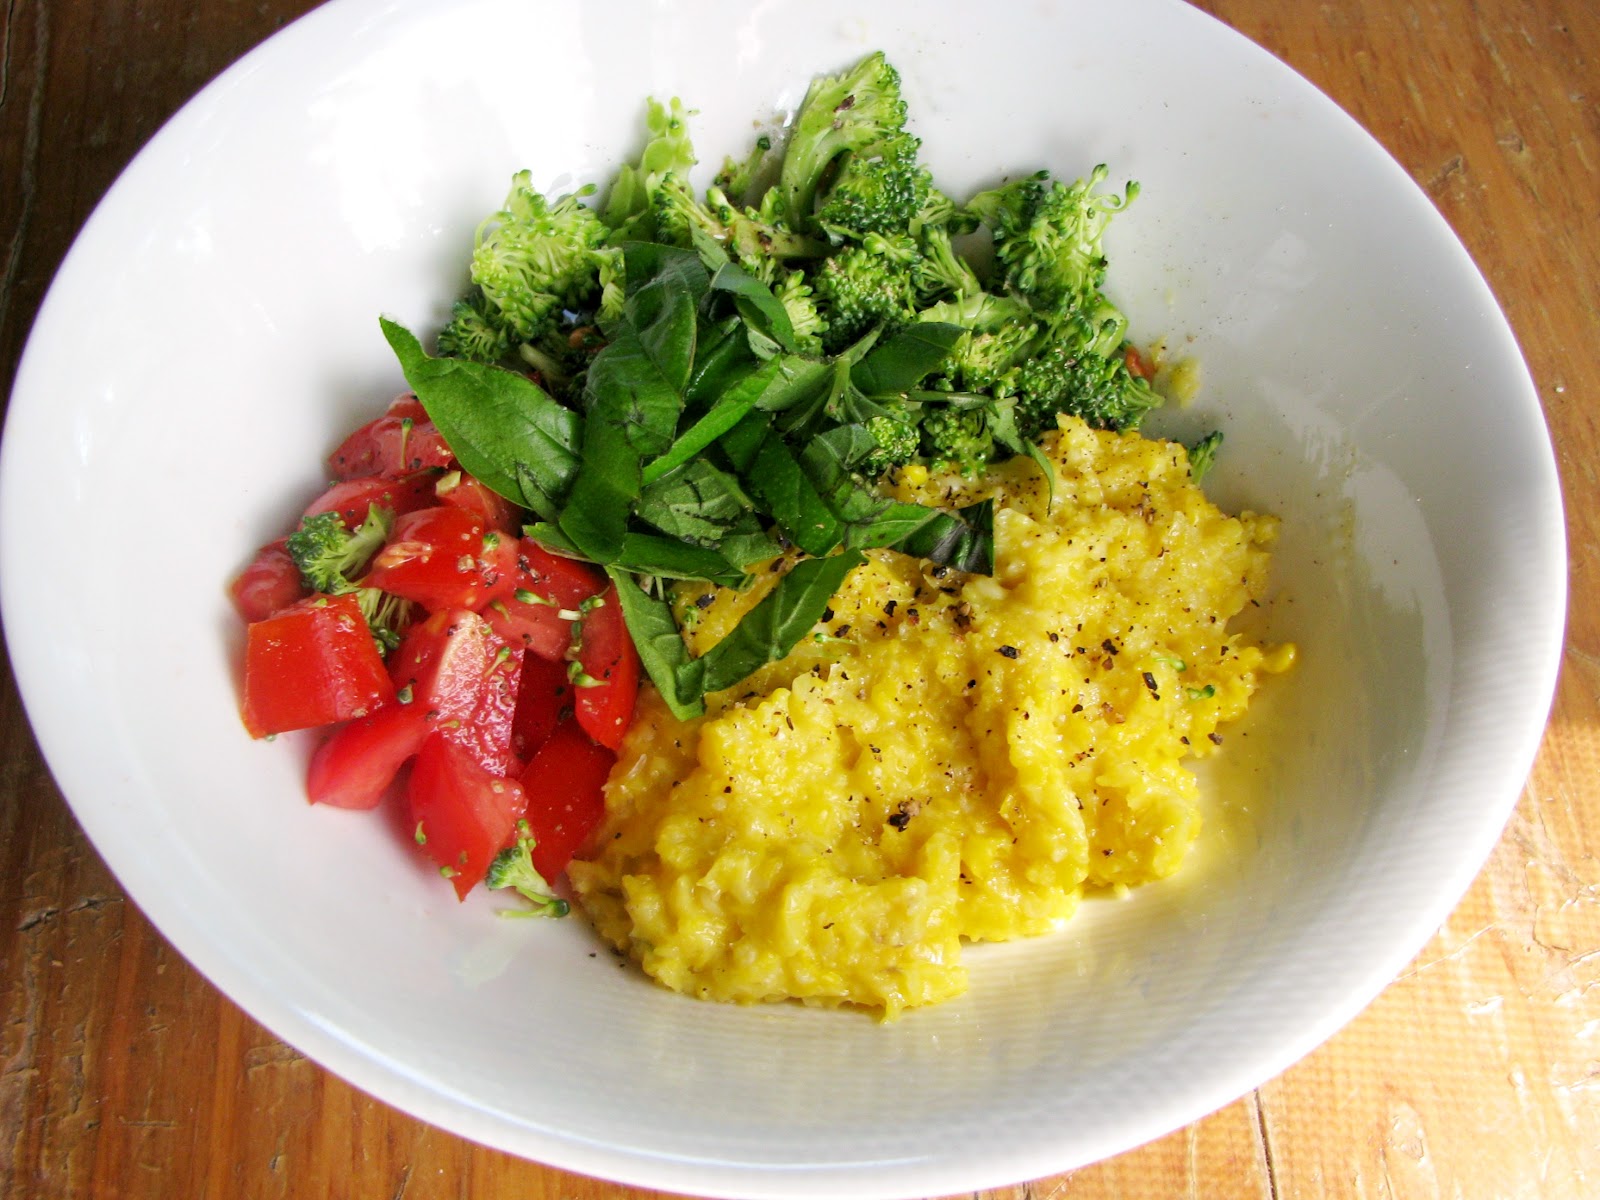
Another fresh corn dish that appeared on the blog Five and Spice recently and I bookmarked immediately was a raw corn polenta topped with broccoli pesto.  All you do is grate the raw kernels off a cob of corn and cook them in a pan until you get a nice thick, creamy mixture with a consistency like polenta.


I only had one cob of corn to work with, so my portion ended up a bit small (I would recommend two cobs for a meal).  Since I was a bit short on time, I skipped the pesto and just topped mine with finely chopped raw broccoli, tomatoes, and basil.  This was such a delicious and fresh summer meal, and I loved the texture and the sweet, pure taste of the corn.  I'll have to make more versions of this next summer with different toppings!


Here are a couple of other simple but delicious appetizers that I've enjoyed at family gatherings in the last month:

First is this bruschetta with brie and peach salsa that I adapted from In Good Taste. The bread gets toasted with a piece of brie on top so that the cheese is slightly melted, and then each piece is topped with a generous helping of fresh peach salsa.


I changed the salsa a bit by adding some diced cherry tomatoes and leaving out the cilantro as I was serving this to a couple of cilantro haters.  I made this as an appetizer for a dinner we hosted for some out-of-town guests, and everyone loved it!

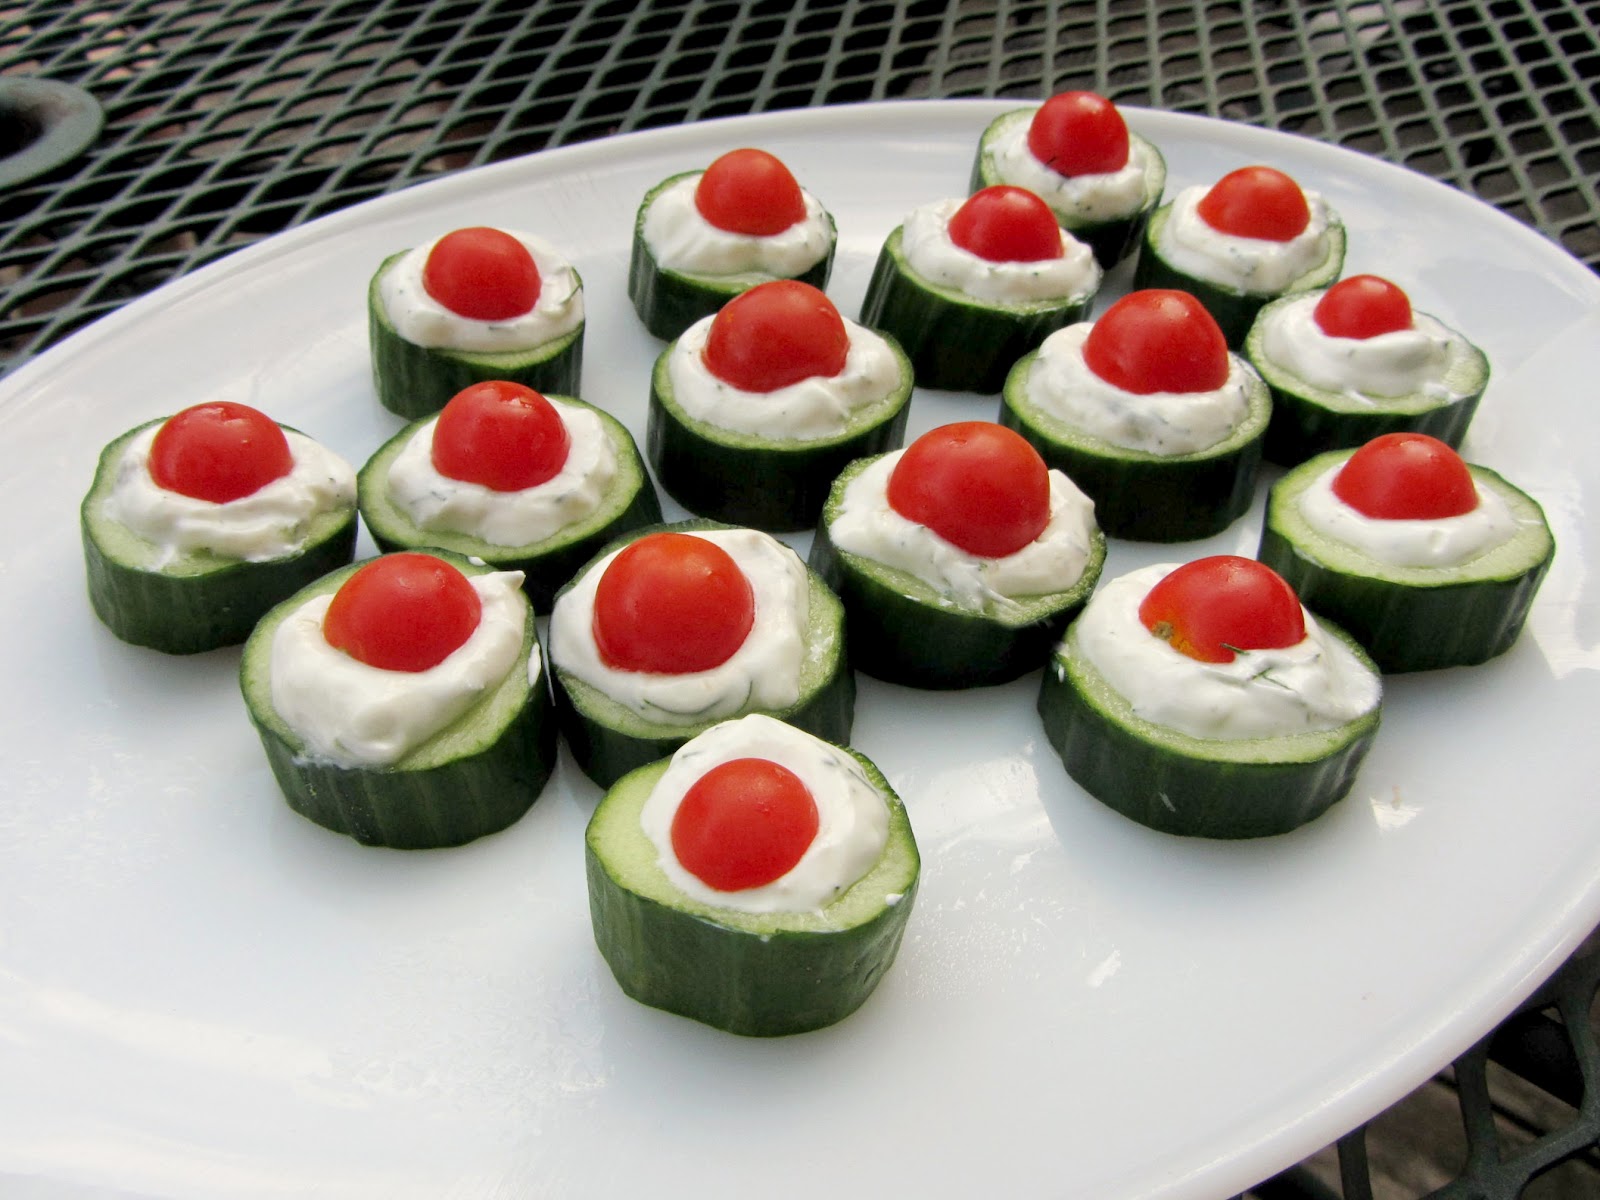
Besides the crostini, I also made another simple appetizer based on an idea I had seen on other blogs.  All you do is cut thick slices of cucumber, scoop out some of the middle, and fill it with a dip.


I decided to use a tzatziki as my filling, which I mixed with a bit of fresh dill, and I also topped them with halved cherry tomatoes. These were a big hit and disappeared quickly!  So if you're looking for an easy idea to bring to potlucks but want something a bit more creative than just veggies and dip, give these a try!

Then last weekend, my parents were bottling wine, which is part of their annual early September tradition.  Since they were spending a long day working outside, my sister made up this beautiful fruit and cheese plate for us all to enjoy as a break.  You can't go wrong with crackers, fruit, and good quality cheese!


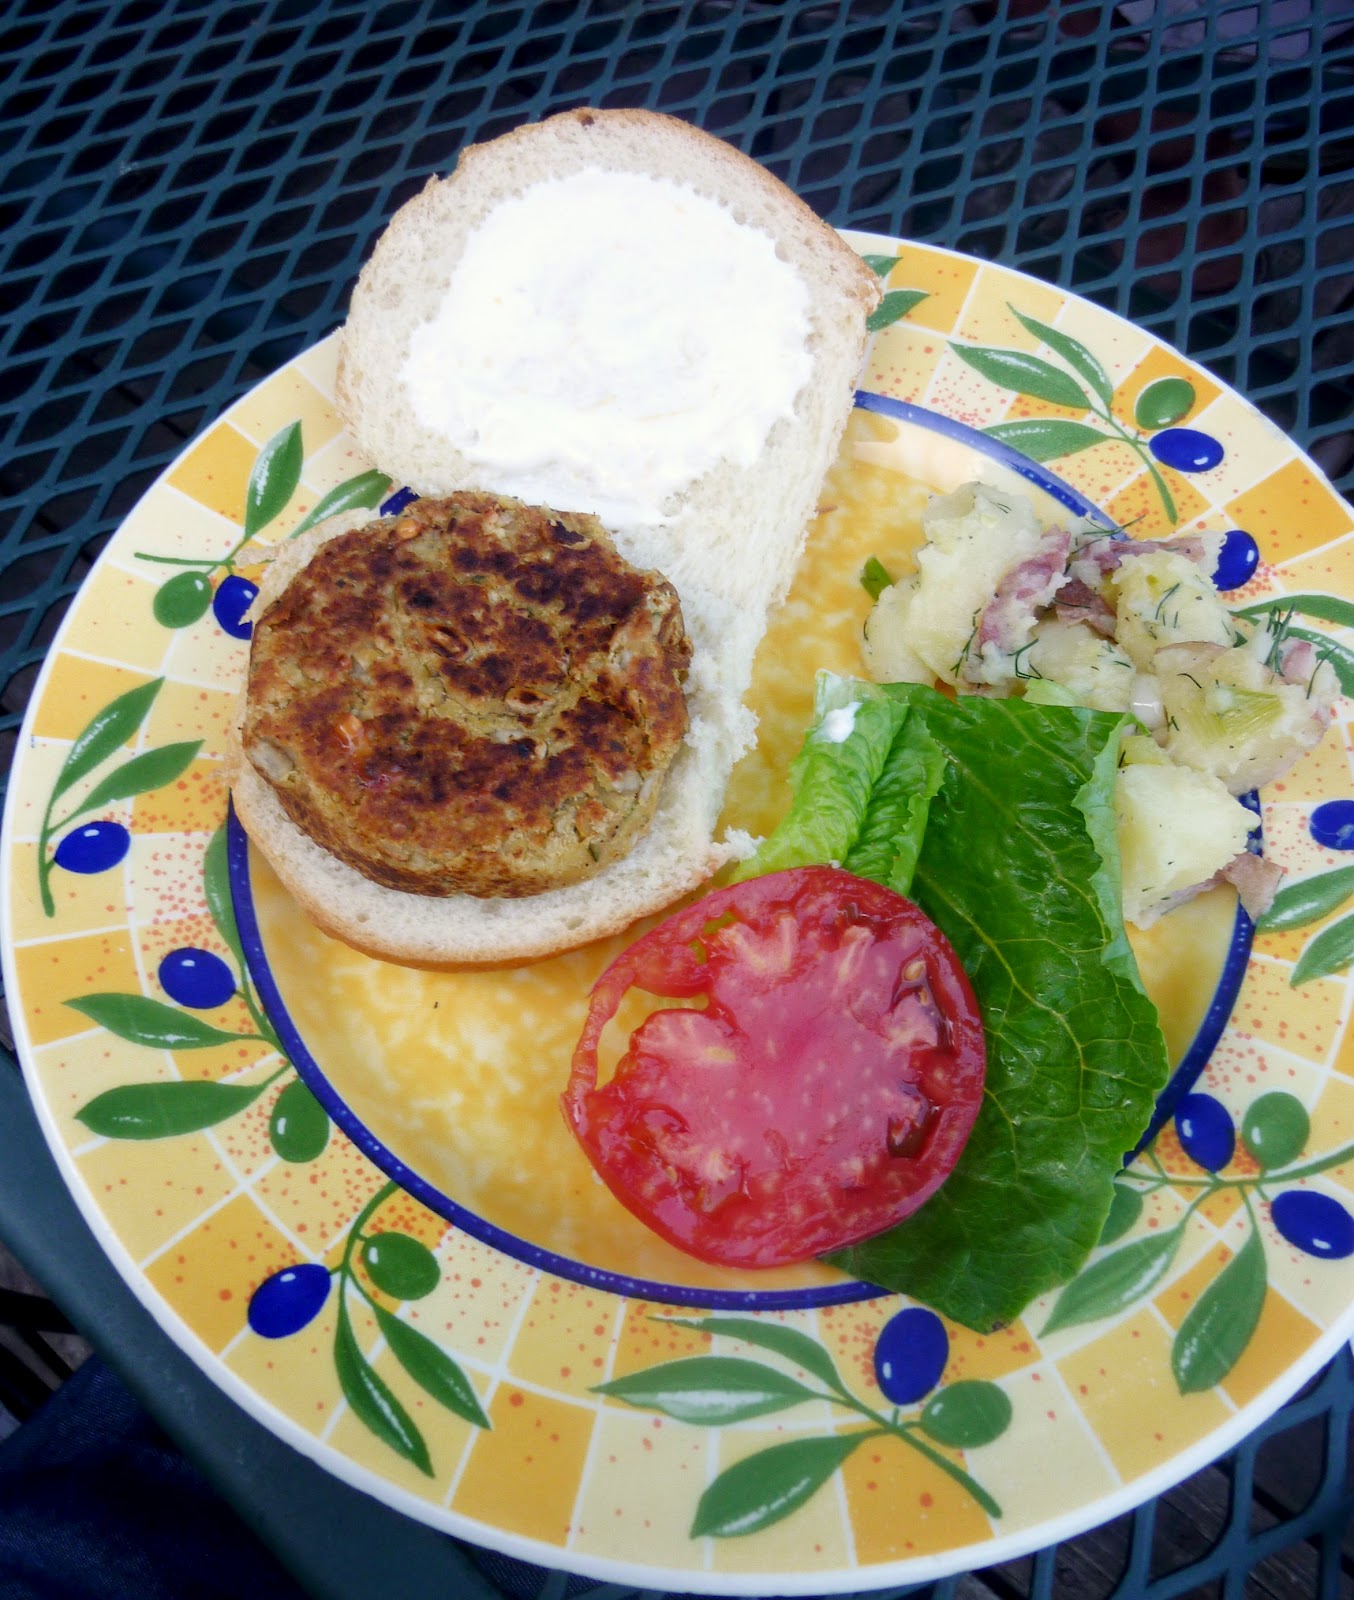
When it comes to summer meals, one option that I rely on a lot is veggie burgers.  I tend to try a new recipe every time I make them, and I usually have a few patties stored in my freezer for a quick dinner.

Here are two versions that I've made recently and would recommend: First is this falafel burger from Edible Perspective.  The burger was really savory from all the spices and herbs, and nice and hearty from the addition of both chickpeas and quinoa.  It did remind of me falafels, and it went really well with a yogurt sauce on a bun.


Next was a rather unique veggie burger made with broccoli, chickpeas and tahini from Peachy Palate. I doubled the recipe to make two burgers, and I thought they were perfectly moist and really flavourful, not to mention really pretty with all the specks of green!


The only issue I had with them was that my broccoli must have been slightly past its prime, because it gave off a bit of an unpleasant smell once it was cooked.  So even though my breath suffered from eating these, my tastebuds were happy!

I couldn't do a post about my summer eats without including my favourite meal from last summer - this roasted summer panzanella. I made it again the other week and was reminded why I loved it so much the first time - warm roasted summer veggies at their prime, combined with toasted bread and fresh basil, and soaked in a simple oil and vinegar dressing.


This time, I left out the cheese and used zucchini instead of summer squash.  I also tried it with balsamic vinegar and I think I might prefer that over the red wine vinegar that I used last time - although any kind of vinegar would work in this dish!

And finally, I thought I would end this round-up with a couple of my summer recipes that didn't quite work out.

I bought some fresh apricots from the market a few weeks ago and looked through my cookbooks for ideas on what to make with them.  I found a recipe for vegan apricot oatbran scones that sounded good, but they didn't turn out how I was hoping.


As you can probably tell, they came out of the oven really dark, and I had to try to scrape a layer of crispy burnt crumbs off the bottom.  The insides weren't much better - they were a bit too dry for my tastes. I'm not sure what I did wrong, but luckily I only made a half batch so they weren't too much of a waste!

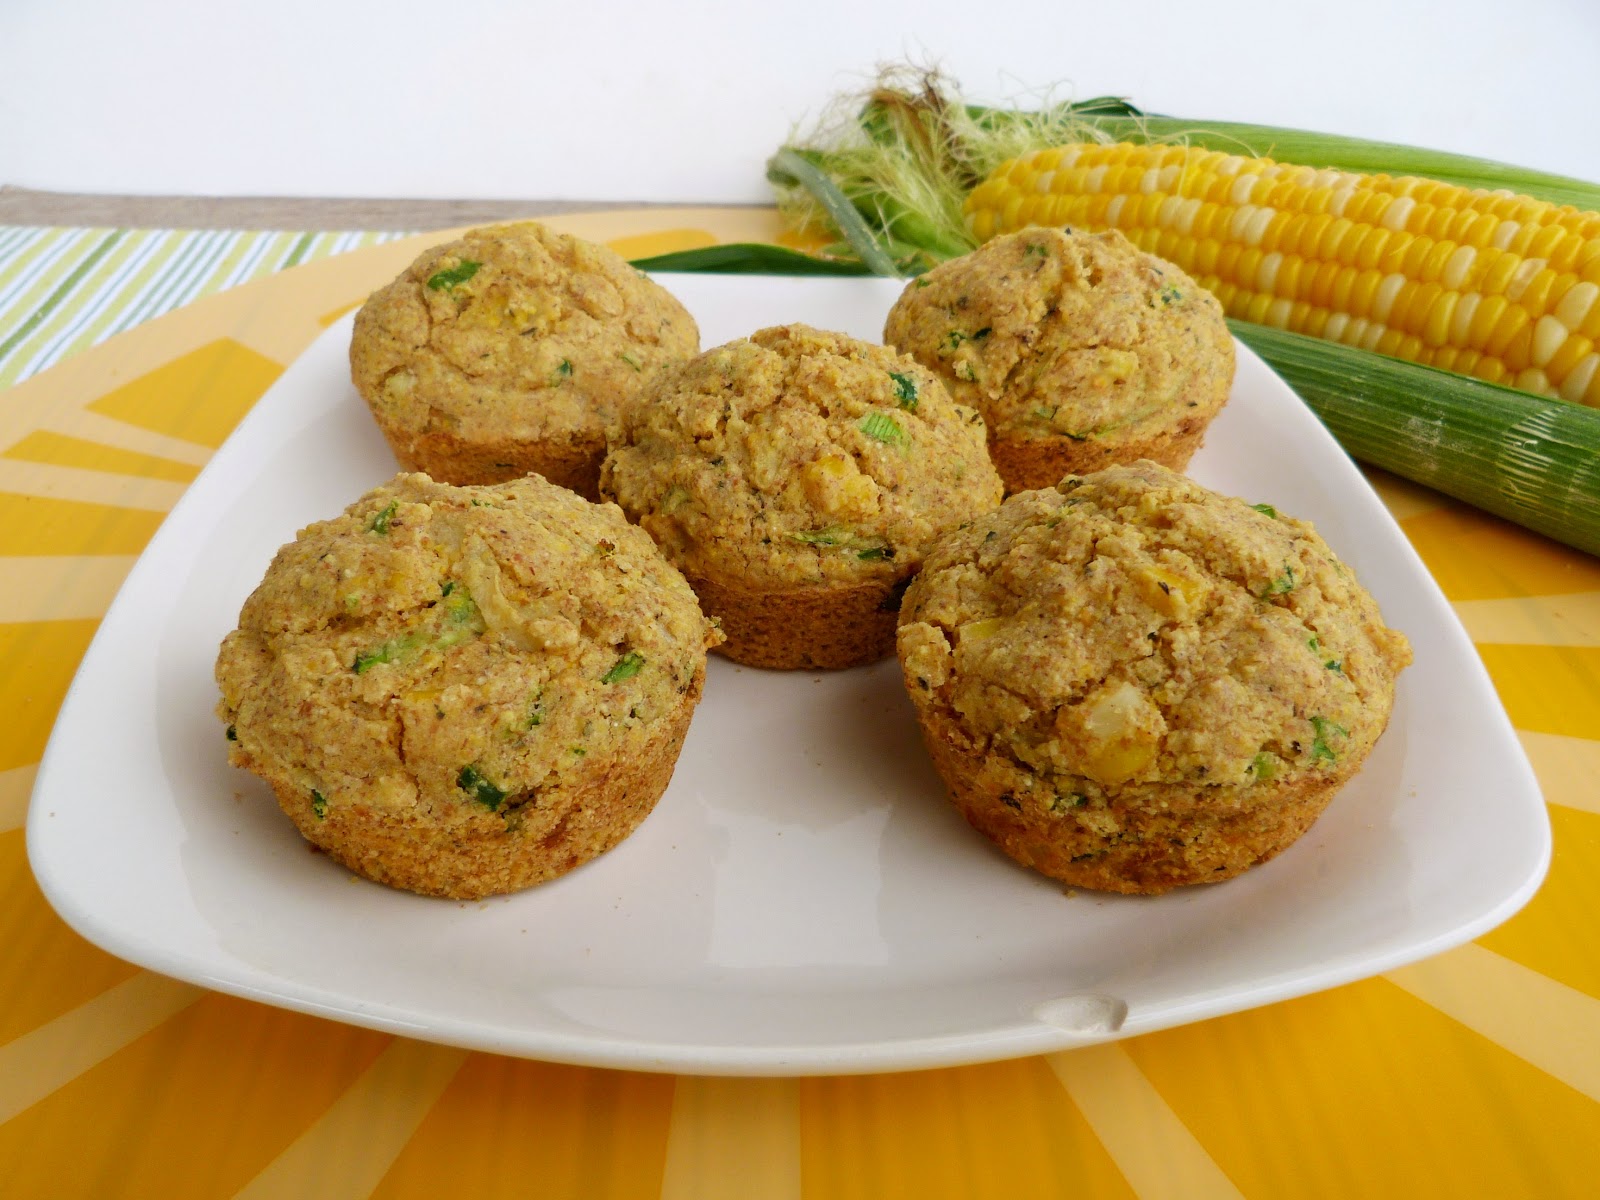
Another recipe that came close to being blog-worthy but still needs some more tweaking was my attempt at making savory muffins.  I thought a combination of fresh corn, zucchini and herbs would make a nice muffin to go with summer soups and salads, and I also added some cornmeal for texture and nutritional yeast for some cheesy flavour.


I loved the taste of these muffins and the chunks of corn kernels in them, but I couldn't get the texture right after two attempts.  Both times, they would seem okay fresh out of the oven, but after that they became way too crumbly to eat properly. I guess this is another recipe that I'll have to revisit next summer, because they at least had good potential!


So there you have a little taste of what I've been making and eating lately!  I'll be sad to see summer tomatoes and corn go, but I'm getting excited to start cooking with some new seasonal ingredients, and to try some of the Fall recipes that are already popping up on some of my favourite blogs!


LinkWithin

Related Posts Plugin for WordPress, Blogger...