Showing posts with label coconut. Show all posts

June 04, 2014

Blueberry Banana Snack Cake


I can't believe it's already June, but I'm so excited because that means not only will summer officially begin this month, but local summer fruits and veggies will be here soon too! I only just had my first rhubarb treats this past weekend (a delicious strawberry rhubarb pie that my sister made, and a rhubarb sauce that I made to eat on toast and in yogurt), and I can't wait for strawberries to arrive next!

Two years ago, I made a healthy strawberry banana snack cake that I really loved, so when I was looking through my old recipes for inspiration the other day, I wanted to try that cake out again.

This time, since local strawberries weren't available yet, I decided to use blueberries instead. I made a couple of other small changes to the recipe, like replacing the spelt flour with oat flour for a slightly different flavour and texture, adding cinnamon, a bit of lemon juice and zest, and a touch of coconut oil, and leaving out the nuts and extra sugar to make this cake less sweet.


I had mentioned in my original post that I thought blueberries would work well in this cake, and now I can say for sure that they do!

I loved the way all the fruit bursts after baking, and the blueberries paired perfectly with the coconut and banana flavours. I also love the chewy, dense texture of this cake, and how light it tastes at the same time - so you can easily eat a couple pieces for a mid-morning or afternoon snack!

As I mentioned in my last post, I'm still getting used to a new oven, so my cake browned just a tad too much even at the minimum baking time. Just be sure to keep an eye on yours, and in the meantime I'll have to test my oven temperature!


Blueberry Banana Snack Cake
Adapted from my previous recipe for Strawberry Banana Snack Cake

1 cup whole wheat flour
1 cup oat flour (I ground my own rolled oats in the blender)
1/2 cup unsweetened shredded coconut
1 tsp cinnamon
1 tsp baking powder
3/4 tsp baking soda
1/2 tsp salt
3 ripe medium-sized bananas, mashed
1/3 cup unsweetened applesauce
1/4 cup pure maple syrup*
1 tbsp melted coconut oil
1 tsp lemon zest
1 tbsp lemon juice
1 tsp vanilla extract
1 cup blueberries

*Note: You may want to add an extra 2 tbsp of sugar or cane sugar if you prefer a sweeter cake. 


Preheat oven to 350°F. Spray an 8x8 pan with cooking spray.

Whisk the dry ingredients in a large bowl (flours through to salt). In a separate bowl, mix the wet ingredients (mashed banana through to vanilla extract).

Add the wet ingredients to the dry ingredients and stir just until the dry ingredients are incorporated.  Gently fold in the blueberries.

Pour batter into prepared pan and bake in the preheated oven for about 35-45 minutes, until the sides start to brown and pull away from the pan, the top feels firm, and a toothpick inserted into the center of the cake comes out clean.

Let cool in the pan for a few minutes, then invert onto a wire rack to finish cooling before cutting into squares.

Makes about 16 squares. 


October 30, 2013

Mango Curry Tofu Salad


Things have been a bit busy for me lately, and between schoolwork and weekend trips, I haven't been able to spend as much time blogging as usual (sadly I won't have a new Halloween recipe this year!). I've still been cooking and making recipes, but I've been leaning more towards easy and quick dishes that can be made with minimal ingredients, like this one!

This mango curry tofu salad was the perfect meal to have around for lunches last week - with no cooking involved, it can be thrown together pretty quickly, and it will keep in the fridge for a couple of days so you can make it ahead of time and bring the leftovers for lunch. 

If you've never had tofu salad, it's basically uncooked firm tofu that you crumble up into pieces to resemble egg salad. Whip up a creamy dressing and add in some fruit, veggies, or fresh herbs and you get a refreshing and light lunch that can be eaten on its own or stuffed into a wrap or pita. 


I usually make a simple tofu salad with apples and a mustard dressing, but this time I changed things up a bit and made an Indian-inspired version.  I left out the mayo in the dressing and used yogurt instead, mixed with curry powder and mango chutney for a sweet-and-spicy combo.

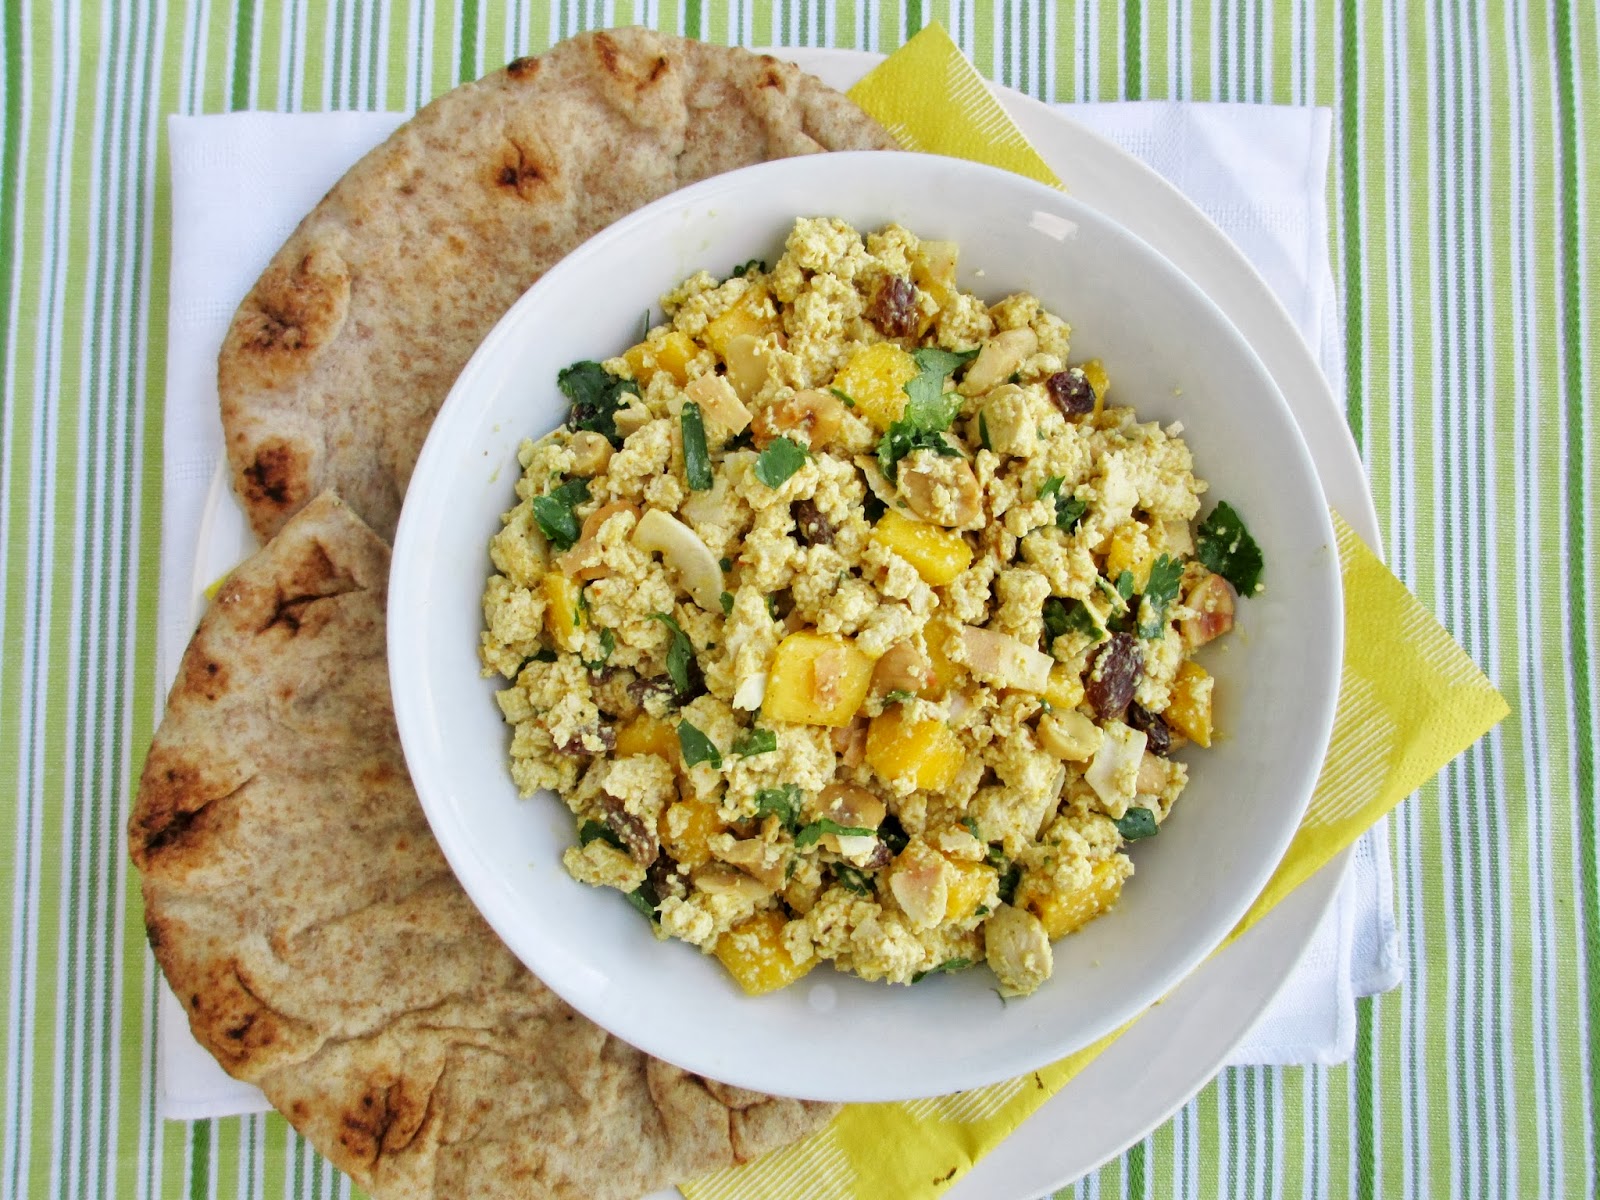
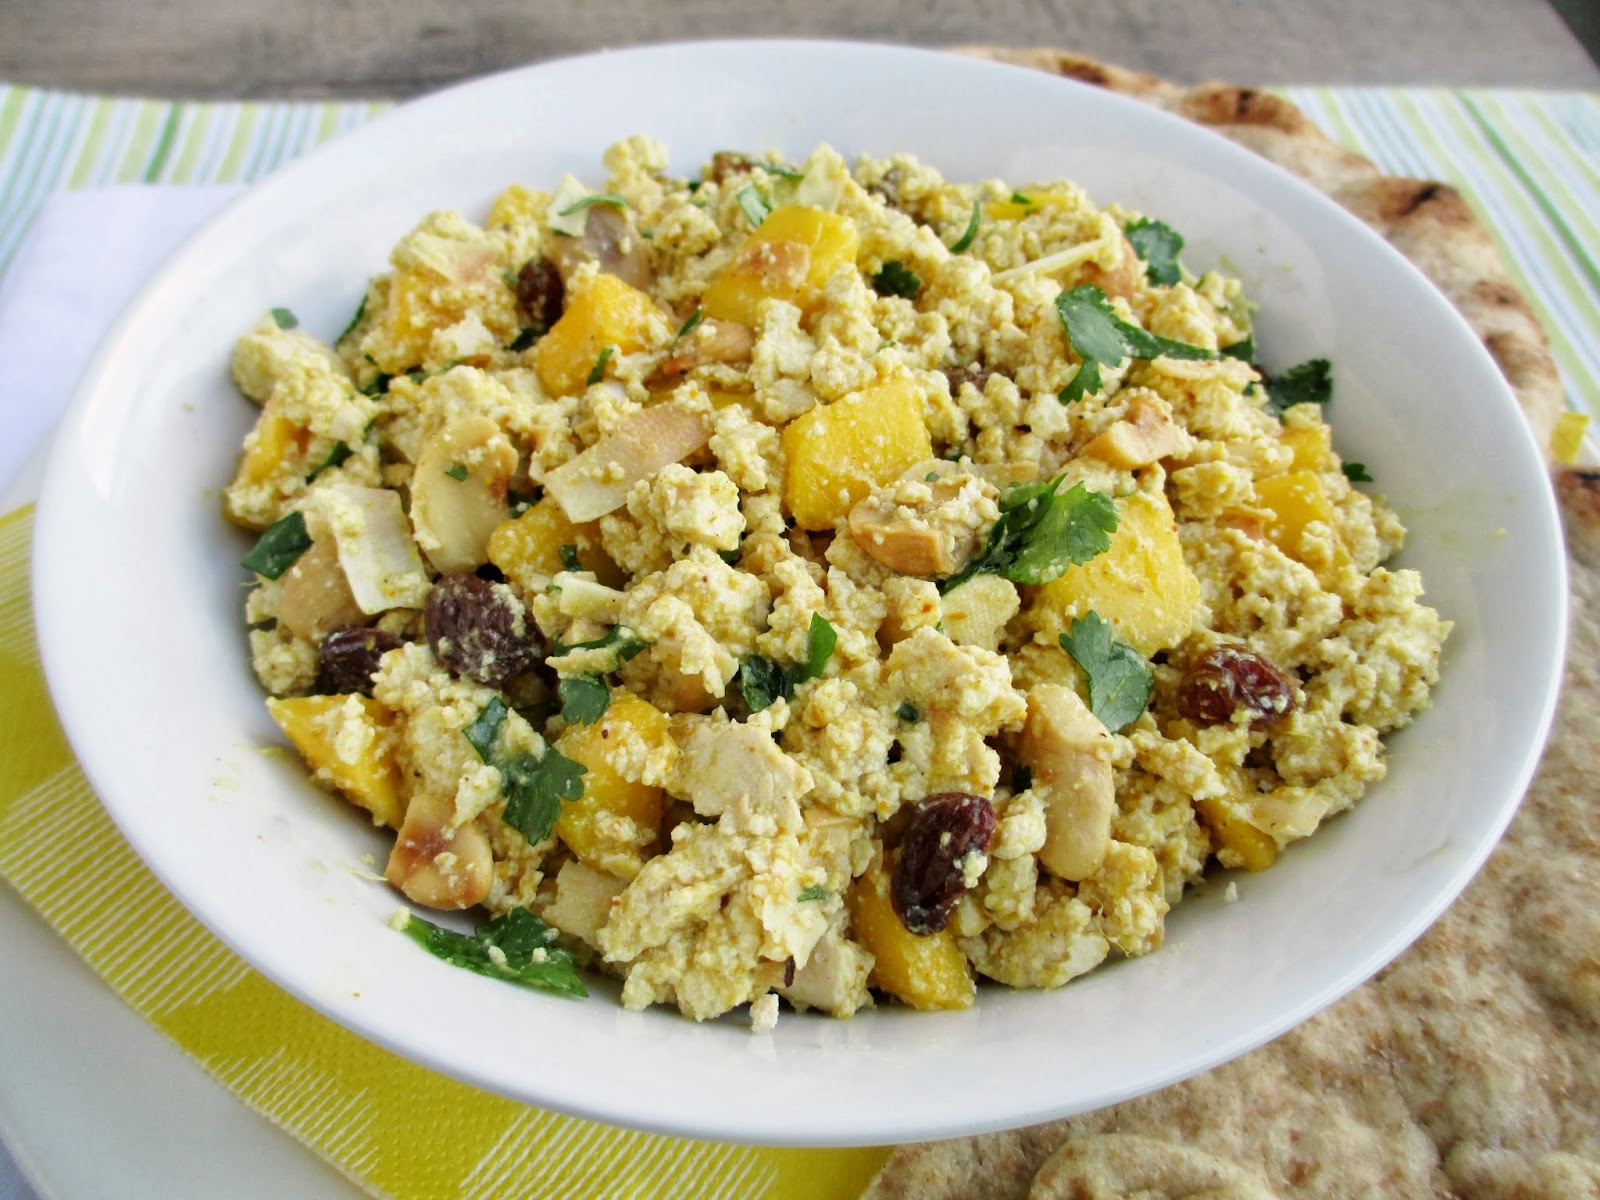
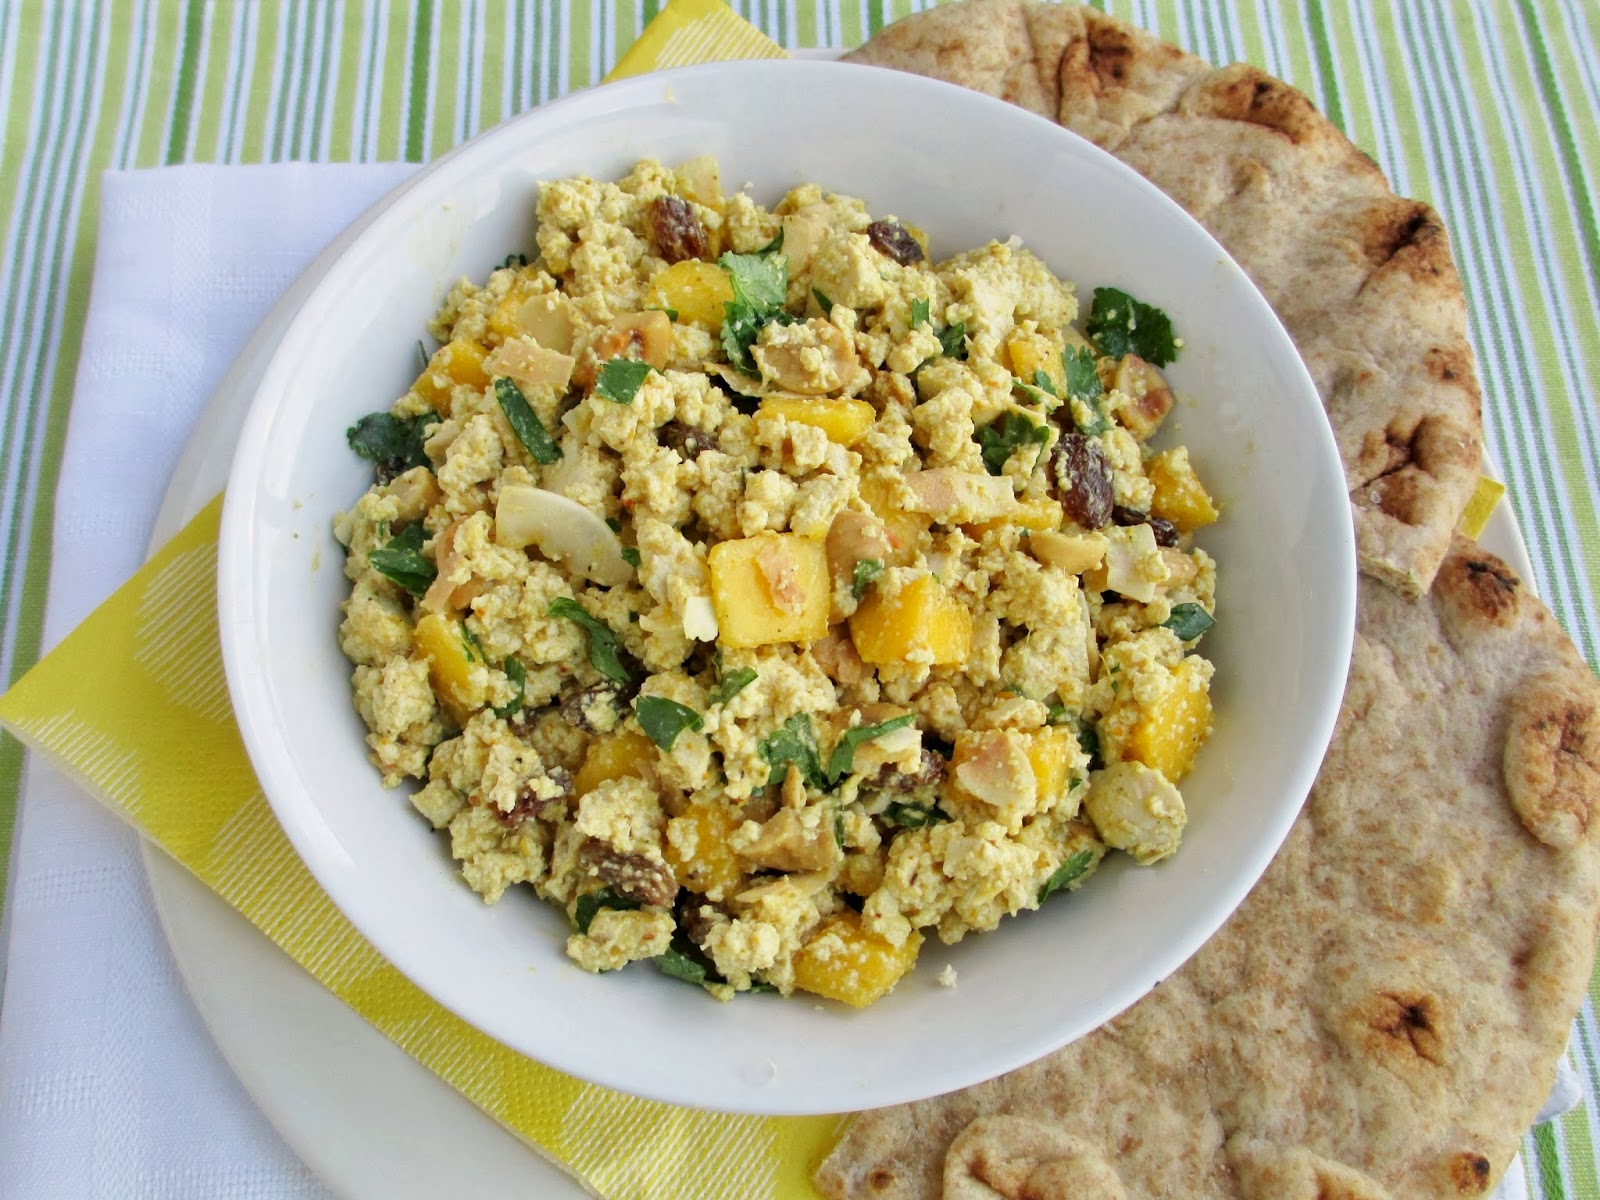
Along with the tofu, I added fresh chopped mango, cilantro, raisins, cashews, and toasted coconut for a mix of textures. The tofu soaked up the dressing to become extra creamy and cool, and I loved the burst of fruitiness from the mango along with the crunchy nuts and chewy coconut. 

I liked eating this both on its own and inside of a pita, or you could try toasting some naan bread to make naan "chips" and eating it like a dip! 


Mango Curry Tofu Salad
Inspired by Whole Foods Market and Eating Well

1 small package (175g) firm tofu
1/2 a large ripe mango, chopped into small pieces (about ½ cup)
2 tbsp unsweetened flaked coconut
2 tbsp chopped roasted cashews
2 tbsp sultana raisins
2 tbsp chopped fresh cilantro
1/4 cup plain low-fat yogurt (use vegan yogurt if desired)
2 tbsp mango chutney
1 tsp curry powder
Dash of salt and pepper

Slice the tofu in half and press between layers of paper towel under a heavy book for about 15 minutes to remove some of the water. Crumble the tofu using your hands or a fork into a bowl. Add the mango to the bowl.

Heat a small skillet over medium-low heat. Add the coconut flakes and toast just until they start to turn light brown. Immediately remove from pan and add to the tofu mixture.  Add the cashews, raisins, and cilantro to the bowl as well and toss to mix everything.

In a separate small bowl, stir together the yogurt, mango chutney, curry powder, salt and pepper. Pour this mixture over the tofu salad and stir well to mix.

Chill in the fridge until ready to serve.  Eat on its own, with naan bread, crackers, or stuffed into pitas.

Makes 2 servings.


August 06, 2013

Vegan Tropical Mango Ice Cream


As I mentioned in my last post, I just got my first ice cream maker this summer. I was always so jealous of other bloggers who dream up such inventive flavour combinations for ice cream that they can actually make at home, so I'm excited that I can finally join in!

So far, I've only experimented with vegan ice creams using coconut milk as the base rather than heavy cream or eggs. I figure I can go out and and buy decadent ice cream any time I want, so if I'm going to go to the effort of making my own personalized ice cream, I might as well take advantage of the opportunity to make it a bit healthier too!


I love tropical flavours and anything with mango, so when I saw a recipe for frozen mango coconut "thaiphoon" ice cream in my Vegan Planet cookbook, I knew I had to give it a try.

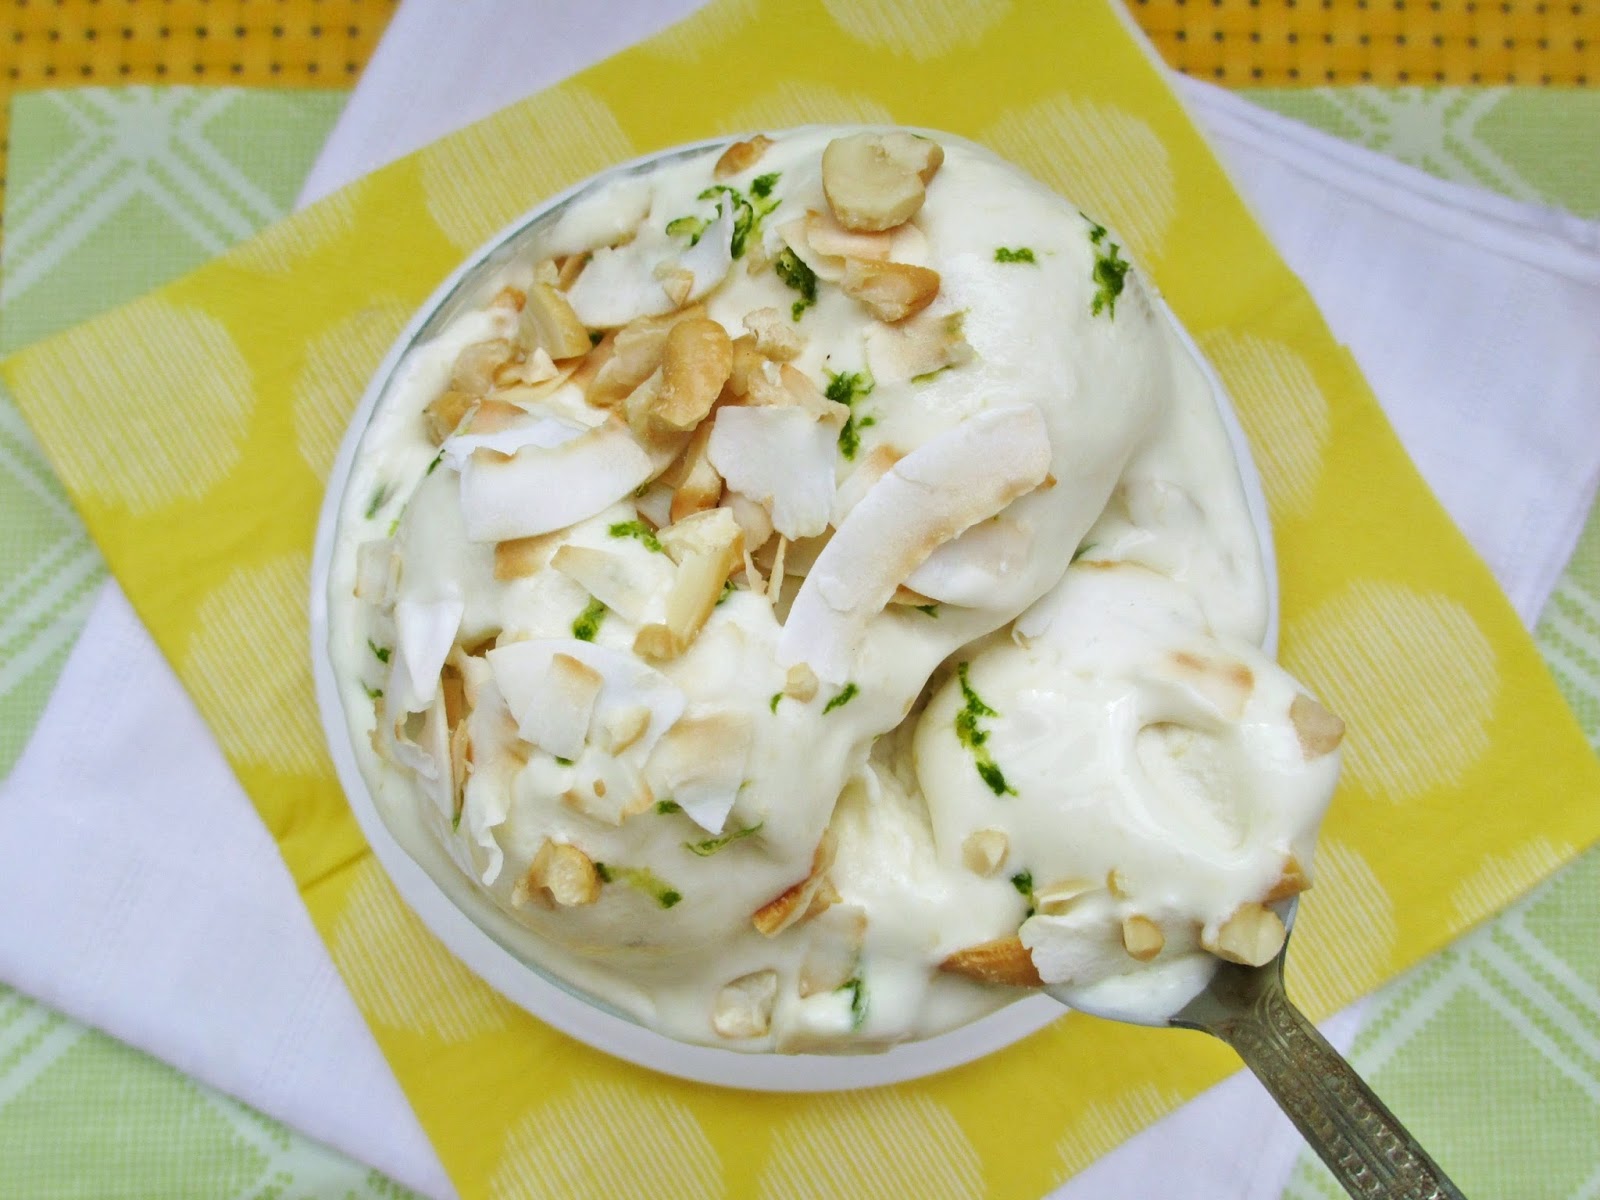
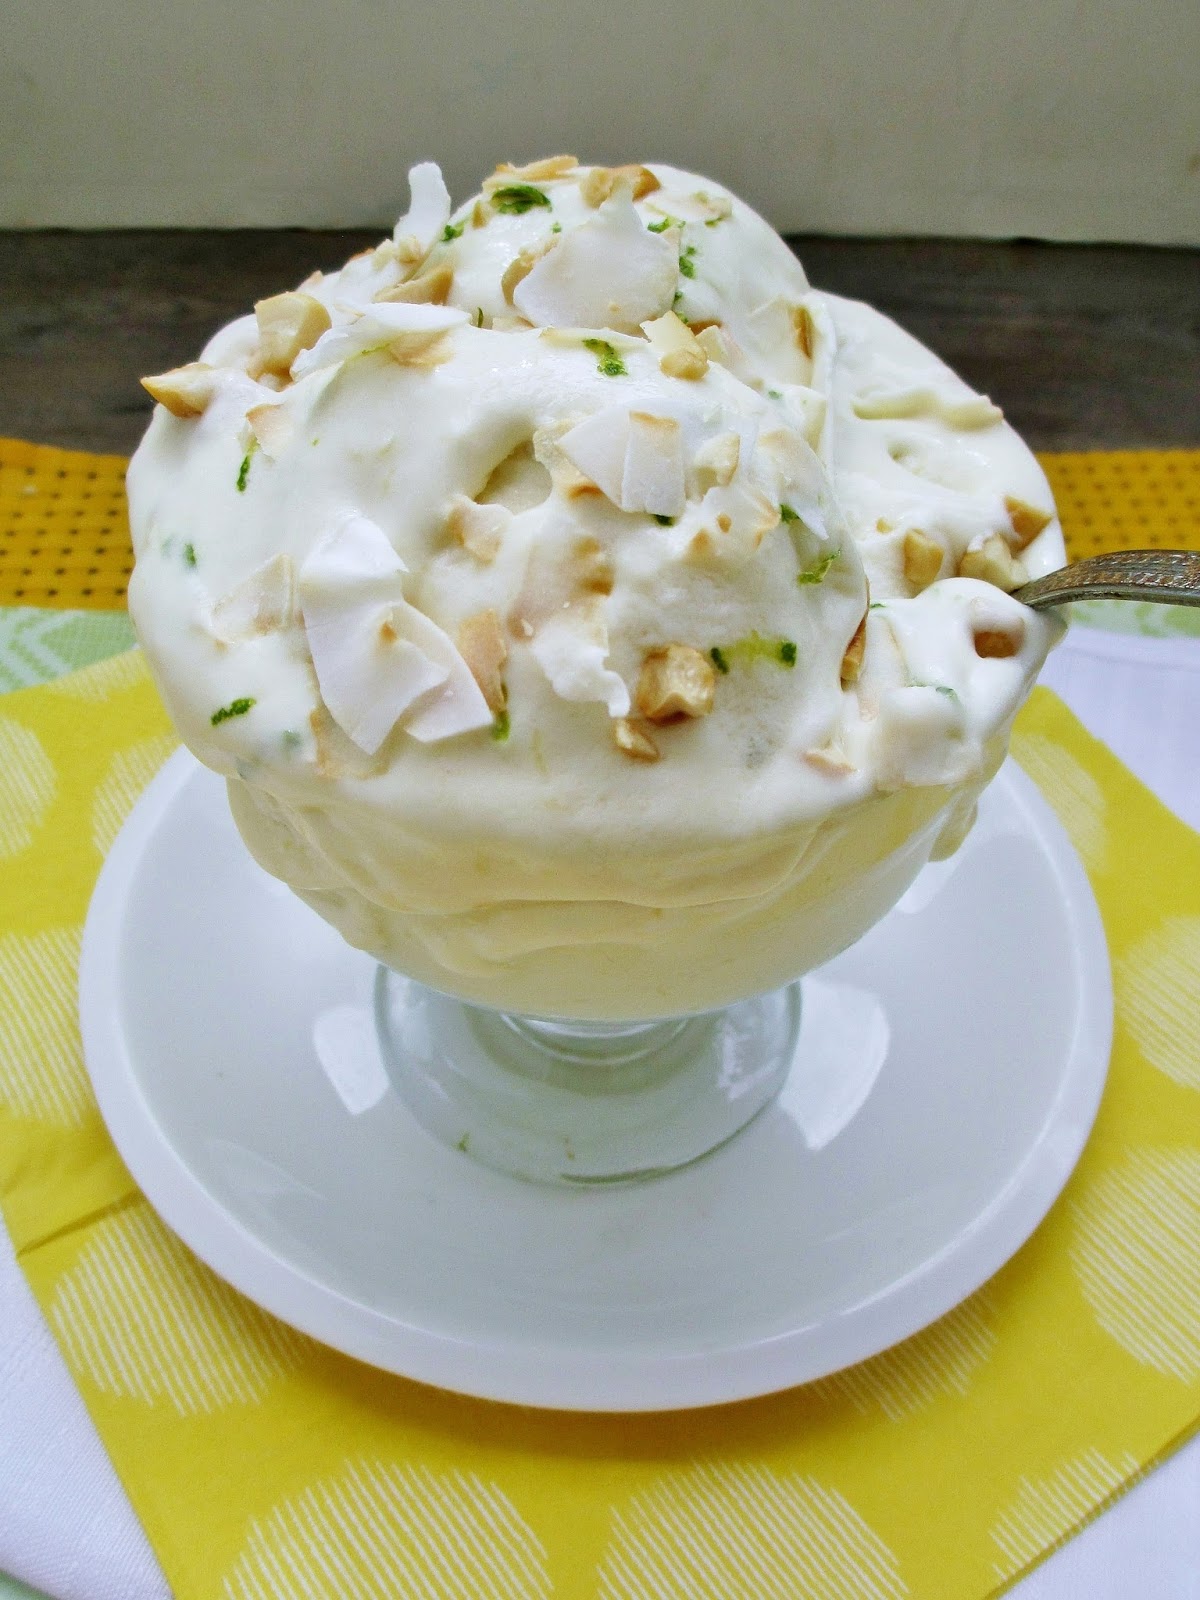
The ice cream itself is a blend of coconut milk, lime juice, and pureed mango, and I guess the "thaiphoon" part comes from the toppings that are added afterwards - chopped nuts, toasted coconut, and diced mango (which I forgot to add until after I took my photos and devoured most of the bowl!).


I liked this ice cream best just after it was churned, when it was still soft-serve consistency with a super creamy texture.

The ice cream itself wasn't too sweet and had hints of coconut and mango flavours with just enough lime. I loved the crunchy cashews and chewy coconut flakes sprinkled on top, but if you're not a fan of crunchy or chewy pieces in your ice cream, you can definitely eat it on its own and it will be just as tasty!

Now I just need the weather to cooperate and realize it's still supposed to be summer, not fall, so that I can keep making and enjoying more ice cream!


Tropical Mango Ice Cream
Adapted from Vegan Planet

Ice Cream Base
2 tbsp arrowroot powder
1/2 cup non dairy milk (I used almond milk)
2 cans full fat coconut milk
1/4 cup + 2 tbsp agave nectar
1 tsp lime zest
2 tbsp fresh lime juice
1 tsp vanilla extract
1 mango

Toppings (per serving)
~1/4 tsp lime zest (optional)
1 tbsp finely chopped roasted cashews (can substitute peanuts)
2 tbsp unsweetened coconut flakes, toasted
Diced fresh mango (optional)


In a small bowl, stir together the arrowroot and almond milk until smooth.

Add coconut milk to a saucepan and heat on medium until it just starts to simmer. Stir in the arrowroot mixture and reduce heat to medium-low. Continue to heat, stirring constantly, for about 5 minutes, until the mixture has thickened a bit. Remove from heat and stir in the agave, lime zest, lime juice, and vanilla extract.

Puree the mango by cutting it into pieces and blending in the small bowl of a food processor until smooth. To make it easier to blend, add 1-2 tbsp of the coconut milk liquid mixture. Stir the pureed mango back into the ice cream mixture. Let cool, then transfer to a container and chill in the fridge until completely cold, preferably overnight.

When ready, pour mixture into your ice cream maker and churn according to the manufacturer’s instructions. 

Eat immediately for soft-serve consistency, or return to the freezer for a couple of hours first to firm up more. (Note: if you're eating it from the freezer, let it thaw at room temperature for at least 15-20 minutes first, as it firms up quite a bit after being stored in the freezer for awhile).  

To serve, place desired ice cream amount in a bowl and top with a bit of lime zest, cashews, toasted coconut, and mango (if desired).


June 27, 2013

Maple Strawberry Shortcakes with Coconut-Maple Whipped Cream


As my Canadian readers know, this weekend is a holiday weekend with Canada Day falling on the Monday.  For many of us, that means a fun weekend full of BBQs, camping, fireworks, the beach, and spending time with friends and family.  I'm not sure how many of those things I'll get to squeeze in, but I'm looking forward to a relaxing long weekend!

And to celebrate the holiday on my blog, I wanted to share some kind of treat that would work either as a Canada Day recipe or just as a regular treat (since I know most of my readers are not Canadian).

Strawberry shortcake isn't necessarily known as being a "Canadian" dessert, but it's something I grew up with and have always loved. To me, it's a symbol of both Canadian summers and the local strawberry picking season - both of which have always seemed far too short!

Every time we came home with a basket of freshly picked strawberries, my sisters and I would request strawberry shortcake for dessert - a pillow of buttery, flaky biscuit topped with sliced strawberries and lots of whipped cream. I remember savouring every bite as we sat outside enjoying the warm weather, and trying to coordinate each of my bites so that I wouldn't run out of strawberries too quickly!


Now that I'm a bit older, I still love the traditional strawberry shortcake that I grew up with, but I wanted to create a new version using all vegan ingredients, since I prefer baking without dairy.

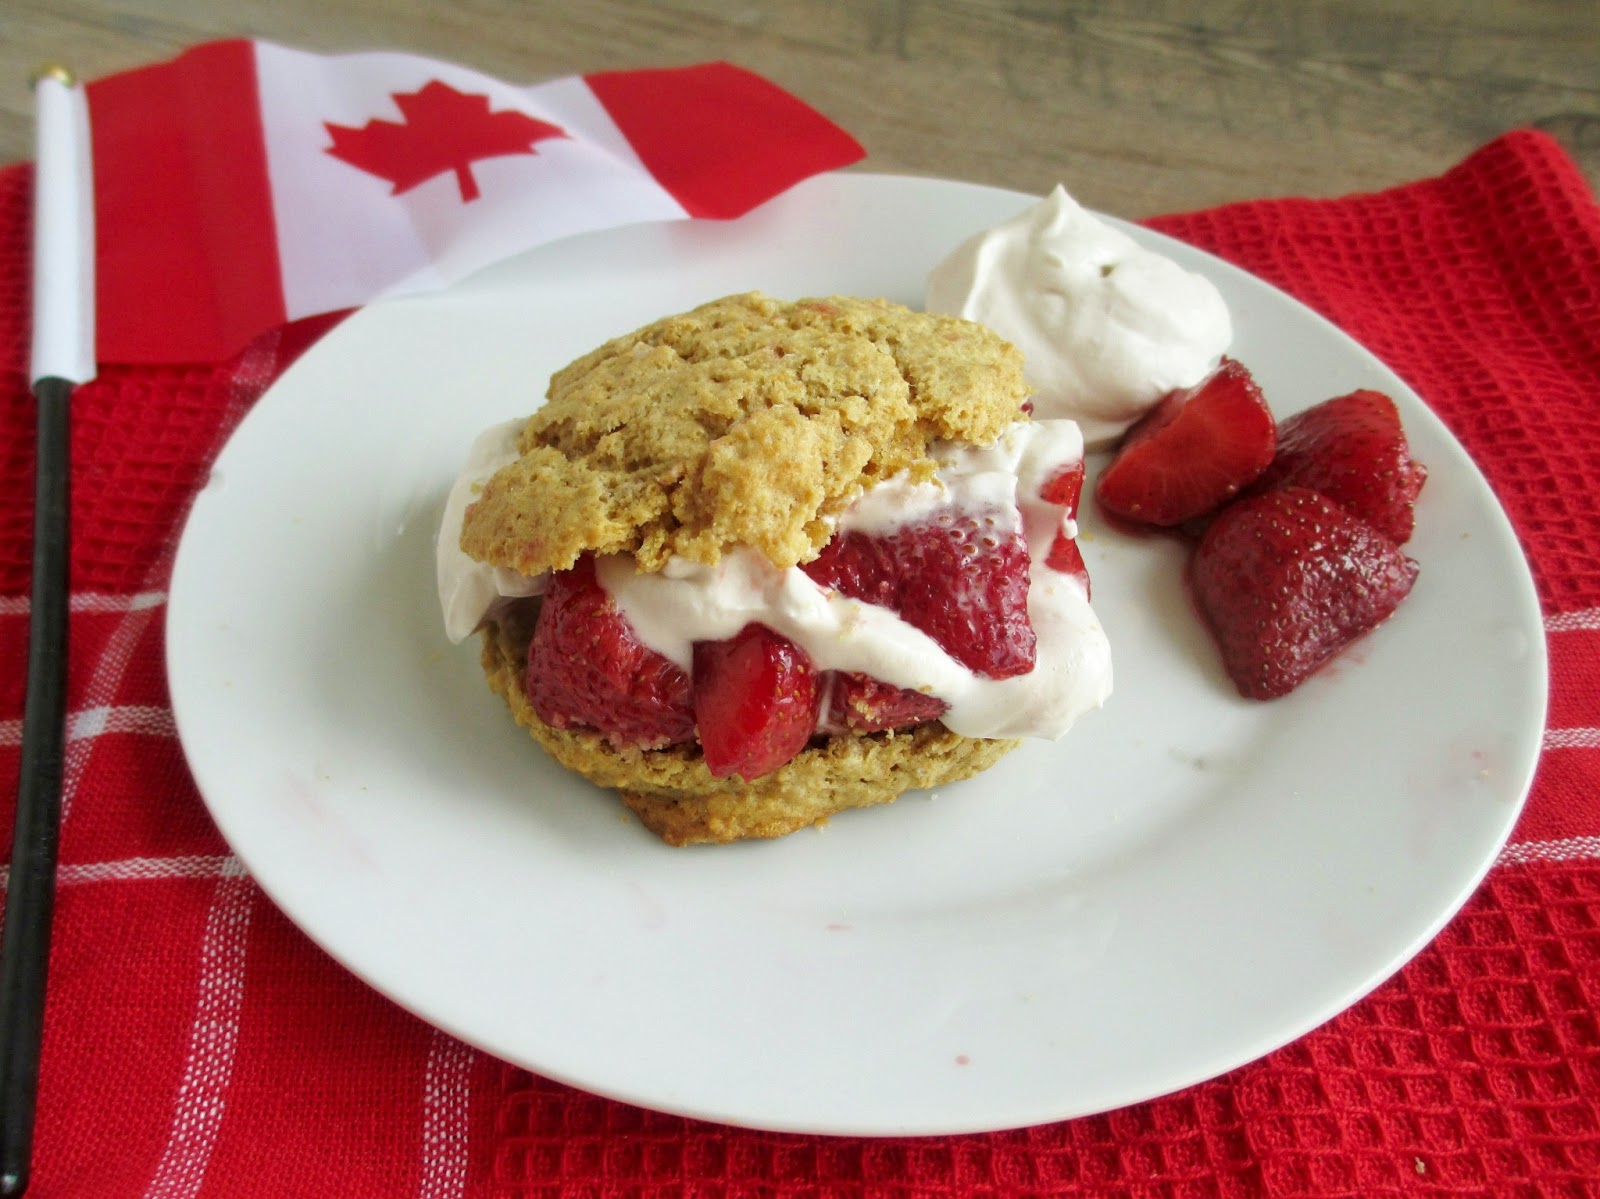
I also wanted to play up the Canadian theme, so I incorporated maple syrup - one of the well-known culinary symbols of Canada - into every component: the shortcakes, the strawberries, and the whipped cream!

The shortcakes, based off a recipe from The Healthy Everythingtarian, are made with coconut oil and soy milk instead of butter and cream, and I added a bit of maple extract for extra flavour.

Next was the strawberries - rather than just slicing them up, I wanted to make them a bit more special by roasting them in the oven with maple syrup and vanilla to get an even more concentrated flavour and make them nice and soft and juicy.

Finally, I made a fresh batch of coconut milk whipped cream (see posts from other blogs here and here if you're not familiar with this idea).  Instead of flavouring it with powdered sugar and vanilla like I usually would, I used maple syrup as the sweetener, along with a splash of maple extract.


Eating the maple shortcakes together with the roasted strawberries and maple whipped cream brought back memories of all the summers past when I would enjoy my strawberry shortcake desserts, but with new tweaks and flavours that made this version memorable in its own way.

I couldn't wait to dig in as soon as I finished taking photos of it, and I loved everything so much that I immediately went back for a second serving, telling myself it's acceptable to eat two helpings for breakfast!

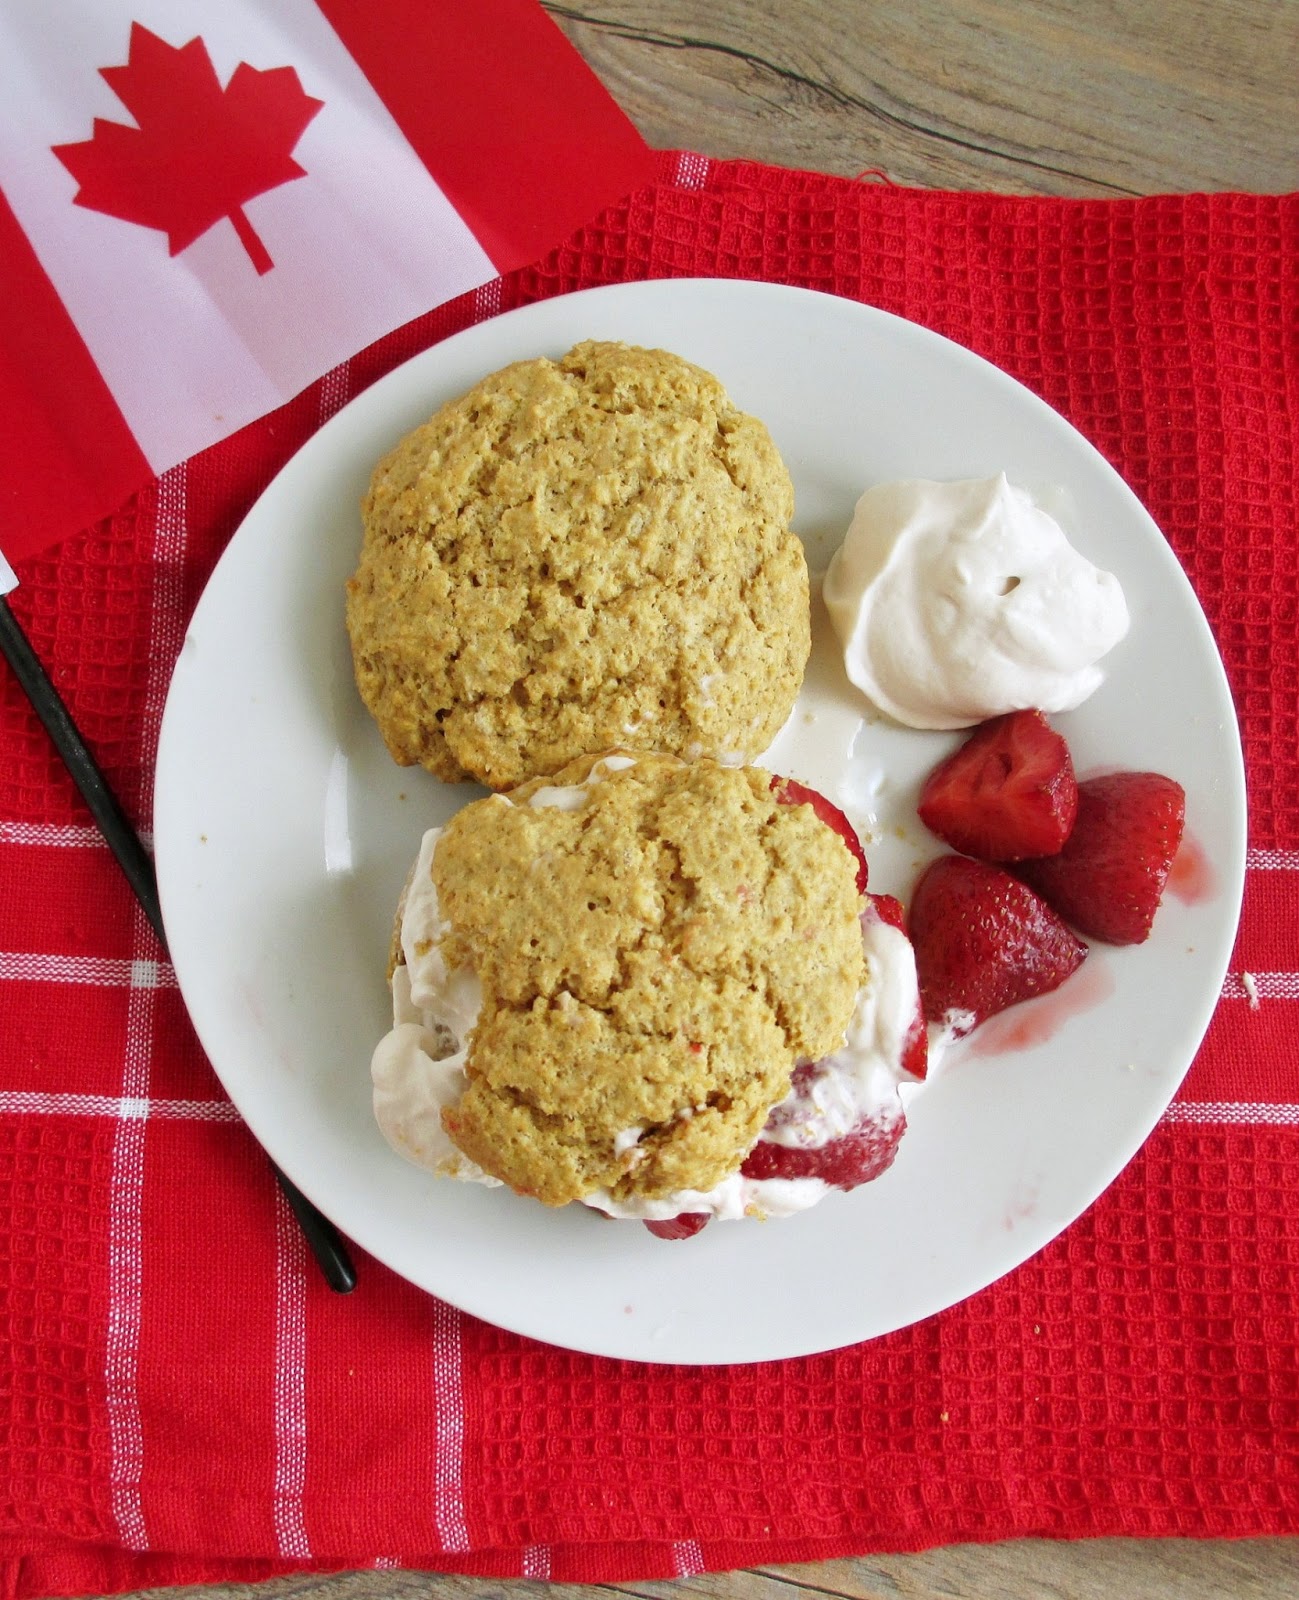
I was impressed with the texture of the shortcakes - they were soft yet crumbly, and I loved the sweetness of the maple to make them more of a treat than plain biscuits. The maple flavour was subtle throughout but still noticeable, and I loved the way the roasted strawberries just melted into the shortcake and the whipped cream.

I think this would make a great addition to a Canada Day meal for those of you who are celebrating the holiday this weekend, or just a great finish to a summertime meal any day!


Maple Strawberry Shortcakes with Coconut-Maple Whipped Cream
Shortcakes adapted from The Healthy Everythingtarian; everything else my own

Roasted Strawberries
2 cups halved strawberries (slice berries in half, then measure)
1 tbsp pure maple syrup
1/2 tsp vanilla extract

Shortcakes
1/3 cup non-dairy milk (I used vanilla soy milk)
1 tsp lemon juice
1 cup whole wheat pastry flour
1 tsp baking powder
1/4 tsp baking soda
1/4 tsp kosher salt
2 tbsp organic cane sugar
3 tbsp solid coconut oil
1/2 tsp maple extract

Whipped Cream
1 can coconut milk, chilled in the fridge for at least 1 day
2-3 tsp pure maple syrup
1 tsp maple extract


Preheat oven to 400°F.

Toss the halved strawberries with the maple syrup and vanilla. Transfer mixture to a small baking dish and roast in the preheated oven for 15-20 minutes, until the berries are softened (but still hold their shape). Remove from oven and set aside. Keep the oven turned on.

While strawberries are roasting, prepare the shortcakes. First, mix the milk and lemon juice together and set aside for at least 5 minutes. In a medium sized bowl, whisk together the flour, baking powder, baking soda, salt, and sugar. Add the coconut oil and use a fork or pastry cutter to cut it into the dry mixture, until it becomes dense, moist crumbs. Add the milk mixture and maple extract and stir just until the wet ingredients are incorporated. 

Use a 1/4 cup measure to divide batter into four equal biscuits.  Drop biscuits on a baking sheet lined with parchment paper, patting the dough into round shapes. (Tip: If your kitchen is warm, you might want to stick the baking sheet in the freezer for 5 minutes before baking to help the biscuits keep their shape and prevent them from spreading too much in the oven). Place baking sheet in the oven and bake for 12-15 minutes, until biscuits are lightly browned and a bit firm on top. Let cool on a wire rack.

While shortcakes are baking, prepare the whipped cream: Open the chilled can of coconut milk and scoop out the thickened cream portion on top into a bowl (leave the water in the can behind - you can drink it or discard it). Use a stand mixer or hand mixer to whip the cream until it becomes thick. Add the maple syrup one teaspoon at a time, beating it in after each addition, until you reach your desired sweetness level. Add the maple extract and beat again, until you have semi-stiff peaks (mine didn’t get quite as firm as regular whipped cream, but it will thicken up more in the fridge).

To serve, place a warm biscuit on a plate (you can slice it in half horizontally if you want). Top with one-quarter of the roasted strawberries and a generous helping of whipped cream. Repeat with remaining biscuits.

Makes 4 servings, plus extra whipped cream*.

*Note: the leftover whipped cream goes really well as a dip for fresh strawberries on their own too!

June 04, 2013

Apple Nachos


If you read my birthday recap post back in April, you may remember that I was given a fun new kitchen toy that I was really excited about: a spiralizer. Even though I haven't posted any recipes yet using my spiralizer, I have definitely been busy testing it out!

One of my favourite discoveries so far is that it isn't only useful for making noodles out of vegetables - it actually has three different blades ranging from skinny to wide, and the wide blade can be used sort of like a mandolin to make thin shavings.

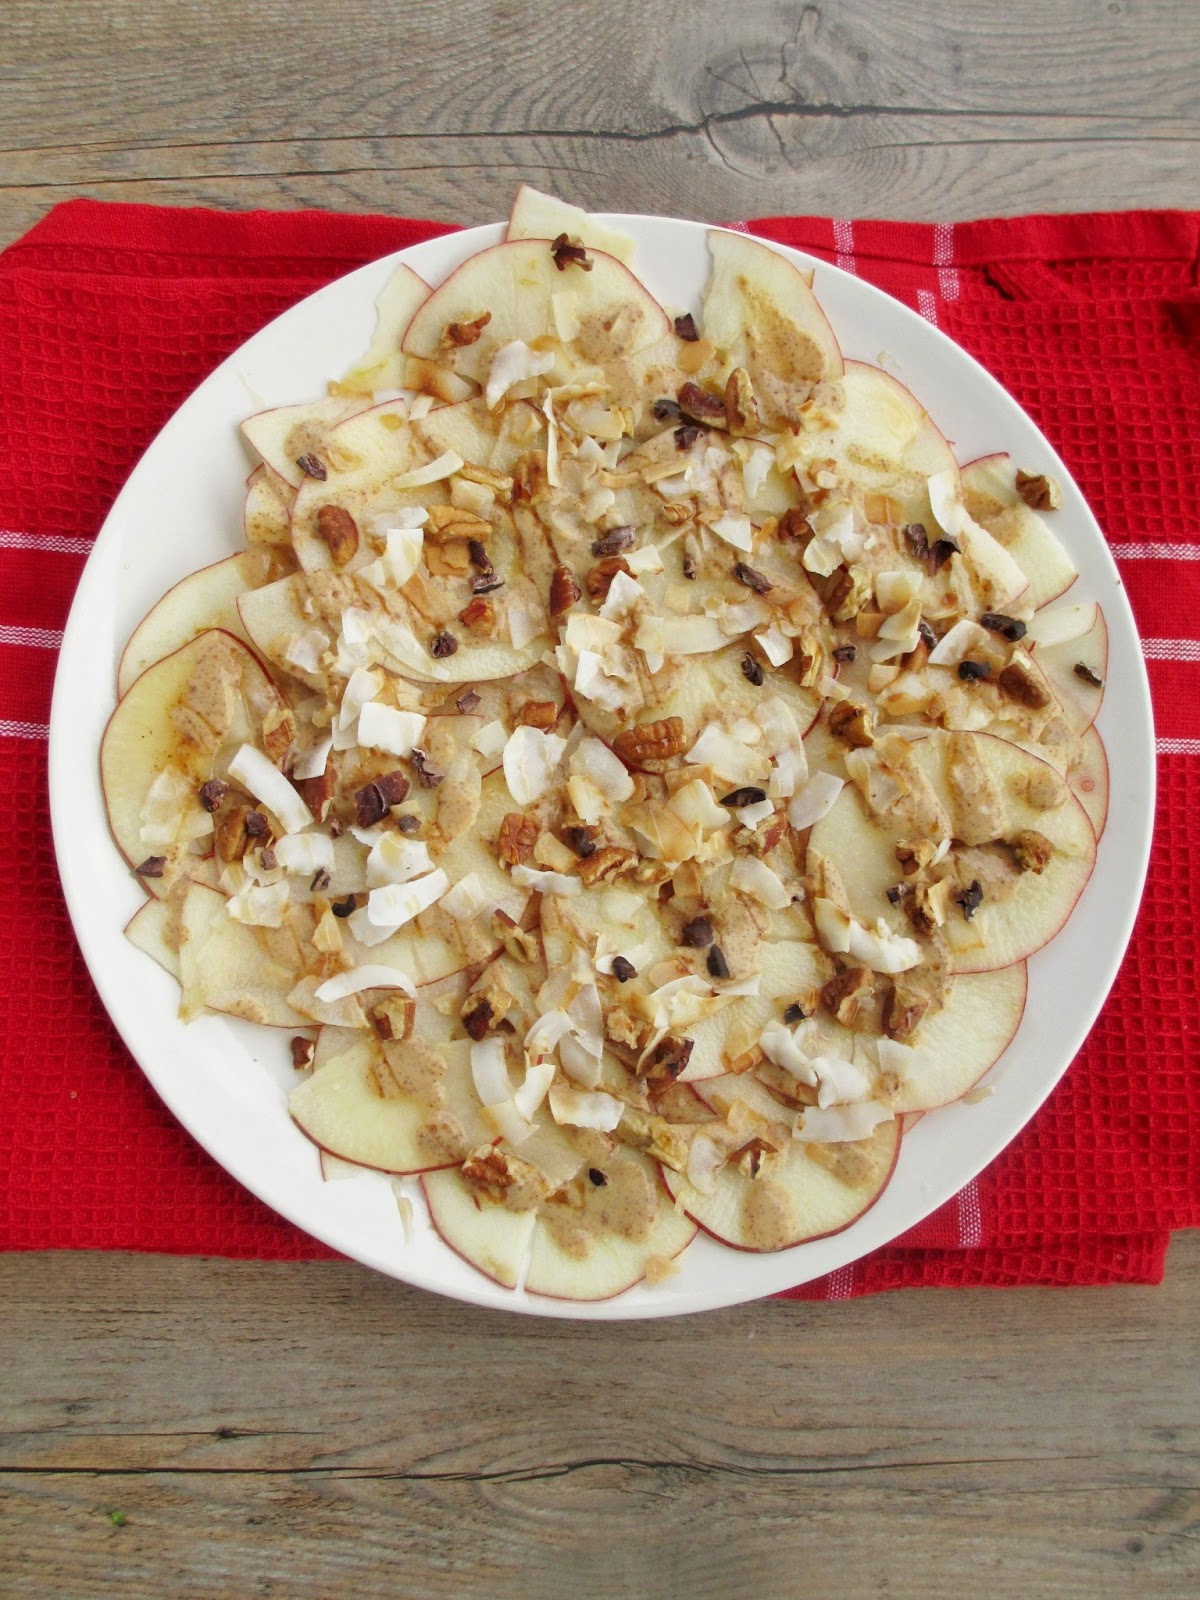
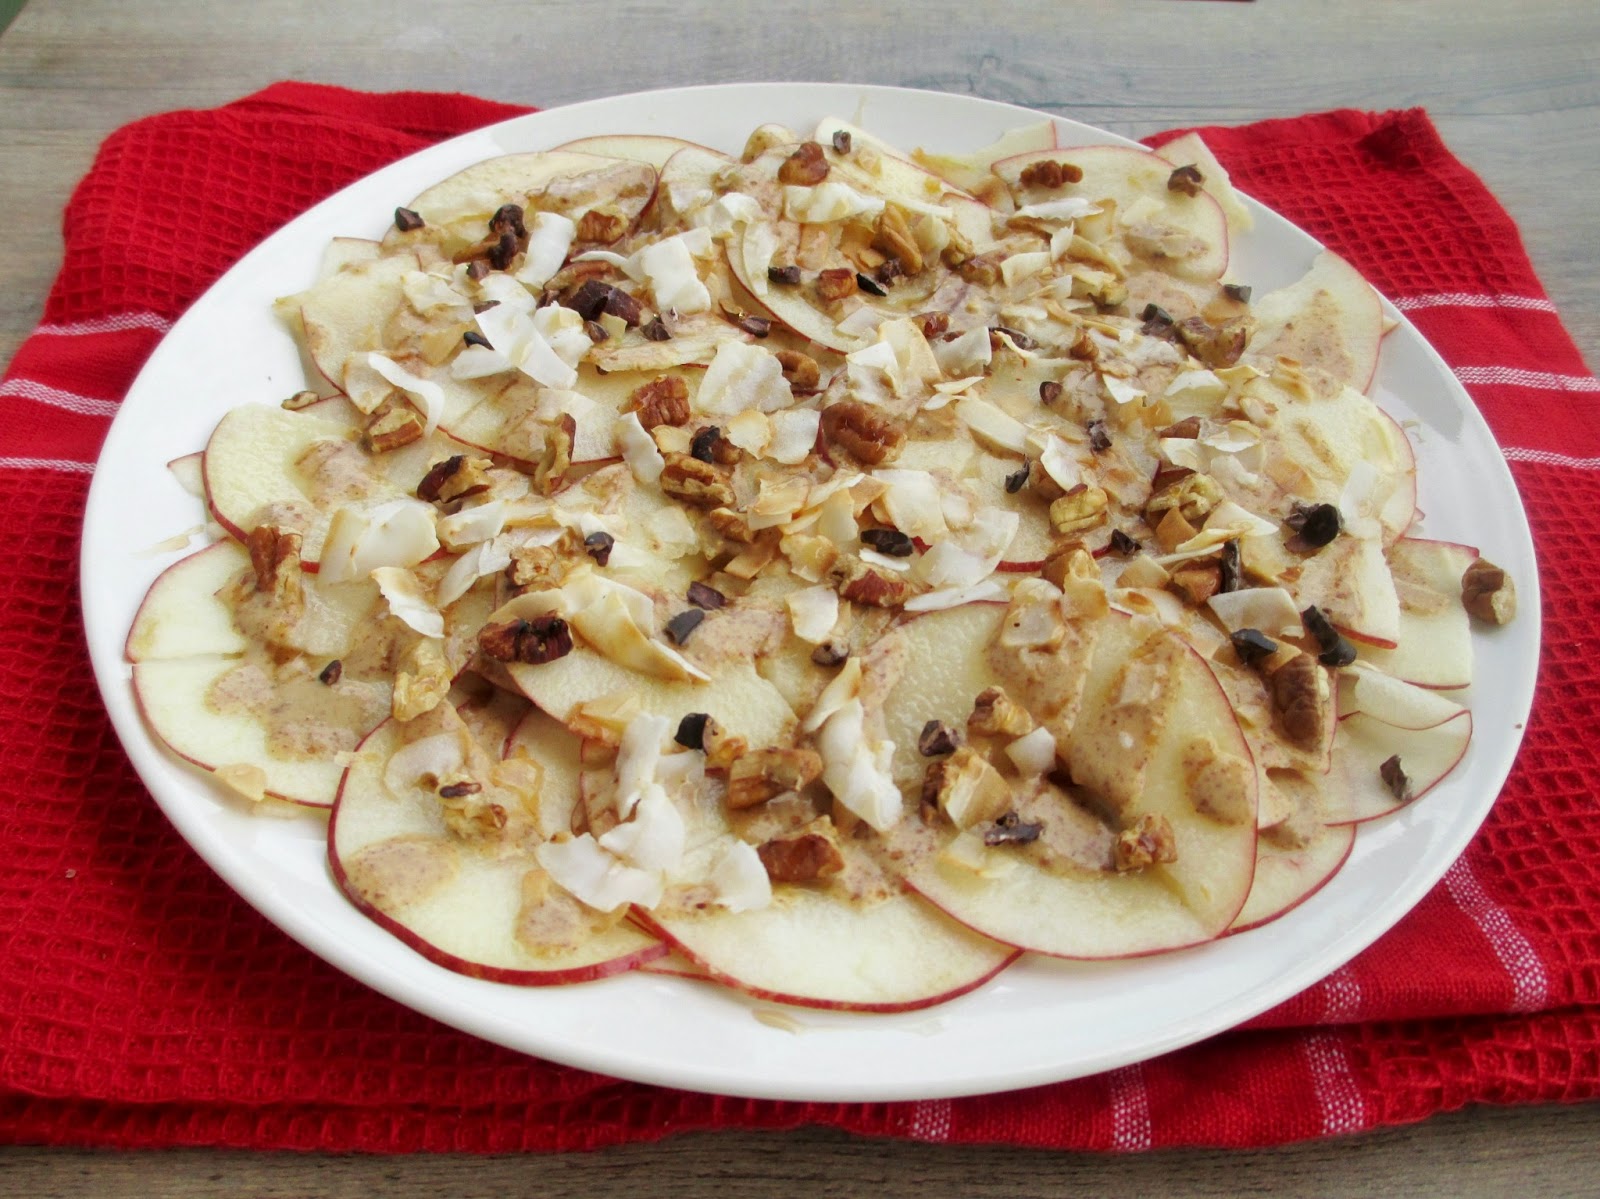
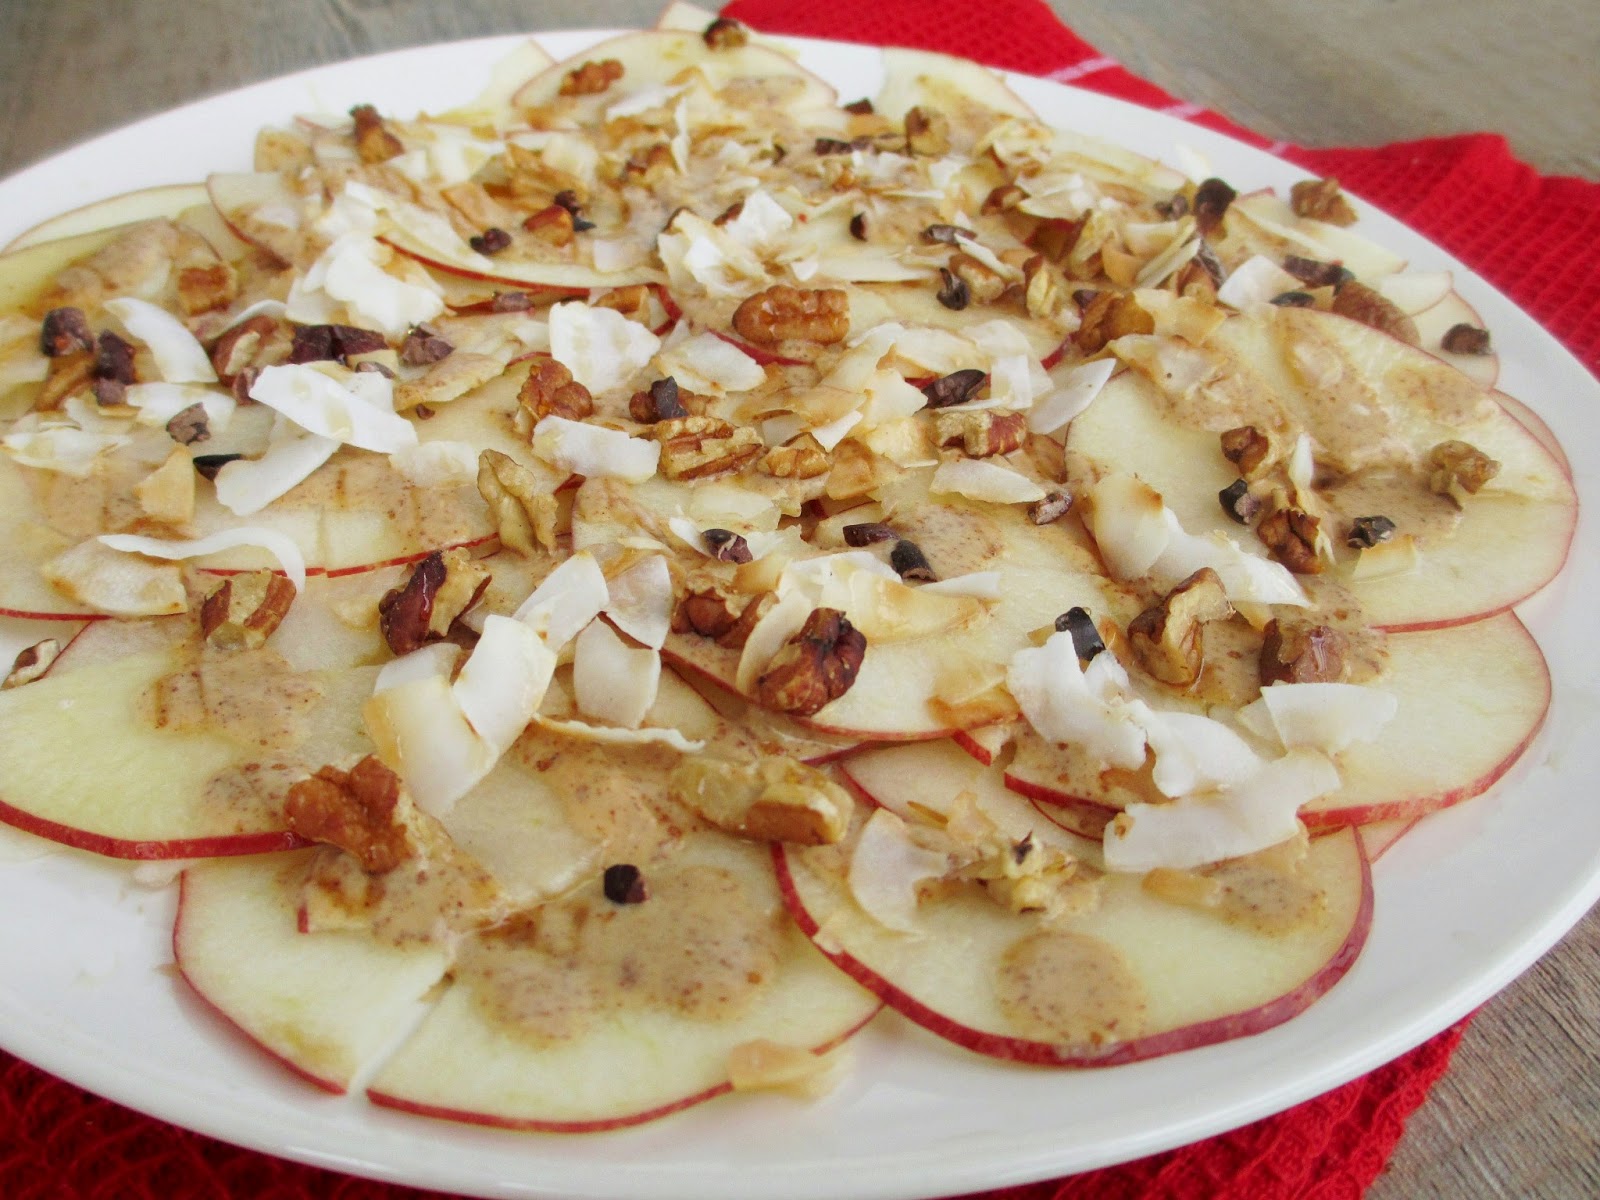
After brainstorming about what I could make with this handy setting, I remembered an idea I had seen throughout the blogosphere for making apple nachos. The basic idea is to layer thinly sliced apples on a plate, sprinkle them with your choice of sweet toppings, and voila - you have apple nachos!


Most of the recipes that I've seen turn the nachos into more of a dessert with toppings like caramel sauce, chocolate chips, and marshmallows, but I wanted to make a healthier version that could be eaten as an afternoon snack.

For my version, I made a peanut-cinnamon sauce using another one of my birthday gifts, PB2 powdered peanut butter, and used toasted pecans, coconut flakes, and raw cacao nibs as the other toppings.

I actually wasn't even planning on sharing my snack on my blog, but I ended up liking it so much that I had to  post the recipe! I loved the texture of the apples - slicing them so thin made them taste extra light and crisp, and they could easily be bent to scoop up the toppings.

I also liked the mixture of crunchy nuts and cacao nibs sprinkled on top, and my favourite part had to be the tasty peanut-cinnamon sauce - yum!  I think this would be a fun snack to make with kids, or for anyone looking for a healthy treat that still tastes like dessert.

And stay tuned later this week for another version of raw nachos!


Apple Nachos
Inspired by Manifest Vegan

2 tbsp PB2*
2 tbsp almond milk
1/4 tsp cinnamon
1-2 tbsp chopped pecans
2 tbsp coconut flakes
Raw cacao nibs
Drizzle of pure maple syrup
1 medium apple
Lemon juice

Start by making the sauce: In a small bowl, whisk or stir together the PB2 and almond milk until smooth. Stir in the cinnamon. Set aside. (Note: *If you don't have PB2, I would suggest using 1 tbsp peanut butter and either thinning it with a bit of almond milk or yogurt, or melting it in the microwave as the original recipe suggested). 

Heat a small skillet on the stove over medium heat. Add pecans and toast for a few minutes, until browned and fragrant. Remove from pan and set aside. Add the coconut flakes to the skillet and toast briefly, just as soon as they start to turn brown. Remove and set aside.

Slice your apple using the largest blade on a spiralizer (Note: I cut a small slit a few millimeters deep down the length of the apple first, from top to bottom, so that I would end up with separate apple pieces rather than a long unseparated strand). If you don’t have a spiralizer, you could try using a mandolin, or use a knife to get as thin slices as possible.

Once you’ve gone through half of the apple, drizzle the slices with lemon juice to prevent browning. Finish slicing the apple and drizzle more lemon juice over the slices.

Spread the apple slices out on a large plate. Drizzle the peanut sauce over top, then sprinkle the pecans, coconut flakes, and a handful of cacao nibs on top. Finish with a tiny drizzle of maple syrup if desired. 

Serves 1-2.

This was submitted to Wellness Weekend at Diet, Dessert & Dogs.

May 02, 2013

Mango Oat Cookies


The past week and a half has been pretty busy, with family events, birthdays, chores, and nice weather to enjoy, which meant that my blog and recipe development has been a bit neglected! I also feel like anything I've tried to bake recently has ended up somewhere on a scale from lacking flavour to strange texture to flatout inedible.

The one successful recipe I've managed to produce this past week was these mango cookies, which I made for a few family members and friends who needed a little something to brighten their day.

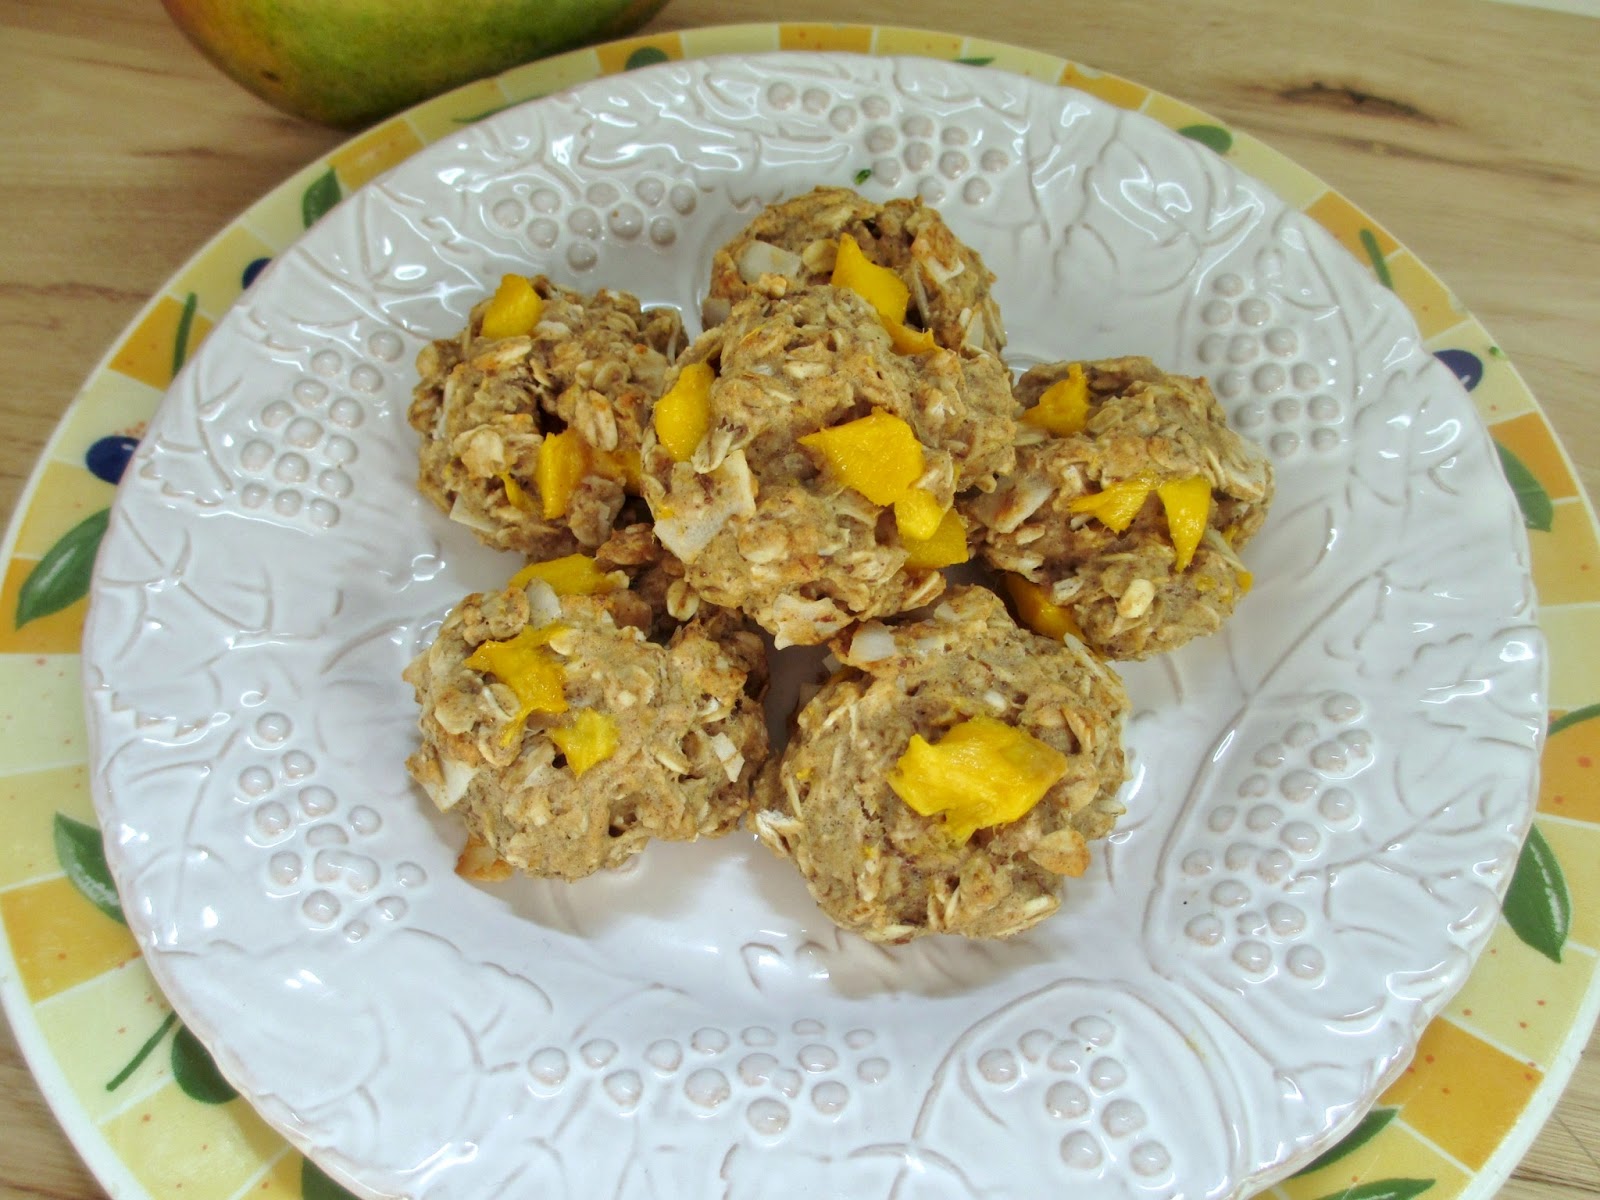
The inspiration for these cookies came from this recipe for strawberry banana nut oatmeal cookies on Vegan Yack Attack. I made a few modifications to the recipe, replacing the strawberries with mango, leaving out the nuts and adding coconut for a more tropical flair.

I wasn't sure if fresh mango would really work in a baked cookie recipe, but they turned out just how I was hoping! The cookies were nice and chewy from the oats and had just enough sweetness. I loved the addition of the coconut chips and the burst of ripe mango in every bite.

These are best eaten on the day they're made, but the recipe makes a smallish batch and the cookies themselves are pretty light tasting, so you shouldn't have a problem finishing them quickly!


Mango Oat Cookies
Adapted from Vegan Yack Attack

1 tbsp ground flax
3 tbsp water
1 cup all purpose flour (next time I would use at least half whole wheat flour)
1.5 cups rolled oats
1/2 tsp baking powder
1/2 tsp baking soda
1/4 tsp salt
1 tsp cinnamon
1 medium-large ripe banana, mashed
1/4 cup pure maple syrup
1/4 cup melted coconut oil
1 tsp vanilla extract
Heaping 1/2 cup diced ripe mango
1/4 cup coconut chips (or coconut flakes)

First, mix the flax with water and set aside to thicken. Preheat oven to 350°F and prepare a baking sheet by lining with parchment paper or spraying with cooking spray.

In a large bowl, whisk together the dry ingredients (flour to cinnamon). In a separate bowl, mix the mashed banana, maple syrup, coconut oil, vanilla, and the flax mixture.  Add wet ingredients to the dry ingredients and stir until the dry ingredients are incorporated.  Gently fold in the mango and coconut chips until they are evenly distributed.

Scoop out cookie dough in about 2-tablespoon sized portions and place on the prepared baking sheet about 1-2 inches apart. (Note: I found it easier to chill my dough for about 10 minutes before scooping to make it easier to work with). 

Bake for 15 minutes, until golden on the bottom and firm on top. Remove from oven and let cool on a wire rack.

Makes about 19 cookies. 

Note: These are best eaten on the day they are made, but can be stored in a sealed container at room temperature.


April 23, 2013

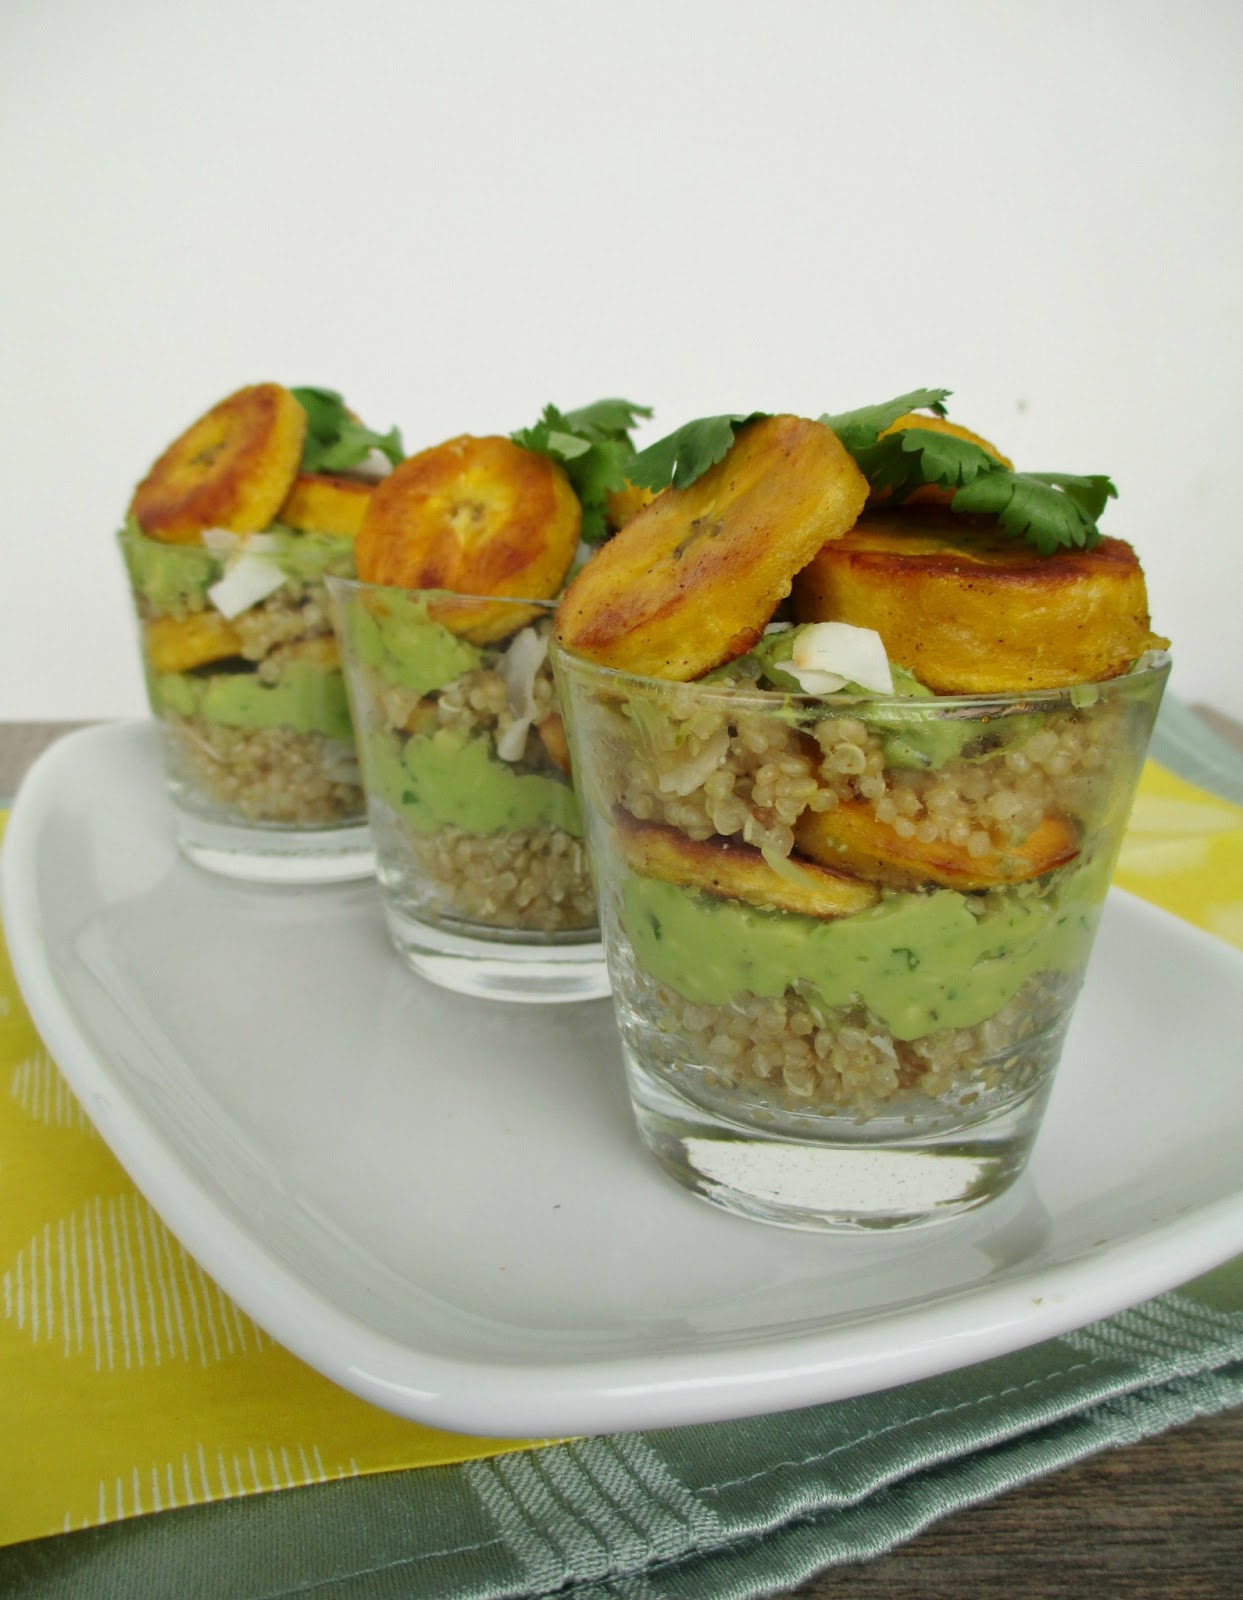
Layered Verrines with Coconut Quinoa, Avocado & Sauteed Plantains


It's a gorgeous day here in Ontario, so today's post will be a short one so that I can get outside and make the most of it before the rain returns tomorrow!

Plantains are one of my favourite things to eat, especially when combined with avocado and other tropical flavours like coconut. My plantain guacamole is one of my favourite recipes on the blog, and it also helped to inspire this dish.

The idea for layered quinoa avocado verrines first came from a recipe that I've made before from Vegetarian Times. While their recipe was more Mexican-flavoured and was topped with sprouts, I went for a tropical version topped with sauteed plantains.


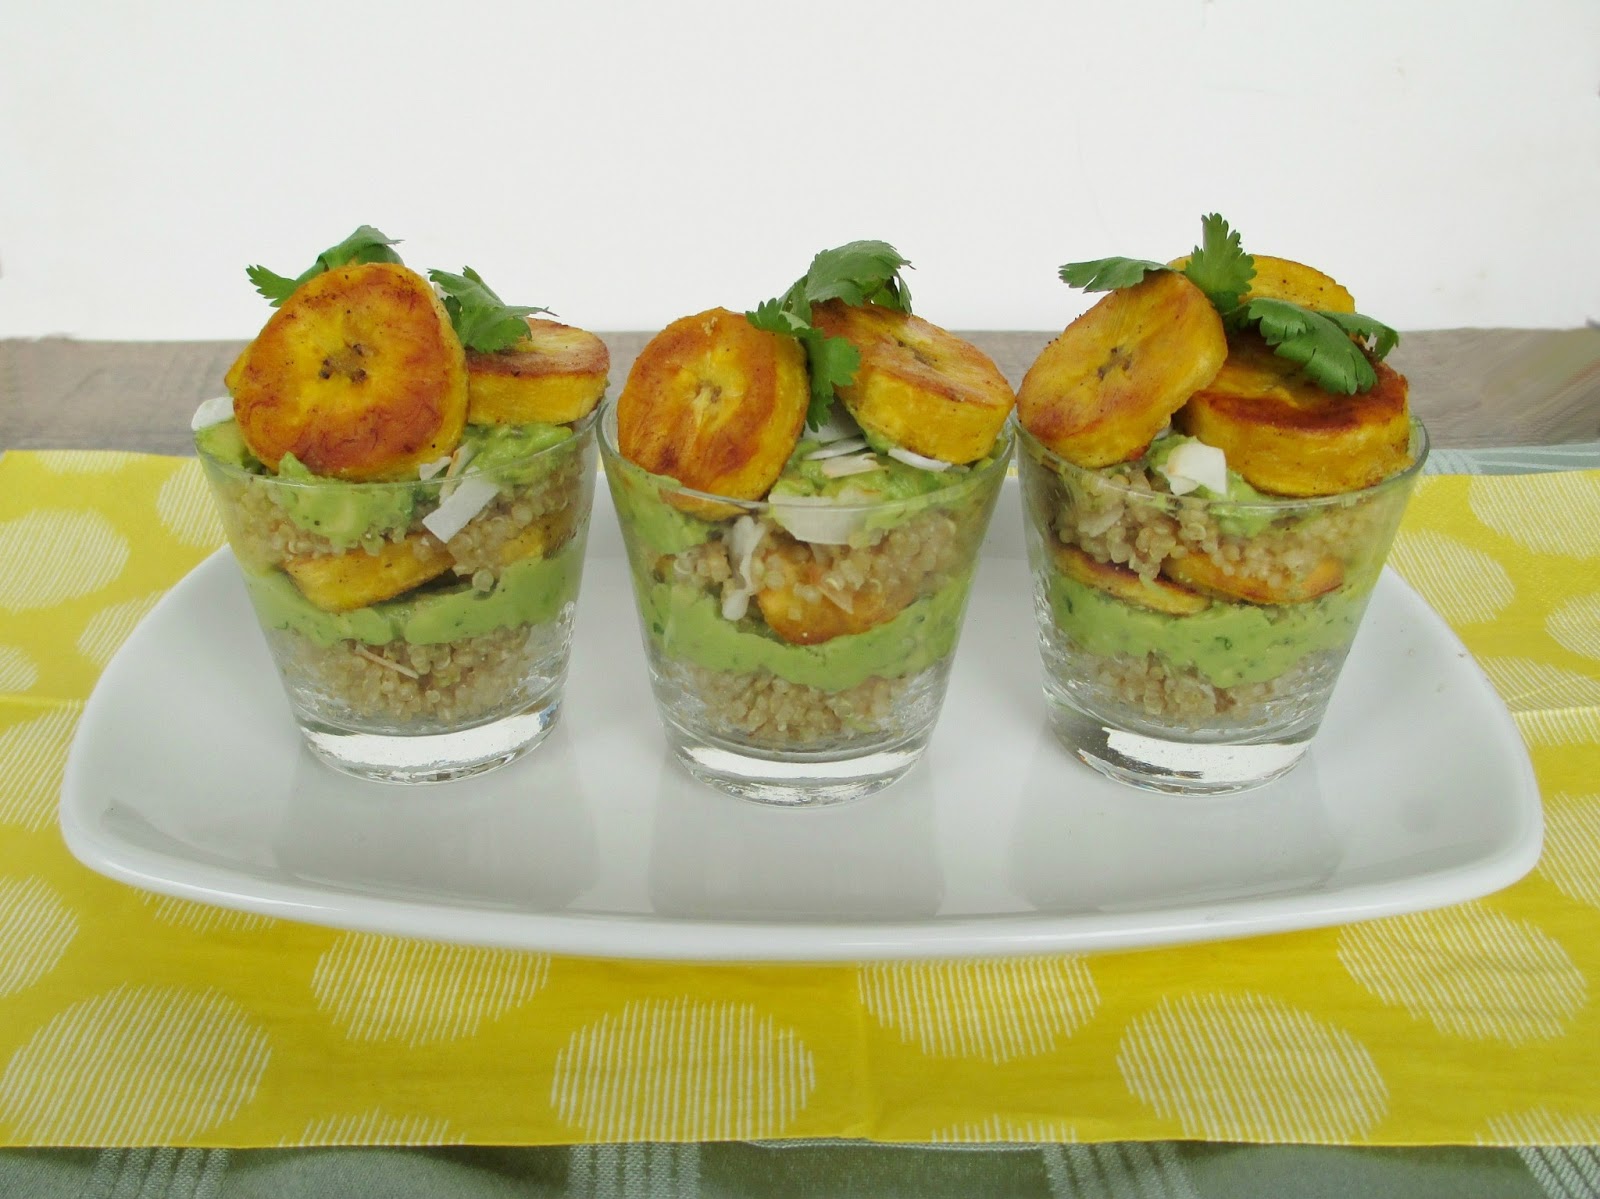
The three components to this recipe all have tropical notes: first is a coconut quinoa made by cooking the quinoa in coconut milk and stirring in a bit of lime zest and toasted coconut flakes; next is a layer of avocado pureed with lime juice and cilantro; and the final component is a layer of sweet ripe plantain slices cooked in coconut oil with a dash of spices.

I could happily eat any of the layers on their own, but they combine to make a creamy and flavourful dish that can either be served in small portions as an appetizer or in larger portions as a main dish. Layering each of the components into a little glass or cup makes for a fun presentation that you can even prepare ahead of time if you're serving them to a group.

Hopefully these tropical flavours will help you get through the last of the cold weather for those of you who are still seeing snow, and let's hope the warmer weather is here to stay!


Layered Verrines with Coconut Quinoa, Avocado and Sauteed Plantains
Inspired by Vegetarian Times

Quinoa:
2/3 cup canned coconut milk or coconut milk beverage
1/3 cup dry quinoa
1/4 tsp ground ginger
Pinch of salt
½ tsp lime zest
2 tbsp coconut flakes

1 ripe avocado
1.5 tbsp lime juice
2 tbsp chopped fresh cilantro
Salt and pepper
1 tbsp coconut oil
1 ripe yellow plantain, peeled and sliced
Dash of cumin
Dash of chili powder
Salt to taste

Heat the coconut milk in a small saucepan over medium-high heat. Once it starts to boil, stir in the quinoa, ginger, and a pinch of salt. Cover, reduce heat to low and simmer for about 15 minutes. Remove from heat and keep covered for 5 minutes. Remove lid, fluff quinoa with a fork and stir in the lime zest and coconut flakes. Keep aside.

Meanwhile, make the avocado sauce: Place the avocado, lime juice, and cilantro in a food processor. Season generously with salt and pepper. Puree until smooth. Set aside.

Heat a large skillet over medium heat. Add the coconut oil. Once the coconut oil is melted, add the sliced plantains and sprinkle them with cumin, chili powder, and salt to taste. Let cook for 5-6 minutes total, flipping the slices halfway through. Remove from the pan and let drain on a plate lined with paper towel.

To assemble, place a portion of the quinoa in the bottom of each glass (use about 2/3 of the quinoa for this layer). Top with a thick layer of the avocado puree. Next, add a few plaintain slices. Repeat the layers once more, ending with the rest of the plantains on top. Garnish with extra cilantro and coconut flakes if desired.

Makes 3 servings.

April 12, 2013

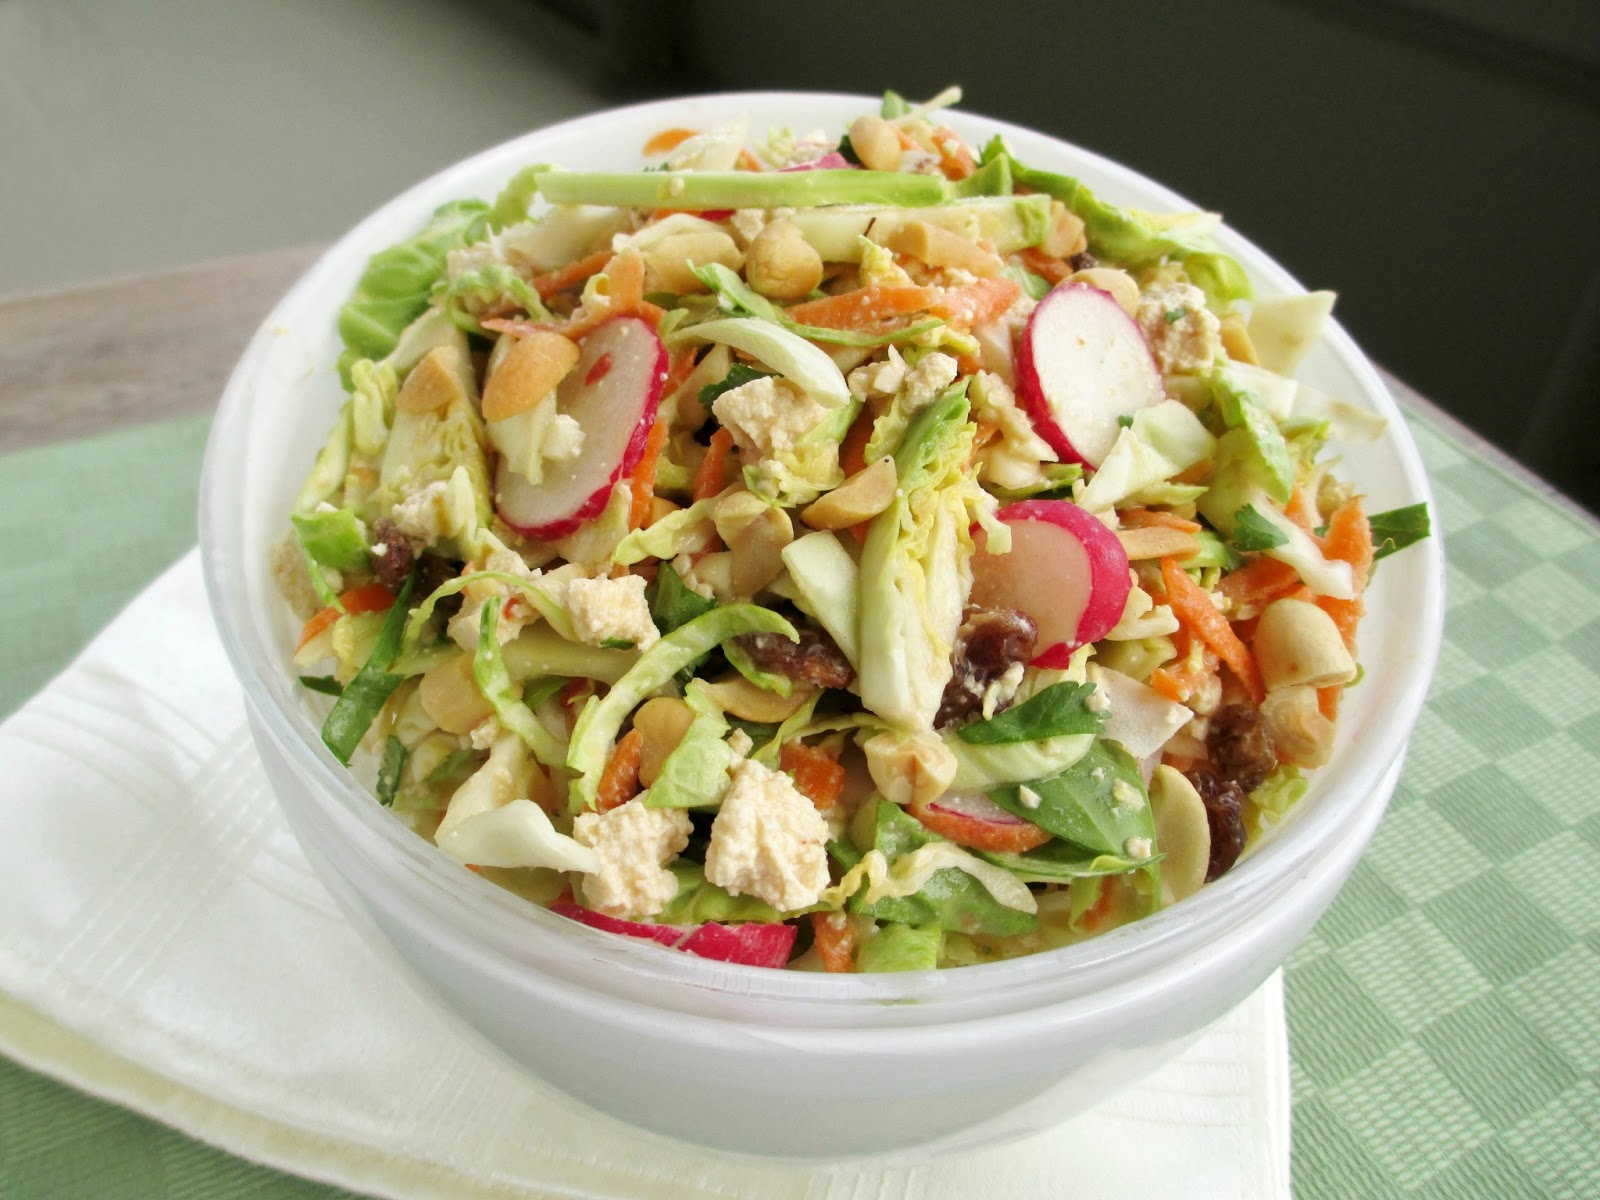
Brussels Sprout, Cabbage & Tofu Slaw with Coconut-Peanut Dressing


Today's post is one of the more interesting salads I've had in a while. I'm not really sure whether to call it a twist on tofu salad, or a twist on cabbage slaw, so I guess it's a cross between the two!

The bulk of this slaw, which I adapted from Peachy Palate, comes from a mixture of shredded cabbage and raw brussels sprouts. If you've never had raw brussels sprouts, you might be surprised to hear that you can actually eat them just sliced up and tossed in a salad without any cooking. I like the crisp texture and the mild flavour that they add, although of course if you already hate brussels sprouts then I'm not going to try to convince you to try them raw!

The second main component of this slaw is crumbled tofu. Again, it isn't cooked - just drained from the package and crumbled up with your hands, and again, if you're nervous about trying tofu this way then don't worry - it will soak up the dressing really well and tastes delicious!


The dressing is one of my favourite types - a peanut butter based dressing with a bit of lime juice, garlic and ginger, and thinned out with coconut milk. The coconut milk and agave nectar in the dressing put it more on the sweet side rather than spicy, which I thought was appropriate for this salad. I ended up with a bit of extra dressing but I used it all anyway and happily slurped up the excess from the bottom of my bowl!

Once you mix everything together, you end up with a cool and refreshing salad with a lot of different textures, from the creamy tofu to the crisp veggies. The final touches are a handful of peanuts for extra crunch, as well as raisins and coconut flakes to add even more layers of flavour.

This recipe makes a pretty big batch, but it holds up well in the fridge so I was able to enjoy it all week!


Brussels Sprout, Cabbage & Tofu Slaw with Coconut-Peanut Dressing
Adapted from Peachy Palate

3 cups thinly sliced Brussels sprouts (ends trimmed and outer leaves removed first)
2 cups shredded or thinly sliced green cabbage
1 cup shredded carrot (about 1 medium carrot)
1/2 cup thinly sliced radish
1/4 cup chopped fresh cilantro
~250 grams firm tofu, drained
1/4 cup sultana raisins
1/4 cup large flaked coconut, toasted
1/4 cup chopped peanuts

Dressing
1 cup unsweetened coconut milk beverage*
1/4 cup + 1 tbsp peanut butter
1 tbsp lime juice
2 tsp agave nectar
1 tsp minced fresh ginger
2 small cloves garlic, peeled and minced
1/4 tsp kosher salt
1/4 tsp red pepper flakes
Ground pepper to taste

First, make the dressing by combining all ingredients in a bowl or large measuring cup. Whisk until the peanut butter is thoroughly mixed in. Store in the fridge while you prepare the salad.

In a large bowl, combine the shredded brussels sprouts, cabbage, carrot, radish and cilantro. Toss to mix. Crumble the tofu using a fork or your hands and add to the bowl. Add the raisins. Pour the dressing over everything and toss to mix (Note: you may not need all the dressing).

Toast the coconut in a small skillet over medium heat for a few minutes, until lightly browned. When ready to serve, top the salad with the toasted coconut and peanuts.

Makes 4 large servings.

*I used a non-dairy coconut milk beverage, which made my dressing a bit thinner than it would be with full-fat canned coconut milk. Also, if you use a regular coconut milk beverage instead of unsweetened, you might want to reduce the agave a bit.

March 28, 2013

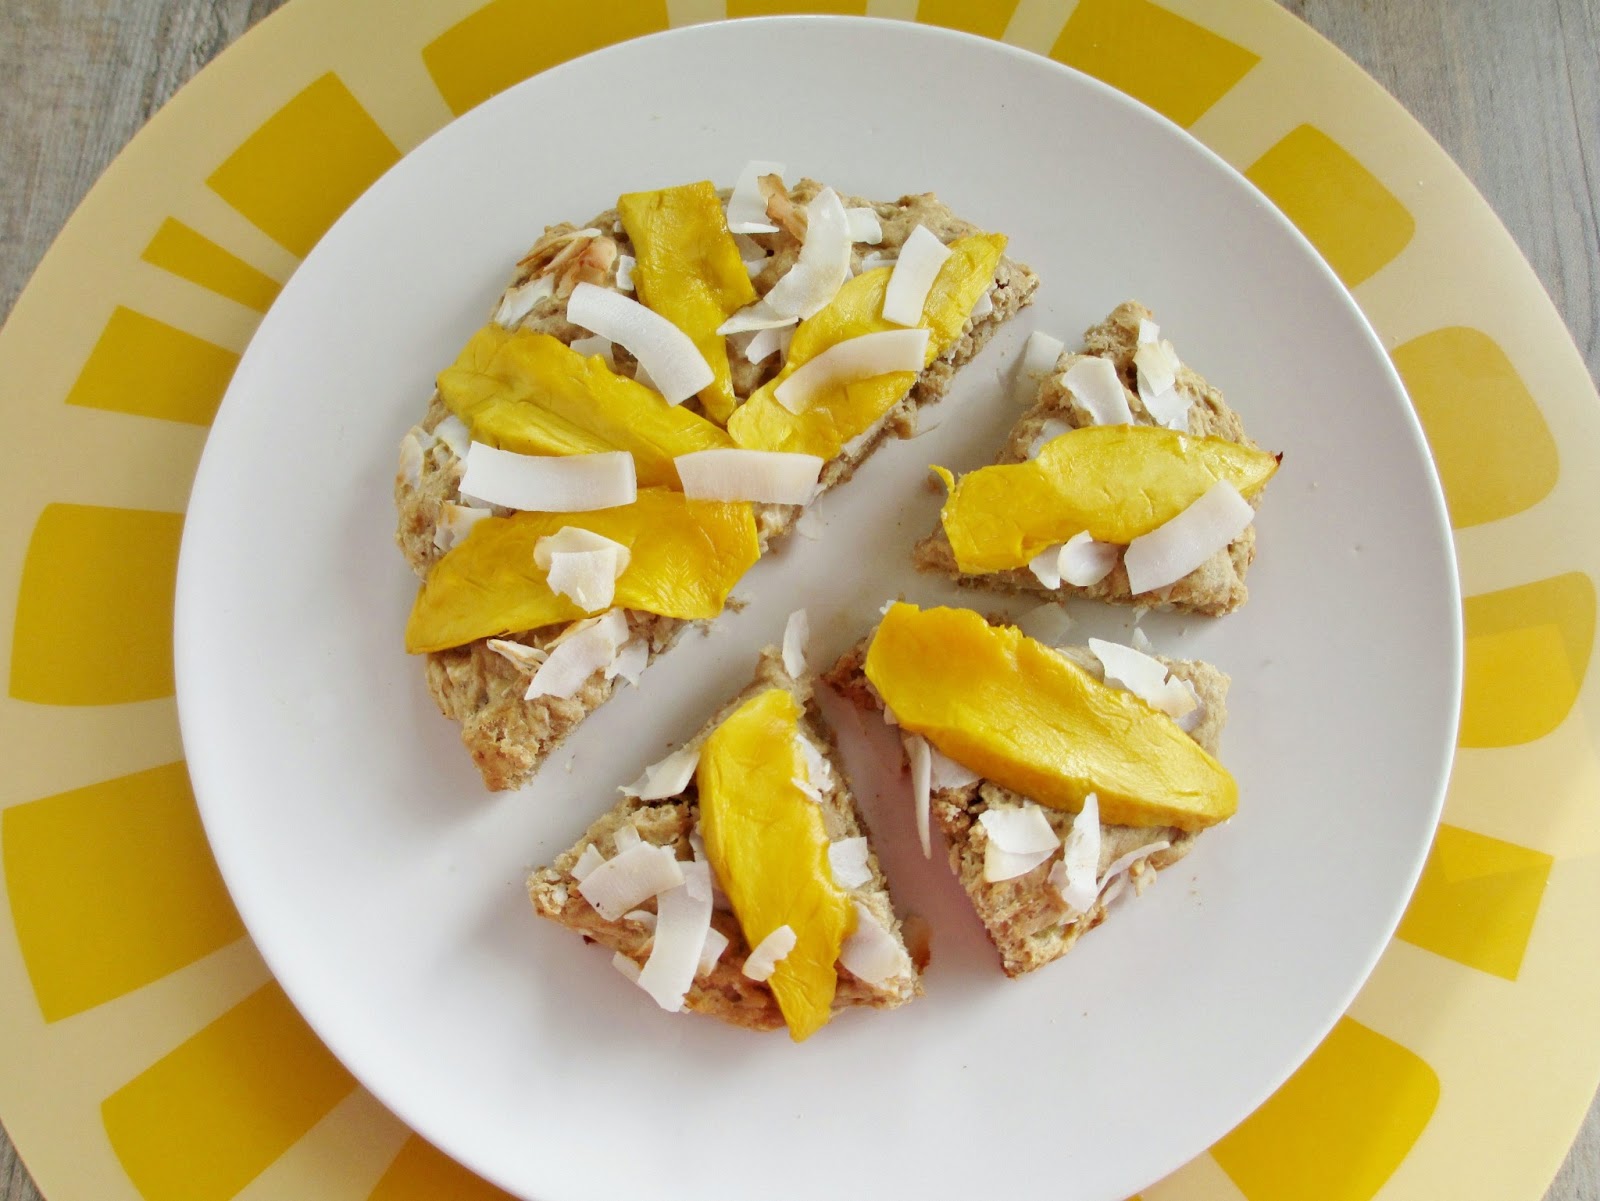
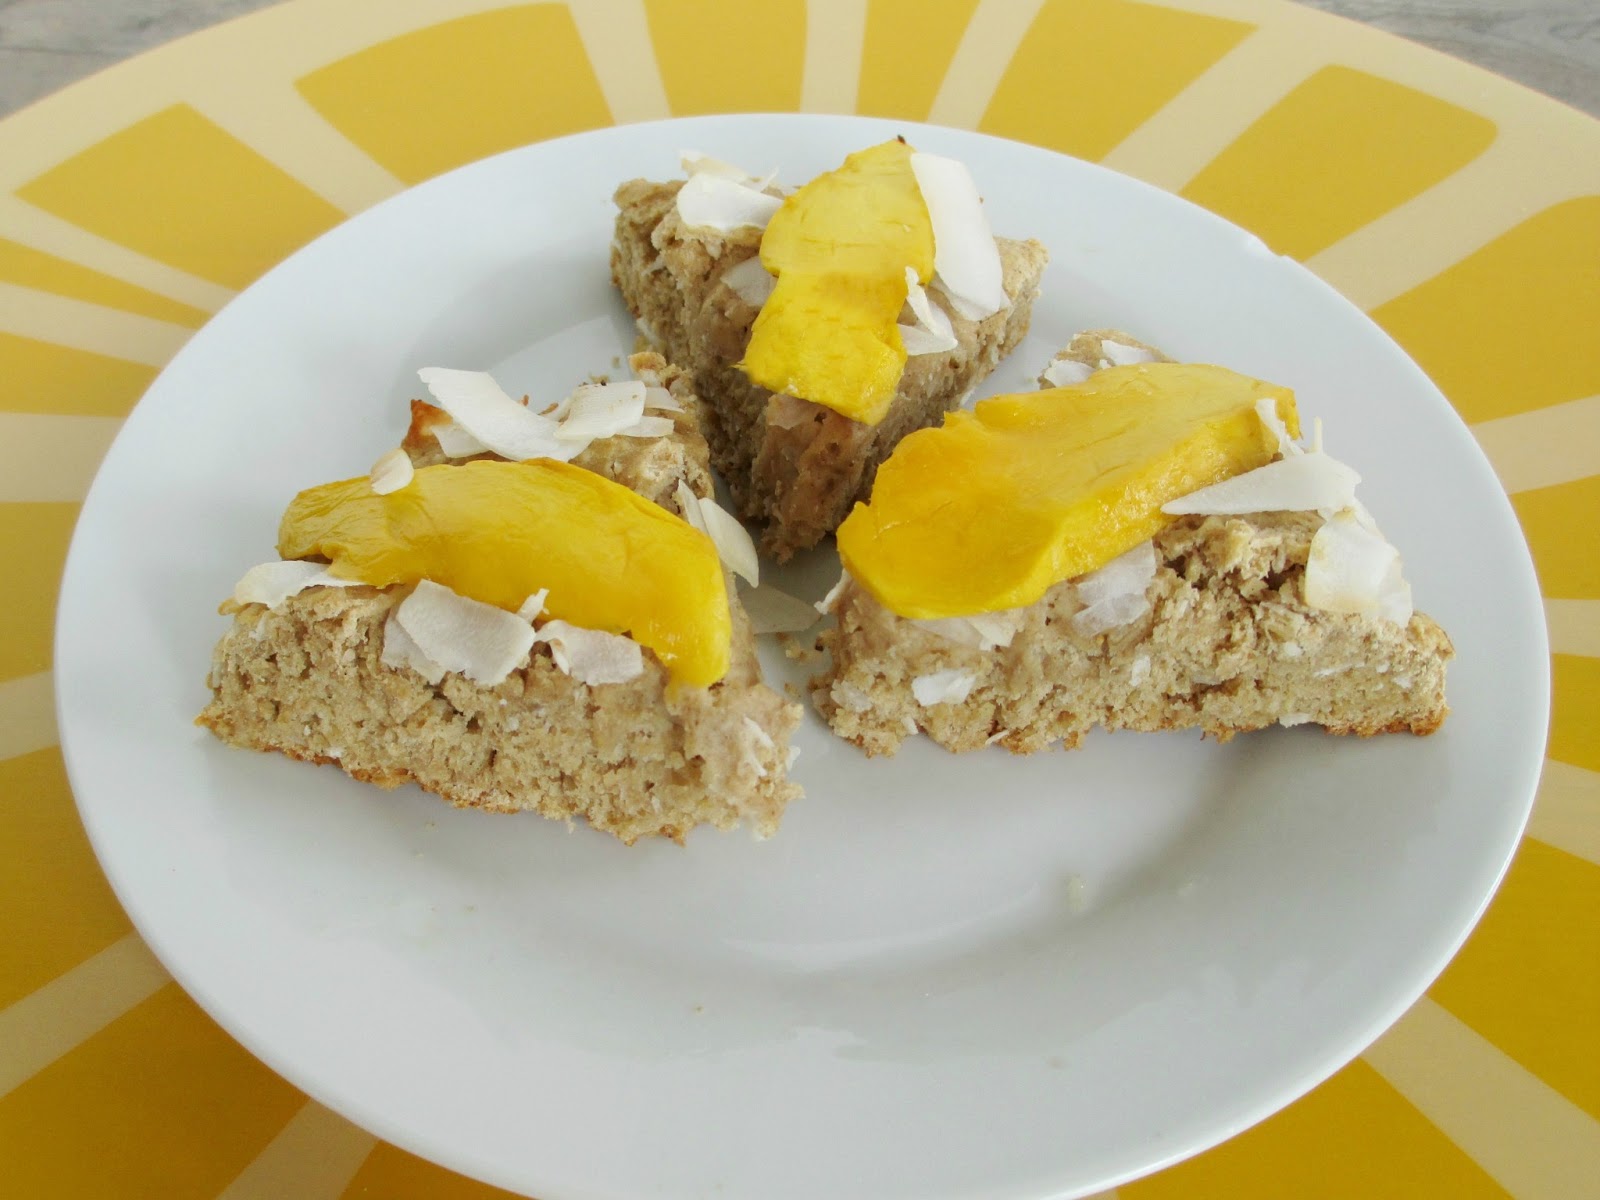
Coconut Mango Breakfast Cake


With the long weekend coming up, and the Easter holiday for those who celebrate it, this weekend should be a busy one filled with family and food! And for anyone who plans on doing some Spring baking this weekend, I've got a nice light breakfast cake recipe for you today.

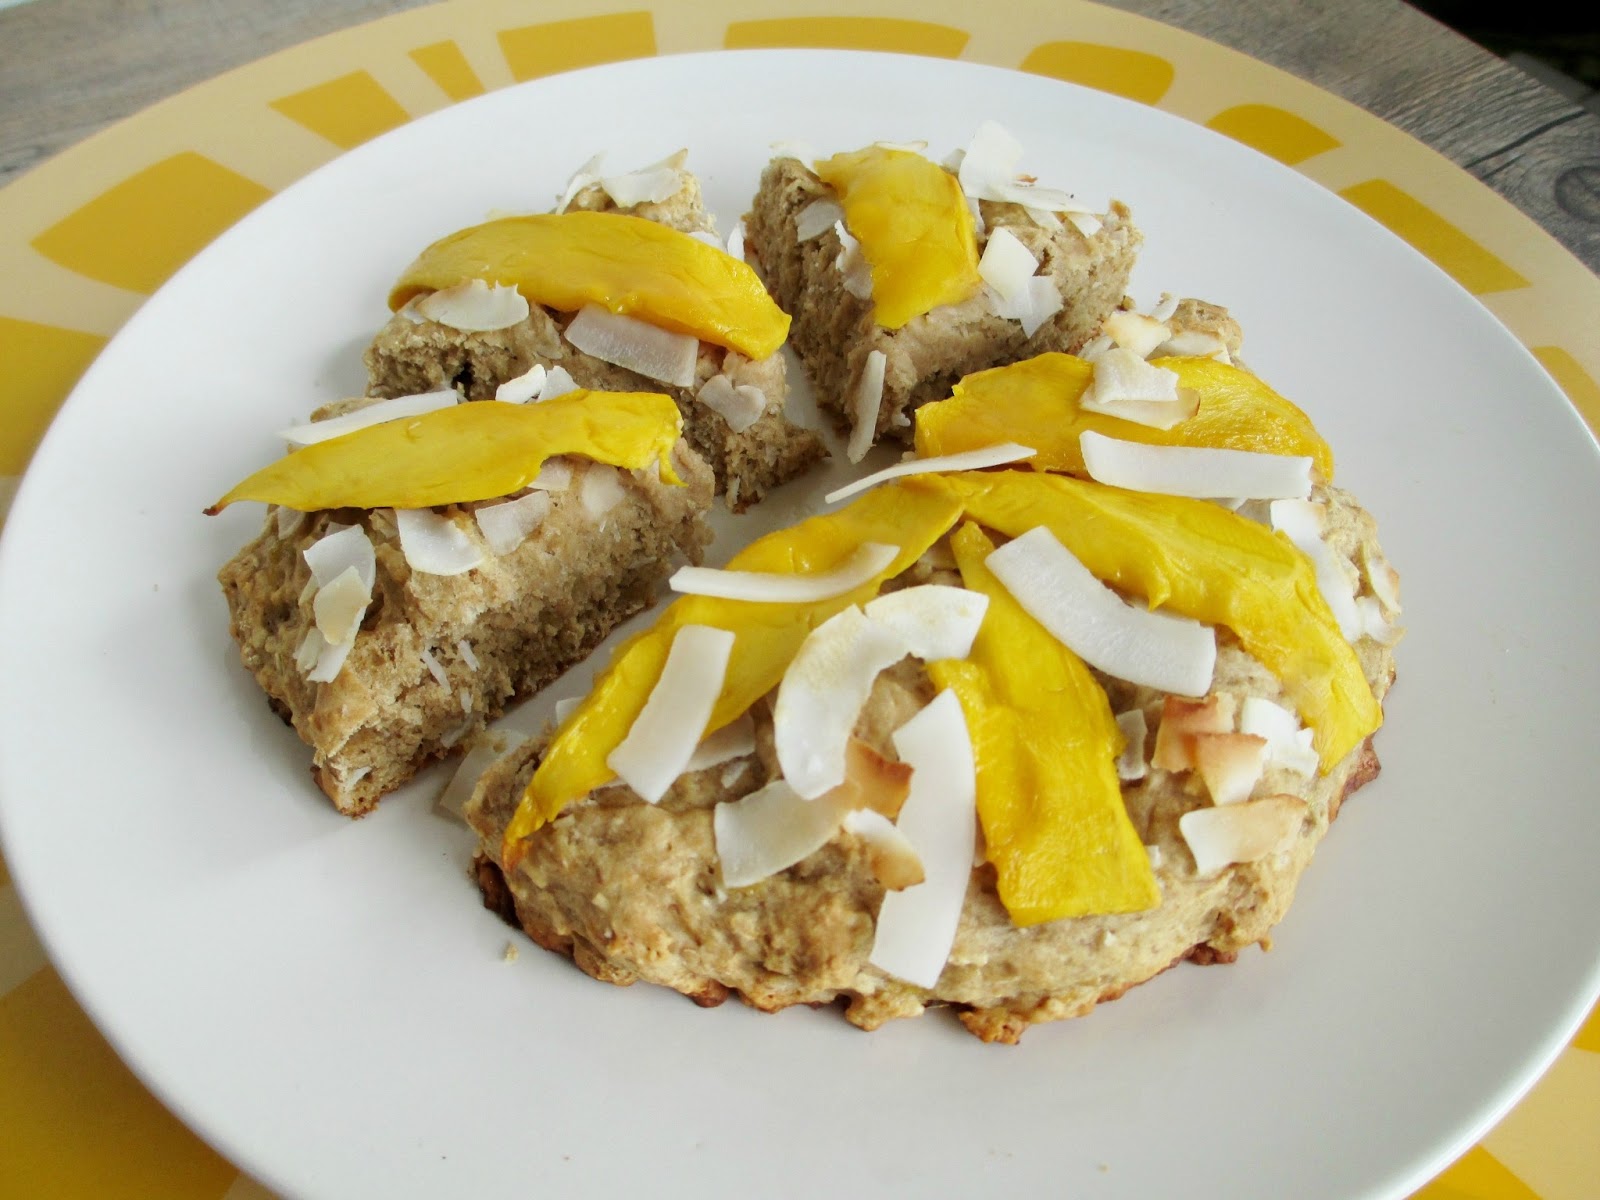
This cake will also get you in the mood for warmer weather (which hopefully comes soon!) with its tropical notes of coconut and mango. Plus it has a fun twist - instead of adding fruit to the cake batter, mango slices are laid on top of the cake before baking, so that it comes out looking like rays of sunshine!


The idea for this recipe came from including cake, a blog that has tons of unique vegan creations (I have so many of her recipes bookmarked!). Her version was a coconut "sweetbread" with nectarines and cinnamon, which I changed to mango and ginger to complement the coconut flavour even more.

The original recipe was made with gluten-free self-raising flour, but since I wanted to stick with baking methods that I'm more experienced with, I made my cake with light spelt flour and added baking powder (sorry to my gluten-free readers!).


The cake itself was lightly sweetened with a hint of coconut, so the mango slices on top added a welcome burst of sweetness and kept the cake from being dry.

My favourite thing about this cake was the texture - it's soft and chewy, kind of like a cross between bread and coffee cake. I also found it to be really light tasting, which is why it's appropriate as a breakfast cake!

This is the type of breakfast that I couldn't get enough of  - I tried just eating one piece, but found myself going back for another, and then another. So be careful if you make this with the intention of sharing it with others, because it might be difficult to share!

Hope you all have a lovely weekend!


Coconut Mango Breakfast Cake
Adapted from including cake

1/2 cup + 1/3 cup light spelt flour
1 tsp baking powder
1 tsp ground ginger (this adds a strong ginger flavour - use 1/2 tsp for less strong)
1/4 tsp kosher salt
2 tbsp unsweetened shredded coconut
1/3 cup mashed banana (1 small ripe banana)
1 tbsp agave nectar
1 tsp vanilla extract
1-2 tbsp almond milk
1-2 tbsp large flaked coconut (I used a mixture of unsweetened coconut flakes + sweeteened coconut chips)
Half a ripe mango

Preheat oven to 350°F and prepare a baking sheet or a cake pan by spraying with cooking spray (I used a 9” round cake pan but a baking sheet should work fine).

In a large bowl, whisk together the dry ingredients (flour through to coconut). In a separate bowl, mix the mashed banana, agave, and vanilla. Combine the wet ingredients with the dry ingredients and stir with a wooden spoon until the dry ingredients are incorporated. If the  mixture is still too dry, add almond milk 1 tablespoon at a time until there are no more dry parts (I used 1 tbsp).

Drop mixture onto the baking sheet or cake pan and use a rubber spatula to spread it out into a circle about 6” wide and 1” thick. Sprinkle the coconut flakes on top.  Carefully slice or peel off the skin of the mango and cut one half lengthwise into thin slices (save the other half for another use).  Lay the mango slices on top of the cake so that they join in the middle and point outwards (as shown in the photos). Press them down lightly into the cake.

Bake in the preheated oven for about 20 minutes, until the edges are lightly browned and a toothpick inserted in the center comes out clean.

Makes one 6” cake (2 large servings or more as a snack)

March 04, 2013

Raw Rainbow "Ice Cream" Cake with Coconut Whipped Cream for St. Patrick's Day


With St. Patrick's Day coming up in less than two weeks, I wanted to experiment with a recipe to celebrate the occasion. It seems like pretty much every traditional Irish recipe from soda bread to colcannon has already been posted several times, and I've seen tons of different green tinted foods and beer infused foods on the web too. 

So instead of going with something green, alcoholic, or Irish, I looked for inspiration from another St. Patrick's Day icon: the pot o'gold at the end of a rainbow!

My mind immediately started spinning with ideas for how to create a rainbow themed recipe, and in the end, I came up with this layered cake made with a raw crust, four layers of "ice cream" made solely from fruit, and a coconut whipped cream topping to resemble a cloud. And of course, the final touch that I added just for photo purposes was a pile of gold coins (chocolate, not real gold unfortunately)!


I was so happy with how this cake turned out - it was just how I had pictured it in my mind. And since I loved how it looked so much, this post is going to be more picture-heavy than usual!

While the recipe may look long and it was a bit time consuming to make, there wasn't that much actual hands-on time and as long as you've got some ripe fruit and a food processor, you can easily make this yourself!


The crust is a simple mixture of raw nuts, dates and coconut that gets crushed up and pressed down into the bottom of your cake pan.

Once the crust is ready, the next step is making the layers for the cake one at a time.  The base of each layer is a frozen banana, which as many of you probably already know, turns into a creamy ice cream-like consistency when you blend it in a food processor (although it firms up quite a bit after being in the freezer).

By adding different coloured fruits along with the banana, I was able to make four distinct layers to represent (some of) the colours of the rainbow: purple from blueberries and blackberries; pink from strawberries; yellow from mango; and green from avocado.


I actually made enough for two small cakes, in different shapes.  Pictured above is a round cake made with a miniature springform cake pan (which makes removal much easier!), and below is a rectangular cake made by forming the layers in one side of a square cake pan.

I liked the look of both shapes, so feel free to use whichever size pan is more convenient. As long the pan has edges to hold in the layers, you can build your cake in pretty much any shape you like!


While you could eat the ice cream cake on its own, I highly recommend making the coconut whipped cream topping. If you've never made whipped cream from coconut milk before, you can find step-by-step guides at the Kitchn and Oh She Glows to use as references.

I sweetened the whipped cream with a bit of icing sugar and added a dash of coconut extract to bring out the coconut flavour even more.  I loved how light and fluffy the whipped cream was and it tasted so good with the fruity ice cream layers.


If you love rainbow sherbert, then you'll love this cake because that's pretty much what it tastes like when you take a bite of all the layers together.  And if you're worried about the avocado, don't be - it actually blends well with the other flavours and you don't really notice a pronounced avocado taste when you eat everything together.

And can you believe that there's no added sugar or sweetener of any kind in the whole cake (not including the whipped cream)? As long as you have ripe fruits, they should provide all the natural sweetness you need!

I doubt my cakes will last until St. Patrick's Day, but you don't need a holiday to make this - I think it would brighten up any day :)


Raw Rainbow "Ice Cream" Cake with Coconut Whipped Cream

Note: This recipe does require some preparation at least a day in advance. Before you start making it, make sure you have at least 3 ripe bananas in your freezer and a can of coconut milk chilling in the fridge.

Crust
1/4 cup natural almonds
1/4 cup raw cashews
2 tbsp unsweetened shredded coconut
1 tbsp ground flax
Dash of salt
1/2 cup (heaping) chopped dates

Purple Layer
1 small-medium frozen ripe banana, chopped
1/4 cup blueberries and blackberries

Pink Layer
1 small-medium frozen ripe banana, chopped
1/4 cup chopped strawberries

Yellow Layer
1/2 a large frozen ripe banana, chopped
1/2 heaping cup chopped ripe mango

Green Layer
1/2 a large frozen ripe banana, chopped
1/2 a ripe avocado (about ½ cup)
1/2 tsp lime zest

Topping
1 can full fat coconut milk, chilled in the fridge overnight unopened
1 tbsp icing sugar
1/2 tsp coconut extract (can substitute vanilla extract if desired)


To make the crust, place the almonds and cashews in the small bowl of a food processor and process until the nuts are ground. Add the coconut, flax, and salt and process again until ingredients are combined. Add the dates and process until the dates are broken down. The mixture should stick together if you squeeze it together with your fingers.

Transfer the crust to the bottom of your desired pans.  I filled one round mini cake pan (4-inch wide, 2-inch deep pan with a removable bottom) and used the remaining crust to make a rectangular shaped cake by filling an 8x8 square pan (lined with a piece of parchment paper) about one-third to one-half full. Press the crust mixture down firmly, making sure it is evenly spread.  Store the crust in the fridge or freezer while you make the remaining layers.

Make the ice cream layers one a time, in whichever order you like. For each layer, place the ingredients in the small bowl of your food processor and process until smooth, scraping down the sides of the bowl with a spatula if necessary. Once you’ve made one layer, spread it evenly over the crust in your pan(s). Let it sit in the freezer until it starts to firm up, at least 15-30 minutes.

Continue with the next ice cream layer, following the same process as before. Let each layer firm up in the freezer before adding the next one. 

Here's how the cakes looked before frosting:


To make the whipped cream, open your can of coconut milk (do not shake it first). Scoop out the thick white cream that should have formed on top into a bowl (leave the watery part in the can). Use a hand mixer (or stand mixer) to beat the cream until it starts to firm up. Add the icing sugar and coconut extract and continue beating until the cream is nice and thick and fluffy like whipped cream, about 3-5 minutes.

Keep ice cream cake(s) stored in the freezer. For the best defrosting results, transfer cake to the fridge for about 1 hour prior to serving, then let sit at room temperature for 5-10 minutes, until the ice cream starts to soften slightly. Top cake(s) with whipped cream (Note: If you are storing the cake in the freezer, I would recommend keeping the whipped cream separate in the fridge, and adding it to individual servings when you're ready to eat, otherwise it will become a frozen block of whipped cream, as I learned!). 

Makes 2 small cakes or 1 larger cake.


December 19, 2012

Tangerine Coconut Cookies


It seems like time is flying by these last couple of weeks - there's less than a week left until Christmas, and I feel like I haven't done all the Christmasy things that I've wanted to yet, like watching all my favourite movies, spending evenings shopping in the crazy busy malls, driving around to look at Christmas lights, and going to see the lights display in the park.

One thing I have managed to is some holiday baking! Our annual cookie swap at school took place a couple of weeks ago, and in the last few days I've made 4 more kinds of little treats.  The latest treat to come out of my kitchen was these tangerine coconut cookies.

I had bookmarked the original recipe for mandarin coconut cookies from Whole Foods, and I was inspired to try them after a fellow student brought some clementine cookies to our cookie swap that I really liked.


These cookies are kind of like a cross between a sugar cookie and shortbread, and they're made vegan by using coconut oil instead of butter.  Because the baking time is a bit longer, they come out with a crisp, crumbly texture (perfect as a tea biscuit!) and if you place them in the freezer before baking, they stay nice and thick without spreading.

These are studded with lots of coconut and full of tangerine flavour.  I love anything with coconut, but I'm actually a bit picky with orange-flavoured treats as I find the zest can be a bit overpowering.  That wasn't the case with these cookies though - the tangerine zest and juice added lots of flavour, but it was balanced out really well by the coconut at the same time.

I also loved the pretty effect of pressing the cookies with a small glass to create the ridges around the edges. Plus the coconut-sugar mixture that I rolled the cookies in makes them look like they were dusted with snow!

If you're still looking for more cookie ideas, I plan on doing a round-up post of some of the other treats I've made lately, so stay tuned!


Tangerine Coconut Cookies
Adapted from Whole Foods

1 tangerine (can substitute with a clementine instead)
6 tbsp (1/4 cup + 2 tbsp) coconut oil, softened
1/2 cup powdered sugar
1/2 tsp vanilla extract
1/2 tsp coconut extract
1 ¼ cups all-purpose flour
1/4 cup + 2 tbsp unsweetened shredded coconut
1.5 tbsp cornstarch
1/2 tsp baking powder
1/4 tsp salt
2 tbsp cane sugar

Preheat oven to 325°F and prepare a baking sheet by lining with parchment paper.

Wash the tangerine and use a zester to remove the zest. Set aside the zest and cut the tangerine in half with a knife.  Use a lemon juicer and juice one half of the tangerine – you should get at least 2 tbsp of juice. Save the other half of the tangerine for another use.

Cream the coconut oil and powdered sugar together in a large bowl, until fluffy.  Add the vanilla and coconut extracts, 2 tbsp of the tangerine juice, and ½ tbsp of zest. Beat until mixed.

Add the flour, 1/4 cup of coconut, cornstarch, baking powder, and salt and beat again until all the dry ingredients are incorporated. Use your hands to form the mixture into a smooth dough.

Combine the remaining 2 tbsp of coconut and the cane sugar. Use a blender or food processor to grind until coarse.

Form the dough into small balls.  Roll each ball in the coconut-sugar mixture and place on the baking sheet. Take a small glass (I used a shot glass) and dip the bottom in water, then in the coconut-sugar mixture. Press the glass into each cookie ball to flatten (You will need to wipe off the bottom of the glass and re-dip in the water a few times).

Bake cookies in the preheated oven for 15 minutes, until firm and lightly golden on the bottom. Transfer to a wire rack to cool.

Makes about 19 small cookies.

Note: If you prefer a softer, chewier cookie, you can try baking them for less time, but I haven't tested this!

August 06, 2012

Blueberry-Jicama Kale Salad


Last weekend, I bought my first pint of local blueberries this summer from the farmers' market.  I don't usually consider blueberries to be one of my favourite fruits, but eating the local ones reminded me how sweet, juicy and flavourful they can be!

After eating some of my blueberries by the handful, I wanted to save the rest to use in a couple of recipes that I had planned.  One of those recipes was a fruity kale salad that I had marked in my new Blissful Bites cookbook from vegan chef Christy Morgan.  The recipe called for strawberries as the main fruit in the salad, but since strawberry season has pretty much ended, I thought blueberries would make a nice substitution and would pair well with the other salad ingredients.

The other main ingredient in the recipe was sliced jicama. Jicama - a Mexican root vegetable that tastes like a cross between an apple and a turnip - is one of my favourite ingredients to eat raw because it's so crisp and juicy. If you haven't tried jicama, I definitely recommend seeking it out at either your local market or an Asian grocery store!

I also added a few of my other favourite salad ingredients: cucumbers, pumpkin seeds and dried cranberries.  To keep it from being boring or bland, the recipe also calls for fresh mint and flaked coconut, which I toasted first in a pan, and finally everything is tossed in a sweet maple and lime dressing.

This was such a fresh salad with both the crisp veggies and juicy berries. I thought all of the ingredients came together so well and the maple syrup in the dressing added just the right amount of sweetness. If you like raw kale, this is a nice way to dress it up with seasonal ingredients!


Blueberry-Jicama Kale Salad
Adapted from Blissful Bites: Vegan Meals That Nourish Mind, Body, and Planet

~2 cups chopped kale leaves
1 tsp olive oil
1 tsp white balsamic vinegar
1/8 tsp herbamare seasoning (can substitute with a pinch of salt if you don't have this)
1/2 cup jicama, peeled and sliced into matchsticks
1/4 cup diced cucumber
1/4 cup blueberries
1 tsp freshly squeezed lime juice
1 tsp pure maple syrup
1 tsbp fresh mint (about 5 leaves), chopped
1 tbsp large flaked coconut, toasted in a dry skillet if desired
2 tbsp dried cranberries
1 tbsp pumpkin seeds or sunflower seeds

Place the kale in a bowl and drizzle with the olive oil, balsamic and herbamare.  Massage the leaves with your fingers for a couple minutes, until they are softened.  Add the jicama, cucumber and blueberries to the bowl.  Pour the lime juice and maple syrup over everything and toss to combine.

Stir in the mint, coconut, cranberries and seeds. Let sit for 10-15 minutes before serving.

Makes 1 large serving or 2-3 side salads.

-       

July 23, 2012

Recipe Round-Up: Popsicle Ideas!

With the sweltering heat we've been having so far this summer in Ontario, I've been wishing more every day that I had a pool in my backyard to cool off in.  But since I'm not that lucky, a more affordable way for me to beat the heat is by making my own popsicles!

I finally bought my first popsicle mold at the start of the summer and I've already made good use of my purchase, having made five different kinds of popsicles for myself so far. I usually make small batches of 2-4 popsicles of each flavour, so that I can even have two different types of popsicles in my freezer at the same time.

Some of the flavours I've tried have been really simple and don't really require a "recipe", so I thought that instead of doing separate blog posts for each one, I'd combine them all into one post with ideas for five different kinds of popsicles you can easily make yourself at home if you have a mold.

1. Mango Lassi Popsicles


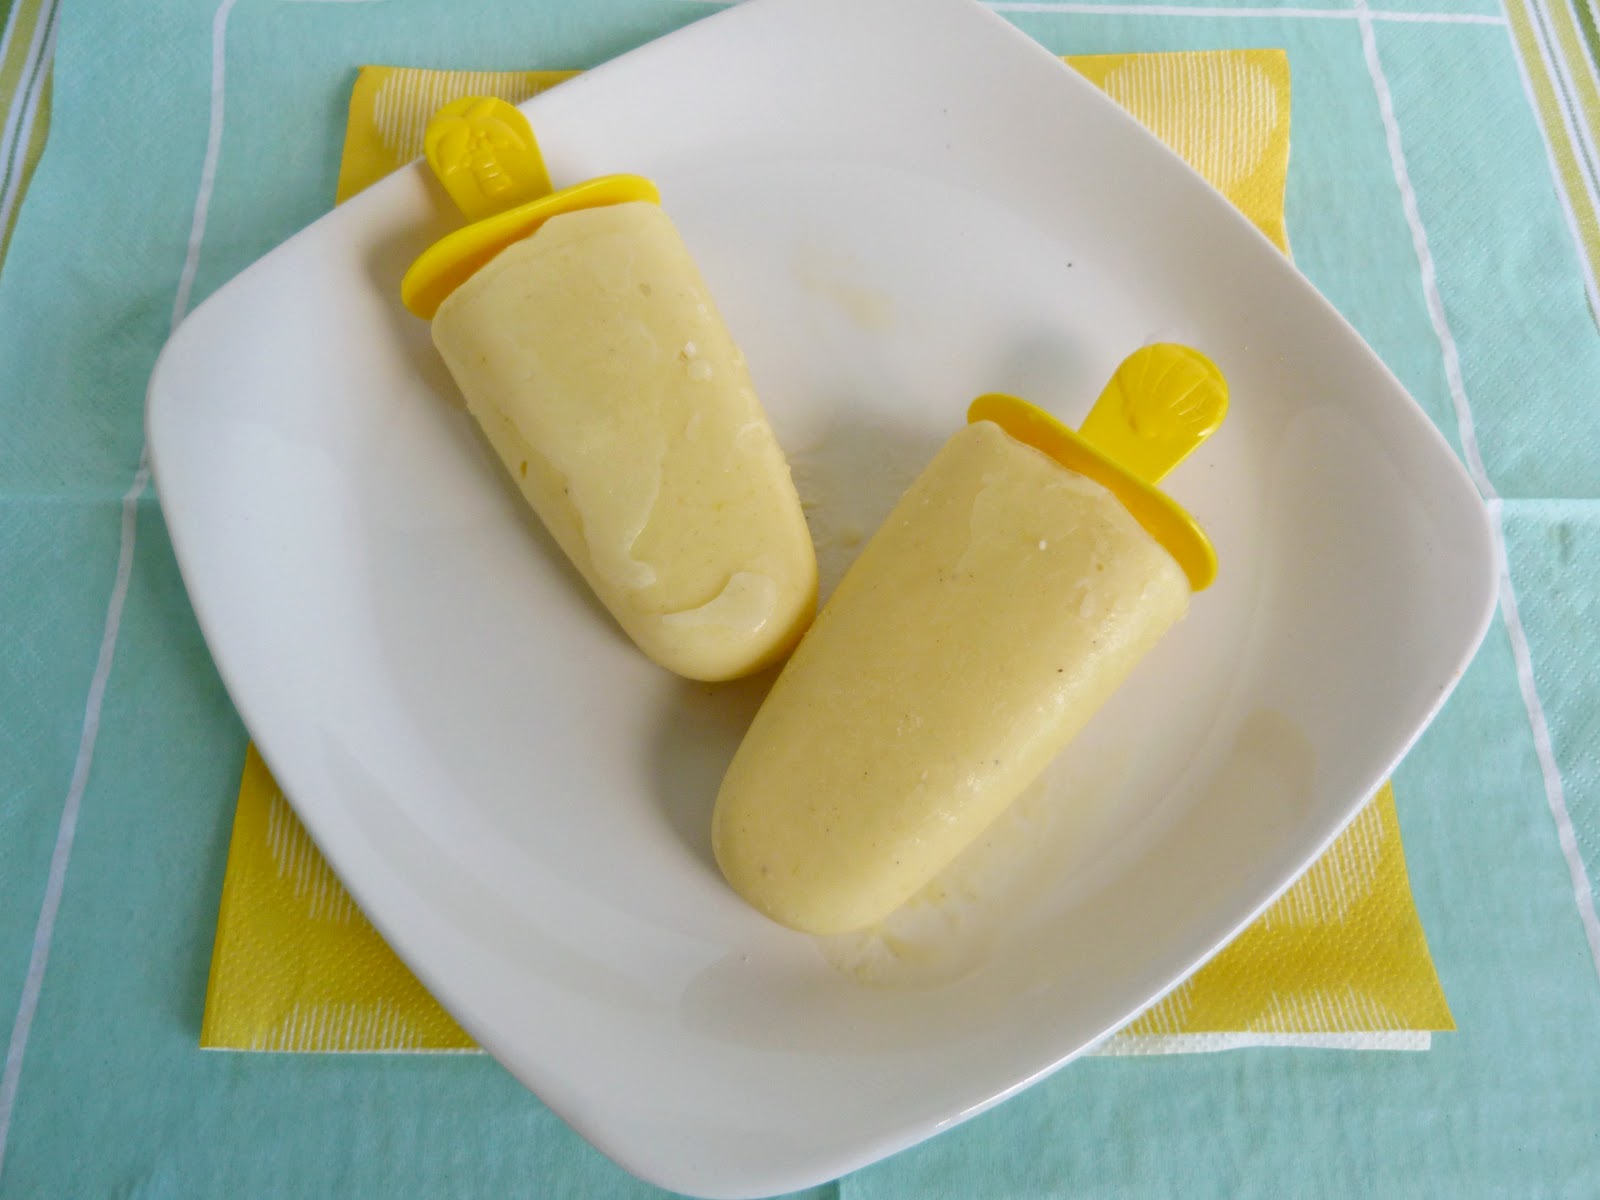
The first popsicles that I made were these mango lassi popsicles, and I've already made a second batch!  I found the recipe for these on Desserts for Breakfast and made a couple of minor changes, like using almond milk and honey instead of the sugar. If you ever have leftover mango, these popsicles are a great way to use it up! They were super creamy from the yogurt, and even though they didn't taste quite the same as an authentic mango lassi drink, I still loved them!

2. Cantaloupe & Mint Popsicles


Next up was these cantaloupe-mint popsicles.  I was inspired to make them with my leftover ingredients from this cold cantaloupe-mint soup, and it turned out those flavours worked just as well together in a popsicle!  They were very juicy, and more of an ice-pop texture as opposed to the creamy mango ones.  I will warn you, however, that these are more of a grown-up popsicle - I wouldn't recommend adding the mint if you plan on making these for kids.  You also have to like cantaloupe, since that's the dominant taste in these popsicles, and I know I lot of people have strong feelings against cantaloupe!

If you'd like to try these, here's the recipe I followed:

Cantaloupe-Mint Popsicles
2 cups chopped cantaloupe
1 tbsp lemon juice
½ tbsp chopped mint leaves
1 tsp honey
Dash of ginger


Add all ingredients to a blender and puree until smooth. Pour mixture into a popsicle mold and freeze until solid.

Makes 4 large popsicles 

3. Matcha Yogurt Popsicles


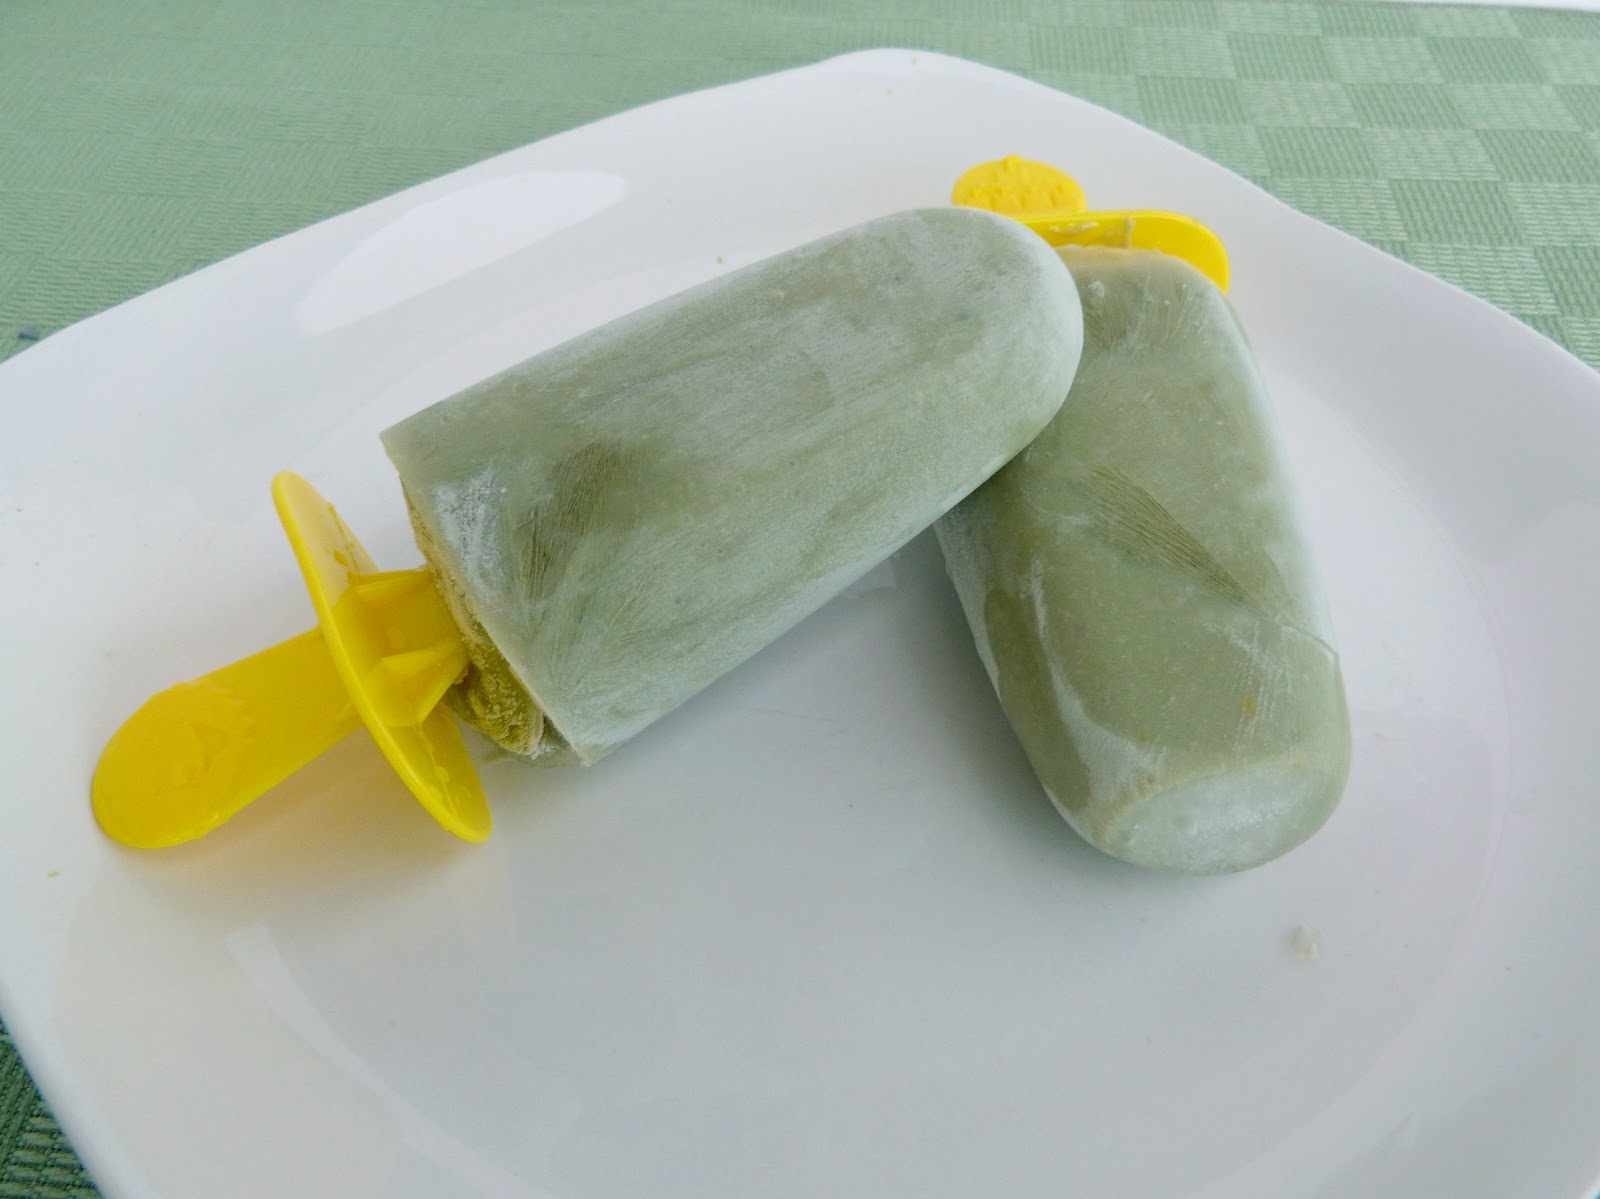
Another recipe that turned out better than I expected was these matcha yogurt popsicles, which I found on All Day I Dream About Food. I only made a third of the recipe, and I didn't have quite enough yogurt so I had to substitute some almond milk instead.  They still turned out nice and creamy, and I loved the way the green tea flavour came through without being too strong, and it was complemented well by the lemon juice, sweetener (I used powdered stevia), and vanilla yogurt. If you're a fan of matcha, you should definitely make these!

4. Chocolate Coconut Water Popsicles


Since I had seen popsicle recipes made from pretty much every type of drink or liquid, I started wondering whether I could just freeze coconut water into a popsicle mould to get the ultimate refreshing and hydrating frozen popsicle! I bought a bottle of my favourite kind of coconut water - Zico Chocolate - and poured some into a couple of my popsicle molds.  I also tried adding a splash of coconut milk beverage to the remaining molds (about 2 tbsp per 1/2 cup of coconut water), to see if adding coconut milk would improve the texture.

They came out just as I was hoping - they had all the taste of the chocolate coconut water, but in a solid icy form!  Both of my versions worked out well, but I preferred the ones that had the extra coconut milk added to them. I haven't tried making popsicles out of unflavoured coconut water, so if anyone has tried that, let me know how you like them!

5. Coconut Chai Popsicles


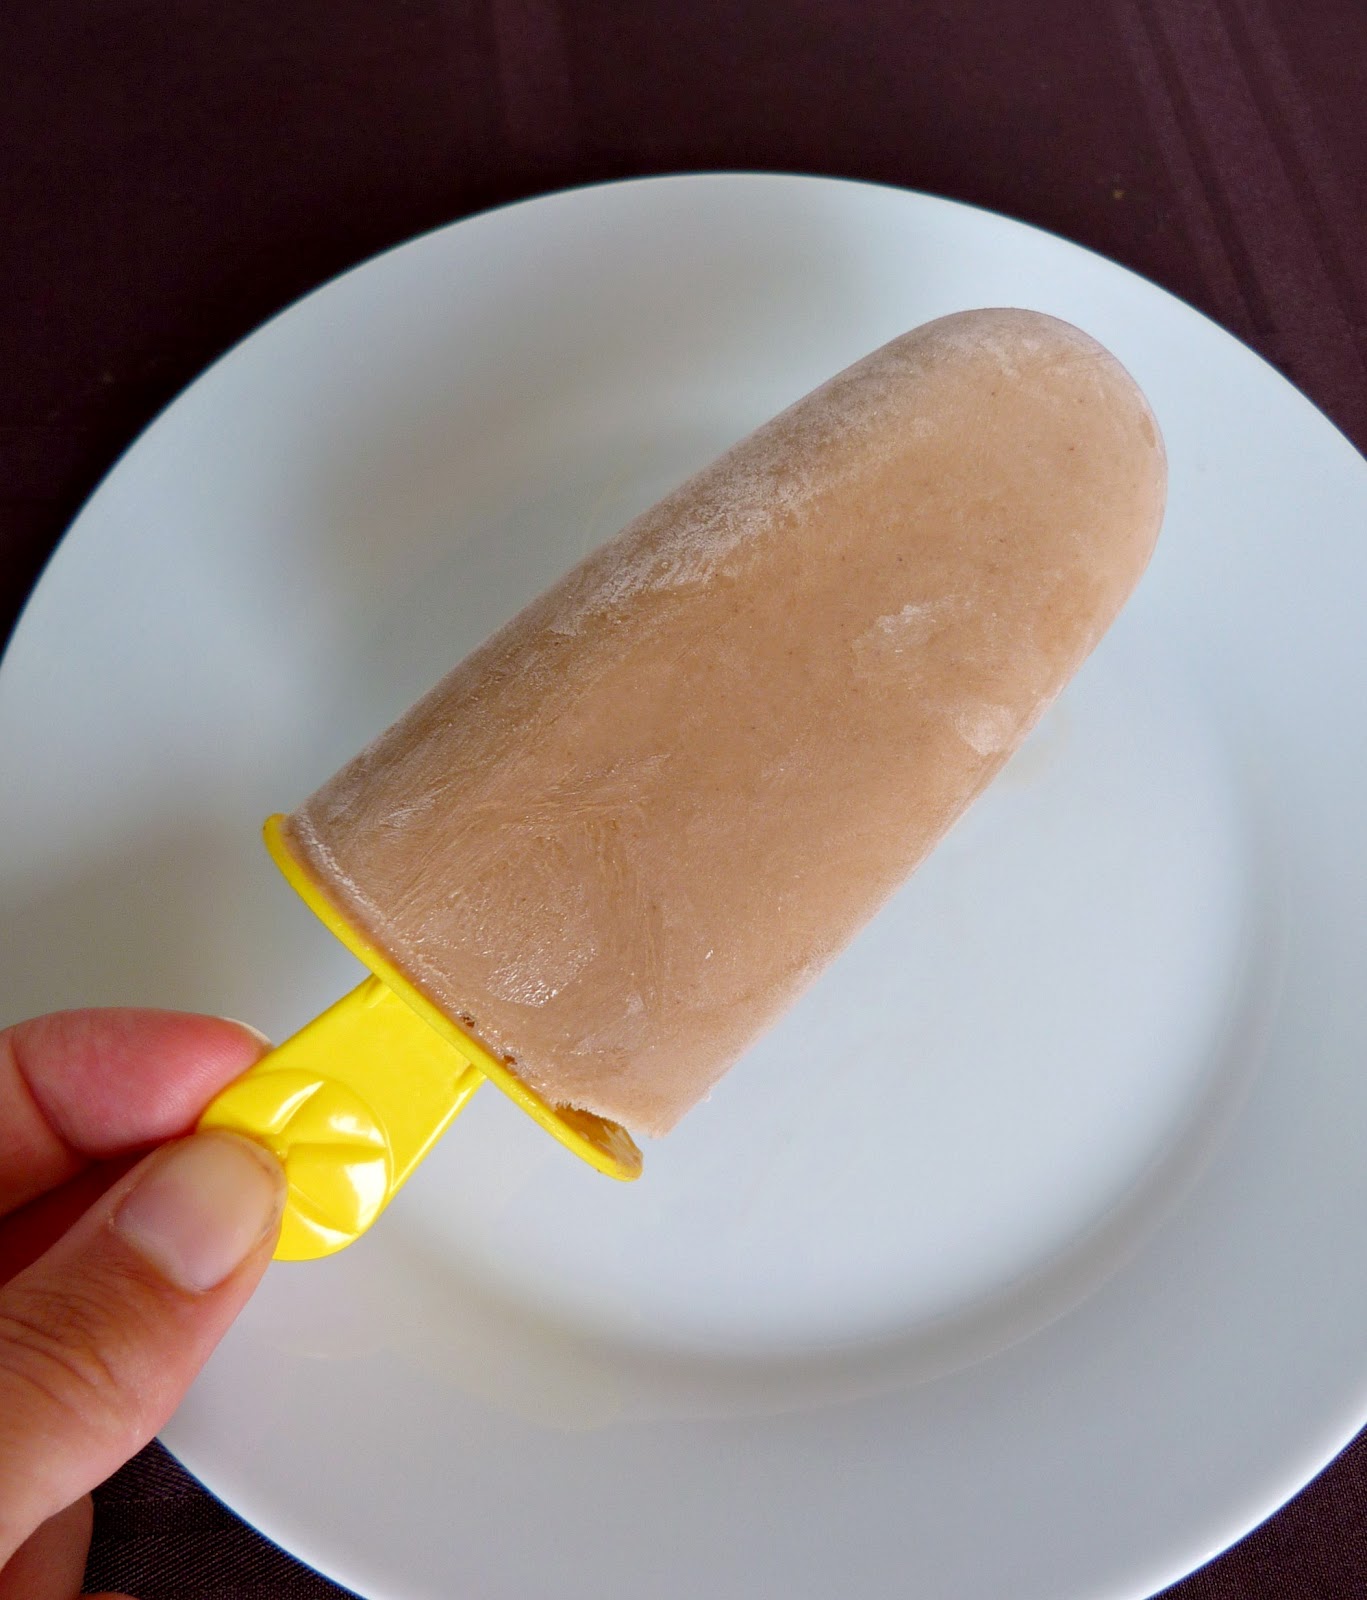
Finally, my favourite popsicles that I've made so far were these coconut chai popsicles.  All I did was heat equal amounts of So Delicious coconut milk beverage and canned coconut milk on the stove and once it was simmering, I whisked in some instant chai powdered beverage mix (1 tbsp of mix per 1/2 cup of liquid).  Once the powder is fully dissolved, let the mixture cool and then pour into popsicle molds.

These came out so soft and creamy, similar to a fudgsicle texture, and I loved the sweet coconut and chai flavours. If you don't have instant chai mix, you could try just adding a mixture of actual chai spices like ginger, cinnamon, nutmeg and cardamom, but I haven't tried this myself so I'm not sure if the spices would be too strong this way.


I can't wait to try out more flavors of popsicles before the summer ends! I've already started thinking of ways to incorporate some of my other favourite ingredients like bananas, avocado and nut butter, and now that local peaches are in season, I'll definitely have to make some peach popsicles!

Hope you're all staying cool too!

LinkWithin

Related Posts Plugin for WordPress, Blogger...