Showing posts with label artichoke. Show all posts

April 16, 2014

Greek Pasta Salad with Tofu Feta


With the Easter holiday coming up this weekend, normally I would be posting an Easter-themed recipe on my blog this week. But for some reason, my Easter inspiration just wasn't there this year - I couldn't come up with anything that hasn't already been done!

So if you're looking for a cute Easter idea, check out these peanut butter bunnies and raw cookie chicks that I made last year. Or if you're just here for the recipes, I've got a great pasta salad to share with you today!

I'm not typically a huge fan of pasta salad, as it can sometimes be a bit boring. For me, the keys to a memorable pasta salad are to add lots of veggies, some kind of protein, and a flavourful dressing - all of which are included in this recipe!

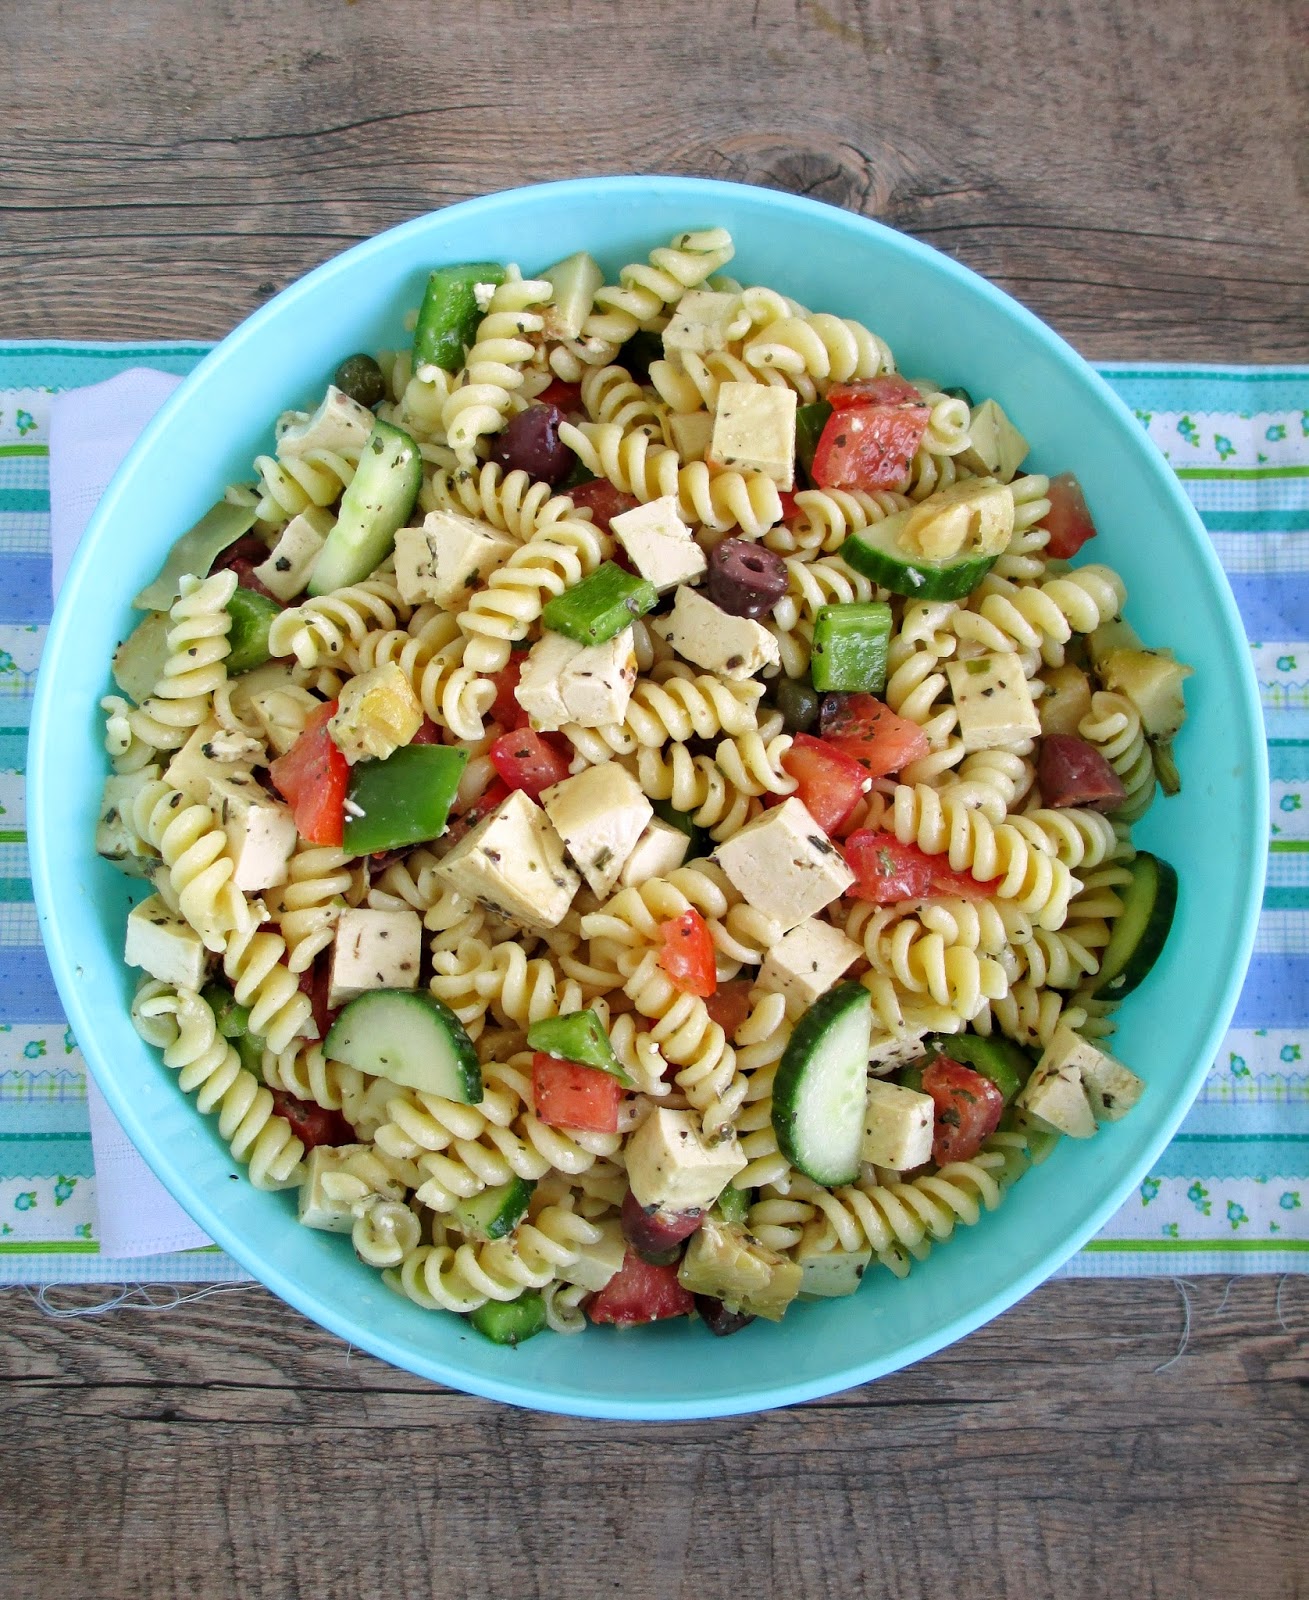
This dish is like a bulked-up Greek salad - besides the usual veggies that you would find in a Greek salad (tomatoes, cucumber, and peppers - I left out red onion based on personal preference), I added olives, artichokes, and capers for lots of salty, briny flavour, and rotini pasta to help soak up the dressing.


Instead of using traditional feta cheese, I decided to make "tofu feta". If you've never heard of this idea, you can mimic the flavour and texture of a salty cheese by marinating uncooked firm tofu in a dressing made with lots of lemon juice, miso, a bit of olive oil, and lots of herbs.

The tofu was actually my favourite part of this dish - I love the chewy texture and it really soaked up the marinade so it didn't just taste like bland tofu! I also loved how each bite was full of ingredients - the ratio of pasta to veggies was a bit skewed towards the veggie side, which is how I prefer my salads!

This makes a lot of pasta - enough to feed yourself for lunches for the week, or it would make a great potluck or BBQ dish to share with a group!


Greek Pasta Salad with Tofu Feta
Inspired by Katy's Kitchen; tofu adapted from Keepin' it Kind

Tofu
350g/12 oz package extra firm pressed tofu, drained and water squeezed out
1/4 cup fresh lemon juice
1 tbsp olive oil
1 tbsp white miso paste
1 tsp dried basil
1 tsp dried oregano
1/2 tsp salt
Ground pepper

Salad
~450g dried pasta (I used rotini)
1 green pepper, seeded and chopped
2 tomatoes, diced (I removed most of the seeds as I chopped)
1/2 an English cucumber, sliced into half-moons
1/2 cup pitted Kalamata olives, sliced in half
6 oz jar of artichoke hearts, drained and chopped (*save the oil for the dressing)
2 tbsp capers, drained
1/2 cup chopped fresh parsley

Dressing
2 tbsp fresh lemon juice
2 tbsp red wine vinegar
2 tbsp oil (I used the oil from the jar of artichoke hearts, but you could use olive oil)
1 large clove garlic, finely minced
Salt and pepper


First, start marinating the tofu. If you don’t have already pressed tofu, press it between layers of paper towel with a heavy object on top for at least 15 minutes to remove excess water. Slice tofu into small cubes (about ½”). Whisk together the remaining ingredients to make the marinade. Place tofu slices in a shallow container and pour marinade over top. Let sit for at least 30 minutes, tossing occasionally to make sure all the tofu pieces get coated.

Bring a large pot of salted water to a boil and add pasta. Cook for length of time specified by package directions, then drain and rinse with cold water.

Meanwhile, prepare the veggies (green pepper, tomatoes, and cucumber) and place in a large bowl. Add the olives, artichokes, and capers. When the pasta is done, add it to the bowl as well.

Make the dressing by whisking all ingredients together. Add salt and pepper to taste. Pour dressing over pasta salad and toss to mix.

Add tofu to the bowl, including any leftover marinade. Add parsley and toss well to mix.

Chill until serving time. 


Makes 4-6 servings.

April 02, 2013

Roasted Cauliflower & Antipasto Panzanella with Pomegranate Dressing


One of my favourite single-serving meals to throw together is a panzanella salad.  For anyone who hasn't heard of panzanella, it's basically a salad with bread, fresh herbs, and an olive oil-vinegar dressing. The bread is the key ingredient, and you can be as creative as you like with the rest of the components!

I've always had a preference for a summer panzanella with the best garden tomatoes, fresh basil, cucumber, and even corn, but I've learned that you can still make delicious and unique panzanellas any time of the year - check out my versions of winter panzanella and spring panzanella that I've posted on the blog!

I recently saw a recipe for a panzanella with olives and artichokes on Kitchen Confidante, and since I've finally learned to like olives, I was inspired to give this idea a try.


For my version, I used a mixture of black and green olives, marinated artichoke hearts and roasted red pepper for an antipasto base (I realize this isn't exactly authentic antipasto, but it was close enough for me!). I also roasted some cauliflower and grape tomatoes to round out the salad, and of course, a good crusty baguette!

For the herbs, I went with both fresh basil and mint, and finally, I made a simple red wine vinegar dressing with the addition of pomegranate molasses for a burst of sweetness.

It seems that you can't really go wrong with a panzanella because I always love every version that I come up with, and this one was no different! I loved the mixture of flavours, from the sweet and tangy dressing to the salty olives and briny artichokes. The warm roasted cauliflower and juicy tomatoes added a nice contrast to the antipasto ingredients, and the bread soaked up all of the flavours while keeping a bit of its crunch.

If you're a panzanella fanatic like me, I hope you'll give this version a try!


Roasted Cauliflower & Antipasto Panzanella with Pomegranate Dressing
Inspired by Kitchen Confidante

Approximate amounts per serving: (feel free to adjust to your liking)
1/4 head cauliflower, chopped
1/2 tbsp olive oil
7-8 grape tomatoes
7-8 pitted olives (I liked the small kalamatas best)
1 clove garlic, peeled and smashed
~50 grams of crusty bread, sliced or torn into small bite-sized pieces
~3 pieces of quartered artichoke hearts, sliced in half (the marinated jarred kind)
1 whole roasted red pepper (I used the jarred kind), sliced into thin strips
3-4 large leaves of fresh basil
1 tbsp chopped fresh mint
1.5 tbsp red wine vinegar
1 tbsp pomegranate molasses
1 tsp whole grain mustard
1/2 tbsp olive oil (optional – I left it out when I made the salad fresh, but added it to my leftovers the next day)
Salt and pepper

Preheat oven to 425°F.

Place the chopped cauliflower in a large roasting pan and drizzle with 1/2 tbsp olive oil, salt and pepper, tossing to coat. Roast in the preheated oven for 25-30 minutes total.

After 10 minutes of roasting, add the tomatoes, olives, and garlic to the pan and return to the oven (for another 15-20 minutes). Place the bread chunks on a small baking sheet and spray with a bit of cooking spray. Add to the oven for the last 5 minutes of cooking time so they are lightly toasted (or longer if you like them extra crispy).

When everything is done roasting, combine in a large bowl (cauliflower, tomatoes, olives, garlic, and bread). Add the sliced artichokes and red pepper, basil, and mint, and toss to combine.

Whisk together the vinegar, pomegranate molasses and mustard. Pour dressing over salad and toss well. Drizzle with the extra 1/2 tablespoon of olive oil if desired.

Serve warm. Season with additional salt and pepper.

Makes 1 serving. 

Note: Leftovers of the fully assembled salad will not keep well, but you can roast a double portion of the veggies and keep leftovers of each portion separate in the fridge. The next day, heat up the veggies, toast your bread, chop up the herbs, and toss in the dressing. 

June 01, 2012

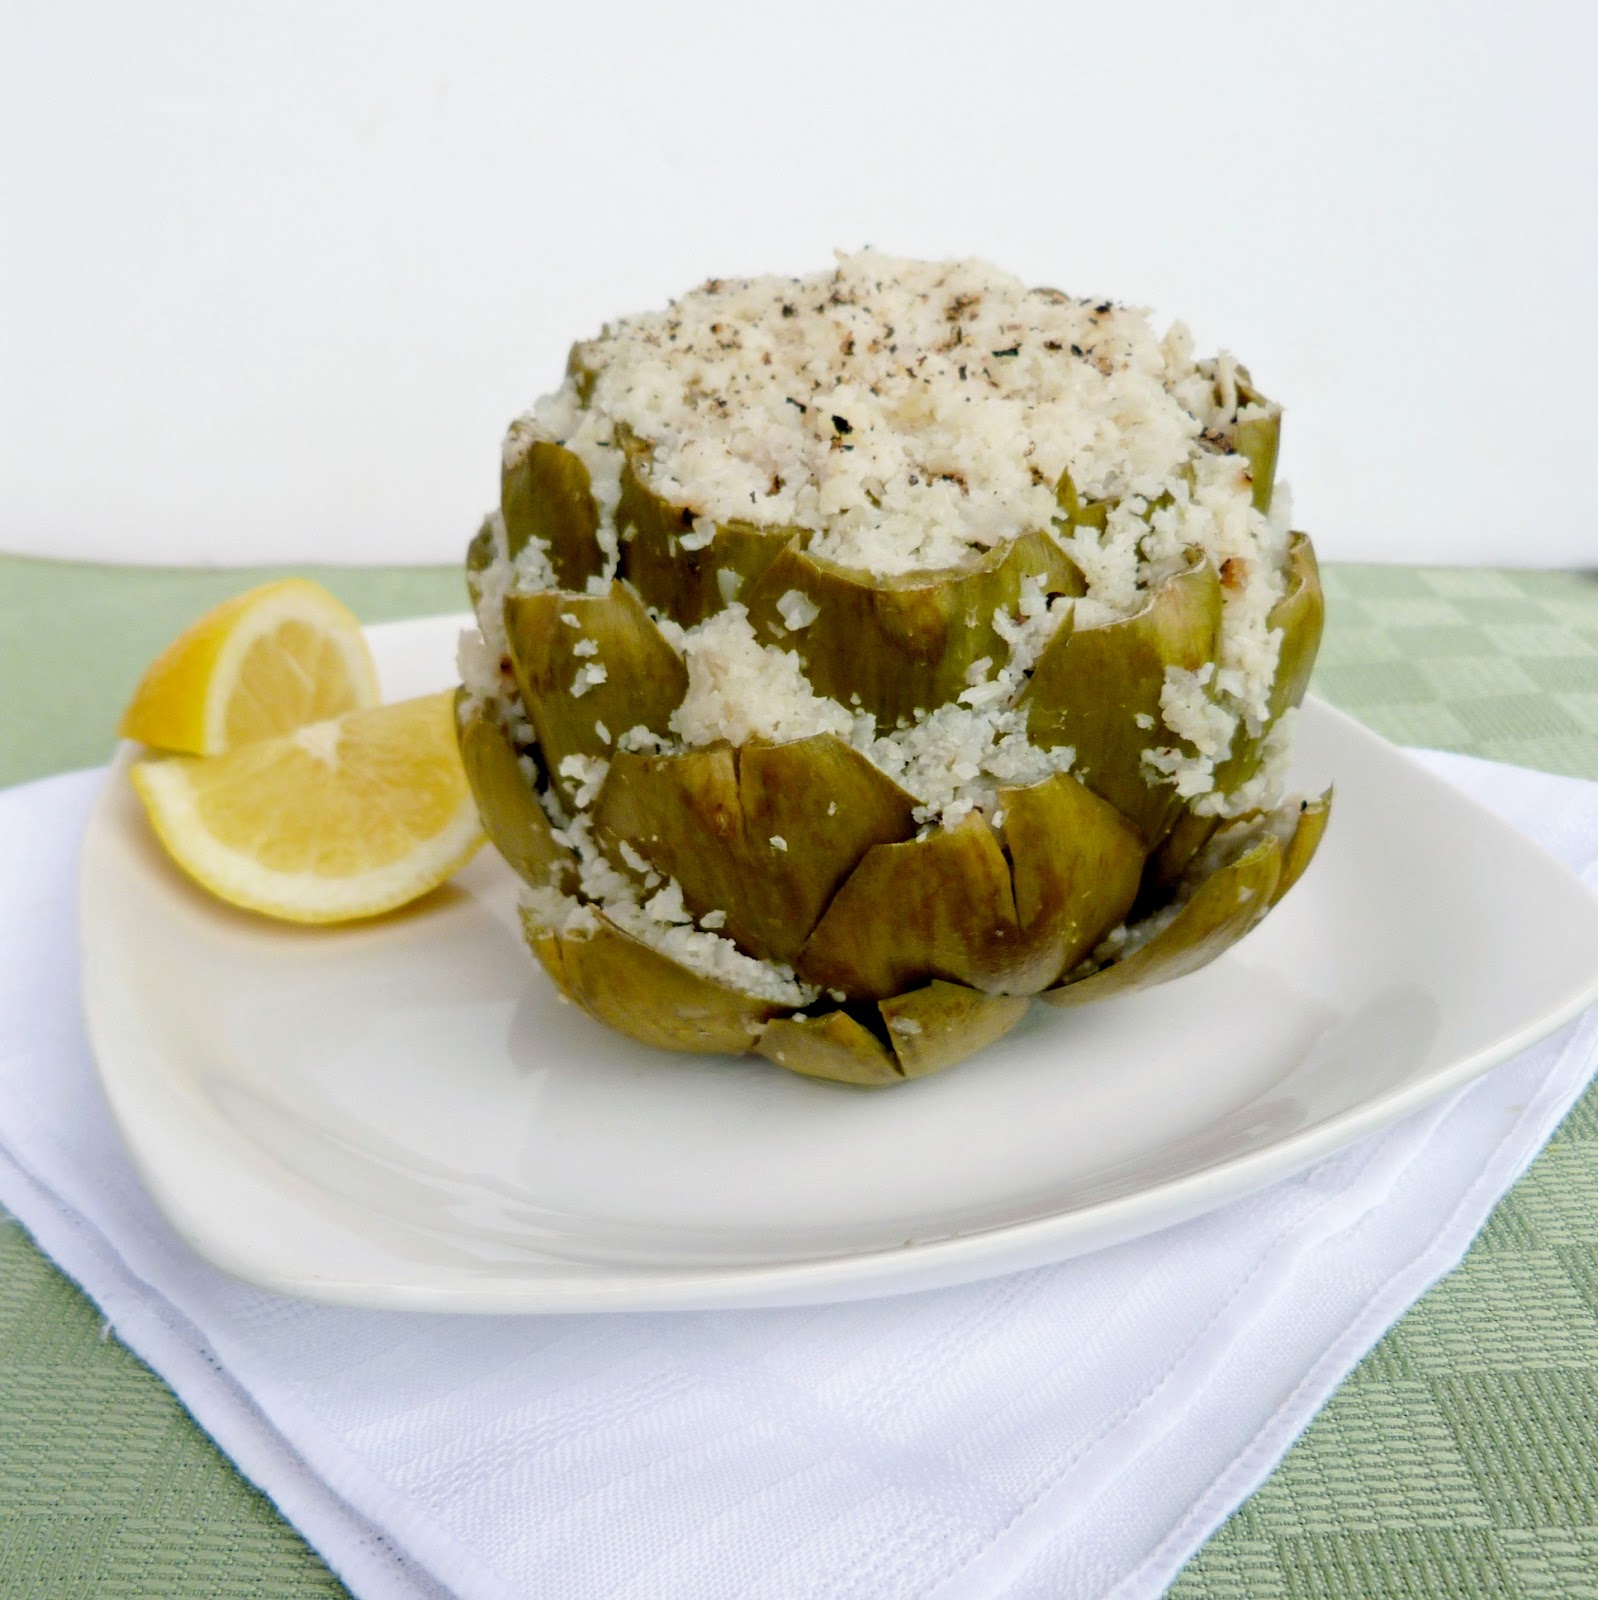
Cauliflower-Stuffed Artichoke


I have a small confession to make: I've never had a real artichoke before. Even though I'm a huge fan of vegetables and I consider myself pretty adventurous when it comes to trying new foods, for some reason I've always been too scared of artichokes to buy any.

So this past weekend, I decided to it was time to change this situation and I specifically sought out an artichoke when I went to the farmers' market. There was only one stall that had them and at $2.50 per artichoke, they weren't exactly the cheapest vegetable around!  But I didn't let the price scare me off and I picked one out to take home.

The main thing that scared me about artichokes was that I didn't even know how to eat them, let alone how to cook them. So I spent some time doing some research and learned that there are different parts of an artichoke - some edible and some not.  For example, you can eat the "meat" at the bottom of each leaf, but not the leaves themselves.  You can also eat the artichoke heart in the middle, but not the fuzzy "choke" at the very centre.

I also learned that you have to clean and trim your artichoke before you can start cooking it.  This involves trimming the pointy ends off each of the leaves, slicing off the top and bottom, and scooping out the inner choke.

Even though it sounded like a lot of work just to eat one vegetable, I was determined to go ahead, hoping that the end result would be worth it!

Here's how mine looked in the steamer basket after I scooped out the choke:


Once the initial preparations were done, I had to decide how I wanted to eat it.  I could have left the artichoke plain and dipped the leaves in a sauce, like many recipes call for.  But instead, I decided to make a filling to create a stuffed artichoke.

Since I had some cauliflower in the fridge, I came up with the idea of a cauliflower stuffing. I've seen some recipes for cauilflower "rice" or "couscous", which is just caulilfower that's been pulverized in the food processor to resemble grains of rice. I thought that seemed like the perfect simple and nutritious stuffing for my artichoke!

The cauliflower couscous was really easy to make, and it was actually pretty fun stuffing it into the hollow artichoke and in between each of the leaves.

Once it's stuffed and ready to go, all that's left to do is place the whole thing in a steamer basket and wait patiently...but I can assure you, the wait is definitely worth it! I was so excited to finally try the artichoke and it did not disappoint!


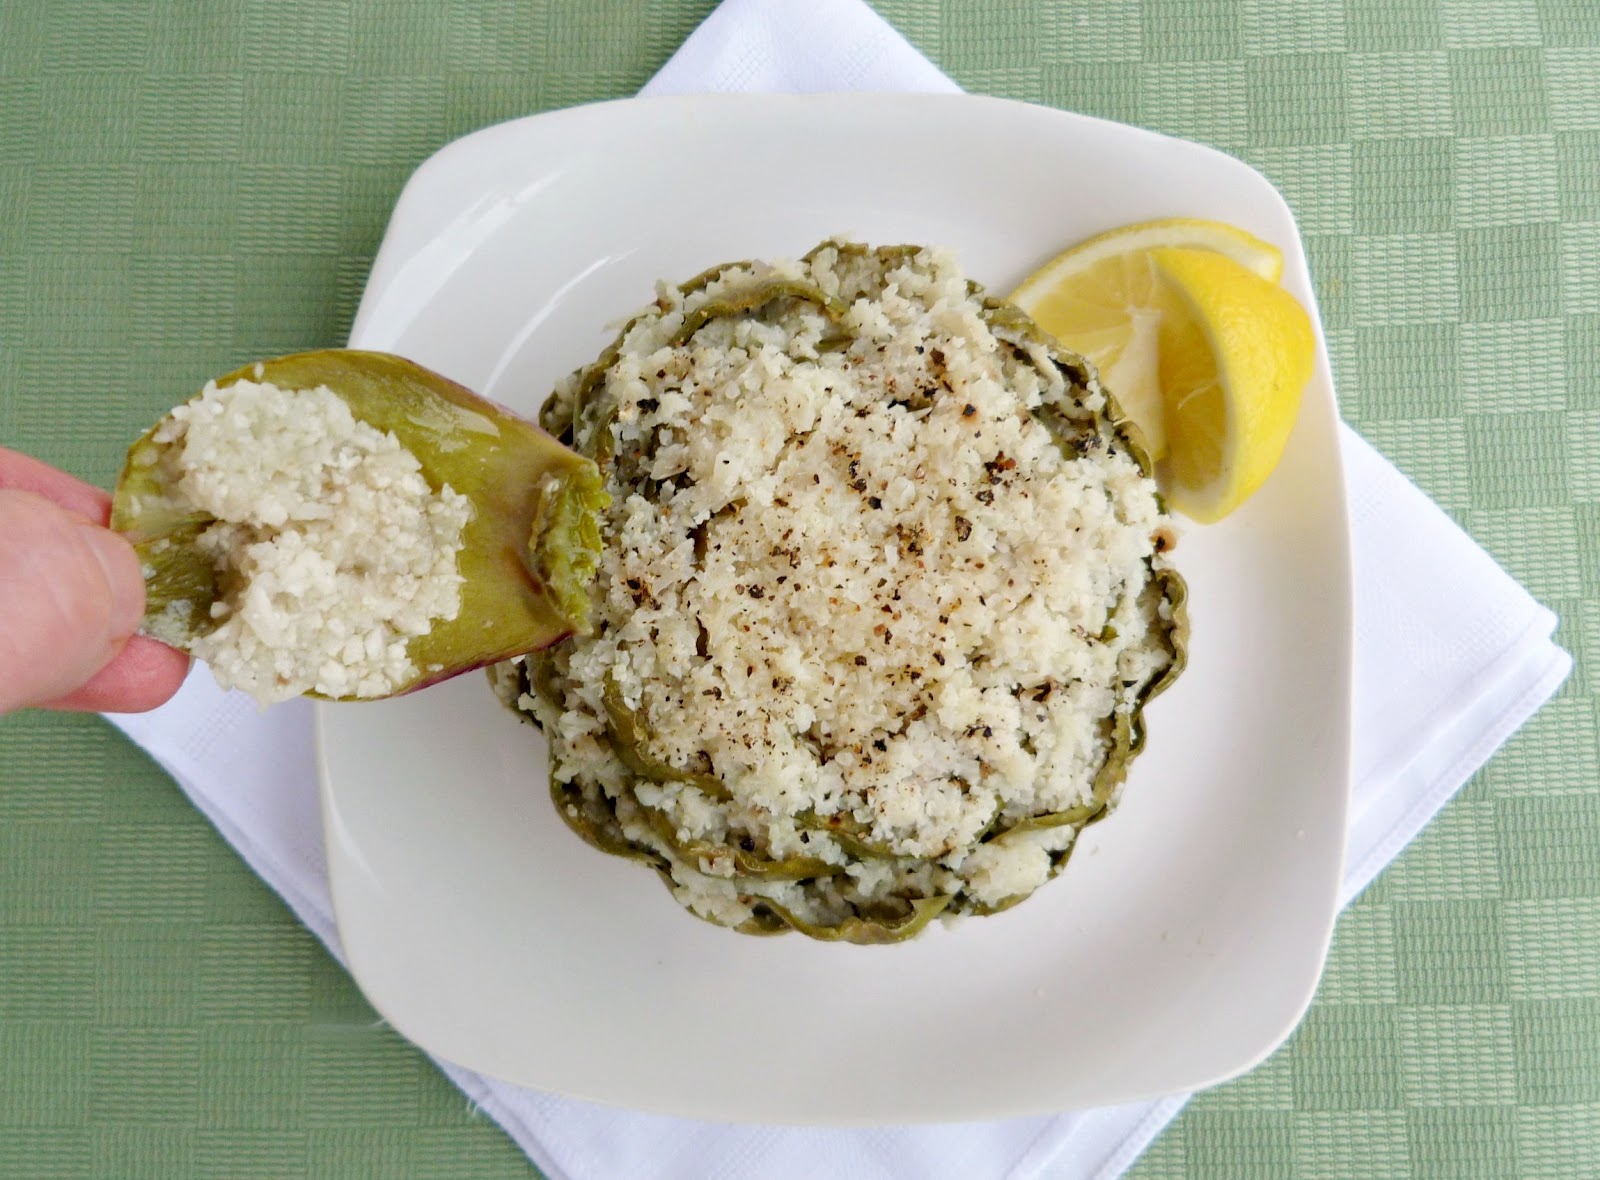
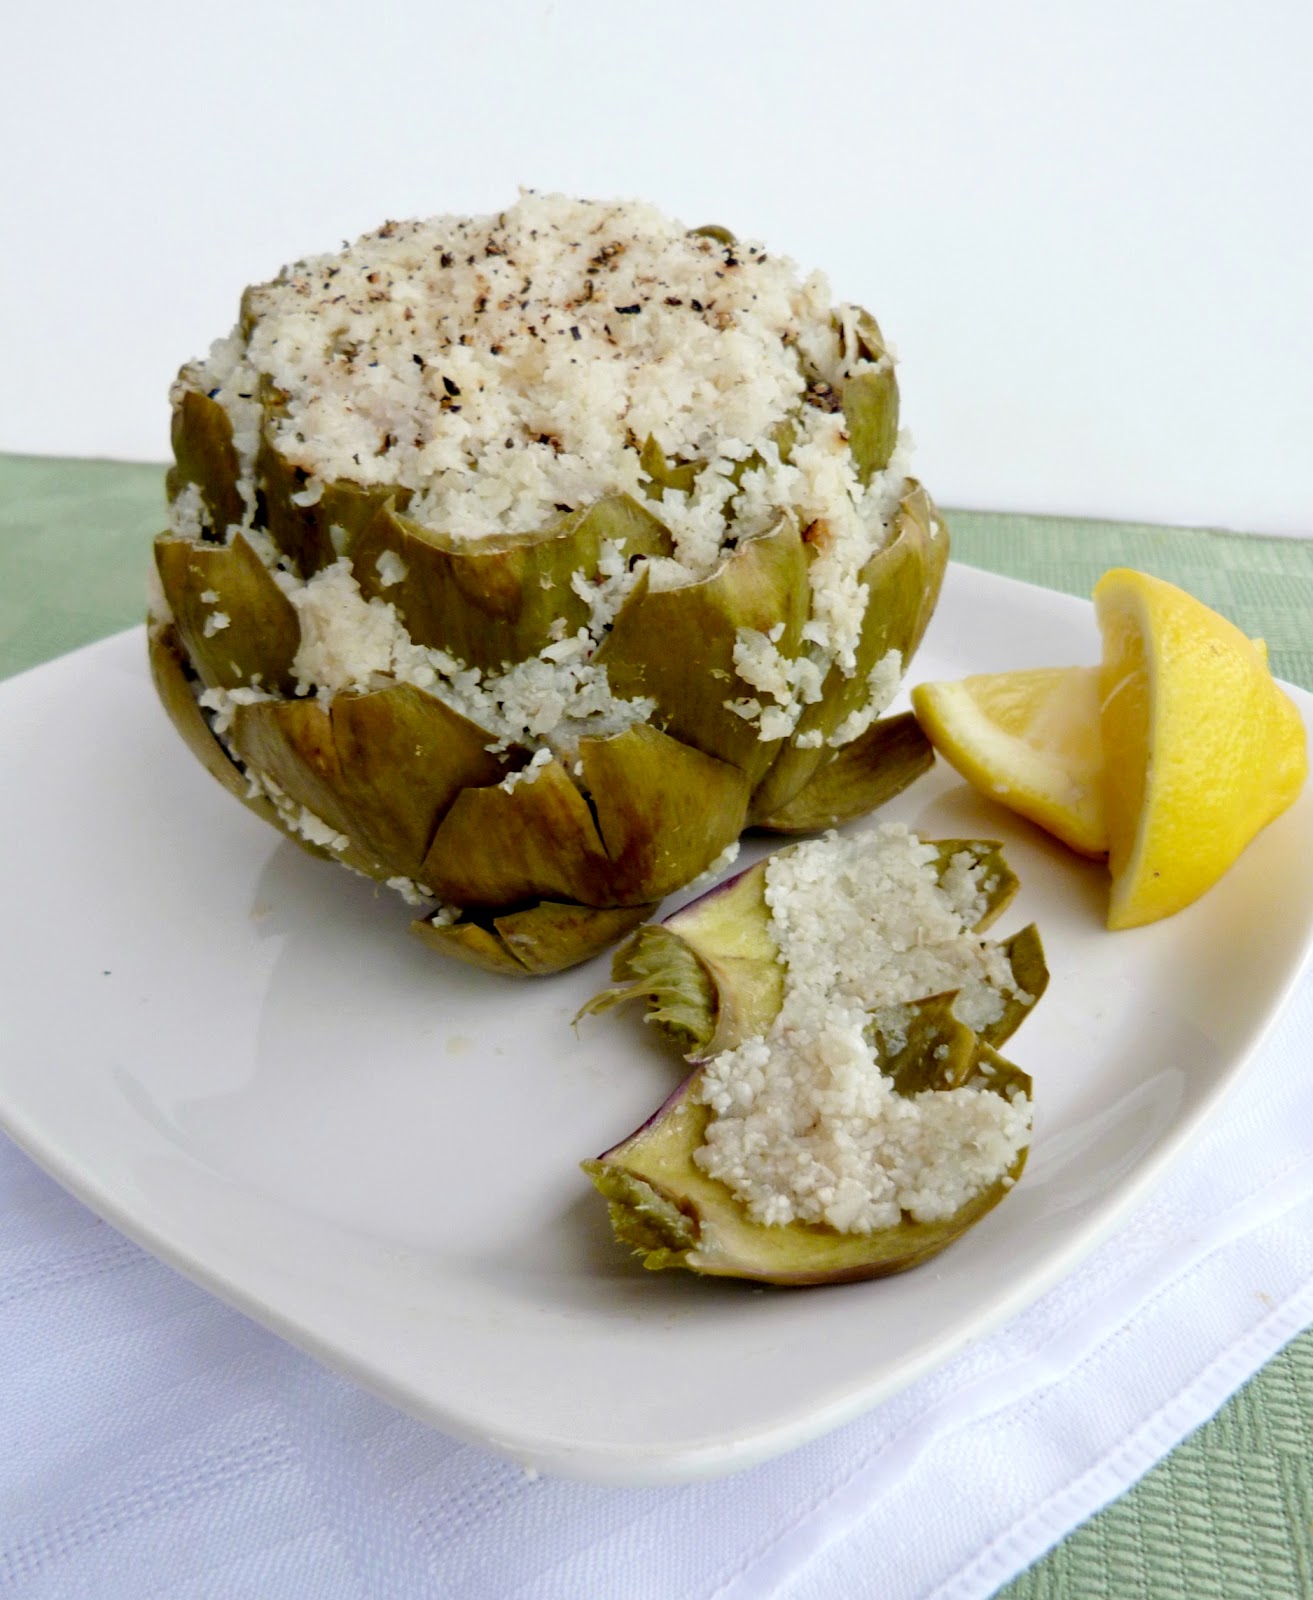
The cauliflower stuffing was soft and moist and had just enough flavour without overpowering the artichoke. And if you've stuffed it well, then each leaf should have a bit of cauliflower on it that you can scrape off with your teeth along with the artichoke meat.

Of course, a big part of the experience is enjoying the process of pulling off each leaf and finding more and more of that delicious artichoke meat as you get closer to the center.

And when you reach the heart in the middle, you'll finally understand why people go to all the work of preparing an artichoke!  The heart of a real artichoke is so much better than any you find in a can or jar - it's so tender and creamy and tastes amazing both on its own and when combined with the cauliflower stuffing.

The whole dish is made even better when it's served with a couple of lemon wedges that you can squeeze over the leaves and stuffing. Artichokes and lemon complement each other really well, so I would definitely recommend that you don't leave that part out!

So if you're like me and have never tried an artichoke, then hopefully I've convinced you to change your mind!  And if you're already a fan of them, then I hope I've at least given you a new idea for a delicious way to enjoy them!


Cauliflower-Stuffed Artichoke


1/4 of a head of cauliflower, chopped (~1/2 lb)
1 shallot, chopped
1 clove garlic, minced
Salt and pepper
1 large globe artichoke
Olive oil (optional)
Lemon wedges for serving

First, prepare the cauliflower stuffing:  
Roughly chop the cauliflower into pieces and add to a food processor through the feed tube, using the grater blade (this should turn it into finely chopped pieces). Replace grater blade with the regular blade.  Add the shallot and garlic to the food processor with the cauliflower and pulse a few times. Season with salt and pepper to taste. Transfer mixture to a bowl and set aside (you should have about 2 cups).

Next, prepare your artichoke: 
Slice off the stem at the bottom so that you have a flat base and the artichoke can stand upright. Trim the pointy tips of the artichoke leaves using kitchen scissors and discard. Slice off about 3/4” from the top of the artichoke so that the leaves can open up and be pulled apart.  Spread the leaves so that you can see the inside of the artichoke – the flowery, hairy part (the choke) is the part you want to scoop out.  Use a small spoon or ice cream scoop to scoop out the inner choke.  Once it is clean inside, squeeze some lemon juice all over the artichoke to prevent browning.

Prepare your steamer by bringing a pot with filled about a couple inches of water to a boil on the stove.

Meanwhile, stuff your artichoke: First, spoon the cauliflower mixture into the hollow centre of the artichoke. Keep stuffing, packing it down as you go, until you can’t fit any more inside.  With the remaining stuffing, fill the inner side of each of the outside leaves, using a small spoon or your fingers to push the mixture down into the leaves.  Drizzle a bit of olive oil over the stuffed artichoke.

To cook:
Place your stuffed artichoke into a steamer basket and insert into the pot of boiling water.  Reduce heat to a simmer, cover the pot, and steam for 30-40 minutes (once you can easily pull off one of the outer leaves, it should be done). Keep an eye on the water level and if it starts to get too low, add some more hot water to the pot.

To eat:
Carefully remove artichoke from steamer and transfer to a plate.  Season with additional ground pepper and serve with lemon wedges to squeeze over top.

Begin by pulling off the outer leaves one by one. Use your teeth to scrape off the stuffing and the “meat” at the base of the leaf, and discard the rest of the leaf. (Note: you’ll notice that as you get closer to the inner layer,  the leaves will have more white meat on them). You can spoon some more of the stuffing from the center onto the leaves as you go if you like. Once you get to the middle, you’ll be left with the artichoke heart, which is the best part – you can eat all of it, along with the rest of your stuffing!

Serves 1.

This was submitted to Wellness Weekend at Diet, Dessert and Dogs.

May 06, 2012

Lemon Artichoke Hummus


Hope you're all having a great weekend and enjoying the warm weather!  Yesterday morning I walked to the farmer's market and picked up my usual fruits and veggies.  This was the first time this year that the market was held outdoors, and also my first sighting of local radishes and rhubarb, so I was sure to pick those up!  I've already made one recipe with the rhubarb that I can't wait to share!

After my shopping, I hung out upstairs at the market where they were having some Cinco de Mayo festivities.  I listened to some songs and sat in on a free Mexican cooking class where the chef showed us how to make salsa and a roasted red pepper soup in a pressure cooker - both of which were very fresh tasting and definitely had some heat to them too!

I'm looking forward to getting outside in the sun again today, but first I have a recipe to share with you!  I actually made this hummus a few months ago when it was still winter.  I loved the bright citrusy flavor but I thought it was more suitable for springtime, so I've been saving the recipe until now!


Along with the standard hummus ingredients of chickpeas, tahini, olive oil, garlic, salt and pepper, this recipe includes marinated artichokes, fresh lemon juice and zest, a bit of parsley and some spices.

I love the combination of artichokes, chickpeas and lemon in other dishes, like one of my favourite salads, so I knew that I would love these flavours together in a hummus too!

The lemon and artichokes both provided a nice amount of acidity to the hummus, and the spices and parsley added more layers of flavor.  This was also one of the creamiest hummuses I've ever made - the secret is adding some of the chickpea liquid and artichoke liquid at the end.

This would be a nice snack to serve with crackers, pita chips, or any other dippers that you like.  This was definitely a big hit in my house, so if you have a potluck or picnic coming up, this hummus would be a great item to bring!


Lemon Artichoke Hummus 
Adapted from What's Cookin' Chicago?


1 15 ounce can chickpeas, drained and rinsed (reserve some liquid)
1 cup drained and chopped artichokes from a jar (reserve some liquid)
Zest and juice of one lemon
1/4 cup tahini
1 tbsp olive oil
2 garlic cloves, minced
1/2 tsp salt
freshly ground pepper to taste
1/2 tsp cumin
Pinch cayenne
1 tbsp chopped fresh parsley
1 tsp artichoke liquid
1-2 tsp chickpea liquid

Place all ingredients except for the artichoke and chickpea liquids in a food processor and process until everything is fully broken down and mixed together, scraping down the sides of the bowl if necessary. 

Add the artichoke liquid and 1 tsp of the chickpea liquid and process until it is incorporated.  If the hummus looks like it needs a bit more liquid, add the remaining teaspoon of chickpea liquid and process again.  Taste and adjust seasoning if desired. 

Serve with veggies, pitas, or crackers.  Store in the refrigerator. 


This was submitted to Wellness Weekend at Diet, Dessert, & Dogs. 

LinkWithin

Related Posts Plugin for WordPress, Blogger...