Showing posts with label orange. Show all posts

May 21, 2014

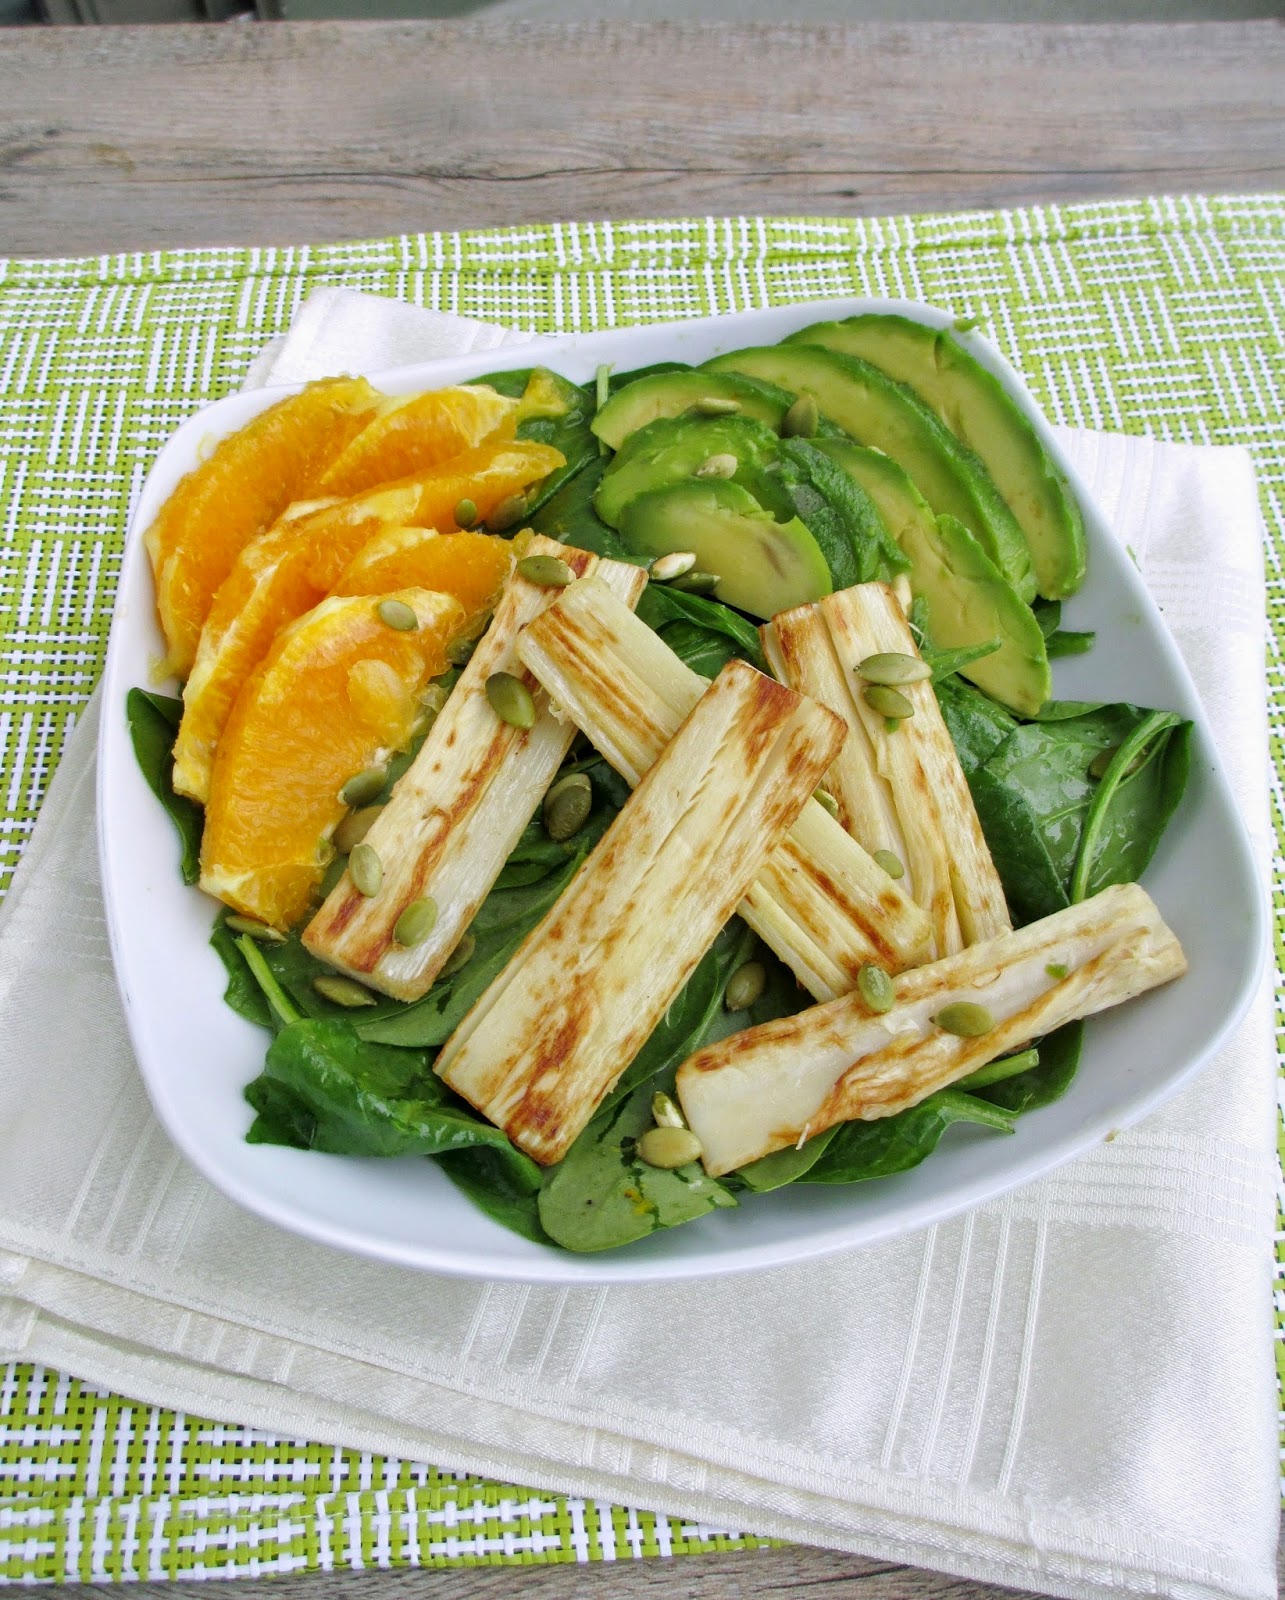
Hearts of Palm, Orange & Avocado Salad


I mentioned in my last post that I recently got two new vegan cookbooks as a gift, and I couldn't wait to try the recipes in Straight from the Earth.

One recipe that stood out that I decided to try my take on first was the grilled hearts of palm salad with grapefruit and avocado. I love the combination of avocado with citrus fruits, and I've been wanting to try hearts of palm for awhile so I was excited to try this!

I'm not a huge fan of grapefruit though, so I decided to use orange instead, which I thought worked really well as a substitute. I had to try a couple of stores before I found canned hearts of palm, but I was glad I managed to get them because I loved their unique taste and texture!

If you've never had hearts of palm, it's a vegetable that actually comes from a palm tree, and I would describe them as having a similar texture as artichokes, but with a milder flavour somewhat like water chestnuts.


The original recipe called for grilling the sliced hearts of palm, but I just sauteed them in a pan and that worked fine too! For the dressing, I modified it to have much less oil and I added some dijon and a bit more orange zest. I also added a sprinkle of toasted pumpkin seeds to my salad for a little bit of crunch.

This was such a fresh tasting salad that would be perfect to eat on a warm summer night. I loved the combination of buttery, creamy avocado slices with the juicy oranges and the warm hearts of palm. The dressing was nice and light and tangy, and you can use whatever greens you like as the base - the original recipe called for arugula but I used baby spinach instead.

I hope to try more recipes from this cookbook soon, and if you've tried any that you recommend, please feel free to share in the comments!
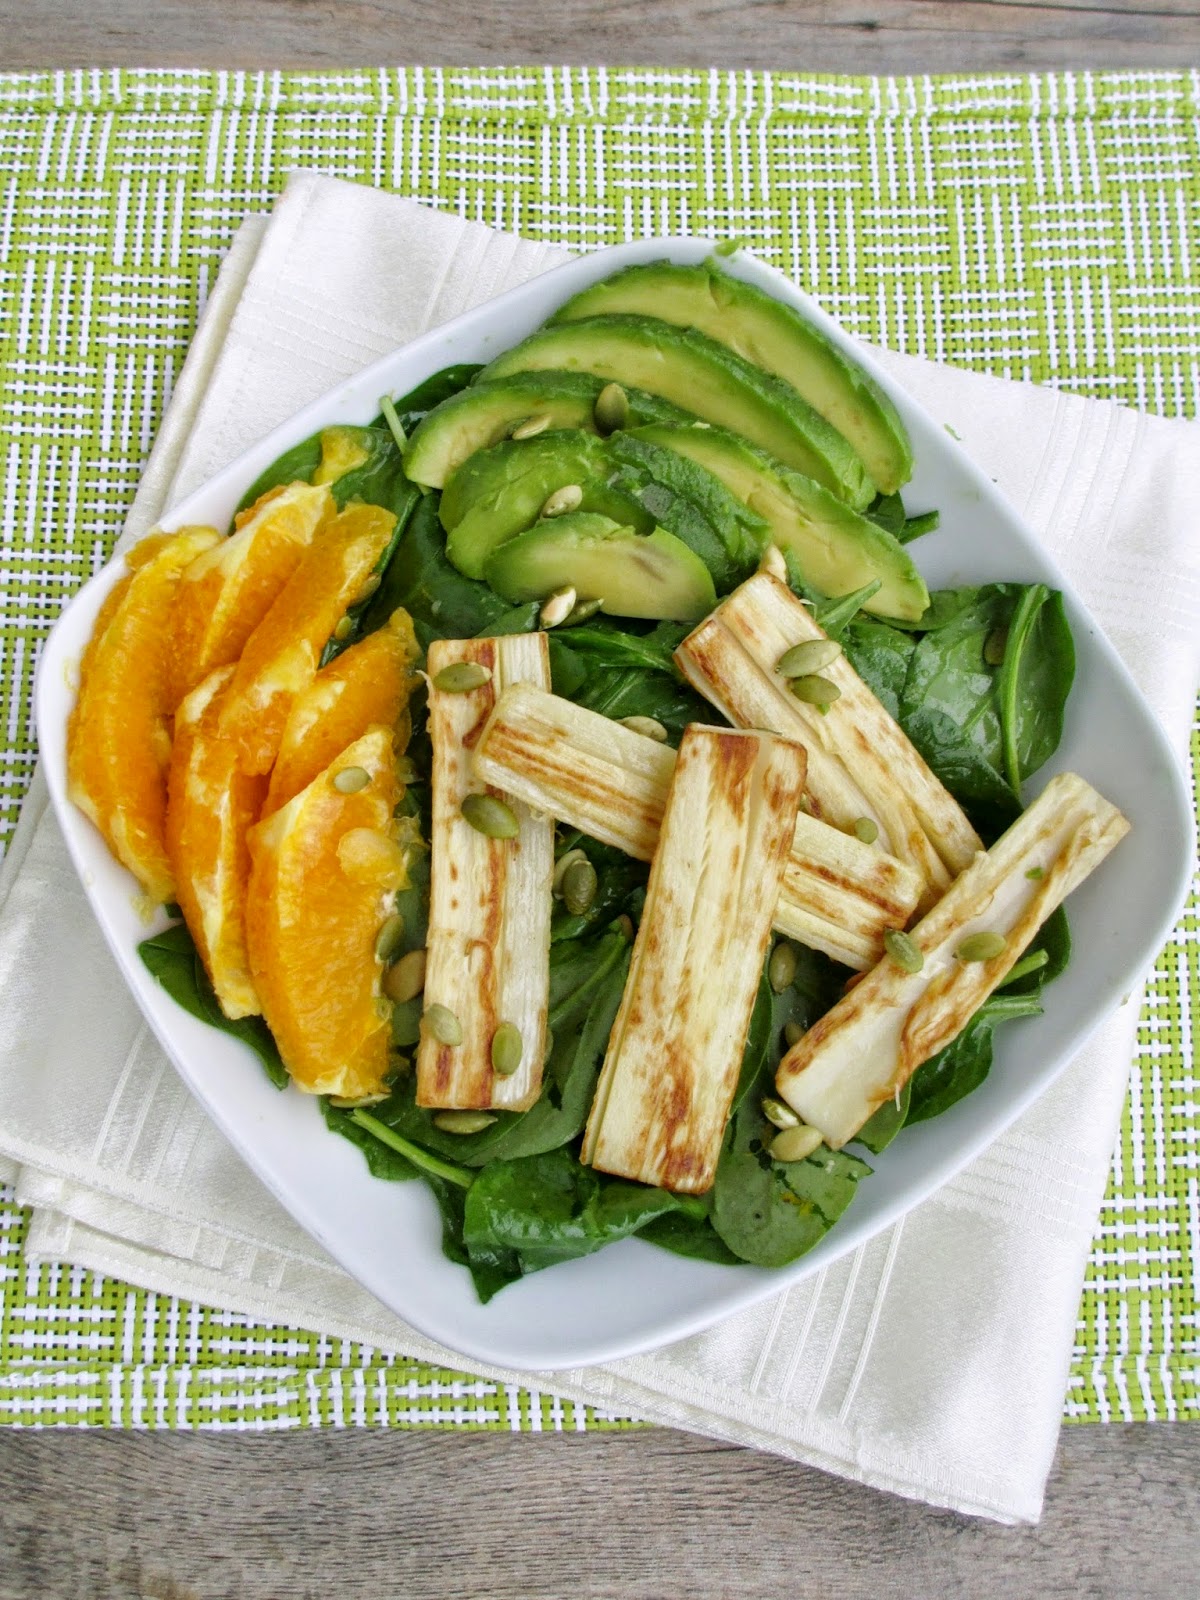

Hearts of Palm, Orange & Avocado Salad
Adapted from Straight from the Earth

Dressing
2 tbsp olive oil
3 tbsp white wine vinegar
1 tsp agave
1/2 tsp Dijon mustard
3/4 tsp orange zest
Salt and pepper to taste

Salad
1 seedless orange (*Note: you will need the zest first for the dressing before you slice it)
1 14oz can hearts of palm, drained and rinsed
1 tbsp pumpkin seeds
1/2 tbsp olive oil
1 ripe avocado
Baby spinach or other baby greens


To make the dressing, whisk all ingredients together in a small bowl (or place in a bowl with a lid and then shake to mix). Taste and adjust seasoning if desired.

Use a knife to slice the peel off the orange. Carefully slice the orange into thin segments and set aside. Slice the hearts of palm in half lengthwise and let dry out a bit on paper towels.

Heat a large skillet over medium heat. Toast the pumpkin seeds just until fragrant and beginning to brown. Remove from heat and transfer to a small bowl. Add olive oil to the pan, then place the hearts of palm flat side down. Let cook for about 2-3 minutes, until lightly browned, then flip and cook the other side for another 2-3 minutes. Remove from heat and transfer to a plate.

Cut avocado in half, remove the pit and scoop out the two halves. Slice each half lengthwise into thin pieces.

Place desired amount of spinach or greens in a bowl and drizzle some of the dressing over top. Toss well to mix, then lay out greens on plates. Top plates with the sliced avocado, oranges, hearts of palm, and toasted pumpkin seeds. Drizzle more dressing over top if desired.

Makes 2 large servings or 4 small servings.


February 26, 2014

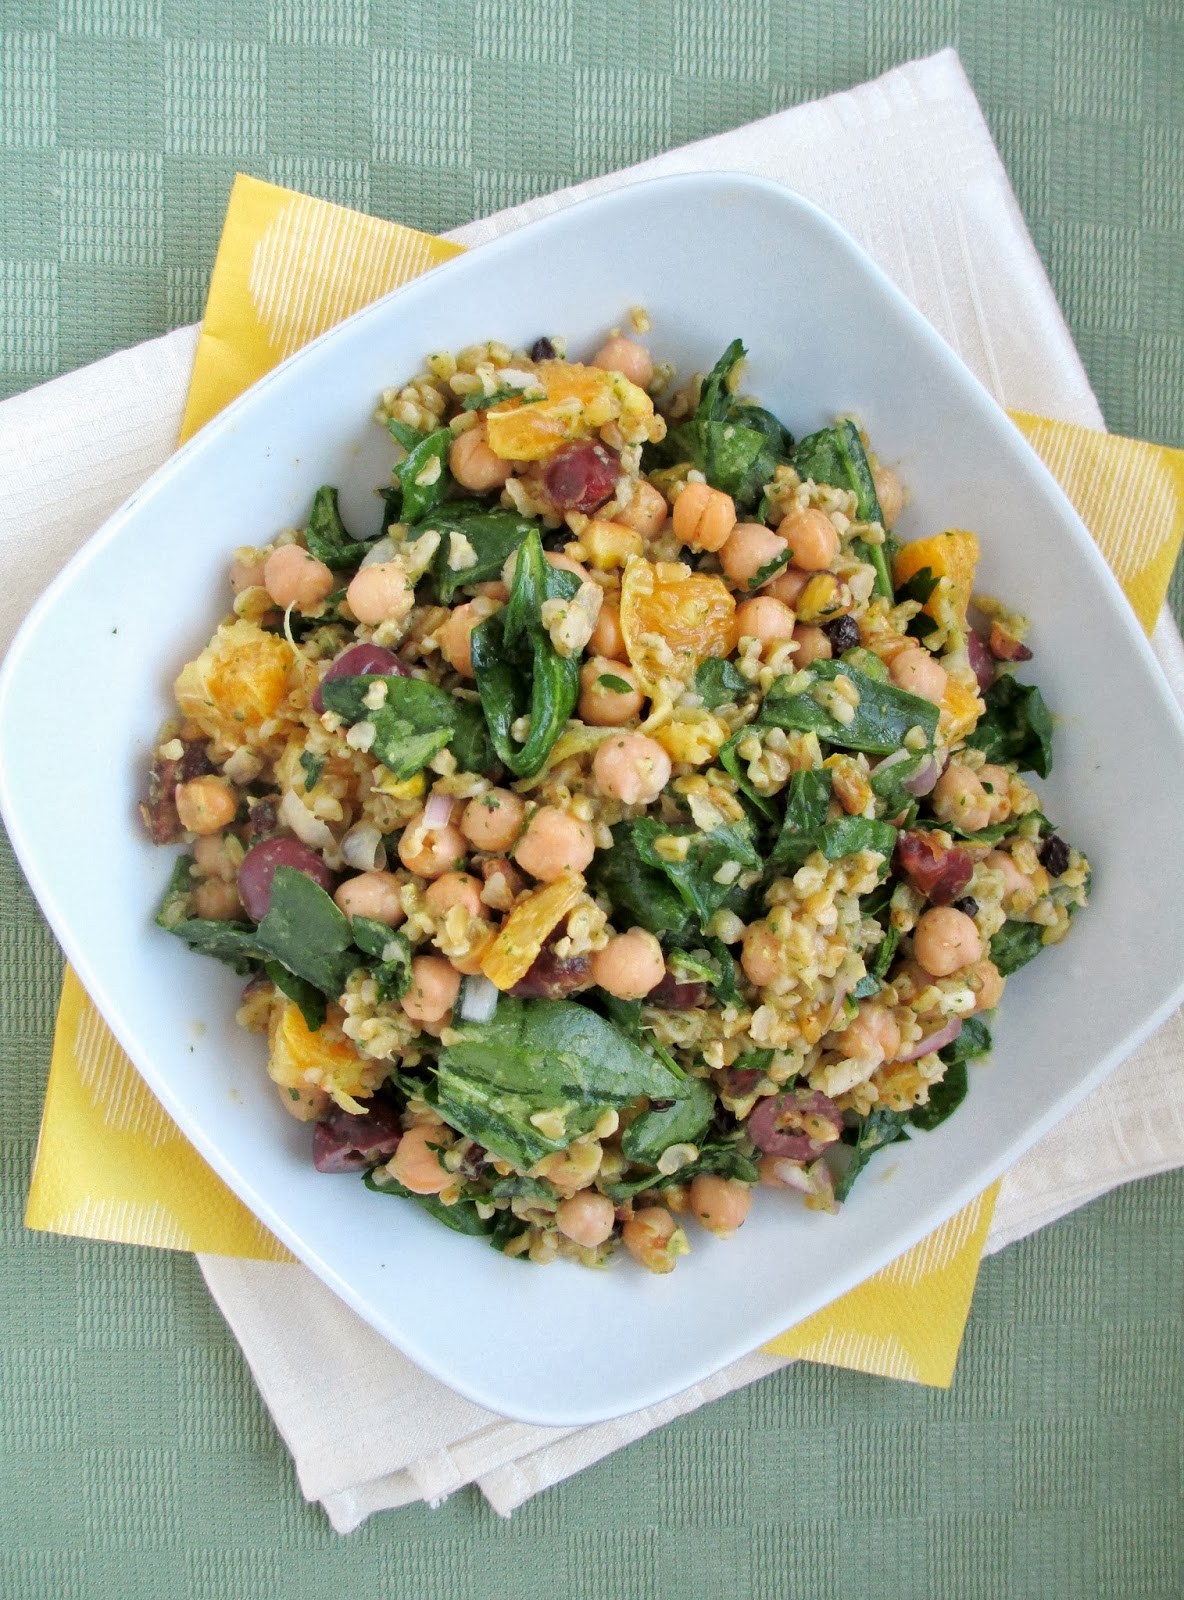
Moroccan Chickpea & Freekeh Salad with Mint-Orange Dressing


Is anyone else getting sick of winter yet? I just spent some time last week enjoying outdoor activites like snowshoeing and skating, but usually by the time March rolls around, I've had my fill of snow and cold weather!

To help ward off the winter blahs, I've been incorporating more bright and fresh ingredients into my meals, like pineapple and citrus. I posted this citrus protein bowl recently, and this week I've been eating another orange-infused meal, this time with a Moroccan twist!

The recipe for this salad was inspired by a moroccan salad with cilantro-orange dressing that I saw on Pinch of Yum recently and immediately bookmarked. I love trying new combinations of ingredients in my meals that I don't normally eat for dinner, so I was intrigued by her addition of dates and pistachios into a bulgur salad.


For my version, I used freekeh instead of bulgur - a grain that is full of fiber and protein and has a sturdy, chewy texture that holds up well in salads like this one. I also added chickpeas to bulk up the dish a bit more into a main dish salad.

In addition to the orange, spinach, dates, and pistachios, I added some currants, olives, shallot, and parsley because I thought they would pair well with the other Moroccan flavours. I also changed up the dressing a bit, using mint instead of cilantro and adding some garlic and cumin for extra seasoning.

With all of those ingredients, this dish definitely had a lot of flavour! I liked the contrast of the salty olives against the sweetness of the dates and orange, with a bit of bite from the fresh parsley too. If you're not a fan of mint, I found it to be pretty subtle once the dressing was mixed in, but feel free to use the original suggestion of cilantro instead!


Moroccan Chickpea & Freekeh Salad with Mint-Orange Dressing
Adapted from Pinch of Yum

1 (145g) package freekeh (about 3/4 cup dry)
1 3/4 cups water
Dash of salt
1/2 cup dates, chopped (measure before chopping)
2 tbsp dried currants
2-3 cups packed baby spinach leaves (chopped if leaves are large)
1 can chickpeas, rinsed and drained
1 large navel orange
1/2 cup pitted Kalamata olives
1/2 cup chopped fresh parsley
1 shallot, peeled and minced
1/4 cup unsalted pistachios

Dressing
1 navel orange
1/3 cup packed mint leaves
1 clove garlic, minced
1 tbsp olive oil
1 tbsp fresh lemon juice
1 tsp honey or agave nectar
Scant 1/2 tsp salt
1/4 tsp cumin
Ground pepper


Prepare the dressing by adding all ingredients to a blender and pureeing until smooth. Taste and adjust seasoning if desired.

Cook freekeh according to package directions (I brought the dry freekeh and water to a boil in a medium sized saucepan, then reduced the heat to low and cooked, covered, for 20-25 minutes). Remove from heat and add the chopped dates and currants to the pot. Keep covered for 5 minutes, then transfer everything to a large bowl.

Add the spinach and chickpeas to the bowl. Remove the skin of the orange using a knife and cut the orange into segments. Chop segments into smaller pieces and add to the bowl. Chop olives and add them as well, along with the parsley and shallot.

Heat a small skillet on medium heat and toast the pistachios for a few minutes, until lightly browned. Remove from heat and add to the bowl (you can skip the toasting part if you want).

Pour the dressing over everything and toss well to combine.

Makes 4 servings.


February 04, 2014

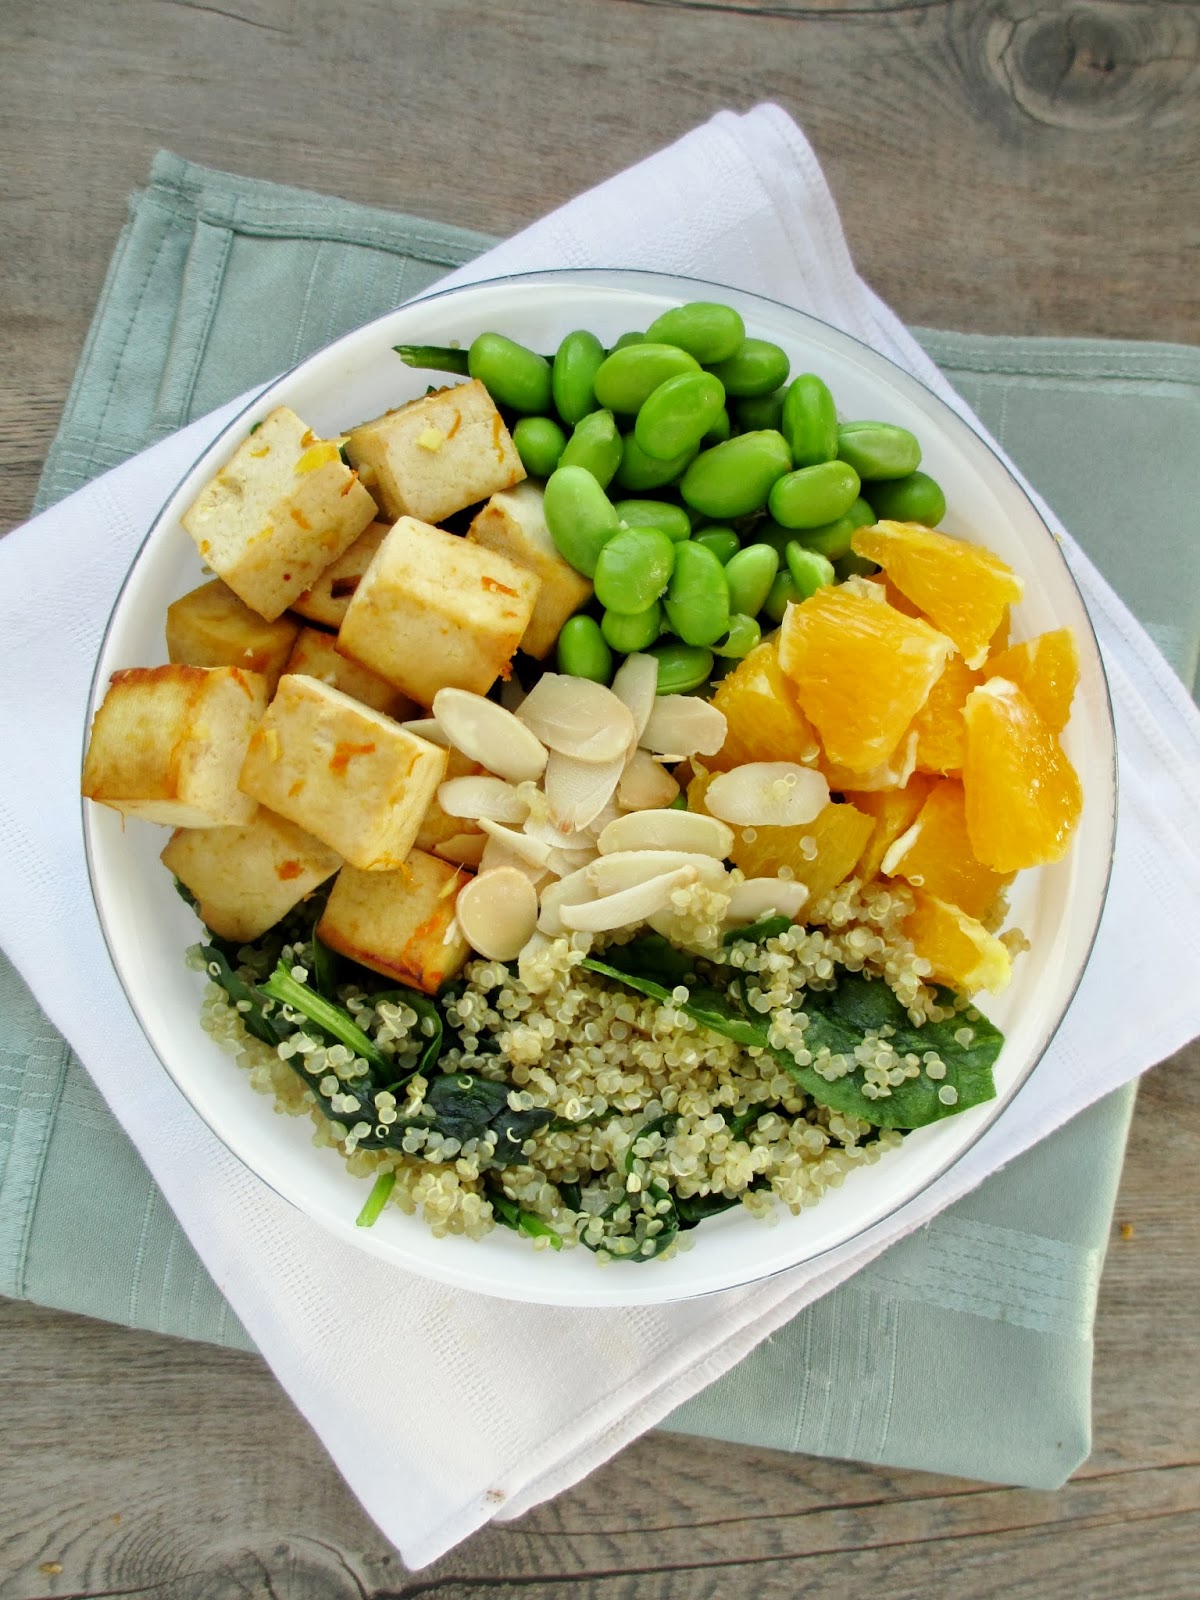
Citrus Protein Bowl


If you read a lot of food blogs, you're probably well aware of the latest trends in recipes, for example, kale chips, grains for breakfast (like quinoa or amaranth with warm fruit), the one-pot pasta idea, black bean brownies, zucchini noodles, etc. (And of course, just because an ingredient or meal idea becomes trendy, that doesn't mean it has to go out of style - I plan on eating zucchini noodles a lot more once the weather warms up again!)

One trend I've noticed lately is the "bowl" concept, which is usually a base of grains like quinoa or rice, topped with a selection of veggies, a protein like chicken, tofu, or beans, and a sauce to bring everything together.

I've been wanting to try making my own bowl for awhile, and when I saw a whole chapter of bowl recipes in Isa Chandra Moskowitz's new cookbook Isa Does It, I had to try one out!


The one that I chose to try first was her citrus tahini bowl - quinoa topped with oranges, bok choy, grilled tofu, and a citrus-soy-tahini sauce. Since the recipe seemed pretty adaptable, I changed things up a bit by using spinach instead of bok choy, baked tofu instead of grilled, and adding some edamame for extra protein and colour, and toasted almonds for a bit of a crunch.

While this wasn't the easiest or quickest recipe to make (I wouldn't recommend starting this from scratch on a weeknight after work), the extra effort was definitely worth it! Plus you can make things easier on yourself by preparing some or all of the components ahead of time and just assembling a fresh bowl for dinner on the night you want to eat it. I made this one night when I had some extra time and then just enjoyed the leftovers for the next few days!


The combination of ingredients in this bowl was just what I was going for - bright colours and flavours and a mix of textures. I loved the chewy baked tofu, which was marinated in the dressing first to soak up extra flavour, combined with the buttery edamame and the juicy oranges. My favourite part was the creamy tahini dressing with its sweet and savory notes.

I also loved how nutritious this meal was! I called this a protein bowl because it has three main sources of protein: quinoa, tofu, and edamame, so it will keep you full without feeling weighed down. Plus the spinach and oranges provide some extra vitamins, which we can all use at this time of year!


Citrus Protein Bowl
Adapted from Isa Does It

Marinade/Sauce:
1/3 cup freshly squeezed orange juice*
1 tsp orange zest
2 tbsp fresh lemon juice
1 tbsp tamari or low-sodium soy sauce
1 tbsp rice vinegar
2 tsp sesame oil
1 tsp pure maple syrup
1 tbsp minced fresh ginger
2 cloves garlic, peeled and minced
Dash of salt
1/4 tsp chili flakes
1/4 cup tahini (to be added later)

Bowl
1 12-14 oz package firm tofu
1 bunch spinach
1 cup quinoa
1 cup frozen shelled edamame
1/4 cup sliced almonds
1 large seedless orange (next time I might use two small oranges to get more orange pieces)

*I peeled one large seedless orange, blended the pieces and strained out the pulp. Zest the orange before peeling.


First, drain the tofu from the water in its packaging and slice in half. Press tofu between layers of paper towel with a heavy object on top for 15-30 minutes.

Meanwhile, prepare the marinade by whisking all ingredients except the tahini together in a bowl. Slice the pressed tofu into squares and place in a shallow dish (I used a square glass baking pan). Pour the marinade over top of the tofu and let sit for 30-60 minutes, flipping the pieces once halfway through.

Preheat oven to 400°F. When the tofu is done marinating, drain out the liquid (but keep it aside in a bowl) and transfer the tofu to an oven-proof baking dish (if it wasn’t already in one). Bake in the preheated oven for 30 minutes, flipping the pieces halfway through.

While tofu is cooking, wash spinach and remove stems. Tear or slice the larger leaves into smaller pieces. Prepare quinoa according to package directions. Once quinoa is done cooking, let it sit covered for 5 minutes, then fluff with a fork. Immediately transfer warm quinoa to a large bowl or pot and add the spinach. Toss well so that the spinach gets mixed into the quinoa, then cover with a lid and let sit for at least 5 minutes – the heat from the quinoa should help to wilt the spinach a bit.

Cook the edamame however you prefer, or according to package directions – either boiling, steaming, or microwaving. Set aside.

Heat a small skillet over medium heat. Add the almonds to the pan and toast for a few minutes, shaking the pan often, until lightly browned. Remove from pan and set aside in a small bowl.

Peel the orange (I like to use a knife to remove the skin). Slice each orange segment into two or three pieces.

Transfer the remaining marinade liquid to a blender and add the tahini. Blend until smooth, then transfer to a small bowl. (Note: feel free to add a bit more orange juice or lemon juice if you prefer a thinner sauce).

To assemble bowls, scoop your desired portion of the quinoa-spinach mixture into a bowl. Top with desired amount of each of the following: baked tofu, cooked edamame, orange pieces, and toasted almonds. Drizzle some of the sauce over top and stir to mix.


Makes 4-6 servings.

September 17, 2013

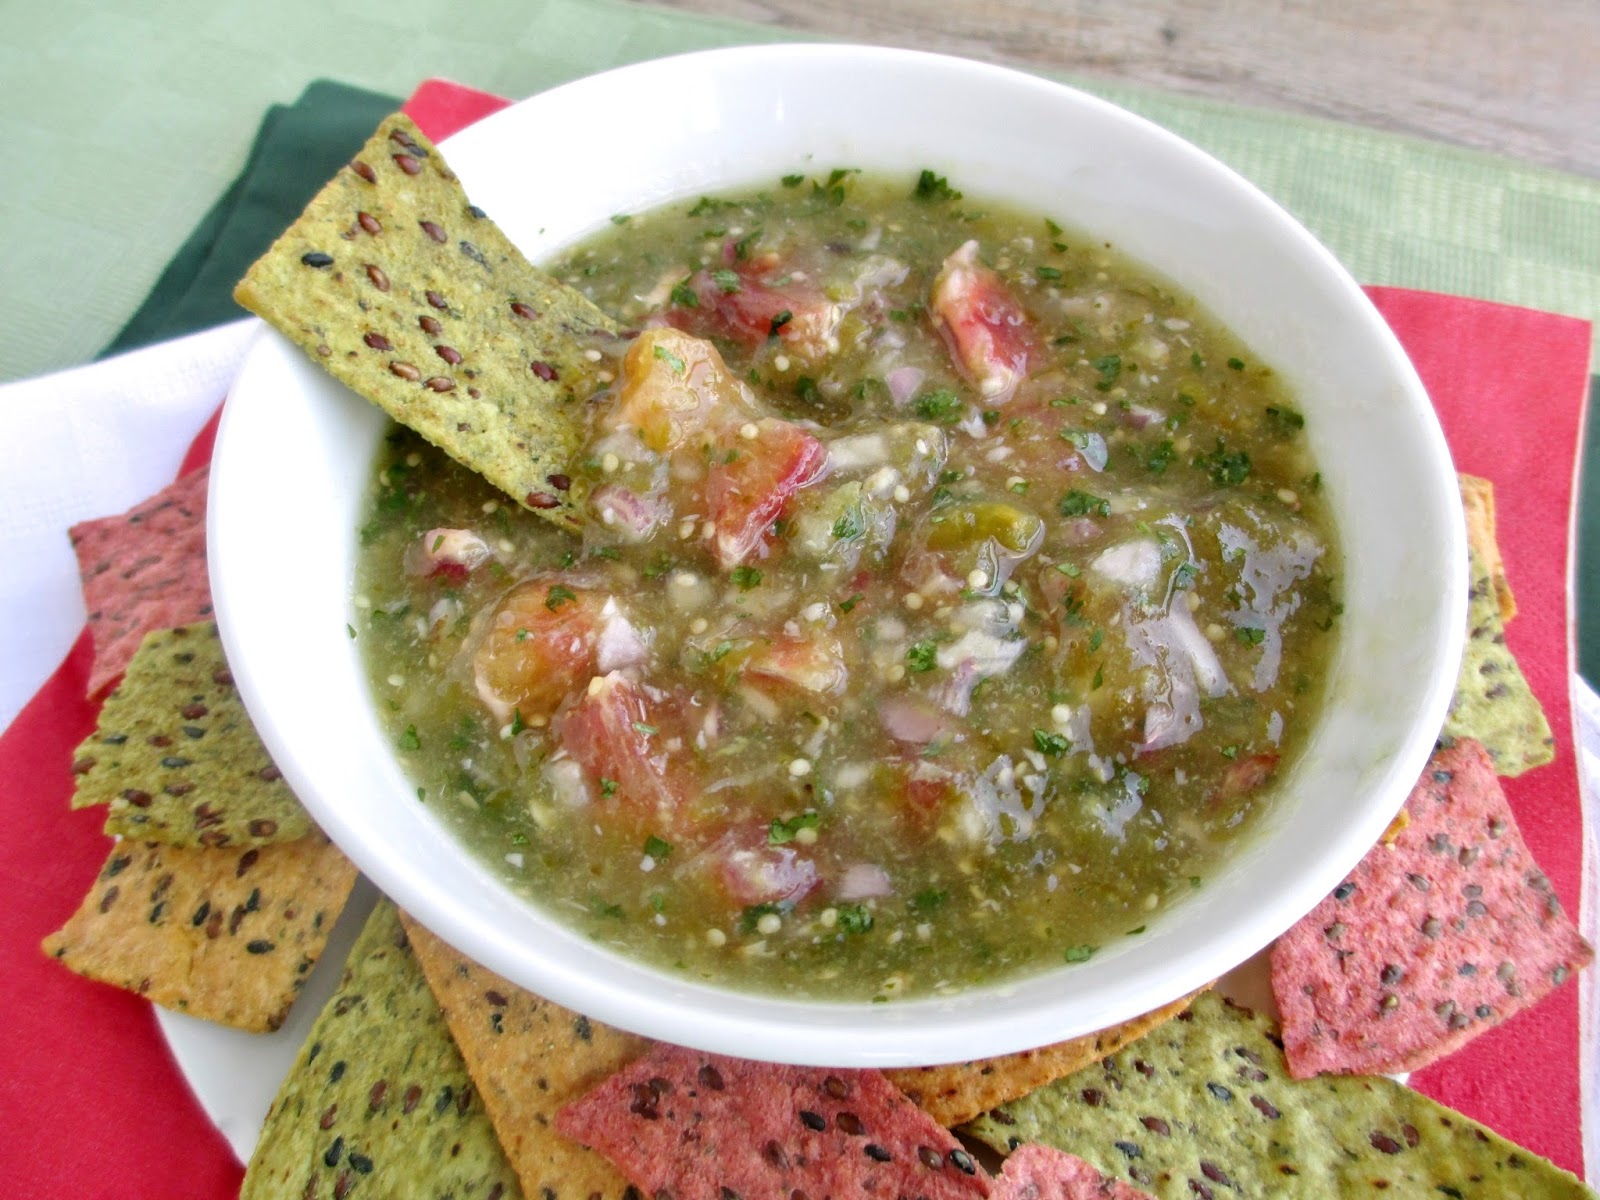
Tomatillo & Blood Orange Salsa


I always look forward to the end of summer because it means I can finally get fresh tomatoes that actually have some flavour, and when I visit my parents' place with their garden full of tomatoes, I try to eat as many tomato sandwiches as I can!

I feel like I somehow missed most of tomato season this year though, since I was out of the country for the end of August and again in the beginning of September.

So while I haven't been able to try out any new tomato recipes this year, I do have a recipe to share featuring a relative of the tomato: tomatillos!


If you've ever had salsa verde made from tomatillos before, then you know that tomatillos may look similar to tomatoes (other than their bright green colour of course), but they actually taste pretty different - rather than being juicy and sweet inside, tomatillos are firm and more tart. Once cooked, however, they soften and take on a deeper flavour with more sweetness.

When I picked up a bag of freshly picked tomatillos from the market a few weeks ago, I knew I wanted to make some kind of a salsa with them, so I looked up some recipes for inspiration and got right to work peeling their skins off and starting the broiler for a warm, smoky salsa.

I also threw in a jalapeno for some heat, but little did I know it happened to be a deathly hot jalapeno, and I could barely eat a teaspoon of the salsa without setting my whole mouth on fire!


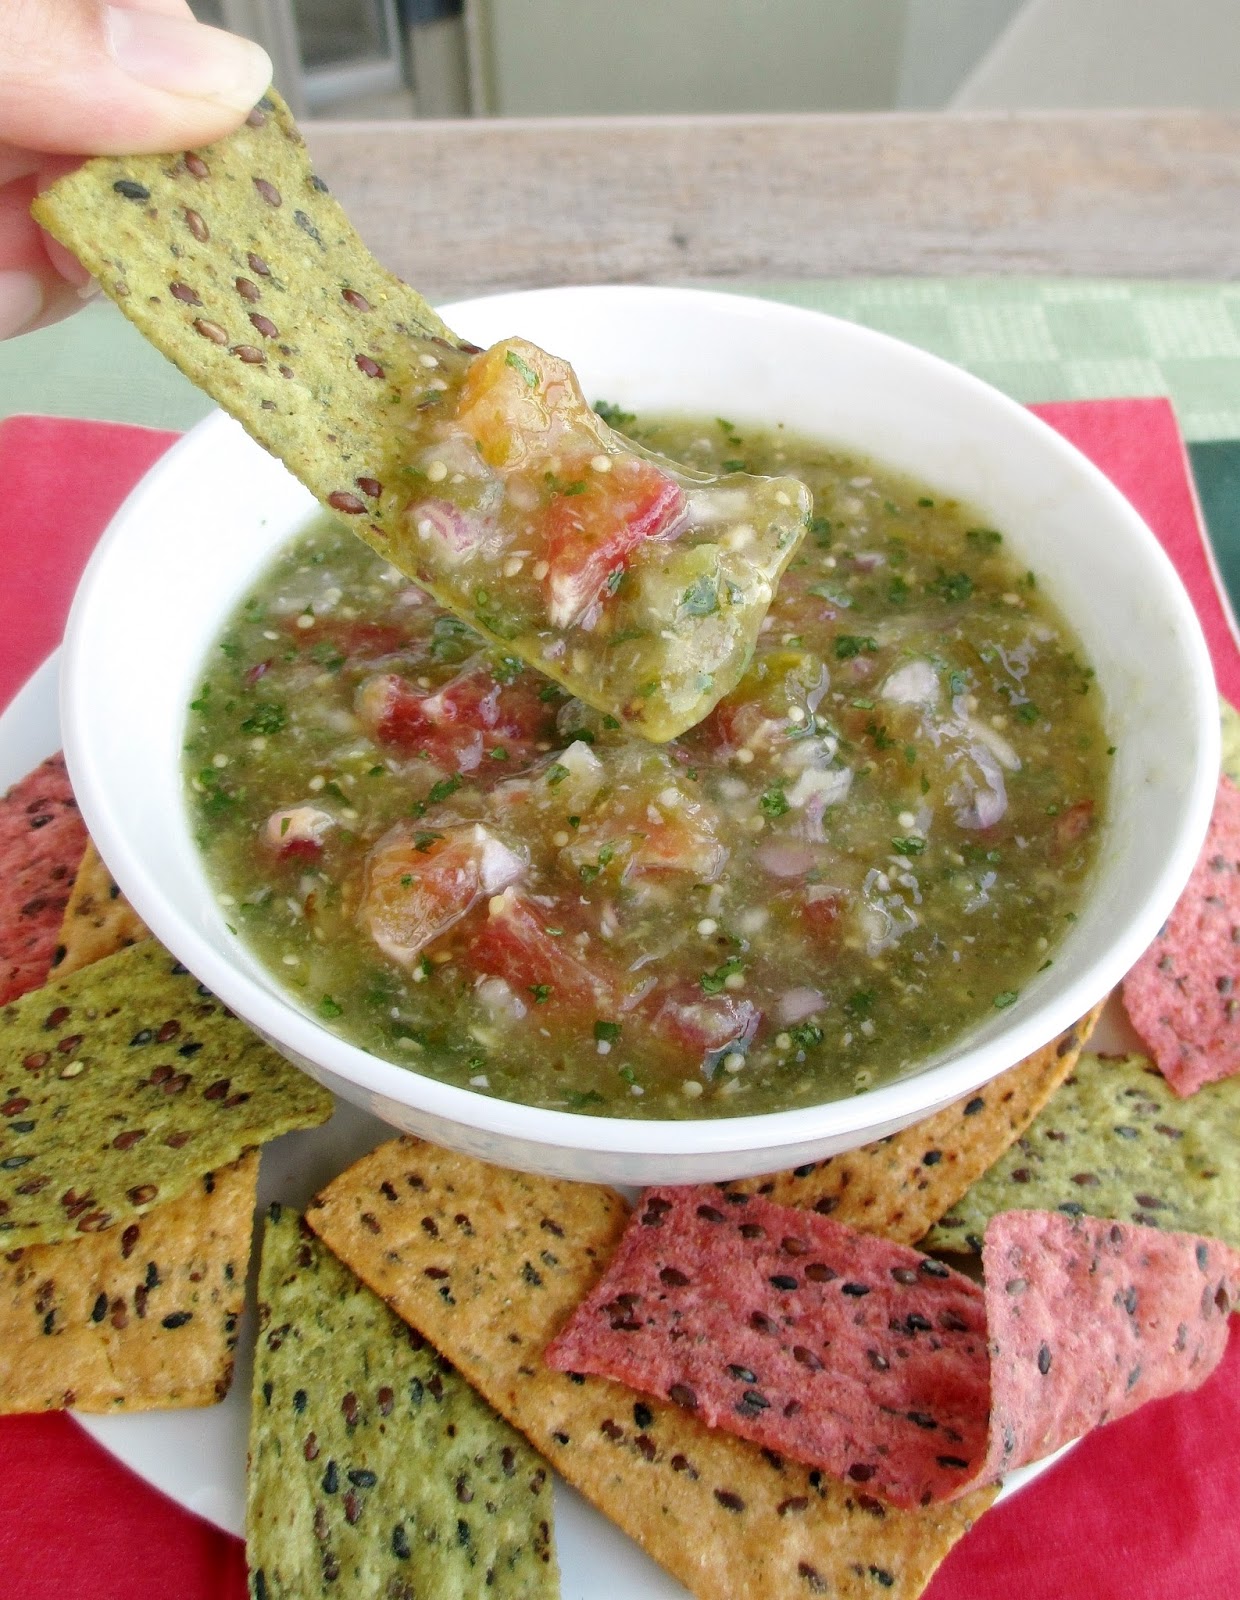
Luckily I still had a few tomatillos left after that first failed attempt, so I tried again a couple of days later, and ended up with a nicely balanced salsa with a mix of sweet, tangy, and spicy dimensions.

After broiling the tomatillos and only half of a jalapeno this time, I blended everything up into a chunky puree and added some shallots, garlic, cilantro, and lime juice to go along with the Mexican notes. And since I love adding fruit to my salsas, I also added some chopped blood orange for a bit of sweetness. You could use a regular orange instead, like this recipe that inspired me to add a citrus fruit, but I liked the sweeter blood orange because the salsa was already tangy.

While I still love traditional tomato-based salsas, I also like trying out new flavours and ingredients when I make my own salsa, so this tomatillo and blood orange combination was definitely a different and tasty new version!


Tomatillo & Blood Orange Salsa
Inspired by this recipe on Serious Eats

3-4 tomatillos, skins removed
1/2 a jalapeno, seeds removed (Note: my jalapeno was very spicy, so I used less than half. Use up to a whole one if yours is a mild jalapeno)
1 large clove garlic, peeled
1 small shallot (or half a large shallot), minced
2 tbsp cilantro
1 tbsp fresh lime juice
1 tsp agave or other sweetener
1/4 tsp salt
1 blood orange


Preheat oven to broil.

Place tomatillos, jalapeno, and garlic on a foil-line baking sheet and broil for about 10 minutes, turning once or twice, until the everything is softened and browned (I left my tomatillos in for a couple minutes longer, 12-13 minutes). Remove from oven and transfer everything directly to a food processor. Process until everything is broken down (it’s okay if it’s still a bit chunky).

Meanwhile, soak the minced shallot in a small bowl filled with cold water (this will help remove some of the bite of the raw shallot).

Add the cilantro, lime juice, agave, and salt to the food processor and process to mix. Drain the shallot and add that to the bowl as well. Pulse briefly to mix. Transfer salsa to a bowl.

Peel the orange, or remove the skin with a knife (I used the knife method). Separate the segments, and cut into small pieces. Stir the diced orange into the salsa.

Serve warm, or let sit in the refrigerator for about an hour to chill.


July 03, 2013

Avocado, Mango & Orange Salad


Who doesn't love a refreshing, juicy fruit salad in the summer? I love adding fruit to my salads, whether it's a leafy salad or a grain-based salad, like this quinoa version.

This fruit salad is a bit different, in that it doesn't really have a base ingredient like lettuce or quinoa. Instead, it's just a simple combination of ripe fruits with fresh herbs, all marinated in a dressing made with freshly squeezed citrus juice.

I had made a version of the original recipe for my family recently as a way to use up some ripe fruits that were lying around, and we all loved it so much that I had to make it again. I changed things up a bit this time, adding some grape tomatoes and chopped cashews for a bit of crunch.

This salad had a lot of bright flavours, and I loved the creaminess of the avocado and mango with the juicy bursts of orange.

This would make a great side dish for a summer BBQ, or you can also eat it like a salsa on top of chips or quesadillas. And if you're in Canada with a Sobeys store nearby, I recommend picking up some of their "light and airy pop crisps" and using them as a base to eat this salad with!


Avocado, Mango & Orange Salad
Adapted from Saveur 

1 ripe mango, diced (I recommend using a champagne/Ataulfo mango)
1/2 cup chopped grape or cherry tomatoes
1 ripe avocado, diced
1/2 a jalapeno, minced
1/4 cup chopped cilantro
1 medium orange (I used a navel orange)
1.5 tbsp fresh lime juice
1/2 tbsp olive oil
Salt and white pepper
1/4 cup chopped roasted cashews

Combine the diced mango, tomatoes, and avocado in a bowl. Add the minced jalapeno and chopped cilantro and stir to combine. Peel the orange, using a knife to slice off all of the white parts of the skin. Carefully slice the orange into wedges.  Take 2 slices and squeeze all of the juice out of them into a small bowl. Measure 1 tbsp of orange juice and set aside (if you don't get 1 tbsp, use another orange slice until you have enough juice). Chop the remaining orange slices into pieces and add them to the salad (you should have about ¾ cup).

Add the lime juice and olive oil to the bowl with the orange juice. Season with salt and white pepper to taste. Stir or whisk to combine, then pour dressing over the salad, tossing to mix.

Let salad chill in the refrigerator until serving time. Sprinkle chopped cashews over the salad when you are ready to serve.

Makes 2 servings. 

December 19, 2012

Tangerine Coconut Cookies


It seems like time is flying by these last couple of weeks - there's less than a week left until Christmas, and I feel like I haven't done all the Christmasy things that I've wanted to yet, like watching all my favourite movies, spending evenings shopping in the crazy busy malls, driving around to look at Christmas lights, and going to see the lights display in the park.

One thing I have managed to is some holiday baking! Our annual cookie swap at school took place a couple of weeks ago, and in the last few days I've made 4 more kinds of little treats.  The latest treat to come out of my kitchen was these tangerine coconut cookies.

I had bookmarked the original recipe for mandarin coconut cookies from Whole Foods, and I was inspired to try them after a fellow student brought some clementine cookies to our cookie swap that I really liked.


These cookies are kind of like a cross between a sugar cookie and shortbread, and they're made vegan by using coconut oil instead of butter.  Because the baking time is a bit longer, they come out with a crisp, crumbly texture (perfect as a tea biscuit!) and if you place them in the freezer before baking, they stay nice and thick without spreading.

These are studded with lots of coconut and full of tangerine flavour.  I love anything with coconut, but I'm actually a bit picky with orange-flavoured treats as I find the zest can be a bit overpowering.  That wasn't the case with these cookies though - the tangerine zest and juice added lots of flavour, but it was balanced out really well by the coconut at the same time.

I also loved the pretty effect of pressing the cookies with a small glass to create the ridges around the edges. Plus the coconut-sugar mixture that I rolled the cookies in makes them look like they were dusted with snow!

If you're still looking for more cookie ideas, I plan on doing a round-up post of some of the other treats I've made lately, so stay tuned!


Tangerine Coconut Cookies
Adapted from Whole Foods

1 tangerine (can substitute with a clementine instead)
6 tbsp (1/4 cup + 2 tbsp) coconut oil, softened
1/2 cup powdered sugar
1/2 tsp vanilla extract
1/2 tsp coconut extract
1 ¼ cups all-purpose flour
1/4 cup + 2 tbsp unsweetened shredded coconut
1.5 tbsp cornstarch
1/2 tsp baking powder
1/4 tsp salt
2 tbsp cane sugar

Preheat oven to 325°F and prepare a baking sheet by lining with parchment paper.

Wash the tangerine and use a zester to remove the zest. Set aside the zest and cut the tangerine in half with a knife.  Use a lemon juicer and juice one half of the tangerine – you should get at least 2 tbsp of juice. Save the other half of the tangerine for another use.

Cream the coconut oil and powdered sugar together in a large bowl, until fluffy.  Add the vanilla and coconut extracts, 2 tbsp of the tangerine juice, and ½ tbsp of zest. Beat until mixed.

Add the flour, 1/4 cup of coconut, cornstarch, baking powder, and salt and beat again until all the dry ingredients are incorporated. Use your hands to form the mixture into a smooth dough.

Combine the remaining 2 tbsp of coconut and the cane sugar. Use a blender or food processor to grind until coarse.

Form the dough into small balls.  Roll each ball in the coconut-sugar mixture and place on the baking sheet. Take a small glass (I used a shot glass) and dip the bottom in water, then in the coconut-sugar mixture. Press the glass into each cookie ball to flatten (You will need to wipe off the bottom of the glass and re-dip in the water a few times).

Bake cookies in the preheated oven for 15 minutes, until firm and lightly golden on the bottom. Transfer to a wire rack to cool.

Makes about 19 small cookies.

Note: If you prefer a softer, chewier cookie, you can try baking them for less time, but I haven't tested this!

November 29, 2012

Cranberry Orange Almond Loaf


It's almost December and like many other food bloggers, I've already started my holiday baking!

Fresh cranberries are one ingredient that I always try to incorporate in my plans for holiday baked goods and desserts. I love their tartness, especially when combined with other sweet ingredients to balance them out. And even though both are sour, cranberries also seem to pair especially well with citrus flavours like lemon and orange.

For this loaf, I wanted to use the classic combination of fresh cranberries and orange, along with a third flavour: almond.  The bread itself is a soft, delicate loaf made with whole wheat and spelt flour, and studded with juicy cranberries and thinly sliced almonds.

I added orange zest and almond extract to both the loaf itself and the glaze, which is a simple icing sugar glaze made with orange juice. Finally, I used almond milk nog in the batter to add one more touch of holiday flavour!


This is a light and sweet loaf that can be served as either breakfast or dessert.  The loaf itself actually wasn't very sweet, but adding the glaze on top while it's still warm helps to add an extra layer of sweetness that absorbs into the top of each slice.

The almond flavour came through pretty strongly, which made this cake different from most of the other baked goods that I'm used to.  I also loved the sliced almonds throughout the loaf - they added a touch of crunch without being too prominent, really letting the cranberries shine!


This loaf definitely got me excited for the holiday baking season, and I can't wait to make more treats using some of my other favourite holiday ingredients, like gingerbread, eggnog, and candy cane!


Vegan Cranberry Orange Almond Loaf
Adapted from Ripe from Around Here

1 tsp egg replacer + 2 tbsp water (or 1 flax egg)
1 cup light spelt flour (or all-purpose)
1.5 cups whole wheat pastry flour
2 tsps baking powder
1 tsp baking soda
1/2 tsp salt
1/2 cup organic cane sugar
1 1/4 cups non-dairy milk (I used almond nog)
1/2 cup unsweetened applesauce
1/4 cup melted coconut oil
1 tsp almond extract
1/2 tsp vanilla extract
1 tbsp orange zest
1.5 cups fresh or frozen cranberries
1/2 cup sliced almonds
1 tbsp cider vinegar
Glaze:
1 cup powdered sugar
2 tbsp fresh orange juice
1 tsp orange zest
1/2 tsp almond extract

Preheat oven to 350°F and prepare an 8.5x4.5” loaf pan by spraying with cooking spray or lining with parchment paper.

First, make your egg replacer – mix 1 tsp powdered egg replacer with 2 tbsp water and set aside for at least 5 minutes.

Whisk together all dry ingredients (flour through to sugar) in a large bowl.  In a separate bowl, mix the non-dairy milk, applesauce, coconut oil, almond and vanilla extracts and orange zest.  Pour the wet ingredients and the egg replacer mixture into the bowl of dry ingredients and stir until the dry ingredients are just incorporated.  Fold in the cranberries, almonds, and cider vinegar.

Pour batter into prepared loaf pan and bake in the preheated oven for 50-60 minutes, until the tops are domed, the sides are starting to pull away from the pan, and a toothpick inserted into the center comes out clean.

Let cool in the pan for about 5 minutes, then invert onto a wire rack. Meanwhile, make your glaze by stirring together all ingredients until a thick, smooth glaze forms.  Pour the glaze over the top of the warm loaf and let it drip down the sides (you may want to put newspaper underneath to catch the drippings). Once cool, cut into slices. 

*Note: I would recommend not covering this loaf for the first day, and storing leftovers in the fridge, then warming up pieces as needed (I covered mine with saran wrap at room temperature overnight, and it got a bit mushy). 

February 20, 2012

Carrot Cake Pancakes with Orange-Cashew Cream


One of my favourite family traditions is Pancake Tuesday. I always looked forward to it because it was the one day of the year when we would get to eat pancakes for dinner.  My parents would cook up a big platter with three or four different kinds of pancakes, and I would try them all!

Blueberry was always my favourite, but we also had chocolate chip, plain, and sometimes an apple-cinnamon or banana version.  Those traditional flavours will always be special to me, but now I like to come up with new kinds of pancakes to try.

My latest favourite is carrot pancakes, because they're just sweet enough for breakfast and I figure since they have a vegetable, they're also appropriate for dinner!  So to celebrate Pancake Day this year, I made these vegan carrot cake pancakes topped with an orange-cashew cream.


The pancakes themselves turned out nice and thick and fluffy, and to get the carrot cake flavor, I added some warm spices, shredded coconut, chopped walnuts and dates to the batter. I also used coconut milk in both the batter and the cashew topping, and topped them with some orange zest.

I also used this opportunity to try my new NuNaturals stevia products.  Instead of adding sugar and vanilla extract to the batter, I used their alcohol-free vanilla stevia drops.  The amount I used added just the right amount of sweetness for my tastes, but my sister thought the pancakes weren't sweet enough, so you might want to use more drops or add 1-2 tsp of sugar or sweetener to the batter if you prefer a sweeter pancake.

These pancakes would taste great on their own or drizzled with maple syrup, but I really liked eating them with the cashew cream that I made by blending a small amount of soaked raw cashews with a bit of orange juice, coconut milk and stevia drops.

Since I was only making a small amount of cashew cream for a single serving, I had a hard time getting the cashews to blend properly so my "cream" was still a bit chunky.  But I still loved the taste and it made a nice topping for the pancakes as a substitute for cream cheese frosting that is usually found on carrot cake.

So if you're looking for new inspiration for Pancake Tuesday, try these carrot cake pancakes or check out the Pinterest Board I created full of more creative pancake ideas!


Single-Serving Vegan Carrot Cake Pancakes with Orange-Cashew Cream
Adapted from The Tie Dye Files and The First Mess

Cashew Cream

2.5 tbsp raw cashews, soaked in water for at least 4-5 hours
1-2 tbsp coconut milk beverage

1 tbsp orange juice

5-10 drops NuNaturals vanilla stevia liquid

Pancakes
1 tsp flax mixed with 2 tsp water
1/3 cup whole wheat flour

2 tbsp rolled oats

2 tbsp sweetened or unsweetened shredded coconut

1 tsp baking powder

1/2 tsp cinnamon

1/8 tsp each nutmeg and ground ginger

1/8 tsp salt

1/3 cup grated carrot

1/2 cup unsweetened coconut milk beverage (or another non-dairy milk)

10 drops NuNaturals vanilla stevia liquid (or 2 tsp sugar)

3-4 dates, soaked in hot water for a few minutes then drained and finely chopped

1 tbsp chopped walnuts


For the cashew cream:

Drain the cashews and place in a food processor or blender. Add remaining ingredients and process until smooth (I would recommend starting with 1 tbsp of coconut milk and add more to thin out the cream if necessary). Set aside or refrigerate if you are making it ahead of time.

For the pancakes:

First, mix the flax with the water and let sit for at least 5 minutes to thicken.


In a large bowl, whisk together all the dry ingredients (flour through to salt).  Add the grated carrot, coconut milk and stevia and stir gently to combine. Fold in the chopped dates and walnuts.


Heat a large skillet on medium-high and spray with low-fat cooking spray. Add the pancake batter to the pan in about 1/3 to 1/2 cup measures (I divided the batter into two large pancakes, but you could easily get three pancakes).


Cook on one side undisturbed for a few minutes, until the bottoms are set and browned. Carefully flip pancakes with a spatula and cook 2-3 more minutes on the other side. 


Serve with cashew cream on top and maple syrup if desired.


Makes 1 serving (2 pancakes)

This was submitted to Wellness Weekend at Diet, Dessert, and Dogs.

LinkWithin

Related Posts Plugin for WordPress, Blogger...