Showing posts with label sauce. Show all posts

October 22, 2013

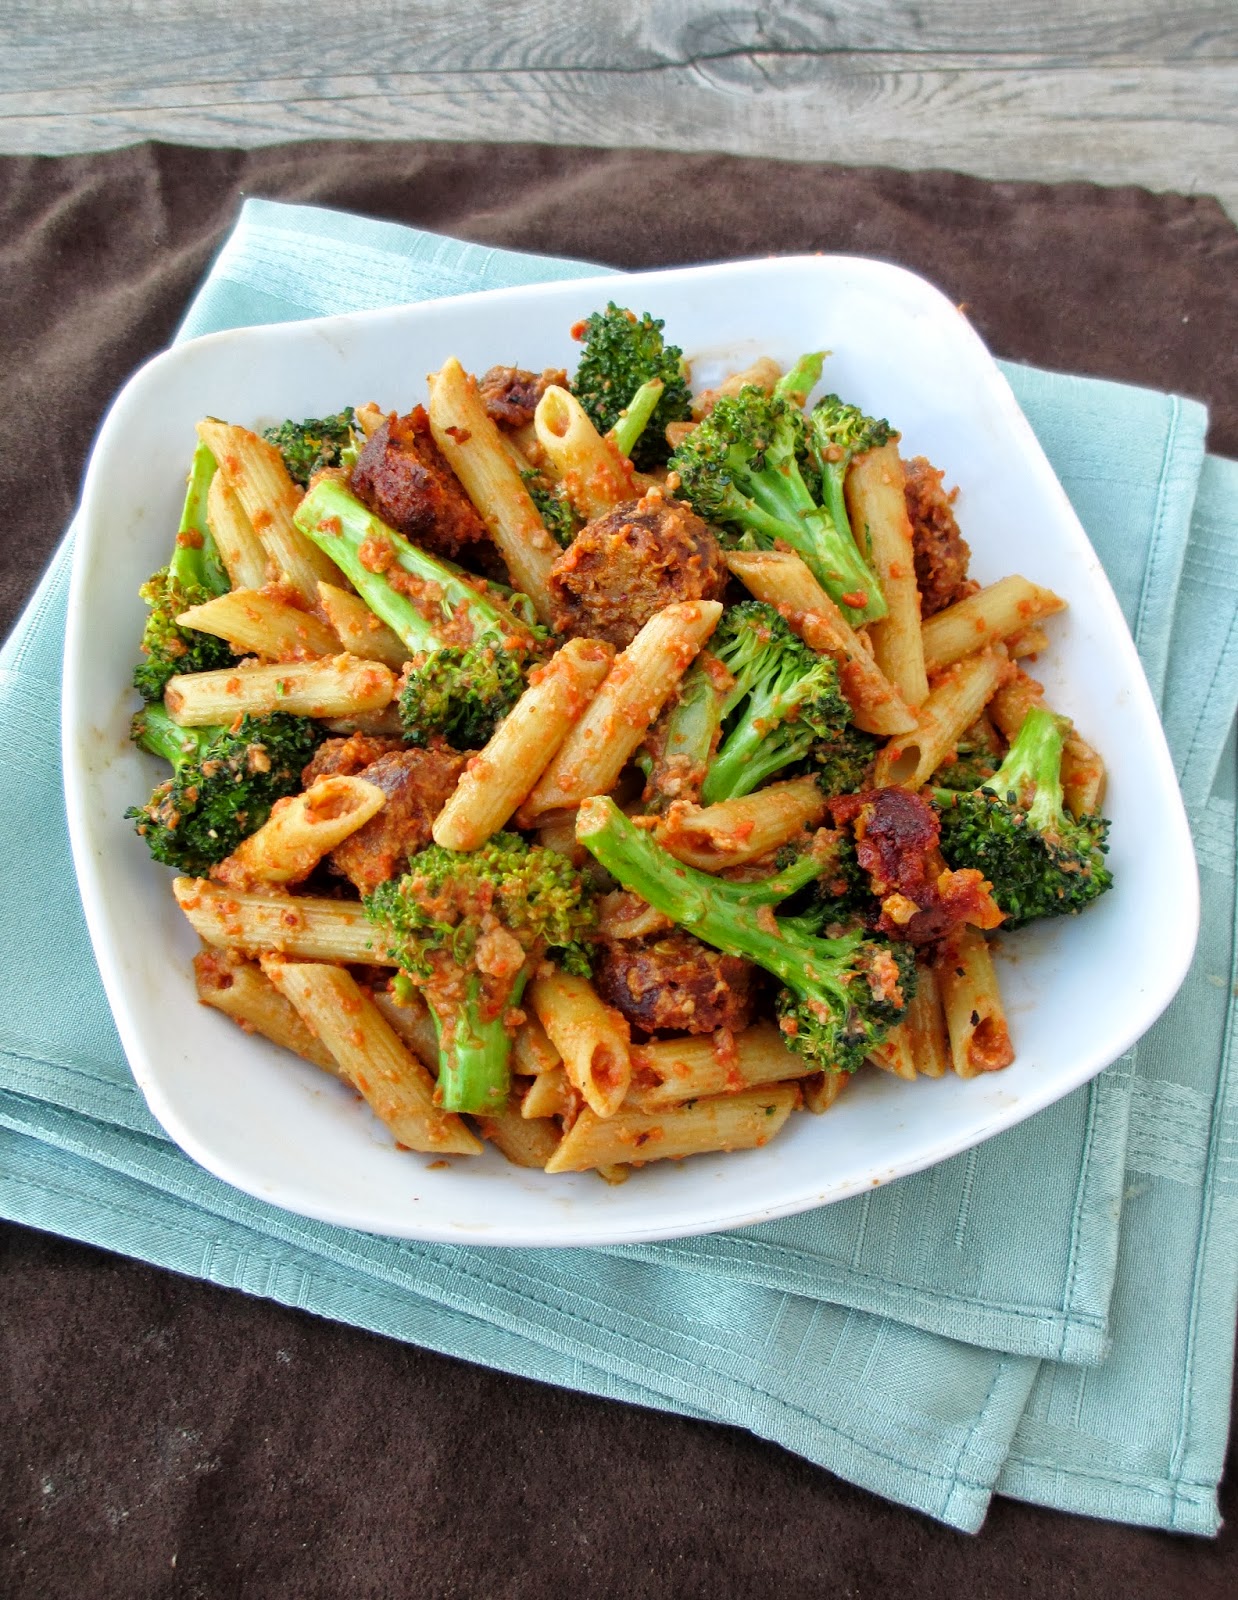
Smoky Red Pepper, Broccoli & Veggie Sausage Pasta


Has anyone experienced their first snowfall of the season yet? I've heard of snow sightings from friends further north in Ontario the past couple of days, so I hope it's not making its way down to southern Ontario - I'm not quite ready for that yet!

There's nothing like a hearty dinner to warm you up on cold days like this though, which is why I'm sharing this pasta recipe today!

When I eat a bowl of pasta, I like it to have lots of sauce and lots of "extras" in it so that no bite is just plain pasta, and this pasta was just that. I've been wanting to try making a roasted red pepper sauce for quite a while now, and I finally got around to it a couple of weeks ago when I had a lonely red pepper in the fridge that needed to be eaten before it went bad.


I used Colourful Palate's recipe for vegan mac & cheese as a guide for the sauce, but turned it into a more smoky and spicy dish by adding some spices to the sauce, roasted broccoli, and Mexican veggie sausage (one of three flavours from Field Roast and the only brand of veggie sausage I've found that I really like!).

The sauce was an interesting change from the tomato-based pasta sauces that I'm used to. It had a bit of a chunky texture from the cashews and sunflower seeds, a nice smoky flavour and a hint of cheesiness from the nutritional yeast.

This can be a quick and easy dinner if you make the pasta sauce ahead of time like I did, and to save even more time, you could just cook some noodles and toss it with the sauce for a simple meal. If you like veggies in your pasta like I do though, the roasted broccoli was the perfect addition.

The spicy veggie sausage complemented the flavours in the sauce really well too, while also making it more of a hearty and filling dish - just what I crave to warm my belly on a chilly night!


Smoky Red Pepper, Broccoli & Veggie Sausage Pasta
Sauce adapted from Colourful Palate

Red Pepper Sauce
1 red pepper
2 tbsp raw cashews
2 tbsp raw sunflower seeds
3 tbsp nutritional yeast (or more if desired)
1 tsp tamari
1/4 tsp smoked paprika
1/4 tsp salt
1/8 tsp cayenne

Turn oven on to broil and rub the outside of the red pepper with a bit of oil. When oven is ready, place the whole pepper on a baking sheet and broil for 10-15 minutes, turning occasionally, until it starts to blacken. Remove pepper from oven and place in a bowl of water to help loosen the skin. Peel off as much of the outside layer of skin as you can and discard. Roughly chop the pepper into pieces and remove the seeds.

Place the cashews and sunflower seeds in a food processor and process until finely ground. Add the red pepper pieces and the remaining ingredients and puree until as smooth as possible (it may still be a bit chunky from the nuts). Taste and adjust seasoning if desired.

Makes about ¾ cup sauce (enough for about 2 servings of pasta).


Pasta
Half a head of broccoli, chopped into bite-sized pieces
1-2 tsp olive oil
2 servings of dry penne pasta (I just eyeballed the amount I wanted)
1 Field Roast Mexican Chipotle veggie sausage (optional)
red pepper sauce (recipe above)


Preheat the oven to 400°F and bring a large pot of salted water to a boil. Toss the broccoli pieces in a bit of olive oil and spread out on a baking sheet. Roast in the preheated oven for 15-20 minutes, until it starts to brown.

Meanwhile, add the pasta to the boiling water and cook according to package directions. Drain and place in a large bowl.

Heat a small skillet over medium heat and spray the pan with cooking spray. Cook the veggie sausage for about 5 minutes total, turning often, just until it is heated through and browned on all sides. Chop into pieces.

Add the broccoli to the pasta and pour the sauce over top. Toss well to mix. Gently mix in the sausage pieces, or divide the pasta into bowls first and then top with the sausage.


Makes 2 servings.  

July 09, 2013

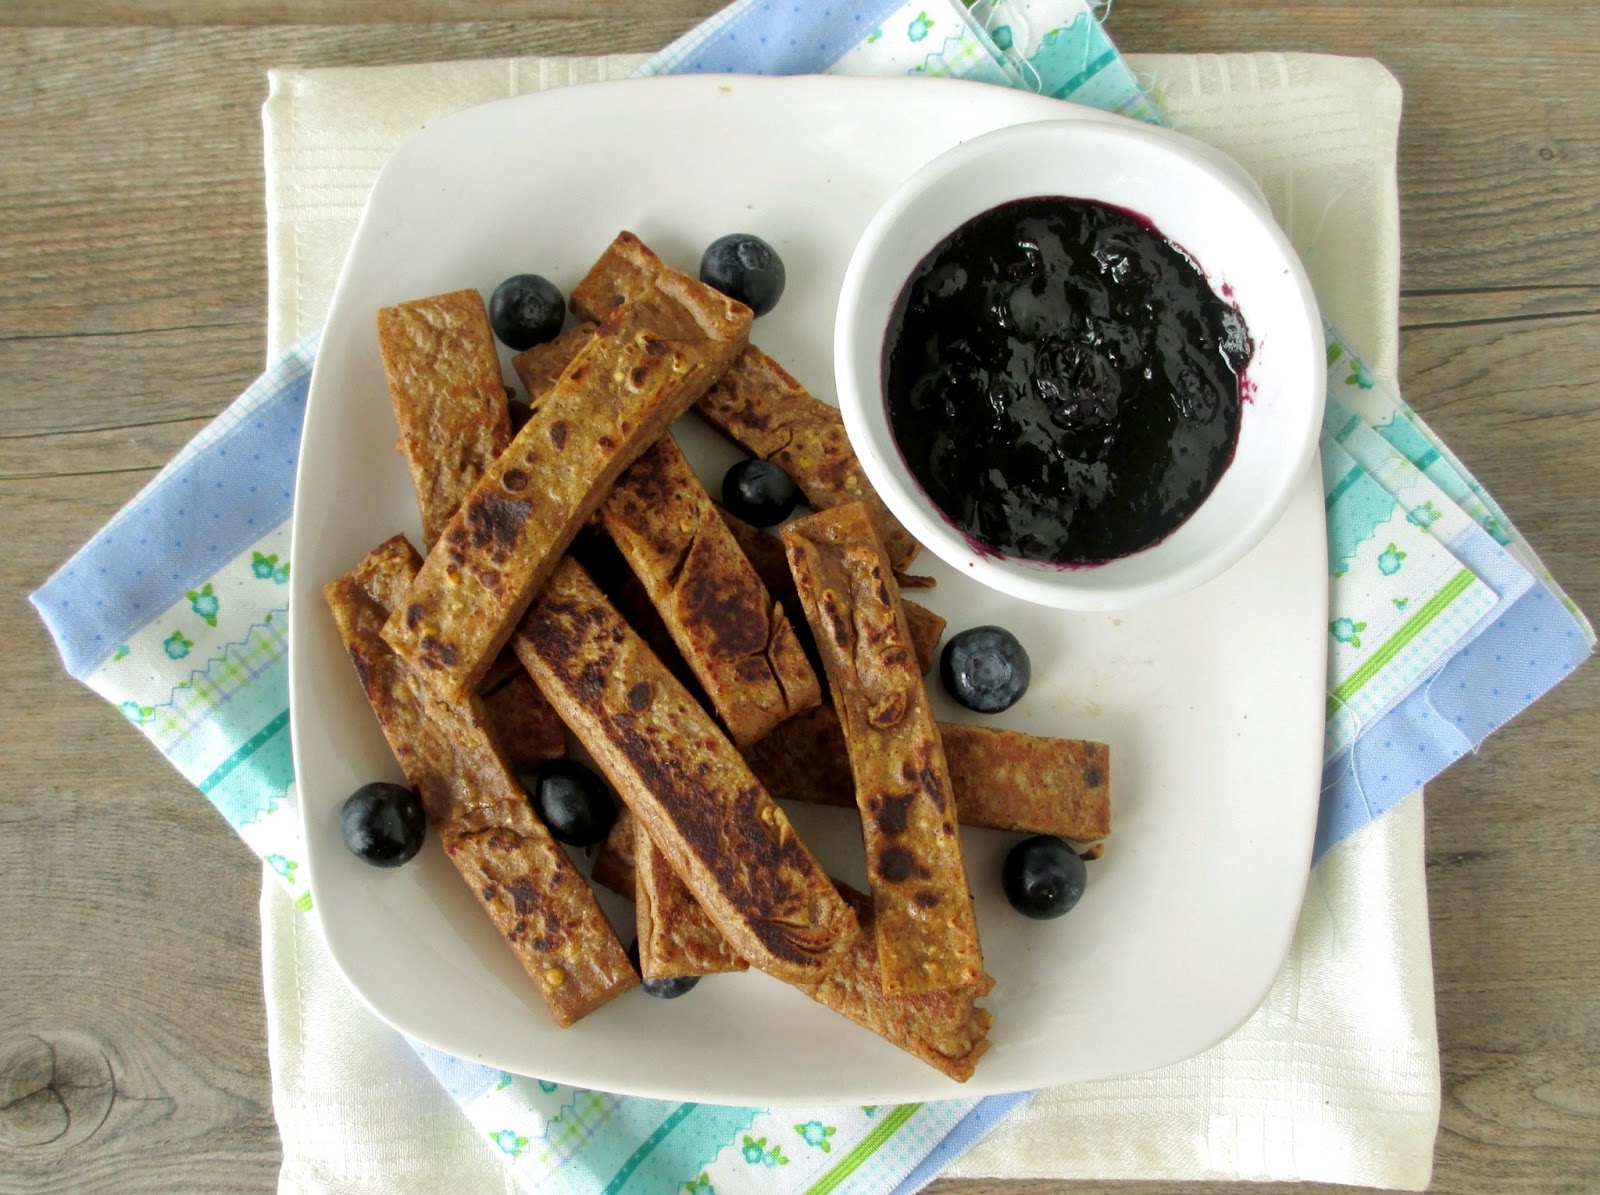
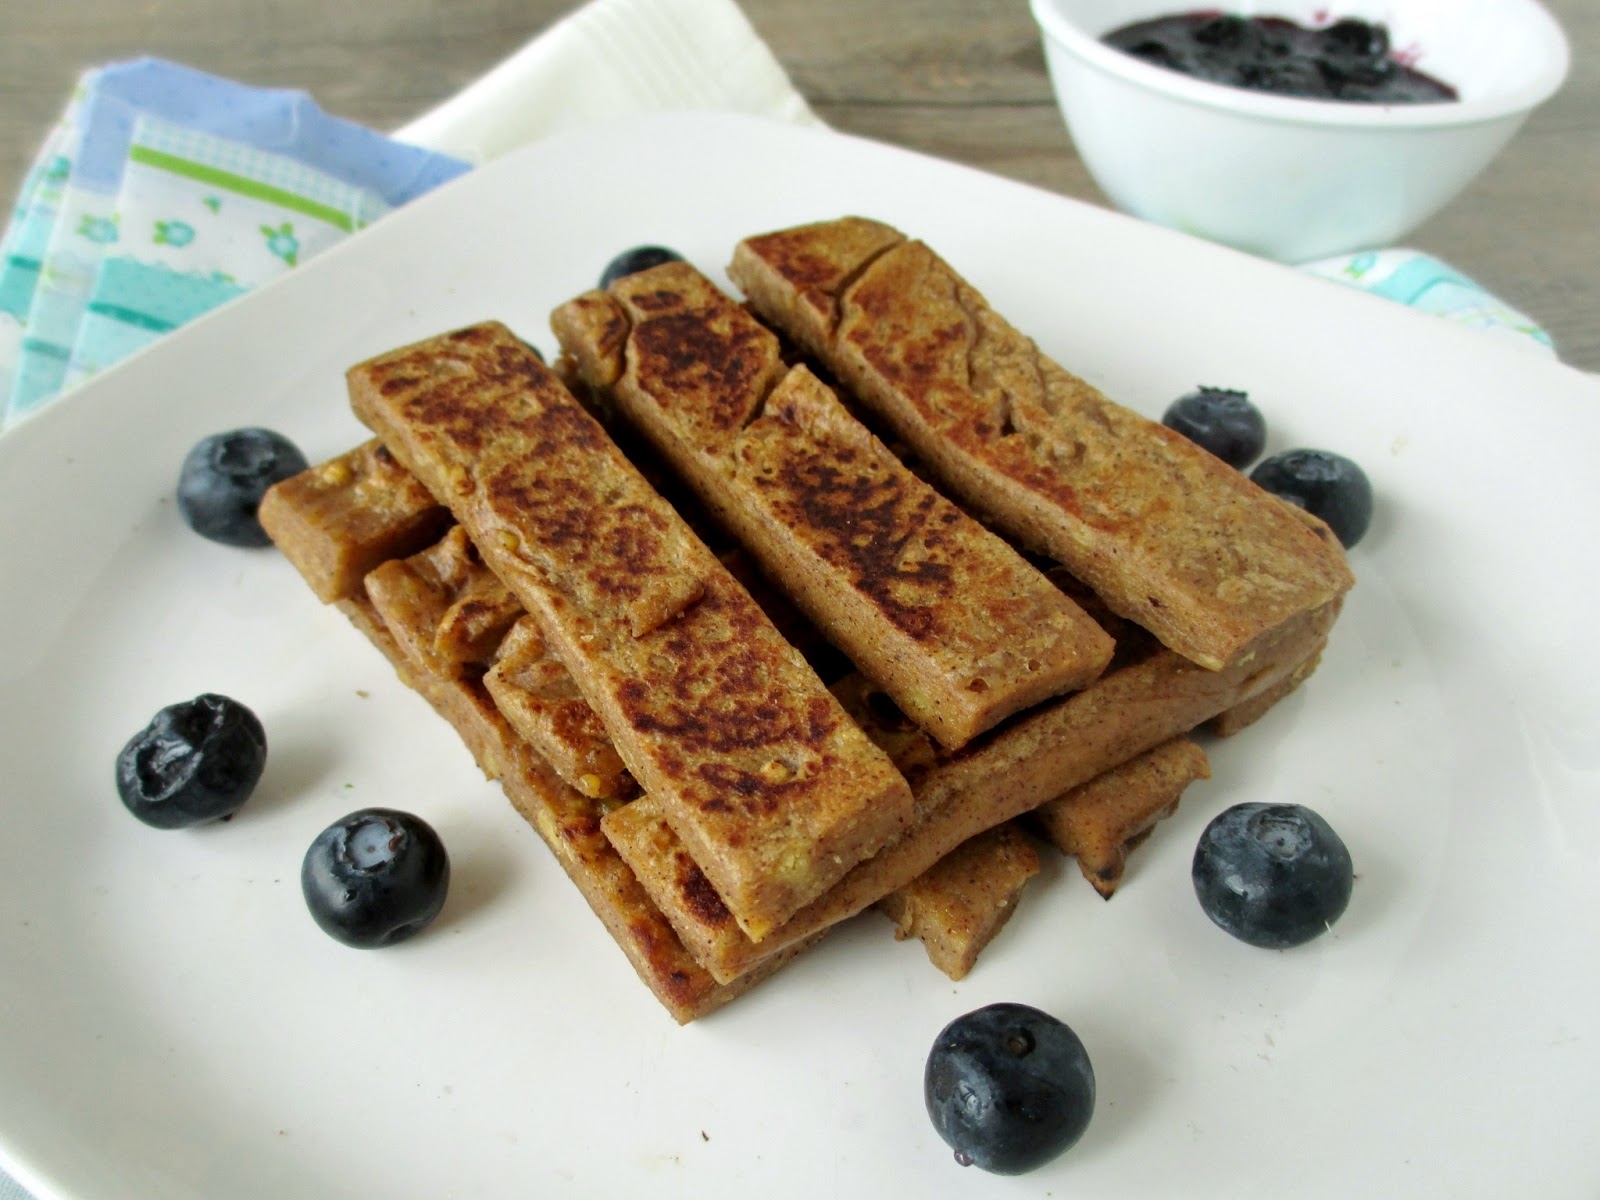
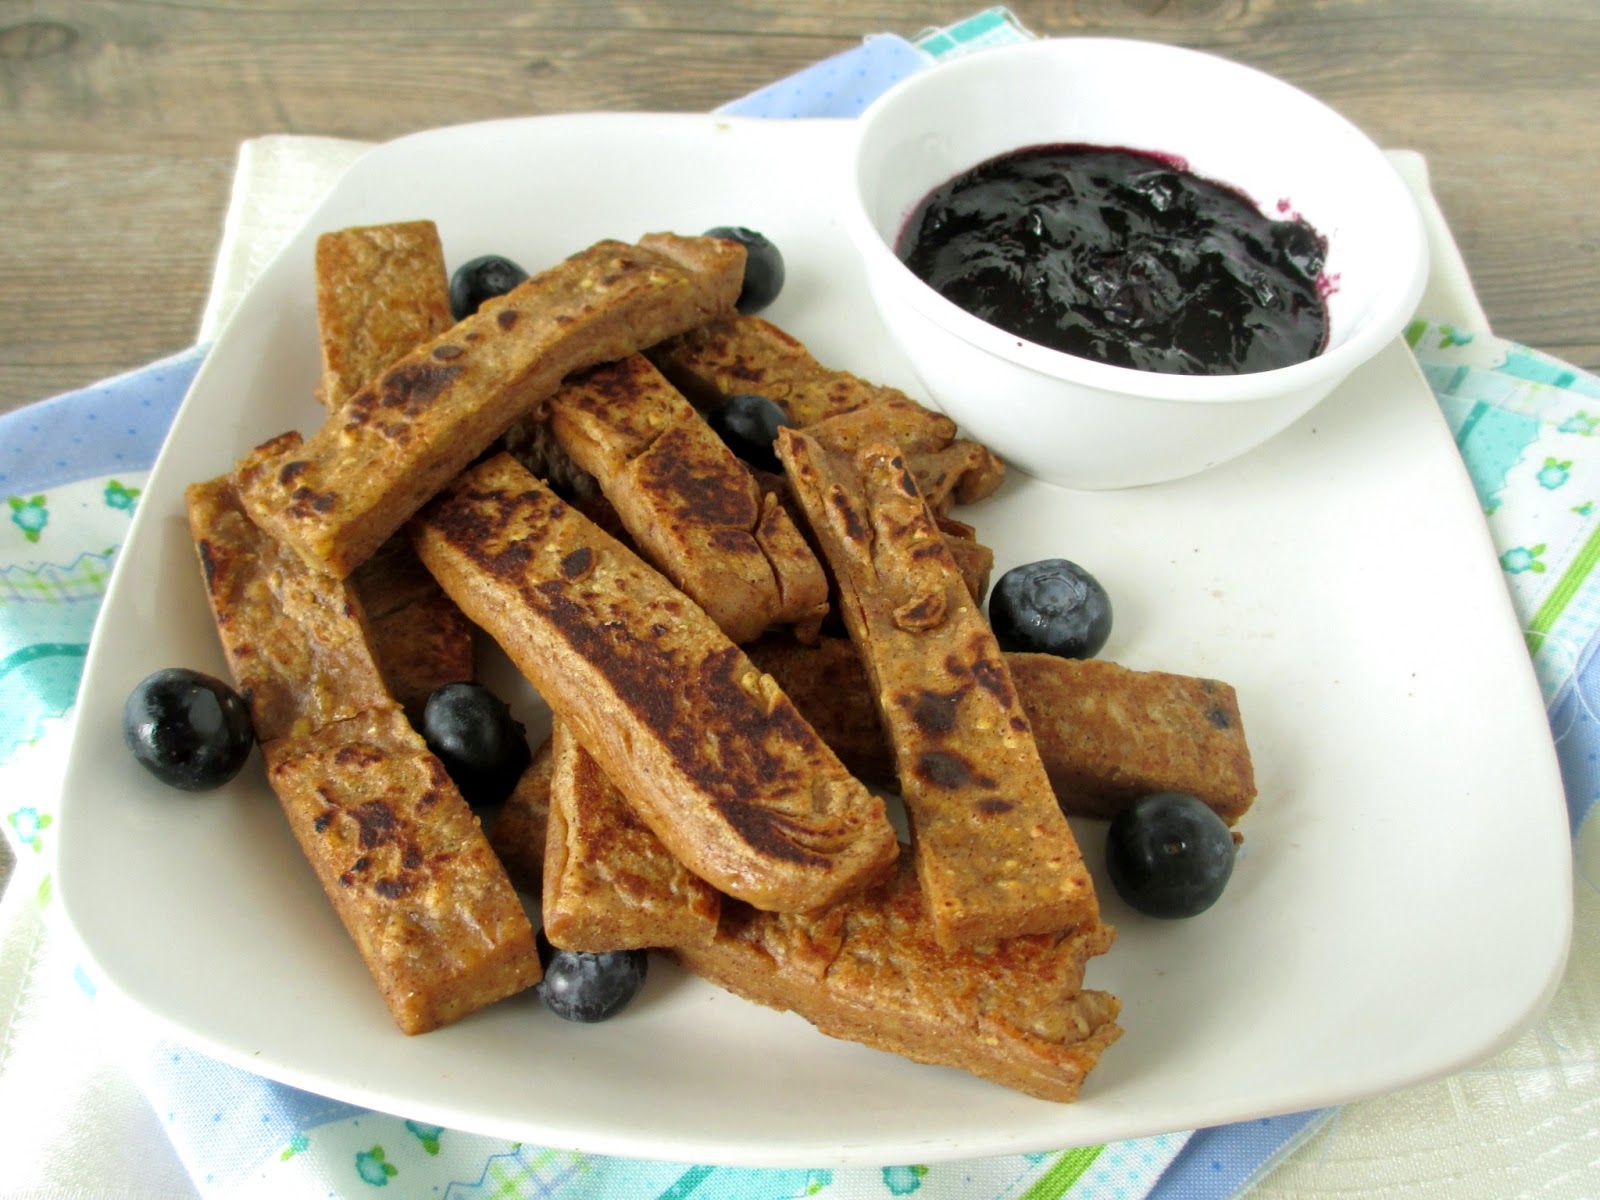
Breakfast Chickpea Fries with Blueberry Sauce


I don't post a lot of breakfast ideas on my blog, mostly because my breakfasts are typically pretty boring! I'll usually bring some yogurt with fruit and granola to eat when I get to my office, or if I have some homemade muffins or other baked goods stored in my freezer, I'll grab one of those to go. 

Occasionally though, I'll make the effort to prepare something a bit fancier on the weekend, like pancakes or french toast. This past weekend, I tried something new that turned out to be one of the most interesting and tasty breakfasts that I've had in a while!


I saw a recipe for french toast polenta sticks on the blog Tasty Yummies recently and thought it was such a creative idea to make a sweeter version of baked polenta "fries" that could be eaten for breakfast.

That recipe inspired me to try out a similar idea with chickpea flour instead of polenta. I've made chickpea flour "fries", also called panisse, many times in the past - they were actually one of the first recipes I posted on my blog! The basic idea is that by whisking chickpea flour into a simmering liquid on the stovetop, you can create a batter that thickens up just like polenta, and can then be cut into shapes and baked or fried.

My original version of chickpea fries was a simple mixture of chickpea flour, water, oil, salt and pepper, so to make a breakfast version, I used almond milk for the liquid and added cinnamon and vanilla extract to the batter.


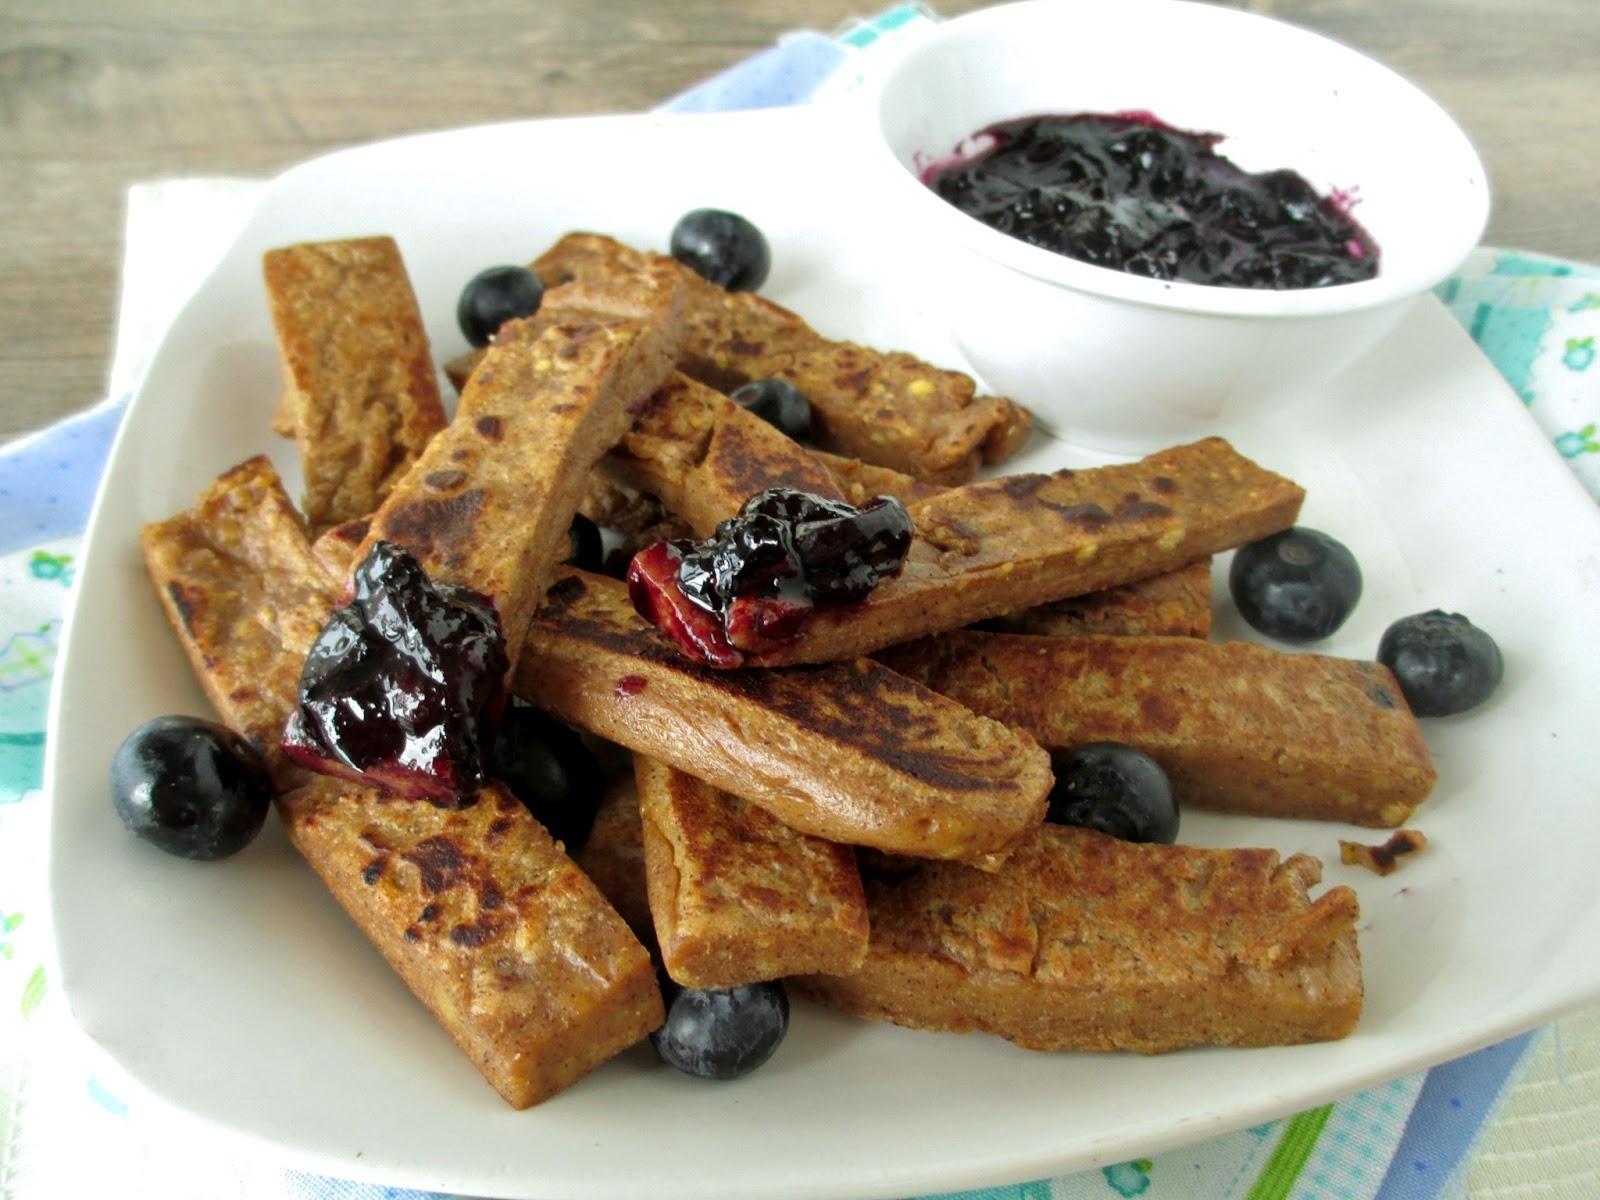
You could serve the fries with maple syrup drizzled on top, but I wanted to make a dipping sauce for mine.  I had some blueberries that I had just picked up from the market, so I simmered them on the stovetop with a bit of maple syrup until they thickened up into a dippable sauce.

I thought the fries had the perfect texture - soft on the inside and slightly crispy on the outside, and the fries themselves weren't sweet, which made them the perfect base for covering in the warm blueberry sauce.

They actually reminded me of eating french toast sticks but without the batter part, which I actually prefer because it means they weren't soggy or eggy tasting like french toast can sometimes be. Not only are these fries vegan, but they're naturally gluten-free as well, making this a fun breakfast treat for everybody!


Breakfast Chickpea Fries with Blueberry Sauce
Inspired by Tasty Yummies and adapted from my original chickpea fries
Note: This recipe requires some advance preparation. I recommend making the chickpea batter the night before, then the next morning you just need to make the blueberry sauce and cook the chickpea fries.

1 cup non-dairy milk (I used vanilla almond milk)
1 tbsp olive oil
1 tsp cinnamon
Pinch of salt
1/2 tsp vanilla extract 
1/2 cup + 1 tbsp chickpea flour

Sauce
1/2 cup blueberries
1 tsp lemon juice
1 tbsp pure maple syrup


First, prepare the chickpea batter: Heat the milk, olive oil, cinnamon, salt, and vanilla in a small saucepan over high heat. Heat until the liquid is hot but not quite simmering.

Reduce heat to medium. Whisk in the chickpea flour slowly. Continue to whisk constantly for 2 minutes, then switch to a wooden spoon and cook for 8-10 more minutes, stirring constantly (your arm will get very sore!). Scrape down the sides of the saucepan occasionally as you stir. The batter will gradually get thicker and will start to pull away from the sides of the pan and clump together. Once it is very thick and can hold its shape, remove the pan from the heat.

Scrape the batter into a greased square cake pan or loaf pan (try to work quickly as the batter will begin to set almost immediately). It should fill about half of a square pan. Smooth the top with a spatula. Let the mixture cool for at least an hour or overnight in the refrigerator, until it is completely set.

Once cooled, invert the pan onto a cutting board. Cut the batter into sticks about 1/2”-3/4” wide.

Start making the blueberry sauce: Add blueberries and lemon juice to a small saucepan and heat over medium-high heat. Let cook until the blueberries have broken down into a chunky sauce, stirring occasionally, about 8-10 minutes. Add the maple syrup and let cook for a couple more minutes, until the liquid has reduced a bit. Keep on low heat until the fries are ready.

Heat a large skillet over medium-high heat and spray with cooking spray or add a pat of vegan butter. Add the fries to the pan and fry for about 5-6 minutes, flipping over halfway through, until they are lightly browned. (The amount here will fit into one skillet, but if you are making a larger amount, you will need to cook them in batches, keeping the finished fries warm while you cook the rest).

Serve fries with blueberry sauce on the side for dipping. I liked to sprinkle my fries with extra cinnamon, and you can also drizzle them with maple syrup if desired.

Makes 1 large serving.


February 15, 2013

Edamame Mushroom Wontons with Dipping Sauce


After making my baked banana, chocolate and strawberry wontons, I still had a lot of leftover wonton wrappers that I didn't want to go to waste, so I decided to come up with a savory recipe to use them with. I had seen a couple of recipes for edamame filled wontons online, and when I consulted my Vegan Eats World cookbook for more ideas, I saw a recipe for edamame gyoza with dipping sauce that sounded perfect!

Gyoza are typically made with round dumpling wrappers (like these ones from The Fig Tree), so I used a slightly different method to adapt the recipe as wontons instead.  I also changed up the filling ingredients from the original recipe a bit and added some mushrooms for more bulk and flavour. I couldn't decide what kind of mushrooms to get when I was at the Asian mart, but I ended up going with fresh enoki mushrooms because of their delicate texture and slightly sweet flavour that I thought would pair well with the edamame (plus they looked so cute!).

The filling for the wontons is blended up in a food processor until you get a slightly chunky, thick mixture that will hold together well inside the wontons. It also has a vibrant green colour, as you can see here:


Making the filling is the easy part, and then comes the somewhat tedious process of forming the wontons and cooking them. I made the wontons following the same method as last time - place a dollop of filling in the center, then fold over one corner to make a triangle shape and seal tightly.

Instead of boiling or frying the filled wontons, I decided to steam them because it seemed like the safest option to avoid having them break apart while cooking. That method seemed to work really well - they held together (for the most part) and I liked how the texture of the wontons became soft but chewy like pasta.


I found that the wontons themselves had a lot of flavour from the mixture of bold ingredients inside - although the green chili was almost too overpowering for my tastes, so I would probably leave that out next time.

The best way to eat these though was dipping them into a sweet and sour sesame-soy-lime dipping sauce.  I thought the flavours of the dipping sauce really complemented the wontons and helped to balance out the spicier edamame filling.

These would be a great appetizer to serve as part of as Asian meal, or eat them as a light meal on their own. Feel free to make a double batch of the dipping sauce and use it with other small bites or appetizers too, like sushi, spring rolls, dumplings, or scallion pancakes. 

Hope you all enjoy the weekend!


Edamame Mushroom Wontons with Dipping Sauce
Adapted from Vegan Eats World

1 cup frozen shelled edamame
~200 g fresh enoki mushrooms
1 clove garlic, peeled and minced
2 tsp minced fresh ginger
3 green onions, minced
1 small Thai green chili, minced (optional)
1/2 tsp kosher salt
1 tbsp mirin
1/2 tsp sesame oil
~30 wonton wrappers

Bring a large pot of water to a boil. Add a dash of salt, then add the frozen edamame. Boil for about 5 minutes, then drain, reserving as much of the cooking water as you can. Rinse the edamame with cold water, then transfer to a food processor.

Wash the mushrooms well, and chop off the woody stems (I cut off almost half of the entire bunch). Chop the rest of the mushrooms and add to food processor (you should end up with about 1 ¼ cups chopped mushroom).

Add the remaining ingredients (except wonton wrappers) to the food processor and pulse or process briefly until all the ingredients are combined (it’s okay to leave it a bit chunky).  Transfer mixture to a bowl.

To make the wontons, lay out one wrapper and keep the rest of the wrappers covered with a damp cloth or paper towel.  Place 1 heaping teaspoon of the filling mixture in the center of the wrapper. Wet the edges of the wrapper with water using your fingers, then fold over one corner to make a triangle. Press the edges of the wrapper together firmly, pinching with your fingers to seal well. Set the filled wontons on a greased baking sheet and keep covered with a damp cloth or paper towels. Continue making the wontons until your filling is used up.

Put the reserved edamame cooking water in a large pot and add more water if necessary to get about 3 cups. Bring to a simmer and add a steamer basket. Steam the wontons by placing about 7 or 8 wontons (as many as can fit in the steamer without overlapping) in the basket and cover the pot with a lid (Note: I found it easier to spray my steamer basket first with cooking spray, otherwise the wontons got a bit stuck). Steam each batch for 3-4 minutes, until the wonton wrappers are cooked like al dente pasta. Carefully remove wontons and transfer to a plate.  Continue steaming in batches.

Serve immediately with dipping sauce.

Makes about 30 wontons.

Dipping Sauce
3 tbsp tamari (or low sodium soy sauce)
4 tsp fresh lime juice
2 tsp mirin
1 tsp agave nectar
1 tbsp finely minced green onion
1 tsp finely minced fresh ginger
1/2 tsp sesame seeds

Place all ingredients in a small bowl and whisk to mix well.  Store in the refrigerator.

January 21, 2013

Paneer & Spinach Quesadillas with Cilantro Chutney


After making my "PLT" sandwiches, I wanted to come up with another use for the rest of my paneer cheese, and my first thought was to use it in quesadillas!

I took my inspiration for these quesadillas from one of my favourite things that I ate when I was in India - parathas.  Parathas are basically an Indian flatbread stuffed with a variety of fillings, from the classic potato (aloo) paratha to more unique combinations like cauliflower and daikon, or onion with mushrooms.

One of my favourite parathas to order used to be paneer with spinach (also known as palak-paneer paratha), cooked until the outside is golden brown and served with spicy green chutney and cool yogurt. Here's a look at my actual order from a paratha restaurant in India:


While I could have attempted to recreate this at home, I decided to try to take the filling ingredients and use them in tortillas shells instead to make these quesadillas!

And since quesadillas are so much better with toppings like salsa and sour cream, I took the typical paratha condiments, cilantro chutney and plain yogurt, and used them to top my quesadillas.


After not having much success with my last attempt to make quesadillas, I was super excited that these turned out the way I wanted! The only caveat is that the paneer doesn't melt easily, so if you want an extra gooey, cheesy filling, just stick the cooked quesadillas in a warm oven or the microwave briefly after you've cooked them. This also works well with any leftovers - I thought they were even better after being reheated!

Since the paneer is rather flavourless on its own, the spinach cooked with onion, chili and ginger helped to spice up the filling.  But what really took these quesadillas over the top taste-wise was the cilantro chutney. While I think that any storebought chutney would still taste great as a condiment here, I was so glad I took the extra effort of making my own.

The chutney was super spicy for my taste (even with only one green chili), but the heat was balanced out by the lemon juice that I added.  Swirling some creamy plain yogurt into the chutney as you spread it on your quesadillas also helped to mellow out the spicy bite!


Paneer & Spinach Quesadillas

~5 cups packed spinach leaves
1 tbsp vegetable oil
1 small yellow onion, diced
2 tsp fresh ginger, minced
1 green chili, minced
1/2 tsp cumin
Dash of salt
~2 cups (200 grams) paneer cheese, grated
6 small whole wheat tortillas
Cilantro chutney (storebought, or recipe below)
Plain yogurt

Wash the spinach and let dry in a colander, squeezing out any excess moisture with your hands.

Heat the vegetable oil in a large saucepan over medium heat. Add the onion, ginger, chili, and cumin and cook, stirring often, until the onion softens (about 4 minutes).  Add the spinach leaves and a dash of salt. Cook until the spinach leaves are wilted and most of the moisture has evaporated, about 6-8 minutes, stirring occasionally. Remove from heat and transfer mixture to a bowl.

To make quesadillas, heat a large non-stick skillet over medium heat. Lay a tortilla in the pan and sprinkle about 1/3 cup of the grated paneer over half of the tortilla.  Top with about 1/4 cup of the spinach mixture. Fold the quesadilla, bring the empty side down over the filling, and press down with a spatula. Once the bottom side is lightly browned (about 2-3 minutes), flip and cook the other side for another couple of minutes.  Remove from pan and transfer to a plate. (If you are making a larger batch, you can transfer the cooked quesadillas to a baking sheet and keep in a warm oven (200°F) while you cook the remaining quesadillas).

Repeat the process until the cheese and spinach mixture are used up – mine made enough for 6 small sized tortillas. Serve warm, with the cilantro chutney and plain yogurt.


Cilantro Chutney
Slightly adapted from Vegan Eats World

2 cups packed cilantro leaves (it’s okay to leave some thin stems in)
1/4 cup unsweetened shredded coconut
3 cloves garlic, peeled and roughly chopped
1 green chili, minced
1 ¼ tsp garam masala
1/2 tsp salt
2 tbsp fresh lemon juice
1/4 cup water (plus more if necessary)

Add all the ingredients except for the water to a food processor or blender. Blend until everything is mixed together.  Add half of the water and blend again. Continue to blend, gradually adding more water as necessary, until the mixture is as smooth as possible (I used 1/4 cup plus 1 tsp water).

Transfer to a small container and store in the fridge.


January 07, 2013

New Years Eve Indian Feast

Last year on New Years' Eve, my family and I enjoyed a huge spread of Asian inspired food, including peanut noodles, mango salad, fresh rolls, lettuce wraps, dumplings, and more.  We liked it so much that my sister suggested doing a similar thing this year, but changing the theme.

The theme we decided on this year was Indian food and since I love Indian cuisine so much, I claimed the right to plan out our menu, which I wanted to share on my blog with you!

After last year's experience of spending all day on New Year's Eve in the kitchen, I wanted to use purchased ingredients as much as possible this time to limit the amount of work I'd have to do!  A couple of trips to ethnic shops got me all of the ingredients I'd need, and we ended up with a delicious spread with a nice variety of dishes.

Appetizers


First, we had a round of drinks and cold snacks as appetizers.  My sister made the Indian-inspired drinks to start off the evening, which were these fruity mango bellinis made with fresh mango puree and champagne - delish!


For the food, I knew I wanted to include bhel puri, a savory and spicy snack of puffed rice, crushed papdis, peanuts and crispy sev noodles (shown below). All you have to do to prepare this is buy a packaged mix of bhel puri (although you can make your own if you feel like it!), and stir in two kinds of chutneys (the mix comes with little packets of sweet and spicy chutneys) to add even more flavour. I also added some chopped tomatoes and cilantro after this pic was taken.


This is a good snack mix for sharing with a group of people - although it should be eaten immediately before it starts getting soggy from the sauces.

Another easy snack to put together was this masala papad - crispy pappadum that I cooked on the stovetop, topped with a mixture of tomato, red onion, cucumber, green chili, cilantro and spices. Just break it into pieces and enjoy as a refreshing appetizer!


And now for the highlight of the appetizers round - these dahi batata sev puri (I'm not exactly sure of the proper name for them, as I've seen them called many different names!). I bought a package of premade puri shells and broke holes into each one so that I could add the filling. The filling was a simple mixture of boiled potato and chickpeas with finely chopped red onion and chaat masala spice.  Here's a picture of the filled puri shells:


Next, I poured in a spoonful of cool plain yogurt into each one, followed by a spicy cilantro chutney and sweet date-tamarind chutney. The final topping was a bit of chopped fresh cilantro, some sev, and another sprinkling of chaat masala.  It took longer than I planned for filling each one, but luckily my sister came along to help out with the last few steps!


These were definitely everyone's favourite appetizer - they've got the perfect balance of sweet and spicy flavours that explode once you pop the whole thing into your mouth! If you want to try making them yourself, here's one of the guides that I followed.

Finally, I also made a raita to serve along with the appetizers. I followed this recipe for rainbow raita from Vegetarian Times, except I replaced the mint with cilantro. This cool and soothing dip was much appreciated  once all of our mouths were set on fire from the spicy food!


Hot Food

After the appetizers, it was time for some cooked Indian food!

I considered making my own samosas, but figured I should save the time and effort by buying some fresh samosas from the local Indian food store instead (they were still homemade, but by someone else!)


I bought two kinds of vegetarian samosas - the smaller ones were filled with spinach and paneer cheese, and the bigger ones were the more traditional potato and pea filling. I thought both kinds were delicious, especially served with tamarind and cilantro chutneys!


For the homemade food, I put together two vegetarian main dishes. First were these skewers of paneer cheese and peppers, marinated in a creamy tikka masala sauce and cooked on the stovetop. They were pretty easy to make, especially since I cheated a bit by using a premade sauce, and they tasted great too - I loved the soft, crumbly paneer!


I also made a tofu dish using a recipe from one of my new cookbooks, Vegan Eats World.  Slices of pressed tofu were marinated in a yogurt sauce with lots of spices (this time I did make the sauce from scratch!)  and baked in the oven along with lots of sliced red onion on top.


I'm not sure if this dish is authentic tandoori, or if you could even find something similar in India, but all that mattered to me was that it tasted good! If I had to choose a favourite out of the hot dishes, this would be it. I thought the texture of the tofu was perfect, and I loved the flavours. Too bad I was already full by this point so I only ate a couple pieces of it (but I did get to enjoy the leftovers afterwards)!


Since this post is already getting long, I'll try to summarize the rest of our meal without pictures!  Along with the tofu, we had tandoori chicken kebabs for the non-vegetarians that were marinated in the same sauce as the tofu.

I also heated up some storebought naan bread (another time saver, although I would have preferred homemade!), and made some basmati rice that I ate with more raita mixed in.

Overall, it was a great meal and a delicious way to end 2012!  And if you have any questions about any of the dishes, feel free to leave a comment - I just didn't want to make this post too long by giving detailed instructions for each dish!

December 13, 2012

Mashed Rutabaga & Kale with Chickpea Gravy


Today's post is all about comfort food - vegan style!

The thought of a big mound of fluffy mashed potatoes drenched in creamy gravy is probably enough to make most people's mouths water, and yet it's something that I've never actually made myself.  I'm pretty sure the last time I ate mashed potatoes and gravy was back when I was a kid, and at every holiday meal since I became vegetarian, I've had to skip the gravy.

I figured it was time to change that by making a vegetarian (and vegan) gravy that would taste just like the kind I used to enjoy as a kid. I've seen lots of recipes for mushroom gravy that sound really good, but I wanted a smoother, silkier gravy.

Then I came across this recipe for vegan gravy that used chickpea flour as the main ingredient for both flavour and texture. I had to make some changes to the method in order to get a sauce that was thick enough, including increasing the cooking time and adding some cornstarch, but in the end it turned out just how I wanted!

The texture was still slightly on the thinner side, but the colour and taste were just right - savory and a bit salty, with notes of fragrant herbs like rosemary and thyme. I also added some nutritional yeast which gave it one more layer of flavour with its slightly nutty, cheesy taste.


Next came the issue of what to serve my gravy with! My first idea was to make a mashed potato and rutabaga mixture that is formed into patties and baked in the oven until firm.  Rutabaga - a relative of the turnip but sweeter - is a root veggie that I've been wanting to experiment with, so I was excited to try these. The patties turned out well in terms of looks and texture, but unfortunately they did not taste good at all for some reason, so I had to come up with a new plan!

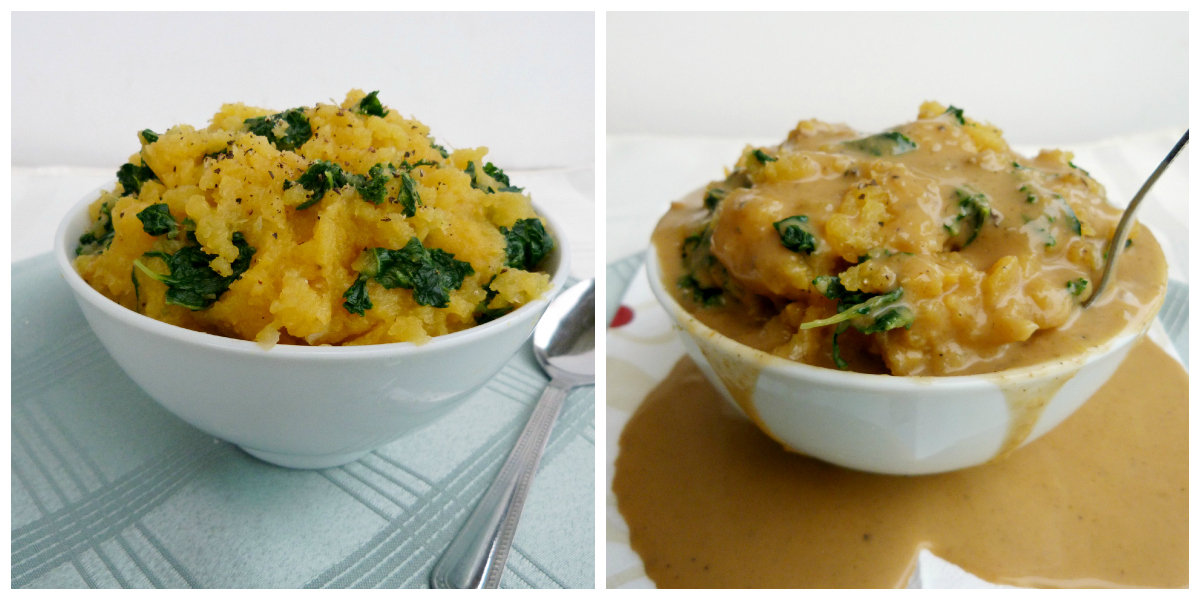
I still had half of a rutabaga left, so I decided to go with a simple mashed rutabaga flavoured with vegetable broth and garlic, with some cooked kale mixed in to make it even more nutritious!

The mashed rutabaga made the perfect base for soaking up the gravy. It was delicious on its own, but became even more delicious when it was smothered in a generous helping of the gravy - see the before and after photos below (don't mind the mess I made after pouring the gravy)!

This was definitely my idea of comfort food!


Mashed Rutabaga with Kale

2 cups vegetable broth
1/2 a rutabaga (~1.5 lbs), peeled and diced
1 tbsp + 1/2 tsp olive oil, divided
1 clove garlic, minced
2 cups packed kale leaves, stems removed
3 tbsp water
2 tbsp almond milk
1/2 tsp kosher salt
Ground pepper

Bring the vegetable broth to a simmer on medium-high heat in a large pot. Place the diced rutabaga in a steamer basket and insert the steamer into the pot. Steam, covered, for about 30 minutes, until soft (Note: try to keep an eye on the liquid level in the pot and add more water partway through to prevent burning).

Meanwhile, heat ½ tsp olive oil in a large skillet over medium heat. Add the garlic and sauté for about 1 minute, stirring often.  Add the kale leaves and sprinkle with a bit of salt. Add 3 tbsp water and cover. Let steam for 2-3 minutes, until the water is gone.  Transfer kale and garlic mixture to a bowl to cool.  Once cool enough to handle, squeeze out any remaining water from the kale with your hands, then finely chop.

When the rutabaga is done, transfer to a large bowl. Mash partially, then add 1 tbsp olive oil and the almond milk and continue to mash until all the pieces are broken down (it will remain a bit chunky). Stir in the salt, kale mixture, and lots of freshly ground pepper.

Makes 2 large servings, or 4 small servings (Feel free to double the recipe if you want to use up a whole rutabaga)


Chickpea Gravy
Adapted from Savvy Vegetarian

1 tbsp olive oil
2 cloves garlic, minced
1 tbsp minced fresh ginger
1/3 cup chickpea flour
1/2 tsp ground coriander
1/2 tsp cumin
1/2 tsp paprika
1/2 tsp dried rosemary
1 tsp dried thyme
1 vegetable bouillon cube mixed in 3.5 cups water
1 tbsp cornstarch
1 tbsp tamari
1 tbsp nutritional yeast
1/2 tsp kosher salt
Ground pepper


Heat 1 tbsp olive oil on medium heat in a medium sized saucepan. Add garlic and ginger and cook for about 1 minute, stirring. Add the chickpea flour and the spices and cook, stirring, for 4-5 minutes, until the mixture is lightly browned.

Gradually add the vegetable broth, whisking constantly. Continue to simmer on medium heat for 15-20 minutes, whisking frequently, until the liquid is reduced by about a third. Whisk in the cornstarch, 1 tsp at a time, until it is dissolved. Continue to simmer, whisking often, for about 10 more minutes, until thickened.

Transfer mixture to a blender and add the tamari, nutritional yeast, salt, and pepper. Blend on low speed until smooth. Taste and adjust seasoning if necessary.

Return to pot and keep on low heat until serving time.  

Serve over mashed rutabaga, or use with another recipe, such as mashed potatoes, roasted cauliflower, tofu, or lentil loaf!

Makes about 2 cups (you will have more than you need for the above recipe of mashed rutabaga)

September 09, 2011

Spinach Tofu Patties


I love vegetarian burgers because they're usually packed with lots of vegetables and other yummy ingredients, and there are so many ways to enjoy them - you can put them in between a bun and dress them up with your favourite toppings, but they are often just as good or even better on their own, without the bun! 

These patties definitely fit into the latter category. They are so flavourful that I preferred to just eat them with a fork rather than hiding them in a bun underneath other toppings. 

The patties themselves are actually made with tofu, but you would probably never guess just by looking at them (and you could probably serve these to a tofu-hater without them knowing either!) They are also filled with spinach and asian flavours like sesame oil and soy sauce. I decided to add some peanut butter to mine too, to go with a sort of asian peanut sauce theme. 

Once cooked, they held their shape well (which can be a problem with other veggie burgers), but they were still soft and easily broke apart with a fork when eaten that way. 

The original recipe didn't include a sauce to go with them, but since I love my condiments, I brainstormed what type of topping I could make for them. I immediately thought of a yogurt sauce, like the tahini yogurt sauce that I made for my beet burgers. I still think that would go really well with them, but I ended up choosing a different sauce. To keep with the asian flavours, I made a peanut chutney using a recipe that I've been wanting to try for a while. It's actually meant to be a dipping sauce so it's quite thick, but it was really good!

I loved eating the patties on top of naan bread with the peanut chutney spread on top, but feel free to use another sauce or just eat these plain! 


Spinach Tofu Patties
Adapted from Joanne of Eats Well With Others, as seen on Marcus Samuelsson's Blog

1/2 lb spinach
1 scallion, minced (I left this out)
1 clove garlic, minced
175 grams tofu (about half a block)
1/4 cup panko or bread crumbs
2 tbsp sesame seeds (I used the toasted kind)
1/2 tbsp soy sauce
1 tsp sesame oil
1.5 tbsp peanut butter
salt and pepper

Bring a large pot of salted water to a boil. Add the spinach and cook for one minute. Then drain the spinach and plunge it into a bowl of ice water. Once it has cooled, drain the water and squeeze out as much additional water from the spinach as you can with your hands. Chop the drained spinach finely and place aside in a bowl.

Add the minced garlic and scallion (if using) to the spinach. Crumble half of the tofu with your hands into the bowl with the spinach mixture. Process the other half of the tofu in a food processor or blender until smooth. Add the pureed tofu to the bowl, along with the bread crumbs, sesame seeds, soy sauce, sesame oil, peanut butter, and a dash of salt and pepper.

Stir everything together until it is fully mixed. Form into 4 patties (or less if you want larger patties), flattening the top and bottom.

Heat a bit of vegetable oil in a skillet on medium heat. Add the patties to the pan and cook, undisturbed, for about 5 minutes, or until they are nicely browned. Carefully flip and cook the other side for another 3-4 minutes.

Serve warm with buns or pitas, or simply top with your favourite sauce (like the peanut chutney recipe below)

Makes 4 patties (the original recipe said it made 4, and I cut the recipe in half and still got 4).


Peanut Chutney Sauce
Recipe from Smells Like Home

2 tbsp peanut butter
2 tbsp mango chutney
1 tbsp lime juice
1 tbsp soy sauce
1 small clove garlic, minced
pinch of salt and red pepper flakes
1-2 tbsp of water to thin if necessary

Whisk all ingredients in a small bowl until smooth.

Makes enough for 4 patties.

August 18, 2011

Beet-Chickpea Sliders with Tahini Yogurt Sauce


Our family recently held a backyard BBQ and we decided to serve different kinds of sliders as the main dish. Of course, we needed a vegetarian option for my sister and I, and I was put in charge of coming up with a recipe and making them. Immediately I thought of something I’ve been wanting to make for awhile – beet burgers!

I’ve already professed my love for both beets and miniature food, so I was very excited about the idea of mini beet sliders...I even gave a little cheer of “Beet burgers! Beet burgers!” very enthusiastically to anyone who asked what I was making.

After searching for a while for the perfect recipe, I decided on this one for beet, oat and chickpea sliders. I liked the concept of adding chickpeas because I thought they would add a nice flavour as well as some texture.

They took some time to put together, since there are a fair number of different ingredients that go in them, but once the patties are made, the rest is simple – just put them on a baking sheet and into the oven!


When I served this platter of purple patties to my family, some people were really excited to try them, but others were much more hesitant! My sister and I would have been quite happy to have them all to ourselves, but most people ended up trying them after all, and everyone who did gave them rave reviews!

Unfortunately, I didn't get any nice pictures that actually did them justice (I couldn't exactly take them away for a photo shoot while everyone else was starting dinner!). But even though they may look a little diffferent from typical burgers, hopefully you will still give beet burgers a chance! They actually don't taste much like beets, and they aren't like storebought veggie burgers either - they have a soft texture and the taste of the chickpeas comes through the most - kind of like falafels.

Beet-Chickpea Sliders
Adapted from Hobby and More

1 ½ medium beets, peeled and grated
1 cup cooked chickpeas
1 medium potato, boiled
1 cup oats, coarsely ground/blended, divided 
4 tsp minced garlic
1 tsp cumin 
1/2 tsp salt
1/4 tsp chili powder
1/4 tsp chili flakes
1 tsp garam masala
2 tbsp olive oil

Place the chickpeas in a large bowl and mash. Add the cooked potato and grated beets and continue to mash until everything looks broken down and mixed together.

Add in the salt, spices and olive oil and mix well. Let the mixture sit for a few minutes, then mix in ½ cup of the ground oats. The mixture should now be dry enough to form into patties.

Form small balls out of the mixture and flatten into patties (they should be the size of your slider buns). Add the remaining ground oats to a plate and press each side of the patty into the oats to coat. Place the coated patties onto a parchment lined baking sheet.

Bake at 350 degrees for 15-20 minutes, until they start to feel crisp on the outside.

Serve with tahini yogurt sauce (if desired) on slider buns. The patties are also really good just on their own!

Makes 12 small patties.


Tahini Yogurt Sauce
Adapted from Eating Well

I also wanted to come up with a sauce to go on the sliders. Since these are similar to falafels, I thought that a tahini-yogurt sauce would go well with them, and it was perfect!

1/2 cup plain yogurt (I used Greek yogurt)
2 tbsp tahini
1 tbsp lemon juice
1/3 cup chopped parsley
Salt and pepper to taste

Mix all ingredients in a small bowl. 


LinkWithin

Related Posts Plugin for WordPress, Blogger...