Showing posts with label chickpeas. Show all posts

February 26, 2014

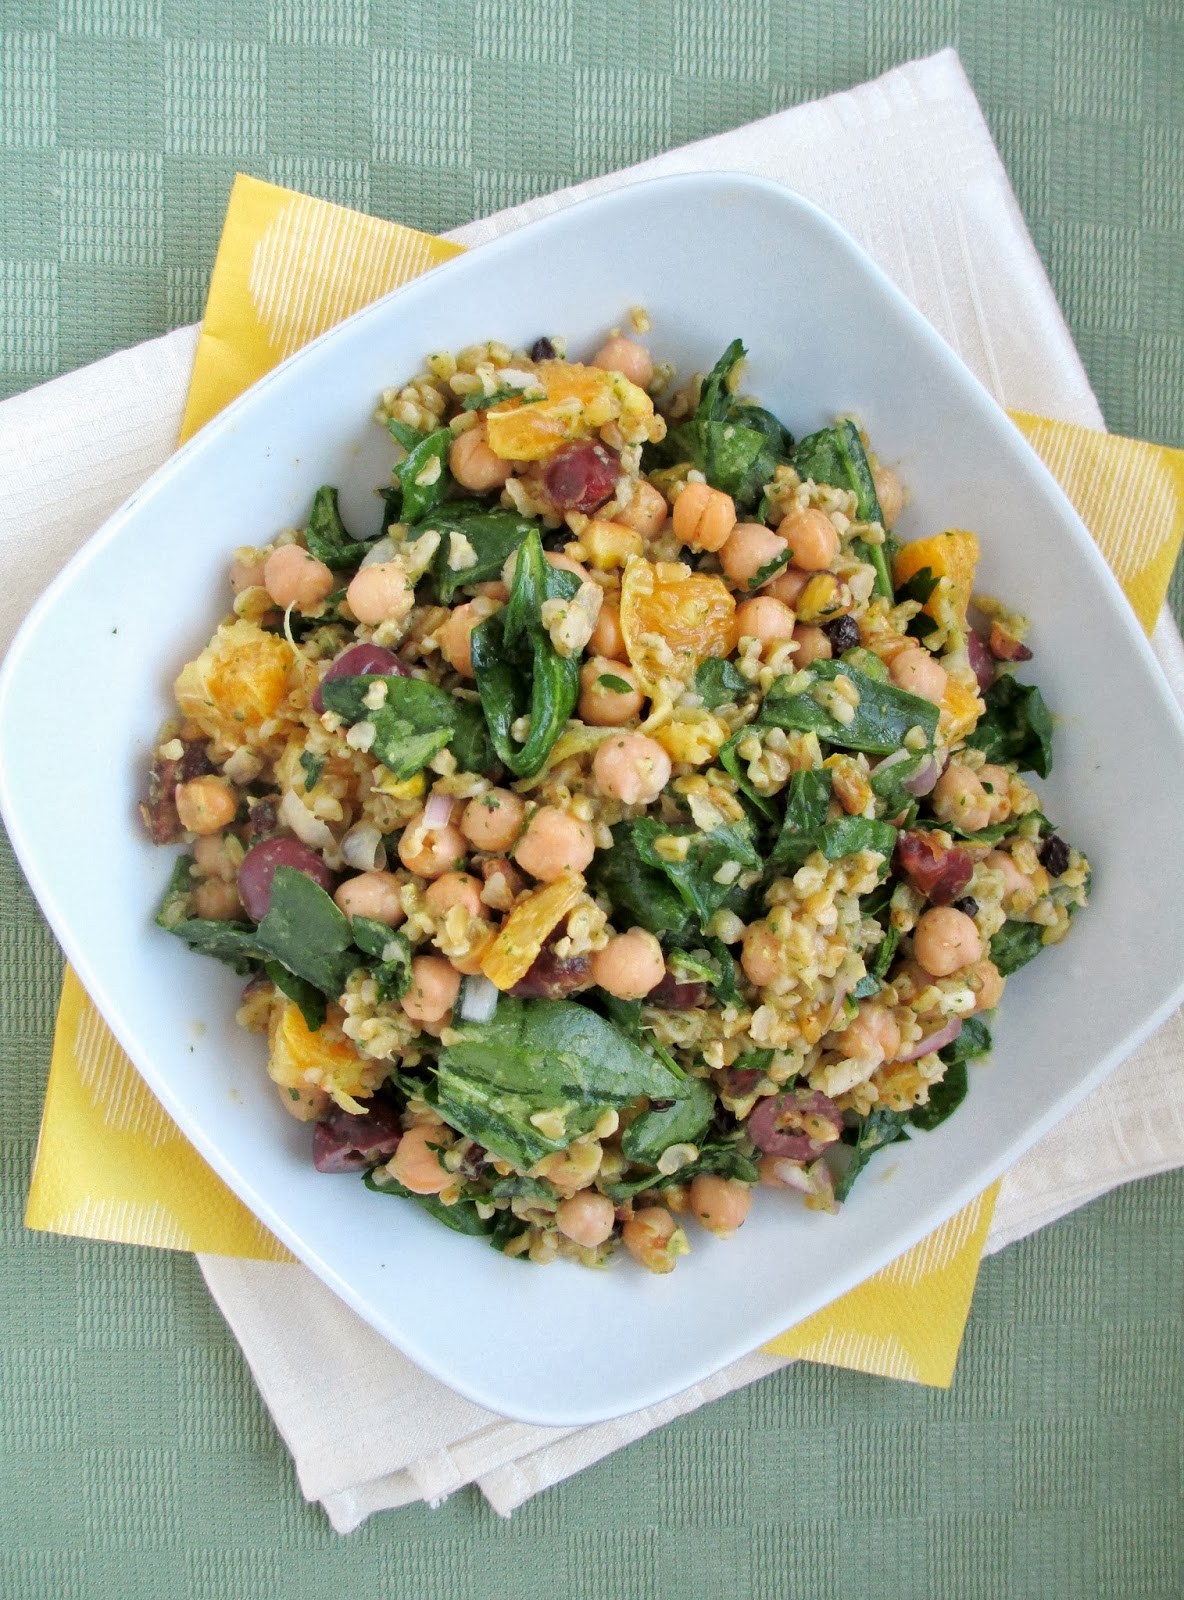
Moroccan Chickpea & Freekeh Salad with Mint-Orange Dressing


Is anyone else getting sick of winter yet? I just spent some time last week enjoying outdoor activites like snowshoeing and skating, but usually by the time March rolls around, I've had my fill of snow and cold weather!

To help ward off the winter blahs, I've been incorporating more bright and fresh ingredients into my meals, like pineapple and citrus. I posted this citrus protein bowl recently, and this week I've been eating another orange-infused meal, this time with a Moroccan twist!

The recipe for this salad was inspired by a moroccan salad with cilantro-orange dressing that I saw on Pinch of Yum recently and immediately bookmarked. I love trying new combinations of ingredients in my meals that I don't normally eat for dinner, so I was intrigued by her addition of dates and pistachios into a bulgur salad.


For my version, I used freekeh instead of bulgur - a grain that is full of fiber and protein and has a sturdy, chewy texture that holds up well in salads like this one. I also added chickpeas to bulk up the dish a bit more into a main dish salad.

In addition to the orange, spinach, dates, and pistachios, I added some currants, olives, shallot, and parsley because I thought they would pair well with the other Moroccan flavours. I also changed up the dressing a bit, using mint instead of cilantro and adding some garlic and cumin for extra seasoning.

With all of those ingredients, this dish definitely had a lot of flavour! I liked the contrast of the salty olives against the sweetness of the dates and orange, with a bit of bite from the fresh parsley too. If you're not a fan of mint, I found it to be pretty subtle once the dressing was mixed in, but feel free to use the original suggestion of cilantro instead!


Moroccan Chickpea & Freekeh Salad with Mint-Orange Dressing
Adapted from Pinch of Yum

1 (145g) package freekeh (about 3/4 cup dry)
1 3/4 cups water
Dash of salt
1/2 cup dates, chopped (measure before chopping)
2 tbsp dried currants
2-3 cups packed baby spinach leaves (chopped if leaves are large)
1 can chickpeas, rinsed and drained
1 large navel orange
1/2 cup pitted Kalamata olives
1/2 cup chopped fresh parsley
1 shallot, peeled and minced
1/4 cup unsalted pistachios

Dressing
1 navel orange
1/3 cup packed mint leaves
1 clove garlic, minced
1 tbsp olive oil
1 tbsp fresh lemon juice
1 tsp honey or agave nectar
Scant 1/2 tsp salt
1/4 tsp cumin
Ground pepper


Prepare the dressing by adding all ingredients to a blender and pureeing until smooth. Taste and adjust seasoning if desired.

Cook freekeh according to package directions (I brought the dry freekeh and water to a boil in a medium sized saucepan, then reduced the heat to low and cooked, covered, for 20-25 minutes). Remove from heat and add the chopped dates and currants to the pot. Keep covered for 5 minutes, then transfer everything to a large bowl.

Add the spinach and chickpeas to the bowl. Remove the skin of the orange using a knife and cut the orange into segments. Chop segments into smaller pieces and add to the bowl. Chop olives and add them as well, along with the parsley and shallot.

Heat a small skillet on medium heat and toast the pistachios for a few minutes, until lightly browned. Remove from heat and add to the bowl (you can skip the toasting part if you want).

Pour the dressing over everything and toss well to combine.

Makes 4 servings.


January 16, 2014

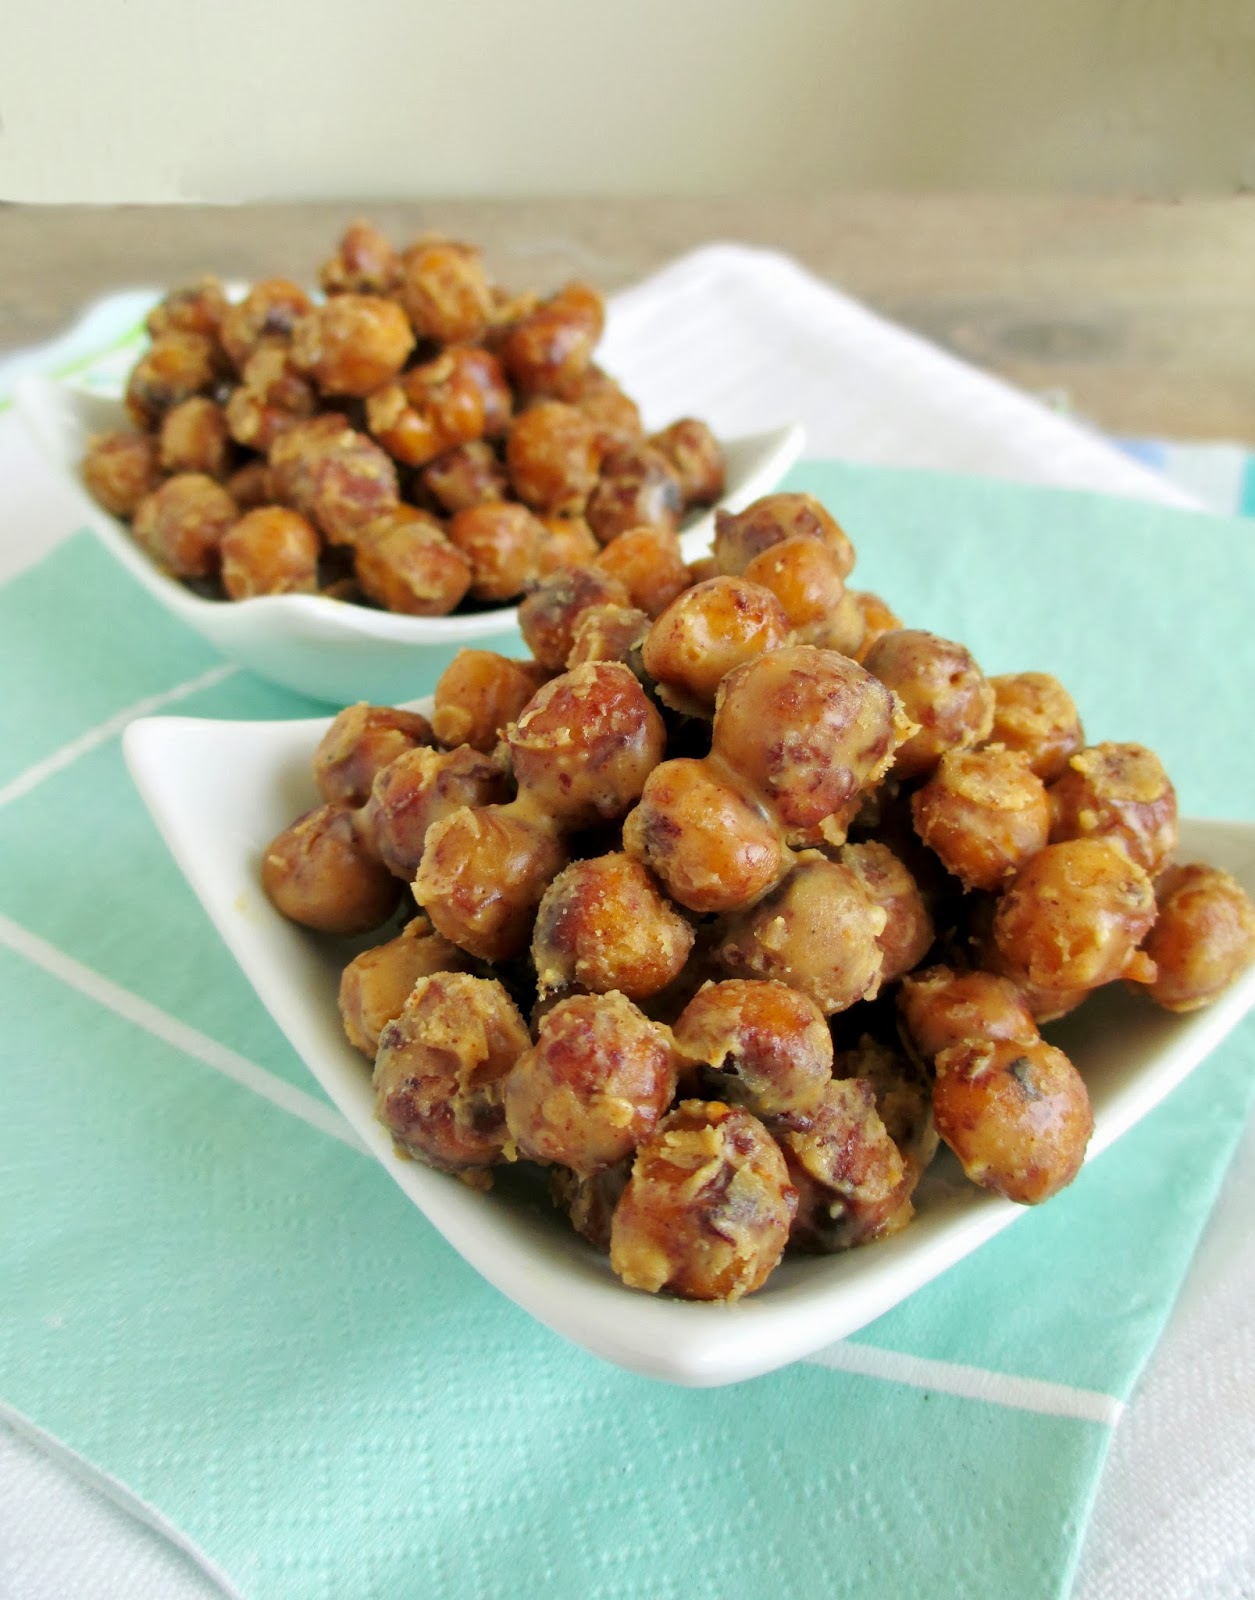
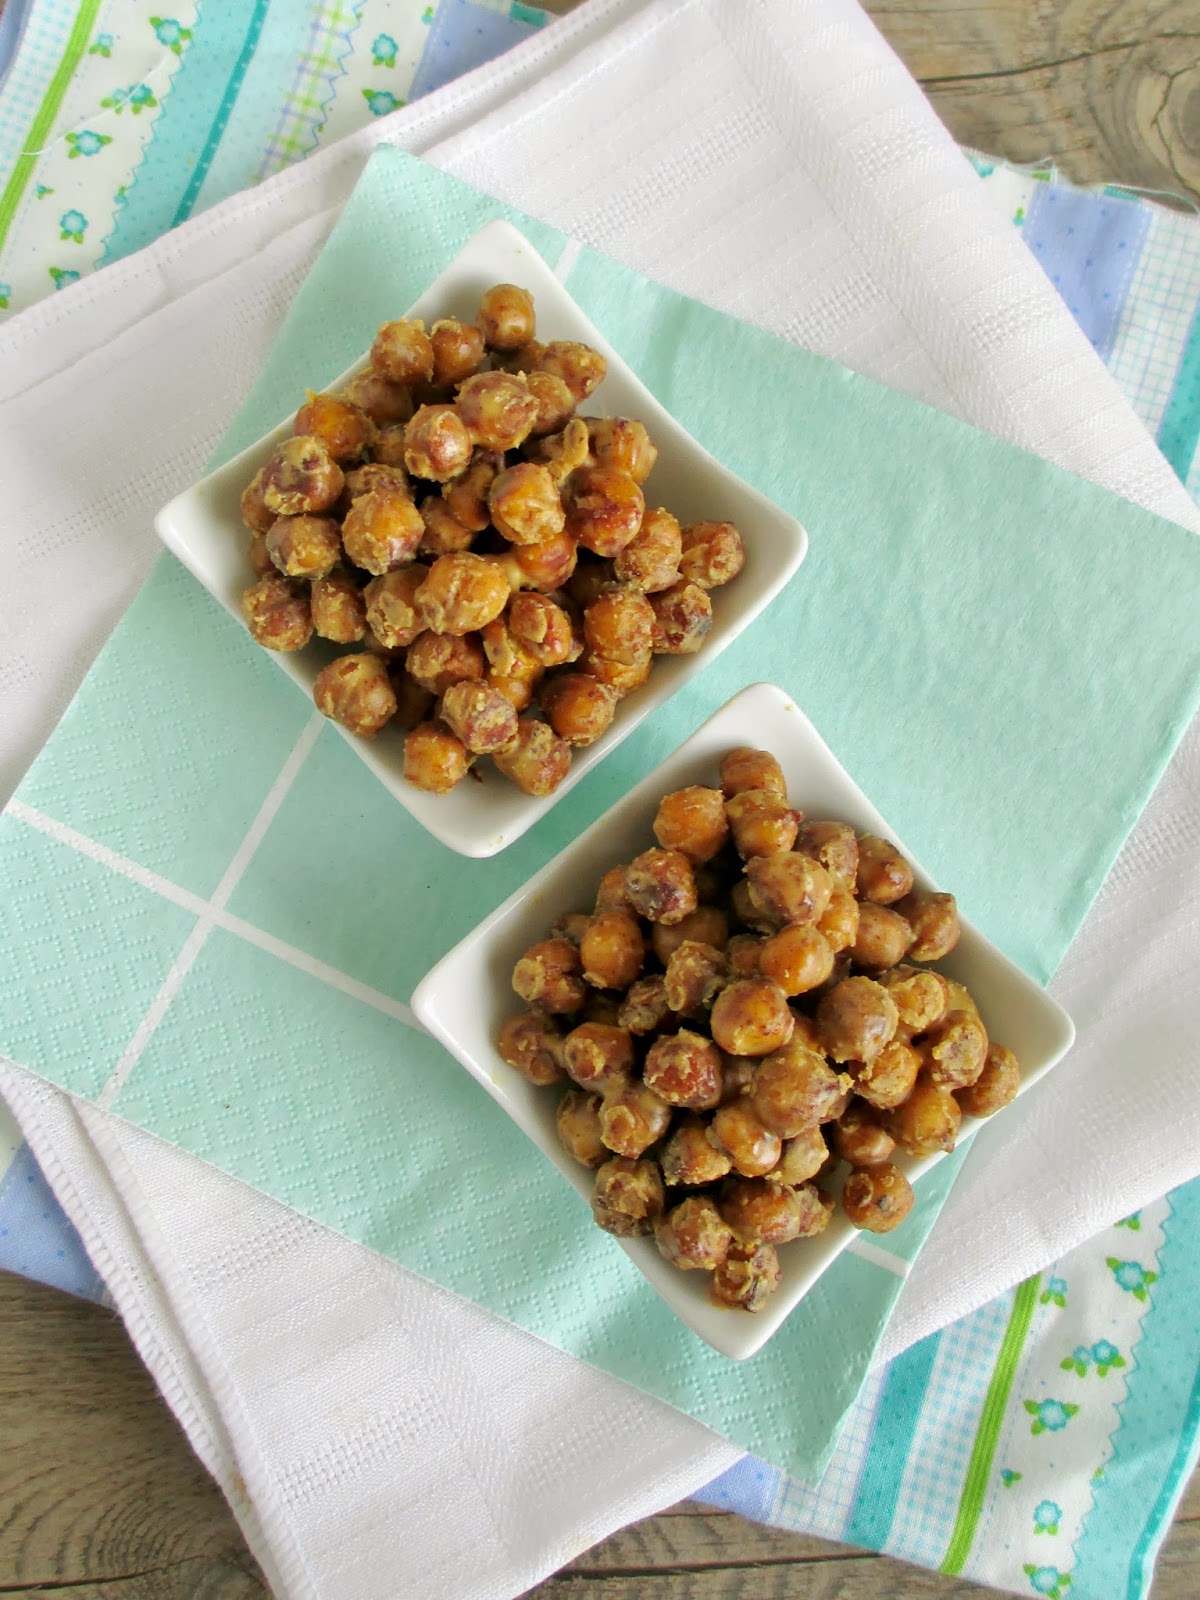
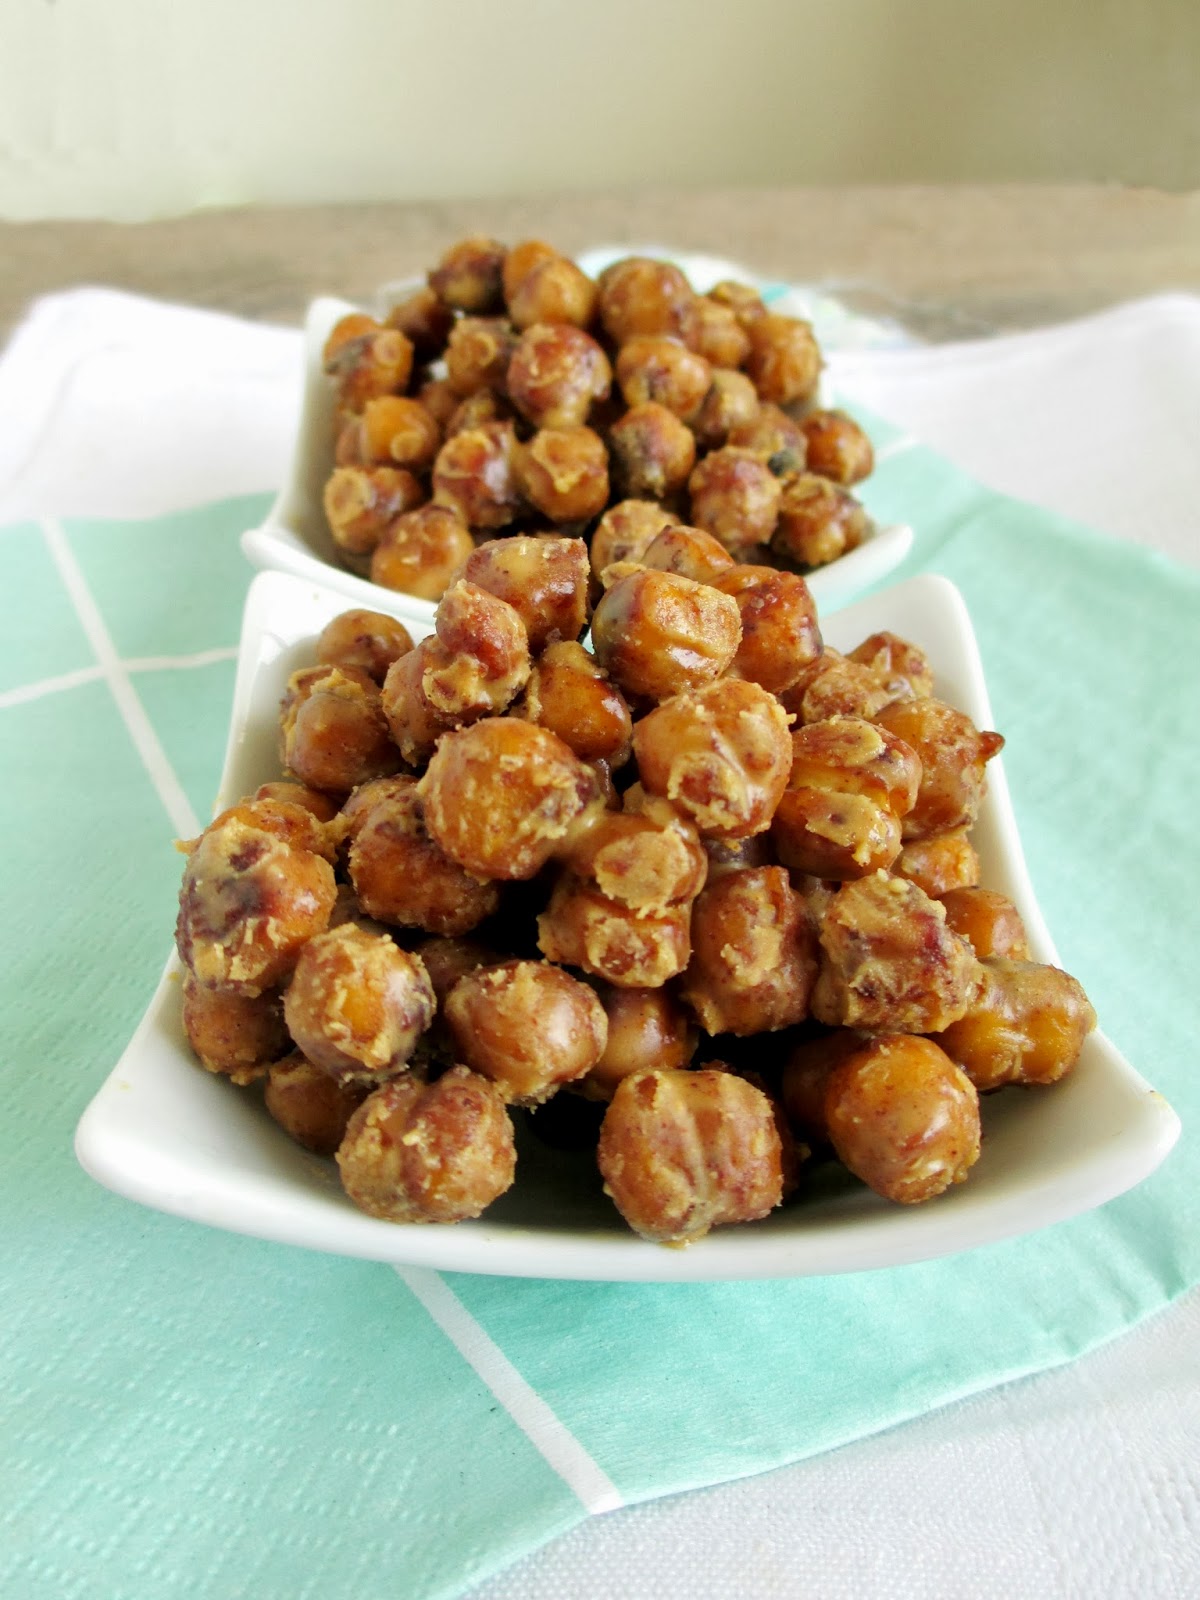
Peanut Butter Roasted Chickpeas


With both awards show season and football playoffs having started this month, it's the perfect time to load up on snack ideas for evenings in front of the TV with friends and family (or even if you're not into sports and awards shows, which I'm sure a lot of people aren't, hopefully you can still use some more healthy snack ideas!).

Last weekend, I watched the Golden Globe Awards in addition to some football (but only because my sister's favourite team was playing). And with the bigger events that I always look forward to - Super Bowl and the Oscars - coming up soon, I spent my Sunday testing out some new snack recipes!

The first snack that I came up with were these peanut butter roasted chickpeas. I've seen a lot of recipes for roasted chickpeas where the chickpeas are coated in various combinations of spices and baked in the oven until crispy, and I've tried them once myself and liked them as a different snack option than usual.


Instead of a savory snack this time though, I wanted to try a sweeter variation. I considered coating the chickpeas in chocolate, like the Nourishing Gourmet did, but since I'm not a huge chocolate lover, I thought that peanut butter would make an even tastier coating!

These were super simple to whip up - all you need to do is toss the chickpeas in a bit of coconut oil, add cinnamon, agave, and vanilla for flavouring, and roast them in the oven until they get nice and crispy. Once they're done, you toss the warm chickpeas in a peanut butter and coconut oil mixture until each one is coated.

Sprinkle on some salt and sugar and you have a slightly sweet and salty snack to munch on that's still pretty nutritious too!


Peanut Butter Coated Roasted Chickpeas

1 cup canned chickpeas, rinsed and drained
1 tsp melted coconut oil
1/2-1 tbsp agave nectar (I used 1/2 tbsp and they weren't too sweet)
1/4 tsp vanilla
1/2 tsp cinnamon
Dash of salt
2 tbsp peanut butter 
1/2 tsp coconut oil*
Salt and sugar to taste (optional)


Preheat oven to 375°F and line a baking sheet with parchment paper. Place the chickpeas in a small bowl and add the melted coconut oil, agave, vanilla, cinnamon, and salt. Stir to mix thoroughly. Spread chickpeas out on the prepared baking sheet in a single layer and bake for 35-40 minutes, stirring once, until toasted and crispy. Remove from oven and transfer to a bowl.

Place the peanut butter and coconut oil in a small microwavable bowl and microwave for 10-20 seconds, until coconut oil is melted. Stir to mix well, then pour over the chickpeas. Stir until chickpeas are evenly coated. Spread coated chickpeas onto a plate and place in the refrigerator (or freezer if you're in a hurry) to cool. Once the peanut butter is a bit hardened, remove from fridge and bring to room temperature. Sprinkle with salt and a pinch of sugar if desired (I added both because my peanut butter was the natural kind without added salt and sugar).

Store in the fridge and eat cold or at room temperature. Best eaten on the day of, but they will last one or two days in the fridge.

Makes 1-2 servings (depending on how hungry you are - double the recipe if you're making these for a group)

*Note: the coconut oil in the peanut butter coating is what makes it firm up in the fridge (since coconut oil is solid at cool temperatures). I have not tested this with other types of oil, which may not harden as well. 

November 22, 2013

Recipe Round-Up: Comfort Food & Cookies

It's been a while since I've posted a round up of recipes I've tried from other blogs - other than all the pumpkin recipes that I've enjoyed this year!

My meals lately have definitely transitioned from fresh and light salads to warm and comforting bowls of roasted veggies and hearty soups and stews. I've also tried out a few vegan cookie recipes recently that I wanted to share with you too!


Warm Chickpea and Artichoke Salad  from the taste space


I've made this dish a couple of times in the past and it's just as good every time I go back to it. All you need is some canned artichokes and chickpeas, slivered almonds, and some flavourings in the form of garlic, lemon juice, and dried herbs. It seems like a simple combination, but when you eat everything together warm, it tastes a lot more special!


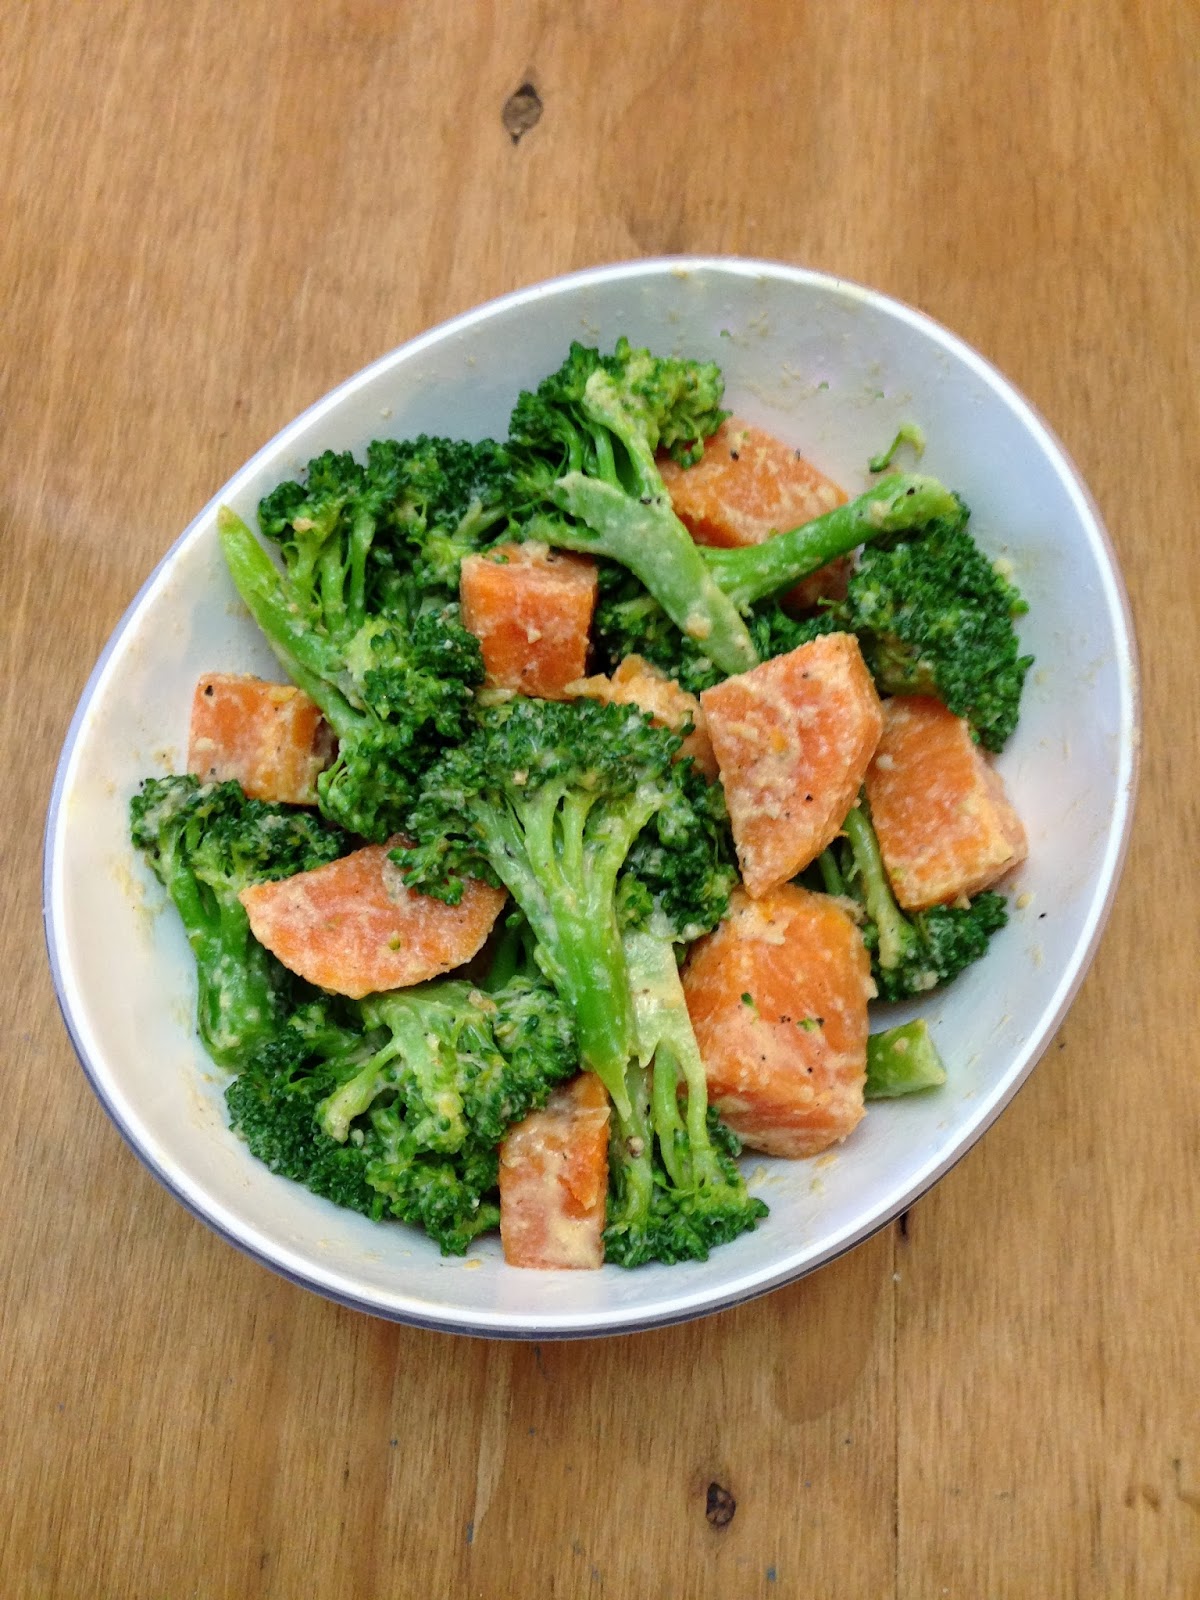
Sweet Potato Broccoli Bowl from Coffee & Quinoa


Sometimes all I want for dinner is a bowl of veggies, but to make it a bit more dinner-worthy, I'll whip up some kind of sauce to pour over top - usually with tahini and lemon juice. I didn't follow this recipe exactly, but this is the kind of creamy-yet-still-healthy sauce that I think goes perfectly over roasted veggies. To save more time, you can steam the veggies like I did, and use leftover quinoa or even leave out the quinoa.


Red Lentil and Squash Curry Stew from Oh She Glows


When I thought I might be coming down with the flu last week, I made this healthy stew that had lots of nutritious ingredients in it: garlic, ginger, onion, squash, sweet potato (which I added because I didn't have enough squash), red lentils, and spinach. I even added extra spinach (I used a whole bunch rather than 1 cup) because it cooks down a lot. This was just what I was craving, and while I'm not making any claims as to the powers of this stew, I did manage to fight off any sickness!


West African Peanut Stew from Sing for Your Supper


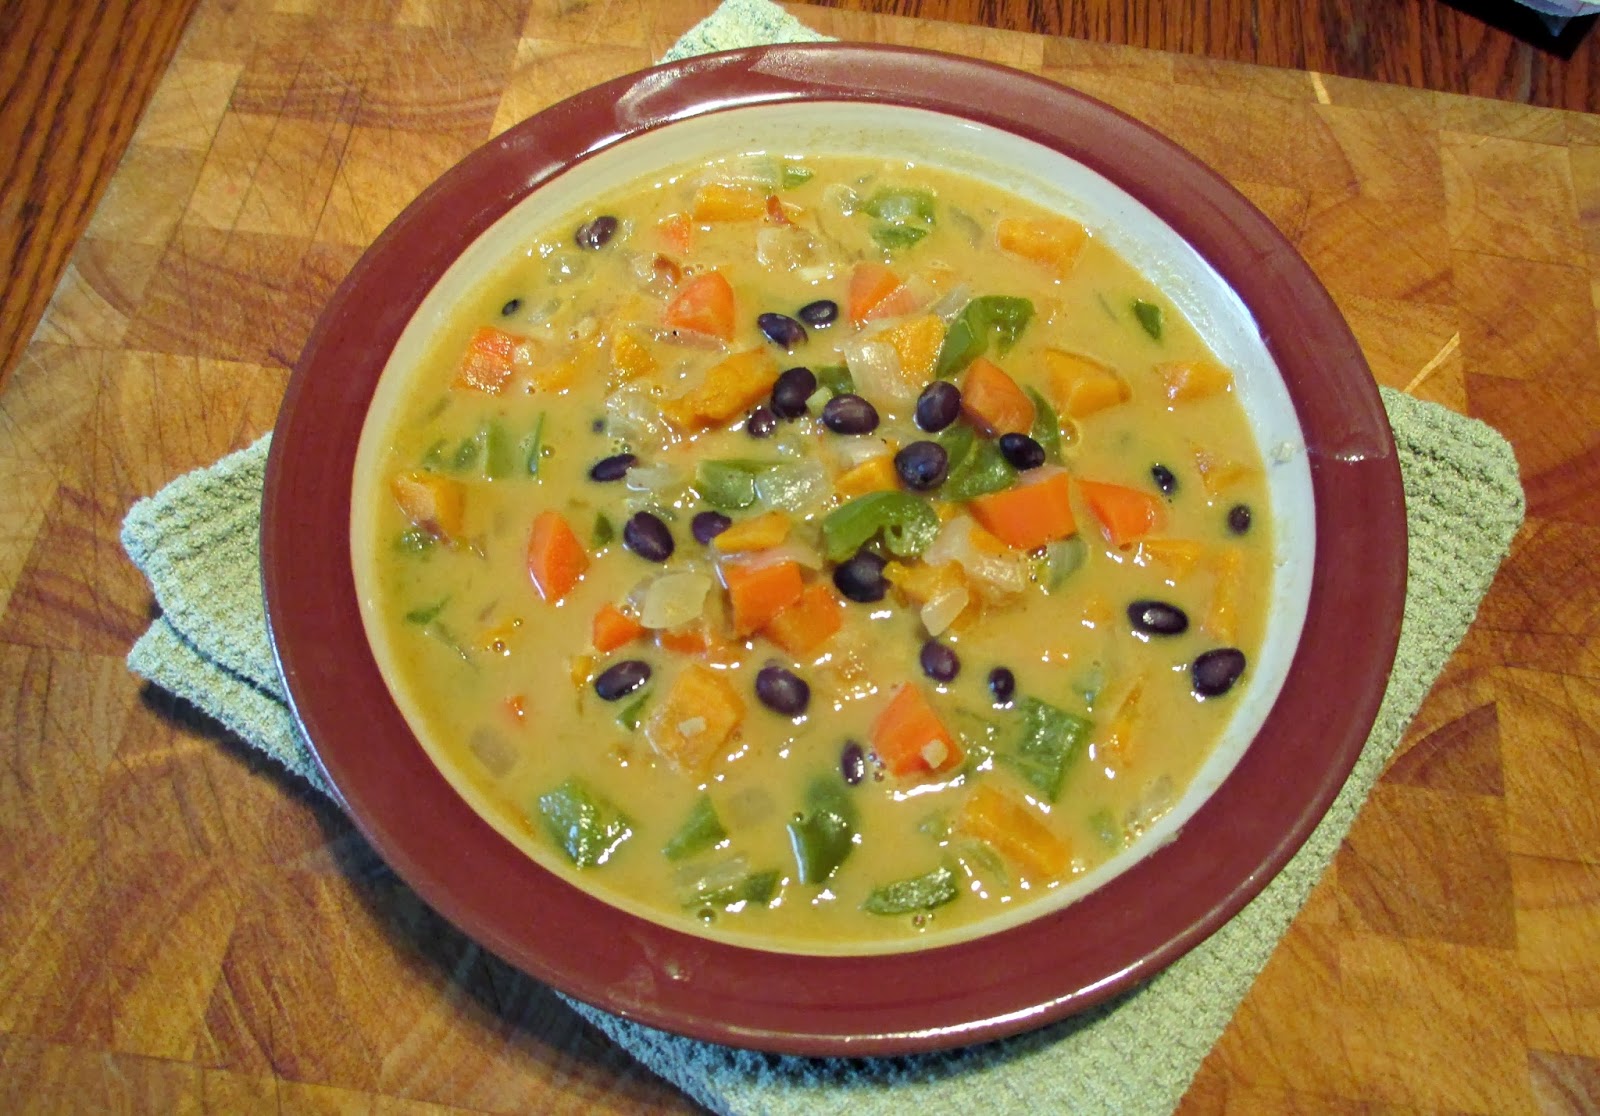
Another easy stew that I tried recently was a variation on this african peanut stew, which I made for my parents the last time I visited. I love anything with peanut butter and spices so I knew I would like it, but I wasn't sure if my parents would. Turned out I was wrong - they both raved about it! The only changes I made were to replace the chicken broth with vegetable broth and I added a hot pepper and some black beans to make it a bit more filling. I liked it just on its own, but it would also work well over rice or couscous!


Mini No-Yeast Cinnamon Rolls from Krissy's Creations


Out of all the recipes in this post, these were probably the least healthy, but I made them as a treat for a special occasion (my mom's birthday). I was looking for a no-yeast cinnamon roll recipe because I didn't have a lot of time in the morning, and these were perfect. Plus they were a nice small size so we could still eat a couple for breakfast and not be too full for lunch later! While they weren't quite as tasty as the yeast kind, I thought they were a really close substitution, especially fresh from the oven! 


Chocolate Chip Banana Bread Bites from Minimalist Baker


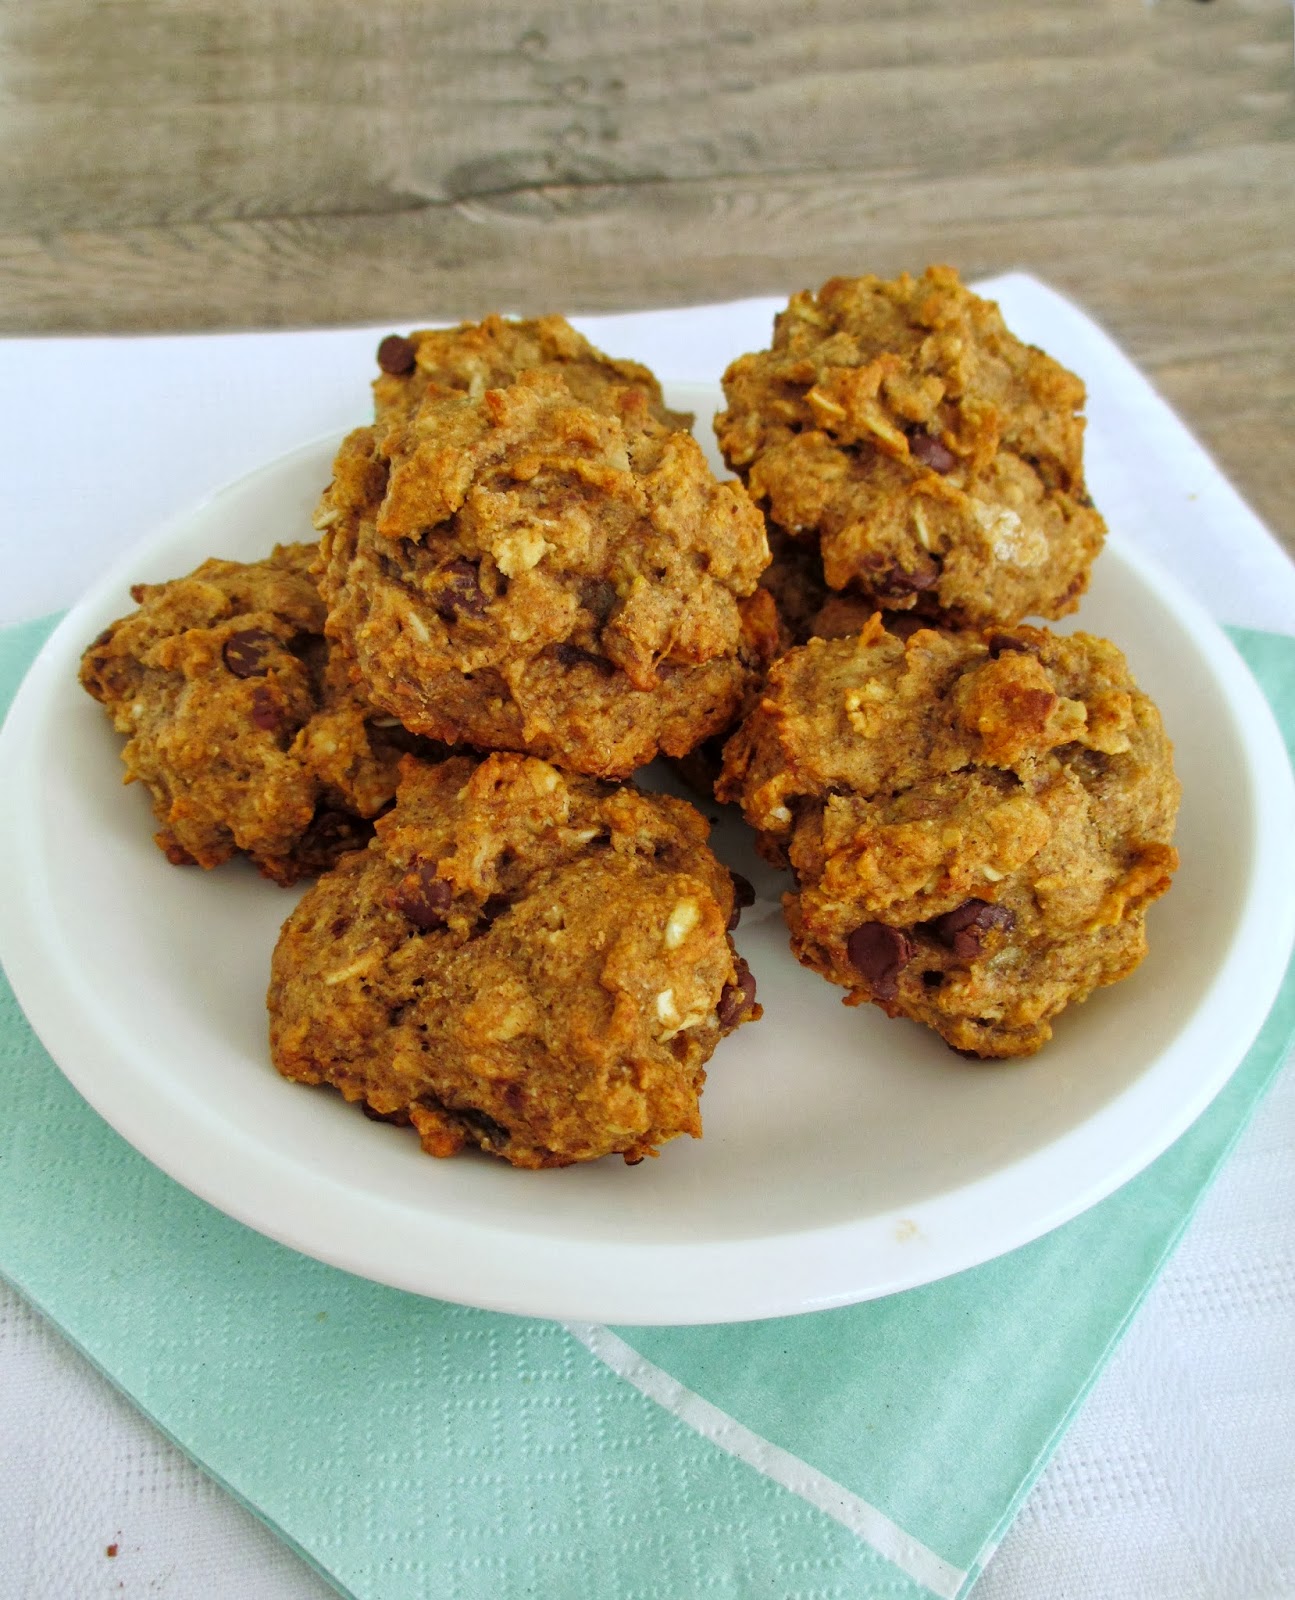
I may have posted these cookies before because this is the second time I've made them, but I can't resist a healthy cookie with the combination of banana, peanut butter, and chocolate chips! These are super easy to make and you probably already have all of the ingredients in your kitchen, so you can whip them up anytime as a snack!


Chocolate Banana Cookies from Katy's Kitchen


I've recently discovered Katy's blog and I'm constantly bookmarking or pinning her recipes to try! These cookies are pretty healthy and had the perfect balance of banana and chocolate flavours. I also liked that they were nice and soft and fluffy - my favourite kind of cookie!


Skinny Snickerdoodles from Chocolate Covered Katie


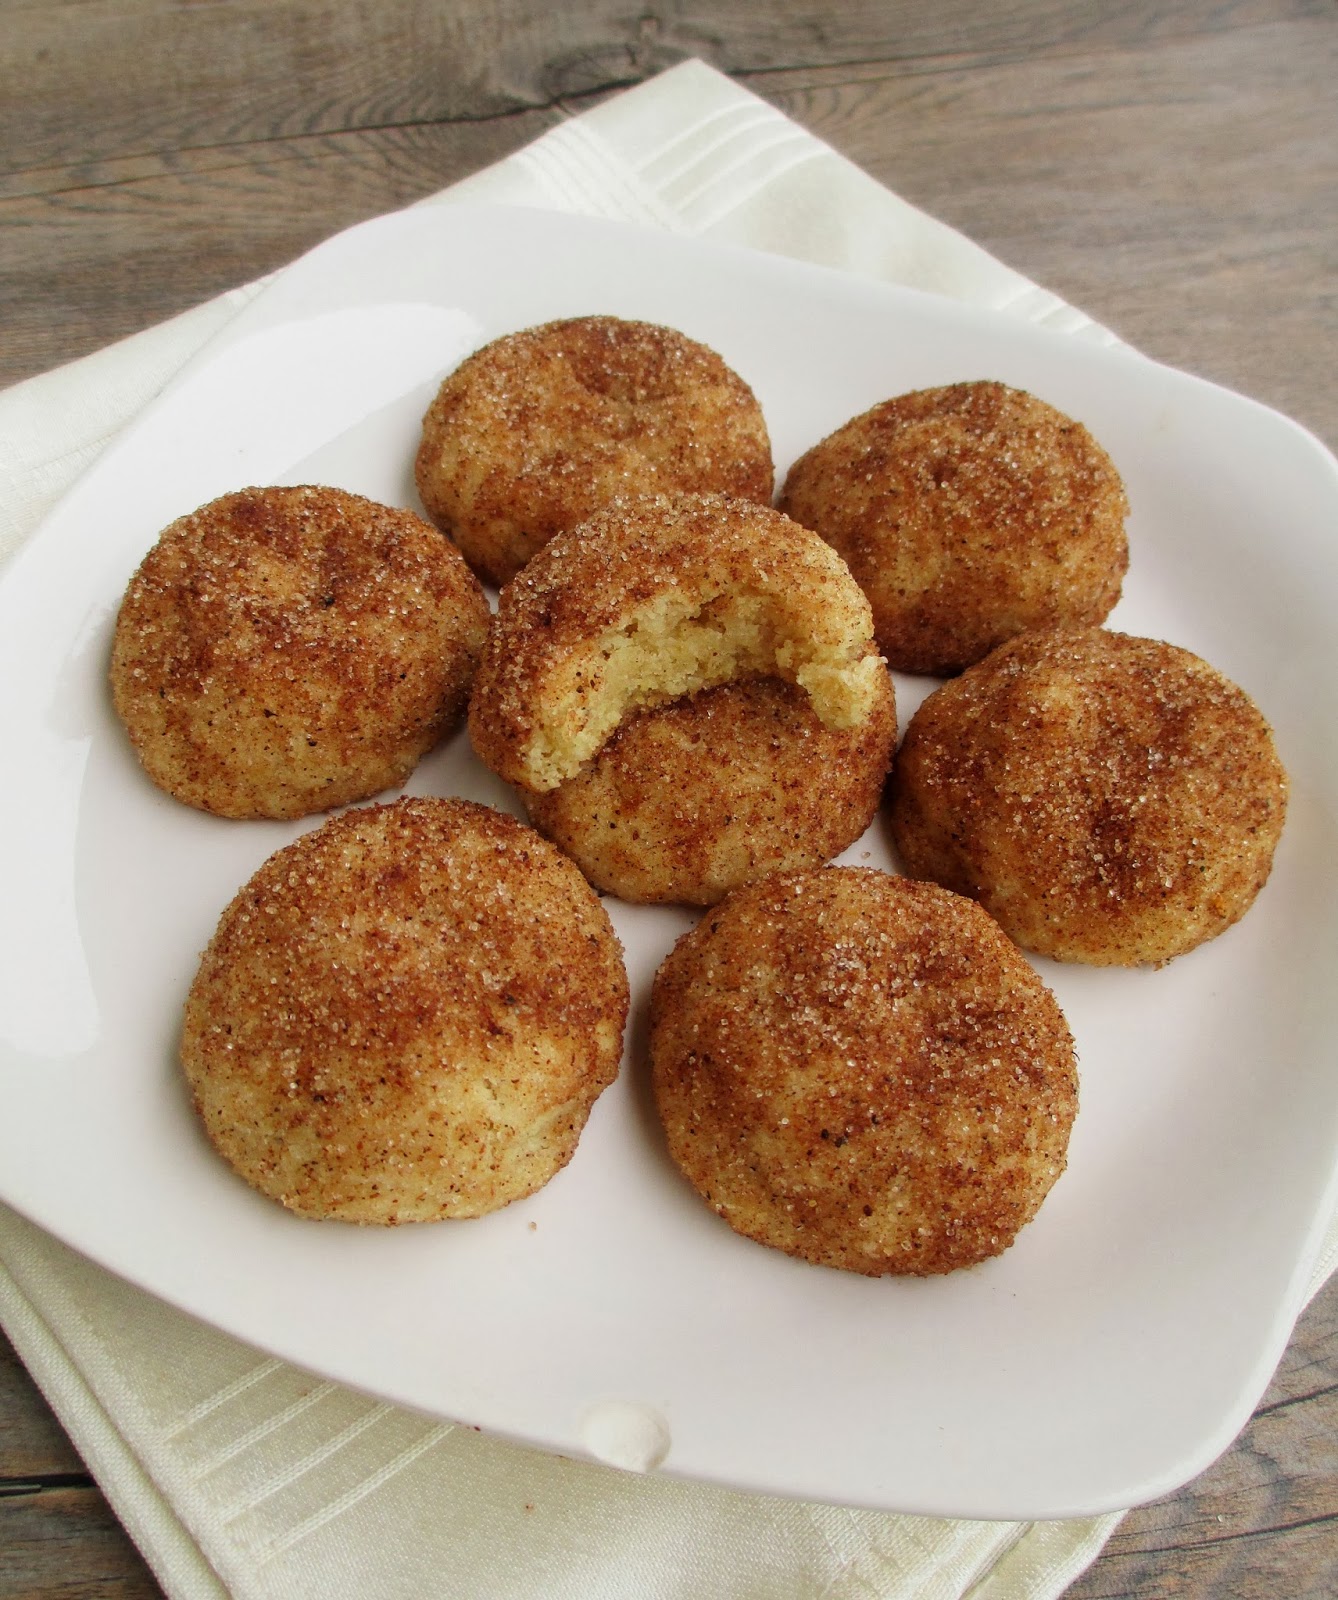
Another healthier cookie that didn't taste "healthy" were these snickerdoodles. I loved the texture - pillowy and soft inside with a bit of crunch on the outside from the sugar, and they're a nice small size so you can eat lots of them! I changed up the spices a bit, adding some chai spices to the coating for a bit of a twist on the usual cinnamon-sugar combo.

I might consider adding these to my holiday baking wish list, or if you have any other good cookie recipe recommendations that I could make for our annual cookie swap next week, feel free to let me know in the comments!

Have a great weekend!


July 30, 2013

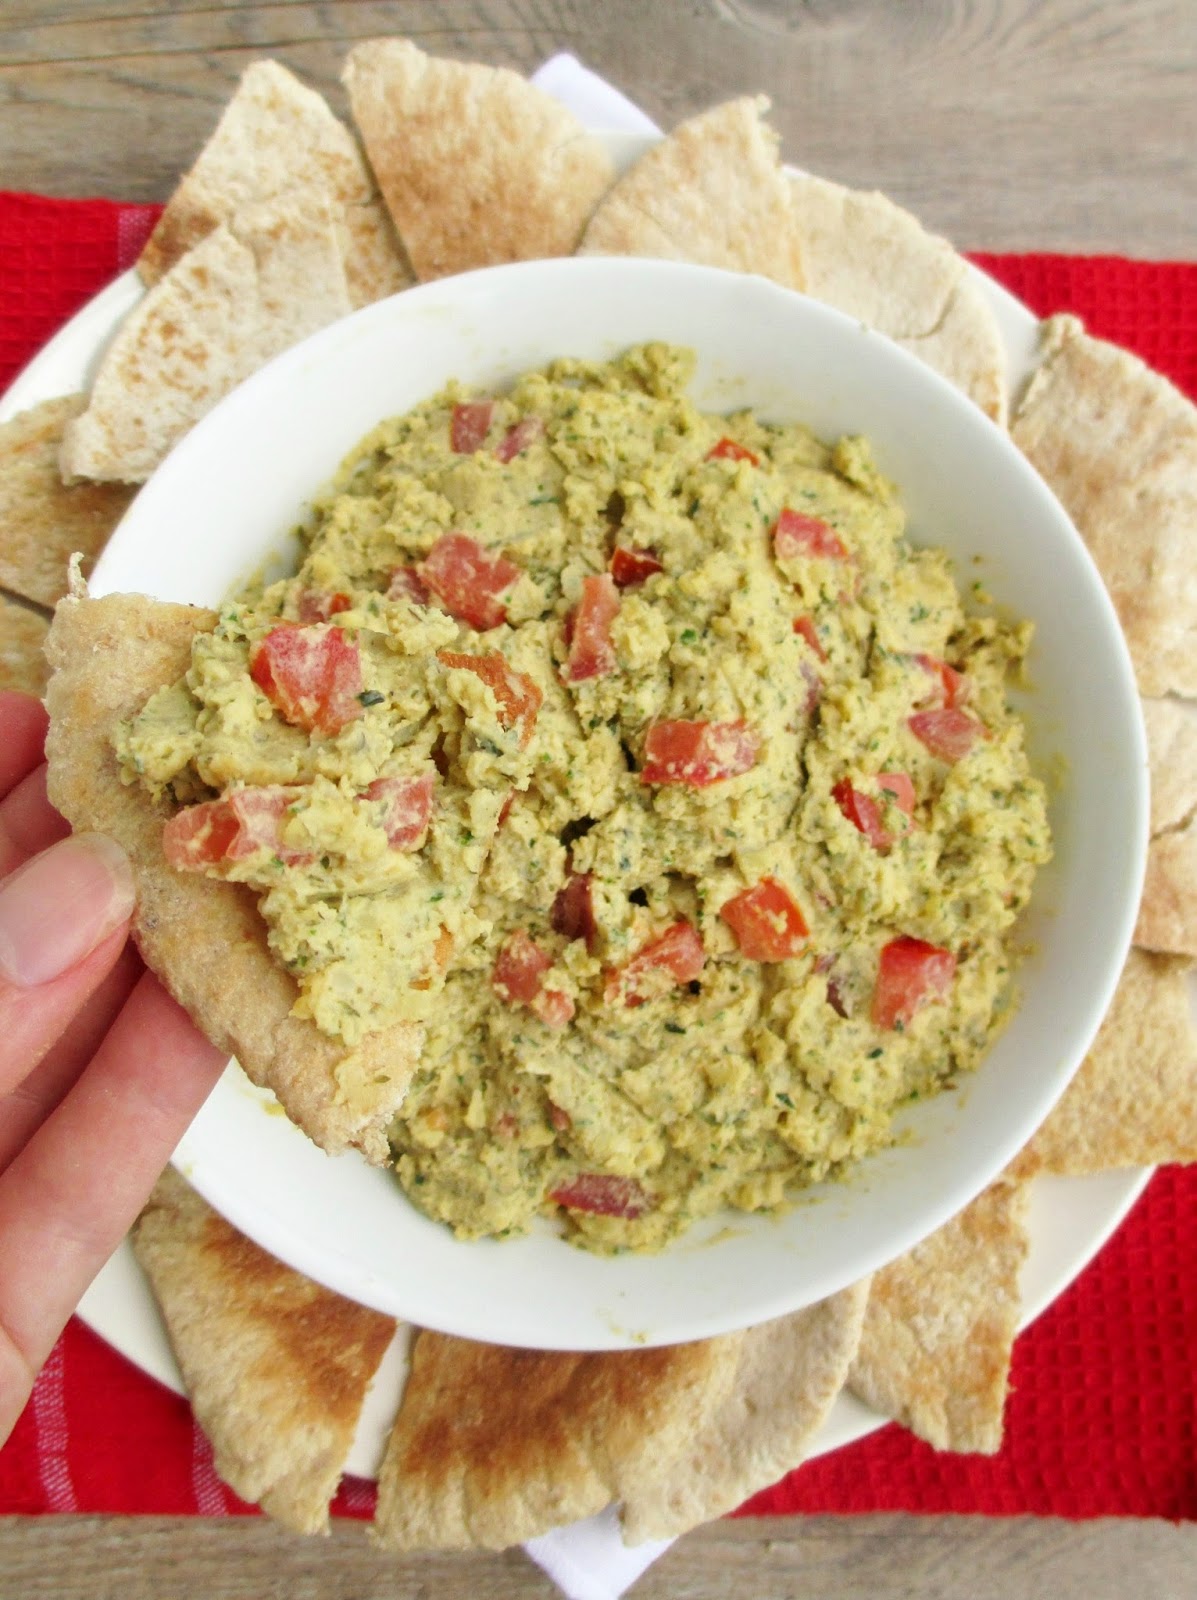
Tabouli Hummus


It's been a while since I've posted a hummus recipe, probably because the last few times I've made it, I end up just throwing a bunch of ingredients into the food processor without bothering to measure anything. I usually find that some combination of chickpeas, lemon juice, garlic and tahini makes a tasty dip!

More often than not though, I still end up buying containers of hummus from the store, even though I know how easy it is - not to mention cheaper - to make at home. The last hummus that I bought was worth the extra expense though because it inspired me to make my own homemade version of it!

The brand of hummus that I bought was Garden Fresh Naturals, and it was a flavour I had never seen from other brands before - tabouli hummus.  The ingredients listed herbs like parsley and mint, along with tomato and bulgur to resemble actual tabouli.

When I tasted the hummus, I got all of the flavour of tabouli, but there were no distinguishable ingredients like fresh herbs, I couldn't see any sign of tomato, and I would never have guessed there was any bulgur in it.

So I decided to make my own version of tabouli hummus with more pronounced flavours and fresh ingredients.


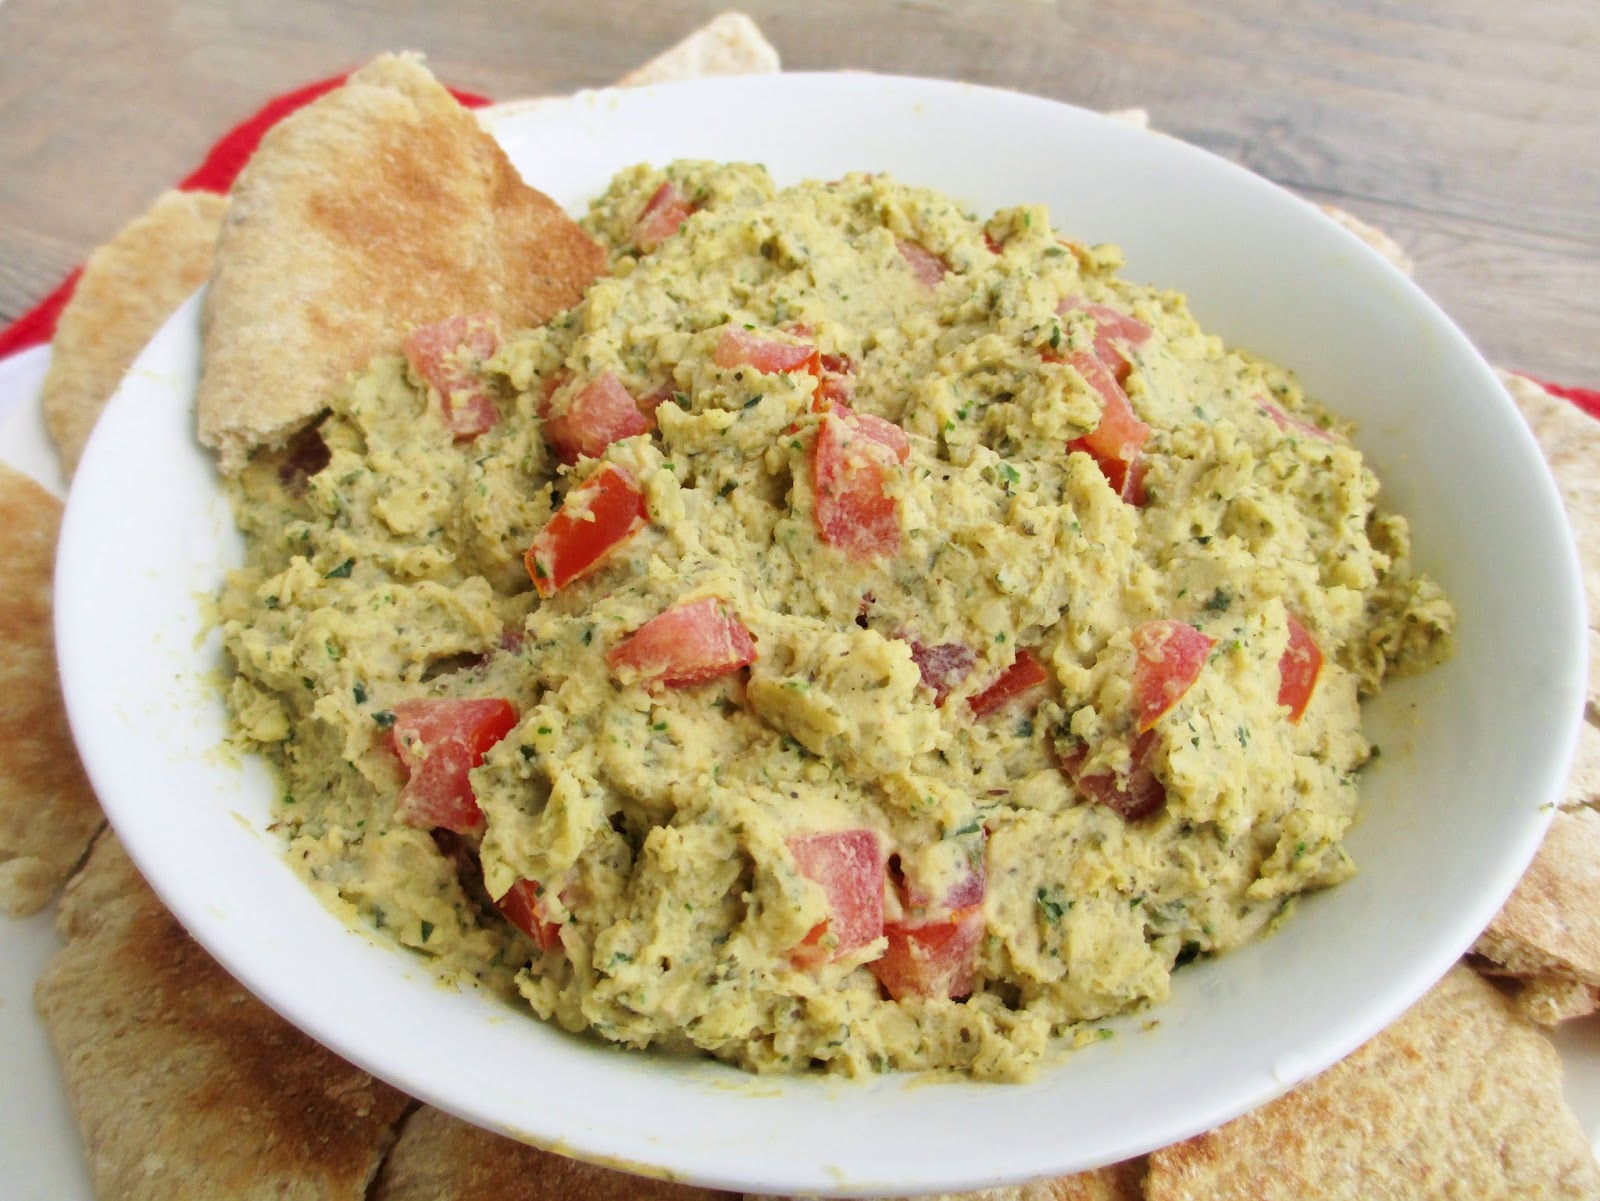
I started with the usual hummus ingredients of chickpeas, tahini, lemon juice, and garlic. Next, I tossed in some fresh herbs typically found in tabouli (parsley and mint), and I even stirred in some diced tomato at the end.

The key ingredient in this version though, the one that really takes it beyond plain hummus, was the addition of actual prepared tabouli. I cheated a little bit by using a boxed mix instead of making my own tabouli from scratch, because I didn't want to make things overly complicated.  The prepared tabouli added a lot more of those same flavours I was going for, and it bulked up the hummus while completely blending in at the same time.

This was definitely a thick, chunky, and spreadable type of hummus rather than the smooth and creamy varieties that you usually get from storebought brands. It makes a great dip for pita chips on its own, or you can use it as a spread in a wrap or sandwich. Actually, my favourite way to eat it was to spread a thick layer of the hummus inside a pita and then stuff the pita with some of the leftover tabouli - like a double tabouli meal in a pita!


Tabouli Hummus

1 box tabouli mix (such as this one)
1 can chickpeas, drained and rinsed (save the liquid)
3-4 tbsp tahini
Juice of one lemon
2 tbsp olive oil
2 tbsp chopped parsley
2 tbsp chopped fresh mint
1 clove garlic, minced
1/4 tsp salt (or more if desired)
ground pepper
1-2 tbsp reserved liquid from the can of chickpeas
1 medium tomato, seeded and diced


Prepare the tabouli mix according to package directions and set aside.

Place the chickpeas in a food processor and add tahini, lemon juice, oil, parsley, mint, and garlic. Season to taste with salt and pepper. Process until the mixture is as smooth as possible. Add some of the reserved chickpea liquid (or water) one tablespoon at a time to thin out the mixture if necessary. Add half a cup of the prepared tabouli and process again until the tabouli is incorporated.

Transfer hummus to a container or bowl and stir in another half a cup of tabouli, and the diced tomato. Save the remaining tabouli for another use.

Store in the refrigerator. Serve with pita chips or crackers, or use as a spread in wraps or sandwiches.

Makes 1 large batch.


January 11, 2013

Eggplant, Chickpea & Pomegranate Stew


It seems like this week flew by - It was my first week back at school after the holidays, so I had extra work to catch up on. I also decided to try out a couple of workout classes at the school gym because they were offering a free fitness week, so that kept me at school later than usual too (not that I'm complaining - it felt great to squeeze in some exercise during the workday)!

With less time and energy left over to cook meals for myself this week, I was happy that I had made a big batch of this stew on Monday to get me through!

I saw this recipe in a magazine that my older sister got for me in Ireland before Christmas, and I was drawn in by the beautiful photo of the dish as well as the ingredients.  In particular, I was intrigued by the addition of both pomegranate seeds and pomegranate molasses - an ingredient that I've been meaning to try out for a while, after reading about it on Janet's blog!

The recipe was pretty easy to follow, although I made a few tweaks and changed the amounts of certain ingredients. Basically, you cut thin slices of eggplant and saute them on the stovetop to get them nice and brown, then you layer the slices in a casserole dish like a lasagna with a mixture of chickpeas, tomatoes, onion, garlic and spices.  The chickpea mixture is also enriched by the pomegranate molasses, which is thick and syrupy with a sweet and tangy flavour.

I have to say, this is probably my favourite eggplant dish that I've tried so far. By slicing it thin and browning it well, it loses some of its spongy texture and paired well with the other ingredients.

I also loved how the pomegrante seeds took this from a simple eggplant and chickpea stew to something a bit more interesting and flavourful!  And now that I've finally tracked down a bottle of pomegranate molasses, I can't wait to start trying it out in more recipes!

Have a good weekend everyone!


Eggplant, Chickpea & Pomegranate Stew
Adapted from Cook Vegetarian magazine (online version here)
Note: I called this a stew but unlike a typical stew, it does not have a lot of liquid, so it's more of a dry stew (for lack of a better term)!

2 medium eggplants (about 1 lb each), sliced lengthwise into ½” thick slices
3 tbsp olive oil
1 medium yellow onion, peeled and finely chopped
3 cloves garlic, peeled and minced
1 tsp minced fresh ginger
1 green chili pepper (or other small pepper), minced
2 tsp paprika
1 tsp cumin
1/4 tsp ground coriander
Dash of cinnamon
1 can chickpeas, rinsed and drained
1 28 oz can chopped tomatoes (I used the no-salt added kind)
2 tbsp pomegranate molasses
Pinch of chili flakes (optional for a spicier stew, depending on how hot your chili pepper is - mine wasn't very hot)
Salt and pepper to taste
~1/4 cup chopped fresh parsley
4-6 tbsp pomegranate seeds

Sprinkle the eggplant slices with salt and lay in a colander (I divided them into two colanders). Let sit for about 20 minutes, then rinse the salt off with water and dry the slices with paper towel.

Preheat oven to 350°F.  Heat 2 large skillets over medium-high heat.  Pour 2 tbsp of olive oil in a small bowl and use it to brush the eggplant slices. Brush one side of each eggplant slice and lay the oiled side face down in the skillet.  Repeat with as many eggplant slices as you can fit in the two pans without overlapping. Once the slices are in the pan, brush the top side with oil.  Cook each side for 3-5 minutes, until well browned, then flip over and cook the other side.  Transfer cooked slices to a plate and repeat process with the remaining eggplant slices until they are all cooked.

Bring one pan back to medium heat with 1 tbsp olive oil.  Add the onion, garlic, ginger, chili, and spices. Cook, stirring often, for about 4-5 minutes, until the onion is translucent.

Add the chickpeas and tomatoes to the pan. Stir in the pomegranate molasses and chili flakes (if using) and season with salt and pepper.

Layer half of the eggplant slices over the bottom of a greased 13x9” baking dish. Pour about half of the chickpea mixture over the slices, spreading with a spoon or spatula to distribute evenly.  Cover with the remaining eggplant slices, then top with the rest of the chickpea mixture. Place in the preheated oven for 15 minutes.

When ready to serve, sprinkle the parsley and pomegranate seeds over top of the dish, or you can serve each portion and then add about 1 tbsp parsley and 1 tbsp pomegranate seeds (or more if desired) as a garnish to each plate. (Note: Before eating, you might want to use a knife to cut the eggplant into smaller slices; otherwise, you can just use your fork to break it up as you eat).

Makes 4-5 servings.

December 10, 2012

Roasted Sweet Potato & Chickpea Salad with Warm Cranberry Chutney Dressing


After posting a couple of holiday recipes that have been on the sweet side, I thought it would be good to share a savory dish that could fit into your upcoming holiday meal plans too!

I love adding fresh cranberries to baked goods, like scones or my cranberry orange almond loaf, but I wanted to try out a dinner recipe highlighting cranberries in a different way.  I saw this recipe for a roasted sweet potato salad with cranberry-chipotle dressing from Cooking Light and thought it would be the perfect base for my own version of a holiday salad.

Along with the roasted sweet potatoes, which I spiced up a bit with chili powder, I added canned chickpeas to bulk up the dish a bit more.  The sweet potato and chickpeas are then tossed in a warm, chunky dressing of fresh cranberries simmered with a bit of orange juice, balsamic vinegar, maple syrup and chili flakes for a touch of heat.


Finally, I added some dried cranberries to the mix for even more cranberry flavour, along with some pumpkin seeds and chopped fresh parsley.

I loved everything about this salad - the potatoes were nice and tender, and I especially loved the cranberry dressing with its mix of sweet, tangy, and slightly spicy notes.

I would definitely consider serving this as a Christmas side dish, since all of the flavours together really did remind me of the holidays. Plus the red cranberries paired with the green pepitas and parsley make for a very festive looking salad!

Of course, you don't have to wait until Christmas to make this - I enjoyed it for lunches and dinner last week when I was busy making treats for our annual school cookie swap, and I was glad to have a healthy yet still filling meal to look forward to once I got sick of eating cookies!


Roasted Sweet Potato & Chickpea Salad with Warm Cranberry Chutney Dressing
Inspired by Cooking Light 

~1.5 lbs sweet potatoes, peeled and diced into bite-sized pieces
2 tbsp olive oil, divided
1/2 tsp chili powder
Salt and pepper
1/2 a shallot, finely minced
1 tsp minced fresh ginger
Heaping 1/4 cup fresh or frozen cranberries
2 tbsp orange juice
1 tbsp balsamic vinegar
1 tsp maple syrup
1/8 tsp chili flakes (optional)
1 cup canned chickpeas, rinsed and drained
2 tbsp dried cranberries
1 tbsp roasted pumpkin seeds (pepitas)
2 tbsp finely chopped fresh parsley
Salt and pepper to taste

Preheat oven to 450°F. Toss diced sweet potatoes with 1 tbsp of olive oil, chili powder, and season with salt and pepper. Place in a baking dish and roast in the preheated oven for 35-40 minutes, stirring once, until tender.

To make the dressing, heat the remaining 1 tbsp olive oil over medium-low heat.  Add the shallot and ginger and sauté for about 1 minute.  Add the cranberries, orange juice, balsamic, maple syrup, and chili flakes. Bring to a boil, then cover, reduce heat to low, and simmer for about 10 minutes, stirring occasionally, until the cranberries have started to break down.  Remove from heat and mash the cranberries to make a chunky sauce. Keep sauce warm over low heat until the potatoes are ready.

When the potatoes are done, remove from oven and transfer to a bowl. Add the chickpeas, dried cranberries, pumpkin seeds, and parsley, and toss to combine.  Add the sauce and toss until the potatoes and chickpeas are evenly coated.

Season to taste with salt and pepper. Serve warm.

Makes 3-4 large servings, or more as a side dish


October 12, 2012

Aloo Channa Chaat Roti Wraps


As promised, I'm back with a recipe that I had made before my trip!

If you've been reading my blog for awhile, then you already know that I love Indian food.  And while I do enjoy bowls of rich curry, my favourite type of Indian food is chaats - street food and snacks.   I love the mix of sweet, spicy, and sour flavours and the combination of fresh toppings, chutneys and cool, creamy yogurt that are typically featured in chaats.

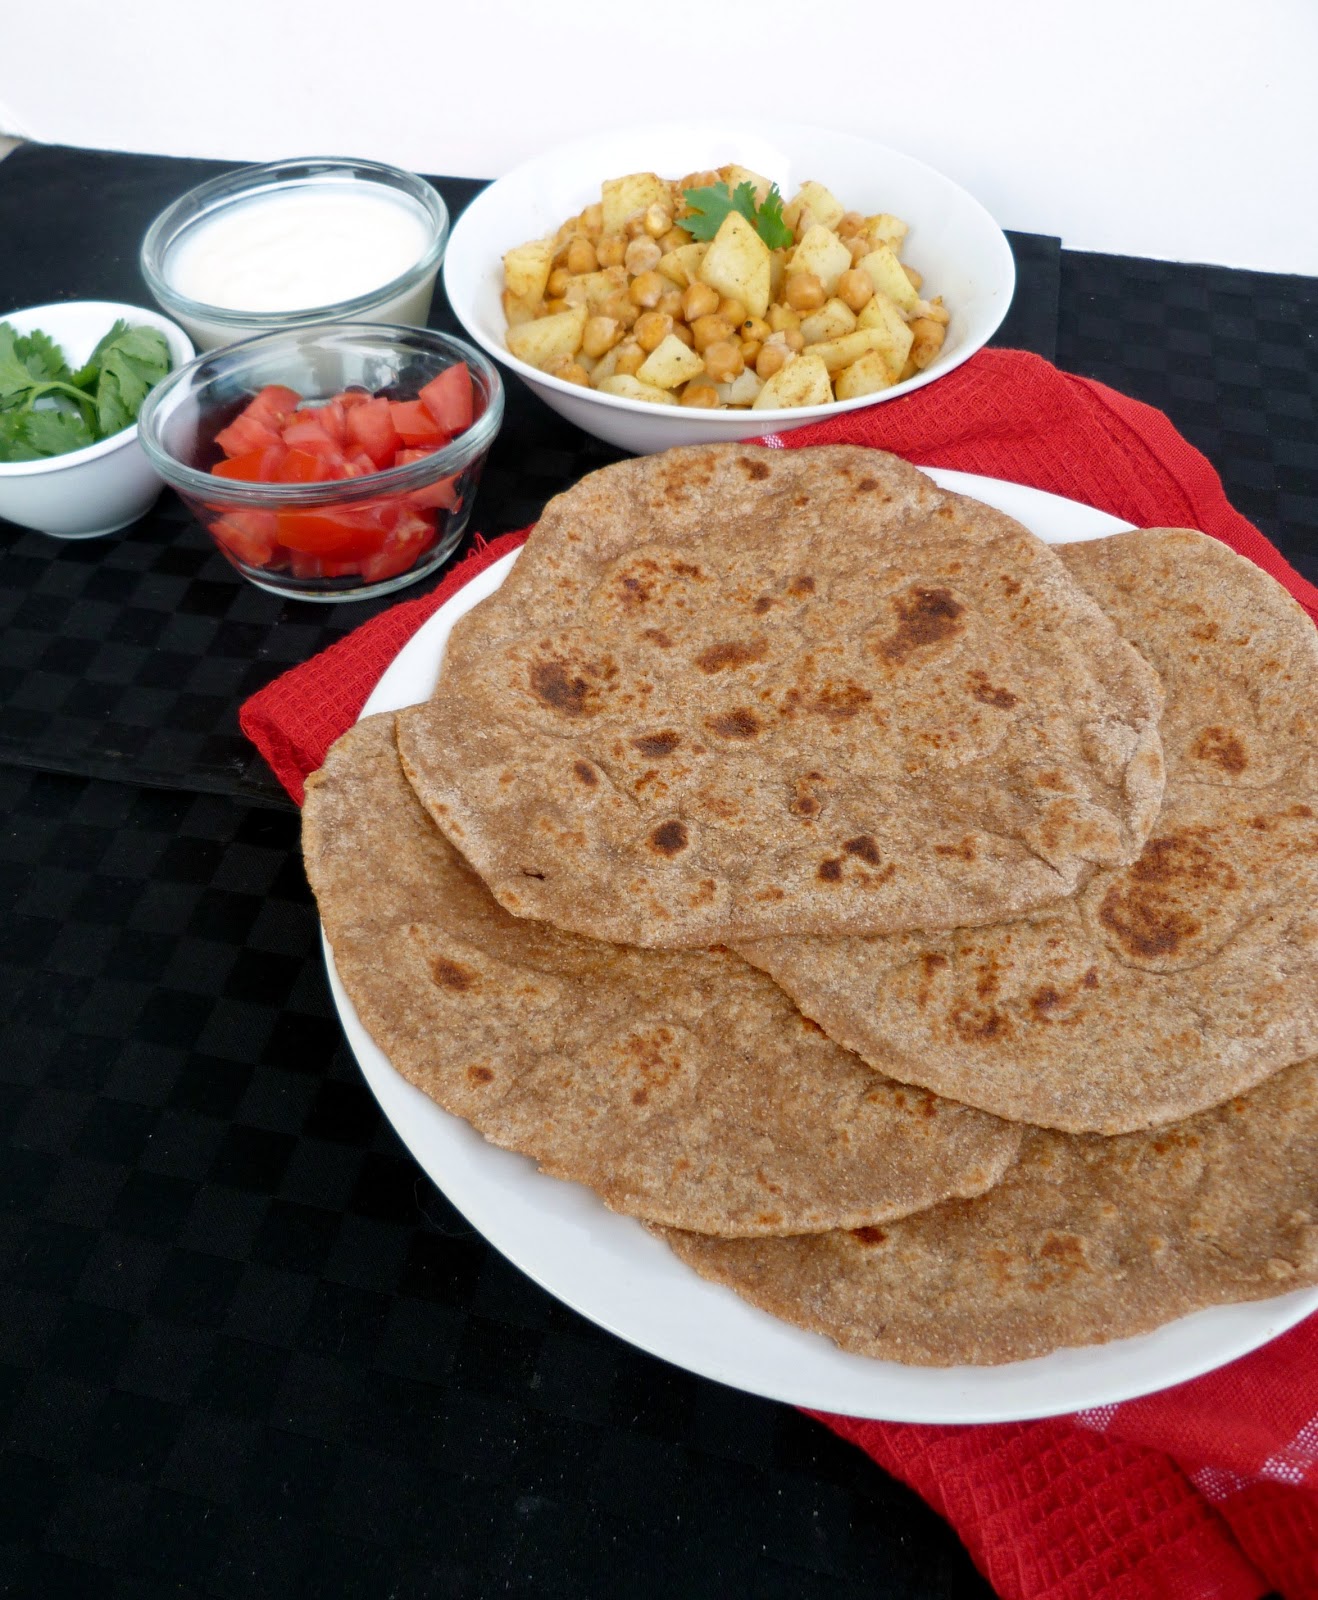
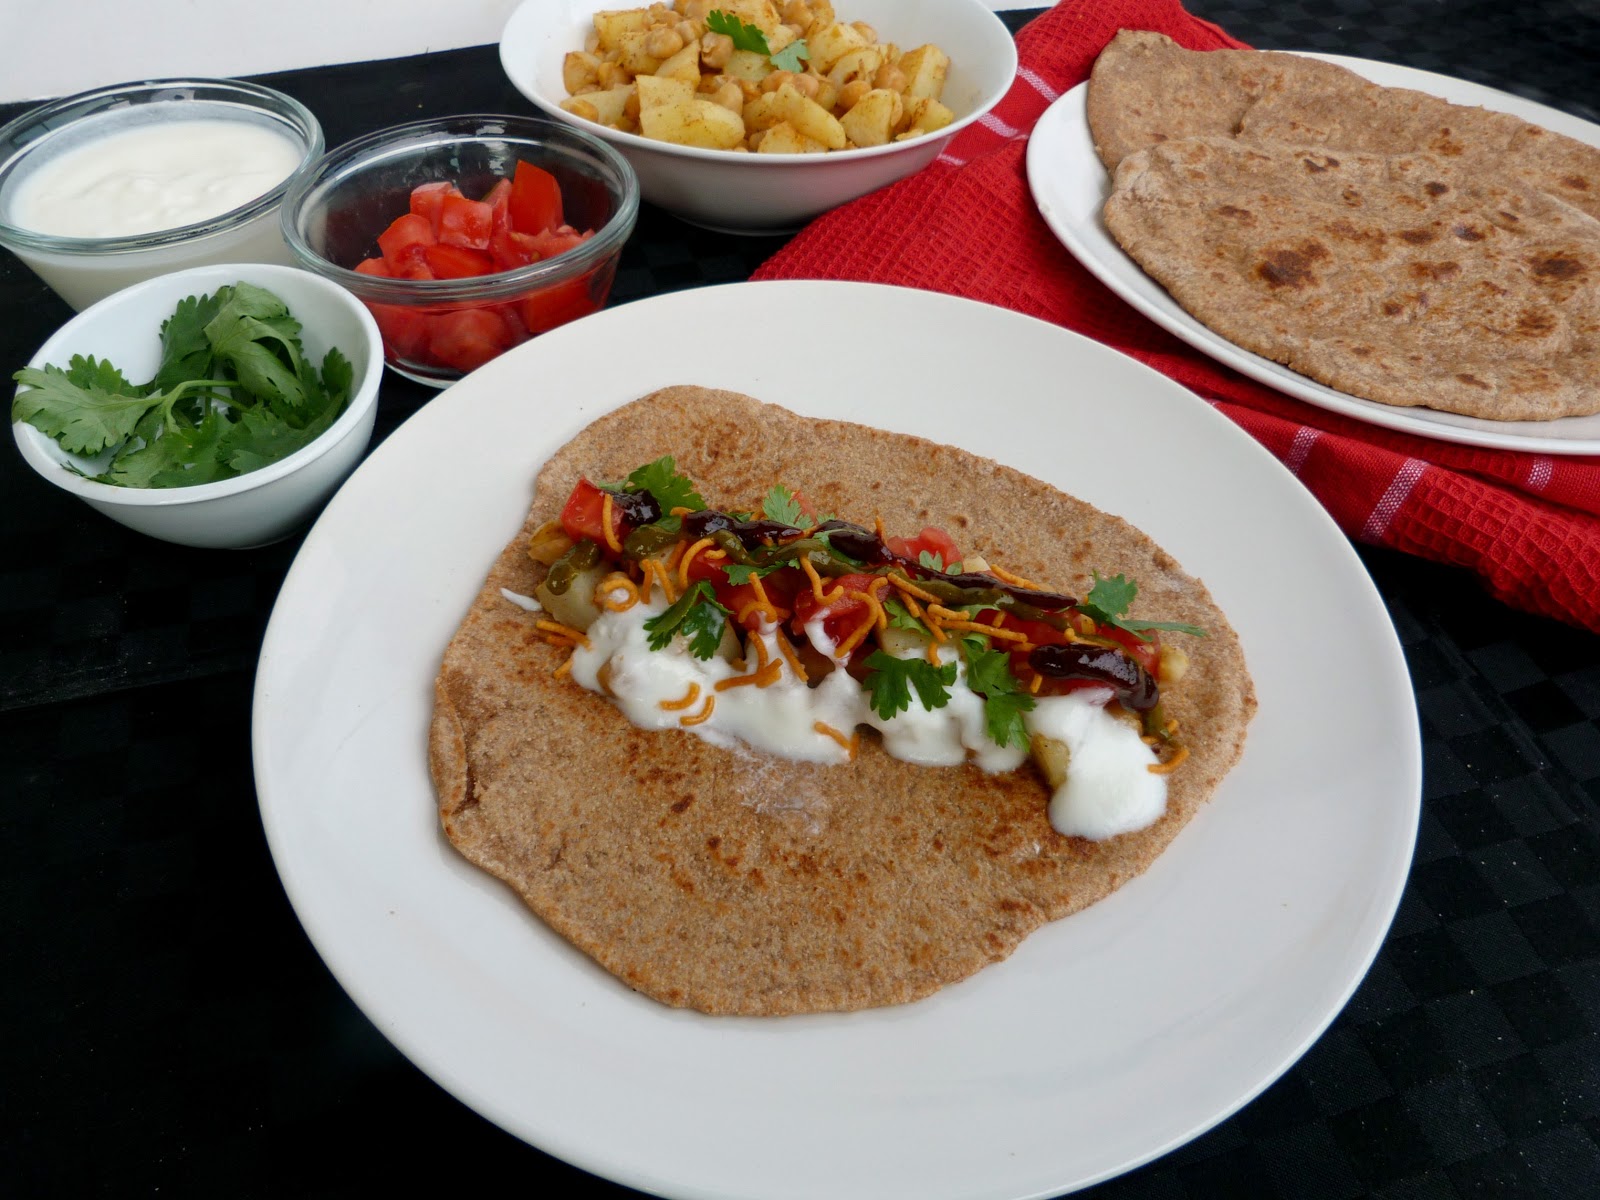
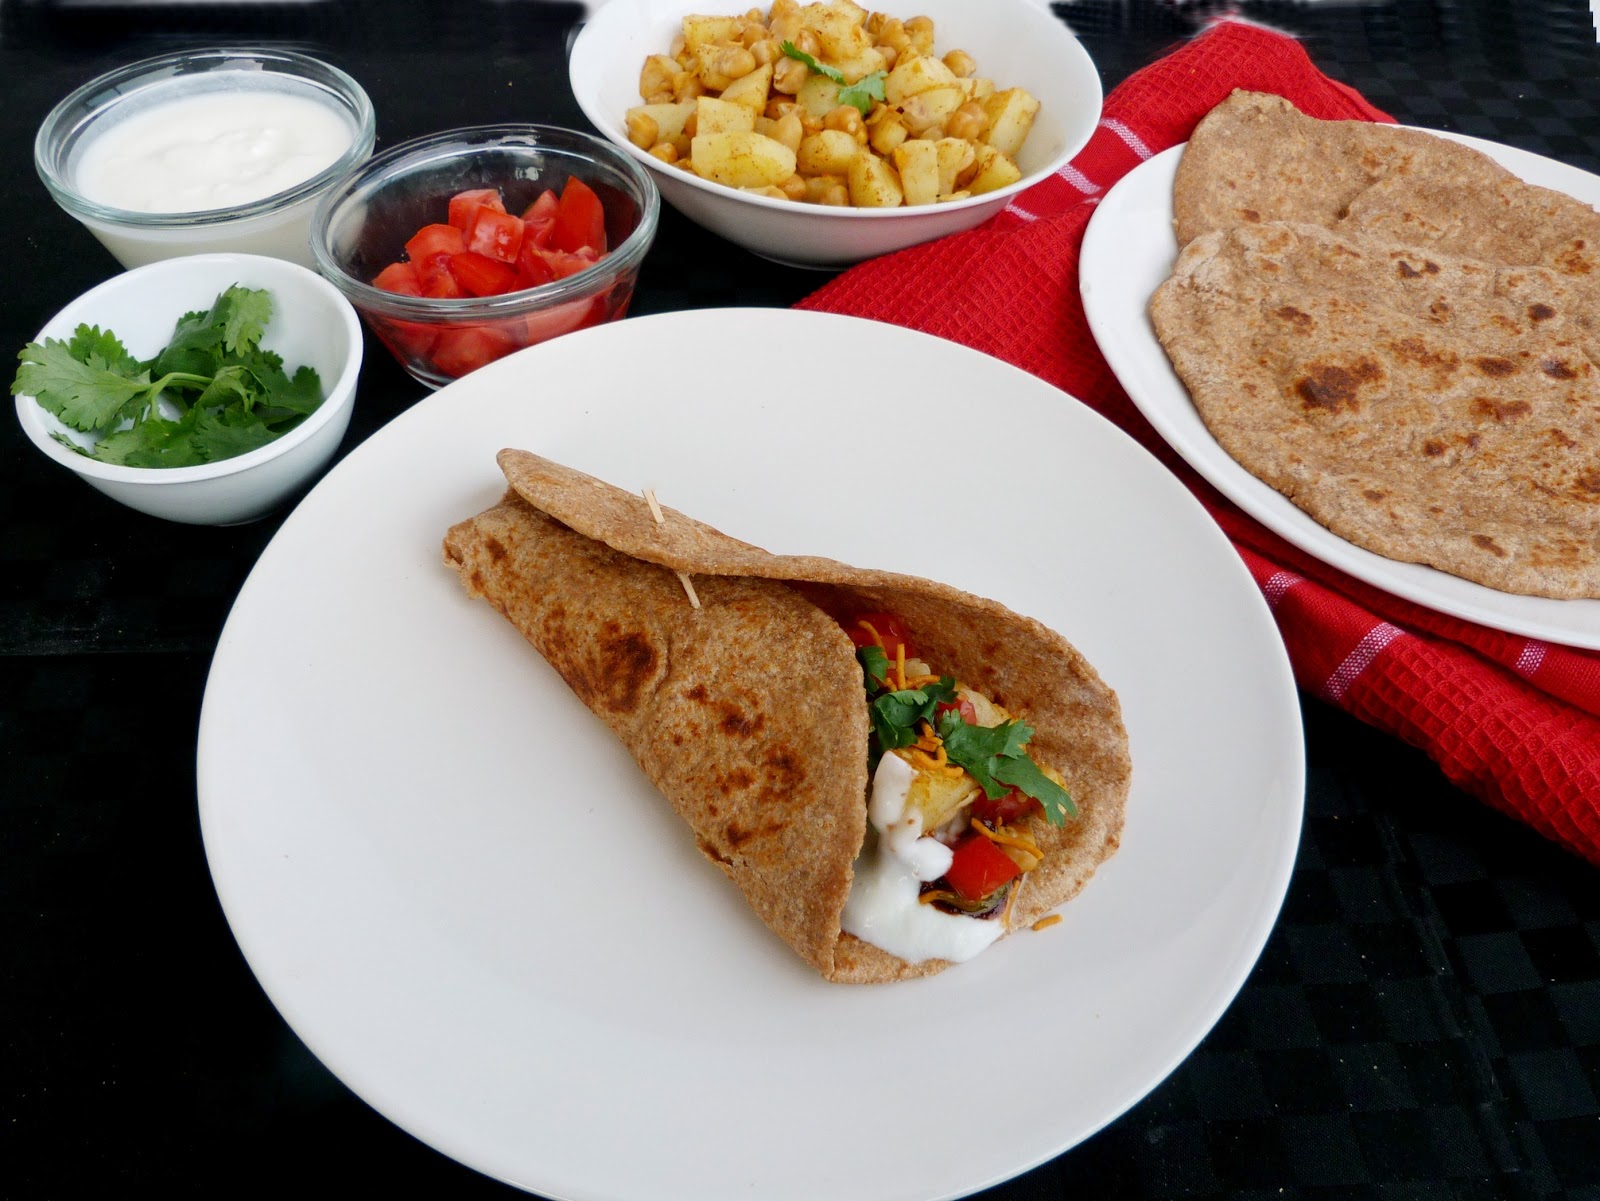
This roti wrap is my own take on Indian chaat.  I made a simple aloo channa (potatoes and chickpea) filling, which I layered onto a freshly made roti bread, topped with chopped tomatoes, cilantro, sev, yogurt, and two types of chutney.


It may sound like a lot of work to make your own bread, make the filling, and prepare all of the topping ingredients separately, but there are a couple of shortcuts you can take to make the process even easier, like making the roti and filling ahead of time.

For the roti, I used this recipe for 5-minute whole wheat naan from Food Doodles.  I would recommend this recipe to anyone who has never made Indian flatbread before, since it's very easy to follow. And once you get some practice at making your own roti, the process becomes really easy - you just mix a simple dough, let it sit, roll it out, and cook it on the stovetop for a few minutes!

This particular recipe gives you 4 thin and flexible wraps that are perfect for rolling up around any filling you like. They are best eaten fresh and warm, but if you have leftovers, they can be wrapped up and stored on the counter or in the freezer.


Once the rotis and the filling are made, you can customize your wraps with the amount of toppings that you like!  (Note: you can even make the filling ahead of time and reheat it when you're ready to eat).

I like to eat mine with lots of tomatoes and cilantro, and I also added some sev noodles (a crispy fried Indian snack) that I had in my pantry for some extra crunch and spice.

The best part, in my opinion, is to pour on lots of plain yogurt and  generous squeezes of both tamarind and spicy green chutneys. I like to use about equal amounts of each one, but it depends on how spicy you like your food!


I loved the combination of ingredients in this wrap - it was spicy mixed with sweet and tangy; warm, cool, and fresh - all at the same time!

I doubt you would ever find anything exactly like this on the streets of India, but the flavours definitely brought me back to the time I spent there and some of the delicious street food that I ate!


Aloo Channa Chaat Roti Wraps

1 recipe whole wheat naan from Food Doodles

Filling:
5-6 oz small white potatoes, peeled
1 cup canned chickpeas, drained and rinsed
Chili powder to taste
Dash of salt
1/2 tsp chaat masala spice
2 tsp lemon juice

Topping:
~ 2 tbsp diced tomatoes
1-2 tbsp fresh cilantro
~1 tbsp sev (optional)
Plain yogurt
Cilantro chutney
Tamarind chutney

Make dough for naan, following the instructions in the link above.

Place potatoes in a pot of water and bring to a boil.  Reduce heat to medium-high and simmer, uncovered, until tender when pierced with a fork, about 15-20 minutes. Drain and cut into small pieces. Set aside.

Heat skillet for cooking the naan.  When naan is finished, keep covered with a towel.  Reduce heat on the stove to medium-low and add a bit of vegetable oil to the skillet.  Add the chickpeas and heat for a couple of minutes.  Add the potatoes, a couple dashes of chili powder, a dash of salt, chaat masala, and lemon juice.  Stir and cook for a couple more minutes, until heated through. (Note: you can leave the chickpeas whole, or mash them a bit for a smoother filling). 

To assemble wraps, spoon some of the chickpea-potato mixture down the middle of a piece of naan.  Top with your choice of toppings – I recommend a couple spoonfuls of plain yogurt, diced tomatoes, cilantro, a pinch of sev noodles, and equal amounts of spicy green cilantro chutney and sweet tamarind chutney. 

Close wrap and enjoy!

Makes enough for at least 4 wraps.

June 26, 2012

Roasted Strawberry, Chickpea & Asparagus Couscous


I'm not sure about those of you who live in the U.S., but here in Ontario, fresh local strawberry season is still in full swing and I'm loving being able to use them in drinks, baked goods, yogurt parfaits, and even salads. 

A new discovery for me this year is roasted strawberries.  If you haven't tried roasting strawberries before, I highly recommend it!  The strawberries start to break down in the oven and get nice and soft and gooey inside, with an intense flavour.  They make a great topping for crostini, but you can also add them to salads and grains like you would with fresh strawberries.

This couscous dish is a great way to incorporate roasted strawberries.  The original recipe that inspired this dish had a combination of fresh strawberries with couscous, chickpeas, goat cheese and basil, as seen on Prevention RD.  I was planning on making this dish until I saw a recipe for israeli couscous with roasted strawberries on Running to the Kitchen. 


So I changed my plan and made my couscous with roasted strawberries instead. I also left out the goat cheese and added asparagus and fresh mint to the salad as well. I thought this was a light and nicely balanced meal with the veggies, fruit, chickpeas and fresh herbs and it made a great lunch to bring with me to school. 

I also loved the balsamic dressing, although the flavour didn't come through that strongly once everything was mixed together.  If you want more of a balsamic taste, you can add another tablespoon to the dressing, or just drizzle some over each serving when you eat it, like I did.  

Hopefully strawberry season hasn't ended yet in your area so that you can try this recipe! And I still have another strawberry recipe coming up next week, so stay tuned!


Roasted Strawberry, Chickpea & Asparagus Couscous
Adapted from Prevention RD 


2 cups strawberries
1 tsp maple syrup
3 tbsp balsamic vinegar, divided
1/2 lb asparagus
1 cup dry couscous
1/4 cup slivered almonds
1 cup canned chickpeas, rinsed and drained
1 tbsp olive oil
1/4 cup chopped fresh basil
1/4 cup chopped fresh mint
Herbamare and ground pepper to taste

Preheat oven to 375°F.

Toss strawberries with the maple syrup and 1 tablespoon of the balsamic vinegar. Place in a small baking pan and roast in the preheated oven for 10-15 minutes, until soft.  Snap the woody ends of the asparagus and discard. Place the asparagus on a baking sheet and drizzle with a bit of olive oil, salt and pepper.  Add to the oven for the last 5-7 minutes of the roasting time, until crisp-tender.  Remove from oven and chop into pieces.

Meanwhile, prepare the couscous according to package directions.  Toast the almonds in a dry skillet over medium heat for a few minutes, until lightly browned and fragrant.

Transfer couscous to a large bowl and add the toasted almonds and chickpeas.  Toss to combine.

Whisk the remaining balsamic vinegar and olive oil together. Pour over the couscous mixture and stir until incorporated.  Stir in the asparagus, roasted strawberries (with their juices), basil and mint. Season with herbamare and ground pepper to taste (I also liked to drizzle more balsamic vinegar over top of each serving).

Serve warm.

Makes 4 servings.

This was submitted to Ricki's Wellness Weekend at Diet, Dessert & Dogs.

May 06, 2012

Lemon Artichoke Hummus


Hope you're all having a great weekend and enjoying the warm weather!  Yesterday morning I walked to the farmer's market and picked up my usual fruits and veggies.  This was the first time this year that the market was held outdoors, and also my first sighting of local radishes and rhubarb, so I was sure to pick those up!  I've already made one recipe with the rhubarb that I can't wait to share!

After my shopping, I hung out upstairs at the market where they were having some Cinco de Mayo festivities.  I listened to some songs and sat in on a free Mexican cooking class where the chef showed us how to make salsa and a roasted red pepper soup in a pressure cooker - both of which were very fresh tasting and definitely had some heat to them too!

I'm looking forward to getting outside in the sun again today, but first I have a recipe to share with you!  I actually made this hummus a few months ago when it was still winter.  I loved the bright citrusy flavor but I thought it was more suitable for springtime, so I've been saving the recipe until now!


Along with the standard hummus ingredients of chickpeas, tahini, olive oil, garlic, salt and pepper, this recipe includes marinated artichokes, fresh lemon juice and zest, a bit of parsley and some spices.

I love the combination of artichokes, chickpeas and lemon in other dishes, like one of my favourite salads, so I knew that I would love these flavours together in a hummus too!

The lemon and artichokes both provided a nice amount of acidity to the hummus, and the spices and parsley added more layers of flavor.  This was also one of the creamiest hummuses I've ever made - the secret is adding some of the chickpea liquid and artichoke liquid at the end.

This would be a nice snack to serve with crackers, pita chips, or any other dippers that you like.  This was definitely a big hit in my house, so if you have a potluck or picnic coming up, this hummus would be a great item to bring!


Lemon Artichoke Hummus 
Adapted from What's Cookin' Chicago?


1 15 ounce can chickpeas, drained and rinsed (reserve some liquid)
1 cup drained and chopped artichokes from a jar (reserve some liquid)
Zest and juice of one lemon
1/4 cup tahini
1 tbsp olive oil
2 garlic cloves, minced
1/2 tsp salt
freshly ground pepper to taste
1/2 tsp cumin
Pinch cayenne
1 tbsp chopped fresh parsley
1 tsp artichoke liquid
1-2 tsp chickpea liquid

Place all ingredients except for the artichoke and chickpea liquids in a food processor and process until everything is fully broken down and mixed together, scraping down the sides of the bowl if necessary. 

Add the artichoke liquid and 1 tsp of the chickpea liquid and process until it is incorporated.  If the hummus looks like it needs a bit more liquid, add the remaining teaspoon of chickpea liquid and process again.  Taste and adjust seasoning if desired. 

Serve with veggies, pitas, or crackers.  Store in the refrigerator. 


This was submitted to Wellness Weekend at Diet, Dessert, & Dogs. 

March 11, 2012

Broccoli Pesto Pasta with Chickpeas


During the summertime when fresh herbs are so abundant, one way that I like to use them up is by making a pesto sauce.  Pesto pasta seems to be one of those things that people can either love or hate, but I've always loved it!

Up until now, I haven't expanded much beyond the traditional basil pesto, but I'm intrigued by other types of pesto I've seen on food blogs, like arugula, cilantro, kale, roasted pepper, and most recently - broccoli pesto.  So the last time I picked up some broccoli with no specific plans for it, I decided to try making broccoli pesto.

The pesto itself was pretty easy to make - the broccoli is blanched in boiling water, then blended with the traditional pesto ingredients of olive oil, garlic and lemon. I also added some fresh parsley and tahini because I I like the combination of tahini and lemon in sauces. Finally, instead of using parmesan cheese, I added some nutritional yeast to give the sauce a bit of cheesy flavour.

For the pasta, I tossed some cavatappi with the pesto sauce and added chickpeas to make it more of a complete meal (the original recipe that I used for inspiration suggested using white beans, so you could try that too, although I prefer chickpeas).

I liked how the taste of the broccoli came through in the pesto without being overpowering - if you have picky eaters in your family, this could be a good way to get them to eat their veggies!  Topped with a big squeeze of lemon juice, this was a nice bright and flavourful meal that made me even more excited for summer!


Broccoli Pesto Pasta with Chickpeas
Adapted from Mrs. Regueiro's Plate

Half a head of broccoli, chopped (about 2.5 cups)
About 7 oz short dried pasta (I used cavatappi)
2 tbsp olive oil
2 tbsp tahini
1 tbsp nutritional yeast
1-2 cloves garlic, minced
1/4 cup fresh parsley
1 tsp lemon zest
Juice of half a lemon,
Pinch of salt
1 cup canned chickpeas, rinsed and drained
Additional lemon wedges for serving


Bring a large pot of salted water to a boil. Add the broccoli pieces and boil until they are tender and bright green, about 4 minutes. Remove immediately using a slotted spoon and place in a food processor.

Bring the water back to a boil and add the pasta. Cook according to package directions, then drain, reserving about 1 cup of the pasta water. Return pasta to the pot and set aside.

Meanwhile, prepare the pesto by adding the olive oil, tahini, nutritional yeast, garlic, parsley, lemon zest, lemon juice and salt to the food processor with the broccoli. Process until completely smooth. If the pesto looks thick, add some of the reserved pasta water, a tablespoon at a time, to thin it out (I added 2 tbsp of water).

Transfer the pesto to the pot with the pasta and stir until all the pasta is coated (you can add more of the pasta water here if needed). Stir in the chickpeas.  If you want the dish to be served hot, turn the stove on medium-low and heat until the pasta and chickpeas are warmed through.

Taste and season with more salt and pepper if desired. Serve with additional lemon wedges.

Makes 3 servings.


January 06, 2012

Mulligatawny with Chickpeas


After a few round-up posts to start the new year, it's about time I shared a new recipe with you! I actually made this soup before the holidays, but I thought this was a better time to post it, now that everyone is looking for healthy dinner ideas.

I've had mulligatawny soup a number of times in the past, but each recipe seems to be different. The name mulligatawny literally means "pepper water" and can generally be described as a spiced lentil soup, but it can be prepared in different ways - sometimes it's just a pureed soup, and some versions have vegetables or even chicken mixed in. I think the best mulligatawny soup I've ever had will always be one that I ate at a nice hotel in India, but this homemade version was really good too!

The recipe comes from the Whole Living website, and what drew me to it was the addition of toasted chickpeas. The recipe sounded perfect as written, but I decided to add some onion for extra flavour and I used yellow split peas instead of lentils, so I had to increase the cooking time.

This was a warm and comforting soup with the flavour of Indian spices brightened up by the fresh lemon juice. I really liked the toasted chickpeas too, they added an interesting textural dimension and turned the soup into more of a meal.  I also recommend serving this with naan bread - its great for cleaning out your bowl!


Mulligatawny with Chickpeas
Adapted from Whole Living

2 tbsp olive oil
1 yellow onion, peeled and diced
2 cloves garlic, minced
2 tsp fresh ginger, minced
1 tsp cumin
1 tsp turmeric
1/2 tsp coriander
1/4 tsp cayenne
salt and pepper
8 oz dried yellow split peas
28 oz vegetable broth, plus additional water
2 tbsp fresh lemon juice, plus additional lemon slices for serving
1 can chickpeas, drained and rinsed

Heat 1 tbsp of the olive oil in a large saucepan over medium heat. Add the onion and cook for a few minutes, stirring often, until lightly browned. Add the garlic, ginger, cumin, turmeric, coriander and cayenne, and a pinch of salt and pepper. Cook, stirring, for about 30 more seconds. 

Add the split peas and vegetable broth and bring to a boil. Reduce heat to a simmer, cover the pot and cook for about 30 minutes, until the split peas are soft.  Make sure you keep an eye on the pot - if the liquid starts to dry up, add additional water to prevent the peas from burning (I added about one cup total throughout the cooking time).

Once the split peas have finished cooking, transfer the soup in batches to a blender and puree. Return soup to pot and add 2 cups of additional water.  Heat over medium heat until the soup is warmed through. 

Meanwhile, heat the remaining oil in a large skillet over medium-high heat. Add the chickpeas and cook, stirring occasionally, until they are golden brown and crisp, about 7-8 minutes. 

Remove the soup from heat and stir in the lemon juice and the cooked chickpeas (or add the chickpeas to each bowl at serving time). 

Serve with rice and/or naan bread if desired, and additional lemon wedges for squeezing over each bowl.

Makes 4-6 servings.

December 07, 2011

Indian Pot Pie


I made this recipe once last winter, and I couldn't wait to make it again this year because I loved it so much!  As you may have noticed by now, I'm a big fan of Indian food. I don't often make authentic Indian dishes when I cook for myself, but I do like to incorporate Indian flavours into Western-style foods.

This Indian pot pie is the perfect example of a traditionally American dish that has been updated to include Indian ingredients and flavours. The filling is made of sweet potato, carrots, onion, peas and chickpeas, cooked in a creamy coconut milk sauce and accented by sweet raisins and mango chutney. Then the filling is enclosed in a double-crusted puff pastry pie and baked in the oven until it's hot and bubbling and the crust is golden and crispy.


I was a little too impatient to let the pie cool enough before I cut into it, so it was a bit messy when I tried to photograph it...but it still tasted amazing!  (And since I had leftovers, I was able to take another picture the next day once the filling had firmed up a bit - see below). The filling would taste great eaten on it own like a curry, but I loved cutting a huge slice of pie and eating it together with the puff pastry.

And the best part was that I got to have the whole pie all to myself to enjoy all week long!  But I also think this would be a great dish to share with friends or loved ones, since it's something different than the usual biscuit-topped chicken pot pie and has a sweet and mild curry flavour that anyone would enjoy!


Indian Pot Pie
Adapted from A Good Appetite

1 tbsp vegetable oil
1.5 cups of peeled, diced sweet potatoes
1.5 large carrots (or 2 medium sized), peeled and diced
1 onion, peeled and diced
1.5 tbsp curry powder
salt and pepper
1 cup canned chickpeas, rinsed
1.5 tbsp flour
1 cup vegetable stock
1/2 cup coconut milk
1.5 tbsp mango chutney
1/2 cup frozen peas
1/4 cup golden raisins
2 puff pastry sheets (15 oz package), at room temperature*

Preheat the oven to 425°F.

In a large saucepan, heat the oil over medium heat. Add the diced sweet potato and carrot and cook for about 3 minutes. Add the onion, curry powder, and some salt and pepper. Cook until the onion begins to soften, a few minutes. Stir in the chickpeas. Sprinkle the flour over everything and cook for another minute, stirring.

Add the vegetable stock, coconut milk and mango chutney. Bring the mixture to a boil, then reduce heat and let simmer for about 10-15 minutes, stirring occasionally, until the vegetables are tender and the sauce has thickened. Stir in the peas and raisins and remove from heat.

Roll out one sheet of puff pastry and place on the bottom of a 9-inch pie dish. Transfer the filling to the pie dish, spreading it evenly across the top. Roll out the second piece of puff pastry and lay overtop of the filling, sealing the edges of the two pieces together around the edges. Cut several small slits in the top crust with a knife.

Place the pie in the oven and bake until the crust is golden brown, about 20-25 minutes.

Let cool and slice into pieces. Serve with plain yogurt if desired.

Makes 4 large servings or 5-6 medium sized servings.

*Note: I have only tried the recipe with puff pastry, but feel free to use another type of pastry (like vegan puff pastry, phyllo dough or pie crust) if you prefer - you might need to adjust the cooking time and temperature though.

October 28, 2011

Spooky Pumpkin Spice Latte Hummus


If you thought there was a mistake in the title of this post, don't worry - I really did mean to add the word "hummus" after "pumpkin spice latte".  While this recipe is quite different from the famous Starbucks seasonal drink in some respects, it still has many of the same components - but in the form of a shareable dip!

As soon as I got my new food processor last week, I immediately started thinking about all the things I wanted to make with it. My first thoughts turned to hummus, but not just any plain hummus - it had to be something special!  And since I was recently reassured that pumpkin season is not over yet, I knew I wanted to make a pumpkin hummus... but instead of doing a savory version (like this Spicy Pumpkin Hummus at Once Upon a Cutting Board), I wanted to make a dessert hummus.

To come up with a good recipe, I turned to the blog The Broccoli Hut, which has lots of unique hummus ideas. I used their recipe for Sweet Maple Pumpkin Hummus as a guide, and made a few tweaks to get the pumpkin spice latte flavour I was looking for.

The result was a smooth and creamy hummus with the taste of pumpkin and Fall spices. I thought the amount of sweetness was just right, and there was just enough of the coffee to give it a bit of a kick without being too overpowering - but feel free to increase or decrease the amounts of sweetener and instant coffee to your own taste!


I've already made two batches of this hummus - the first I ate with apple slices, and the second I ate with some homemade vegan and gluten-free buckwheat graham crackers.

And since Halloween is coming up, I cut my graham crackers into "spooky" shapes (unfortunately I didn't have cookie cutters so they're a bit rough - but they are supposed to be tombstones and coffins!)  I loved the graham crackers on their own (they tasted more like gingerbread cookies), but they were even better dipped into the hummus!

This would be a great idea to bring to a Halloween potluck or party, with either apples or graham crackers.

Hope you all have a Happy Halloween!


Pumpkin Spice Latte Hummus
Adapted from The Broccoli Hut

1 cup canned chickpeas, drained and rinsed (preferably with the skins peeled first)
1/4 cup canned pumpkin puree
1 tbsp almond butter
1 tbsp + 1 tsp pure maple syrup
1/2 tsp vanilla
1/2 tsp cinnamon
1/2 tsp pumpkin pie spice
pinch of nutmeg and cloves
scant 1/4 tsp salt
1/2 tsp instant coffee

Place all ingredients in a food processor and puree until smooth and fully mixed. Store in the refrigerator.

Makes about 1 1/4 cups.


Buckwheat Graham Crackers


Recipe can be found at Sketch-free Vegan Eating

The only changes I made to their recipe was to use dark buckwheat flour instead of light (since that's all I could find), adding a pinch of ground ginger, and using a bit of almond milk to replace some of the water. I would also adjust the cooking time to 18-23 minutes, depending on the thickness of the crackers.


October 22, 2011

Pumpkin Chickpea Granola Bars


I feel like pumpkin season is practically over already, yet I've only posted one pumpkin recipe so far on my blog! So before it's too late, here's one more pumpkin treat that I made recently...

This is actually just an adaptation of my Chickpea Granola Bars that I posted earlier - since I loved them so much, I thought it would be fun to try a more seasonal version.  So I changed up the original recipe by replacing the peanut butter with canned pumpkin puree. I also added some pumpkin pie spice, pumpkin seeds, pumpkin granola, and used maple syrup instead of agave.

I wasn't sure whether all of the changes would work, but luckily the granola bars turned out great! The pumpkin flavour wasn't that strong, but all of the other ingredients came together to make a tasty and healthy Fall snack! These were a bit more fragile than the original version since they didn't have the peanut butter to help hold them together, but as long as you keep them refrigerated, they should hold up fine. I bet they would also be good crumbled up and eaten as a topping for yogurt or oatmeal!


Pumpkin Chickpea Granola Bars
Adapted from these Chickpea Granola Bars

1/2 tbsp ground flax
2 tbsp warm water
1 cup + 2 tbsp canned chickpeas, rinsed and drained
1/2 tbsp brown sugar
1/2 tsp cinnamon
1/2 tsp pumpkin pie spice
Pinch of salt
1/4 cup canned pumpkin puree
2 tbsp pure maple syrup
1.5 tbsp melted coconut oil
1/2 cup  rolled oats + 1/4 cup granola (or ¾ cup oats) - I used this pumpkin spice granola
1/2 cup puffed rice cereal
1/4 cup dried cranberries and raisins (about 2 tbsp of each)
about 2 tbsp pumpkin seeds (pepitas)


Preheat oven to 375°F. Combine the flax with water and set aside.

Combine the chickpeas with brown sugar and cinnamon in a baking dish. Bake for 8 minutes, stir, then bake 8 more minutes. Let cool and then mash until there are no whole chickpeas left.

In a large bowl, mix together the oats, granola, puffed rice, pumpkin seeds and dried fruit, with the pumpkin pie spice and pinch of salt. Then add in mashed chickpeas and stir together.

In a separate bowl, combine the pumpkin puree, maple syrup, and coconut oil. Then stir in the flax mixture.

Add wet ingredients to dry and stir to incorporate.

Pour mixture into a greased 8 x 8 pan (Mine filled about 2/3 of the pan). Press down firmly with a rubber spatula. 

Refrigerate for at least 2 hours before cutting. Store in the fridge or freezer.

Makes 6 bars.


This recipe is being shared at Wellness Weekends hosted by Diet, Dessert and Dogs.

October 19, 2011

Moroccan-Spiced Spaghetti Squash with Chickpeas


Spaghetti squash seems to be one of the less popular varieties of squash. I can understand why - the taste and texture are quite different from other squashes like butternut and acorn, and if you're expecting it to taste anything like real spaghetti, you might be unpleasantly surprised!

But spaghetti squash can actually make a really delicious meal if you combine it with some spices and other tasty ingredients. For my first spaghetti squash of the season, I decided to create this Moroccan-spiced dish with chickpeas, raisins, apricots, and parsley. 

I loved the combination of flavours in this dish! The spices weren't too overpowering, especially when paired with the sweetness of the dried fruit. I used both raisins and apricots for the fruit, but you could leave out the apricots if you prefer. I also added a lot of chickpeas which helped to bulk up the meal, since spaghetti squash is not very substantial on its own. 

This was a nice comforting Fall meal, and it's very economical too - most of the ingredients can probably be found in your pantry already, and one spaghetti squash is enough to feed an entire family, so I had lots of leftovers to eat for lunches all week!


Moroccan-Spiced Spaghetti Squash with Chickpeas
Adapted from Eat Drink Better, originally from Smitten Kitchen

1 spaghetti squash
2 tbsp olive oil
1 medium sweet onion, peeled and chopped
3 cloves of garlic, peeled and minced
1 tsp cumin
1/2 tsp ground coriander
1/2 tsp cinnamon
1/8 tsp cayenne
1 tsp salt (I used a bit less)
3-4 tbsp golden raisins
1/4 chopped dried apricots (optional)
1 can chickpeas, drained and rinsed (about 2 cups)
1/4 cup chopped parsley or cilantro


Cut the squash in half lengthwise and scoop out the seeds. Brush the insides with 1 tbsp of olive oil and place face-down on a baking pan. Roast in the oven at 400°F for 30-40 minutes, until squash is tender.

Meanwhile, heat the remaining olive oil in a large skillet over medium heat. Add the onion and sauté for about 5 minutes, until lightly browned and soft. Add the minced garlic and cook, stirring often, for about one more minute.

Stir in the spices, salt, raisins, apricots (if using), and chickpeas. Cook for another minute or two until the chickpeas are warmed, then remove from heat.

When the squash is done roasting, remove from oven and let it cool until it is ready to handle. Scrape out all of the flesh using a fork (it will separate into spaghetti-like strands) and transfer the strands to a large bowl. Add the chickpea mixture and the parsley or cilantro to the squash and toss to mix everything together.

Serve warm.

Makes 4 servings.

LinkWithin

Related Posts Plugin for WordPress, Blogger...