
Showing posts with label raw. Show all posts

March 25, 2013

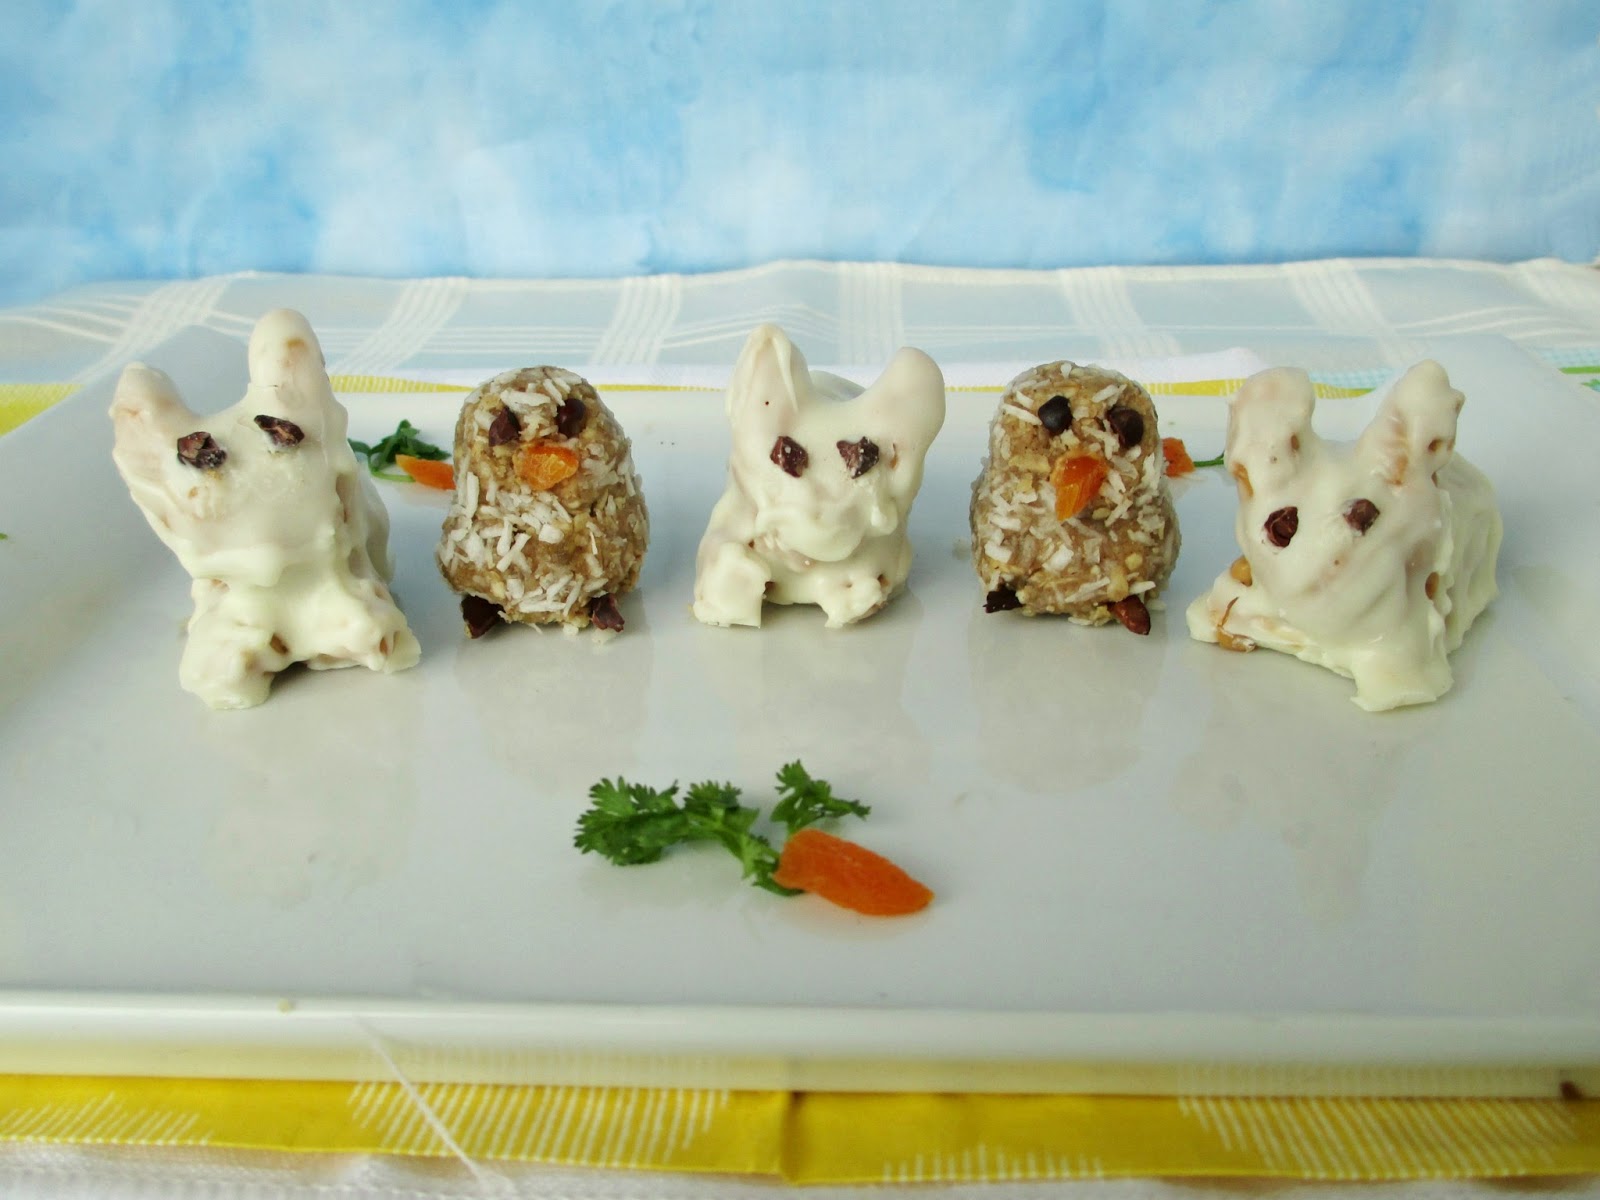
Peanut Butter Bunnies and Raw Cookie Chicks for Easter


If you've been following my blog for awhile, you've probably realized that I love to make themed recipes for every holiday that comes around, and Easter is no different!

I couldn't wait to share these Easter themed treats that I made last week because they actually turned out even more adorable than I had imagined!

I started developing these chicks and bunnies in my head when I was bored (ie. procrastinating) one day. I knew I wanted to make healthy-ish, bite-sized, no-bake treats and since I came up with different ideas for both chicks and bunnies, I decided to make both.
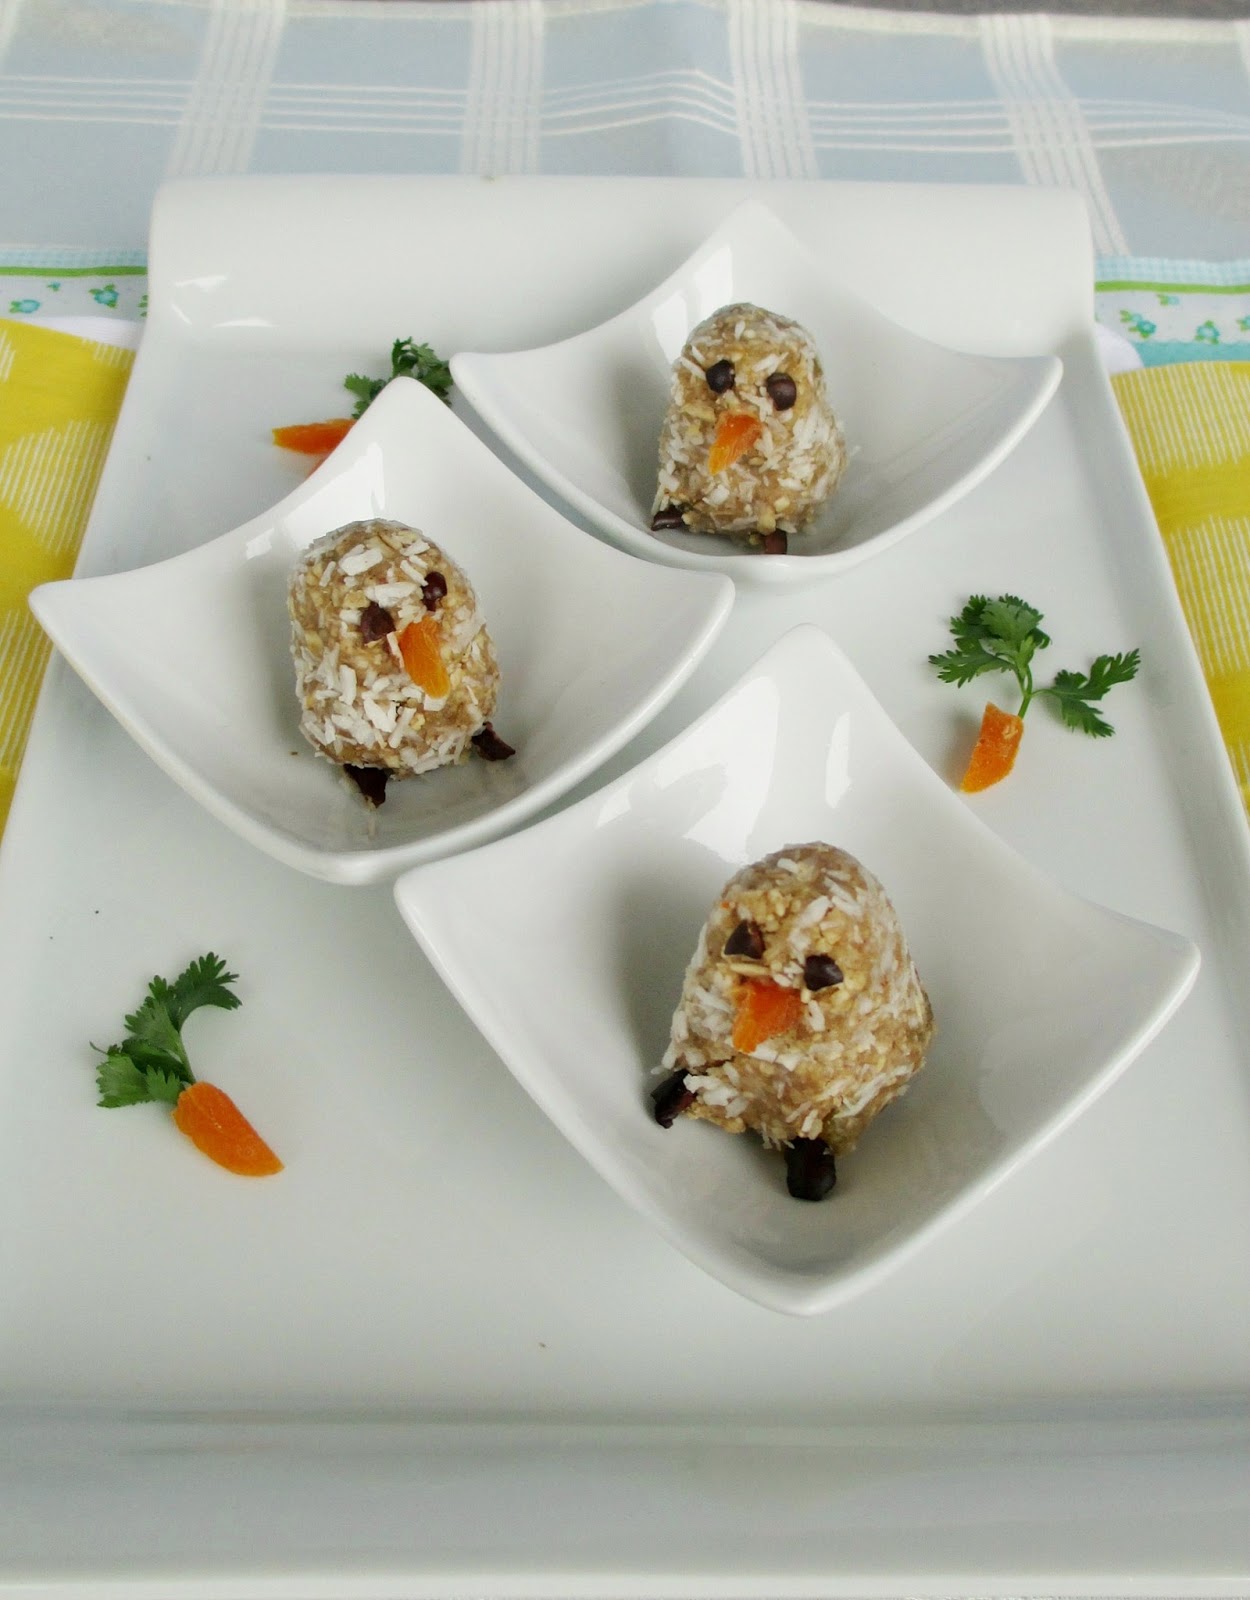

The chicks are a raw cookie base, like the energy balls that I'm used to making as snacks for myself. I went with a mixture of cashews, walnuts and oats with a dash of cinnamon and salt to get a cookie flavour. And while I would usually use dates in a raw cookie recipe to add sweetness and stickiness, I went with golden raisins this time so that the chicks would have a light, golden colour.

Once I shaped the cookie mixture into chicks, I rolled them in coconut to create a feather effect, and decorated them with raw cacao nibs and dried apricots to complete their features.
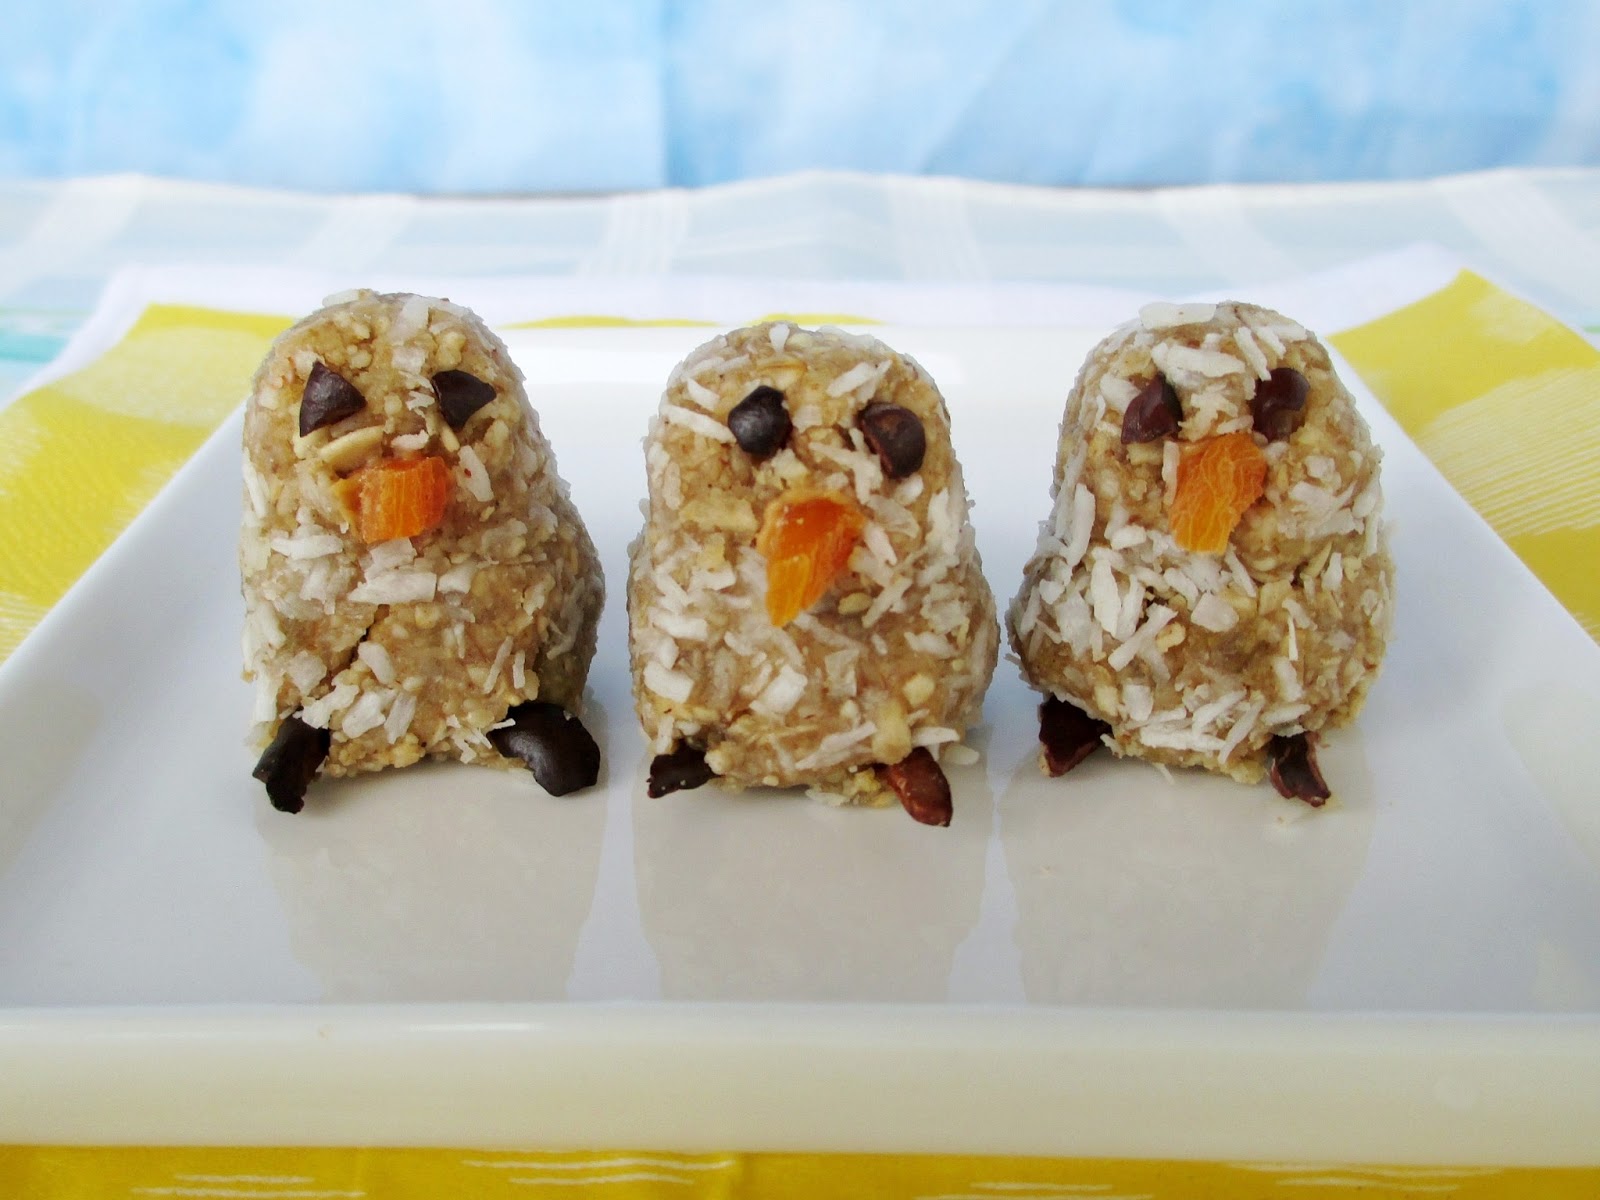

While they certainly weren't perfect (especially the one on the left!), they did end up looking like chubby little baby chicks, which was what I was going for!

The chicks themselves had just the right texture - chewy and crumbly, with a touch of sweetness from the golden raisins and a hint of coconut flavour.  They did taste more on the healthy side rather than a dessert (especially since I forgot to add any extra sweetener), but as long as you're not expecting a sweet, rich treat than I think you'll love them as a snack!


These bunnies on the other hand, are definitely on the tasty dessert side of the scale!  The filling is a mixture of creamy peanut butter with a bit of icing sugar for sweetness and rice puffs for crispiness. I also added a bit of coconut flour to help thicken the mixture and make it a bit easier to work with.

I wasn't really sure how to go about creating rabbit shapes from scratch, but managed to make shapes of different sizes from the peanut butter mixture and stuck them together to create something that (hopefully) resembles bunnies!

Once I had formed the bunnies, the last step was to coat them in melted white chocolate so that they would have a firm shell in a nice Eastery white colour (although as you can see, I didn't do a very clean job with the coating so bits of brown are still poking through!). Of course, you're welcome to use dark chocolate instead if that's your preference!


I admit I did feel a bit guilty when I first went to bite one of these little guy's heads off, but once I knew how delicious they tasted, all my guilt went away!

I loved the creamy peanut butter filling mixed with the white chocolate coating, and the rice puffs helped to lighten up the texture a bit so that it didn't taste as rich.

The only downside of the bunnies was the effort and time it took to make them, especially since you need to keep chilling the mixture in between steps. That was one reason why I only made small batches of each treat for myself, but feel free to double or triple the recipes below if you want to share these Easter treats with others!
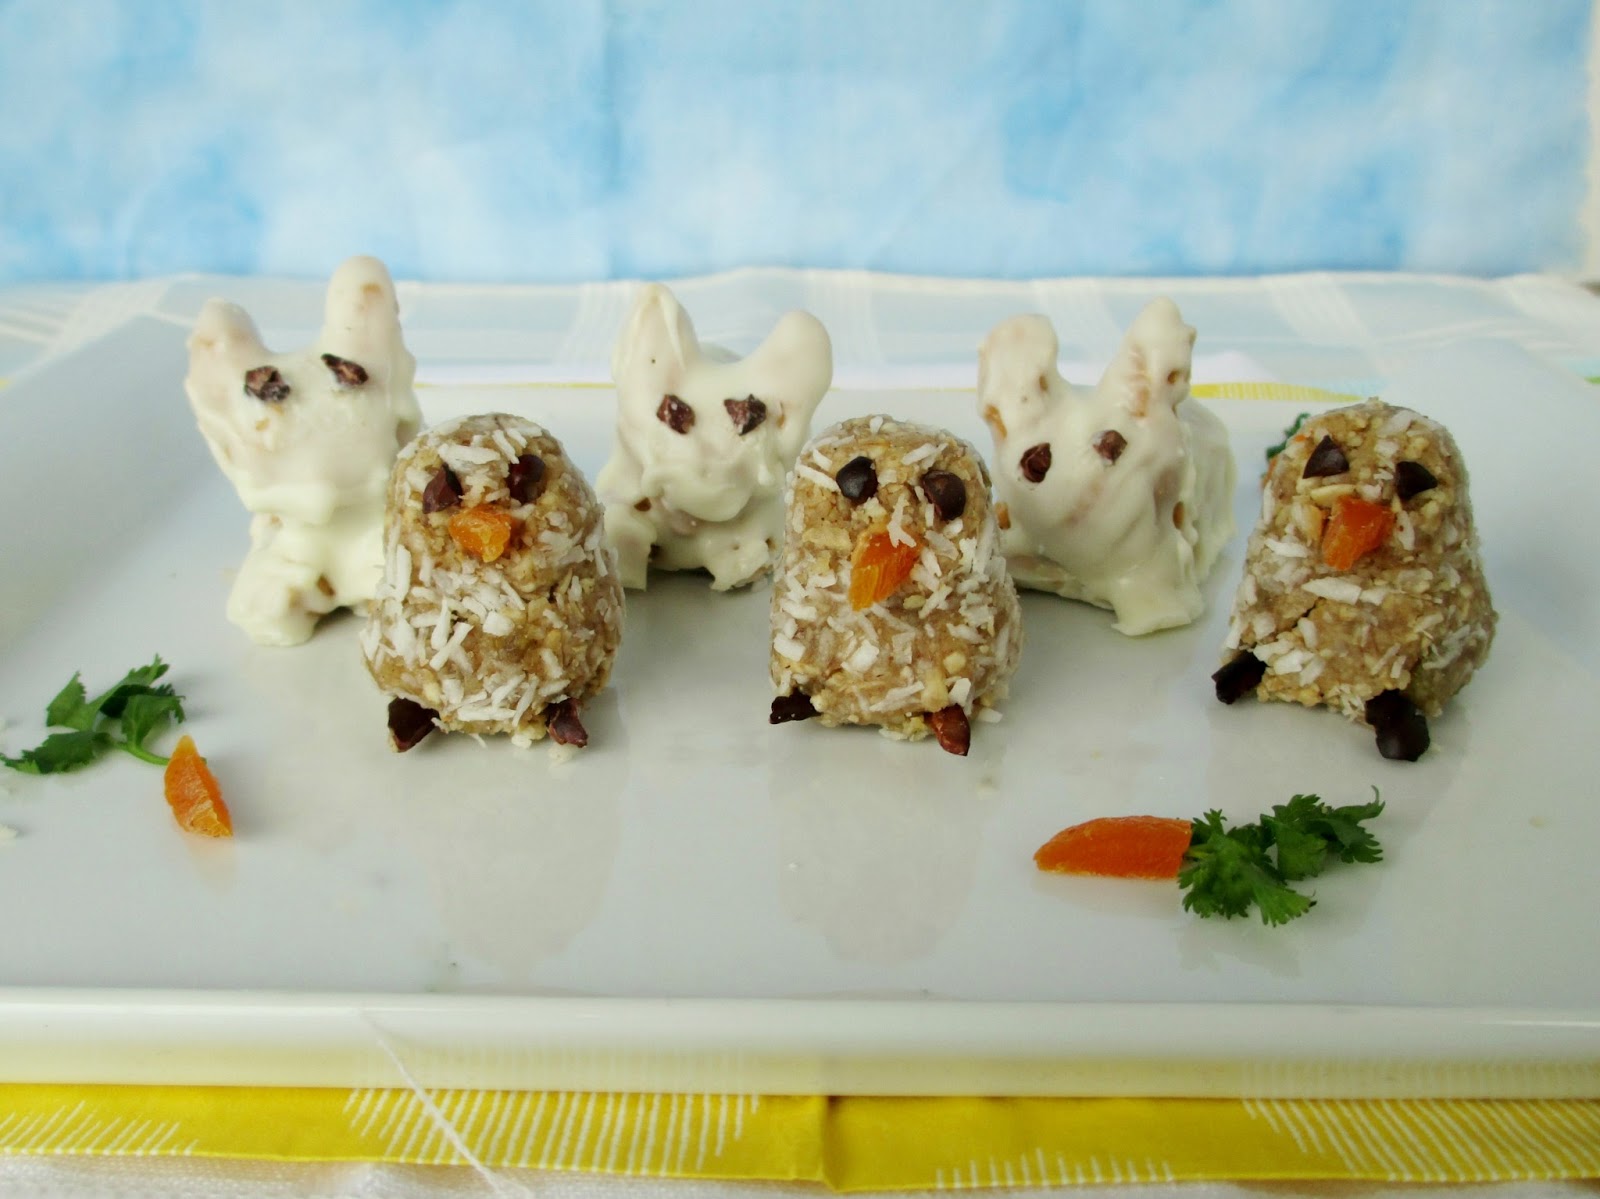

Note: the recipes below include instructions for shaping into chicks or bunnies. If you don't have time to do this, you can still use the recipes to make simple ball shapes, like truffles, instead!

Raw Cookie Chicks

2 tbsp raw cashews
2 tbsp raw walnuts
2 tbsp rolled oats
Dash of cinnamon
Dash of sea salt
2 tbsp golden raisins
1/4 tsp vanilla extract
1/2-1 tsp agave nectar (I forgot this and I still liked them - they just weren't very sweet)
1 tbsp unsweetened shredded coconut
1/2 tbsp non-dairy milk
Dried apricot and raw cacao nibs for decorating


Place the first five ingredients in a food processor and process until finely ground. Add the raisins, vanilla and agave and process again until it forms a sticky mixture. 

Roll dough into 6 balls - 3 should be a slightly bigger size for the bodies and 3 should be smaller to form the heads. Carefully stick the heads onto the bodies, pressing together to make sure it sticks and reforming the balls so that they keep their shape. (see pictures below):
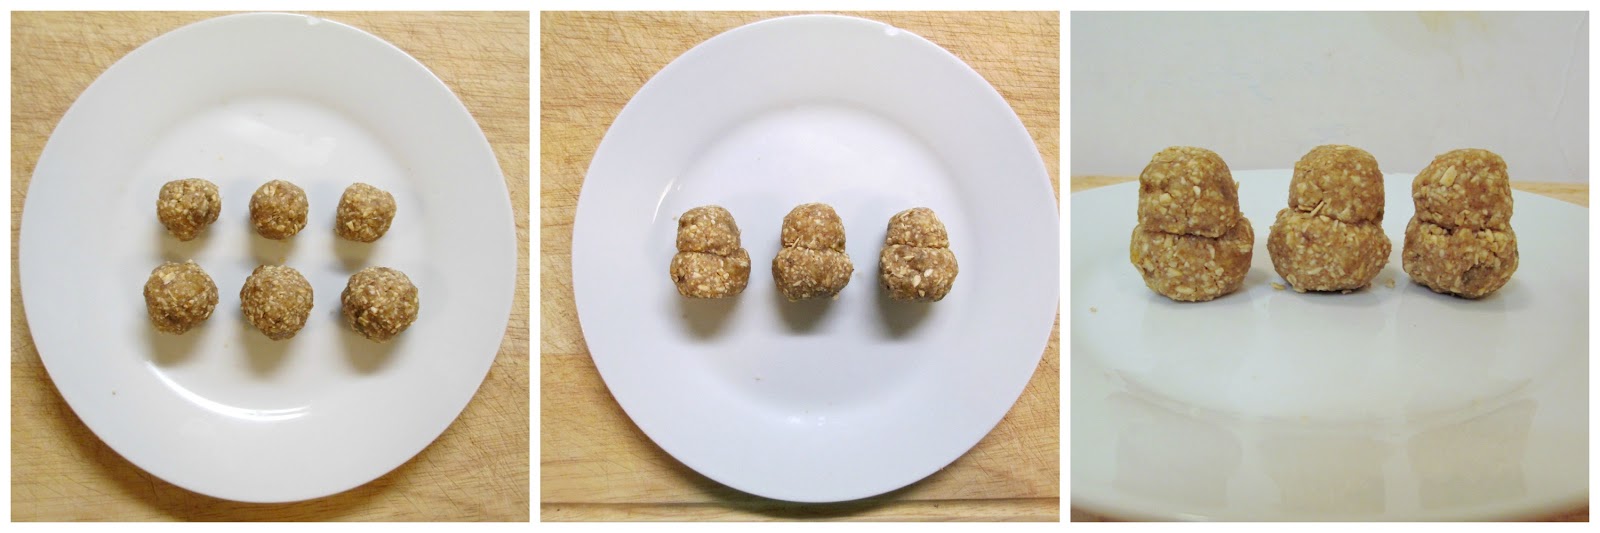

Place the coconut on a shallow plate. Brush the milk onto the outsides of the chicks and then roll chicks in the coconut, pressing in to help it stick. 

Push two small cacao nibs into each head to make eyes, and two more cacao nibs into the bottom of each body to make feet. Cut small slices of dried apricot into triangle shapes and stick on to each head to make noses (Note: If the nose won't stick on its own, dot some peanut butter on the end first to help it stick). 

Store in the fridge. 

Makes 3 chicks


Peanut Butter Bunnies

1/4 cup smooth peanut butter
1 tbsp icing sugar
1/4 tsp vanilla extract
Dash of sea salt
1 tbsp coconut flour
1/4 cup rice puffs (I used kamut puffs and chopped them in half to make smaller pieces)
~2 oz white chocolate (can substitute vegan chocolate chips)
1/2 tsp coconut oil
Cacao nibs for eyes


In a small bowl, stir together the peanut butter, icing sugar, vanilla, salt, and coconut flour until smooth.  Stir in the rice puffs. Chill mixture in the fridge for at least 15 minutes to firm up.

Roll mixture into shapes to make the bunnies: you will need 3 larger ovals for the bodies, 3 small round balls for the heads, 6 thin logs for the ears, 3 tiny balls for the tails, and 6 small ovals for the feet. I recommend forming the shapes in stages, chilling in between (as soon as the mixture gets too soft to work with, stick it back in the fridge for about 10-15 minutes before continuing).

Put the shapes together to make three bunnies: Lay the oval shaped body on the plate, stick the head onto one end, add the ears to the head, place the tail on the back end of the body, and stick the feet onto the front end of the body. Place bunnies in the freezer for 10-15 minutes to firm up. 

Meanwhile, heat the white chocolate in the microwave on high for 1 minute. Add the coconut oil and microwave again for 15 seconds. Stir until smooth and heat once more if it is not melted yet. 

Use a spoon or small spatula to spread the melted white chocolate onto the bunnies. As soon as you coat one bunny, stick the cacao nibs on for the eyes (Note: if the chocolate hardens before you can add the eyes, just dip one side of the cacao nib into melted white chocolate and then stick it on the head). Let the coated bunnies firm up in the fridge. 

Store in the fridge and serve chilled or at room temperature. 

Makes 3 bunnies. 

March 04, 2013

Raw Rainbow "Ice Cream" Cake with Coconut Whipped Cream for St. Patrick's Day


With St. Patrick's Day coming up in less than two weeks, I wanted to experiment with a recipe to celebrate the occasion. It seems like pretty much every traditional Irish recipe from soda bread to colcannon has already been posted several times, and I've seen tons of different green tinted foods and beer infused foods on the web too. 

So instead of going with something green, alcoholic, or Irish, I looked for inspiration from another St. Patrick's Day icon: the pot o'gold at the end of a rainbow!

My mind immediately started spinning with ideas for how to create a rainbow themed recipe, and in the end, I came up with this layered cake made with a raw crust, four layers of "ice cream" made solely from fruit, and a coconut whipped cream topping to resemble a cloud. And of course, the final touch that I added just for photo purposes was a pile of gold coins (chocolate, not real gold unfortunately)!


I was so happy with how this cake turned out - it was just how I had pictured it in my mind. And since I loved how it looked so much, this post is going to be more picture-heavy than usual!

While the recipe may look long and it was a bit time consuming to make, there wasn't that much actual hands-on time and as long as you've got some ripe fruit and a food processor, you can easily make this yourself!


The crust is a simple mixture of raw nuts, dates and coconut that gets crushed up and pressed down into the bottom of your cake pan.

Once the crust is ready, the next step is making the layers for the cake one at a time.  The base of each layer is a frozen banana, which as many of you probably already know, turns into a creamy ice cream-like consistency when you blend it in a food processor (although it firms up quite a bit after being in the freezer).

By adding different coloured fruits along with the banana, I was able to make four distinct layers to represent (some of) the colours of the rainbow: purple from blueberries and blackberries; pink from strawberries; yellow from mango; and green from avocado.


I actually made enough for two small cakes, in different shapes.  Pictured above is a round cake made with a miniature springform cake pan (which makes removal much easier!), and below is a rectangular cake made by forming the layers in one side of a square cake pan.

I liked the look of both shapes, so feel free to use whichever size pan is more convenient. As long the pan has edges to hold in the layers, you can build your cake in pretty much any shape you like!


While you could eat the ice cream cake on its own, I highly recommend making the coconut whipped cream topping. If you've never made whipped cream from coconut milk before, you can find step-by-step guides at the Kitchn and Oh She Glows to use as references.

I sweetened the whipped cream with a bit of icing sugar and added a dash of coconut extract to bring out the coconut flavour even more.  I loved how light and fluffy the whipped cream was and it tasted so good with the fruity ice cream layers.


If you love rainbow sherbert, then you'll love this cake because that's pretty much what it tastes like when you take a bite of all the layers together.  And if you're worried about the avocado, don't be - it actually blends well with the other flavours and you don't really notice a pronounced avocado taste when you eat everything together.

And can you believe that there's no added sugar or sweetener of any kind in the whole cake (not including the whipped cream)? As long as you have ripe fruits, they should provide all the natural sweetness you need!

I doubt my cakes will last until St. Patrick's Day, but you don't need a holiday to make this - I think it would brighten up any day :)


Raw Rainbow "Ice Cream" Cake with Coconut Whipped Cream

Note: This recipe does require some preparation at least a day in advance. Before you start making it, make sure you have at least 3 ripe bananas in your freezer and a can of coconut milk chilling in the fridge.

Crust
1/4 cup natural almonds
1/4 cup raw cashews
2 tbsp unsweetened shredded coconut
1 tbsp ground flax
Dash of salt
1/2 cup (heaping) chopped dates

Purple Layer
1 small-medium frozen ripe banana, chopped
1/4 cup blueberries and blackberries

Pink Layer
1 small-medium frozen ripe banana, chopped
1/4 cup chopped strawberries

Yellow Layer
1/2 a large frozen ripe banana, chopped
1/2 heaping cup chopped ripe mango

Green Layer
1/2 a large frozen ripe banana, chopped
1/2 a ripe avocado (about ½ cup)
1/2 tsp lime zest

Topping
1 can full fat coconut milk, chilled in the fridge overnight unopened
1 tbsp icing sugar
1/2 tsp coconut extract (can substitute vanilla extract if desired)


To make the crust, place the almonds and cashews in the small bowl of a food processor and process until the nuts are ground. Add the coconut, flax, and salt and process again until ingredients are combined. Add the dates and process until the dates are broken down. The mixture should stick together if you squeeze it together with your fingers.

Transfer the crust to the bottom of your desired pans.  I filled one round mini cake pan (4-inch wide, 2-inch deep pan with a removable bottom) and used the remaining crust to make a rectangular shaped cake by filling an 8x8 square pan (lined with a piece of parchment paper) about one-third to one-half full. Press the crust mixture down firmly, making sure it is evenly spread.  Store the crust in the fridge or freezer while you make the remaining layers.

Make the ice cream layers one a time, in whichever order you like. For each layer, place the ingredients in the small bowl of your food processor and process until smooth, scraping down the sides of the bowl with a spatula if necessary. Once you’ve made one layer, spread it evenly over the crust in your pan(s). Let it sit in the freezer until it starts to firm up, at least 15-30 minutes.

Continue with the next ice cream layer, following the same process as before. Let each layer firm up in the freezer before adding the next one. 

Here's how the cakes looked before frosting:


To make the whipped cream, open your can of coconut milk (do not shake it first). Scoop out the thick white cream that should have formed on top into a bowl (leave the watery part in the can). Use a hand mixer (or stand mixer) to beat the cream until it starts to firm up. Add the icing sugar and coconut extract and continue beating until the cream is nice and thick and fluffy like whipped cream, about 3-5 minutes.

Keep ice cream cake(s) stored in the freezer. For the best defrosting results, transfer cake to the fridge for about 1 hour prior to serving, then let sit at room temperature for 5-10 minutes, until the ice cream starts to soften slightly. Top cake(s) with whipped cream (Note: If you are storing the cake in the freezer, I would recommend keeping the whipped cream separate in the fridge, and adding it to individual servings when you're ready to eat, otherwise it will become a frozen block of whipped cream, as I learned!). 

Makes 2 small cakes or 1 larger cake.


December 04, 2012

Vegan Eggnog Pudding in Raw Ginger Cookie Cups


I hope you're all getting as excited for Christmas as I am (or the holiday season in general if you don't celebrate Christmas), because I've got another Christmas-themed recipe to share with you today!

I've already shared a recipe featuring cranberries, and now I've got a recipe featuring two of my other favourite holiday flavours - gingerbread and eggnog!

I bought two bottles of So Nice Noel Nog (an eggnog flavoured soy milk)  recently, and one of the ways I wanted to use this tasty beverage was in a pudding.  But instead of serving the pudding on its own, I thought it would be fun to serve it in miniature cookie cups.

And to keep these on the healthier - and easier - side, I decided to make raw cookie cups that taste like gingerbread!  There's no baking involved in these cookie cups - just mix together some ingredients in your food processor and press them into mini muffin pans.  Stick the pan in the freezer and voila, you have raw ginger cookies that serve double duty as a cup for your eggnog pudding!

Here's what an unfilled cup looked like...


These started out as an idea in my head that I wasn't sure would work, but luckily they turned out just how I wanted!  The pudding was cool, creamy, and sweet, with a distinct eggnog flavour - even though it was made without "real" eggnog!

I also added a touch of spiced rum to bring out the eggnog flavour even more - I only used a hint of rum because I didn't want it to be overpowering, but feel free to increase the amount for a more grown-up tasting dessert!

The cookie cups were chewy and held their shape well. I loved the mix of salty and spicy notes in the crust, and I thought they made the perfect base to pair with the eggnog flavour. The only caution I would give is that the pudding was a bit on the thin side, so be careful if you bite into a filled cookie cup or you might end up with some pudding spilling out - and you won't want to waste any!

With this recipe, you really get three treats that you can eat any way you like - the pudding is great on its own, the cookie cups can be eaten plain, or you can put them both together and get the best of both combined into one dessert!


Vegan Eggnog Pudding in Raw Ginger Cookie Cups

Pudding
Adapted from this recipe for vanilla pudding

1.5 tbsp cane sugar
1.5 tbsp cornstarch
Pinch of nutmeg
1 cup soy nog
1/2 tsp vanilla extract
1 tsp to 1 tbsp spiced rum (optional)

Place the sugar, cornstarch, salt and spices in a medium saucepan and heat over medium-low heat. Gradually add the soy nog, whisking constantly to remove any lumps. Continue to heat, stirring constantly, for 5-10 minutes, until the mixture thickens.  Continue heating for 2-3 more minutes, stirring occasionally.  

Remove from heat and stir in the vanilla extract and 1 tsp rum. Taste and add more rum if desired (I only used 1 tsp).  Transfer to a container and chill in the fridge for at least 2 hours.

Note: You may want to double the pudding recipe if you want to have enough for all the cookie cups, plus more for eating on its own. Or, you can only make half the recipe for the cookie cups, which is what I did. 

Cookie Cups

2/3 cup chopped pecans
2/3 cup chopped raw cashews
2/3 cup rolled oats
dash of sea salt
2 tsp cinnamon
1/2 tsp ginger
1/4 tsp cloves
2 tsp molasses
2 tbsp maple syrup
1/2 tsp vanilla extract
2 tbsp non-dairy milk

Place pecans, cashews, and oats in a food processor and process until the mixture is finely ground. Add the salt, spices, molasses, and maple syrup and process again until the mixture starts to stick together.  Add the vanilla and milk and pulse until the dough comes together (you should be able to pinch it into a ball with your fingers).  

Remove mixture from food processor and divide into 14-15 mini-muffin pan cups. For each cup, press the dough down with your fingers so that it moulds in a thin layer around the bottom and up the sides of the muffin cup. 

Place the muffin tin in the freezer for at least 30 minutes, until the cookie cups are firm.  Run a knife around the edges of each cookie cup to carefully remove them. Transfer to a container and return to the freezer to keep them firm.

Makes about 14 cups 

To assemble:
Keep the pudding and cookie cups separate until you are ready to serve. Once the pudding is firm, spoon it into each cookie cup (be careful not to fill them too much or they will overflow when you try to eat them!).  Sprinkle a bit of ground nutmeg over each filled cookie cup.

Note: You may end up with extra cookie cups, depending on how full you fill them with the pudding. Feel free to re-shape any empty cups into cookie dough balls instead! 
Also, you may want to eat these over a plate or napkin - once you bite in, some of the pudding might spill out!  Or you can just eat them the way my sister's boyfriend did - by putting the entire thing in your mouth at once!


This was submitted to Wellness Weekend at Diet, Dessert & Dogs and Bringing in the Holidays Potluck Party at Lifeologia. 

February 08, 2012

Raw Beet Cheesecake for Two


On Monday, I shared a recipe for beet pasta and I told you that I had a Valentine's dessert with beets coming up soon.  Well, I'm happy to say that you don't have to wait any longer!

I'm so excited to finally share this recipe that I made almost a month ago.  I came up with the idea when Cara of Fork and Beans announced a Valentine's Bake-Off Contest.


The rules for the contest were to create an original recipe for a vegan and gluten-free Valentine's Day dessert, and my mind immediately turned to beets! I like the idea of using natural ingredients to create vibrant colours in food instead of using food dye, and beets seemed like the perfect thing to make a pretty pink Valentine's dessert.

Since I don't have much experience in gluten-free baking, I thought that a raw dessert might be the best way to go.  I've tried a couple versions of raw "cheesecakes" where the filling is made of blended cashews, so I wanted to take that idea and create a version using beets.

For the crust, I used a mixture of almonds and dates, although another nut like walnuts or pecans would also work. I also added some cacao nibs to give the crust a slight chocolate-y taste, and I thought the hint of cacao went perfectly with the beet filling.

I was a bit nervous to taste the filling, but it turned out just how I was hoping! The beets added a nice sweetness without tasting too "beet-y", and they combined really well with the cashews to create the cheesecake taste that I wanted.


The final touch to make this dessert extra special for Valentine's Day was to make a garnish shaped like hearts....and what better way to make them than with more beets! I followed Martha Stewart's method for making candied beets and cut them into heart shapes to place on top of the finished cake.

Since I was just making this for myself, I used my miniature cake pan to make a small cheesecake.  Although I ate most of the cake myself, it ended up being the perfect size for two people to share!

Personally, I would choose this raw beet cheesecake over any other indulgent or chocolatey dessert for Valentine's Day, but I realize that most people probably don't share my tastes.  You definitely won't fool anyone into thinking this is a rich cheesecake, but if you want a healthy dessert that still tastes good then I hope you'll give this recipe a try!

And be sure to check out all the other submissions to the Fork and Beans contest for more Valentine's Day dessert ideas!


Miniature Raw Beet Cheesecake
Inspired by various other raw cheesecake recipes

Crust:
1/4 cup raw almonds
1/4 cup chopped pitted dates
1 tbsp raw cacao nibs
Pinch of kosher salt

Filling:
1/2 cup raw cashews, soaked in water for at least 4 hours
1/2 cup raw grated beet
2.5 tbsp melted coconut oil
2.5 tbsp agave syrup
1/2 tsp vanilla extract
Juice of half a lemon

Candied beet hearts for garnish (recipe below)

To make the crust:
Place the almonds in a food processor and process until they are finely chopped. Add the dates, cacao nibs and salt and continue to process until the dates are broken down and the mixture sticks together.

Transfer the crust to the bottom of a round mini cake pan (I used a 4-inch wide, 2-inch deep pan with a removable bottom) and press down firmly, making sure it is evenly spread.  Store the crust in the fridge while you make the filling.

To make the filling:
Drain the cashews and place in the food processor. Add the remaining filling ingredients and process until completely smooth. Pour the filling on top of the crust in the cake pan and smooth the top with a spatula. Place in the fridge or freezer for 1-2 hours to firm up. Once it is set, carefully remove from the pan and garnish with candied beet hearts.

If you have leftovers, store in the fridge or freezer (if stored in the freezer, let it thaw at room temperature before serving).


Candied Beet Hearts:
Adapted from Martha Stewart 

1 medium sized beet, peeled (you won't need all of it)
1/2 cup water
1/4 sugar

Preheat oven to 250°.


Slice the beet very thinly - four or five slices will be enough, depending on how many pieces you want to make. Use a heart-shaped cookie cutter to cut hearts out of each slice (you can try a couple different sized cookie cutters).

Bring the water and sugar to a boil in a small saucepan. Add the sliced beets, reduce heat to low and simmer for about 30 minutes (the syrup will reduce and become thick and sticky).

Remove beets from the pot with a slotted spoon and place on a foil-lined baking sheet. Bake in the preheated oven for 1 hour, until the beets have dried (they may need an extra 15 minutes or so). Store in a container at room temperature.


This has also been submitted to Wellness Weekends at Diet, Dessert & Dogs.


September 14, 2011

Raw Zucchini Roll-Ups


Yesterday I posted my first version of raw zucchini lasagna - layered stacks of peeled vegetables with cashew cheese and raw tomato sauce.

Then since I still had leftover cashew cheese and tomato sauce the next day, I decided to reconstruct the lasagna into a different form - zucchini roll-ups! I got the idea after seeing some raw zucchini sushi rolls on the blog For the Love of Food.

These were pretty easy and fun to make and I liked that they were more bite sized compared to the lasagna, so they would be a good appetizer to serve!

After trying both versions of my raw zucchini lasagna now, I can't decide which one I liked better!


Raw Zucchini Roll-Ups
Inspired by For the Love of Food

I don't have an exact "recipe" for this, but here is what I did:
(Also, see my raw zucchini lasagna post or the zucchini sushi rolls at the link above for additional help!)

You need:
about 1/2 a large zucchini
1/2 a carrot
1/2 a beet
cashew cheese
raw tomato sauce

Peel or slice the zucchini into wide, thin strips. Peel the carrot and raw beet and slice into equally sized pieces with a knife.

Lay out a strip of zucchini and place a spoonful of cashew cheese on one end. Lay a few slices each of carrot and beet on top of the cheese. Roll up the zucchini and secure with a toothpick.

Repeat for as many roll-ups as you like. Top with the raw tomato sauce.

Makes 6 roll-ups (using amounts above)


September 13, 2011

Raw Zucchini Lasagna


Recently, I've become more intrigued by raw foods - as you can see from my raw beet apple carrot salad, raw corn avocado chowder, and raw zucchini noodles. I don't see myself converting to a fully raw food diet anytime soon, but I do enjoy making the occasional meal or dessert out of purely raw ingredients - I just feel so good about what I'm eating when it's all unprocessed, because I know I'm getting as many nutrients as possible!

But since a lot of raw food recipes still intimidate me a bit, as they often require ingredients I have never heard of, I don't make a lot of raw food meals for myself at home. So when I had the chance to try a raw zucchini lasagna at a vegetarian restaurant that I went to recently, I couldn't wait to order it! The dish was described as "A delicate vegetable stack topped with cashew cheese and raw tomato basil sauce on a bed of organic greens". And when it appeared in front of me (see picture below), I immediately started thinking of how I could recreate it myself at home!


As you can see from the picture of my version at the top of this post, I think my reproduction turned out pretty good! I have to say, it was more work than I would normally put into a meal, but it was also a lot of fun!

I was the most excited to make the cashew cheese - something I have been wanting to try for a while. That was probably my favourite component of the dish, although it didn't stand out that much once it was mixed in between all the layers of vegetables.

For the vegetables, I chose to use peeled carrots, beets and parsnips, in addition to the slices of zucchini. I really loved this combination, especially the sweetness of the raw beets. It also helped that all of the ingredients that I used (the vegetables, tomatoes and garlic) were fresh from the farmer's market.

So as long as you don't expect this to taste anything like real lasagna, and if you like eating raw vegetables as much as I do, then you will love this raw-zagna!


Raw Zucchini Lasagna
Inspired by the "Rawzagna" dish at Veg Out Restaurant

Note: These are the approximate amounts that I used for a large individual serving, but you can use whatever amounts of vegetables that you like!

about 1/2 a large zucchini
1/2 a carrot
1/2 a parsnip (or use more carrot)
1/2 a medium beet
cashew cheese (recipe below)
raw tomato sauce (recipe below)

Peel the green skin off the zucchini and discard. Using a knife or a vegetable peeler, slice into very thin, wide strips. You will want enough strips for 3 layers of lasagna.

Peel the skin off the carrot, parsnip and beet, then peel them into thin strips using a vegetable peeler. Aim for uniform lengths of all the vegetables.

To assemble the lasagna, start by laying a few slices of zucchini on a plate. Next, add a layer of the peeled carrot, parsnip and beet. Top with a few dollops of cashew cheese and a large spoonful of tomato sauce. Repeat for two more layers, ending with a generous amount of sauce on top.


Raw Cashew "Cheese"
Recipe from Chocolate & Zucchini

3/4 cup raw cashews
1/4 cup water
1 tsp lemon juice
1 clove garlic, minced
1 tbsp nutritional yeast
1/4 tsp sea salt
pepper

Soak the cashews in a container filled with water for a few hours. Drain and place in a food processor or blender. Add 1/4 cup water and the rest of the ingredients. Process until mixture is fully blended.

Transfer to a container and let sit for at least 12 hours (the original recipe says 24 hours) before placing in the fridge.

Makes 3/4 cup (more than you will need for this recipe, but you can save the leftovers for up to 5 days for other uses)


Raw Tomato Sauce
Adapted from The Parsley Thief

1 lb tomatoes (I used about 3 medium tomatoes)
1 clove of garlic
1/4 tsp kosher salt
2 tbsp of sliced fresh basil leaves
1/2 tbsp olive oil
freshly ground pepper

Chop the tomatoes and place in a blender.

Smash the garlic with the salt until it resembles a paste.

Add the garlic paste, basil, olive oil and some pepper to the blender.

Pulse the mixture in the blender a few times until it is roughly blended. Transfer to a container and let sit for about an hour before using.


**Stay tuned to see version #2 of my raw zucchini lasagna - reconstructed!**


LinkWithin

Related Posts Plugin for WordPress, Blogger...