Showing posts with label chocolate. Show all posts

July 09, 2014

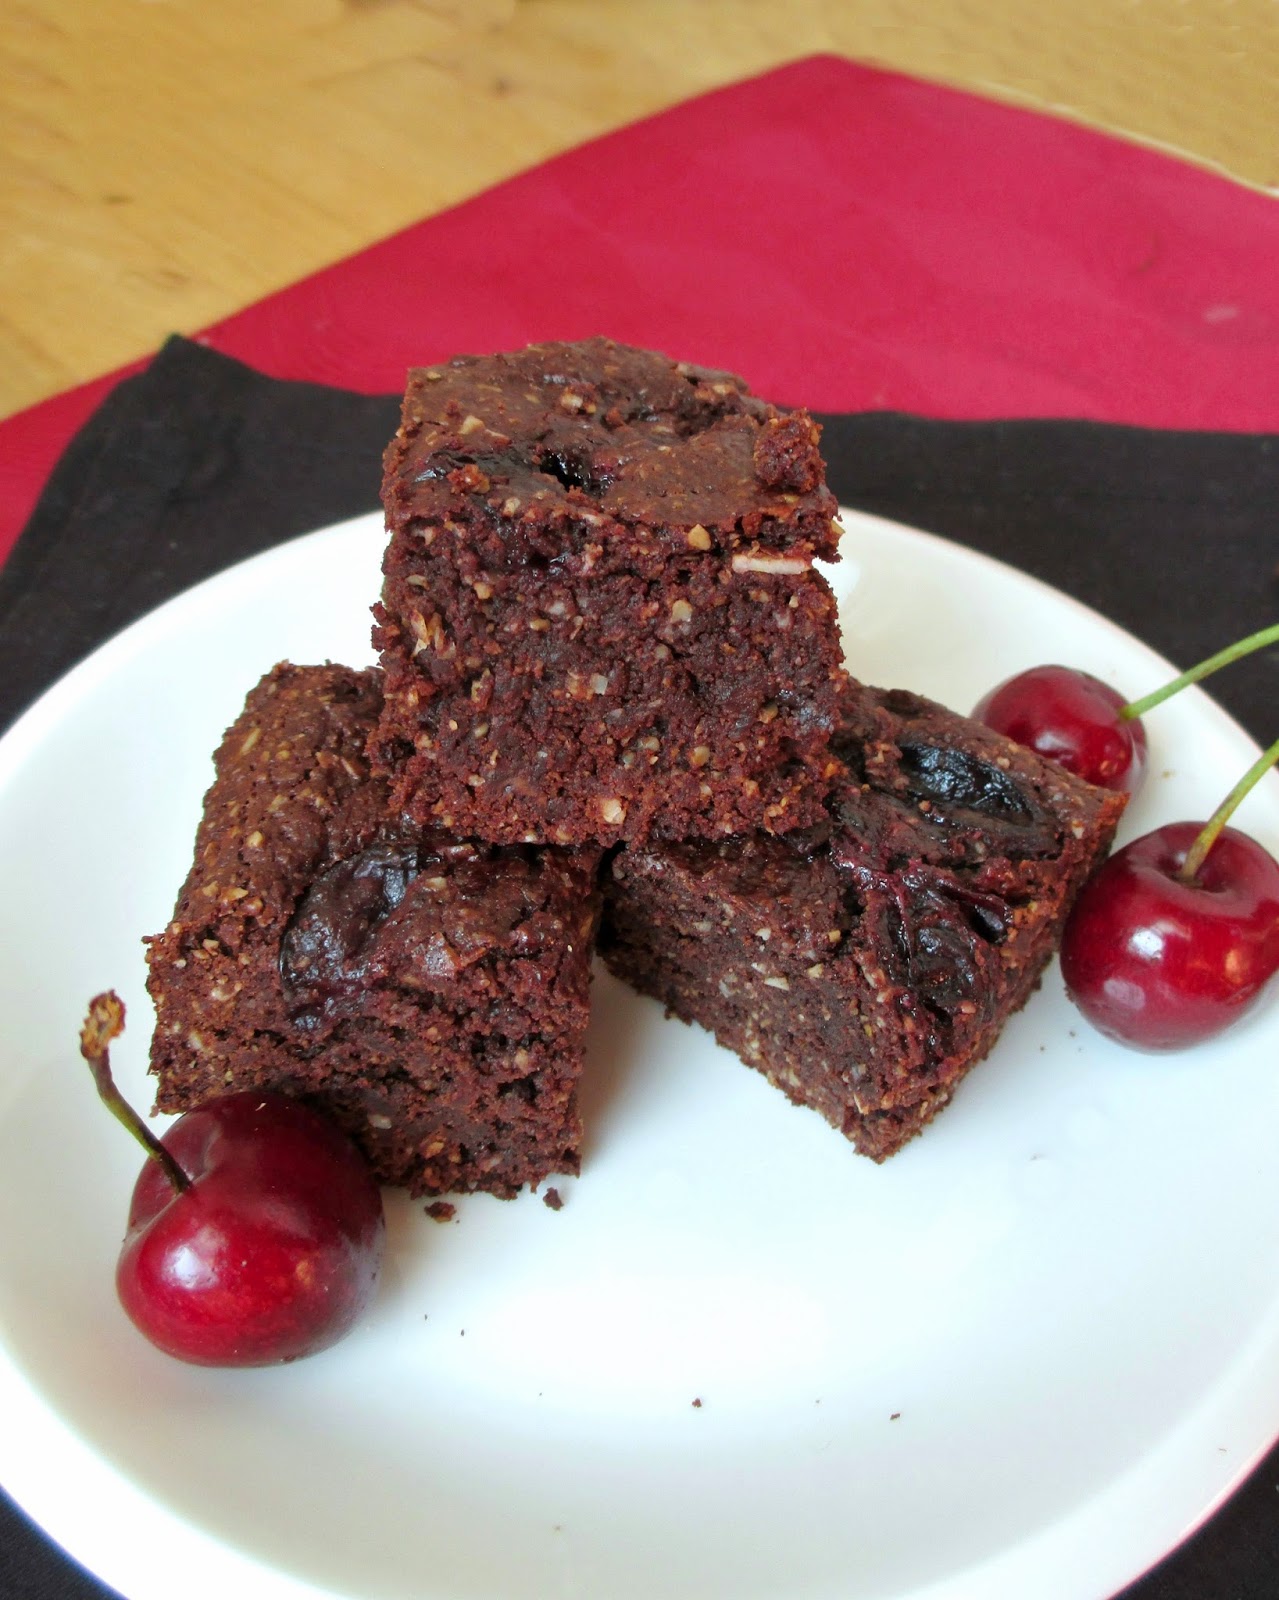
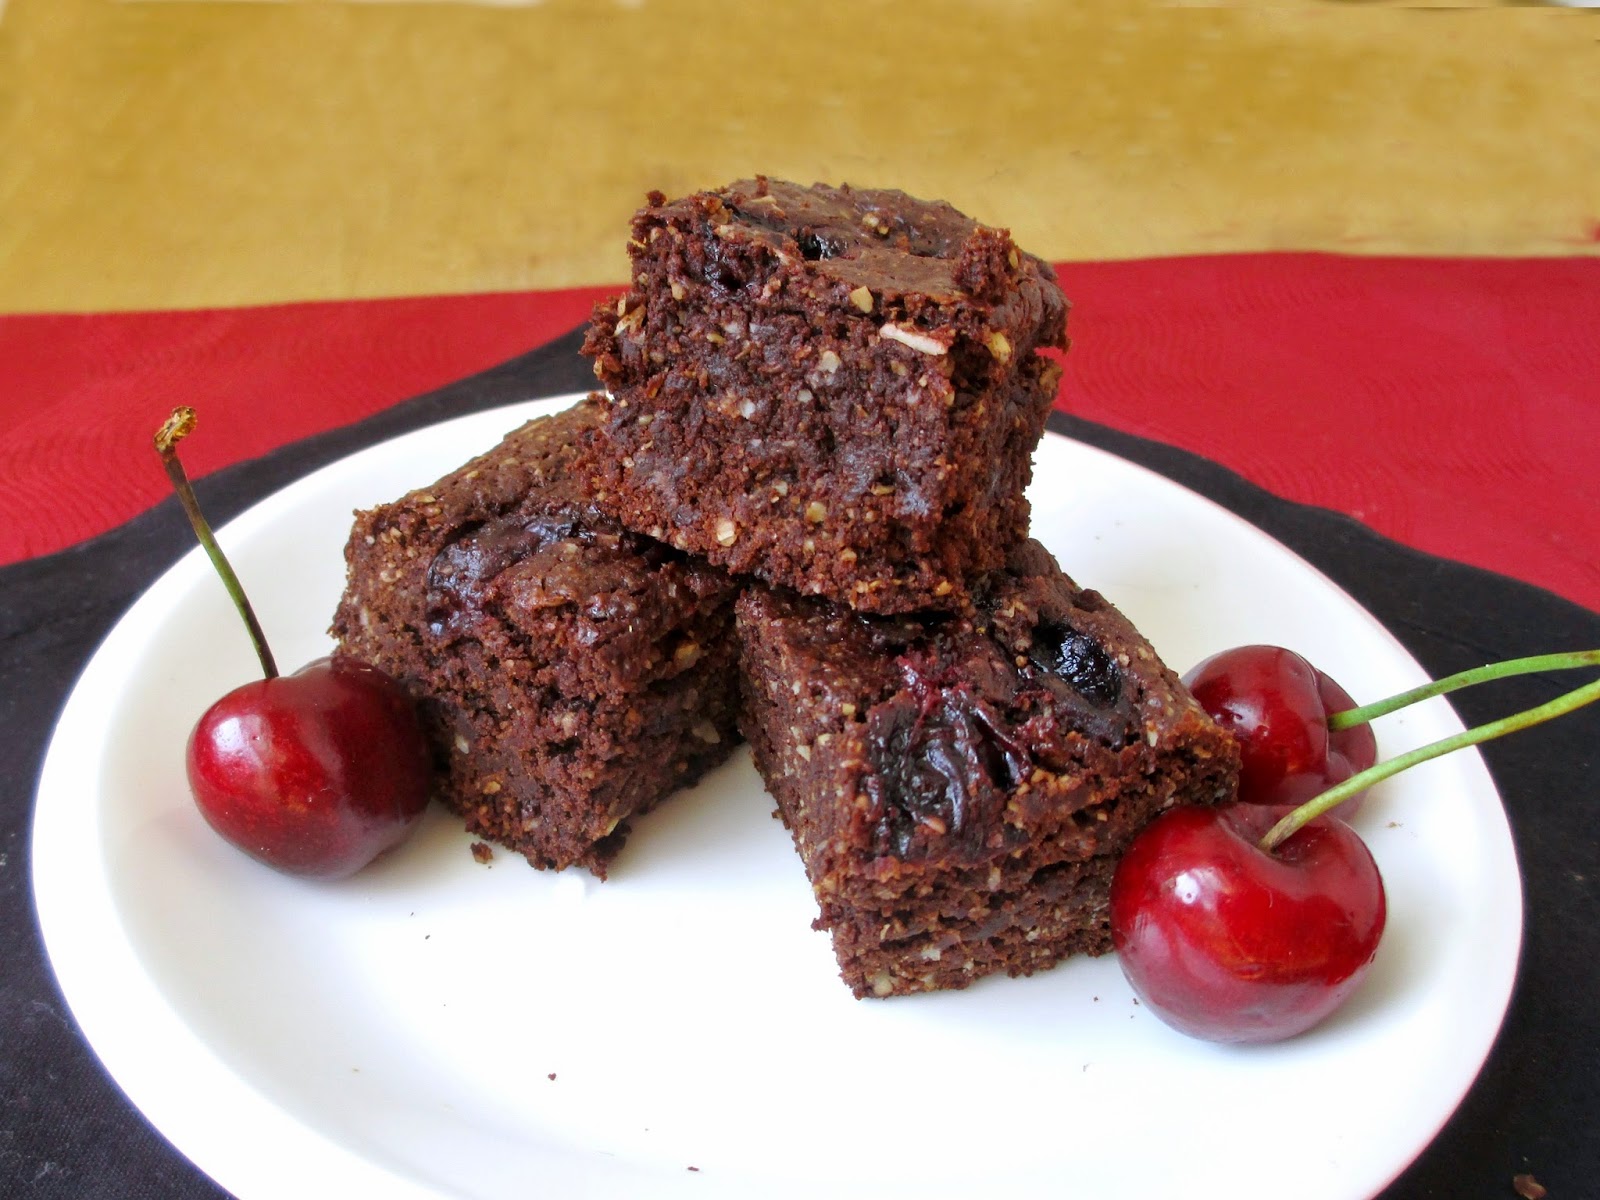
Vegan Roasted Cherry Brownies


This past weekend, I brought home a couple of containers of fresh local cherries from the market and immediately started thinking of ways to use them (besides just eating them on their own!).

I'm not sure why, but whenever I think about cherry recipes, I always want to pair them with chocolate - it's one of those combos that just goes together so well! So after enjoying a chocolate coffee cherry smoothie for breakfast on Sunday, I decided to make cherry brownies as a treat that I could bring into work the next day.

Since I'm not usually the biggest fan of chocolatey desserts myself, I don't have a lot of experience making brownies. Luckily, some of the experts on vegan baking in the blogging world have already perfected their own brownie recipes that I was able to use as guides!

For my brownie base, I mostly followed Oh She Glows' recipe (also in her cookbook that I own), with some of these tips from Edible Perspective, except that I used a mix of oat flour and all purpose flours instead of almond meal, so mine are not gluten-free.


Instead of just adding the cherries as is to the batter, I was inspired by Annie's Eats to roast them first with a bit of maple syrup so they were nice and sweet and juicy!

While my coworkers could still tell that these were a "healthier" brownie (or maybe they just guessed because they know me and my baking by now), I loved how they turned out!

They held together well (a problem with vegan brownies I've tried in the past), and they were definitely chewy and fudgy in a stick-to-the-roof-of-your-mouth kind of way, with just the right amount of chocolate flavour. I also thought the roasted cherries were the perfect addition to add some extra sweetness and cut the richness of the brownies a bit.

I've still got some cherries leftover, so if you have any other favourite cherry recipes or ideas that I can use, feel free to let me know!


Vegan Roasted Cherry Brownies
Adapted from Oh She Glows, Edible Perspective, and Annie's Eats

1 cup (heaping) fresh cherries
1 tbsp pure maple syrup
1.5 tbsp ground flax + 3 tbsp water
1 1/3 cups oat flour
3/4 cup all purpose flour
1/2 cup cocoa powder
1/2 tsp salt
1/4 tsp baking soda
100g dark chocolate, chopped (I used 1 Lindt bar), or ½ cup chocolate chips
1/4 cup + 2 tbsp coconut oil
1 cup sugar*
1/4 cup almond milk
1 tbsp instant coffee
2 tsp vanilla extract
1/4 cup chocolate chips


Preheat oven to 450°F. Slice the cherries in half and remove the pit (or use a cherry pitter). Places halved cherries in a small baking pan and toss with the maple syrup. Roast in the preheated oven for about 10 minutes, until they start to release their juices. Remove and let cool. Reduce oven temperature to 350°F.

Mix flax and water in a small bowl and set aside to thicken (I find it helps to let it sit in the fridge until all the water is absorbed).

In a large bowl, whisk together the oat flour, all purpose flour, cocoa powder, salt, and baking soda.

Melt the chocolate with the coconut oil, either in the microwave or over a double boiler on the stove. Add the sugar (*I followed Ashley's tip to grind it in the blender first so it's more powdery), almond milk, instant coffee, vanilla extract, and the flax mixture to the melted chocolate and stir well to combine.

Pour the wet ingredients into the dry ingredients and stir until all the dry ingredients are incorporated (batter will be very thick and dry). Fold in the roasted cherries (with their juices) and the remaining chocolate chips.

Pour batter into an 8x8 or 9x9 pan (I used an 8x8) lined with parchment paper. Bake for about 30-37 minutes, until the edges have hardened and the surface is just barely firm (I baked mine for 35 minutes). Remove and let cool in the pan for at least 30-45 minutes, then transfer to the fridge to cool completely (you can remove brownies from the pan first and transfer to a wire rack). Once completely cooled, slice into pieces.

Makes 20-25 small brownies 

November 19, 2013

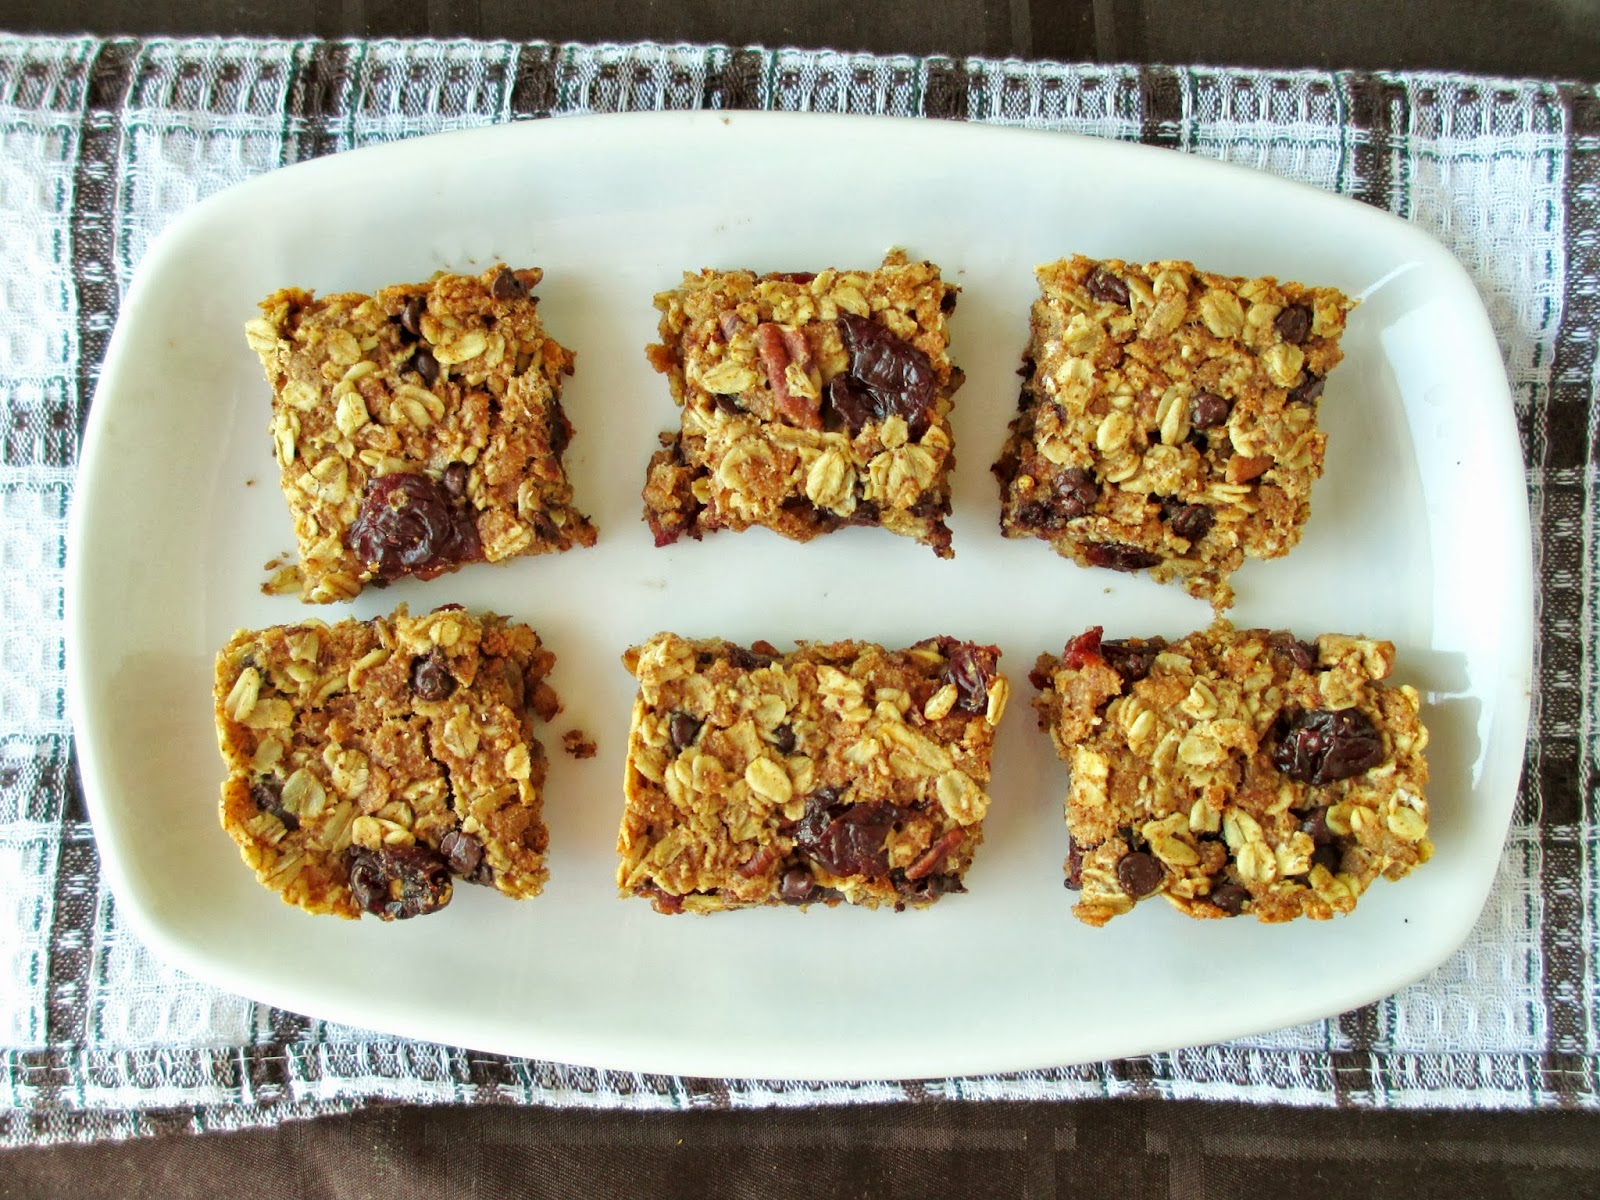
Almond Butter, Cherry & Chocolate Granola Bars


It's been awhile since I've made my own granola bars as I've been taking the more convenient route of buying them from the grocery store instead. Lately I've been enjoying Kashi chewy granola bars in my favourite flavour: cherry and dark chocolate.

I love the combination of dried cherries with chocolate chips in a granola bar because it makes a healthy snack taste a bit more decadent! Since that brand can be a bit expensive if they're not on sale though, I wanted to make my own version of a granola bar with those same flavours.

I turned to the blog Healthy Food for Living for my recipe inspiration because I've tried her granola bars in the past and loved them. I only made a few minor changes, swapping almond butter for the peanut butter, changing some of the ingredient amounts, and adding some chopped pecans. I also followed her suggestion of baking them in a loaf pan to get thicker bars.


These came out soft and chewy, with lots of flavour - just how I like my granola bars! I also liked that they were plenty sweet for my tastes with only a bit of extra sweetener (in the form of pure maple syrup) because the tart cherries added some sweetness of their own.

These make a tasty and hearty snack that you can cut into whatever size you want - smaller squares or longer granola bars. I can't say that I'll stop buying Kashi or other granola bars, but it's nice to have a homemade snack around once in a while too!


Almond Butter, Cherry & Chocolate Granola Bars

1/2 cup unsweetened applesauce
2 tbsp pure maple syrup
1/4 cup almond butter
1 tsp vanilla
1 cup large rolled oats
1.5 cups rice krispies (or another type of puffed rice)
1/4 tsp salt
1/2 tsp cinnamon
1/3 cup dried cherries
2 tbsp semi-sweet chocolate chips
2 tbsp chopped pecans


Preheat oven to 350°F. Line a 9x5” loaf pan with parchment paper and spray lightly with cooking spray.

In a medium sized bowl, stir together the applesauce, maple syrup, and almond butter until smooth. Stir in the vanilla extract. Gently fold in the remaining ingredients until everything is evenly coated.

Pour into prepared pan, smoothing out the top with a rubber spatula. Use your hands or the spatula to press down firmly on the top so that the mixture holds together tightly.

Bake in the preheated oven for 25-30 minutes, until lightly browned and firm on top. Cool in the pan for 10 minutes, then carefully remove from the pan and let cool completely on a wire rack. Cut into bars or squares. 

Makes about 10 squares. 

July 25, 2013

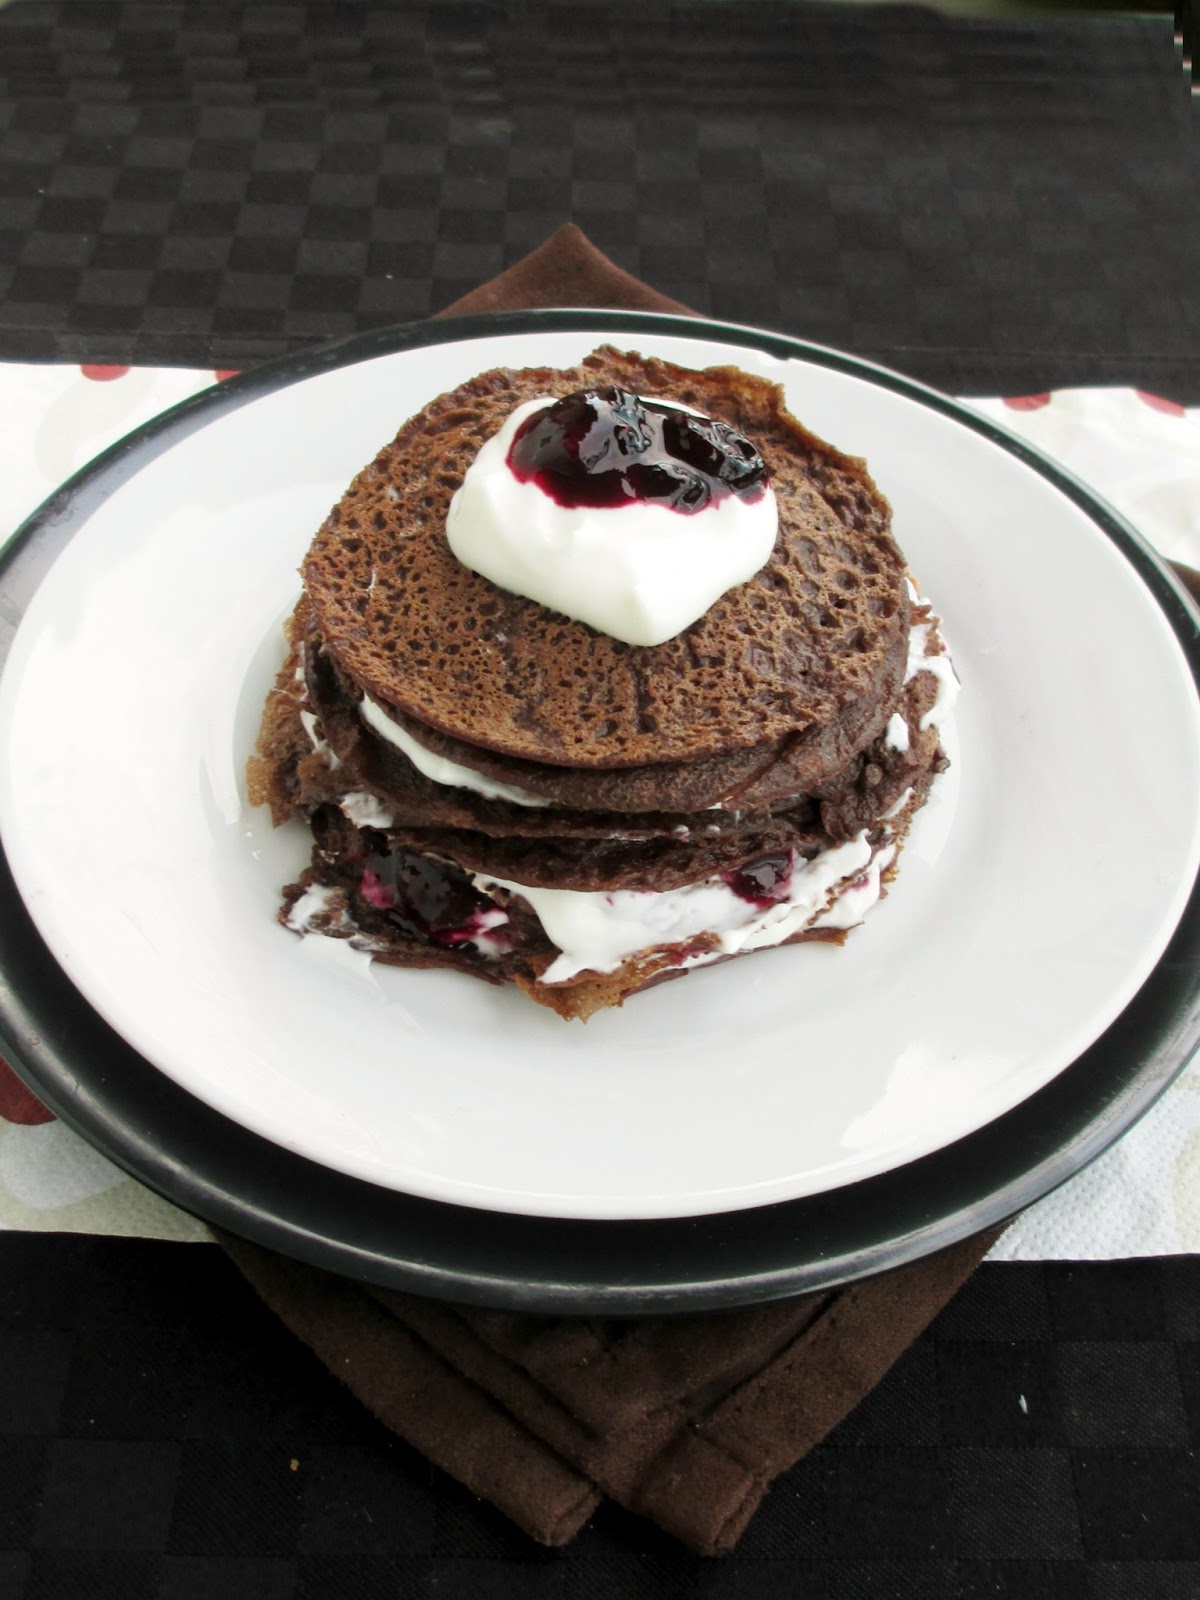
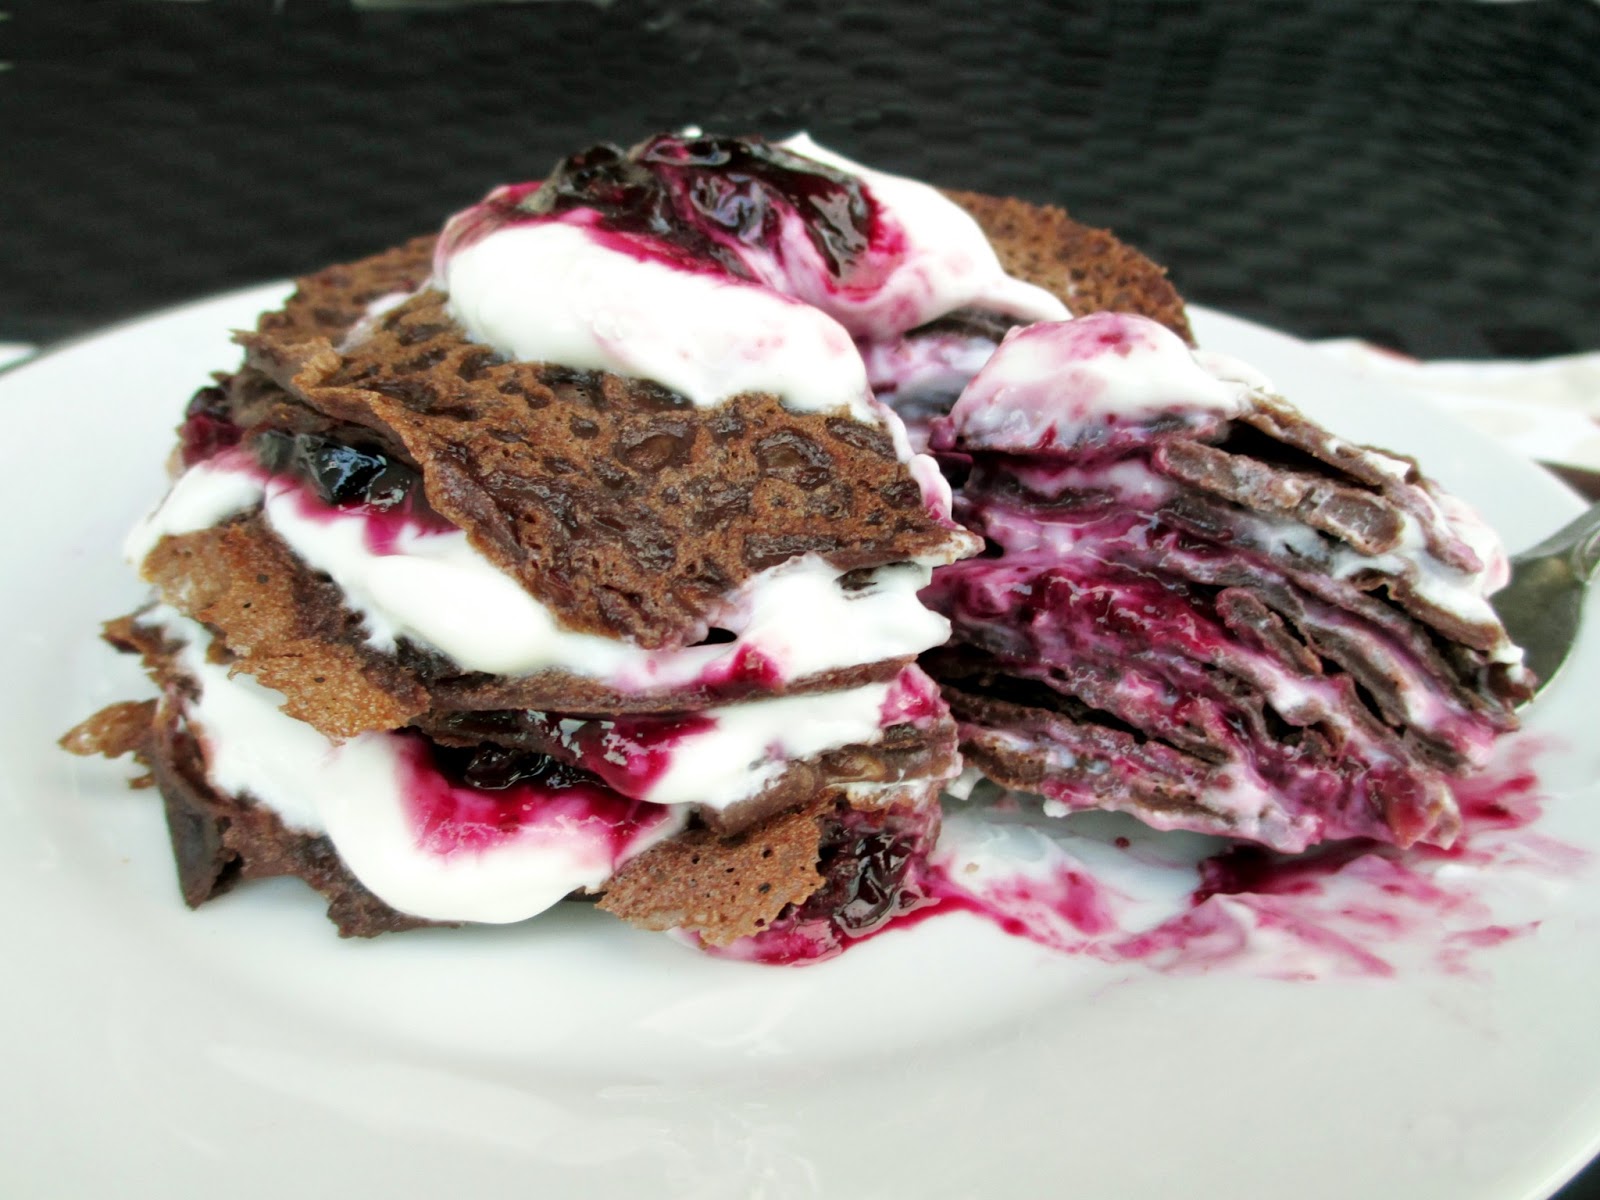
Miniature Chocolate-Cherry Crepe Cake & 2nd Blogiversary


Today is a bit of a special day here on Vanilla & Spice - it's my 2nd Blogiversary!

I can't believe that this little space has been active for two whole years already, but I guess when you're doing something that you love like cooking, baking, photographing food, and sharing recipes with amazing readers, time flies by!

Rather than reflecting on the past year of blogging like I did last year, I think I'll just stick to writing about today's recipe this time (and with more photos than usual because I had a hard time choosing) - after all, that's why you come here in the first place!


To celebrate the occasion, I wanted to make a special treat, but since I'm not really much of a cake or cupcake person, I thought I would do something a bit different.

I'm actually really excited about this recipe because it's something I've been wanting to make for quite a while - my very own personal sized crepe cake!

I'm sure you've all seen at least one version of a crepe cake before, but if not, the idea is that you layer a batch of regular crepes with a thick filling or frosting in between the layers to help them stick together, and add whatever toppings you like - fruit, nuts, whipped cream, caramel sauce - basically whatever you could imagine for a cake!


For my version, I knew I wanted to do a chocolate-cherry combination, since I still had some amazing fresh cherries stored in my freezer that I had picked a couple of weeks ago.

I'm actually a novice when it comes to crepe making (especially vegan crepes), but I did some research and chose a recipe that uses part chickpea flour because crepes usually rely on eggs as a main ingredient, and chickpea flour is an ingredient that I know works well in other "eggy" vegan recipes, like vegan scrambled eggs.

I modified the original recipe to make it a bit more decadent by adding cinnamon and cocoa powder, a bit of maple syrup for a touch of sweetness, and using chocolate almond milk for more chocolatey flavour.


My first crepe was a bit of a disaster, but that's expected when you're making crepes for the first time! Luckily, I quickly got the hang of it and ended up with evenly thin, chewy crepes with just enough of a chocolate taste for my liking.

For the cake filling, I kept it pretty simple and used a combo of fresh cherry-blueberry sauce and coconut flavoured greek yogurt.

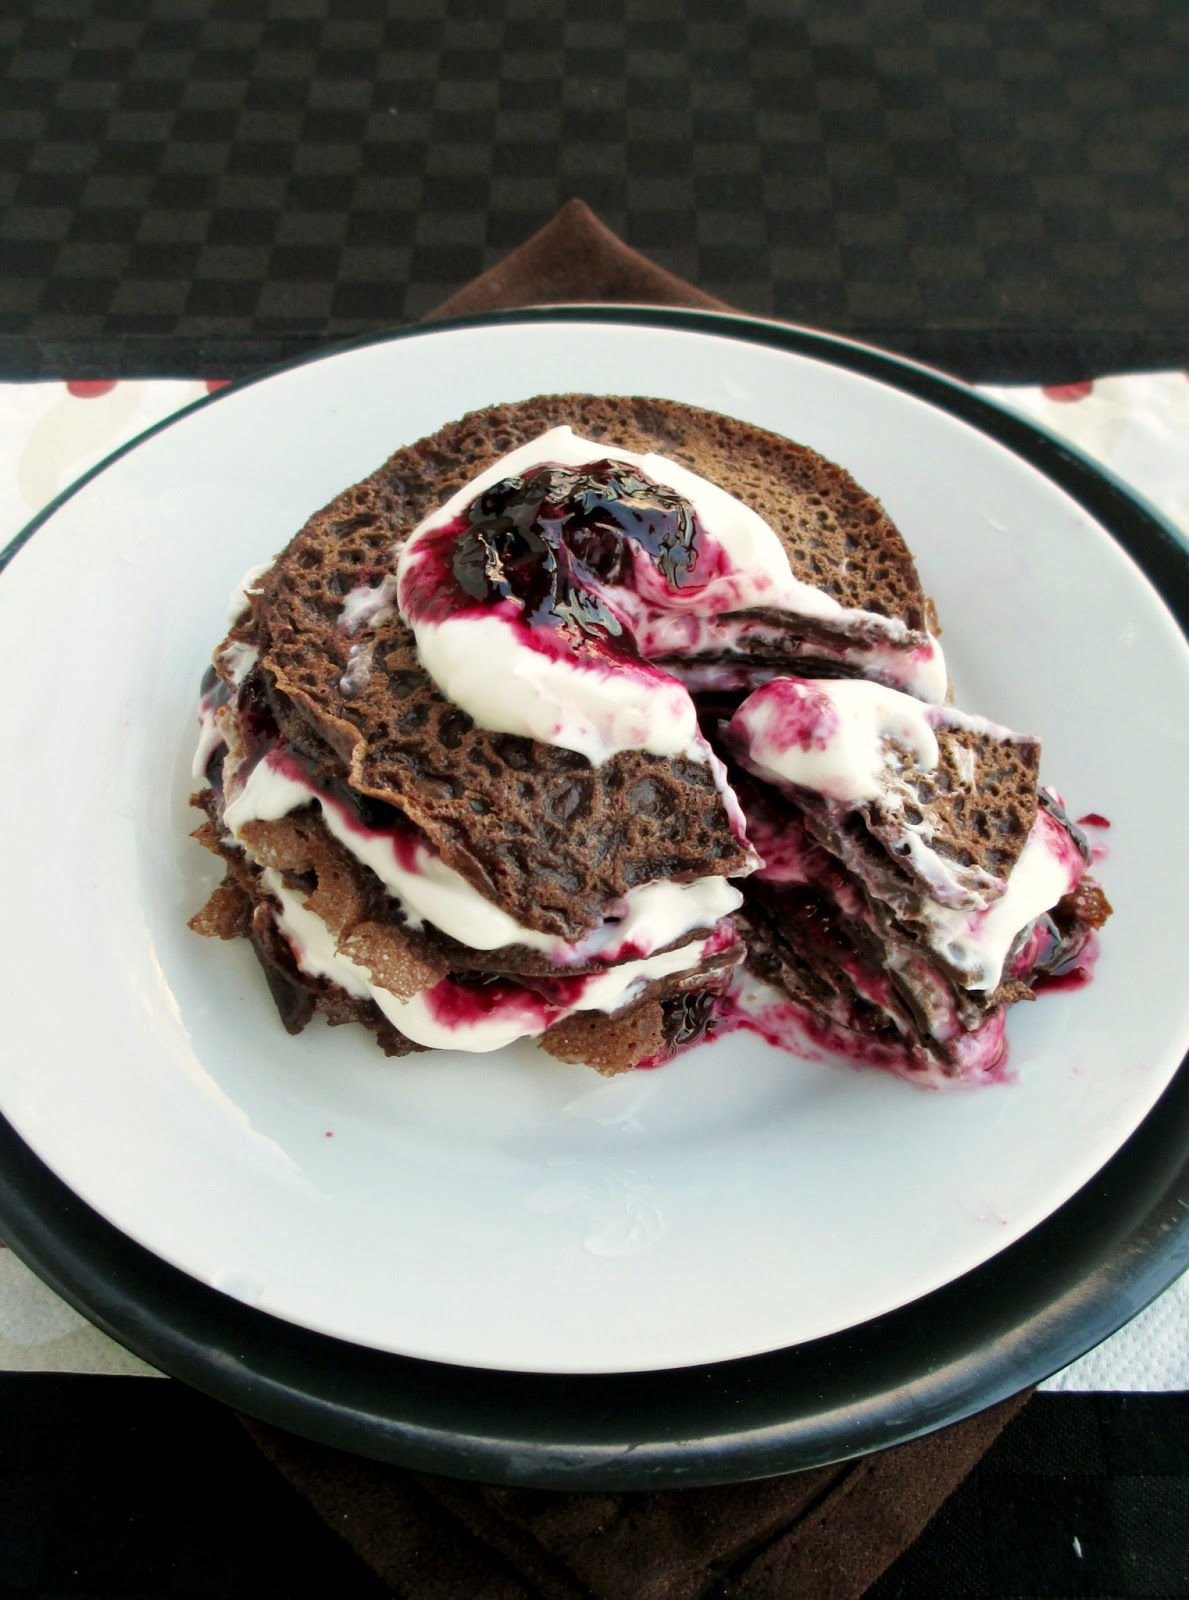
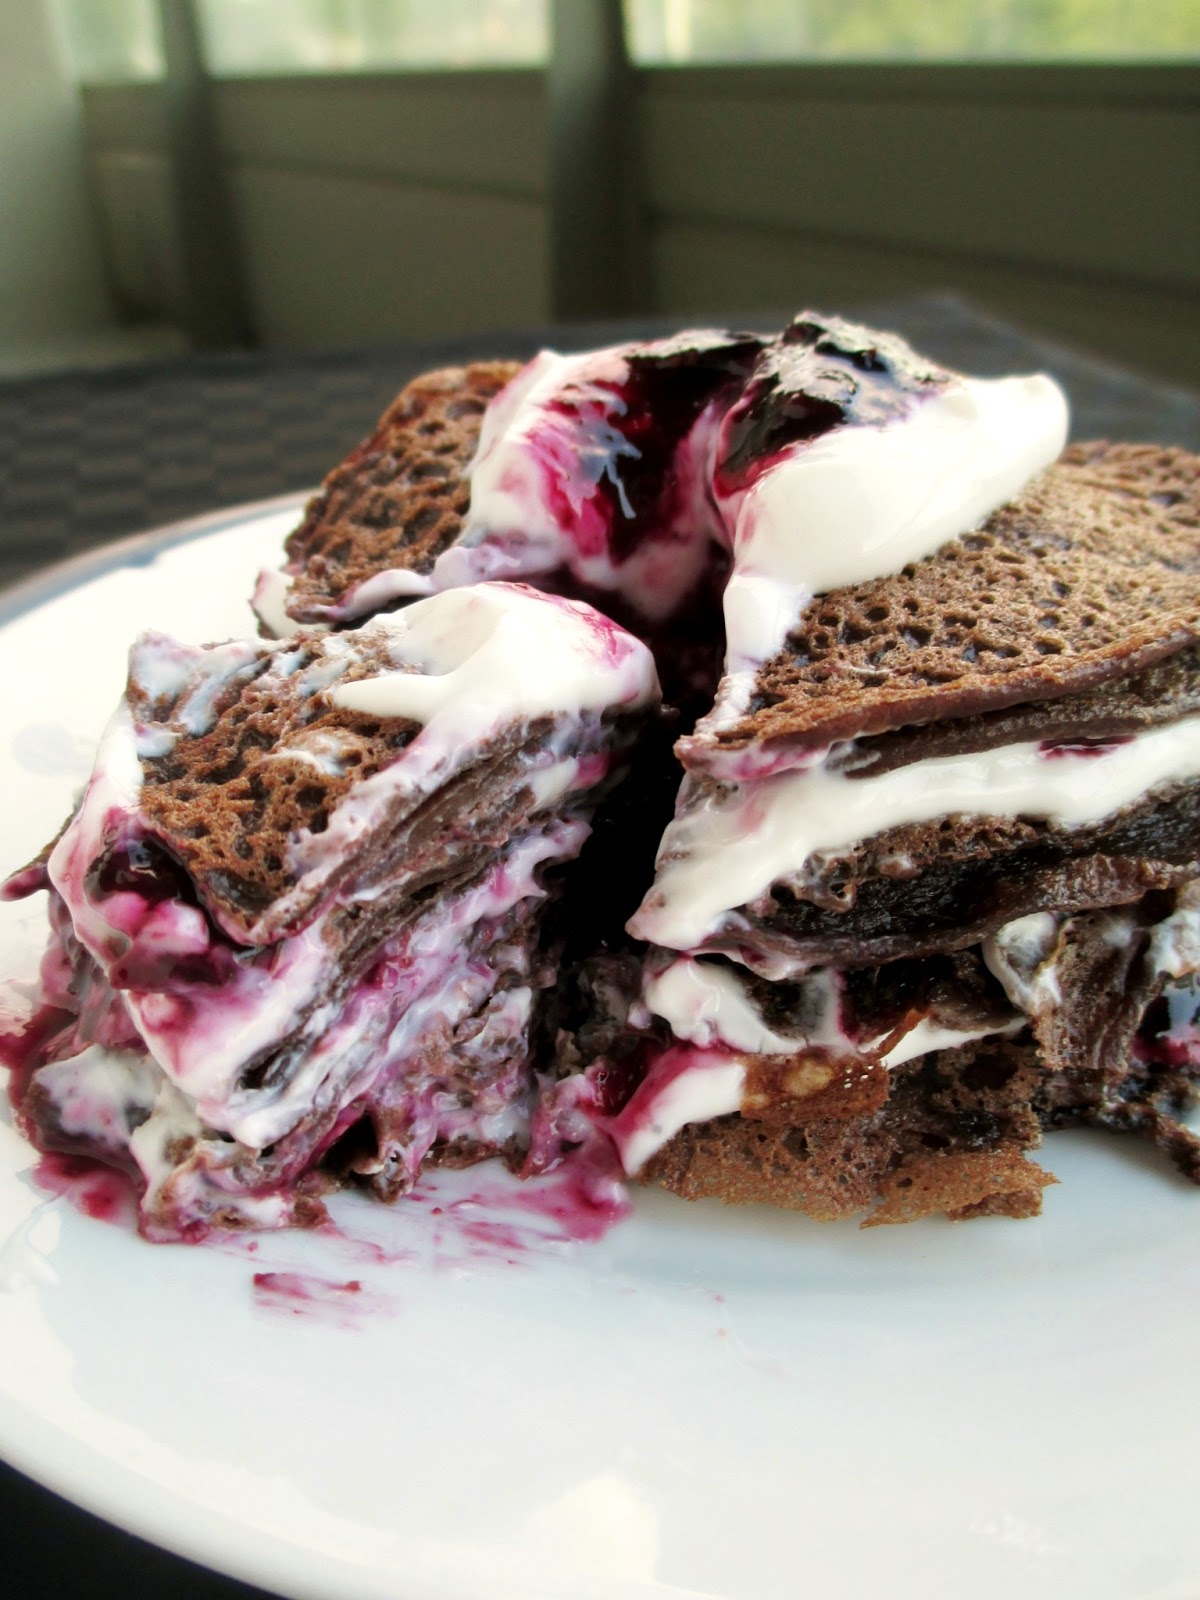
I loved each component on its own, but all came together to make an even tastier creation! The sauce was thick and fruity, with a nice balance of sweet and tart notes, and I thought it paired perfectly with the chocolate crepes and the creamy coconut yogurt.


Once you have all the components ready, it's pretty easy (and fun) to assemble the cake. First, you cut smaller circles out of each large crepe so that you have enough to stack into a tall enough miniature-sized crepe cake. Then a spoonful of yogurt and cherry sauce is spread in between each crepe layer as you build it, so that you end up with a mix of everything in each bite.

I assembled mine when everything was still a bit warm, but when I came back for the leftovers the next morning after it had been sitting in the fridge overnight, everything had firmed up more and it was a bit easier to slice and eat.  But either way - warm or chilled - this makes a delicious dessert or even a special breakfast treat!

I'm so glad I finally got around to trying out a crepe cake, and a blog anniversary seems like the perfect occasion to try something new in the kitchen! I think I might be making this again for future celebrations - I'm already dreaming of new combinations that I could try for my next birthday cake!

I know this has been a long post, but I just wanted to end by saying thanks for reading and for all of your comments this past year - I wouldn't still be doing this without the support from all of you! And one last shout-out to my sister Natalie of Once Upon a Cutting Board, who is also celebrating her blogiversary!


Miniature Chocolate-Cherry Crepe Cake
Crepe recipe adapted from Vegan Eats World, everything else my own
Note: My crepes were vegan, but not the yogurt. Feel free to adapt the recipe by using your own favourite crepe recipe and whatever kind of greek yogurt you like (vegan or not)!

Crepes
3/4 cup chocolate almond milk
1/4 cup water
1/4 cup + 2 tbsp all-purpose flour
2 tbsp + 2 tsp chickpea flour
1/2 tbsp cornstarch
1 tbsp cocoa powder
1/4 tsp salt
dash of cinnamon
1 tsp olive oil
1 tsp maple syrup

Filling
1/2 cup fresh or frozen cherries (or a mix of cherries and blueberries, which is what I did because I didn't have enough cherries)
1 tsp lemon juice
1 tbsp maple syrup
1 100g container greek yogurt (I used Oikos fat-free coconut greek yogurt but vanilla would work too)


To make the crepe batter, add all ingredients to a blender and puree until smooth. Transfer mixture to a container, cover, and let sit in the fridge for at least an hour.

When ready to make crepes, heat a large skillet over medium heat and spray with cooking spray.  Working quickly, pour 1/3 cup of the batter into the pan, swirling the pan around so that the liquid coats the pan evenly all the way to the edges. Let cook for one and a half to two and a half minutes, until the surface looks dry and cooked, and the edges have started to crisp up. Run a spatula around the edges of the crepe and carefully flip it over. Cook the other side for about one minute. Carefully remove the crepe from the pan and transfer to a plate.  Repeat with the rest of the batter (I got four 7" crepes out of mine, but it depends on the size of pan you use).

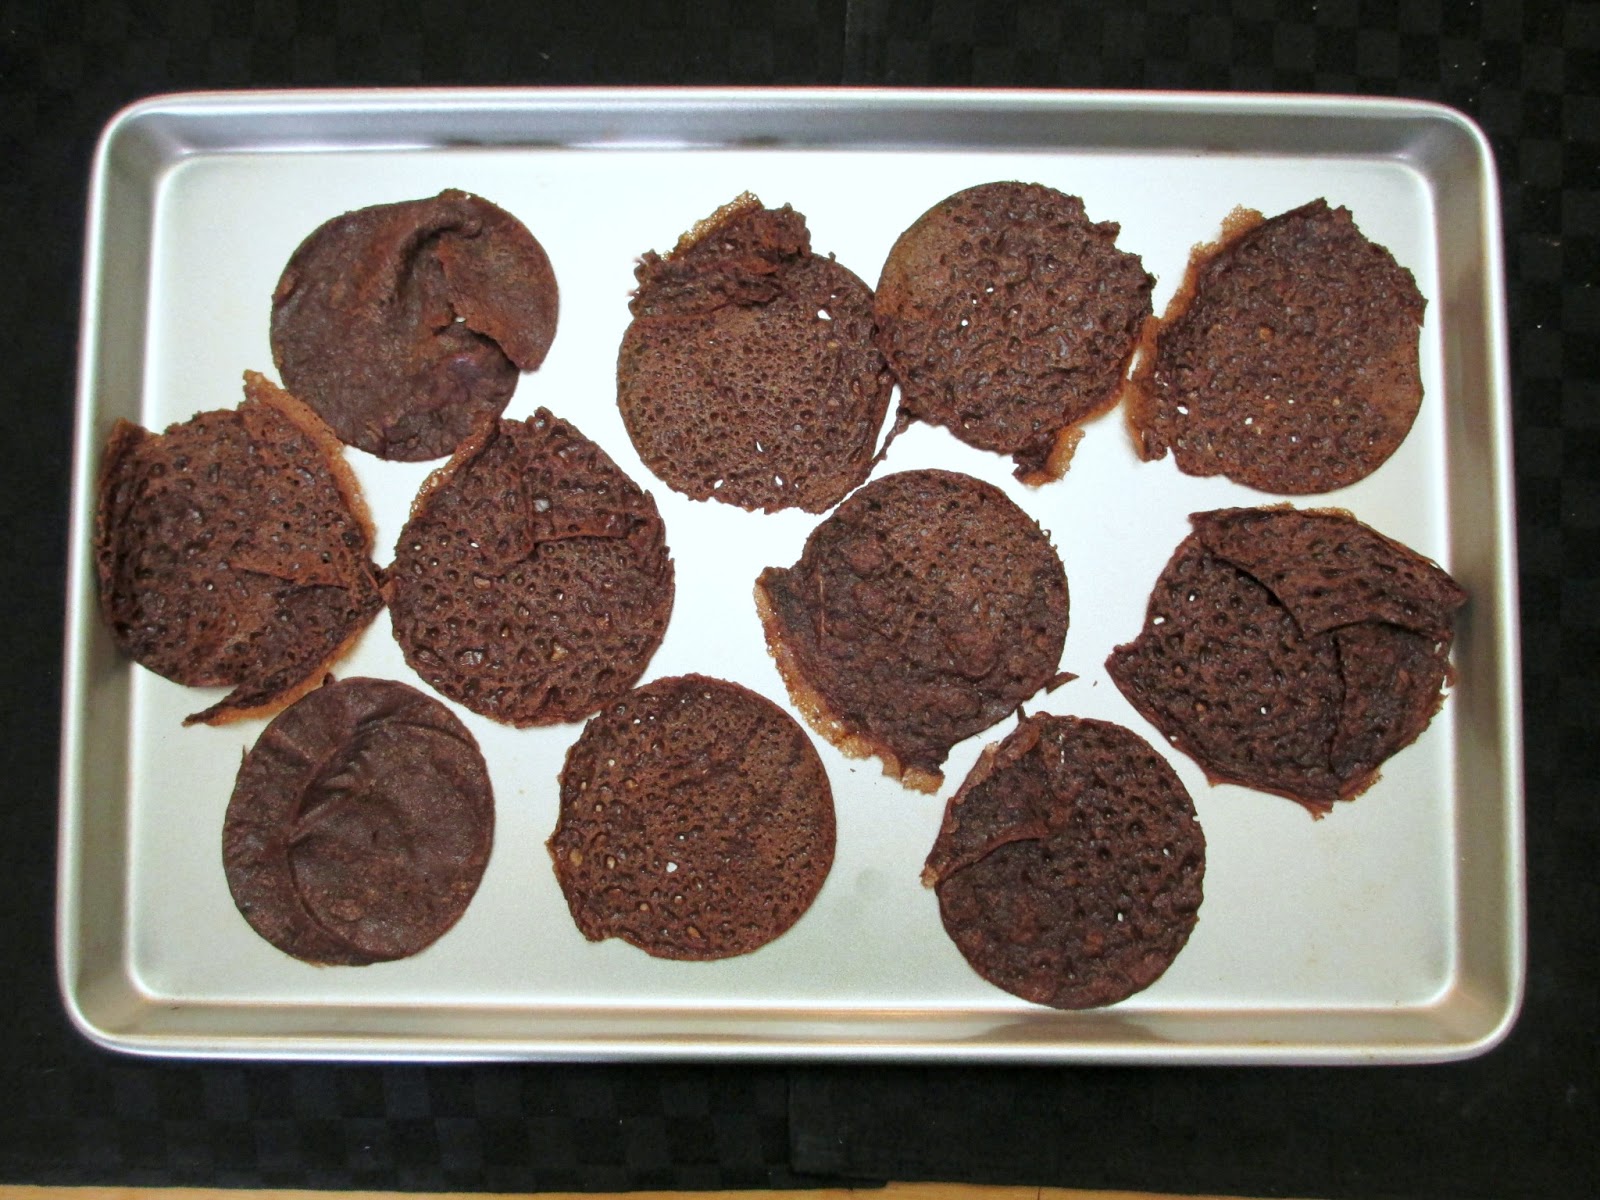
Use a circular cookie cutter or the lid of any jar about 3" in diameter to cut circles out of each crepe (I used a peanut butter jar lid). You should get one full circle plus two partial circles out of each crepe, but that's okay - they don't all need to be perfect circles. For the partial circles, just arrange some of the leftover pieces to fill in the gaps so that you have somewhat complete circles. You should end up with 11-12 3" crepe circles (see picture of mine below).


To make the sauce, place the berries, lemon juice, and maple syrup in a small saucepan and let cook on medium-high heat until the berries are broken down and the mixture has thickened a bit, stirring often (5-10 minutes). Remove from heat and let cool.

To assemble the cake, lay one or two crepe circles on a plate. Top with a spoonful of the greek yogurt and a spoonful of the cherry sauce (don't use too much sauce, as you don't want to run out!). Follow with another layer of crepes (I found it easier to put two thin crepes together as one layer), and another layer of yogurt and cherry sauce. Repeat until you've layered all of the crepes, ending with a spoonful of yogurt and cherry sauce on top.

Serve at room temperature, or chill in the fridge for 1-2 hours to firm up a bit before serving.

Serves 1 (if you're hungry) or 2 people.


February 07, 2013

Baked Banana, Chocolate & Strawberry Wontons


Valentine's Day is one week away, and even though I don't particularly care for the holiday itself one way or another, I still wanted to make some kind of dessert recipe for my blog in honour of the spirit of love that Valentine's Day celebrates!

The inspiration for this recipe came from Oh My Veggies, who posted these baked banana wontons a while ago. I loved the idea of filling wonton wrappers with fruit and baking them in the oven for a healthier option than frying. I also thought they made a fancy looking dessert that would be fun to serve for Valentine's Day, so I decided to make my own version.

I liked the idea of using banana in the filling, but I also wanted to incorporate more traditional Valentine's themed ingredients so I added chocolate and red strawberries to both the filling and the topping for the wontons.


Stuffed inside each wonton is a mixture of mashed banana with strawberry jam, along with a piece of milk chocolate.  Once you've assembled all of your wontons, they go into the oven to bake and when they come out, the filling is warm and gooey so that you taste chocolate melted together with banana and jam with each bite.  For a non-chocolate lover like myself, these have a nice balance of light fruit and rich chocolate, without any of the ingredients being too dominant.

Since the wontons would have looked a little plain on their own, I made an easy strawberry sauce by simmering fresh strawberries on the stovetop with a bit of agave, vinegar and vanilla extract for more flavour. Finally, a drizzle of melted chocolate and a light dusting of powdered sugar turns this into a fancier looking dessert that you can serve to your loved ones or treat yourself with on Valentine's Day.

I ended up eating most of these myself immediately after I made them (telling myself that wontons can count as dinner), so you don't need a holiday to enjoy them either!

Feel free to play around a bit with the ingredients too - I liked the combination of strawberries with banana, but I think raspberries would also make a delicious sauce, and a sprinkle of toasted almonds or pistachios would add a nice crunch. You can also try baking them at a higher temperature if you want the wontons to be more crispy, but I personally preferred the way these came out with a soft middle and chewy edges.


Baked Banana, Chocolate & Strawberry Wontons
Inspired by Oh My Veggies and Weight Watchers
Note: My version of this dessert was not vegan, but if you can find eggless wonton wrappers and vegan chocolate, you can make a vegan version!

Strawberry Sauce
1 cup chopped strawberries, tops removed
2 tbsp agave nectar
1/2 tbsp white balsamic vinegar
1/2 tsp vanilla extract

Wontons
12-15 square wonton wrappers
1 medium banana, mashed
2-3 tbsp strawberry jam 
Half of a Hershey’s milk chocolate bar (or another chocolate bar)
1 ¼ tsp melted coconut oil, divided
~1 oz dark chocolate
Icing sugar for serving
More chopped strawberries for serving (optional)


Preheat oven to 350°F and prepare a large baking sheet with parchment paper.

First, make the sauce: Place strawberries, agave, and balsamic in a small saucepan over medium-high heat. Once the mixture starts bubbling, reduce heat to medium-low and let simmer for about 10 minutes. Remove from heat and stir in the vanilla. Mash the strawberries up a bit to get a smoother sauce. Keep warm on low heat while you make the wontons.

For the wontons, lay out one wrapper and place one heaping teaspoon of banana in the middle. Top with ½ tsp of strawberry jam and half of a rectangle of Hershey’s chocolate (or an equivalent amount of another chocolate if you use a different kind). 


Wet the edges of the wrapper with water, then gently fold over one half so that it forms a triangle. Seal the edges together with your fingers tightly, being careful not to let the filling squeeze out.

Keep a small bowl with 1 tsp melted coconut oil aside. Brush both sides of the wonton with melted coconut oil and lay on the prepared baking sheet. 

Repeat with remaining ingredients until the banana mixture is used up – I got 12 wontons.

Place baking sheet in the preheated oven and bake for 8-10 minutes, until the outside is starting to brown on the edges.

Meanwhile, melt the dark chocolate in the microwave. Heat on high for 30 seconds, then add ¼ tsp coconut oil and microwave again in 15 second intervals, stirring each time, until the chocolate is smooth and melted.

To serve, lay wontons on a plate and top with a few spoonfuls of the strawberry sauce. Drizzle some of the chocolate sauce over top and use a sieve to add a dusting of icing sugar.  Add some chopped fresh strawberries as a garnish if desired.  Serve warm.

Makes about 12 wontons, or 3-4 servings.

Note: These are best eaten fresh as the edges will get chewier the longer they sit out, but if you have leftovers, you can store them in the fridge and reheat briefly (only 10-20 seconds) in the microwave. 

December 28, 2012

Rum & Chocolate Dipped Apricots


Does anyone else feel like they've lost a sense of time, let alone what day of the week it is lately? I've been staying at my parents' place for the past week for the holidays, and without my regular routine I feel a bit thrown off track - but in a good way! It's been so nice to just relax and spend time with family, even though it means I haven't been cooking as much or keeping up with reading all my favourite blogs!

Since I'm sure many of you are also enjoying some time away from your computers, I thought I would just share a simple idea today that hardly qualifies as a recipe.

If you're sick of Christmas cookies but still like having treats around, or if you're looking for ideas for a New Year's Eve party, I'd recommend these rum and chocolate dipped dried apricots!  These were inspired by the popular chocolate and sea salt dipped clementines that I've seen around the blogosphere, but obviously I changed the base to dried apricots and added in a bit of booze because, after all, it is still the holidays!

To make these little treats, you just have to soak some dried apricots in hot rum, let them dry off a bit, and then dip them in melted dark chocolate and let them harden.  If you want to spice them up a bit, feel free to add a dash of cayenne or paprika to the chocolate, along with a sprinkle of sea salt on top of the chocolate for that sweet and salty combination.

I found that each of the flavours - the rum, spice, and sea salt - were fairly subtle on their own, but they all came together nicely for a fun and unique little treat!


Rum & Chocolate Dipped Apricots

Note: The rum taste isn't very strong, but if you don't like rum, or don't want to include alcohol in this recipe, then you can skip that step and just dip the dried apricots in melted chocolate for an even simpler treat!

1/4 cup spiced rum (or enough to cover apricots)
~15 dried apricots
~1 oz dark chocolate
1/4 tsp coconut oil
Dash of smoked paprika (optional)
Sea salt

Place the rum in a shallow bowl (I divided mine into two small glass bowls). Heat in the microwave for 15 seconds (this will help the apricots soak it up better). Add the apricots and submerge them as much as possible in the rum (some parts may still be sticking out).  Let soak for at least one hour, turning the apricots occasionally so that they soak evenly.  Remove from rum and let sit on a foil-lined baking sheet or plate.

Heat the chocolate in a microwave-safe bowl for 30 seconds on high.  Add the coconut oil and heat for another 15 seconds. Stir, and if lumps remain then heat an additional 10-15 seconds until melted. Stir in a dash of smoked paprika if using

Dip one end of each apricot in the melted chocolate and place on the foil to harden.  Once you’ve done a couple of apricots, sprinkle a bit of sea salt over the chocolate before it dries.  Repeat with remaining apricots.  Place the whole tray in the freezer until the chocolate hardens.

Store at room temperature (Note: I stored mine in the fridge for a while, which seemed to make the salt disappear).

February 14, 2012

Vegan Crunchy Peanut Butter Cups


Happy Valentine's Day everyone!

If you're still looking for a decadent-tasting but healthy dessert to finish off your night, I've got just the thing for you - these miniature vegan peanut butter cups!

When I first saw these popped amaranth peanut butter cups on the blog My Little Celebration, I knew immediately that I had to make them! They're basically made of a layer of chocolate and a layer of peanut butter mixed with chopped peanuts and popped amaranth. 

Amaranth is a small grain that can be cooked and eaten like rice or quinoa and is high in calcium, protein and fiber. Another way to cook it is by popping it on the stove like popcorn. I had never tried amaranth before, but now that I know how much fun it is to pop it, I want to start making it much more often!

In my version of these treats, I replaced the butter with melted coconut oil and reduced the amount of powdered sugar because I didn't want them to taste too sweet. I also added some cacao nibs to the bottom layer and made them in my mini muffin pan to get smaller sized cups.


Once I had made them as the recipe instructed, I thought they'd be even better if I added another layer of chocolate on top so that the peanut butter layer was enclosed in the chocolate (like a Reese's cup). So I coated half of them with more chocolate and left the other half with the peanut butter layer showing. After tasting them both ways, I preferred the chocolate cups, so I recommend adding the extra top layer!

Even though I personally loved these, I should add a warning that if you're expecting these to taste like Reese's peanut butter cups, you will probably be disappointed.  Since my sister happened to have a mini Reese's cup lying around, I actually did a taste test to compare the two and I much preferred my healthier version! I find Reese's overly sweet and a bit artificial tasting, whereas these taste like real peanut butter and I loved the crunchy texture from the cacao nibs, chopped peanuts and the amaranth (although you could try leaving out the peanuts for a smoother filling).

This recipe does require some waiting time in between making each layer, but they still didn't take much time overall and were pretty easy to make. They also store well in the freezer, so you can take one out whenever you crave a treat!


Vegan Crunchy Peanut Butter Cups

1/4 cup natural peanut butter
1/2 tbsp melted coconut oil
1 tbsp powdered sugar
2 tbsp crushed peanuts
2 heaping tbsp popped amaranth (about 1 tbsp unpopped)
About 6 tbsp vegan chocolate chips, divided
1-2 tbsp raw cacao nibs

Prepare a mini-muffin pan by coating the cups with a bit of cooking spray.

First, pop the amaranth grains in small batches. Heat a small saucepan over medium-high heat. Once it is hot, add a small spoonful of amaranth and cover the pot with a lid. As the kernels begin to pop, shake the pot back and forth. Once it is has finished popping, remove from the heat immediately and transfer to a small bowl. Continue popping the amaranth in batches until you get two heaping tablespoons (I did this in 4 batches, but I burnt the first one!)

Prepare the peanut butter filling by combining the peanut butter and coconut oil in a bowl. Stir in the powdered sugar and crushed peanuts, then stir in the popped amaranth.

Melt 3 tbsp of the chocolate chips in the microwave or over a small pot of simmering water on the stove. Spoon the melted chocolate into the mini muffin pan cups, spreading it evenly (I was able to get 8 cups).  Sprinkle a pinch of cacao nibs into each cup, pressing gently with your finger into the chocolate. Place the muffin tray in the freezer for a few minutes until the chocolate has firmed up a bit.

Remove the pan from the freezer and add a large spoonful of the peanut butter filling on top of the chocolate in each cup, spreading evenly. Place the filled cups back in the freezer for 10-15 minutes, until firm.

If you are adding the top layer of chocolate, melt the remaining chocolate chips. Remove peanut butter cups from the muffin tin. Working quickly, use a flat knife or spoon to spread some of the melted chocolate over the top of one peanut butter cup and around the sides. Repeat with remaining peanut butter cups. Return to freezer until hardened.

Store in the fridge or freezer and let thaw for 5-10 minutes before eating.

Makes 8 mini cups (this was a good sized portion just for myself, but you may want to double the recipe!)


This was submitted to the RecipeLion February Blog Hop

December 20, 2011

Crispy Peppermint Chocolate Bark


It seems like I've been posting a lot of sweet treats lately, but at this point I would feel wrong posting anything other than holiday treats until Christmas is over! But I promise I have lots more healthy recipes to share starting next week!

I made this bark as part of a homemade treat bag that my sister and I gave out to all of our colleagues with our Christmas cards this year. I thought it would be something a bit more fun and different than the usual chocolate bark.

The bark is made from a mixture of semi-sweet and mint chocolate chips, and sprinkled with Hershey's candy cane kisses for extra peppermint flavour (You could substitute chopped candy canes but the candy cane kisses taste so much better and they're a bit easier on your teeth!)

It's also filled with rice krispies, which gives it a nice crispy texture. Even though I don't usually like chocolate desserts, I couldn't stop eating this bark! I loved the minty taste and the light texture, which made it less rich than pure chocolate bark.

I think this would be a great gift idea for both kids and adults!


Crispy Peppermint Chocolate Bark
Adapted from Everybody Likes Sandwiches

500 grams of chocolate chips (I used a mix of semi-sweet and mint chocolate chips)
2 cups Rice Krispies
About 20 Hershey's Candy Cane Kisses, finely chopped

Place the chocolate chips in a heat-proof bowl and set over a saucepan of boiling water on the stove. Stir the chocolate until it is melted.

Remove from heat and immediately stir in the Rice Krispies until they are fully coated. Using a rubber spatula, spread the mixture out evenly onto a large baking sheet lined with foil or wax paper. Sprinkle the chopped kisses over the bark and press them in slightly with your hands or a spatula to ensure they stick.

Place the baking sheet in the fridge or freezer until the bark is hardened, then break into pieces.

Makes about 30 pieces.

LinkWithin

Related Posts Plugin for WordPress, Blogger...