Showing posts with label peanut butter. Show all posts

June 17, 2014

Thai Peanut Cucumber Cups


This week is especially hot and humid here in Ontario, and when the weather is this warm, all I want for dinner is cold and refreshing meals, like chilled soups and salads full of fresh veggies. 

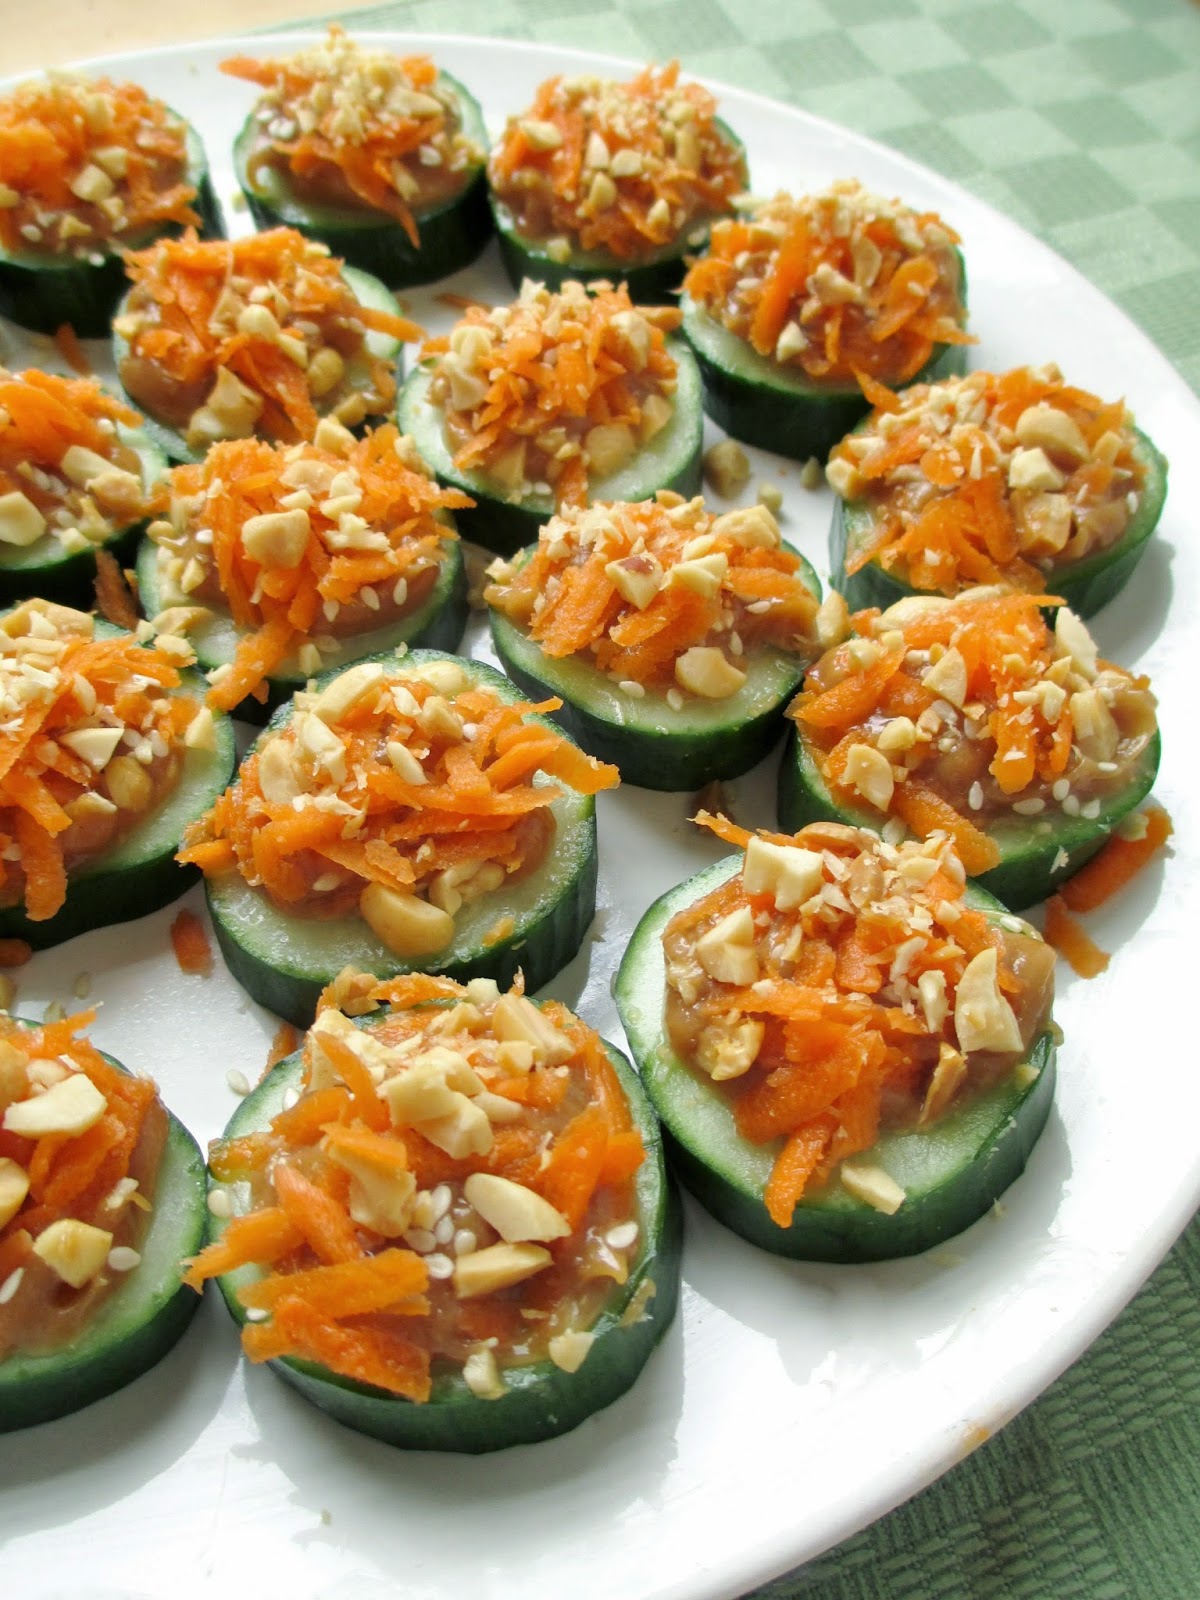
Of course, veggies can get a bit boring sometimes, so it helps to turn them into something more exciting, like these Thai peanut cucumber cups that I made as an appetizer last week!

The inspiration for these came from Courtney of The Fig Tree blog, who posted these peanut satay celery sticks a while back. I thought the idea of filling celery sticks with a peanut sauce, carrots, and sesame seeds sounded so creative!  I'm not a huge fan of celery though, and I knew that cucumbers go well with cold peanut noodle dishes, so I thought cucumber cups would work really well as a base instead.


I've actually made cucumber cup appetizers before and they're always a hit, but I usually fill them with hummus or tzatziki, so this was a fun twist! If you've never seen this idea before, you just slice your cucumber and then scoop out some of the middle so that you have a nice little cup to fill with sauce, and then you can add whatever toppings you like too. 

For these, I filled the cucumber cups with a thick peanut sauce, then sprinkled sesame seeds, chopped peanuts, and shredded carrot on top of each one (see above picture for a visual of the process). Everything comes together into one bite that's creamy, crunchy, a bit spicy, and refreshing all at once!

I shared these with a group of friends and everyone loved them, so I'm sure I'll be making them again whenever I need a light, veggie-based appetizer - which will probably be often this summer!


Thai Peanut Cucumber Cups
Inspired by The Fig Tree and Vegetarian Times

1/2 cup peanut butter
4 tsp sweet chile sauce
1.5 tbsp rice vinegar
2 tsp sesame oil
2 tsp soy sauce
1 clove garlic, minced
Dash of ground ginger (or fresh ginger, I just didn't have any!)
pinch of red pepper flakes
1 tbsp water
1 English cucumber
~1/3 cup shredded carrot
Sesame seeds
Chopped peanuts


To make the peanut sauce, stir together the peanut butter, chile sauce, rice vinegar, sesame oil, soy sauce, garlic, and ginger until smooth. Add the water to thin out a bit. Set aside or store in the fridge until needed.

Slice the cucumber into pieces about 1 inch thick. Use a melon baller or a ½ tsp measure to scoop out the middle seedy portion of each slice – don’t go all the way through, you still want a bit of cucumber at the bottom of each cup!

Lay out cucumber cups on a plate or serving dish. Spoon the peanut sauce into each cup (I just estimated how much to put in – you want a round mound in the middle of each cup but not too much that it overflows). 

Sprinkle a bit of sesame seeds on top of the peanut sauce in each cup, followed by a bit of shredded carrot and crushed peanuts – it might help to do the peanuts first so they stick to the peanut butter, then finish with the carrots, but the order doesn’t really matter!

Refrigerated finished cucumber cups until serving time.

Makes enough for about 20-22 cups.


January 16, 2014

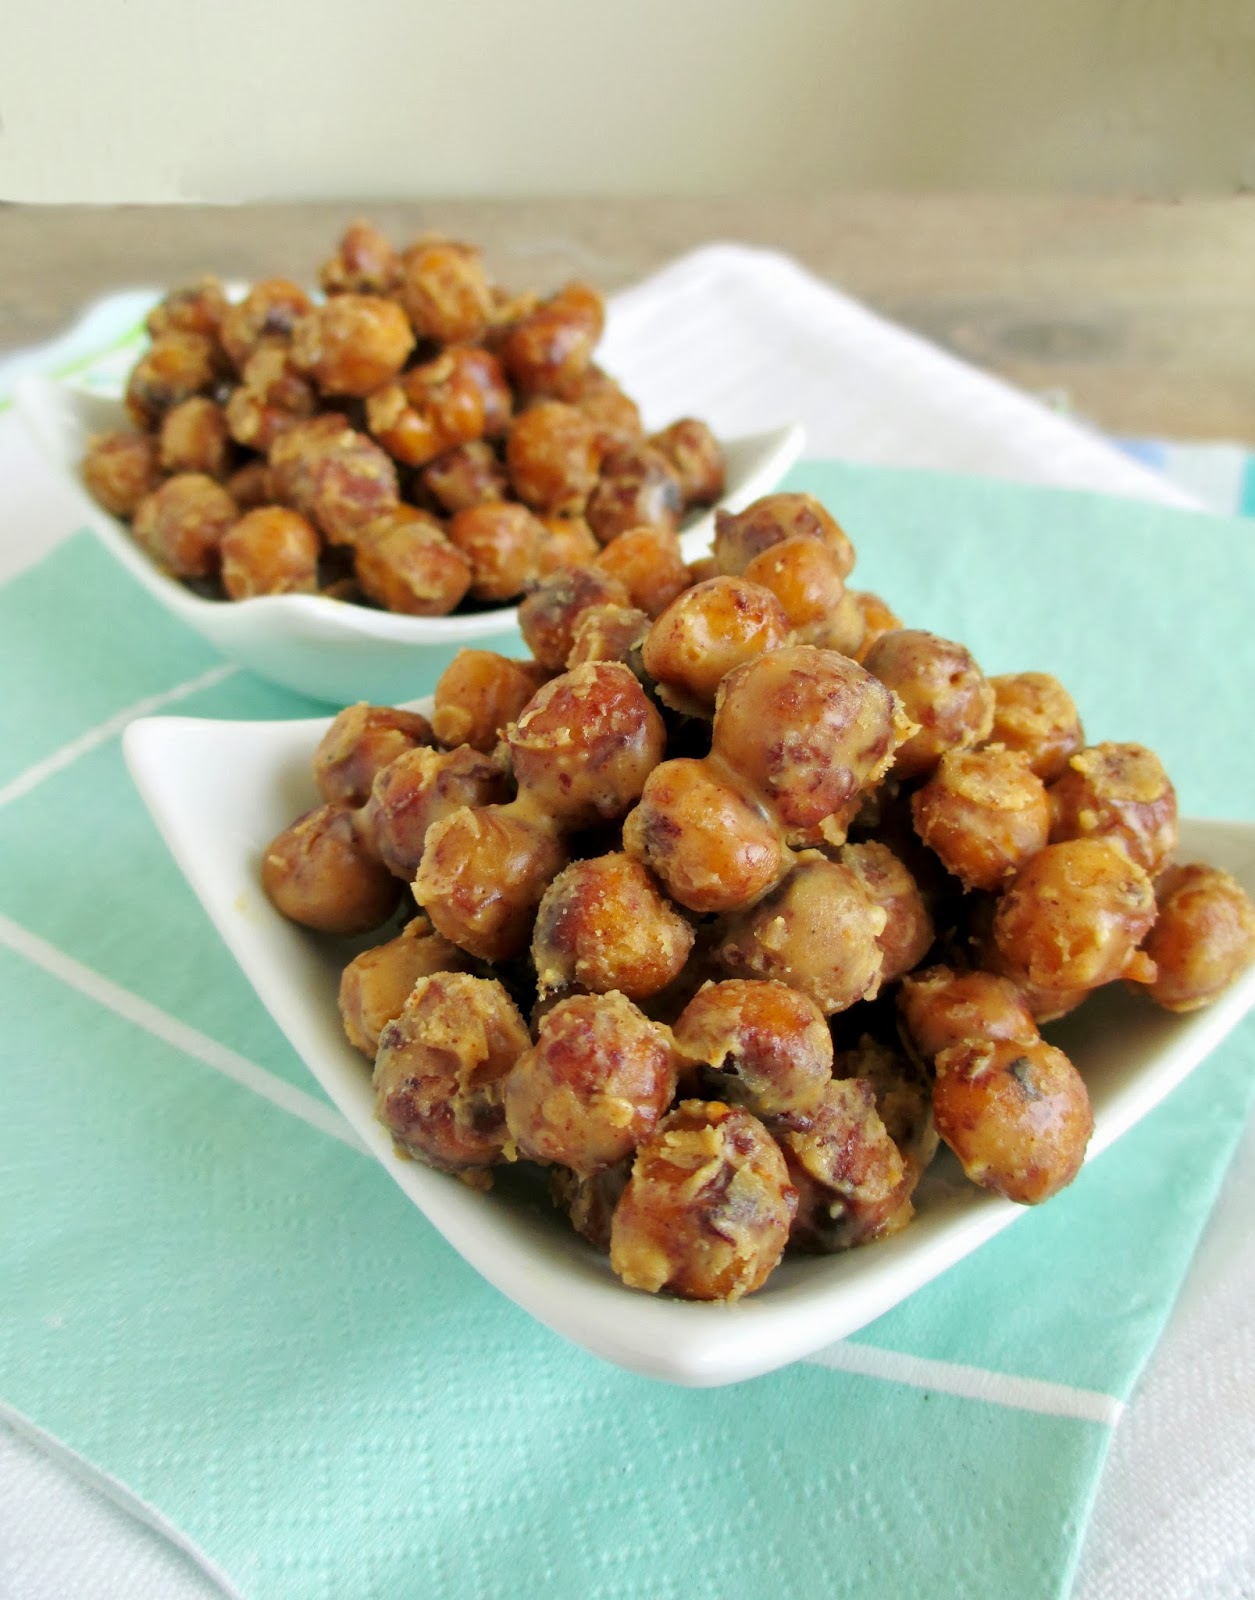
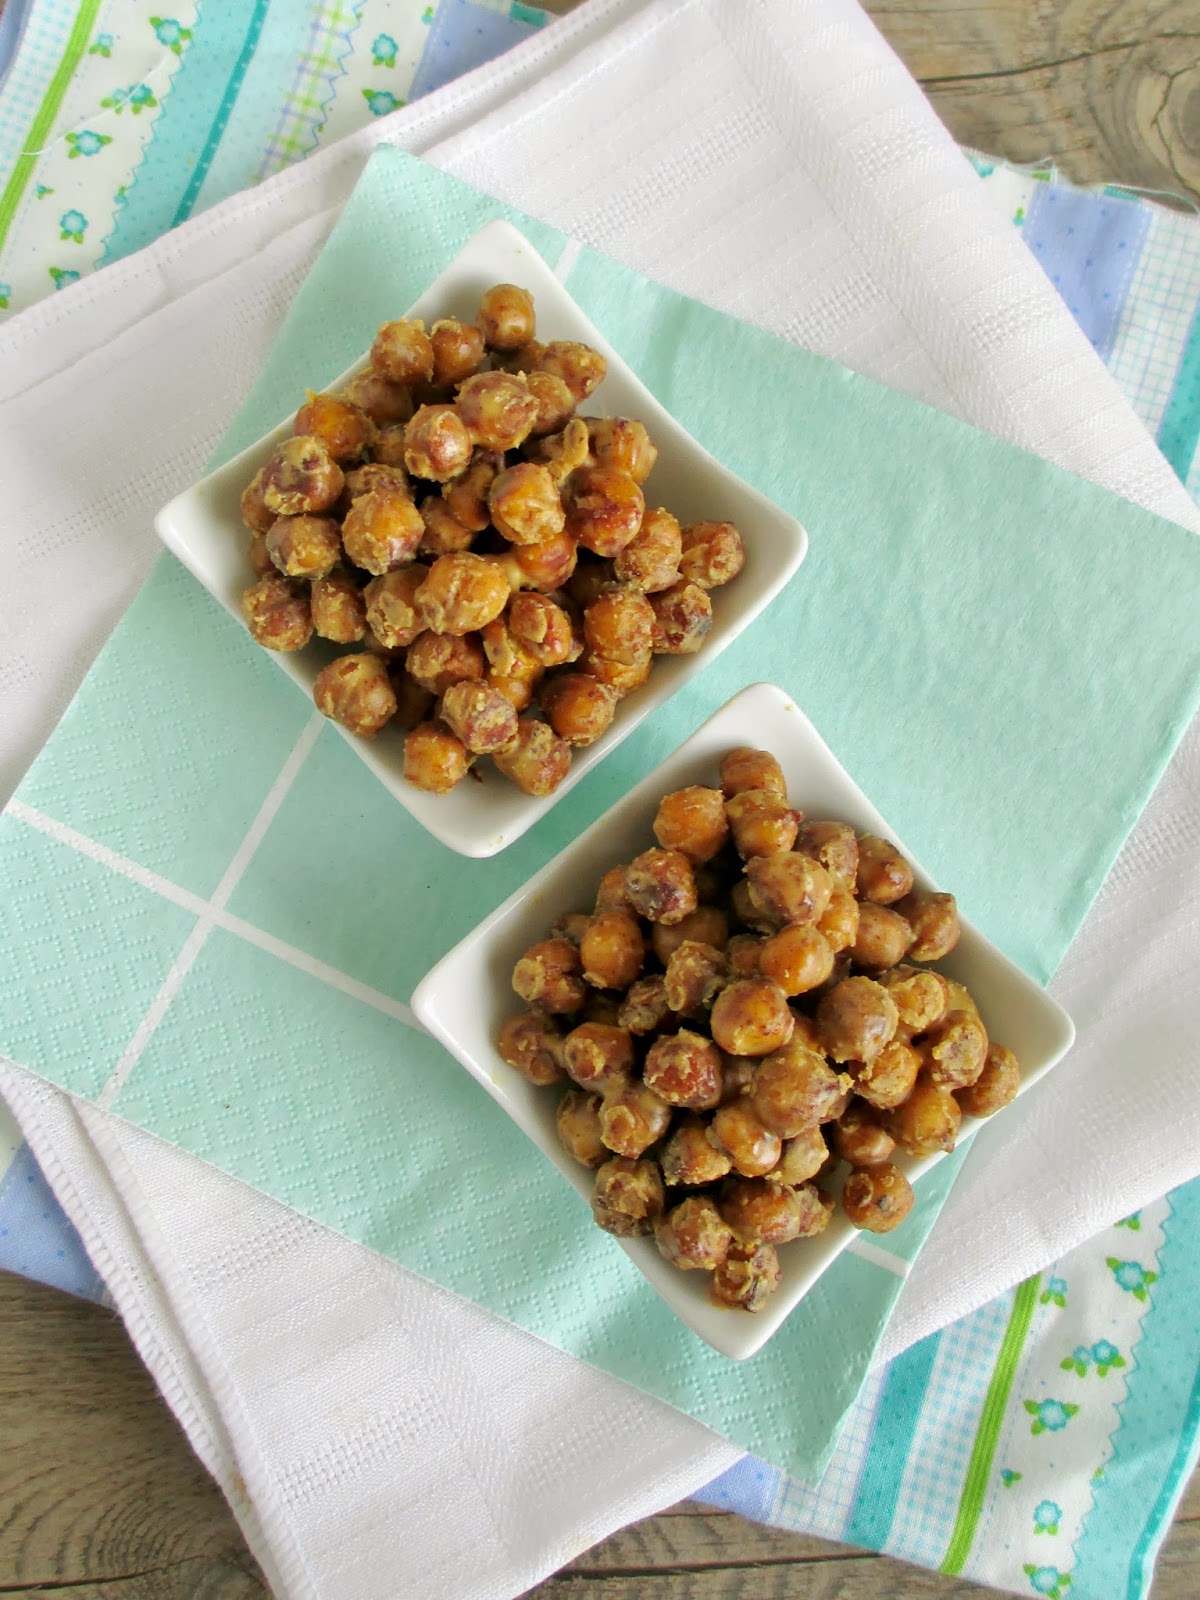
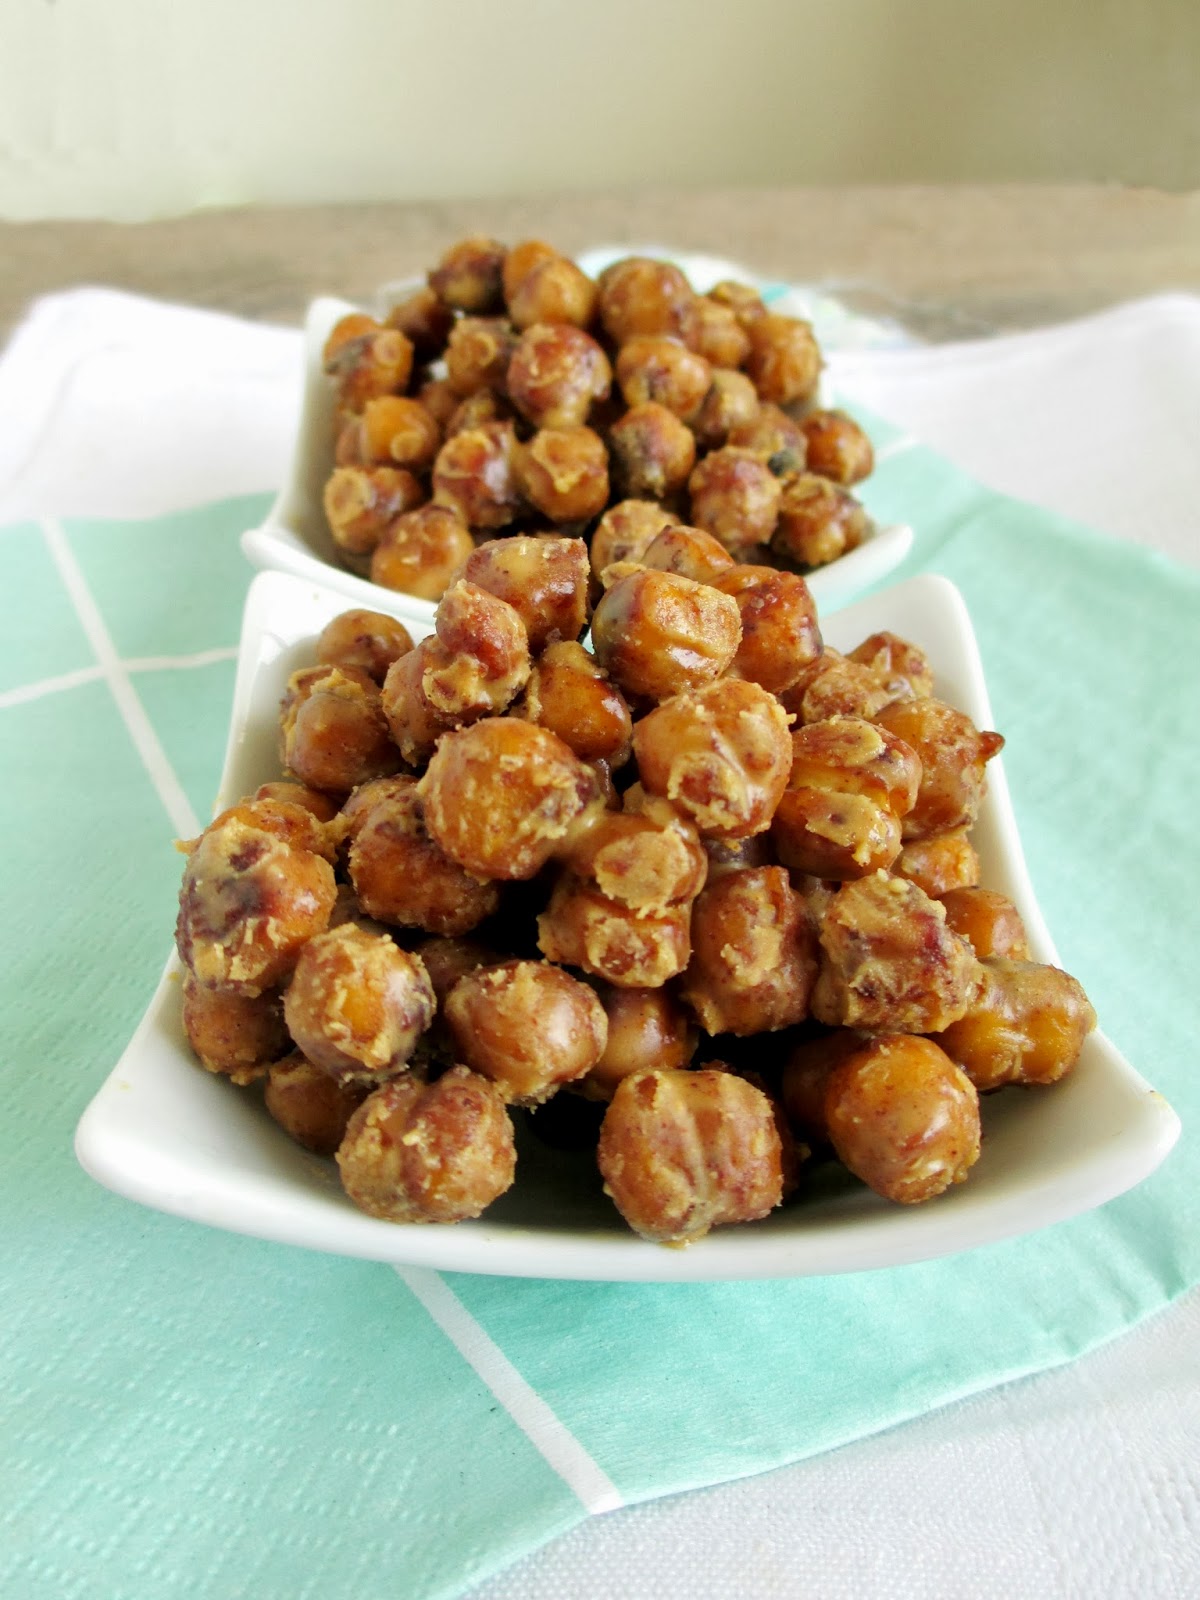
Peanut Butter Roasted Chickpeas


With both awards show season and football playoffs having started this month, it's the perfect time to load up on snack ideas for evenings in front of the TV with friends and family (or even if you're not into sports and awards shows, which I'm sure a lot of people aren't, hopefully you can still use some more healthy snack ideas!).

Last weekend, I watched the Golden Globe Awards in addition to some football (but only because my sister's favourite team was playing). And with the bigger events that I always look forward to - Super Bowl and the Oscars - coming up soon, I spent my Sunday testing out some new snack recipes!

The first snack that I came up with were these peanut butter roasted chickpeas. I've seen a lot of recipes for roasted chickpeas where the chickpeas are coated in various combinations of spices and baked in the oven until crispy, and I've tried them once myself and liked them as a different snack option than usual.


Instead of a savory snack this time though, I wanted to try a sweeter variation. I considered coating the chickpeas in chocolate, like the Nourishing Gourmet did, but since I'm not a huge chocolate lover, I thought that peanut butter would make an even tastier coating!

These were super simple to whip up - all you need to do is toss the chickpeas in a bit of coconut oil, add cinnamon, agave, and vanilla for flavouring, and roast them in the oven until they get nice and crispy. Once they're done, you toss the warm chickpeas in a peanut butter and coconut oil mixture until each one is coated.

Sprinkle on some salt and sugar and you have a slightly sweet and salty snack to munch on that's still pretty nutritious too!


Peanut Butter Coated Roasted Chickpeas

1 cup canned chickpeas, rinsed and drained
1 tsp melted coconut oil
1/2-1 tbsp agave nectar (I used 1/2 tbsp and they weren't too sweet)
1/4 tsp vanilla
1/2 tsp cinnamon
Dash of salt
2 tbsp peanut butter 
1/2 tsp coconut oil*
Salt and sugar to taste (optional)


Preheat oven to 375°F and line a baking sheet with parchment paper. Place the chickpeas in a small bowl and add the melted coconut oil, agave, vanilla, cinnamon, and salt. Stir to mix thoroughly. Spread chickpeas out on the prepared baking sheet in a single layer and bake for 35-40 minutes, stirring once, until toasted and crispy. Remove from oven and transfer to a bowl.

Place the peanut butter and coconut oil in a small microwavable bowl and microwave for 10-20 seconds, until coconut oil is melted. Stir to mix well, then pour over the chickpeas. Stir until chickpeas are evenly coated. Spread coated chickpeas onto a plate and place in the refrigerator (or freezer if you're in a hurry) to cool. Once the peanut butter is a bit hardened, remove from fridge and bring to room temperature. Sprinkle with salt and a pinch of sugar if desired (I added both because my peanut butter was the natural kind without added salt and sugar).

Store in the fridge and eat cold or at room temperature. Best eaten on the day of, but they will last one or two days in the fridge.

Makes 1-2 servings (depending on how hungry you are - double the recipe if you're making these for a group)

*Note: the coconut oil in the peanut butter coating is what makes it firm up in the fridge (since coconut oil is solid at cool temperatures). I have not tested this with other types of oil, which may not harden as well. 

October 02, 2013

Curried Sweet Potato, Apple & Peanut Soup


I realize I'm a bit behind in posting fall recipes, and now that it's officially October - the month of all things pumpkin, Canadian Thanksgiving, and Halloween - it's about time that I shared a warm and comforting Autumn soup!

I was craving a creamy spiced soup recently and sweet potato seemed like the perfect ingredient to make a flavourful and thick base. When I saw this recipe online for a curried sweet potato and apple soup, I was intrigued by the combination of ingredients and thought it sounded appropriate for the season with the warm spices and apple.

For my version, I changed up the spices a bit, used vegetable broth as the liquid instead of water, and at the last minute I decided to add a dose of peanut butter to the soup since I love peanut flavoured dishes and I know that it complements both sweet potato and apples really well too.


I tend to prefer thick and creamy soups that I can dip bread into, and this one definitely fell into that category. It also had a nice amount of heat from the spices without being too spicy, and a touch of sweetness from the apple and sweet potato.

If you love peanut butter, I definitely recommend including it as it adds a richness and just the right amount of peanut flavour. But I also tasted the soup before adding it and I loved it that way too, so it's up to you!

I just regretted not making a double batch of this recipe because as soon as it was gone I wished I had more!


Curried Sweet Potato, Apple & Peanut Soup
Adapted from Prevention Magazine 

1/2 tbsp olive oil
1 small yellow onion, diced
1 large clove garlic, minced
1/2 tbsp minced fresh ginger
3/4 tsp curry powder
1/2 tsp cumin
1/4 tsp salt
1/8 tsp nutmeg
Pinch of red pepper flakes (optional for extra heat)
3/4 lb diced and peeled sweet potato (about 1 large sweet potato)
1 large apple, diced
2 cups vegetable broth
2 tbsp peanut butter
Crushed peanuts and plain yogurt for serving (optional)


Heat oil in a large saucepan on medium heat. Add the onion and garlic and cook, stirring often, for about 4 minutes. Stir in the ginger, curry powder, cumin, salt, nutmeg, and red pepper flakes (if using), then add the sweet potato, apple, and vegetable broth to the saucepan. Bring to a boil, then cover and reduce heat to medium-low. Simmer for about 20 minutes, until the sweet potato has softened.

Transfer soup to a blender in two separate batches and puree until smooth. Return soup to saucepan and stir in the peanut butter until it is completely melted.

Serve hot, topped with a spoonful of yogurt and a handful of crushed peanuts on each serving if desired.

Makes 2 large servings or 3 smaller servings (you can easily double the recipe for a larger batch)

April 12, 2013

Brussels Sprout, Cabbage & Tofu Slaw with Coconut-Peanut Dressing


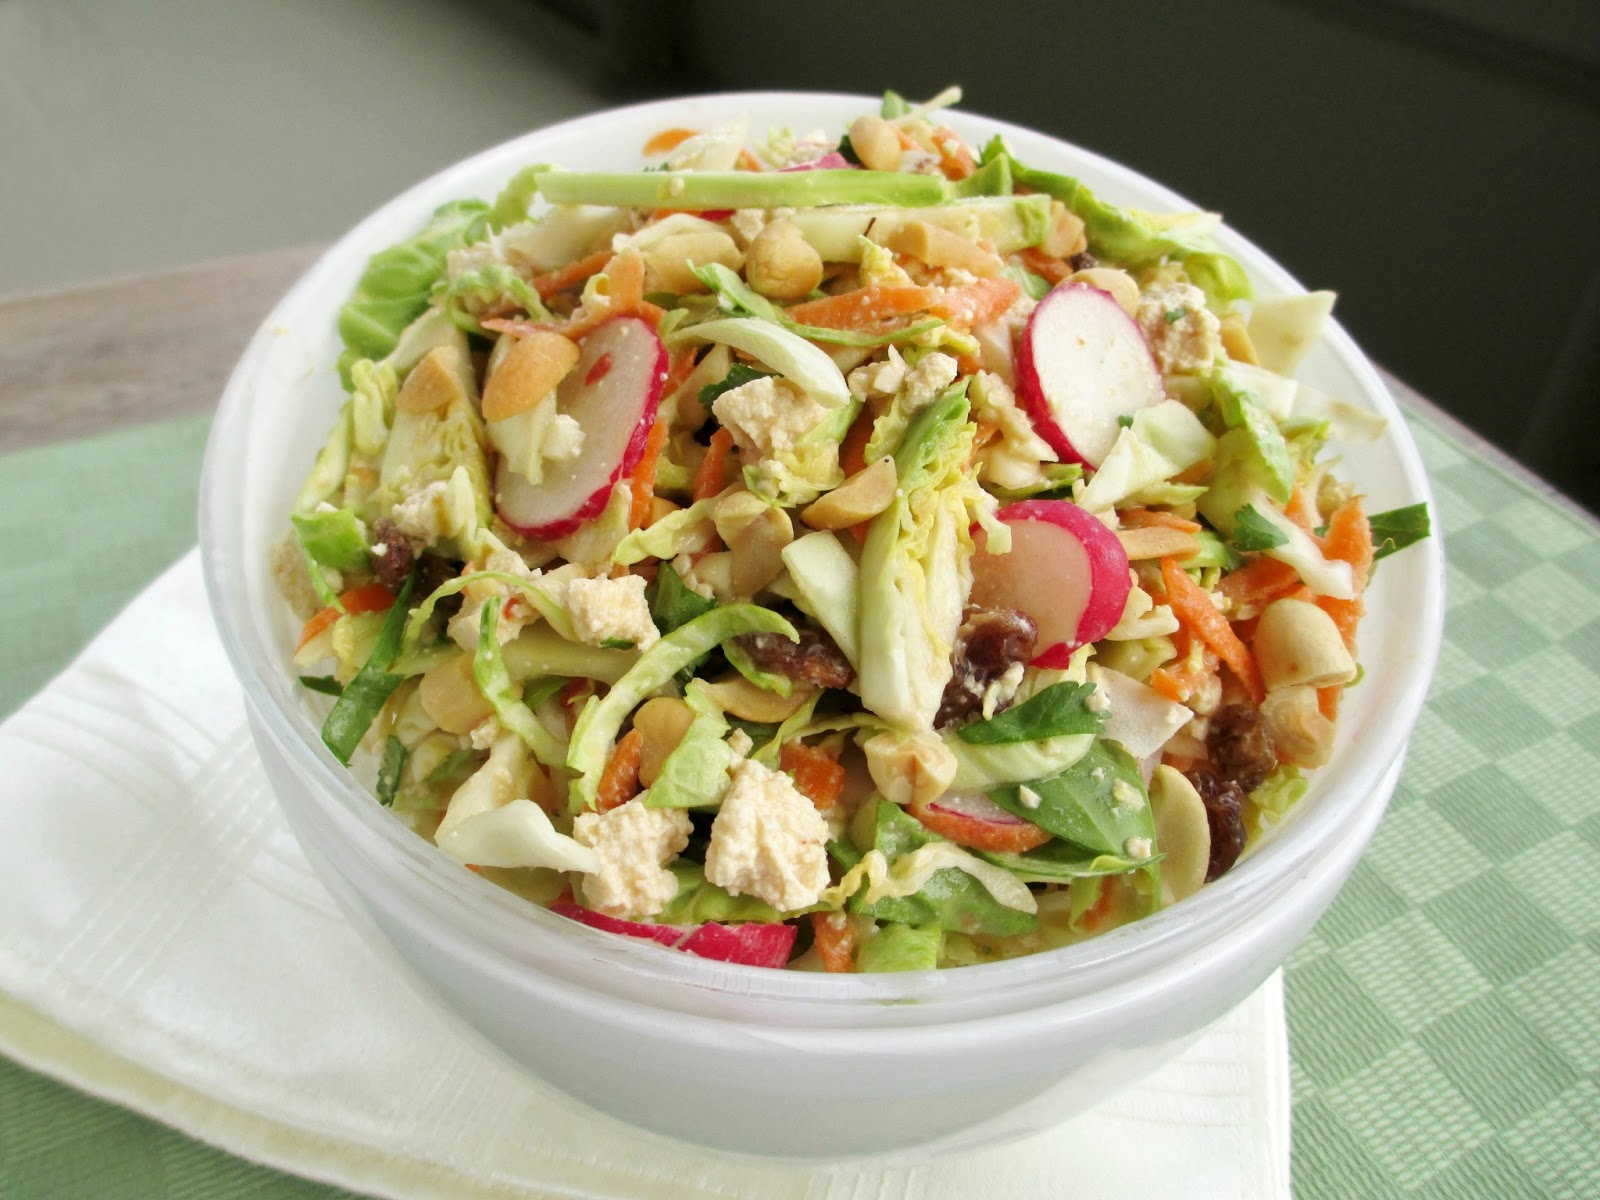
Today's post is one of the more interesting salads I've had in a while. I'm not really sure whether to call it a twist on tofu salad, or a twist on cabbage slaw, so I guess it's a cross between the two!

The bulk of this slaw, which I adapted from Peachy Palate, comes from a mixture of shredded cabbage and raw brussels sprouts. If you've never had raw brussels sprouts, you might be surprised to hear that you can actually eat them just sliced up and tossed in a salad without any cooking. I like the crisp texture and the mild flavour that they add, although of course if you already hate brussels sprouts then I'm not going to try to convince you to try them raw!

The second main component of this slaw is crumbled tofu. Again, it isn't cooked - just drained from the package and crumbled up with your hands, and again, if you're nervous about trying tofu this way then don't worry - it will soak up the dressing really well and tastes delicious!


The dressing is one of my favourite types - a peanut butter based dressing with a bit of lime juice, garlic and ginger, and thinned out with coconut milk. The coconut milk and agave nectar in the dressing put it more on the sweet side rather than spicy, which I thought was appropriate for this salad. I ended up with a bit of extra dressing but I used it all anyway and happily slurped up the excess from the bottom of my bowl!

Once you mix everything together, you end up with a cool and refreshing salad with a lot of different textures, from the creamy tofu to the crisp veggies. The final touches are a handful of peanuts for extra crunch, as well as raisins and coconut flakes to add even more layers of flavour.

This recipe makes a pretty big batch, but it holds up well in the fridge so I was able to enjoy it all week!


Brussels Sprout, Cabbage & Tofu Slaw with Coconut-Peanut Dressing
Adapted from Peachy Palate

3 cups thinly sliced Brussels sprouts (ends trimmed and outer leaves removed first)
2 cups shredded or thinly sliced green cabbage
1 cup shredded carrot (about 1 medium carrot)
1/2 cup thinly sliced radish
1/4 cup chopped fresh cilantro
~250 grams firm tofu, drained
1/4 cup sultana raisins
1/4 cup large flaked coconut, toasted
1/4 cup chopped peanuts

Dressing
1 cup unsweetened coconut milk beverage*
1/4 cup + 1 tbsp peanut butter
1 tbsp lime juice
2 tsp agave nectar
1 tsp minced fresh ginger
2 small cloves garlic, peeled and minced
1/4 tsp kosher salt
1/4 tsp red pepper flakes
Ground pepper to taste

First, make the dressing by combining all ingredients in a bowl or large measuring cup. Whisk until the peanut butter is thoroughly mixed in. Store in the fridge while you prepare the salad.

In a large bowl, combine the shredded brussels sprouts, cabbage, carrot, radish and cilantro. Toss to mix. Crumble the tofu using a fork or your hands and add to the bowl. Add the raisins. Pour the dressing over everything and toss to mix (Note: you may not need all the dressing).

Toast the coconut in a small skillet over medium heat for a few minutes, until lightly browned. When ready to serve, top the salad with the toasted coconut and peanuts.

Makes 4 large servings.

*I used a non-dairy coconut milk beverage, which made my dressing a bit thinner than it would be with full-fat canned coconut milk. Also, if you use a regular coconut milk beverage instead of unsweetened, you might want to reduce the agave a bit.

March 25, 2013

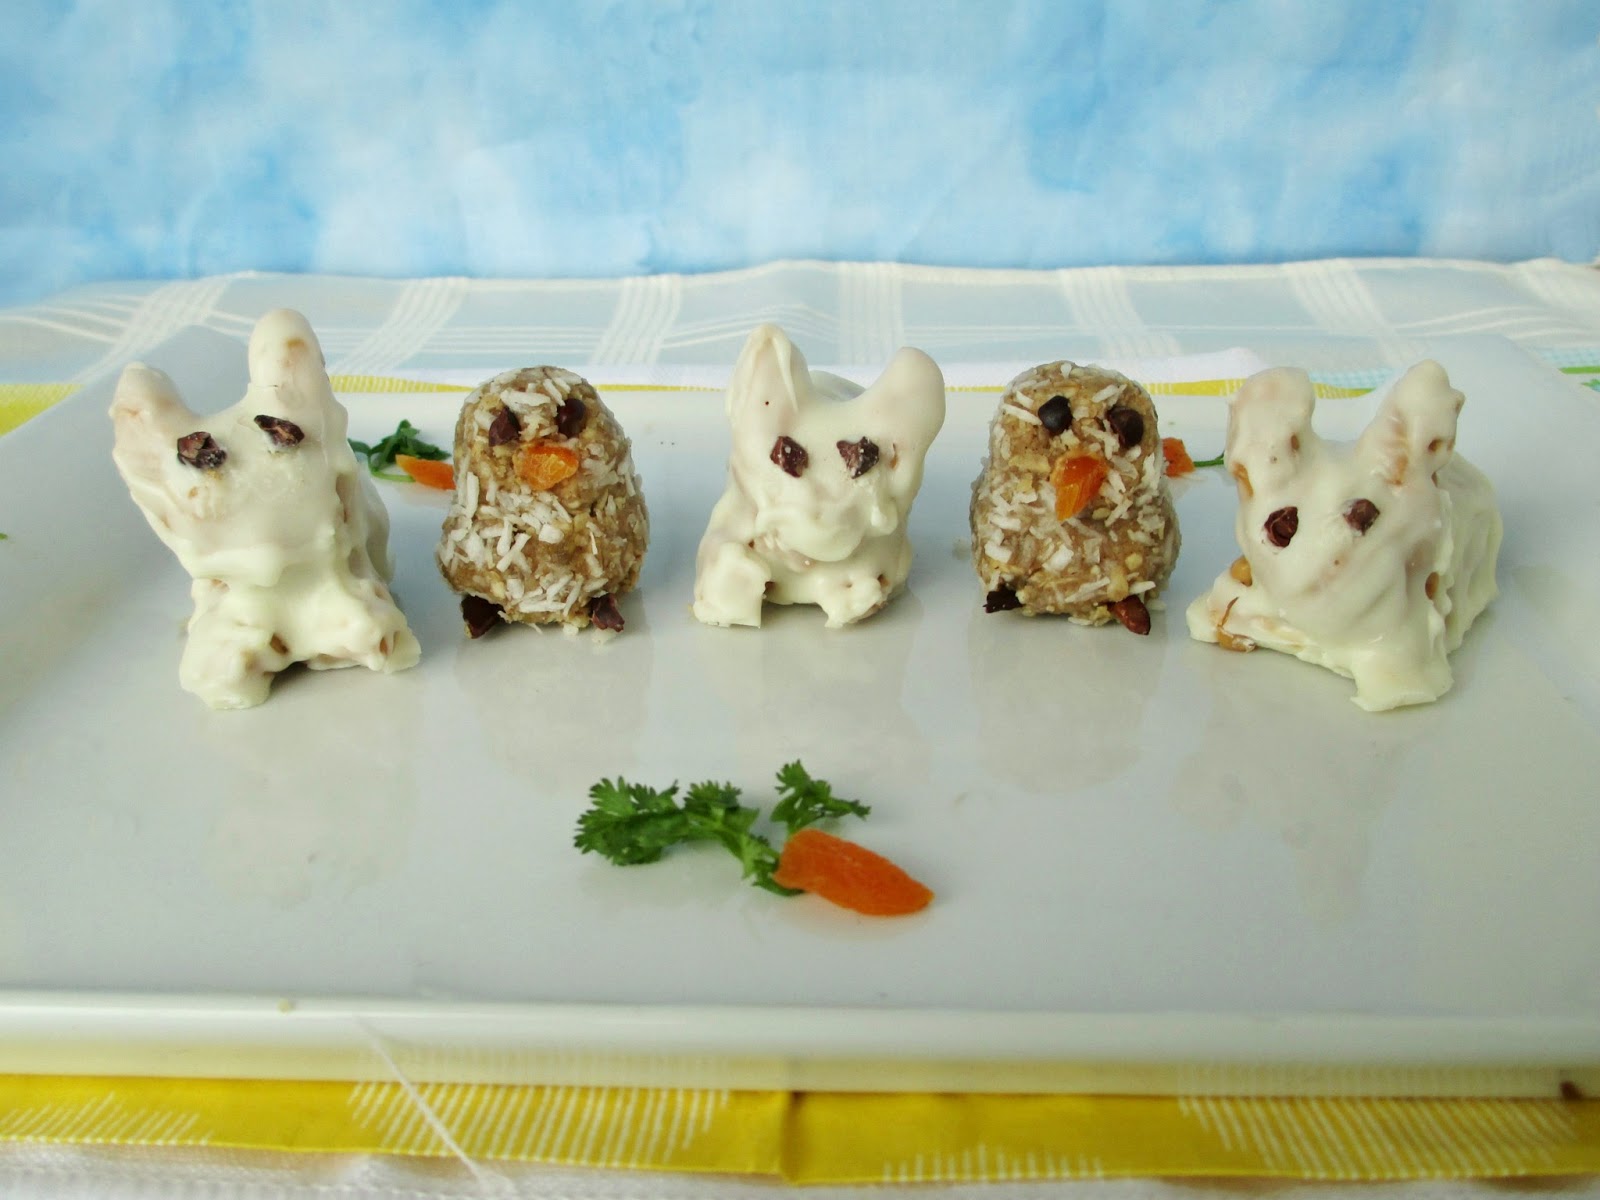
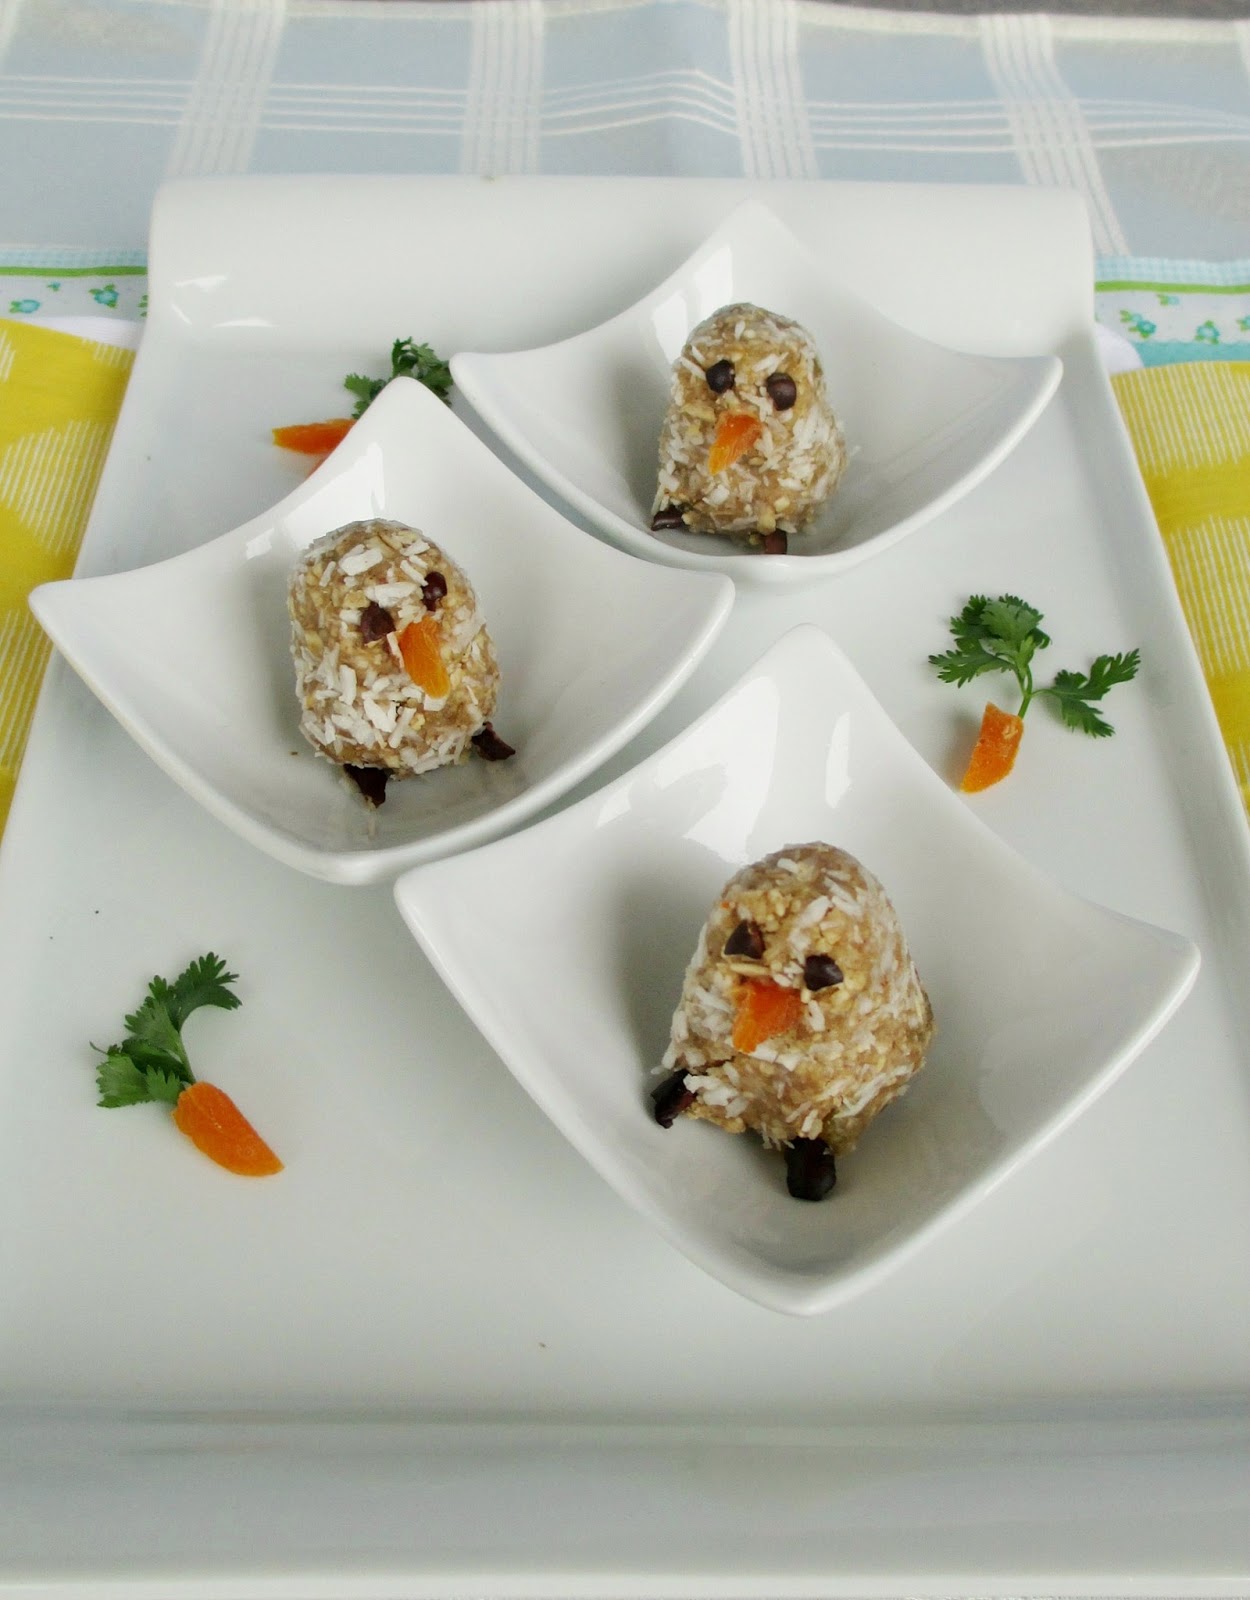
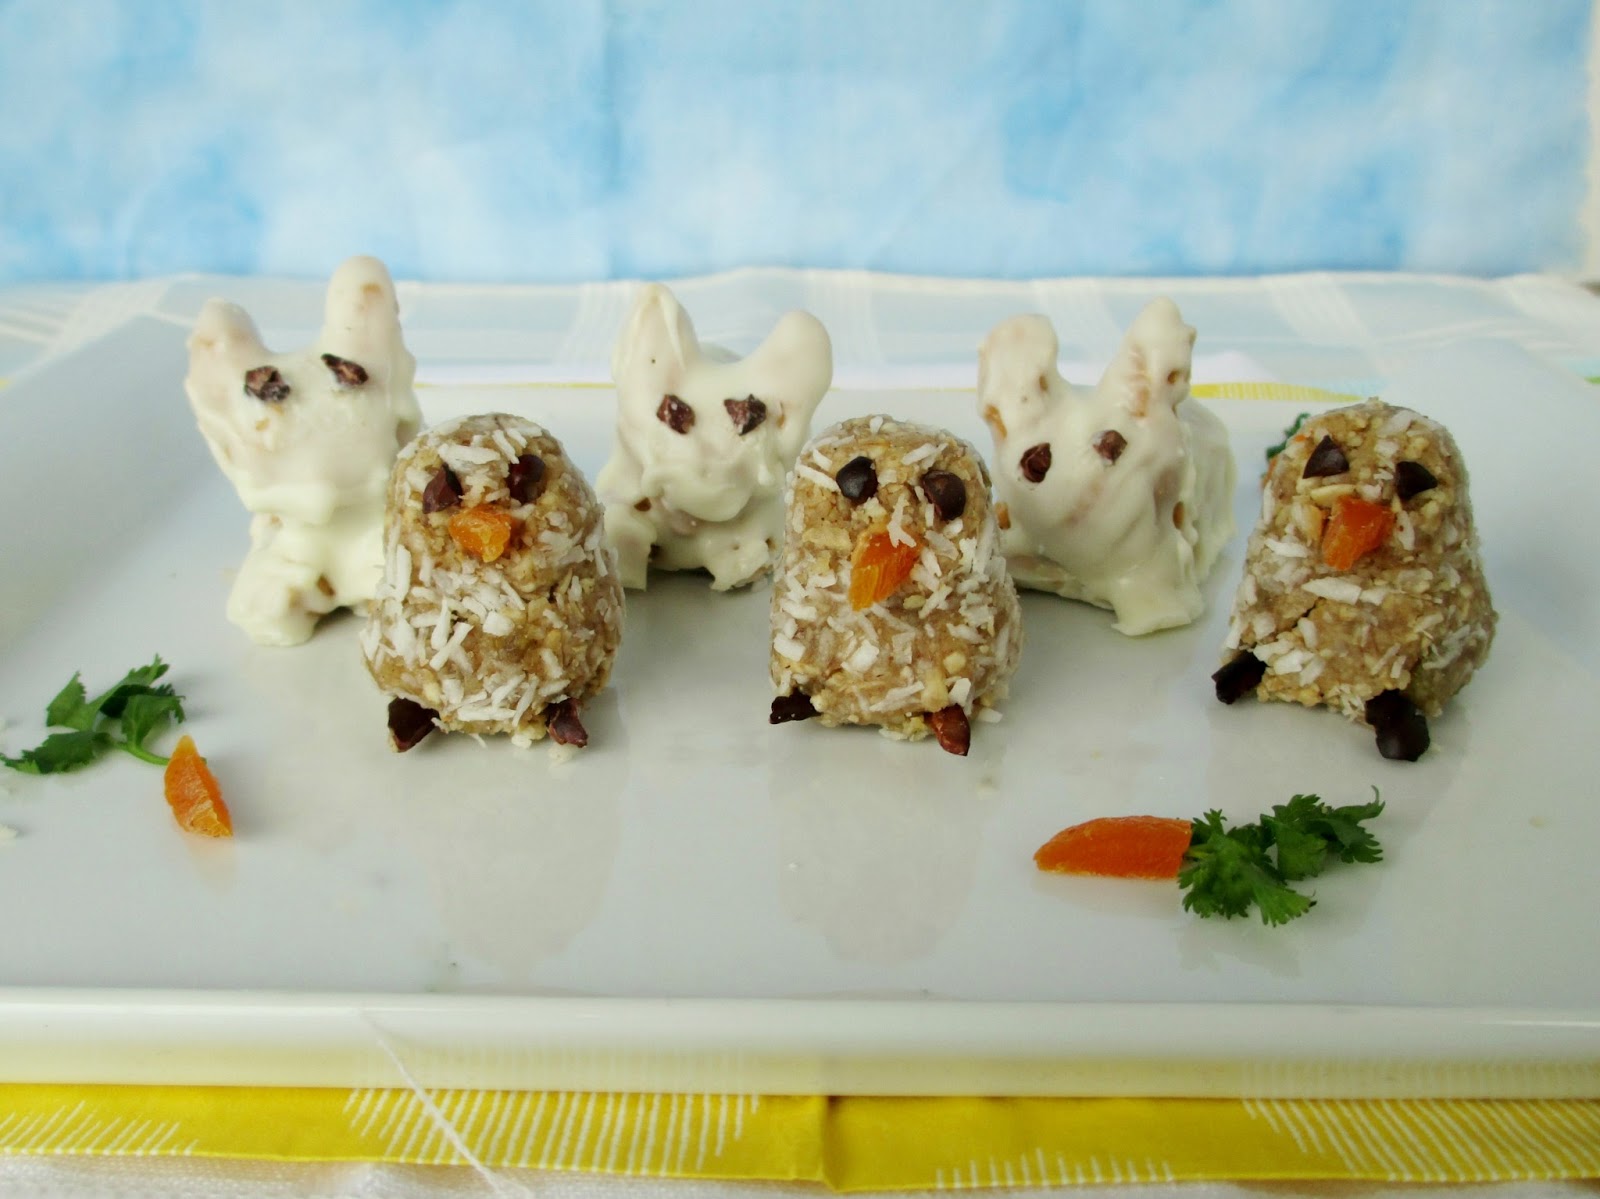
Peanut Butter Bunnies and Raw Cookie Chicks for Easter


If you've been following my blog for awhile, you've probably realized that I love to make themed recipes for every holiday that comes around, and Easter is no different!

I couldn't wait to share these Easter themed treats that I made last week because they actually turned out even more adorable than I had imagined!

I started developing these chicks and bunnies in my head when I was bored (ie. procrastinating) one day. I knew I wanted to make healthy-ish, bite-sized, no-bake treats and since I came up with different ideas for both chicks and bunnies, I decided to make both.


The chicks are a raw cookie base, like the energy balls that I'm used to making as snacks for myself. I went with a mixture of cashews, walnuts and oats with a dash of cinnamon and salt to get a cookie flavour. And while I would usually use dates in a raw cookie recipe to add sweetness and stickiness, I went with golden raisins this time so that the chicks would have a light, golden colour.

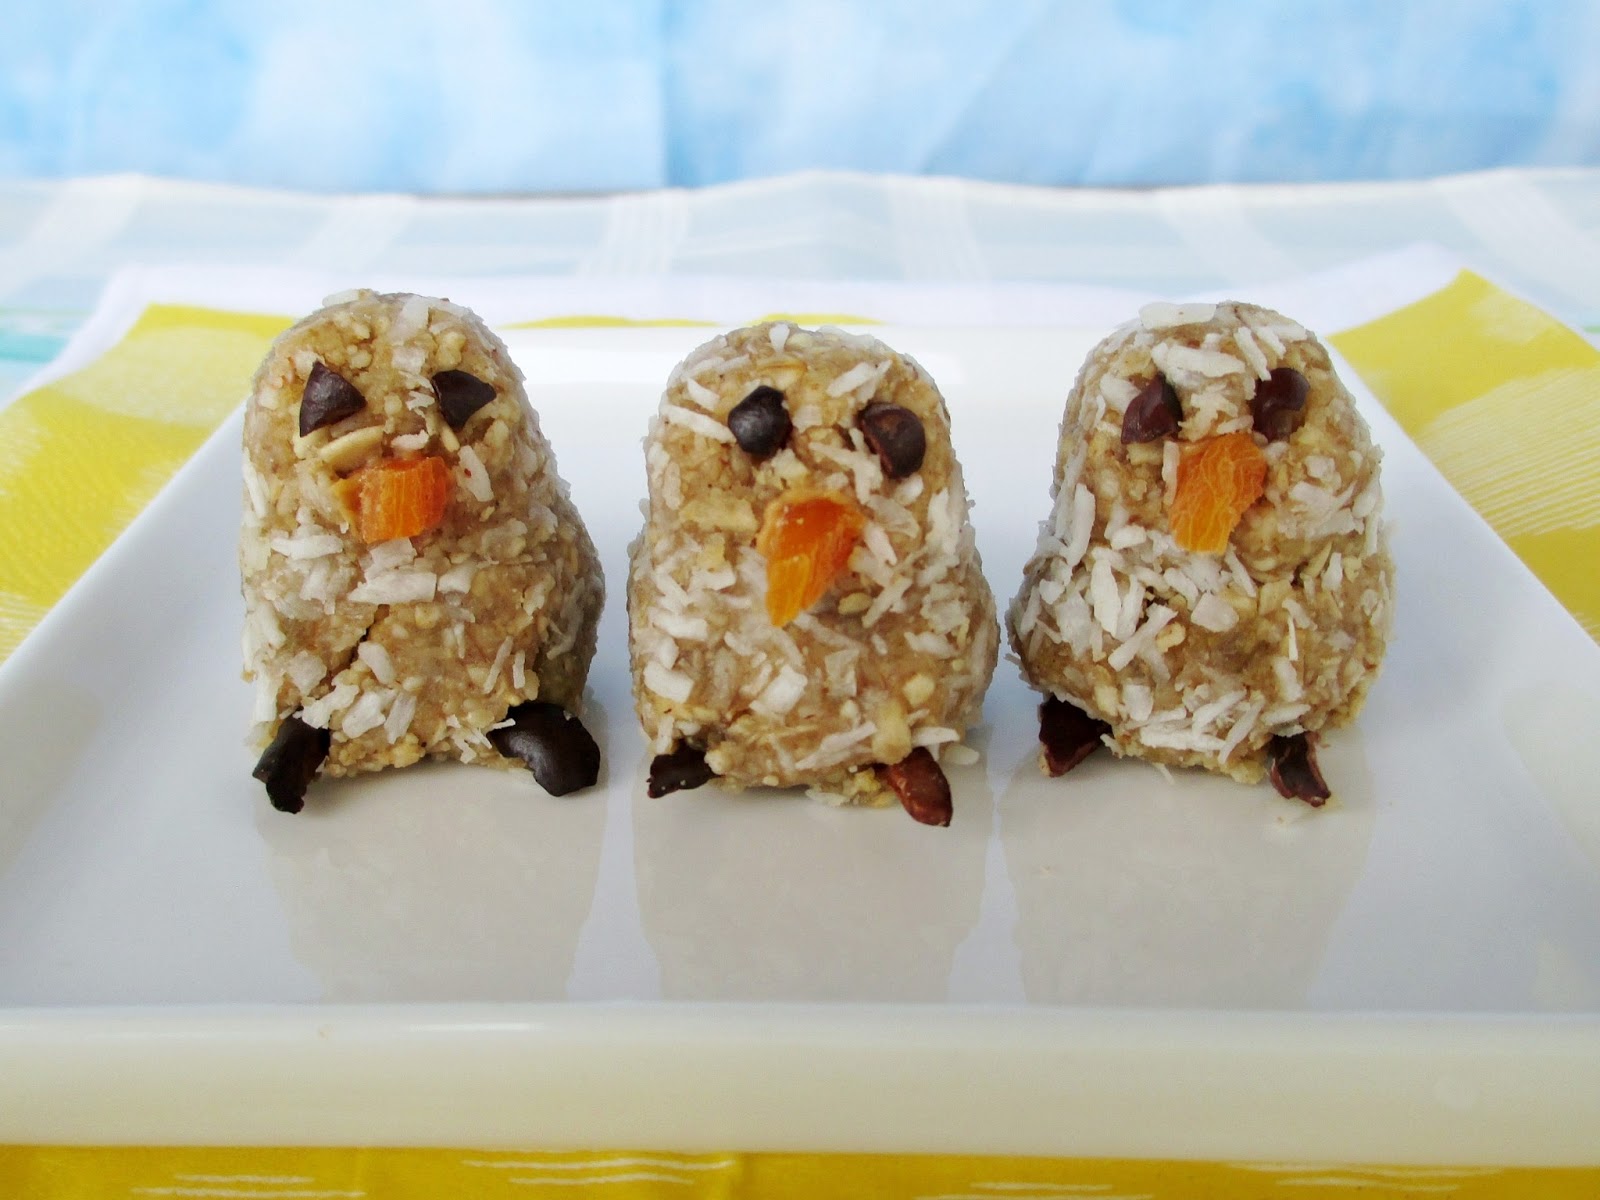
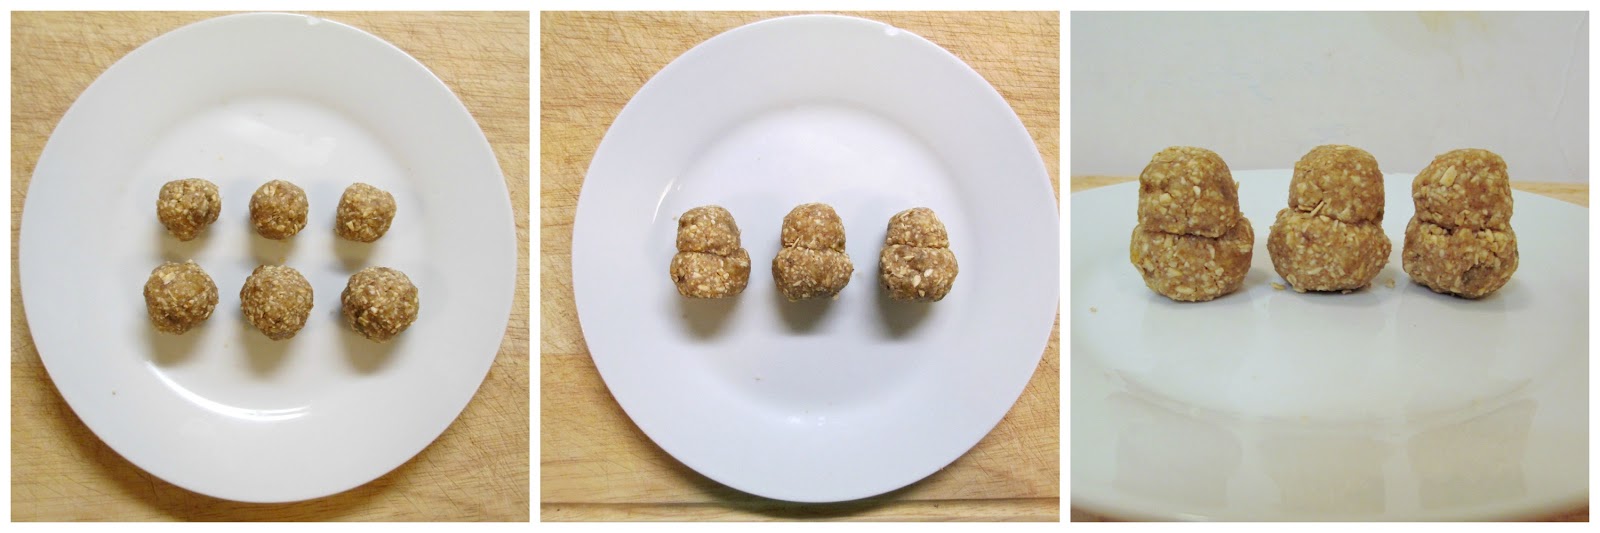
Once I shaped the cookie mixture into chicks, I rolled them in coconut to create a feather effect, and decorated them with raw cacao nibs and dried apricots to complete their features.


While they certainly weren't perfect (especially the one on the left!), they did end up looking like chubby little baby chicks, which was what I was going for!

The chicks themselves had just the right texture - chewy and crumbly, with a touch of sweetness from the golden raisins and a hint of coconut flavour.  They did taste more on the healthy side rather than a dessert (especially since I forgot to add any extra sweetener), but as long as you're not expecting a sweet, rich treat than I think you'll love them as a snack!


These bunnies on the other hand, are definitely on the tasty dessert side of the scale!  The filling is a mixture of creamy peanut butter with a bit of icing sugar for sweetness and rice puffs for crispiness. I also added a bit of coconut flour to help thicken the mixture and make it a bit easier to work with.

I wasn't really sure how to go about creating rabbit shapes from scratch, but managed to make shapes of different sizes from the peanut butter mixture and stuck them together to create something that (hopefully) resembles bunnies!

Once I had formed the bunnies, the last step was to coat them in melted white chocolate so that they would have a firm shell in a nice Eastery white colour (although as you can see, I didn't do a very clean job with the coating so bits of brown are still poking through!). Of course, you're welcome to use dark chocolate instead if that's your preference!


I admit I did feel a bit guilty when I first went to bite one of these little guy's heads off, but once I knew how delicious they tasted, all my guilt went away!

I loved the creamy peanut butter filling mixed with the white chocolate coating, and the rice puffs helped to lighten up the texture a bit so that it didn't taste as rich.

The only downside of the bunnies was the effort and time it took to make them, especially since you need to keep chilling the mixture in between steps. That was one reason why I only made small batches of each treat for myself, but feel free to double or triple the recipes below if you want to share these Easter treats with others!


Note: the recipes below include instructions for shaping into chicks or bunnies. If you don't have time to do this, you can still use the recipes to make simple ball shapes, like truffles, instead!

Raw Cookie Chicks

2 tbsp raw cashews
2 tbsp raw walnuts
2 tbsp rolled oats
Dash of cinnamon
Dash of sea salt
2 tbsp golden raisins
1/4 tsp vanilla extract
1/2-1 tsp agave nectar (I forgot this and I still liked them - they just weren't very sweet)
1 tbsp unsweetened shredded coconut
1/2 tbsp non-dairy milk
Dried apricot and raw cacao nibs for decorating


Place the first five ingredients in a food processor and process until finely ground. Add the raisins, vanilla and agave and process again until it forms a sticky mixture. 

Roll dough into 6 balls - 3 should be a slightly bigger size for the bodies and 3 should be smaller to form the heads. Carefully stick the heads onto the bodies, pressing together to make sure it sticks and reforming the balls so that they keep their shape. (see pictures below):


Place the coconut on a shallow plate. Brush the milk onto the outsides of the chicks and then roll chicks in the coconut, pressing in to help it stick. 

Push two small cacao nibs into each head to make eyes, and two more cacao nibs into the bottom of each body to make feet. Cut small slices of dried apricot into triangle shapes and stick on to each head to make noses (Note: If the nose won't stick on its own, dot some peanut butter on the end first to help it stick). 

Store in the fridge. 

Makes 3 chicks


Peanut Butter Bunnies

1/4 cup smooth peanut butter
1 tbsp icing sugar
1/4 tsp vanilla extract
Dash of sea salt
1 tbsp coconut flour
1/4 cup rice puffs (I used kamut puffs and chopped them in half to make smaller pieces)
~2 oz white chocolate (can substitute vegan chocolate chips)
1/2 tsp coconut oil
Cacao nibs for eyes


In a small bowl, stir together the peanut butter, icing sugar, vanilla, salt, and coconut flour until smooth.  Stir in the rice puffs. Chill mixture in the fridge for at least 15 minutes to firm up.

Roll mixture into shapes to make the bunnies: you will need 3 larger ovals for the bodies, 3 small round balls for the heads, 6 thin logs for the ears, 3 tiny balls for the tails, and 6 small ovals for the feet. I recommend forming the shapes in stages, chilling in between (as soon as the mixture gets too soft to work with, stick it back in the fridge for about 10-15 minutes before continuing).

Put the shapes together to make three bunnies: Lay the oval shaped body on the plate, stick the head onto one end, add the ears to the head, place the tail on the back end of the body, and stick the feet onto the front end of the body. Place bunnies in the freezer for 10-15 minutes to firm up. 

Meanwhile, heat the white chocolate in the microwave on high for 1 minute. Add the coconut oil and microwave again for 15 seconds. Stir until smooth and heat once more if it is not melted yet. 

Use a spoon or small spatula to spread the melted white chocolate onto the bunnies. As soon as you coat one bunny, stick the cacao nibs on for the eyes (Note: if the chocolate hardens before you can add the eyes, just dip one side of the cacao nib into melted white chocolate and then stick it on the head). Let the coated bunnies firm up in the fridge. 

Store in the fridge and serve chilled or at room temperature. 

Makes 3 bunnies. 

January 24, 2013

West African Vegetable Stew


For those of you living in areas that have been hit by the arctic cold weather this past week, I think you'll appreciate today's post for a big pot of healthy vegetable stew!  I made this on Sunday night and with six servings to enjoy, it's been getting me through the deep freeze this week (although I sadly just ate up my last serving for lunch today).

Ever since my trips to Zambia and Kenya this past year, I've been wanting to try cooking more African-inspired dishes.  So I was intrigued when I noticed a recipe for "mafe" in one of my new cookbooks and learned that it is a West African peanut stew traditionally made with meat, but this version was adapted to be vegetarian.

I combined that recipe with a similar one in another cookbook to come up with this variation on mafe.  The base of the stew is a flavourful blend of onion, garlic, ginger, and hot peppers.  Next, you add a mixture of vegetables - I used sweet potato, green pepper, okra, tomatoes and cabbage, which are cooked in vegetable broth and apple juice. Finally, you stir in some cilantro and a generous amount of peanut butter to thicken the broth a bit.


I was a bit nervous adding the cabbage and okra to this dish because I'm not really used to cooking with them. I also know that okra has kind of a bad reputation for being a slimy vegetable, but I had tried it in Zambia and loved it, so I was willing to give it a chance here!

And I was glad that I did - the okra basically blended in to mix with the other vegetables, adding some mild taste and texture without being too noticeable.  Actually, the okra and cabbage ended up being my favourite bits to eat in this stew!

This was definitely the kind of hearty dish that I needed this week - it both warmed me up and filled me up, and had a nice spicy heat to it that wasn't overpowering but still left me with a runny nose! Serve with some rice or couscous to help soak up the broth, and you've got a nice winter meal to enjoy!


West African Vegetable Stew
Adapted from Ripe From Around Here and Vegan Eats World

1.5 tbsp vegetable oil
2 small yellow onions, diced
2 cloves garlic, minced
2 jalapenos, minced
1-inch piece of ginger, peeled and minced
1 large sweet potato, peeled and diced into ½” cubes (about 3 cups)
1 tsp cumin
1 green pepper, diced
1/2 a small head of cabbage, chopped and core removed
2 medium tomatoes, chopped
3 cups vegetable broth
1 cup unsweetened apple juice
1/2 tsp salt
1.5-2 cups chopped fresh okra
1/2 cup peanut butter
1/4 cup chopped fresh cilantro, plus more for serving
4-6 tbsp chopped peanuts
Cooked rice or couscous for serving

Heat the oil in a large sauce pan over medium heat.  Add the onions and cook for about 10 minutes, stirring occasionally, until softened and starting to brown. Add garlic, jalapenos, ginger, and sweet potato. Stir in the cumin. Cover and cook for about 3 minutes.

Add the green pepper, cabbage, tomatoes, broth, apple juice, and salt. Simmer on medium heat, covered, for about 15 minutes, stirring occasionally. Add the okra and cook for 5 more minutes.

Place the peanut butter in a small bowl. Take about ½ cup of the hot broth and add it to the bowl. Stir until mixture is smooth, then transfer back to the pot and stir to mix it in.

Remove from heat and stir in cilantro.  Let cool slightly.  Serve over rice or couscous. Top each serving with a sprinkle of chopped peanuts, chopped cilantro and season with additional salt and pepper if desired.

Makes 5-6 servings

February 14, 2012

Vegan Crunchy Peanut Butter Cups


Happy Valentine's Day everyone!

If you're still looking for a decadent-tasting but healthy dessert to finish off your night, I've got just the thing for you - these miniature vegan peanut butter cups!

When I first saw these popped amaranth peanut butter cups on the blog My Little Celebration, I knew immediately that I had to make them! They're basically made of a layer of chocolate and a layer of peanut butter mixed with chopped peanuts and popped amaranth. 

Amaranth is a small grain that can be cooked and eaten like rice or quinoa and is high in calcium, protein and fiber. Another way to cook it is by popping it on the stove like popcorn. I had never tried amaranth before, but now that I know how much fun it is to pop it, I want to start making it much more often!

In my version of these treats, I replaced the butter with melted coconut oil and reduced the amount of powdered sugar because I didn't want them to taste too sweet. I also added some cacao nibs to the bottom layer and made them in my mini muffin pan to get smaller sized cups.


Once I had made them as the recipe instructed, I thought they'd be even better if I added another layer of chocolate on top so that the peanut butter layer was enclosed in the chocolate (like a Reese's cup). So I coated half of them with more chocolate and left the other half with the peanut butter layer showing. After tasting them both ways, I preferred the chocolate cups, so I recommend adding the extra top layer!

Even though I personally loved these, I should add a warning that if you're expecting these to taste like Reese's peanut butter cups, you will probably be disappointed.  Since my sister happened to have a mini Reese's cup lying around, I actually did a taste test to compare the two and I much preferred my healthier version! I find Reese's overly sweet and a bit artificial tasting, whereas these taste like real peanut butter and I loved the crunchy texture from the cacao nibs, chopped peanuts and the amaranth (although you could try leaving out the peanuts for a smoother filling).

This recipe does require some waiting time in between making each layer, but they still didn't take much time overall and were pretty easy to make. They also store well in the freezer, so you can take one out whenever you crave a treat!


Vegan Crunchy Peanut Butter Cups

1/4 cup natural peanut butter
1/2 tbsp melted coconut oil
1 tbsp powdered sugar
2 tbsp crushed peanuts
2 heaping tbsp popped amaranth (about 1 tbsp unpopped)
About 6 tbsp vegan chocolate chips, divided
1-2 tbsp raw cacao nibs

Prepare a mini-muffin pan by coating the cups with a bit of cooking spray.

First, pop the amaranth grains in small batches. Heat a small saucepan over medium-high heat. Once it is hot, add a small spoonful of amaranth and cover the pot with a lid. As the kernels begin to pop, shake the pot back and forth. Once it is has finished popping, remove from the heat immediately and transfer to a small bowl. Continue popping the amaranth in batches until you get two heaping tablespoons (I did this in 4 batches, but I burnt the first one!)

Prepare the peanut butter filling by combining the peanut butter and coconut oil in a bowl. Stir in the powdered sugar and crushed peanuts, then stir in the popped amaranth.

Melt 3 tbsp of the chocolate chips in the microwave or over a small pot of simmering water on the stove. Spoon the melted chocolate into the mini muffin pan cups, spreading it evenly (I was able to get 8 cups).  Sprinkle a pinch of cacao nibs into each cup, pressing gently with your finger into the chocolate. Place the muffin tray in the freezer for a few minutes until the chocolate has firmed up a bit.

Remove the pan from the freezer and add a large spoonful of the peanut butter filling on top of the chocolate in each cup, spreading evenly. Place the filled cups back in the freezer for 10-15 minutes, until firm.

If you are adding the top layer of chocolate, melt the remaining chocolate chips. Remove peanut butter cups from the muffin tin. Working quickly, use a flat knife or spoon to spread some of the melted chocolate over the top of one peanut butter cup and around the sides. Repeat with remaining peanut butter cups. Return to freezer until hardened.

Store in the fridge or freezer and let thaw for 5-10 minutes before eating.

Makes 8 mini cups (this was a good sized portion just for myself, but you may want to double the recipe!)


This was submitted to the RecipeLion February Blog Hop

January 15, 2012

Peanut Butter & Banana Oatmeal Cookies


After a week of posting about healthy dinner ideas, I figured it was time to share another treat! But these vegan peanut butter banana cookies would hardly qualify as an indulgence - they contain healthy fats from almond butter and peanut butter, very little oil, and the only added sweetener is a touch of pure maple syrup.

I made these cookies for my family just after New Years, but since nobody really wanted another dessert lying around the house after the holidays, I only made a small batch and reassured everyone that they were "healthy" cookies.

I guess I should have made a bigger batch because all the cookies disappeared pretty quickly! They were soft and thick (my favourite kind!) and had a nice balance of flavors between the almond butter and peanut butter with a hint of banana.


2011 Canadian Weblog Awards

Before I get to the recipe, I wanted to share a bit of exciting news that I received this morning - the Ninjamatics 2011 Canadian Weblog Awards just announced their shortlist of nominees for blogs in a variety of categories, and I was so happy to find out that I made the top five for two categories - Best New Weblog and Best Weblog About Food and Drink!

Even if I don't make it any further to the final round, I'm honoured just to be chosen among all the other great blogs that were nominated! Congratulations to the other Canadian nominees on the shortlist!


Peanut Butter & Banana Oatmeal Cookies
Adapted from Food Doodles

1 cup rolled oats
2.5 tbsp shredded unsweetened coconut
1/2 tsp baking powder
1/4 tsp cinnamon
1/4 tsp salt
1 large ripe banana
2 tbsp each almond butter and peanut butter (or ¼ cup peanut butter)
1.5 tbsp canola oil
1/2 tsp vanilla
3/4 tbsp pure maple syrup
Handful of chocolate chips
Handful of raisins

Preheat oven to 350°.

In a large bowl combine all the dry ingredients (oats through to salt).

In a separate bowl, mash the banana. Add the nut butters, oil, vanilla and maple syrup and whisk until smooth. Add the wet ingredients to the dry ingredients and stir until all the dry ingredients are incorporated. Fold in the chocolate chips and raisins.

Line a large baking sheet with parchment paper or coat with baking spray. Scoop out the dough and drop cookies onto the baking sheet about 1” apart. Bake for 12-14 minutes, until they start to turn golden. Let cool on the baking sheet for a few minutes to help them firm up, then transfer to a wire rack to finish cooling.

Makes about 13 cookies (You may want to double the recipe for a bigger batch!) 


January 12, 2012

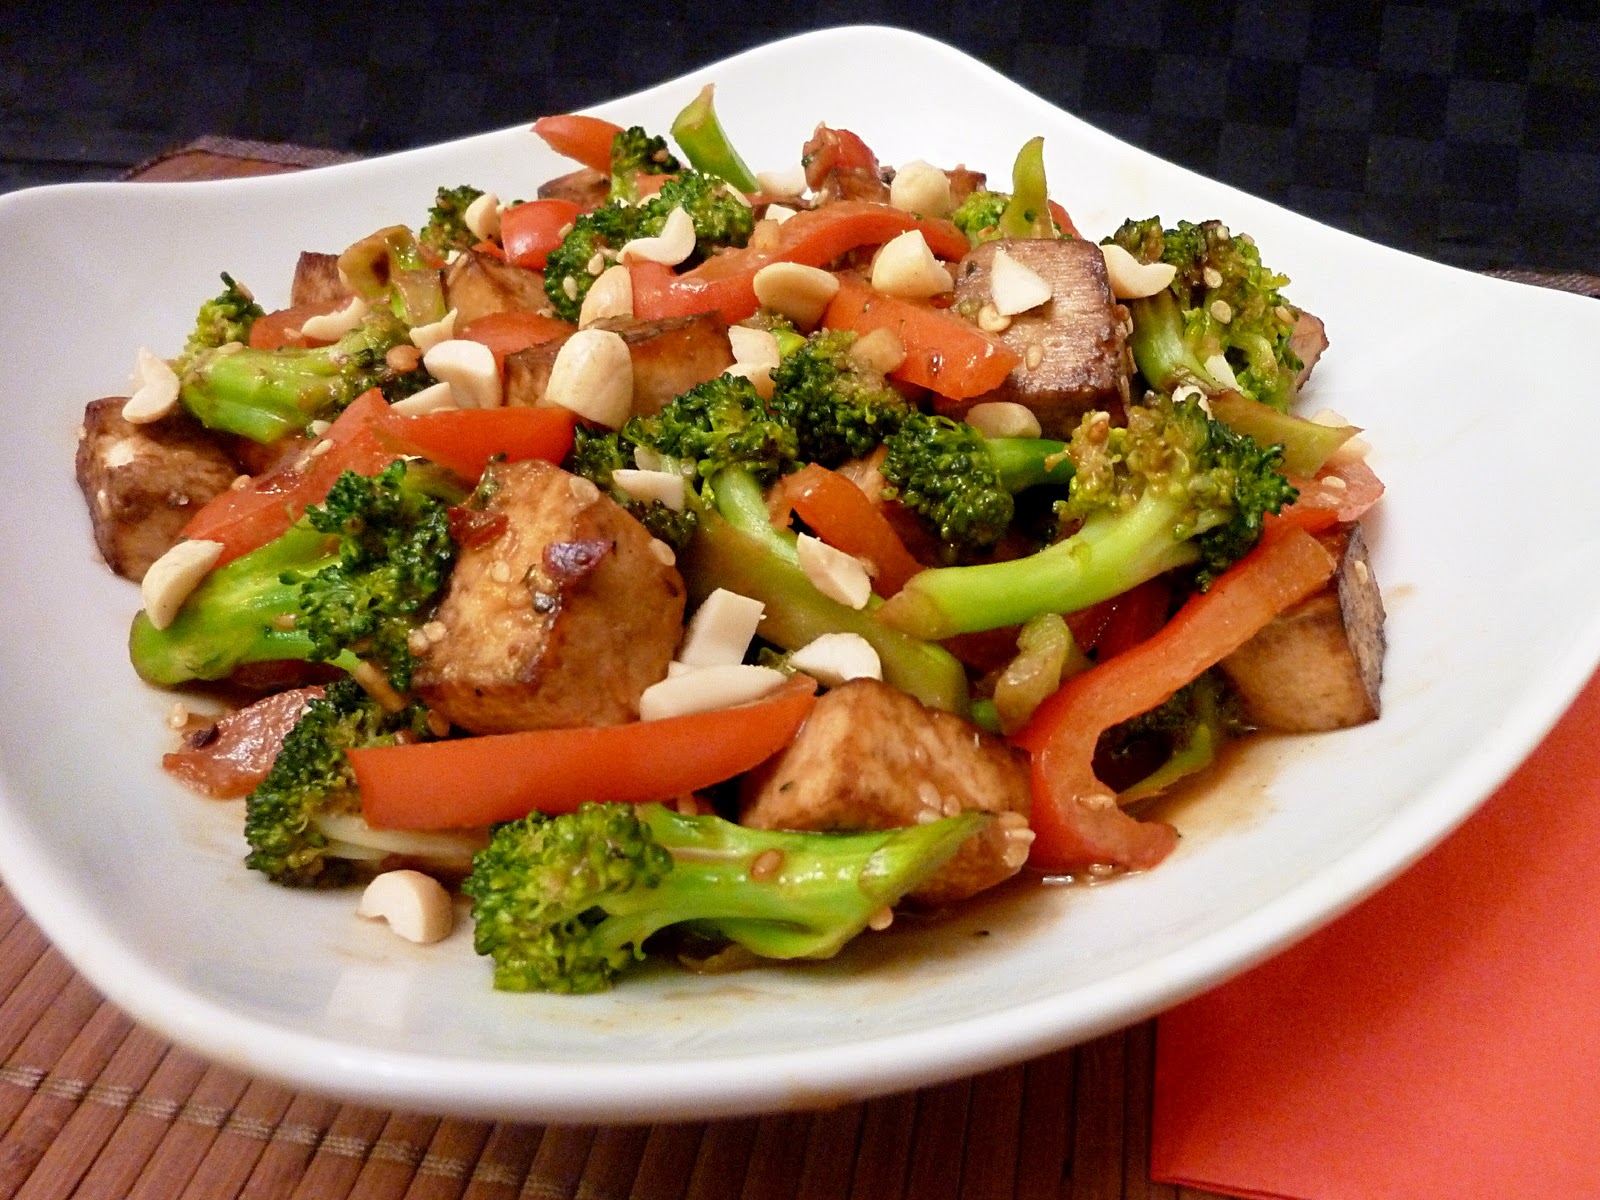
Broccoli Tofu Stir-Fry with Peanuts


It seems like I make a lot of dishes with peanut sauce, but I can't help it - it's one of my favourite things to eat! Besides, pretty much anything tastes delicious when its smothered in a creamy, spicy peanutty sauce!

So naturally, this recipe for spicy stir-fried broccoli with peanuts on Eating Well's website caught my eye. The original recipe looked more like a side dish, so I took the suggestion of adding tofu to turn it into a main dish.

I marinated the tofu in some soy sauce, sesame oil, rice vinegar and sesame seeds - flavours that went well with the rest of the stir-fry. Once you have your ingredients prepped, the rest of the dish doesn't take very long to put together - just cook the tofu, broccoli and red pepper, mix in the sauce and sprinkle with chopped peanuts.

I loved the flavours in this dish and I thought the tofu and vegetables were cooked just the right amount!

When I ate the stir-fry on its own, I ended up with some leftover sauce at the bottom, which I was happy to slurp up because it tasted so good!  But the next night I decided to serve the leftovers over some plain rice and that was the perfect way to soak up the extra sauce, so I would recommend cooking some rice to eat with your meal.


Broccoli Tofu Stir-Fry with Peanuts
Adapted from Eating Well

For the tofu:
1/2 lb extra-firm tofu (I used the small 175g package of Soyganic Super Firm Tofu)
3/4 tbsp soy sauce
1/2 tbsp sesame oil
1/2 tbsp rice vinegar
1 tbsp sesame seeds

Press the tofu between paper towels for at least 5-10 minutes to remove some of the moisture.  Slice tofu into pieces and lay in a shallow bowl.
Whisk together the remaining ingredients and pour over tofu. Let the tofu marinate for about half an hour, turning occasionally to coat all sides. 

Heat about 1 tsp of vegetable oil in a skillet over medium heat. Add the marinated tofu and cook for 5-7 minutes,   flipping occasionally, until all sides are browned.

For the Peanut Sauce:
1/3 cup creamy natural peanut butter
1/4 cup water
2 tbsp brown sugar
1 tbsp reduced-sodium soy sauce
1 tbsp rice vinegar
dash of hot sauce (optional)


Whisk all ingredients together in a small bowl. Set aside.


For the Stir-Fry:
1 tbsp canola oil
~ 1 lb broccoli crowns, trimmed and cut into 1-inch pieces
1/4 cup water
1 tbsp reduced-sodium soy sauce
1 large red bell pepper, sliced
2 cloves garlic, minced
1/4 to 1/2 teaspoon chili flakes (depending on your taste)
1/4 cup chopped unsalted peanuts

Heat the oil in a large skillet or wok over medium heat. Add broccoli and cook, stirring often, until it begins to soften and turn brown, about 6 minutes.

Add water and soy sauce to the pan along with the red pepper and garlic. Cook, stirring often, until the pepper has softened and the liquid has evaporated, 2 to 4 minutes. Remove from heat and add the cooked tofu. Stir in the reserved peanut sauce and sprinkle with chili flakes. 

Serve hot, over plain rice or on its own. Garnish each serving with chopped peanuts.

Makes 3-4 servings. 


November 24, 2011

African Pineapple Peanut Stew with Black Beans


Before I get to today's recipe, I just wanted to say Happy Thanksgiving to everyone celebrating it across the border! If you're still looking for some recipe ideas, be sure to check out my round up of vegan Thanksgiving recipes that I posted last month for our Canadian Thanksgiving.

Back to this stew...one of my favourite recipes that I've made multiple times is the African Pineapple Peanut Stew from the Moosewood Restaurant Cooks at Home cookbook. I make it whenever I have a pineapple to use up,  since I think its much better with fresh rather than canned pineapple. I've also tried it with various greens, including spinach and swiss chard, but I like the kale version best!

The recipe for this stew has been around on the blogosphere for many years already, so its not exactly a new recipe. But to change things up a bit this time, I tried adding black beans, which I thought would go well with the pineapple and peanut butter. The black beans helped to bulk up the meal a bit more, and the flavours went really well together!

I like to serve this on top of rice, but you could also eat it on its own or with some flatbread. Feel free to add some more liquid if you prefer a soupier stew, and don't leave out the peanuts, they're my favourite part!

Stay tuned for another recipe featuring the same flavours in salad form - I'll be posting it soon!


African Pineapple Peanut Stew with Black Beans
Adapted from Moosewood Restaurant Cooks at Home: Fast and Easy Recipes for Any Day, as seen on The Way the Cookie Crumbles

1 tbsp vegetable oil
1 onion, diced
pinch of salt
2 cloves of garlic, minced
2.5 cups chopped fresh pineapple
1 bunch of kale, coarsely chopped and stems removed
1 can (about 2 cups) black beans, rinsed and drained
1/2 cup peanut butter
1 tbsp hot sauce
1/2 cup chopped cilantro
1/4 cup chopped peanuts
Cooked rice for serving

Heat the vegetable oil in a large pot over medium heat. Add the diced onion and a pinch of salt. Sauté for 6-8 minutes, stirring occasionally, until onion is browned.  Add the garlic and sauté for about 30 more seconds.

Add the pineapple, black beans and kale to the pot. Cover and simmer for 5 minutes.

Remove lid and stir in the peanut butter and hot sauce. Simmer for about 5 more minutes.

Serve over hot rice and garnish with the cilantro and peanuts.

Makes 4-5 servings.

September 23, 2011

Ginger-Peanut Noodles


While I don't like to repeat meals and recipes often, one thing that I do make regularly for a quick and easy dinner is Asian noodles with veggies. I have tried a few different variations on this dish - changing up the vegetables or the sauce, but my favourite version is peanut noodles. I love peanut sauce and it's so easy to make yourself using ingredients from your pantry.

I know there are a ton of recipes out there for peanut noodles already, but this one for a soba noodle salad with ginger peanut dressing from Vegetarian Times that I tried recently was so good that I had to post about it! One thing that makes it different from any other recipe that I've seen is that you actually blend cilantro into the sauce as well as adding fresh cilantro on top. The sauce was delicious - it had the right amount of peanut butter and it was a bit tangy, which I liked.

Another part of this recipe that made it stand out from others was that it includes sliced cucumber, which I have never tried adding to my noodles before, but it was perfect in this recipe!

I loved this recipe on its own, but I think it would also be good with some tofu added in for a more substantial meal.


Ginger-Peanut Noodles
Adapted from Vegetarian Times

6 oz dried noodles, preferable soba noodles but spaghetti would also work (I used kamut udon noodles)
1 red pepper, sliced thinly
about 1/2 to 2/3 of a large English cucumber, peeled, seeded and sliced into half moons
1 large carrot, peeled and grated
1/4 cup chopped fresh cilantro
1/4 cup chopped peanuts

Dressing:
1/2 cup smooth peanut butter
1/4 cup rice vinegar
1 tbsp agave nectar or maple syrup
2 tsp soy sauce
zest and juice of one lime
1 tbsp minced fresh ginger
1 clove of garlic, minced
1/4 cup cilantro
a dash or two of hot sauce, such as Sriracha (optional)

Cook the noodles according to package directions. Drain and rinse with cold water, then set aside.

Prepare all the vegetables (red pepper, cucumber and carrot) and add to noodles.

Add all ingredients for the dressing to a blender or food processor and puree until smooth. Add 1-2 tbsp of water to thin out if necessary.

Pour the dressing over noodles and mix thoroughly. Serve at room temperature or refrigerate until serving time. Garnish each serving with the chopped cilantro and peanuts.

Makes 4 servings.

This recipe was submitted to Wellness Weekends at Diet Dessert & Dogs.

September 09, 2011

Spinach Tofu Patties


I love vegetarian burgers because they're usually packed with lots of vegetables and other yummy ingredients, and there are so many ways to enjoy them - you can put them in between a bun and dress them up with your favourite toppings, but they are often just as good or even better on their own, without the bun! 

These patties definitely fit into the latter category. They are so flavourful that I preferred to just eat them with a fork rather than hiding them in a bun underneath other toppings. 

The patties themselves are actually made with tofu, but you would probably never guess just by looking at them (and you could probably serve these to a tofu-hater without them knowing either!) They are also filled with spinach and asian flavours like sesame oil and soy sauce. I decided to add some peanut butter to mine too, to go with a sort of asian peanut sauce theme. 

Once cooked, they held their shape well (which can be a problem with other veggie burgers), but they were still soft and easily broke apart with a fork when eaten that way. 

The original recipe didn't include a sauce to go with them, but since I love my condiments, I brainstormed what type of topping I could make for them. I immediately thought of a yogurt sauce, like the tahini yogurt sauce that I made for my beet burgers. I still think that would go really well with them, but I ended up choosing a different sauce. To keep with the asian flavours, I made a peanut chutney using a recipe that I've been wanting to try for a while. It's actually meant to be a dipping sauce so it's quite thick, but it was really good!

I loved eating the patties on top of naan bread with the peanut chutney spread on top, but feel free to use another sauce or just eat these plain! 


Spinach Tofu Patties
Adapted from Joanne of Eats Well With Others, as seen on Marcus Samuelsson's Blog

1/2 lb spinach
1 scallion, minced (I left this out)
1 clove garlic, minced
175 grams tofu (about half a block)
1/4 cup panko or bread crumbs
2 tbsp sesame seeds (I used the toasted kind)
1/2 tbsp soy sauce
1 tsp sesame oil
1.5 tbsp peanut butter
salt and pepper

Bring a large pot of salted water to a boil. Add the spinach and cook for one minute. Then drain the spinach and plunge it into a bowl of ice water. Once it has cooled, drain the water and squeeze out as much additional water from the spinach as you can with your hands. Chop the drained spinach finely and place aside in a bowl.

Add the minced garlic and scallion (if using) to the spinach. Crumble half of the tofu with your hands into the bowl with the spinach mixture. Process the other half of the tofu in a food processor or blender until smooth. Add the pureed tofu to the bowl, along with the bread crumbs, sesame seeds, soy sauce, sesame oil, peanut butter, and a dash of salt and pepper.

Stir everything together until it is fully mixed. Form into 4 patties (or less if you want larger patties), flattening the top and bottom.

Heat a bit of vegetable oil in a skillet on medium heat. Add the patties to the pan and cook, undisturbed, for about 5 minutes, or until they are nicely browned. Carefully flip and cook the other side for another 3-4 minutes.

Serve warm with buns or pitas, or simply top with your favourite sauce (like the peanut chutney recipe below)

Makes 4 patties (the original recipe said it made 4, and I cut the recipe in half and still got 4).


Peanut Chutney Sauce
Recipe from Smells Like Home

2 tbsp peanut butter
2 tbsp mango chutney
1 tbsp lime juice
1 tbsp soy sauce
1 small clove garlic, minced
pinch of salt and red pepper flakes
1-2 tbsp of water to thin if necessary

Whisk all ingredients in a small bowl until smooth.

Makes enough for 4 patties.

LinkWithin

Related Posts Plugin for WordPress, Blogger...