Showing posts with label avocado. Show all posts

June 25, 2014

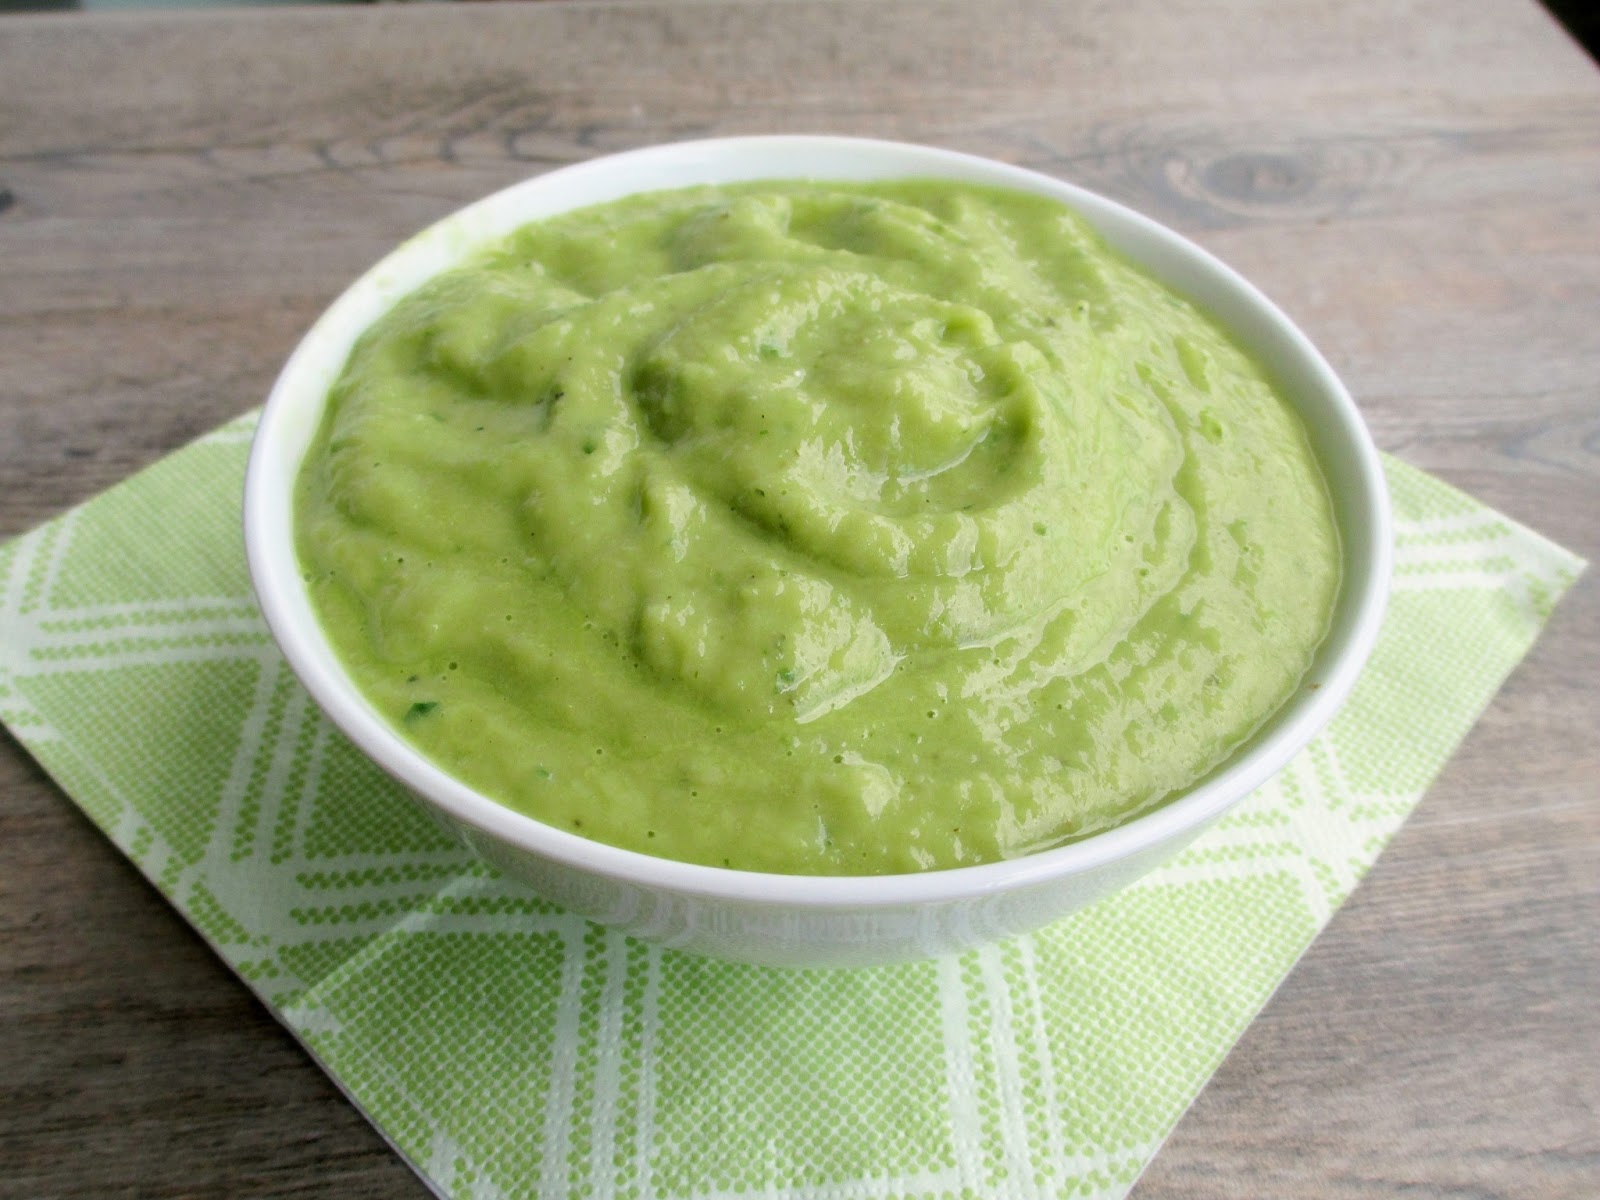
Chilled Zucchini Avocado Soup


Lately when I come home to my hot and humid apartment, the last thing I want to do is turn on the stove and add even more heat to my place, so refreshing no-bake meals are definitely needed!

This week, I decided that I wanted to make a chilled soup - one of my favourite things to eat in the summertime (and if you check the soup category in my Recipe Index, you'll find quite a few chilled ones there!).

I had a nice zucchini from the market sitting in my fridge, so I used that as my inspiration for this chilled zucchini avocado soup. While this is a no-bake recipe, it does require a bit of cooking on the stovetop first to saute some garlic and green onion, and get the zucchini nice and tender so that it will blend easily.

To make the soup extra creamy, I added an avocado and some plain yogurt which get blended up with the zucchini mixture until smooth. Finally, some fresh basil, lemon juice and a dash of cumin add even more layers of flavour to highlight the zucchini.


I loved how easy this was to whip up - I made it on a day when I got home late from the gym and then grocery shopping and I wanted dinner to be ready quickly, which it was!

The only hard part is waiting for it to chill, but you could definitely eat it warm if you like too. I actually ate it warm the first night and really enjoyed it that way, and then had the leftovers chilled, which was even more tasty and super refreshing!

This is also a very adaptable recipe, so feel free to add other herbs or veggies to the soup or as garnishes - some sliced radish, cucumber, or tomato would probably work well stirred in if you like extra texture in your soup!


Chilled Zucchini Avocado Soup
Partly inspired by this recipe

1 tbsp olive oil
2 large cloves garlic, minced
~4 green onions (about half a bunch), sliced
1 large zucchini, thinly sliced
2 cups water or vegetable stock (I used water)
1 ripe avocado, roughly chopped
2 tbsp fresh basil (can substitute another herb)
1/2 cup plain low-fat yogurt
2 tbsp fresh lemon juice
1/2 tsp salt
1/4 tsp cumin
Ground pepper


Heat oil in a medium saucepan on medium heat. Add garlic and green onion and cook for 3-4 minutes, stirring occasionally. Add zucchini and sprinkle with salt and pepper. Cook for a couple of minutes, then add the water. Bring to a boil, cover pot and simmer for about 5 minutes, until zucchini is tender. Remove from heat and let cool slightly.

Pour contents of the pot into a blender (I did it in just one batch but you could do two batches if your liquid is still very hot to avoid it exploding!). Blend until smooth. Add the remaining ingredients and blend again until smooth.  Taste and adjust seasoning if desired. Transfer to a container and refrigerate until chilled.

Serve warm or chilled, with extra yogurt and basil on top if desired. (Note: the soup might thicken up after sitting in the fridge, so feel free to add extra water to thin it out if you prefer).

Makes 2-3 servings

May 21, 2014

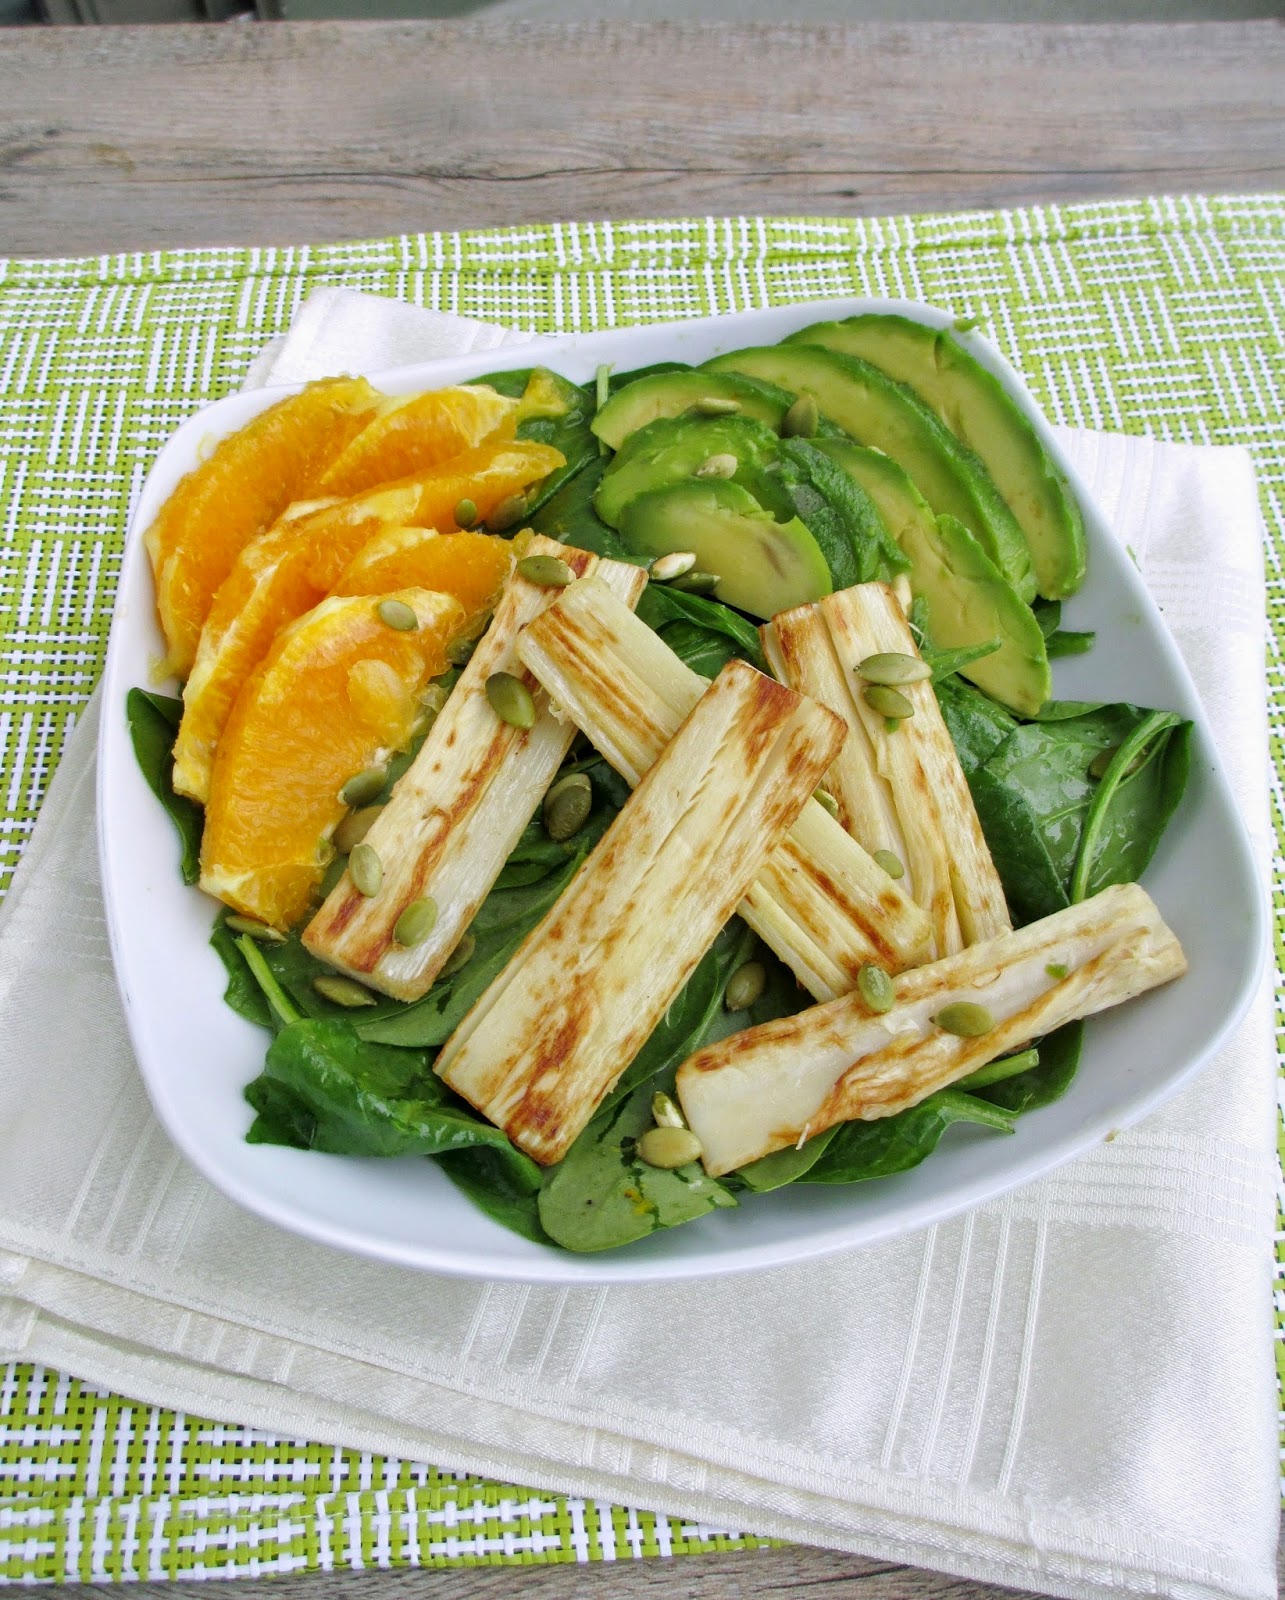
Hearts of Palm, Orange & Avocado Salad


I mentioned in my last post that I recently got two new vegan cookbooks as a gift, and I couldn't wait to try the recipes in Straight from the Earth.

One recipe that stood out that I decided to try my take on first was the grilled hearts of palm salad with grapefruit and avocado. I love the combination of avocado with citrus fruits, and I've been wanting to try hearts of palm for awhile so I was excited to try this!

I'm not a huge fan of grapefruit though, so I decided to use orange instead, which I thought worked really well as a substitute. I had to try a couple of stores before I found canned hearts of palm, but I was glad I managed to get them because I loved their unique taste and texture!

If you've never had hearts of palm, it's a vegetable that actually comes from a palm tree, and I would describe them as having a similar texture as artichokes, but with a milder flavour somewhat like water chestnuts.


The original recipe called for grilling the sliced hearts of palm, but I just sauteed them in a pan and that worked fine too! For the dressing, I modified it to have much less oil and I added some dijon and a bit more orange zest. I also added a sprinkle of toasted pumpkin seeds to my salad for a little bit of crunch.

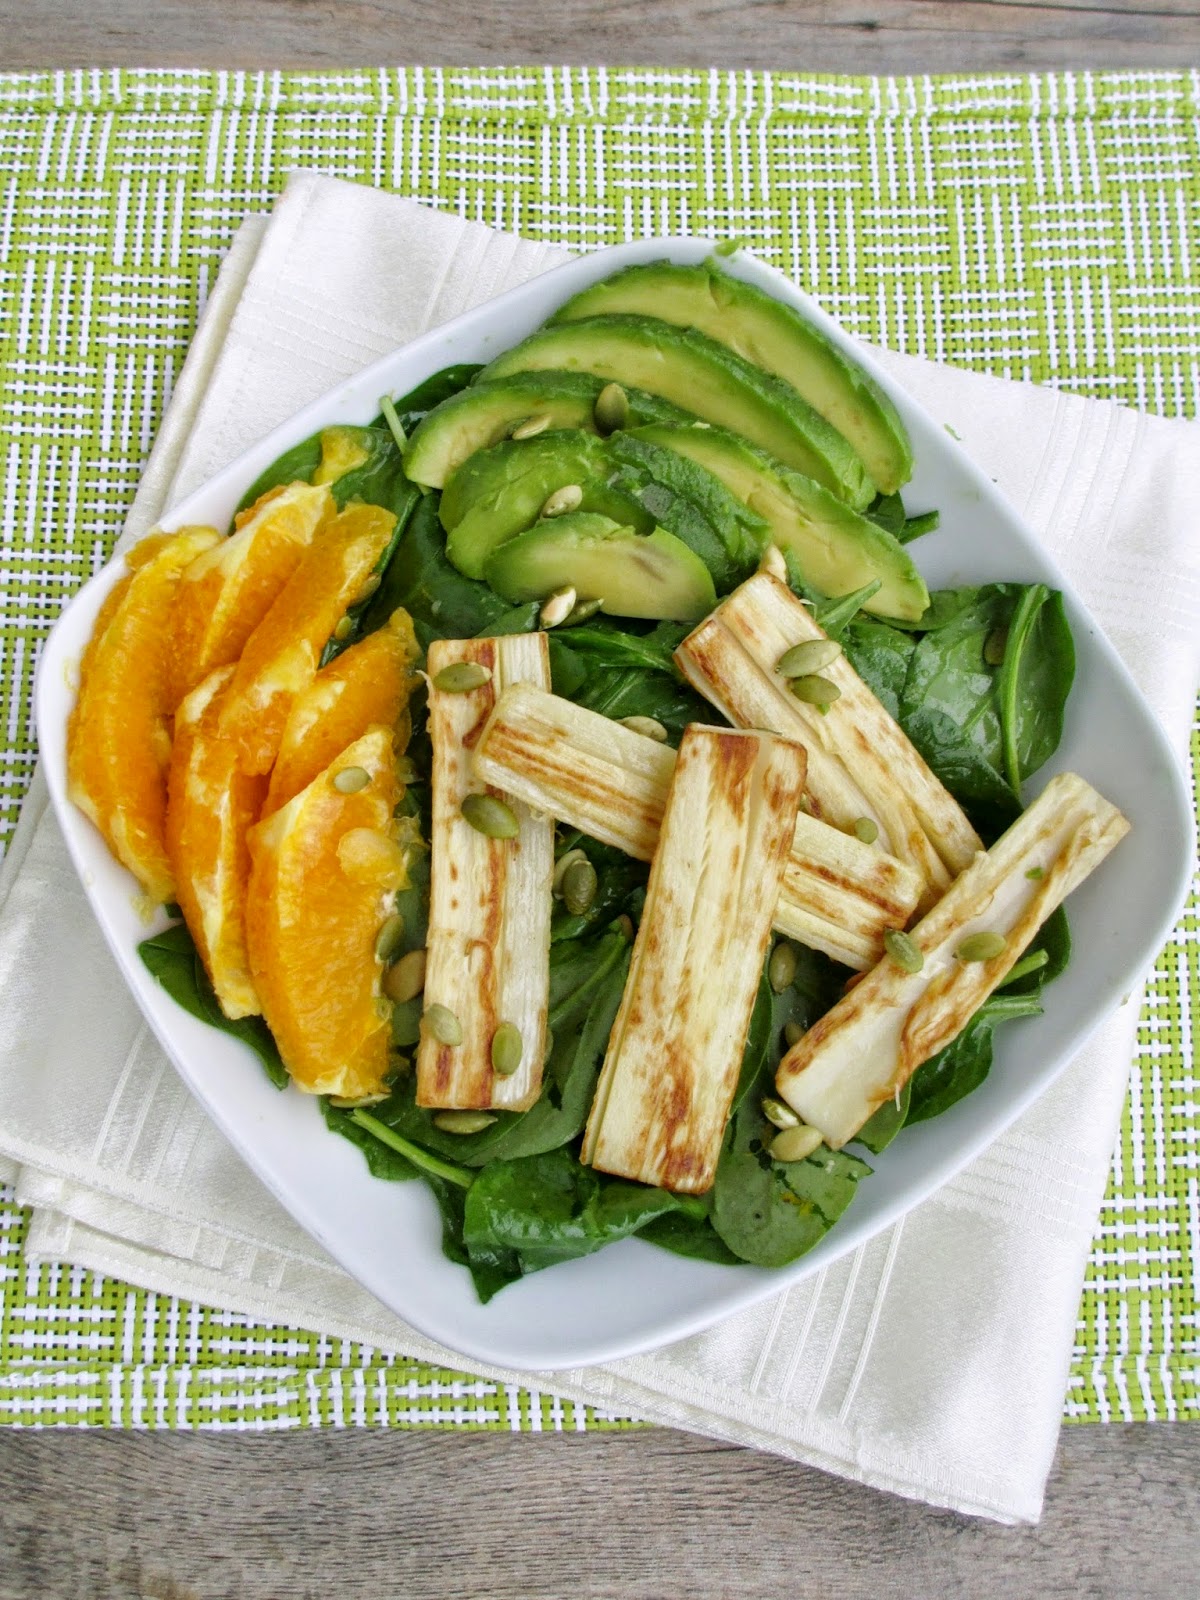
This was such a fresh tasting salad that would be perfect to eat on a warm summer night. I loved the combination of buttery, creamy avocado slices with the juicy oranges and the warm hearts of palm. The dressing was nice and light and tangy, and you can use whatever greens you like as the base - the original recipe called for arugula but I used baby spinach instead.

I hope to try more recipes from this cookbook soon, and if you've tried any that you recommend, please feel free to share in the comments!


Hearts of Palm, Orange & Avocado Salad
Adapted from Straight from the Earth

Dressing
2 tbsp olive oil
3 tbsp white wine vinegar
1 tsp agave
1/2 tsp Dijon mustard
3/4 tsp orange zest
Salt and pepper to taste

Salad
1 seedless orange (*Note: you will need the zest first for the dressing before you slice it)
1 14oz can hearts of palm, drained and rinsed
1 tbsp pumpkin seeds
1/2 tbsp olive oil
1 ripe avocado
Baby spinach or other baby greens


To make the dressing, whisk all ingredients together in a small bowl (or place in a bowl with a lid and then shake to mix). Taste and adjust seasoning if desired.

Use a knife to slice the peel off the orange. Carefully slice the orange into thin segments and set aside. Slice the hearts of palm in half lengthwise and let dry out a bit on paper towels.

Heat a large skillet over medium heat. Toast the pumpkin seeds just until fragrant and beginning to brown. Remove from heat and transfer to a small bowl. Add olive oil to the pan, then place the hearts of palm flat side down. Let cook for about 2-3 minutes, until lightly browned, then flip and cook the other side for another 2-3 minutes. Remove from heat and transfer to a plate.

Cut avocado in half, remove the pit and scoop out the two halves. Slice each half lengthwise into thin pieces.

Place desired amount of spinach or greens in a bowl and drizzle some of the dressing over top. Toss well to mix, then lay out greens on plates. Top plates with the sliced avocado, oranges, hearts of palm, and toasted pumpkin seeds. Drizzle more dressing over top if desired.

Makes 2 large servings or 4 small servings.


January 28, 2014

Vegan Taco Chili Layer Dip


It's the end of January, and that means it's time for my annual Super Bowl recipe post! 

For the past two years, I've posted new versions of layer dips because that's my favourite thing to eat while watching the big game (or maybe I just like having an excuse to eat chips and dip for dinner!).

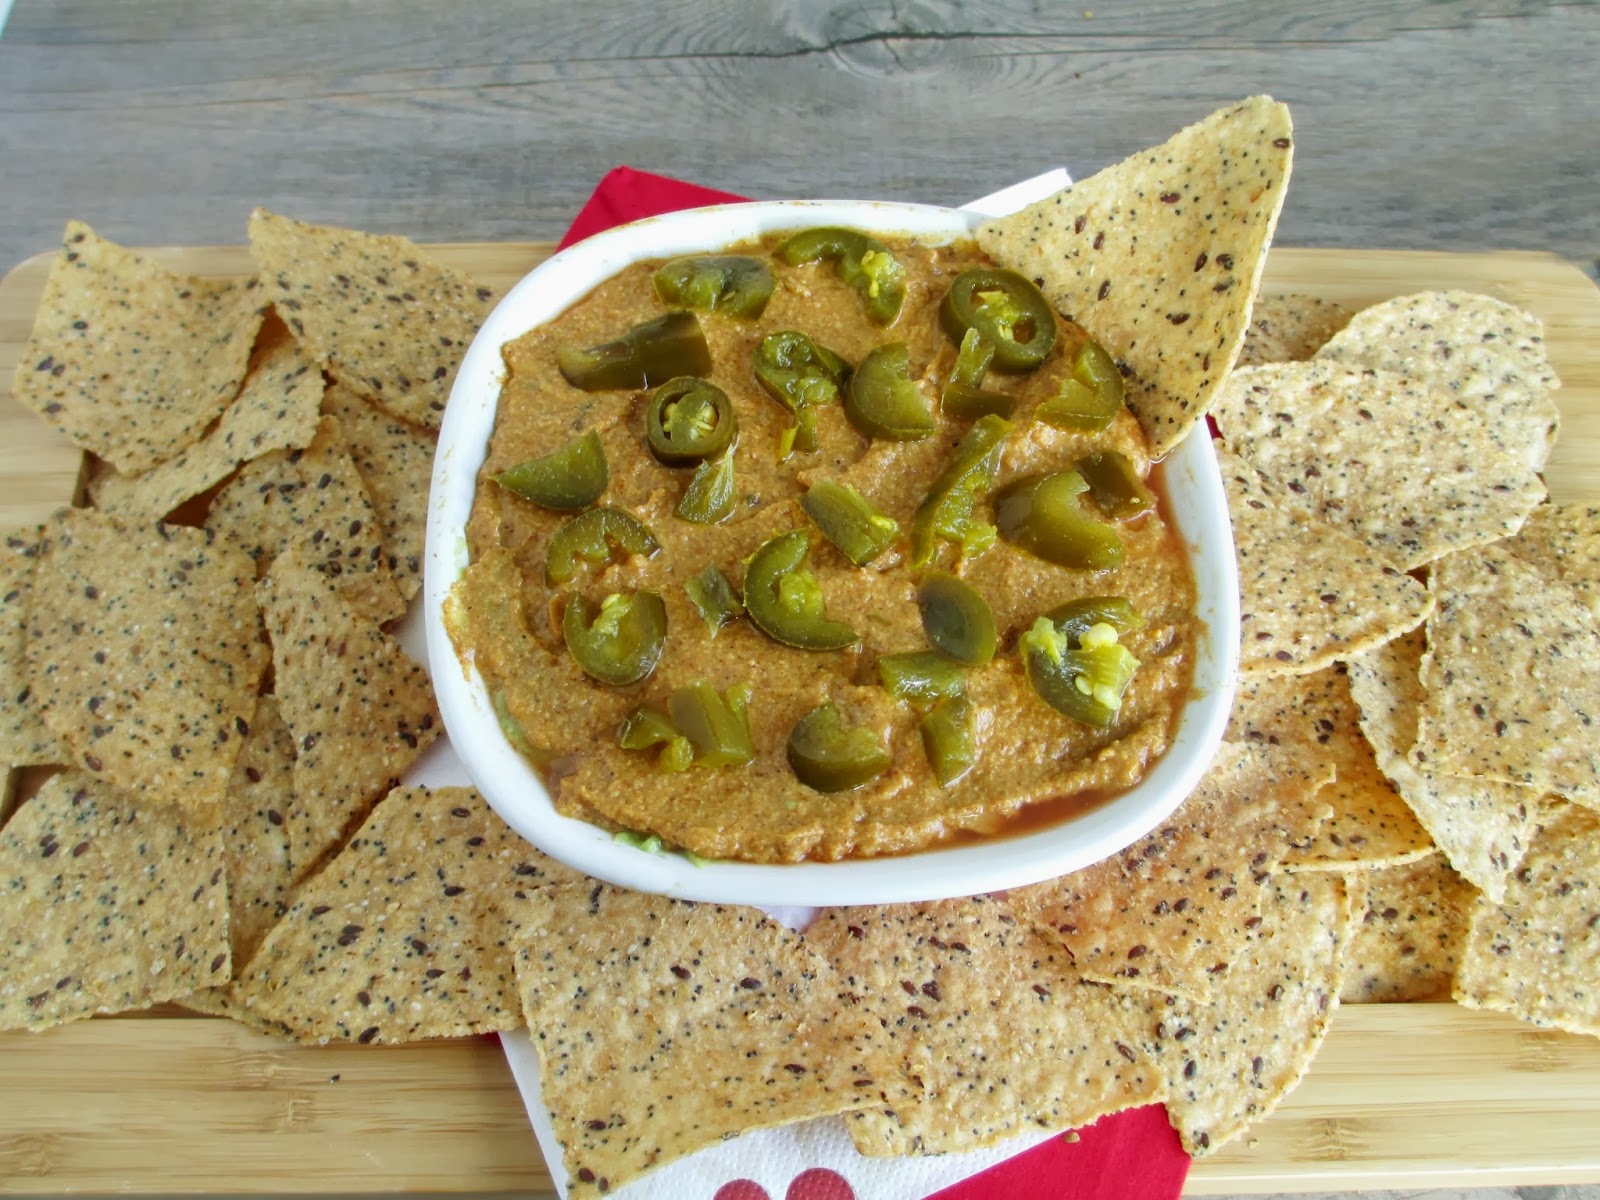
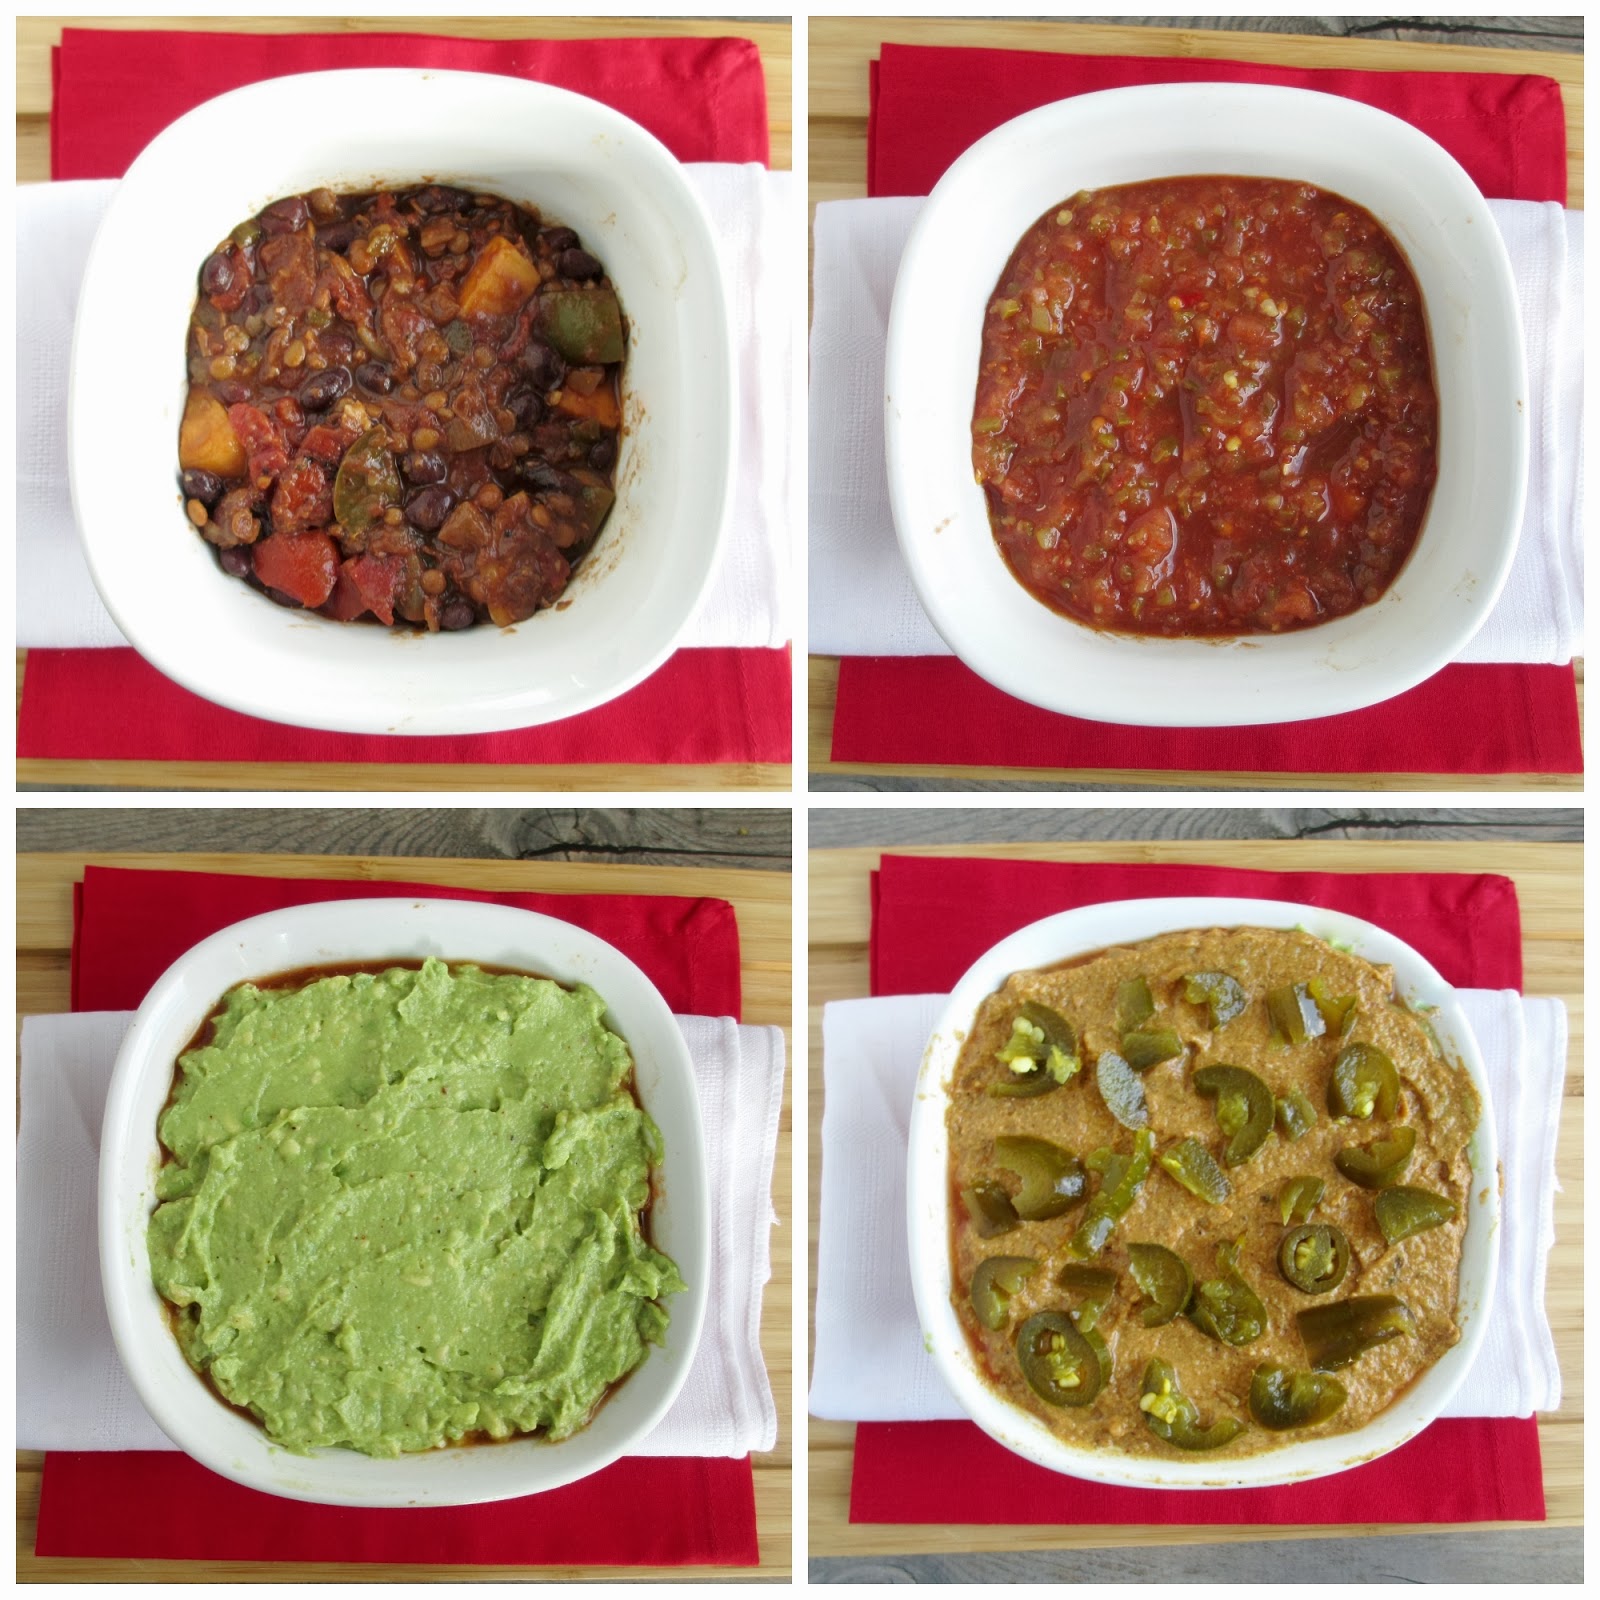
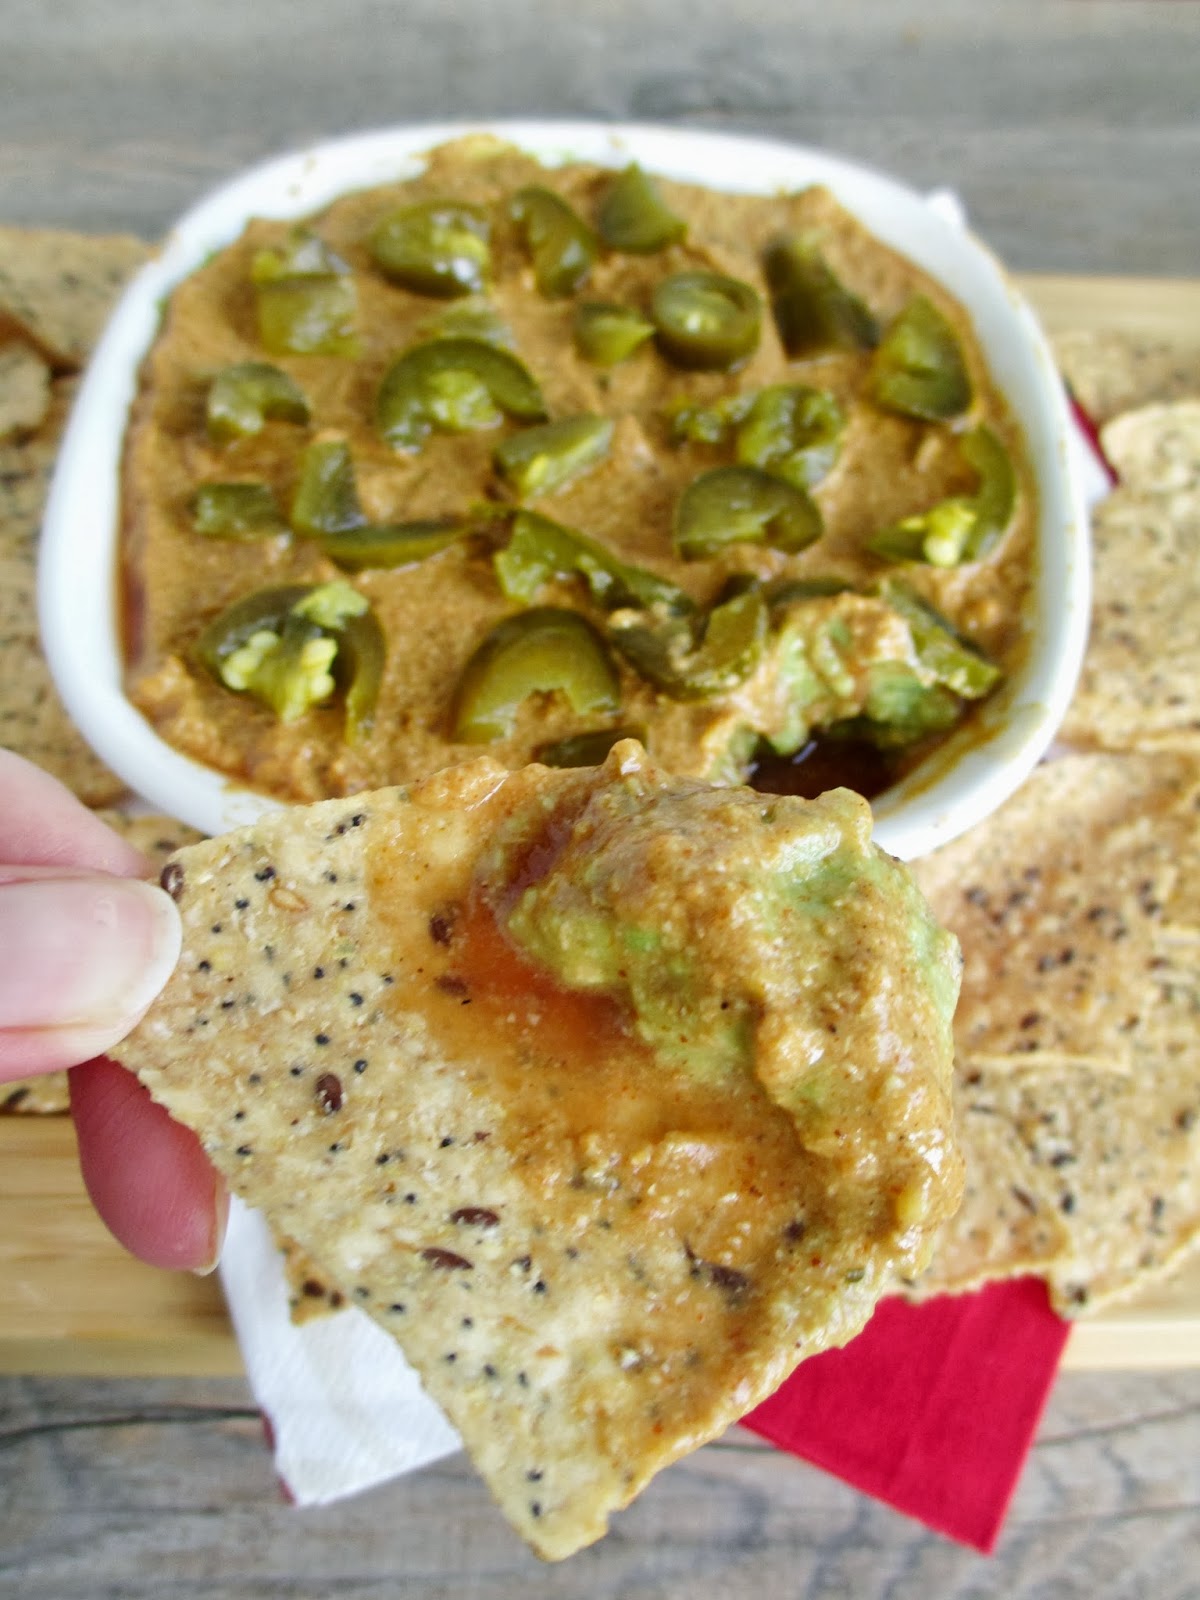
This year I tried a new spin on my usual layer dip by making a chili version inspired by a recipe in the Vegan Planet cookbook. This chili taco dip has four main layers: leftover vegetarian chili on the bottom, salsa, mashed avocado, and a vegan "cheese" sauce made with nutritional yeast instead of regular shredded cheese, plus some pickled jalapenos as an extra topping. 


If you can manage to get your chip through all the layers at once, you get the perfect combination of flavours and textures - chunky beans and veggies, smooth salsa, creamy avocado and cheese sauce. There's a bit of spice in each layer too, from the chili to the kick of the jalapenos, but I found it to be just the right amount of heat!

This is a pretty easy dish to whip up if you've got leftover chili already sitting in the fridge, like I did from this veggie black bean and lentil chili recipe. Then all you need to do is mash an avocado, make the cheese sauce (which really only takes a few minutes), and then the fun part - putting all the layers together!

If you're watching the Super Bowl this weekend, what do you plan on making? Last year I contributed baked pickle chips, buffalo cauliflower wings, and monkey bread to our game day menu but I haven't decided what I'll be having yet this year (besides layer dip of course!). If you're looking for more ideas, feel free to check out all of my other Super Bowl recipes!


Vegan Taco Chili Layer Dip
Adapted from Vegan Planet

1 cup vegetarian chili
1/2 cup salsa
1 ripe avocado
1/2 tbsp lime juice
1/4 tsp salt
Ground pepper
Dash of taco seasoning
1 recipe nacho cheese sauce (recipe below)
Handful of pickled sliced jalapenos, chopped


Place the chili in the bottom of a small dish (I used a 20 oz, 5" square ceramic dish). Note: if there is liquid in your chili, try to drain it out first so that your dip doesn’t get too runny. Reheat the chili in the microwave until it reaches room temperature.

Next, layer the salsa over the chili, spreading it out into an even layer with a small spatula.

Scoop out the insides of the avocado (remove the pit) into a bowl and mash until it is fairly smooth. Add the lime juice, salt, some freshly ground pepper, and a dash or two of taco seasoning. Stir to mix. Spread the avocado mixture over the salsa layer.

Spread the nacho cheese sauce evenly over the avocado layer. Finally, sprinkle some jalapeno slices over the top (use as much or as little as you like). Serve immediately, or cover and store in the fridge. Bring to room temperature (or reheat slightly) before serving.

Serves 2-4 (depending on how hungry you are!)


Nacho "Cheese" Sauce

1 tbsp chickpea flour
1/4 cup nutritional yeast flakes
1 tsp tex-mex or taco seasoning
1/4 tsp smoked paprika
Pinch of salt
1/4 cup + 2 tbsp almond milk


Heat a small saucepan over medium heat. Add chickpea flour and toast, stirring often, for 2-3 minutes. Stir in nutritional yeast and spices. Add almond milk and reduce heat to medium-low. Stir constantly for a few minutes, until mixture has thickened. Remove from heat and transfer to a bowl to cool.

Makes about 1/3 cup


July 23, 2013

Corn, Avocado & Blueberry Kale Salad


I know I've been posting a lot of blueberry recipes lately, but when Ontario fruits are in season, I try to use them in as many ways as possible before they're gone!

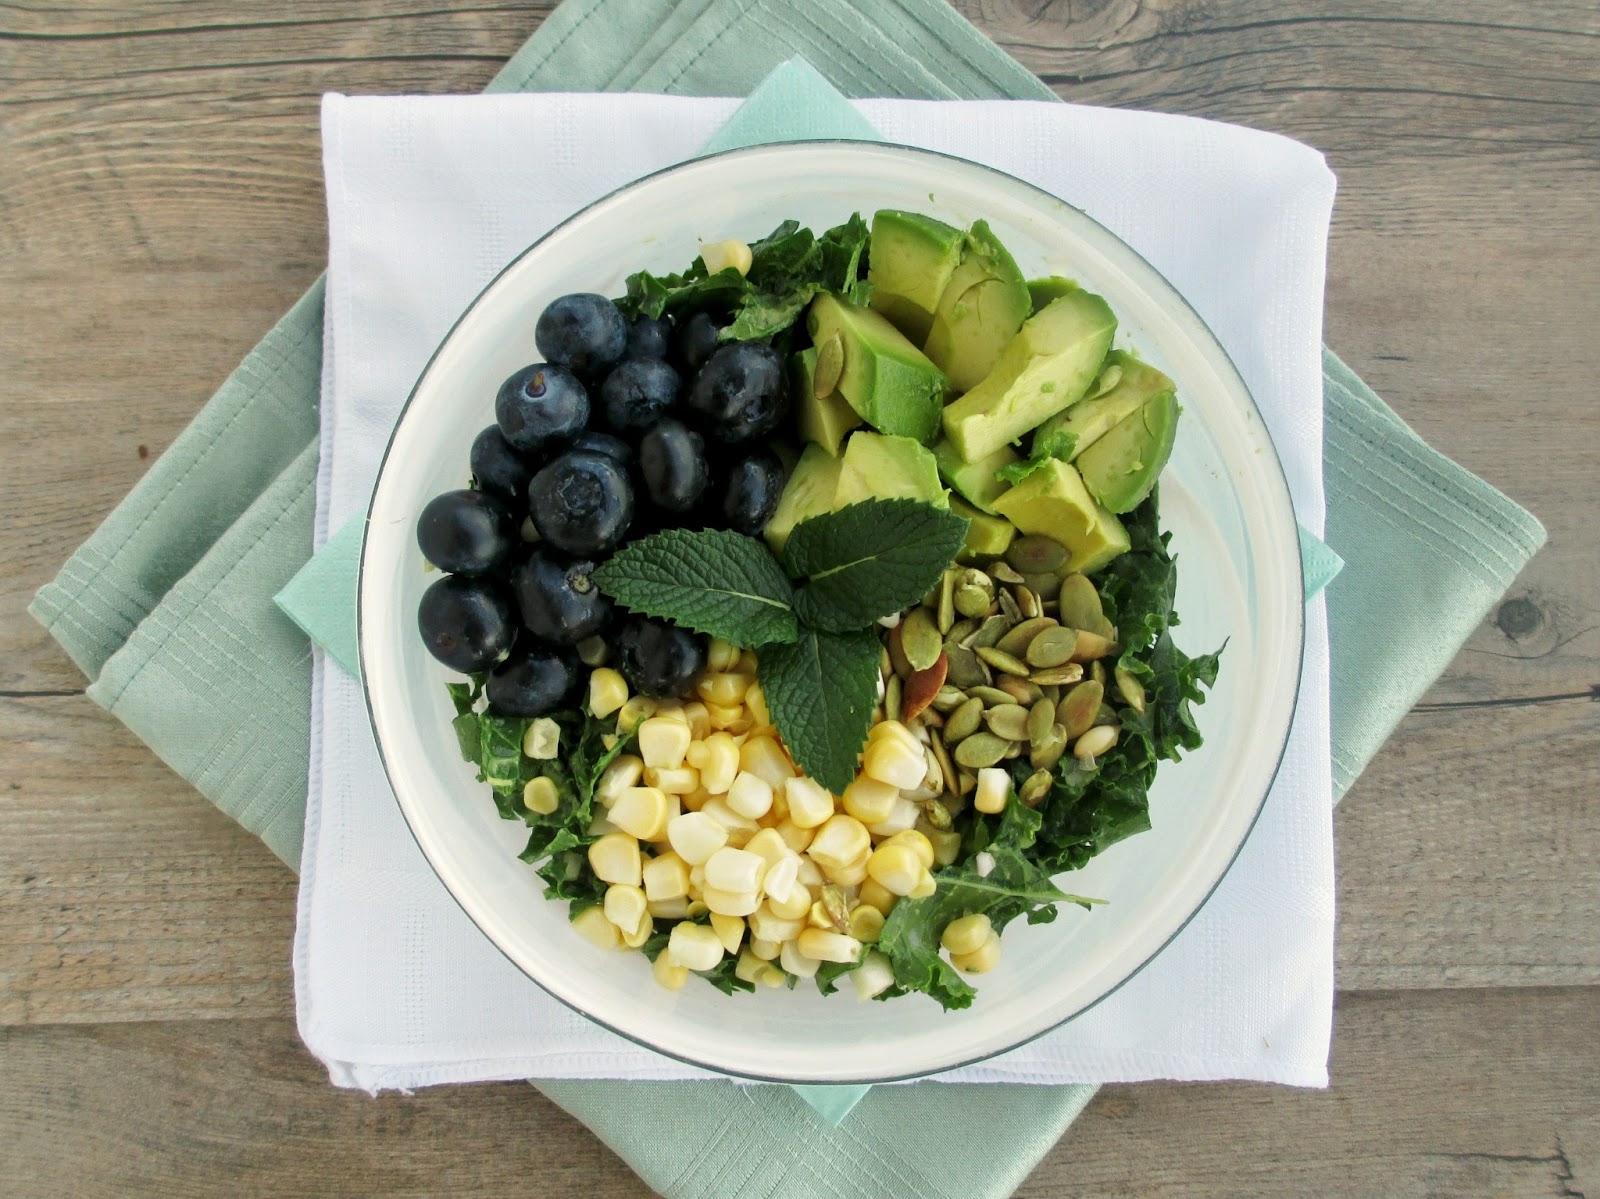
My last two blueberry recipes were both breakfast items, so today I'm sharing a recipe for a salad featuring blueberries along with fresh corn, avocado, kale, mint, and pumpkin seeds.


I first discovered the combination of corn and blueberries last summer after trying a version of this salad from Two Peas and Their Pod. I thought the natural sweetness of fresh corn off the cob paired well with blueberries and their shapes and textures complemented each other too.

This summer, I wanted to make my own version of a corn and blueberry salad. I considered just making a really simple salad of those two ingredients, but instead I wanted to bulk it up a bit more so I used shredded kale as the base of the dish and added an avocado in both the dressing and the salad itself to make it a bit more filling.

The dressing is a simple oil-vinegar-agave mixture but with pureed avocado to make it thick and creamy, mint leaves for a refreshing note and some minced shallot for a bit of a bite.


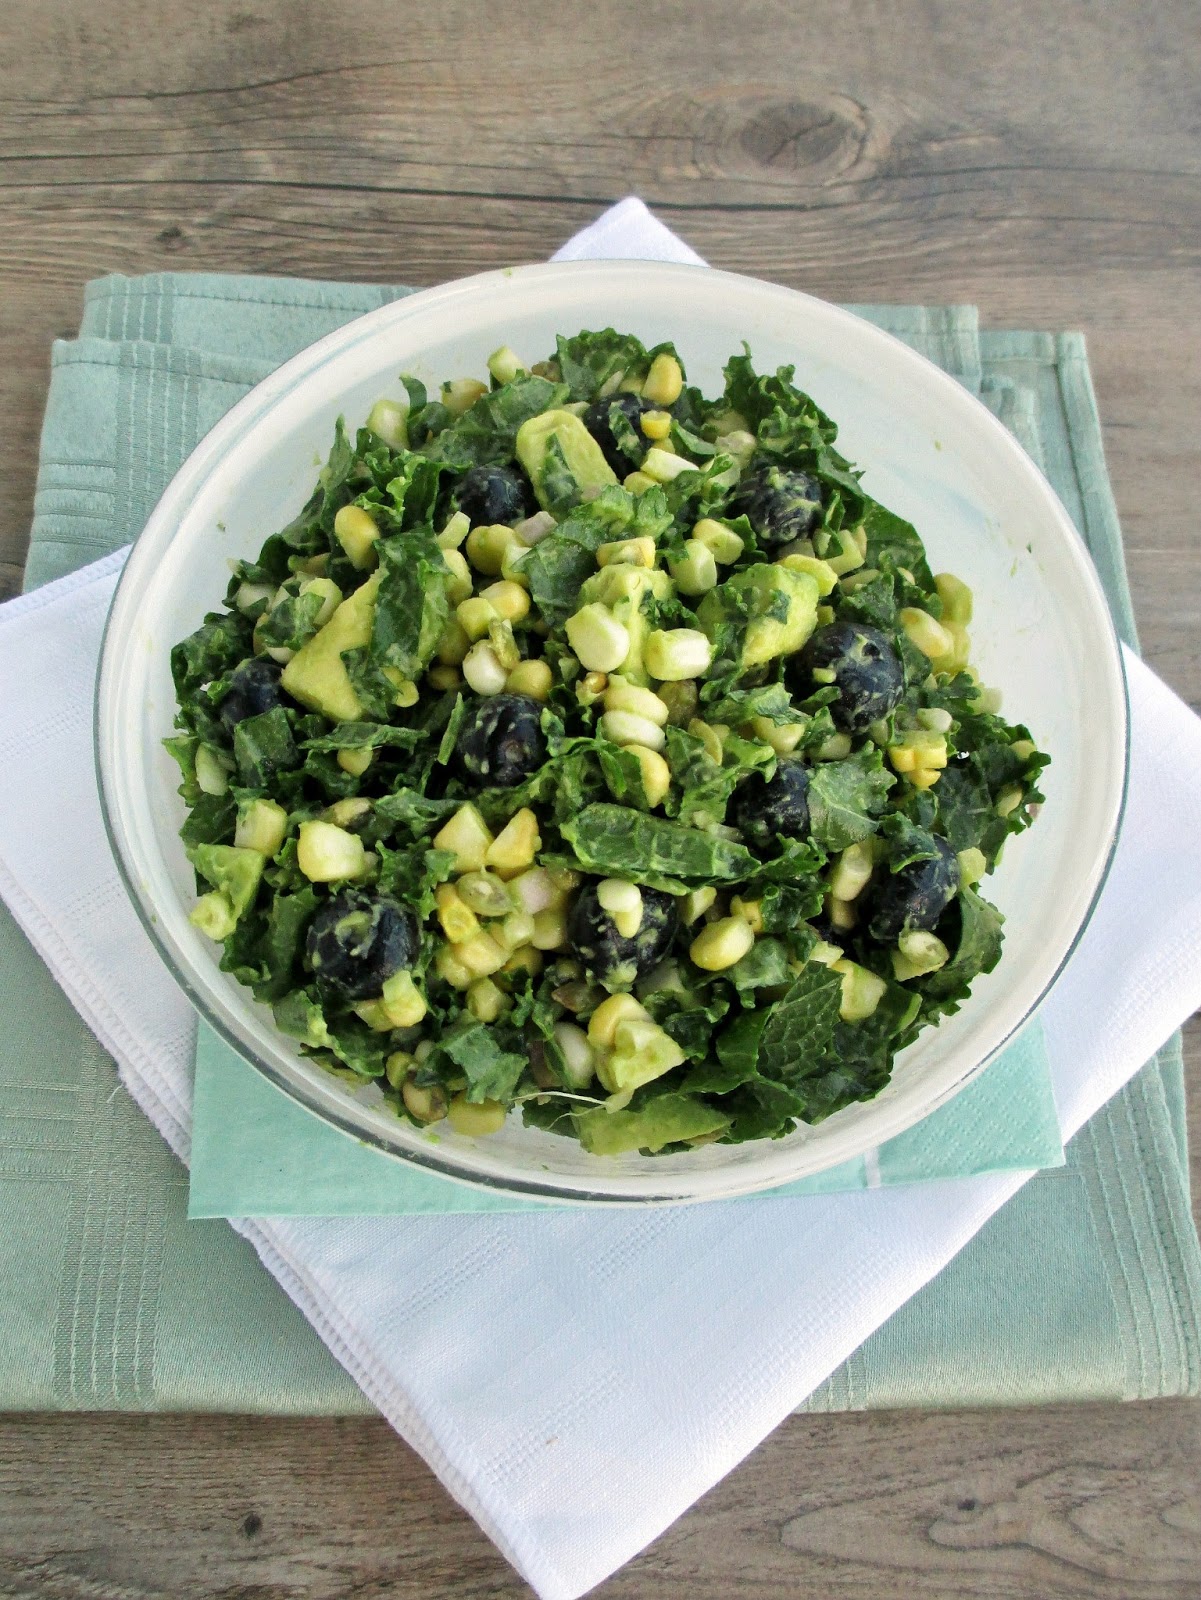
Once you've made the dressing, the rest of the salad can just be quickly thrown together - I didn't even bother to cook the corn first, since I wanted the kernels to keep their firm texture in the salad. If you've never tried raw corn before, I recommend eating it that way!

I love salads that have lots of different layers of texture like this one, from the juicy blueberries to the creamy avocado, with some crunch from the raw corn and toasted pumpkin seeds. I also love salads that are filling enough to eat as a main course for dinner, and this one fits that criteria too!

I have a feeling I'll be posting more corn recipes soon, since I just heard that Ontario corn is now available - yay!


Corn, Avocado & Blueberry Kale Salad

Dressing
1/2 a ripe avocado (you'll use the other half in the salad)
1 tbsp chopped fresh mint
Juice of half a lime
1/2 tbsp white wine vinegar
1/2 tbsp olive oil
1/2 tsp agave nectar or other sweetener
1-2 tbsp water
Herbamare (or salt) and pepper
1 small shallot, minced

Salad
~2.5 cups shredded kale
2 tbsp pumpkin seeds
1 cob sweet corn (I prefer it raw in this recipe but you can cook it first if you like)
1/2 cup blueberries
1/2 a ripe avocado, diced
~10 small mint leaves, thinly sliced


To make the dressing, place the first six ingredients in a blender or food processor and puree. Add enough water so that you can puree the ingredients until smooth (it should still be thick). Season to taste with herbamare and ground pepper. Stir in the minced shallot. Set aside.

To make the salad, place the shredded kale in a large bowl. Add about half of the dressing and massage it into the kale with your hands.

Toast the pumpkin seeds in a dry skillet on medium heat for a few minutes, until they are fragrant and lightly browned. Remove from pan and add to the kale. Slice the kernels off the corn and add them to the bowl, along with the blueberries, avocado, and sliced mint. Add the rest of the dressing and stir until is everything is mixed well. Season with additional salt and pepper if desired.

Makes 1 large serving or 2 smaller servings.


July 11, 2013

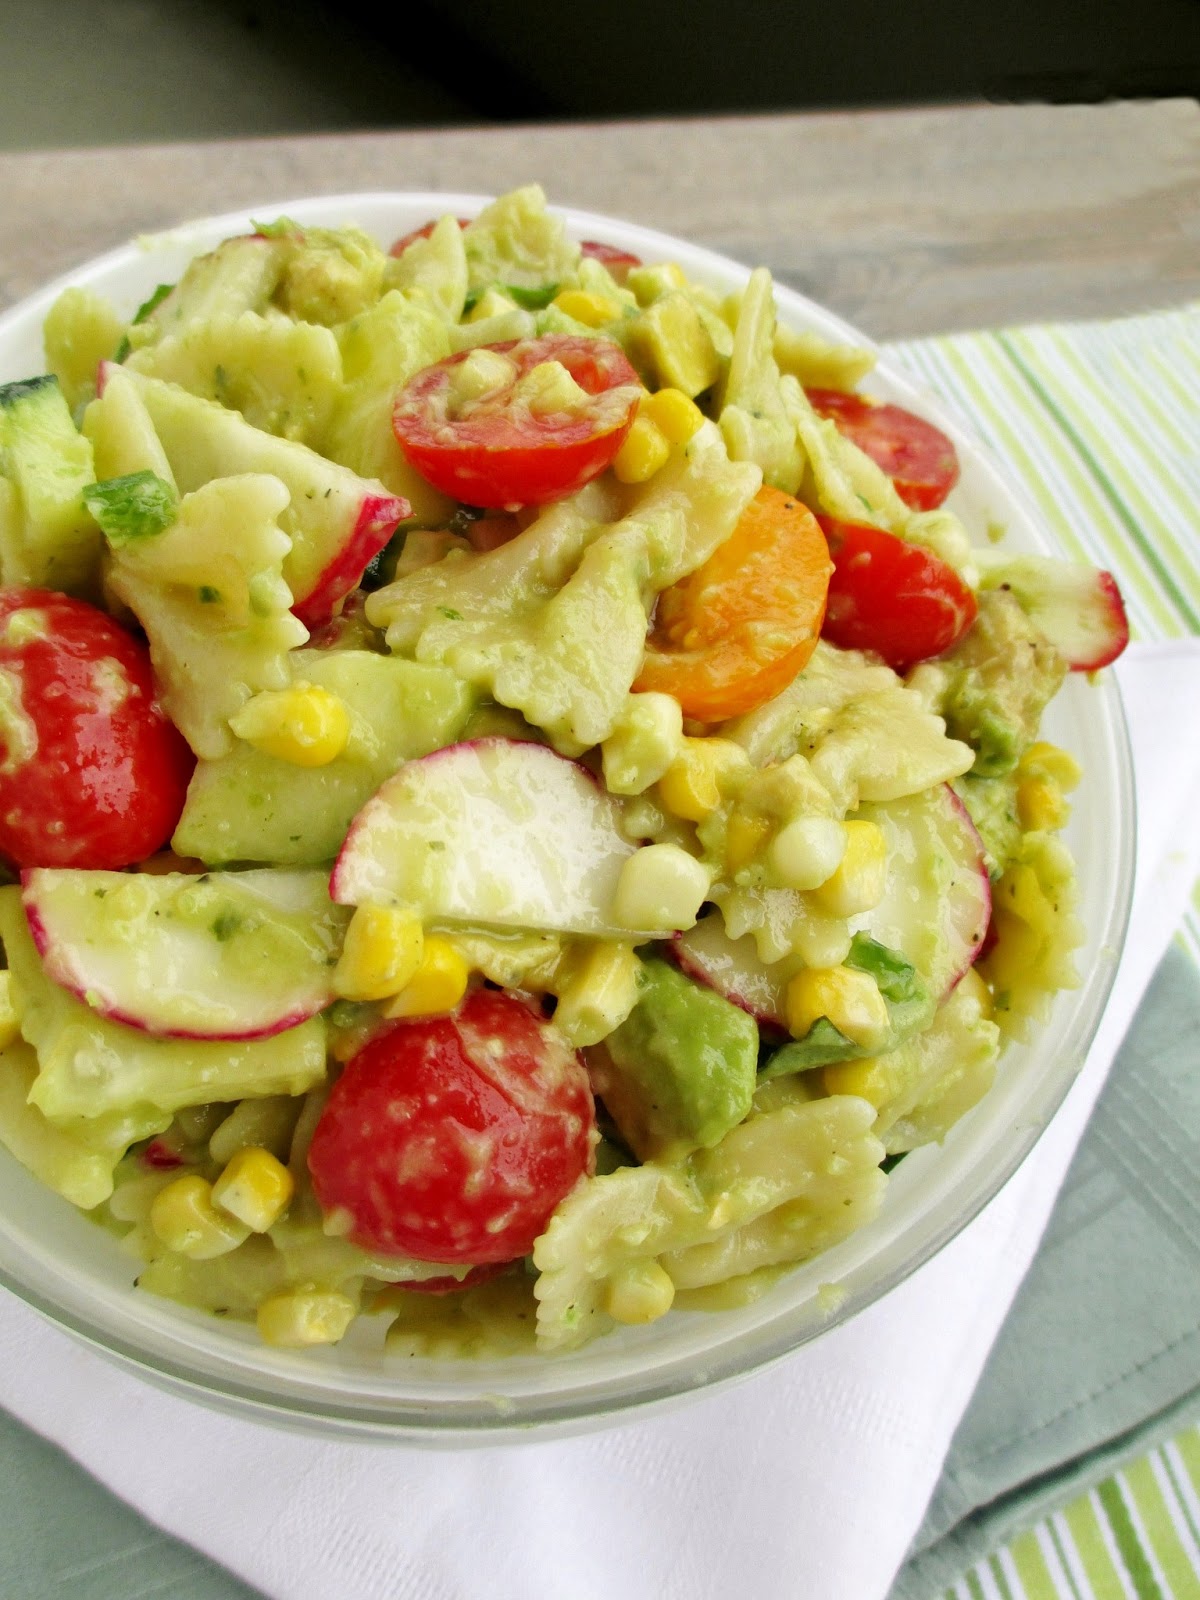
Summer Pasta Salad with Roasted Pepper Dressing


I've been wanting to make a summery pasta salad for a few weeks now, especially after my sister Natalie made this tasty looking arugula pasta salad with chickpea, veggies, olives, and goat cheese. 

So when I finally managed to make a trip to my local farmers' market this past weekend, I filled my bags with all the summer veggies I could find and brought them home to use in this pasta salad.

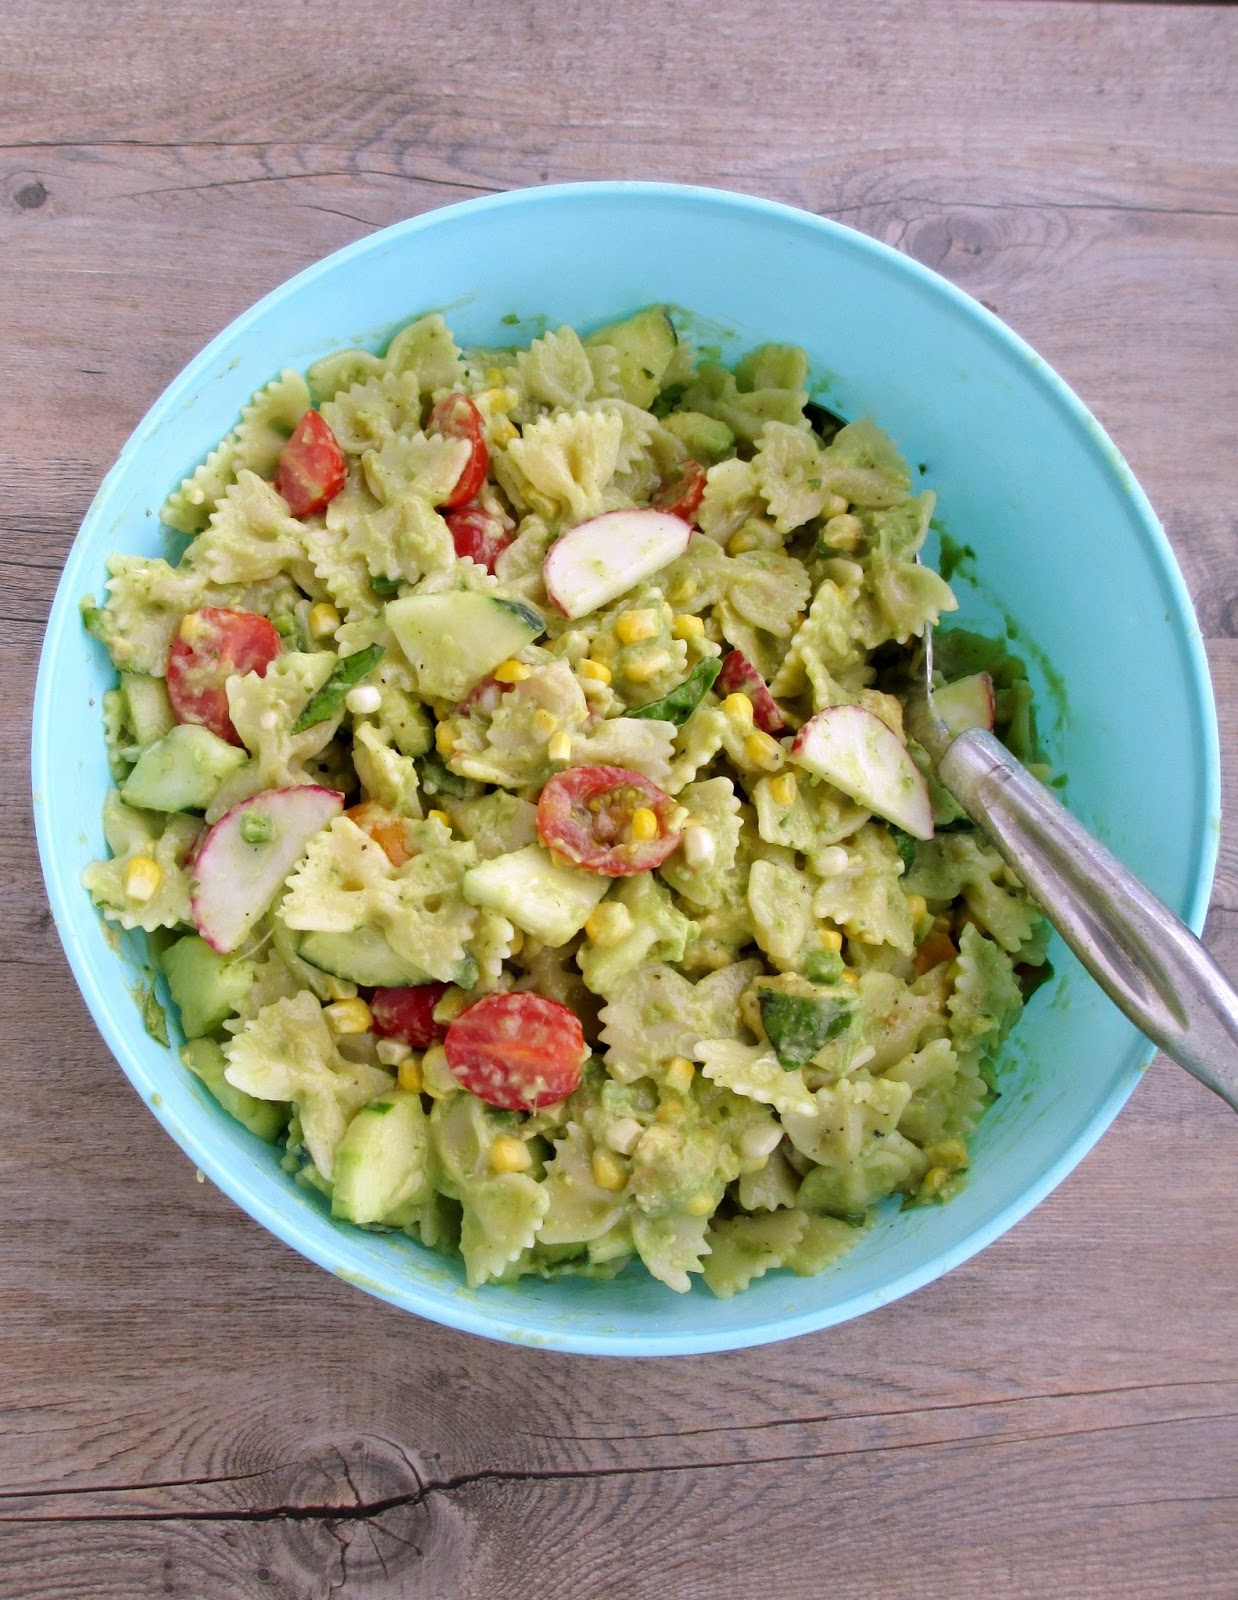
Besides pasta (obviously), this salad has heirloom tomatoes, corn off the cob, field cucumber, Ontario radishes, and fresh basil, plus avocado (not local) and jalapeno. 


And as if that wasn't enough, I tossed everything in a creamy green dressing made with roasted cubanelle peppers and avocado. I actually meant to use poblano peppers, but when I couldn't find those, I took my chances on the milder cubanelles and the dressing still turned out wonderful.  

The original recipe that I adapted the dressing from was meant to be a salad vinaigrette, so I reduced the amount of water to make it thicker and doubled all of the amounts to make sure I had enough to coat a large amount of pasta. I loved the tang from white wine vinegar and lime juice, and it still had a bit of a bite from jalapeno, garlic, and shallots. 


This big batch of pasta salad was enough to last me through meals all week, and I looked forward to eating it for lunch every day!

You can't really go wrong with all those fresh summer ingredients, but I really loved the combination of veggies and bowtie pasta noodles coated in the creamy dressing.

And if the long list of ingredients scares you off, don't worry - you can easily adapt the recipe to your whatever fresh veggies you have on hand. I'm thinking red or yellow peppers, green beans, or fresh peas would work well in this salad, and feel free to add more herbs besides the basil.


Summer Pasta Salad with Roasted Pepper Dressing
Inspired by a recipe from Crazy Sexy Kitchen

Dressing
4 medium sized cubanelle peppers (can substitute poblano peppers if you can find them)
1 tsp olive oil
1 large shallot, minced
2 large cloves garlic, minced
1 ripe avocado, peeled and diced
1 large jalapeno, minced
2 tbsp chopped fresh basil
1/2 tsp dried parsley
1/4 cup white wine vinegar
3-4 tbsp fresh lime juice
~2 tbsp water
Salt and pepper to taste

Pasta
1lb (one box) dried farfalle pasta
2 cobs of cooked corn, kernels removed
2 cups halved cherry or grape tomatoes
2 cups halved (or quartered) cucumber slices
1 cup halved radish slices
2 avocados, diced
1 large jalapeno, minced (optional)
1/4 cup chopped fresh basil
Salt and pepper to taste

First, make the dressing: Preheat oven to broil. Place the whole peppers on a baking sheet and broil until slightly blackened on all sides, turning occasionally to broil all sides. Remove from oven and place peppers in a bowl of water for a couple of minutes to loosen the skin. Carefully peel off as much of the thin outer layer of skin as you can, then slice off the stems and remove the seeds. Roughly chop the peppers into pieces.

Heat olive oil in a small skillet over medium heat. Add shallot and garlic and sauté until the onion is softened, about 3-4 minutes. Remove from heat.

Transfer the cooked peppers, shallot and garlic to a blender. Add the avocado, jalapeno, basil, parsley, vinegar and lime juice and puree until smooth. Add water to thin out a bit (you can add more if needed, but you want a thick dressing). Season to taste with salt and pepper.  Transfer dressing to a bowl and refrigerate until needed.

Fill a large pot with water and heat on the stove until boiling. Add pasta to the water and boil according to directions on the box. Drain and rinse with cold water.

Place cooked pasta in a large bowl. Add the remaining pasta ingredients and toss to combine. Pour dressing over the salad and stir until thoroughly mixed. Season to taste with additional salt and pepper.

Serve chilled or at room temperature.

Makes 4-6 servings.

July 03, 2013

Avocado, Mango & Orange Salad


Who doesn't love a refreshing, juicy fruit salad in the summer? I love adding fruit to my salads, whether it's a leafy salad or a grain-based salad, like this quinoa version.

This fruit salad is a bit different, in that it doesn't really have a base ingredient like lettuce or quinoa. Instead, it's just a simple combination of ripe fruits with fresh herbs, all marinated in a dressing made with freshly squeezed citrus juice.

I had made a version of the original recipe for my family recently as a way to use up some ripe fruits that were lying around, and we all loved it so much that I had to make it again. I changed things up a bit this time, adding some grape tomatoes and chopped cashews for a bit of crunch.

This salad had a lot of bright flavours, and I loved the creaminess of the avocado and mango with the juicy bursts of orange.

This would make a great side dish for a summer BBQ, or you can also eat it like a salsa on top of chips or quesadillas. And if you're in Canada with a Sobeys store nearby, I recommend picking up some of their "light and airy pop crisps" and using them as a base to eat this salad with!


Avocado, Mango & Orange Salad
Adapted from Saveur 

1 ripe mango, diced (I recommend using a champagne/Ataulfo mango)
1/2 cup chopped grape or cherry tomatoes
1 ripe avocado, diced
1/2 a jalapeno, minced
1/4 cup chopped cilantro
1 medium orange (I used a navel orange)
1.5 tbsp fresh lime juice
1/2 tbsp olive oil
Salt and white pepper
1/4 cup chopped roasted cashews

Combine the diced mango, tomatoes, and avocado in a bowl. Add the minced jalapeno and chopped cilantro and stir to combine. Peel the orange, using a knife to slice off all of the white parts of the skin. Carefully slice the orange into wedges.  Take 2 slices and squeeze all of the juice out of them into a small bowl. Measure 1 tbsp of orange juice and set aside (if you don't get 1 tbsp, use another orange slice until you have enough juice). Chop the remaining orange slices into pieces and add them to the salad (you should have about ¾ cup).

Add the lime juice and olive oil to the bowl with the orange juice. Season with salt and white pepper to taste. Stir or whisk to combine, then pour dressing over the salad, tossing to mix.

Let salad chill in the refrigerator until serving time. Sprinkle chopped cashews over the salad when you are ready to serve.

Makes 2 servings. 

April 23, 2013

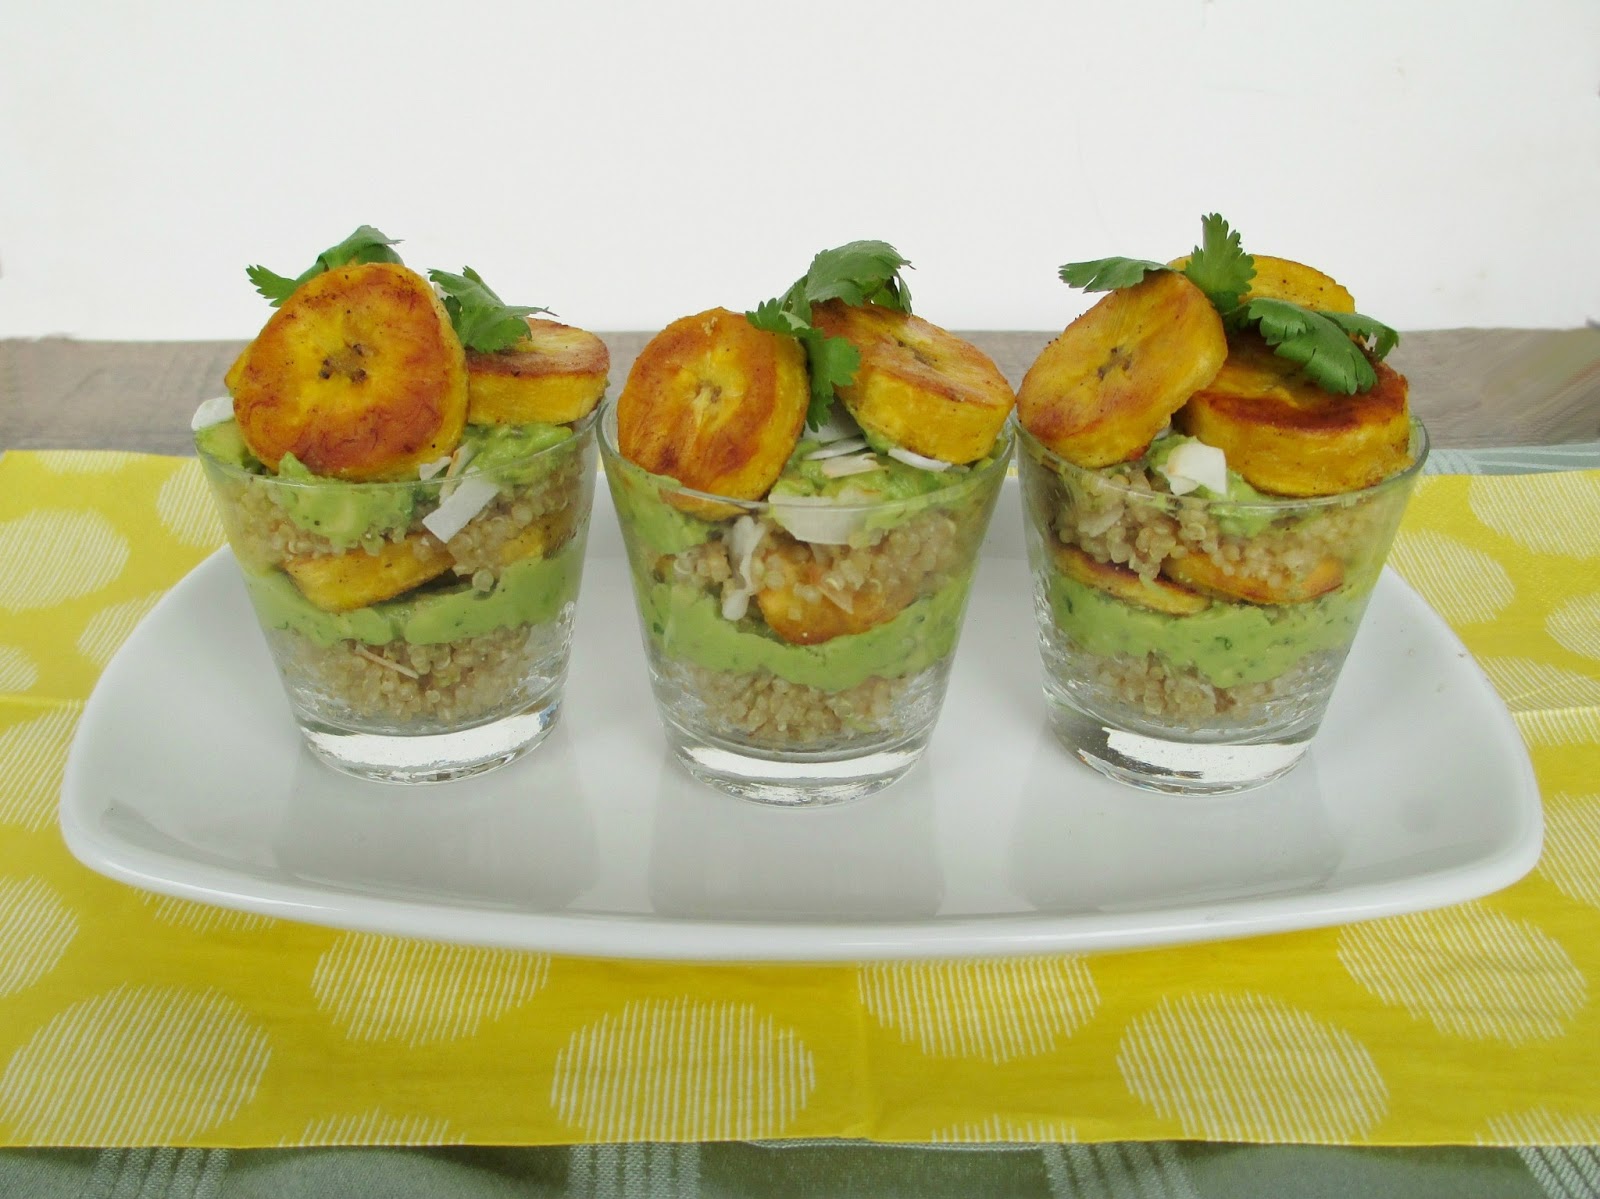
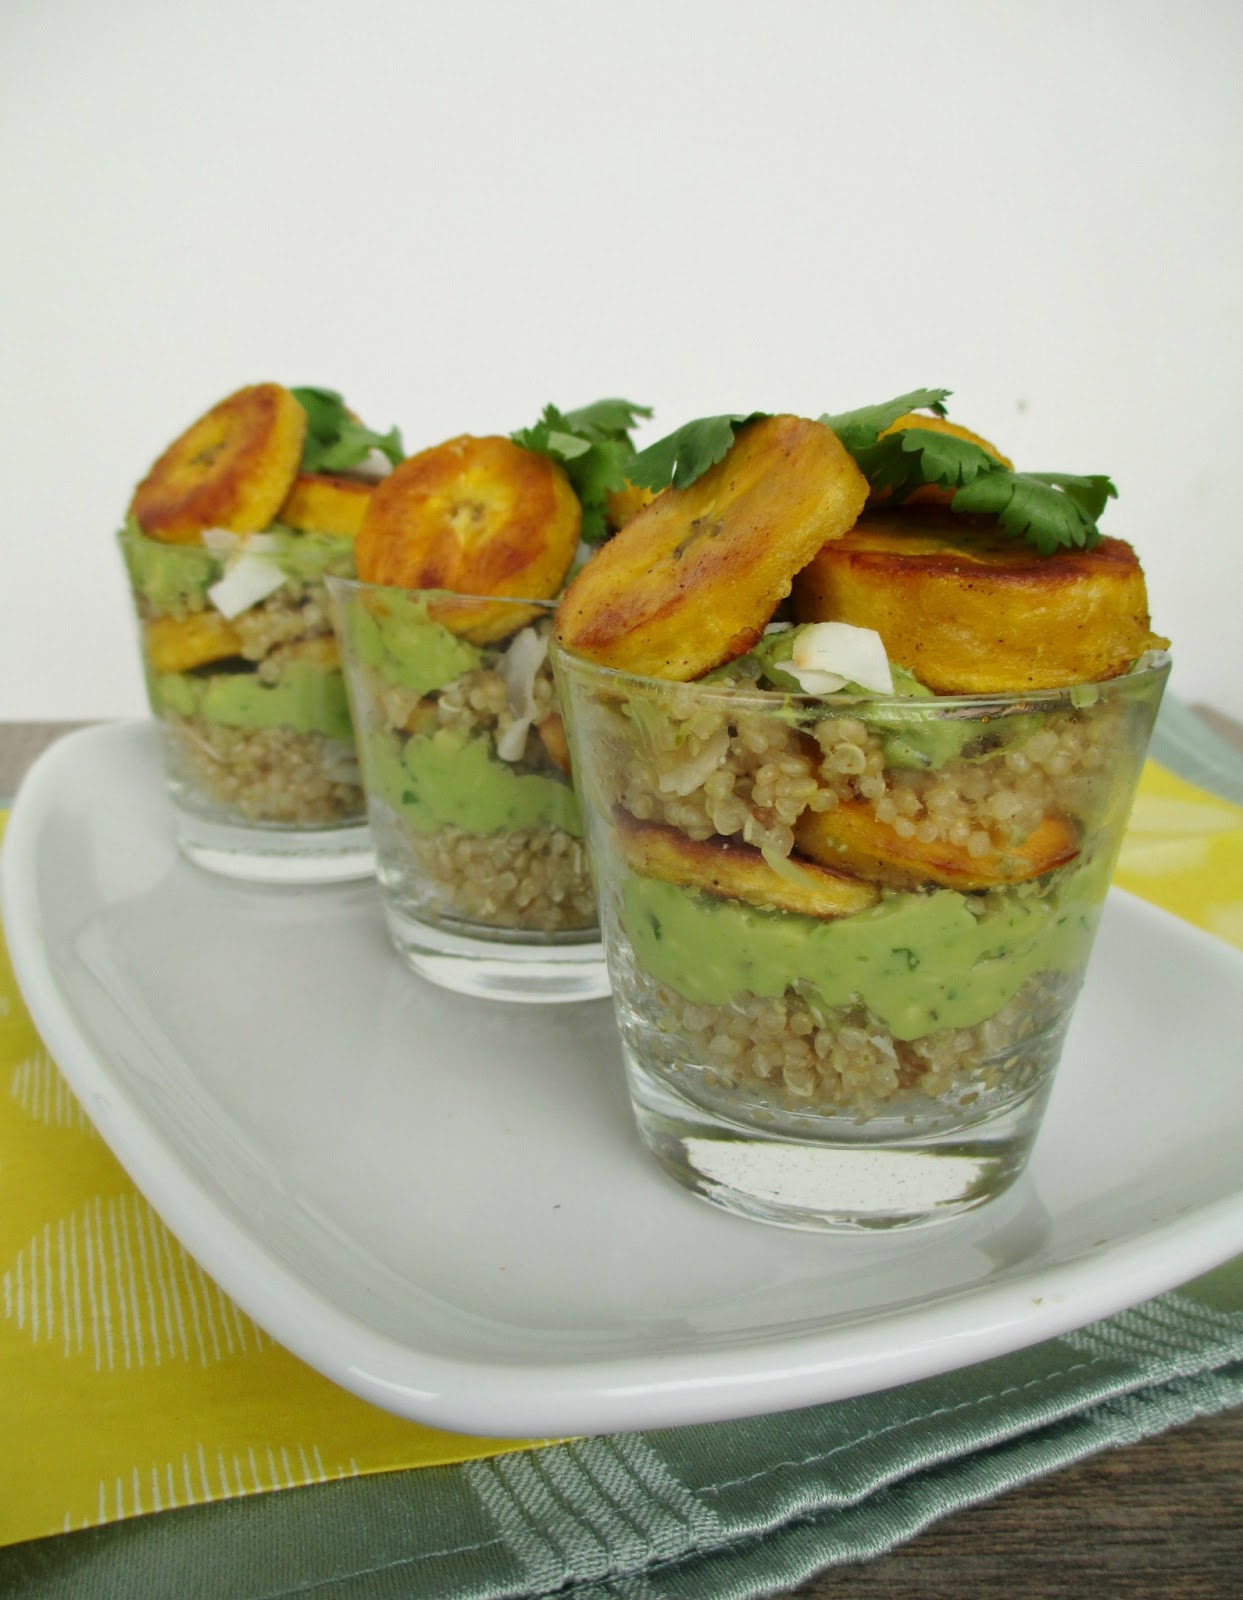
Layered Verrines with Coconut Quinoa, Avocado & Sauteed Plantains


It's a gorgeous day here in Ontario, so today's post will be a short one so that I can get outside and make the most of it before the rain returns tomorrow!

Plantains are one of my favourite things to eat, especially when combined with avocado and other tropical flavours like coconut. My plantain guacamole is one of my favourite recipes on the blog, and it also helped to inspire this dish.

The idea for layered quinoa avocado verrines first came from a recipe that I've made before from Vegetarian Times. While their recipe was more Mexican-flavoured and was topped with sprouts, I went for a tropical version topped with sauteed plantains.


The three components to this recipe all have tropical notes: first is a coconut quinoa made by cooking the quinoa in coconut milk and stirring in a bit of lime zest and toasted coconut flakes; next is a layer of avocado pureed with lime juice and cilantro; and the final component is a layer of sweet ripe plantain slices cooked in coconut oil with a dash of spices.

I could happily eat any of the layers on their own, but they combine to make a creamy and flavourful dish that can either be served in small portions as an appetizer or in larger portions as a main dish. Layering each of the components into a little glass or cup makes for a fun presentation that you can even prepare ahead of time if you're serving them to a group.

Hopefully these tropical flavours will help you get through the last of the cold weather for those of you who are still seeing snow, and let's hope the warmer weather is here to stay!


Layered Verrines with Coconut Quinoa, Avocado and Sauteed Plantains
Inspired by Vegetarian Times

Quinoa:
2/3 cup canned coconut milk or coconut milk beverage
1/3 cup dry quinoa
1/4 tsp ground ginger
Pinch of salt
½ tsp lime zest
2 tbsp coconut flakes

1 ripe avocado
1.5 tbsp lime juice
2 tbsp chopped fresh cilantro
Salt and pepper
1 tbsp coconut oil
1 ripe yellow plantain, peeled and sliced
Dash of cumin
Dash of chili powder
Salt to taste

Heat the coconut milk in a small saucepan over medium-high heat. Once it starts to boil, stir in the quinoa, ginger, and a pinch of salt. Cover, reduce heat to low and simmer for about 15 minutes. Remove from heat and keep covered for 5 minutes. Remove lid, fluff quinoa with a fork and stir in the lime zest and coconut flakes. Keep aside.

Meanwhile, make the avocado sauce: Place the avocado, lime juice, and cilantro in a food processor. Season generously with salt and pepper. Puree until smooth. Set aside.

Heat a large skillet over medium heat. Add the coconut oil. Once the coconut oil is melted, add the sliced plantains and sprinkle them with cumin, chili powder, and salt to taste. Let cook for 5-6 minutes total, flipping the slices halfway through. Remove from the pan and let drain on a plate lined with paper towel.

To assemble, place a portion of the quinoa in the bottom of each glass (use about 2/3 of the quinoa for this layer). Top with a thick layer of the avocado puree. Next, add a few plaintain slices. Repeat the layers once more, ending with the rest of the plantains on top. Garnish with extra cilantro and coconut flakes if desired.

Makes 3 servings.

March 04, 2013

Raw Rainbow "Ice Cream" Cake with Coconut Whipped Cream for St. Patrick's Day


With St. Patrick's Day coming up in less than two weeks, I wanted to experiment with a recipe to celebrate the occasion. It seems like pretty much every traditional Irish recipe from soda bread to colcannon has already been posted several times, and I've seen tons of different green tinted foods and beer infused foods on the web too. 

So instead of going with something green, alcoholic, or Irish, I looked for inspiration from another St. Patrick's Day icon: the pot o'gold at the end of a rainbow!

My mind immediately started spinning with ideas for how to create a rainbow themed recipe, and in the end, I came up with this layered cake made with a raw crust, four layers of "ice cream" made solely from fruit, and a coconut whipped cream topping to resemble a cloud. And of course, the final touch that I added just for photo purposes was a pile of gold coins (chocolate, not real gold unfortunately)!


I was so happy with how this cake turned out - it was just how I had pictured it in my mind. And since I loved how it looked so much, this post is going to be more picture-heavy than usual!

While the recipe may look long and it was a bit time consuming to make, there wasn't that much actual hands-on time and as long as you've got some ripe fruit and a food processor, you can easily make this yourself!


The crust is a simple mixture of raw nuts, dates and coconut that gets crushed up and pressed down into the bottom of your cake pan.

Once the crust is ready, the next step is making the layers for the cake one at a time.  The base of each layer is a frozen banana, which as many of you probably already know, turns into a creamy ice cream-like consistency when you blend it in a food processor (although it firms up quite a bit after being in the freezer).

By adding different coloured fruits along with the banana, I was able to make four distinct layers to represent (some of) the colours of the rainbow: purple from blueberries and blackberries; pink from strawberries; yellow from mango; and green from avocado.


I actually made enough for two small cakes, in different shapes.  Pictured above is a round cake made with a miniature springform cake pan (which makes removal much easier!), and below is a rectangular cake made by forming the layers in one side of a square cake pan.

I liked the look of both shapes, so feel free to use whichever size pan is more convenient. As long the pan has edges to hold in the layers, you can build your cake in pretty much any shape you like!


While you could eat the ice cream cake on its own, I highly recommend making the coconut whipped cream topping. If you've never made whipped cream from coconut milk before, you can find step-by-step guides at the Kitchn and Oh She Glows to use as references.

I sweetened the whipped cream with a bit of icing sugar and added a dash of coconut extract to bring out the coconut flavour even more.  I loved how light and fluffy the whipped cream was and it tasted so good with the fruity ice cream layers.


If you love rainbow sherbert, then you'll love this cake because that's pretty much what it tastes like when you take a bite of all the layers together.  And if you're worried about the avocado, don't be - it actually blends well with the other flavours and you don't really notice a pronounced avocado taste when you eat everything together.

And can you believe that there's no added sugar or sweetener of any kind in the whole cake (not including the whipped cream)? As long as you have ripe fruits, they should provide all the natural sweetness you need!

I doubt my cakes will last until St. Patrick's Day, but you don't need a holiday to make this - I think it would brighten up any day :)


Raw Rainbow "Ice Cream" Cake with Coconut Whipped Cream

Note: This recipe does require some preparation at least a day in advance. Before you start making it, make sure you have at least 3 ripe bananas in your freezer and a can of coconut milk chilling in the fridge.

Crust
1/4 cup natural almonds
1/4 cup raw cashews
2 tbsp unsweetened shredded coconut
1 tbsp ground flax
Dash of salt
1/2 cup (heaping) chopped dates

Purple Layer
1 small-medium frozen ripe banana, chopped
1/4 cup blueberries and blackberries

Pink Layer
1 small-medium frozen ripe banana, chopped
1/4 cup chopped strawberries

Yellow Layer
1/2 a large frozen ripe banana, chopped
1/2 heaping cup chopped ripe mango

Green Layer
1/2 a large frozen ripe banana, chopped
1/2 a ripe avocado (about ½ cup)
1/2 tsp lime zest

Topping
1 can full fat coconut milk, chilled in the fridge overnight unopened
1 tbsp icing sugar
1/2 tsp coconut extract (can substitute vanilla extract if desired)


To make the crust, place the almonds and cashews in the small bowl of a food processor and process until the nuts are ground. Add the coconut, flax, and salt and process again until ingredients are combined. Add the dates and process until the dates are broken down. The mixture should stick together if you squeeze it together with your fingers.

Transfer the crust to the bottom of your desired pans.  I filled one round mini cake pan (4-inch wide, 2-inch deep pan with a removable bottom) and used the remaining crust to make a rectangular shaped cake by filling an 8x8 square pan (lined with a piece of parchment paper) about one-third to one-half full. Press the crust mixture down firmly, making sure it is evenly spread.  Store the crust in the fridge or freezer while you make the remaining layers.

Make the ice cream layers one a time, in whichever order you like. For each layer, place the ingredients in the small bowl of your food processor and process until smooth, scraping down the sides of the bowl with a spatula if necessary. Once you’ve made one layer, spread it evenly over the crust in your pan(s). Let it sit in the freezer until it starts to firm up, at least 15-30 minutes.

Continue with the next ice cream layer, following the same process as before. Let each layer firm up in the freezer before adding the next one. 

Here's how the cakes looked before frosting:


To make the whipped cream, open your can of coconut milk (do not shake it first). Scoop out the thick white cream that should have formed on top into a bowl (leave the watery part in the can). Use a hand mixer (or stand mixer) to beat the cream until it starts to firm up. Add the icing sugar and coconut extract and continue beating until the cream is nice and thick and fluffy like whipped cream, about 3-5 minutes.

Keep ice cream cake(s) stored in the freezer. For the best defrosting results, transfer cake to the fridge for about 1 hour prior to serving, then let sit at room temperature for 5-10 minutes, until the ice cream starts to soften slightly. Top cake(s) with whipped cream (Note: If you are storing the cake in the freezer, I would recommend keeping the whipped cream separate in the fridge, and adding it to individual servings when you're ready to eat, otherwise it will become a frozen block of whipped cream, as I learned!). 

Makes 2 small cakes or 1 larger cake.


January 29, 2013

Layered Sweet Potato Dip


With the Super Bowl coming up this weekend, I've been thinking about snacks that I could make to eat while watching the game. I'm not a big football fan by any means, but watching the Super Bowl is a tradition for me, and along with watching comes eating a meal of football food!

My traditional Super Bowl snack is usually a dip to eat with tortilla chips.  In the past, I've made an Indian inspired layer dip, my favourite plantain guacamole, and the standard layer dip that usually includes shredded cheese, sour cream, guacamole and salsa.

This year, I wanted to change things up a bit, and I found the perfect inspiration from Two Saucy Sisters blog, who put a unique spin on layer dip by adding a layer of mashed sweet potato.  I loved this idea, but I thought the sweet potato on its own might be a bit plain, so I decided to make a sweet potato hummus to use as one of the layers instead.


The sweet potato hummus came out super thick and creamy and was spiced up a bit with flavourful ingredients like garlic, lemon juice, and notes of cumin, cayenne and smoked paprika. And that's just one layer of this dip!

In addition to the hummus, you add a layer of mashed avocado with lime juice, then some salsa, and finally you top it off with plain yogurt. You can also add a sprinkle of chopped cilantro and a drizzle of sriracha sauce to give the dip even more of a kick.

This is actually really easy to put together, especially if you make the sweet potato layer ahead of time.  I loved how creamy the dip was and the way the layers mixed together when you dug in.  I think a great layer dip is one where each component tastes great on its own, but they come together to make something that tastes even better, and this dip definitely does that!

You can serve this in one larger dish for easier sharing, or divide it up into small cups to make fun individual dip portions, like I did. Just dig your spoon all the way to the bottom to get a bit of everything, and spread onto a tortilla chip - or just enjoy straight from the spoon!

If you're watching the game this Sunday, I hope you have fun cheering on your favourite team and of course cooking and eating lots of good food!  Also, I've set up a new Superbowl tag for some of the recipes on here that I think would make good Super Bowl food (like quesadillas, salsa, dips and fries), so feel free to check that out for more ideas!


Layered Sweet Potato Dip
Adapted from Two Saucy Sisters

*Note: I didn’t include specific amounts here – just use as much of each as you like, as long as you include approximately equal amounts of all four main components (sweet potato hummus, avocado mash, salsa, and plain yogurt or sour cream).

Sweet potato hummus (recipe below)
1 ripe avocado
1 tbsp lime juice
Salt and pepper
Taco seasoning (optional)
Prepared salsa (I used a mango salsa)
Plain yogurt (can substitute sour cream)
Fresh cilantro (optional)
Sriracha (optional)

First, make the sweet potato hummus (see instructions below). 

Next, make the avocado layer: Chop the avocado and place in a bowl. Give it a rough mash, then add the lime juice. Season with as much salt and pepper as you like, and sprinkle with taco seasoning. Continue mashing until smooth.

To serve in individual sized cups: Start by placing a large spoonful of the hummus in the bottom of each cup. Next, add an equal amount of the avocado mash. Top with as much salsa as you like. Finally, add a spoonful or two of plain yogurt or sour cream (Note: I added one more spoonful after taking these photos). Garnish with chopped fresh cilantro and a drizzle of sriracha if desired.

To serve in one container: Layer ingredients in the same order, spreading each one out to fill the container.

Serve with tortilla chips and spoons for scooping.


Makes enough for 4 individual sized cups. You will have lots of sweet potato hummus left over, so if you want to make more cups, just double the amounts for the avocado layer and use more salsa and yogurt.


Sweet Potato Hummus
1/2 lb sweet potato, peeled and cut into chunks
1 cup canned chickpeas, drained and rinsed
1 clove garlic, peeled and chopped
1.5 tbsp tahini
1.5 tbsp fresh lemon juice
1 tbsp olive oil
1/2 tsp cumin
1/4 tsp cayenne
1/4 tsp smoked paprika
1/8 tsp salt

Place sweet potato chunks in a steamer basket and steam, covered, until tender (about 10 minutes). Remove from heat but keep the cooking liquid aside.

Place cooked sweet potato and all remaining ingredients in a food processor and puree until smooth. If the mixture is too thick, add some of the cooking liquid from the sweet potatoes to thin it out (I added 1 tbsp). Taste and add more seasoning if desired.

Transfer hummus to a bowl and keep refrigerated.


August 27, 2012

Vegan Posole ( Mexican Hominy Soup)


A few months ago, I ordered a Mexican corn soup from a local cafe and I was surprised to see that the corn came as large, white, chewy kernels instead of the small, crunchy yellow corn I was used to. I later learned that the corn used in my soup was actually hominy, also known as white corn posole, made by removing the outer layers of corn kernels and drying them.  Then when I visited Zambia in July, I noticed the same type of corn appearing in many of the dishes, where it was called maize.

After tasting hominy in a few different ways, I really came to love its hearty, firm texture and I wanted to cook with it myself.  You can find cans of hominy in the grocery store, but rather than starting off with the canned variety, I decided to use the dried kernels.

The first recipe I made with my new ingredient was this soup called posole.  Mexican posole is traditionally made with hominy and meat, but I made a vegan version inspired by the soup I had at the cafe, and adapted from a recipe for tortilla soup that I found in Appetite for Reduction.  The cookbook recipe called for fresh corn and pinto beans, but I replaced both with an extra portion of hominy instead.

Along with the hominy, the soup is filled with onions, peppers and tomatoes, and flavoured with lime juice, cilantro, garlic and jalapeno.  I also added some cubed avocado at the end to bulk up the soup a bit more with a healthy fat. Finally, both the soup I had eaten at the cafe and the recipe in my cookbook included pieces of tortilla chips as a garnish. Since I didn't want to buy a whole bag of tortilla chips just for this recipe, I used broken up taco shells as a substitute.


As you can see,my tortillas/taco shells started to get soggy immediately after adding them to the hot soup, so I would suggest only adding them right when you want to eat, or leaving them out (personally I enjoyed my soup just as much without the tortillas, although I might have had a different opinion if I used actual tortilla chips, so I'll leave the option up to you!)

The big chewy kernels of corn were my favourite part of the soup, and I loved how hearty it was between the hominy and the avocado.  Even without the crisp tortilla strips that I was hoping for, there were still lots of textures going on that made this more like a chunky stew than just a soup.

For a non-vegan version, you could also try adding shredded cheese and sour cream as a garnish to make this more like a taco soup, but I liked it just fine without!

The only difficult part about this recipe is having to soak the hominy ahead of time, but as long as you plan ahead, the rest of the dish is pretty easy and doesn't take too long to put together. Or you could even skip the soaking step and just used canned hominy  - although I haven't tried that myself, so I can't vouch for the results!


Vegan Posole
Adapted from Appetite for Reduction

1 cup dry white corn posole (or 2 cups cooked hominy) - I used this brand
1 tsp olive oil
1 small yellow onion, thinly sliced
2 jalapenos, seeded and minced
1 poblano or Cuban pepper, seeded and diced
4 cloves garlic, peeled and minced
1/4 to 1/2 tsp red pepper flakes (to taste)
1 tsp kosher salt
28 oz can of whole tomatoes
28 oz vegetable stock
1 tbsp cumin
1/2 cup chopped fresh cilantro, plus more for topping
Juice of 1 lime
1 avocado, diced
hot sauce to taste (optional)
About 1 cup broken up corn tortilla chips (I used broken hard taco shells instead)

Soak the dry posole/hominy in water for at least 6 hours or overnight.  Drain and add to a pot filled about two-thirds full with water.  Bring to a boil with a couple pinches of salt, reduce heat and simmer for 1.5-2 hours, until softened (if the water runs out partway through, add some more so the hominy doesn’t dry up).

Heat the oil in a large pot over medium-high heat.  Add the onion, jalapeno and poblano pepper and sauté for 4-5 minutes, stirring occasionally.  Add the garlic, red pepper flakes and salt and sauté one more minute.

Add the tomatoes to the pot, breaking them up with your hands as you put them in (I also cut some up further with a knife).  Fill the empty tomato can with vegetable stock and add to the pot.  Stir in the cumin.  Cover and bring to a boil. Add the cooked hominy and cilantro and simmer, uncovered, for 5 minutes.  Remove from heat and stir in the lime juice.

To serve, ladle portions of soup into bowls and divide the avocado pieces among the bowls. Add a dash or two of hot sauce if you want more heat. Garnish each bowl with a handful of tortilla pieces and top with more cilantro.

Makes 4-6 servings.

August 23, 2012

Triple Layer Avocado Banana Carob Pudding


I've been known to experiment with some unusual or less common ingredients in my baking, like beets, daikon radish and chickpeas.  Sometimes these experiments turn out well (in the case of my raw beet cheesecake and chickpea granola bars) but other times they've sadly ended up in the garbage.

Another "abnormal" ingredient that I've been wanting to incorporate into a dessert for a while now is avocado.  I've seen many versions of avocado pudding around the blogosphere lately and I've been curious to try it, but a couple of factors have prevented me from making it so far:

1) Most of recipes I've seen are for chocolate pudding, and I'm not a big fan of chocolate desserts
2) I don't often make dessert just for myself and I wasn't sure how my family would feel about me serving them a pudding made with avocado for dessert!

But last week, I had a ripe avocado that I had no plans for, and I was craving a cool and creamy dessert, so I decided to go ahead and make my own single-serving version of avocado pudding.


Instead of making a one-dimensional chocolate pudding, I wanted to try different variations and flavours that I could layer on top of each other like a parfait.  I decided on a simple avocado-banana version with lemon as one flavour, and a carob version since I find carob a bit milder and sweeter than chocolate.  To separate the two avocado layers, I made a banana pudding with a bit of peanut butter, which I thought would go well with the carob and avocado.

This pudding actually came together really quickly and since I used frozen bananas, it was already thick and cold enough to eat without needing to chill in the fridge first (although you could still make it ahead of time and keep it in the fridge until you're ready to eat it).

The texture was so smooth and creamy from the avocado, and I loved each of the flavours - both separately and combined!  I liked that the carob layer had a hint of chocolate flavour without being too rich, and I loved the burst of lemon and coconut in the top layer.  Finally, a garnish of shredded coconut and raw cacao nibs adds some welcome texture and crunch.

And in case you're worried about eating avocado for dessert, I actually thought it contributed more in terms of texture rather than flavour - I probably wouldn't have guessed it was made with avocado if I hadn't known!

Now that I've finally tried avocado pudding, I can't believe I waited so long!  I ate half of my "dessert" in the afternoon immediately after I photographed it and had to stop myself from eating it all at once because I wanted to save some for a second dessert later.  And I even think I could get away with serving this non-traditional vegan pudding to my family without any complaints!


Triple Layer Avocado Banana Carob Pudding

1.5 frozen small bananas
Half a ripe avocado
1/4 cup + 1-2 tbsp non-dairy coconut milk beverage (or almond milk)
1 tbsp + 1/2 tsp agave nectar
1/2 tbsp carob powder
1 tbsp fresh lemon juice
1/4 tsp coconut extract (optional)
1/2 tbsp peanut butter
Shredded coconut and cacao nibs for topping

Place 1 small frozen banana and the avocado in a food processor. Add ¼ cup coconut milk and 1 tbsp agave and process until all chunks are broken down and mixture is smooth.

Divide mixture evenly into two small bowls.  Add carob powder to one bowl and whisk until incorporated. Add lemon juice and coconut extract to the other bowl and stir to mix. Place both bowls in the fridge while you prepare the other layer.

Rinse out the food processor and place the other half frozen banana in the small bowl of the food processor. Add 1-2 tbsp coconut milk beverage, 1/2 tsp agave and 1/2 tbsp peanut butter and process until smooth.  Place in the freezer to chill.

When ready to serve, layer each of the three mixtures into a parfait glass or bowl (I put the carob on the bottom, the banana in the middle, and the avocado-lemon on top).  Sprinkle with shredded coconut and cacao nibs if desired.  Serve cold.

Makes 1 large serving or 2 small servings.

May 21, 2012

Avocado Potato Salad for a Virtual Potluck


Today is an official holiday here in Canada for Victoria Day, and it's also the unofficial start to the summer!  With summer comes the start of patio season, BBQ season, and enjoying meals outdoors in the company of friends and family.

So today seems like the perfect day to have a potluck with some of the wonderful people I've met through blogging!  Since we can't all be together in person, Courtney of The Fig Tree blog came up with the idea of having a virtual potluck - that way we can share all of our dishes with each other and with our readers!

The rules were pretty simple - we each had to come up with at least one vegan or vegetarian dish that we would "bring" to the potluck, focusing on a spring/summer theme. Each of us will post our recipe on our blogs today, and link up to the other participating blogs.

For my dish, I decided to bring a traditional potluck item - potato salad, but with an updated and more interesting twist!


If you've ever been to a potluck, chances are that somebody brought a potato salad.  While there are some good potato salads out there, the majority are not vegetarian or vegan-friendly, since they often contain bacon or sausage and are covered in a heavy mayonnaise or sour cream dressing. In my opinion, the worst offenders are those containers of gloop from the grocery store deli section - I'm sure there are some people who love those potato salads and I've eaten them in the past too, but to me it's not a real potato salad if you can't even distinguish the pieces of actual potato in it!

For my potato salad, I used mini red potatoes that I boiled and diced into bite-sized pieces.  I tossed the potatoes with bright red cherry tomatoes and garlic, and lots of fresh lemon juice and dill to brighten it up.  Finally, I mashed a ripe avocado and mixed that into the salad so that everything became coated in a thick  layer of avocado dressing.

I loved how creamy and filling the potato salad was with the mashed avocado, and the flavours all went so well together!  This would be a great dish to make in the summer for those backyard BBQs or potlucks, and I'm sure your guests would be excited to try a new take on the old potato salad!


Avocado Potato Salad
Inspired by this recipe from Gourmet

12 oz mini red potatoes
1.5-2 tbsp olive oil
1 tsp lemon zest
2 tbsp fresh lemon juice
3 tbsp fresh dill, minced
1 clove garlic, minced
About 10 cherry tomatoes, halved or quartered
1 ripe avocado
Salt and pepper

Place the potatoes in a saucepan and cover  with water. Bring to a boil and add a dash of salt to the water, then reduce heat to medium and simmer for 15-20 minutes, until potatoes are tender.  Remove from heat and drain.

Once they are cool enough to handle, cut potatoes into quarters and place in a bowl. Toss with the olive oil, lemon zest, lemon juice, dill, and garlic.  Add cherry tomatoes to the bowl and stir to combine.  Mash the avocado with a fork (I like to leave it a bit chunky) and add it to the bowl.  Stir until the potatoes are evenly coated with the avocado.  Season with salt and pepper to taste. 

Serve warm or at room temperature.

Makes 2-4 servings (2 as a main dish or 4 as a side). *Note: I only made a smaller salad, so if you wanted to make this for a larger crowd, you should double or triple the recipe


Now that you've seen my dish, it's time to check out what everyone else brought to our virtual potluck - just click on the picture to see each post with the recipes!

We ended up with a pretty good mix of appetizers, side dishes, main course and dessert...and this wasn't planned, but there also seemed to be a bit of an avocado theme going on!

Starting with snacks and appetizers, we have this unique Broccoflower Guacamole from Elaina of the blog Flavour - if you've ever wondered what to do with a broccoflower, try this recipe!


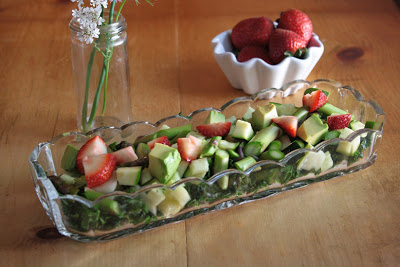
Two people brought beautiful fresh salads with a mix of fruit, veggies and avocado - first up is this Super Green Salad with Strawberries from Caitlin of The Vegan Chickpea with lots of good-for-you green ingredients!


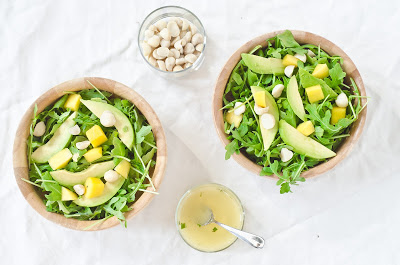
And second is this gorgeous Mango Avocado Salad with Pineapple Mint Dressing from our lovely host Courtney of The Fig Tree blog - I love all the tropical ingredients in this salad!


For our main course, Helena of Peaches and Cream brought this Big Bertha Burger - a hearty veggie burger made with oats, herbs and spices


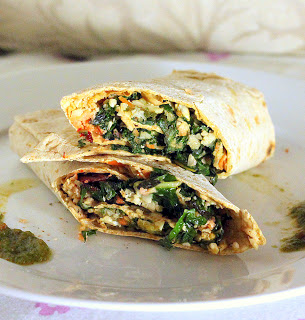
Richa of the blog Hobby and More brought another main course dish full of Indian flavors - these Chard Cauliflower Carrot Wraps with Mint Thyme Tomato Chutney. I would love to eat these wraps for lunch any day, and the mint chutney would have so many other uses too!


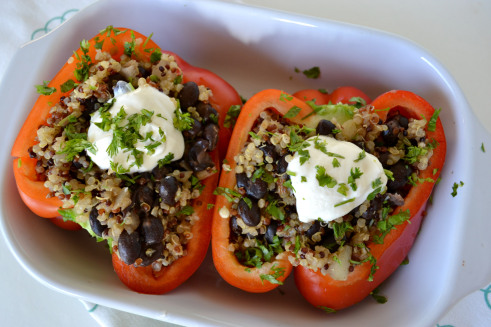
And lucky us - we got a third main course from Cara of Fork and Beans, who made Stuffed Peppers (I say lucky because in normal circumstances, there might be none or just one vegetarian main course option at potlucks, so to have three means we would be very well fed!)


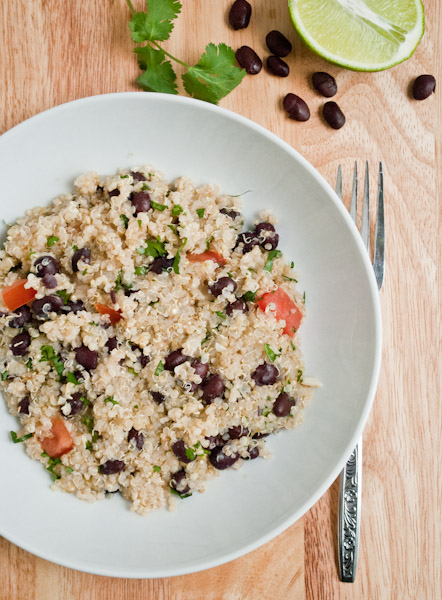
Next, Destini of The Healthy Wife made another quinoa dish - this Lime Cilantro Black Bean Quinoa Salad - I think it sounds so flavourful and it would be a filling side dish for vegetarians with the beans and quinoa!


And of course, what's a potluck without dessert?  The dessert options at our virtual potluck sound pretty amazing and feature lots of seasonal  fruit...plus they're on the healthy side so you don't have to feel guilty about ending your meal with one of these options!

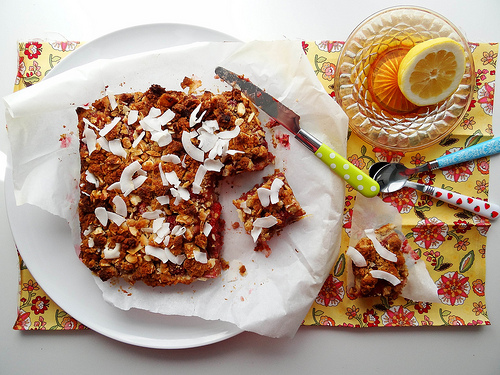
First up for dessert are these Strawberry Rhubarb Coconut Crumb Bars from Heather of Sunday Morning Banana Pancakes - I was immediately hooked after reading the title because I love the combination of strawberries and rhubarb, and adding coconut sounds even better!


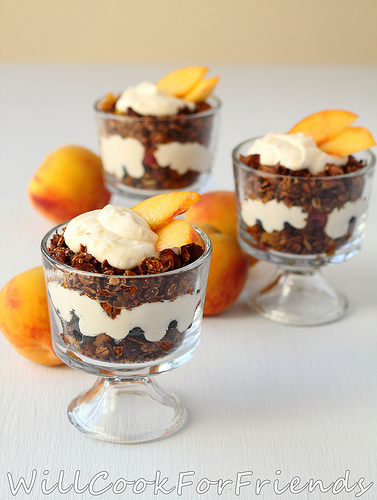
Next, Willow of Will Cook for Friends brought these beautiful Peaches and Cream Granola Parfaits - homemade granola layered with a peach and yogurt puree, topped with peach slices...I would be happy to eat this for breakfast or dessert!


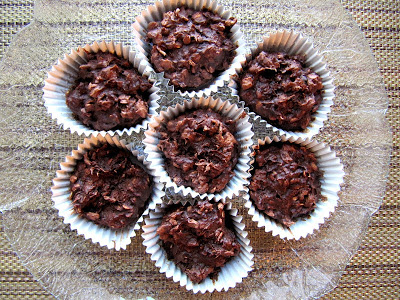
Finally, Natasha of the blog VIMWAC (A Vegetarian in Manitoba Without a Clue) brought these Chocolate and Banana Rolled Oat Bites - I love easy no-bake desserts like this, and I'm sure they would disappear quickly at a potluck!


Everything looks so good that I wish this was a real-life event so I could try it all!  Thanks for joining our virtual potluck and hope everyone has a great week!


LinkWithin

Related Posts Plugin for WordPress, Blogger...