Showing posts with label Indian. Show all posts

January 07, 2014

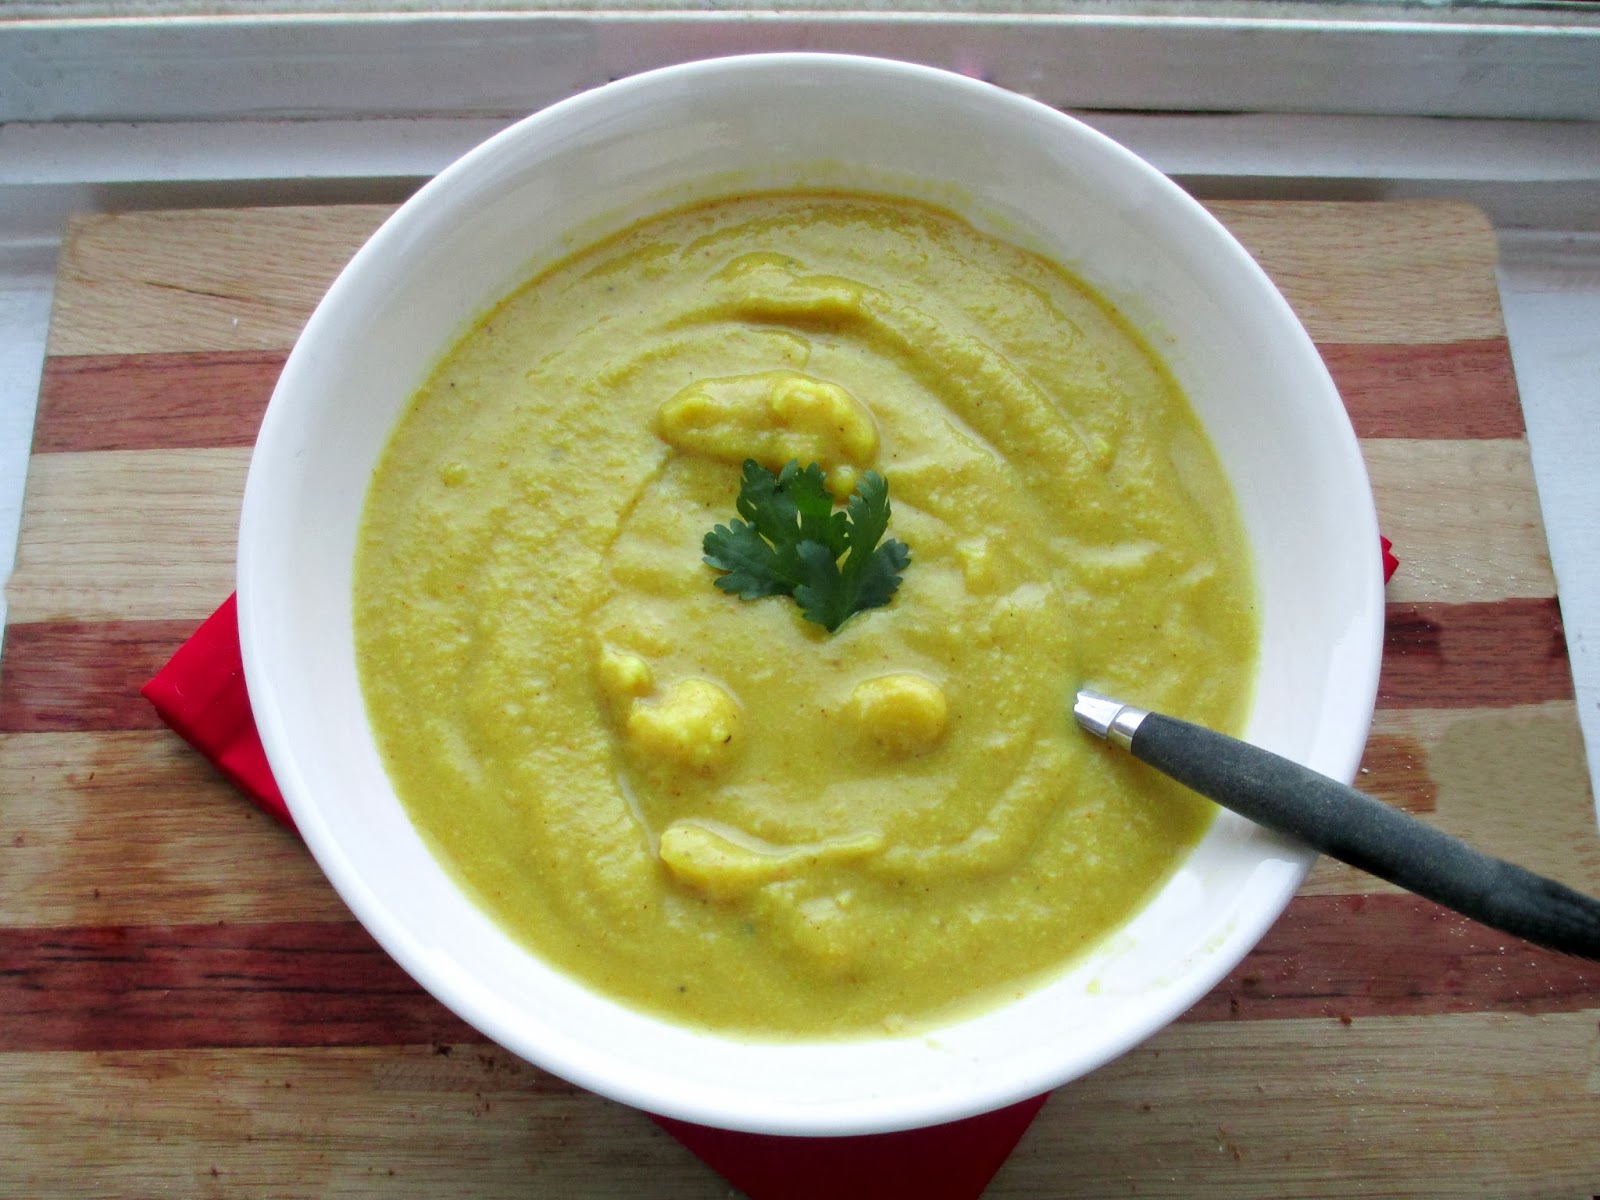
Curried Cauliflower Potato Soup


I know most of you are probably sick of hearing people talking about the cold weather lately, so I'll try not to complain about it in this post! But with the wind chill bringing temperatures to below -30 all day in my area, all I'm craving is a nice comforting bowl of soup (and some hot chocolate)!

I actually made this soup last week when we were in the middle of another extremely cold spell and it was the perfect dinner to warm me up from the inside out - not only from the temperature of the soup but also from the spices that were just hot enough to make my nose start to run!

This recipe is actually very similar to one that I made a couple of years ago, but instead of pumpkin this time, I used potato to help thicken it. I love pureed vegetable soups that are thick and creamy, and this is definitely one of those soups! I also left some of the cooked cauliflower pieces separate and stirred them in after pureeing the soup to add some texture throughout.

A bowl of this warm curry spiced soup with some naan bread to scoop it up is my idea of a comforting meal for this winter weather! Hope you're all staying warm too!


Curried Cauliflower Potato Soup
Slightly adapted from my Cauliflower Pumpkin Soup

2 tbsp canola oil, divided
1 head cauliflower, chopped
1-2 cloves garlic, minced 
1 yellow onion, diced
1 tbsp curry powder
Dash of cayenne
4 cups vegetable broth
2 small potatoes, peeled and diced
Salt to taste
~1 tsp lemon juice


Heat 1 tbsp oil in a large saucepan on medium heat. Add about 1/4 to 1/3 of the chopped cauliflower pieces to the pot (I chopped these pieces even smaller first) and sprinkle with salt and pepper. Sauté, stirring often, for about 5 minutes, until cauliflower is browned. Remove from pot and set aside.

Heat remaining 1 tbsp oil in the saucepan on medium heat. Add garlic and cook for about 30 seconds, stirring often. Add onion, curry powder, and cayenne and cook for another 4-5 minutes, stirring occasionally, until onion has softened.

Add vegetable broth, remaining cauliflower pieces and potato. Bring to a boil, then reduce heat to medium-low, cover, and simmer for about 15 minutes, until the vegetables are soft. Transfer soup to a blender in batches and puree until smooth. Stir in the reserved cauliflower pieces.

Taste and add salt if desired (I didn’t add any because my vegetable broth had enough salt in it). Stir in lemon juice.

Makes ~4 servings.


October 30, 2013

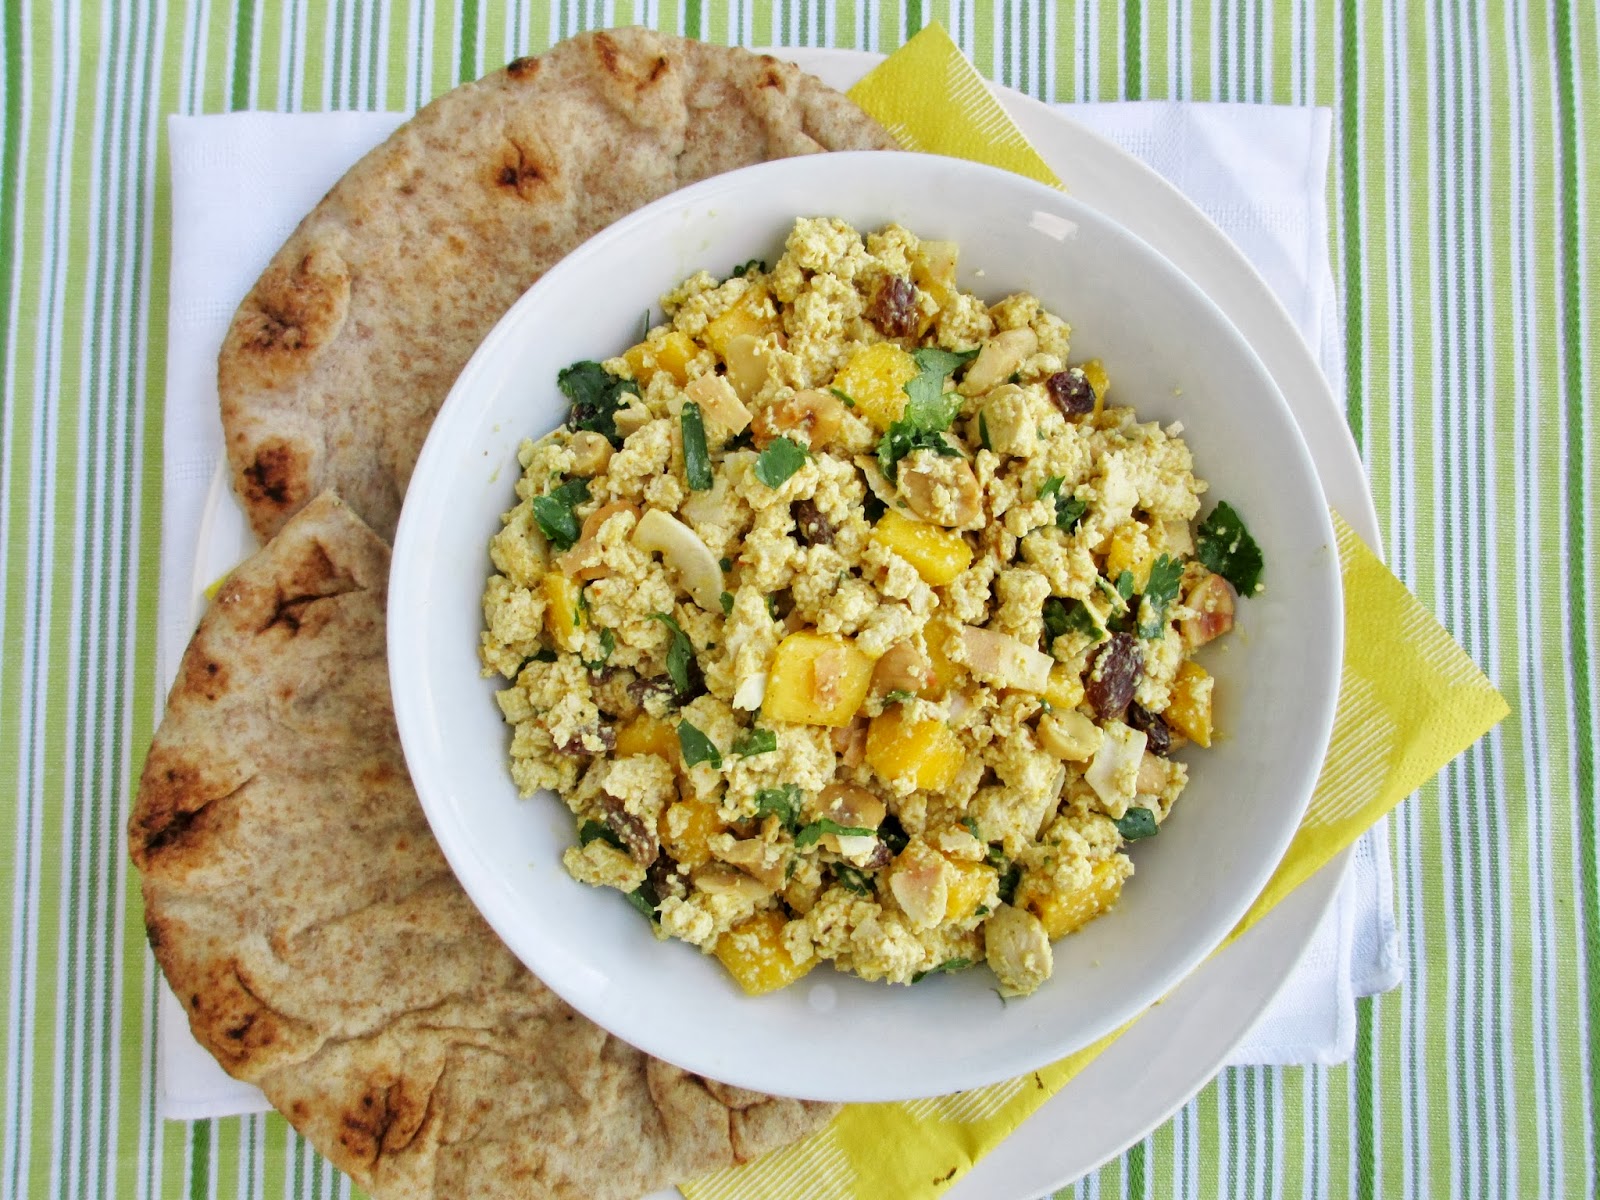
Mango Curry Tofu Salad


Things have been a bit busy for me lately, and between schoolwork and weekend trips, I haven't been able to spend as much time blogging as usual (sadly I won't have a new Halloween recipe this year!). I've still been cooking and making recipes, but I've been leaning more towards easy and quick dishes that can be made with minimal ingredients, like this one!

This mango curry tofu salad was the perfect meal to have around for lunches last week - with no cooking involved, it can be thrown together pretty quickly, and it will keep in the fridge for a couple of days so you can make it ahead of time and bring the leftovers for lunch. 

If you've never had tofu salad, it's basically uncooked firm tofu that you crumble up into pieces to resemble egg salad. Whip up a creamy dressing and add in some fruit, veggies, or fresh herbs and you get a refreshing and light lunch that can be eaten on its own or stuffed into a wrap or pita. 


I usually make a simple tofu salad with apples and a mustard dressing, but this time I changed things up a bit and made an Indian-inspired version.  I left out the mayo in the dressing and used yogurt instead, mixed with curry powder and mango chutney for a sweet-and-spicy combo.

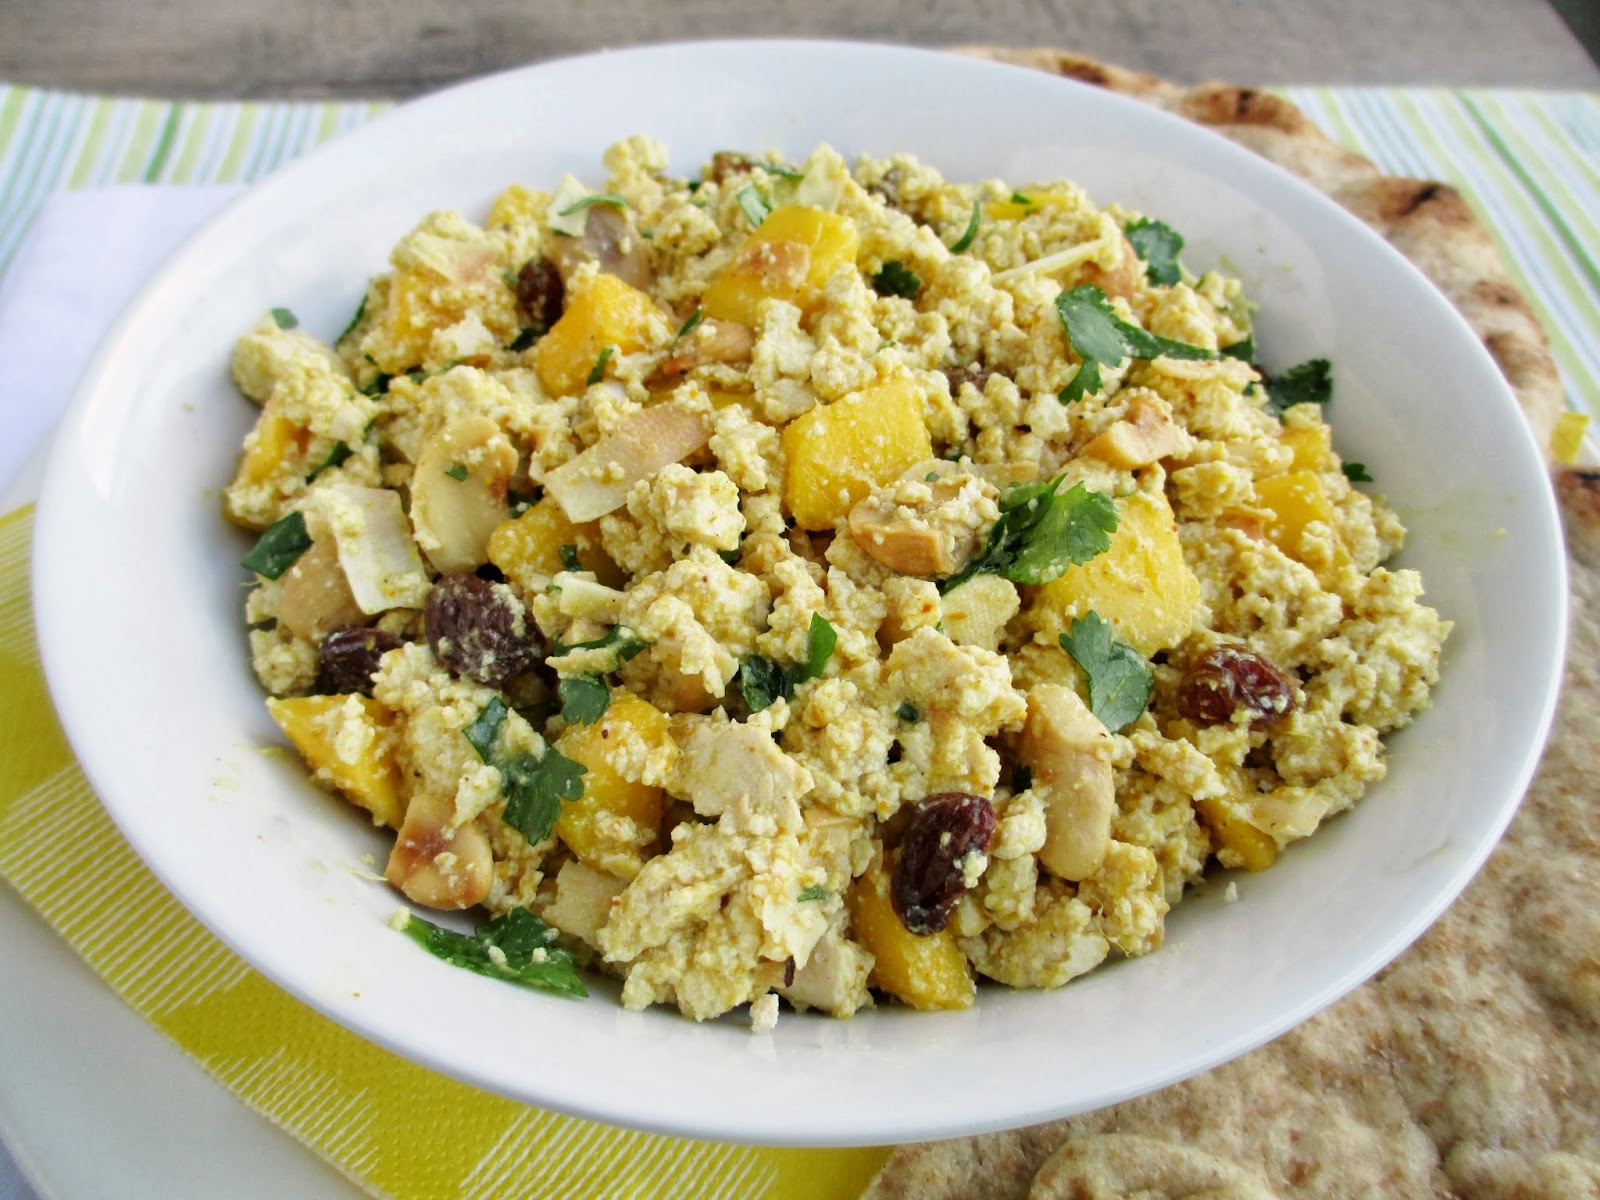
Along with the tofu, I added fresh chopped mango, cilantro, raisins, cashews, and toasted coconut for a mix of textures. The tofu soaked up the dressing to become extra creamy and cool, and I loved the burst of fruitiness from the mango along with the crunchy nuts and chewy coconut. 

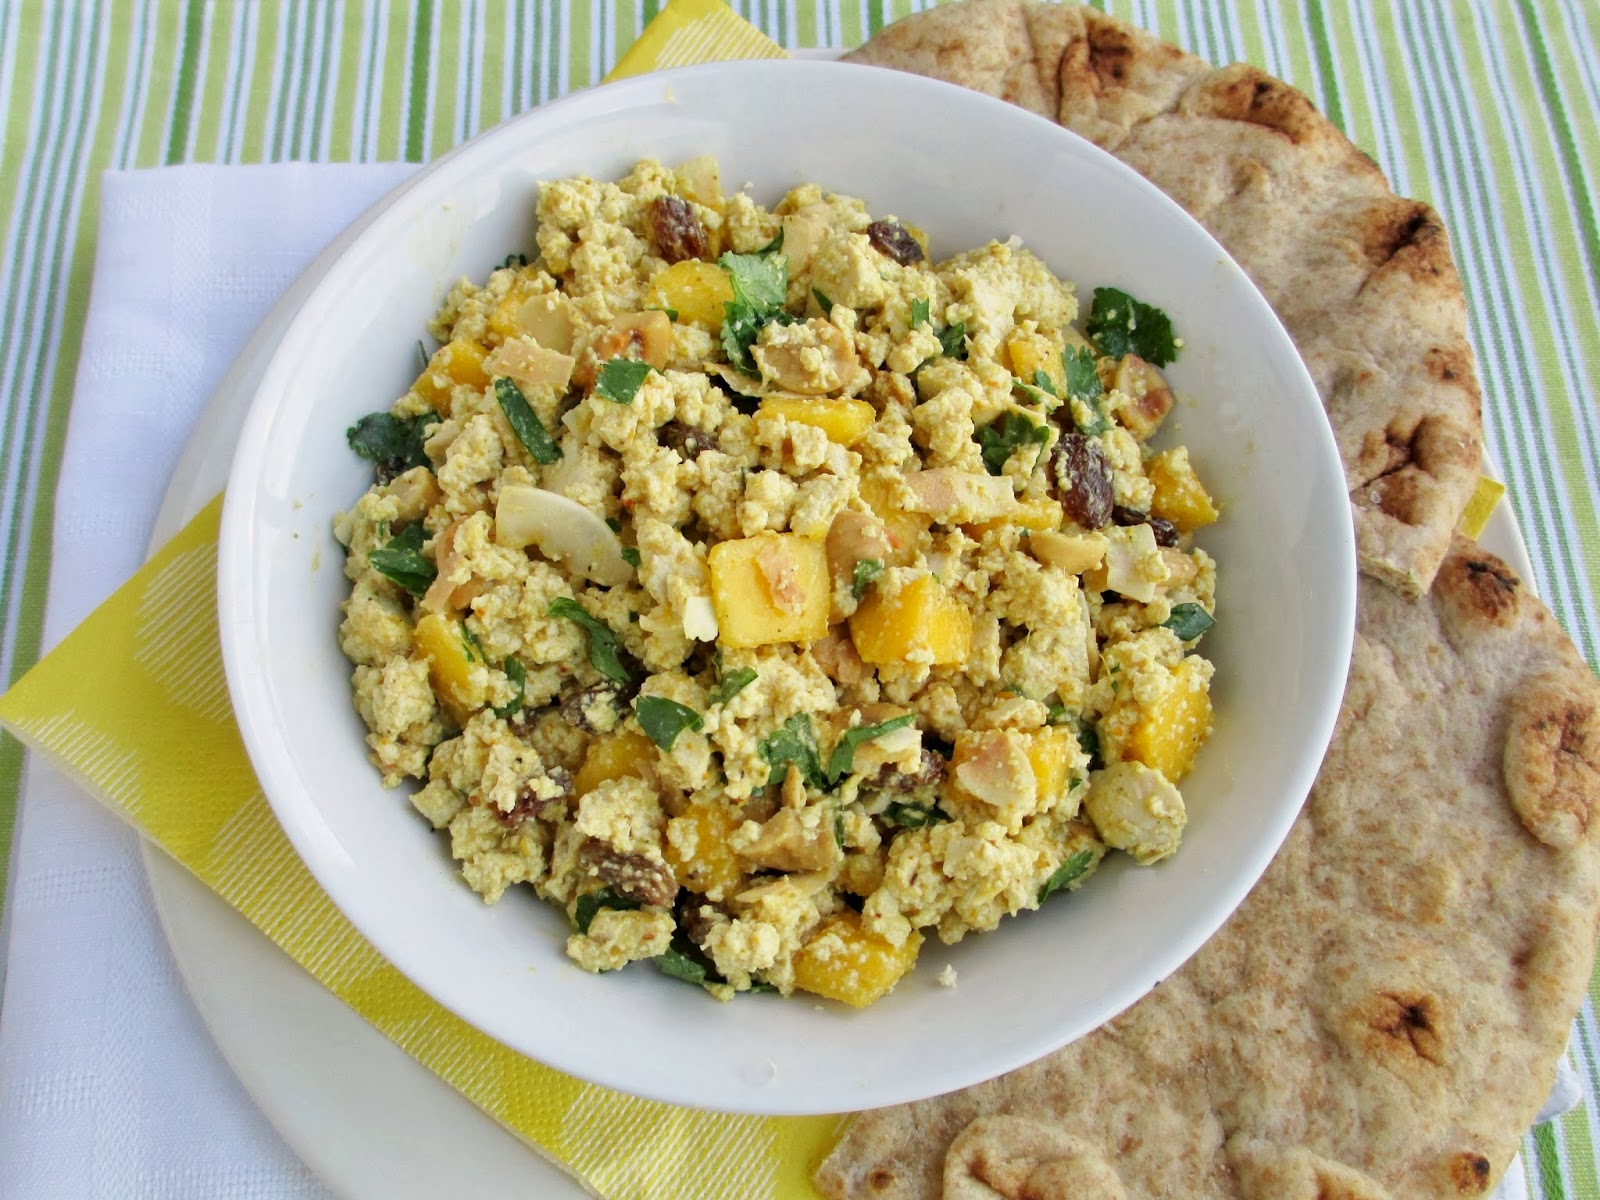
I liked eating this both on its own and inside of a pita, or you could try toasting some naan bread to make naan "chips" and eating it like a dip! 


Mango Curry Tofu Salad
Inspired by Whole Foods Market and Eating Well

1 small package (175g) firm tofu
1/2 a large ripe mango, chopped into small pieces (about ½ cup)
2 tbsp unsweetened flaked coconut
2 tbsp chopped roasted cashews
2 tbsp sultana raisins
2 tbsp chopped fresh cilantro
1/4 cup plain low-fat yogurt (use vegan yogurt if desired)
2 tbsp mango chutney
1 tsp curry powder
Dash of salt and pepper

Slice the tofu in half and press between layers of paper towel under a heavy book for about 15 minutes to remove some of the water. Crumble the tofu using your hands or a fork into a bowl. Add the mango to the bowl.

Heat a small skillet over medium-low heat. Add the coconut flakes and toast just until they start to turn light brown. Immediately remove from pan and add to the tofu mixture.  Add the cashews, raisins, and cilantro to the bowl as well and toss to mix everything.

In a separate small bowl, stir together the yogurt, mango chutney, curry powder, salt and pepper. Pour this mixture over the tofu salad and stir well to mix.

Chill in the fridge until ready to serve.  Eat on its own, with naan bread, crackers, or stuffed into pitas.

Makes 2 servings.


September 26, 2013

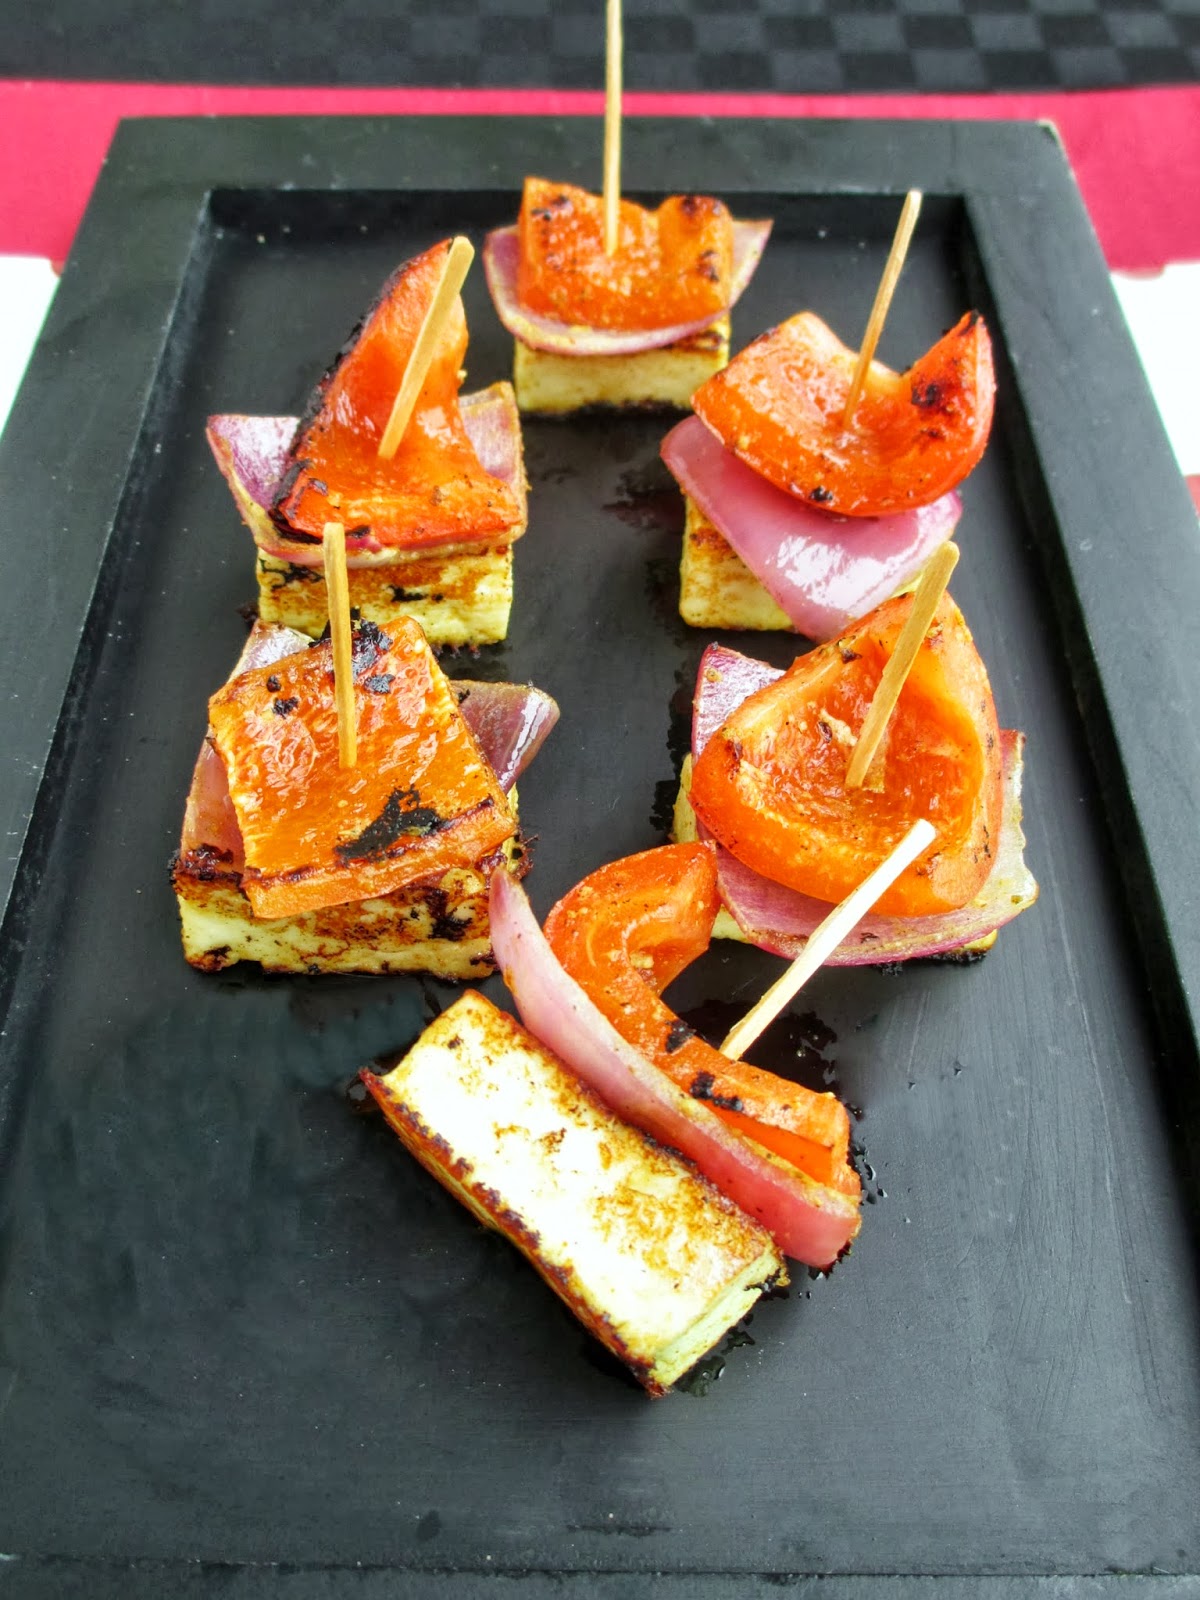
Mini Paneer Tikka Skewers


After my brief trip to New Delhi a couple of weeks ago, I was re-inspired to make another Indian recipe, since it's been a while since I've cooked Indian food for myself!

I know Indian cuisine has a reputation for being overly complicated and difficult to cook, but as long as you have a few key spices, you can make simplified versions of classic Indian dishes, like these miniature bites inspired by paneer tikka!

Paneer tikka is a vegetarian alternative to the popular dish of chicken tikka, and is basically just cubes of paneer cheese marinated in a creamy spiced sauce and grilled on a skewer with vegetables like onion and peppers.


For my version, I kept things pretty simple by making an easy marinade for the paneer out of yogurt and spices and cooking everything on the stovetop, since I don't have an authentic tandoor oven!

Once you've browned the paneer and cooked the pepper and onion, you just have to assemble one piece of each item and stick a toothpick through them to make these cute miniature skewer bites!

While these may not be perfectly authentic, I think they're a fun idea to serve as an appetizer at a party if you're looking for something new and different to bring. I brought these to a party last week and they all got eaten up, even though they were cold by the time I served them. They aren't too spicy so they're a good option to serve a crowd of people who have different levels of spice tolerance, although you could serve them with a bowl of spicy cilantro chutney for people who want an extra flavour kick!


Mini Paneer Tikka Skewers
Adapted from The Spice Tailor and Sanjeev Kapoor

1 (350g) package paneer cheese
1 cup plain yogurt
2 tbsp fresh lemon juice
2 cloves garlic, minced
1 tbsp minced fresh ginger or 1 tsp ground ginger (I used ground)
1 tsp garam masala
1 tsp cumin
1/2 tsp red chilli powder (the Indian spice, not the Mexican one)
1/4 tsp turmeric
Dash of salt (to taste)
1 tbsp chickpea flour (gram flour)
1 red or green pepper
1 medium red onion
1-2 tbsp olive oil
chaat masala (optional, if you have some)


Slice the paneer in half horizontally so that you get two bricks the same size as the original. Slice each brick into equal sized cubes (about 12 pieces per brick).

In a bowl or blender, mix the yogurt, lemon juice, garlic, ginger, spices, and chickpea flour until smooth. Pour some of the mixture into a shallow baking dish or a large ziplock bag. Add the paneer cubes, then pour on the rest of the liquid mixture. Let the paneer marinate in the fridge for at least 30 minutes.

Slice the pepper and onion into about 1” square pieces (you want approximately equal sized vegetables, and they should be about the same size as your paneer cubes).

Heat 1 tbsp oil in a large skillet on medium heat. Remove the paneer cubes from the marinade and add them to the pan. Let cook for about 2-3 minutes, then flip over and cook the other side, until all sides are lightly browned. Remove paneer cubes from pan and let sit.

Meanwhile, toss the pepper and onion pieces in the leftover marinade while the paneer is cooking. Once the paneer is done, add another tbsp of oil to the pan (or spray with cooking spray) and add the vegetables. Cook for about 8-10 minutes, stirring occasionally, until the peppers and onions are softened.

To assemble skewers, place one piece of pepper and one piece of onion on top of a paneer cube and skewer with a toothpick. Repeat until all the vegetables and paneer are used up. Sprinkle assembled skewers with a bit of chaat masala spice.

Serve warm or at room temperature. You can pour a bit of the leftover marinade over the skewers, or you can eat them dipped in a chutney (I would recommend a spicy green Indian chutney).


Makes about 24 mini skewers.

September 23, 2013

What I Ate in India


The past month or so has been a busy one for me, since I've been lucky enough to squeeze in two international trips to different conferences, and the latest one took me all the way to India!

I've talked a lot about my love for India on the blog before, especially the food there. Not only do I love the flavours and variety of Indian dishes, but I can't think of another country that I've visited with such a high prevalence of vegetarians and vegetarian options at restaurants - quite different than my experiences in other countries like Japan!

My last trip to India in 2010 (when I did an internship there) was mostly based in Mumbai, so I was excited to have the chance to visit the capital city of the country this time, New Delhi. It was a pretty short trip and most of my time was spent at the conference center (the amazing Taj Palace Hotel - highly recommended if you ever visit New Delhi!). I did have one full free day though, so I took advantage of being so close to the Taj Mahal and made a day trip of going to see it. Now I know why it's considered one of the seven wonders of the world - it is absolutely beautiful!

But on to the food, since that's why you came here in the first place!


This was my first meal the morning after I arrived in New Delhi. From my limited experience, Indian hotels tend to offer amazing breakfast buffets, and this one was especially good because they made fresh dosas to order! Dosa is basically a large, thin, crispy crepe that comes plain or with a filling. I got a masala dosa, which is stuffed with a potato mixture, and of course I ate mine with lots of coconut chutney (in the middle of the plate), which I love too!

I also love the Indian style coffee they serve for breakfast - it's extra milky and sweet, which makes it taste like a treat instead of just my regular morning caffeine dose!


Every day there were new items at the breakfast buffet, so I always filled my plate with lots of different things to try, which would keep me full for a long time! Above are some of the dishes that I tried - in the interest of keeping this post short, I won't explain what they all are, but I've labelled them so that you can look them up if you see something that interests you (or I'm happy to try to respond to any questions in the comments)!


For my first dinner, I was still pretty jet-lagged so I just went down to the hotel restaurant, which actually turned out to be really nice! If you're visiting India as a tourist, you can definitely get some attentive service at many hotel restaurants - I was never allowed to serve myself from my own plate, and I had at least 3 different waiters constantly checking on me, not to mention the chef himself who came out at the end!

I ordered the delhi chaat platter because I love chaats (street food snacks), and it came with an assortment of four different chaat items: palak patta chaat (fried spinach leaves topped with yogurt and chutneys), dahi gujiya (lentil dumpling soaked in yogurt and chutneys), ragda pattice (potato patties topped with a split pea gravy and chutneys), and raj kachori (crisp puri shells stuffed with a potato mixture and various chutneys).  I loved the combination of yogurt with sweet and spicy chutneys in each of the dishes! The meal also came with complimentary pappadums to start, mini naans with pumpkin chutney (top right), and a bite of sweet dessert!
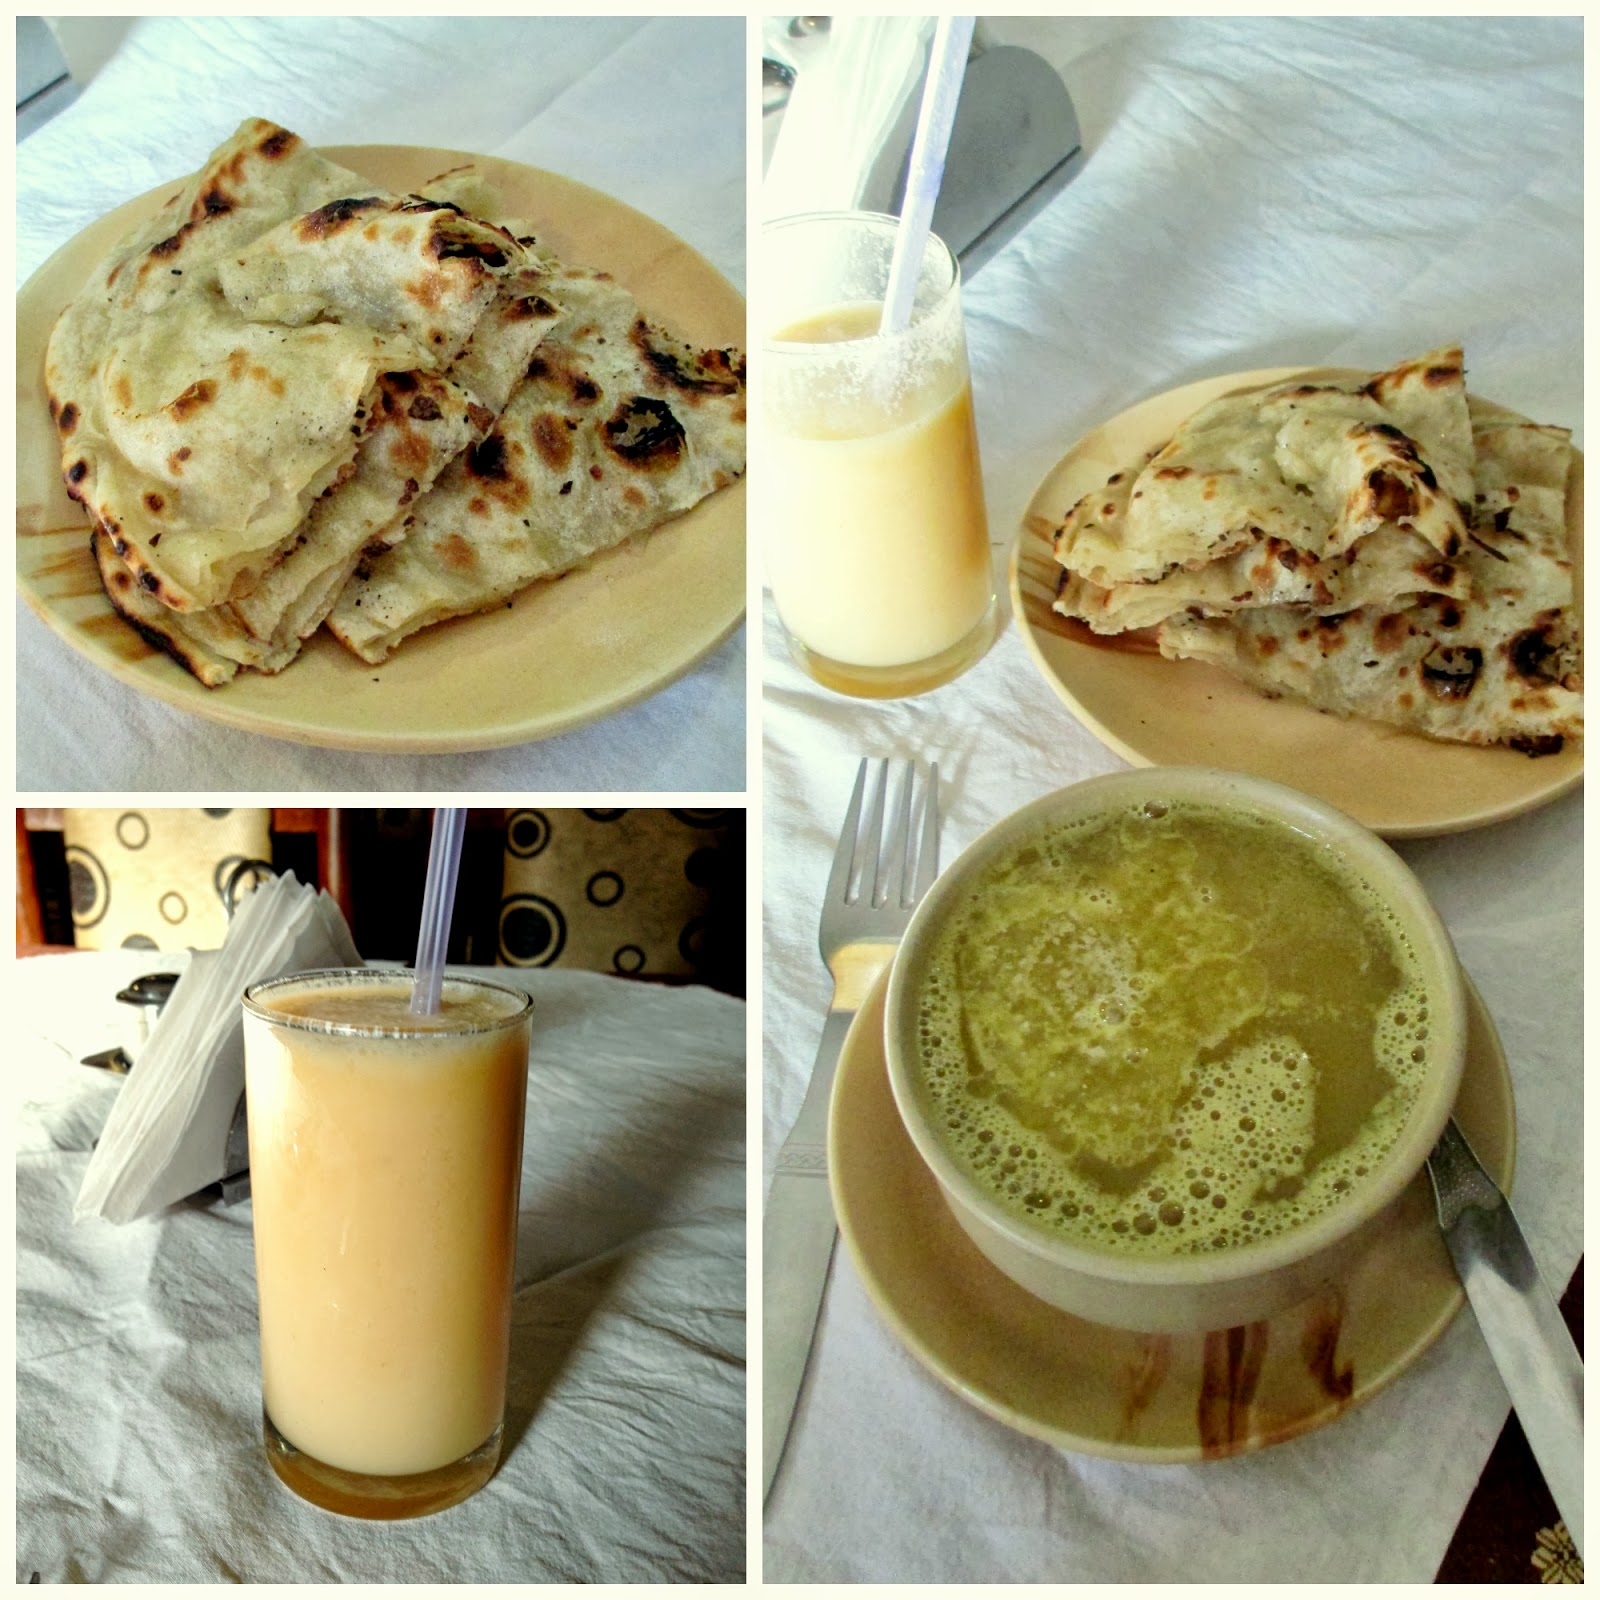


The next day I travelled about 4 hours to Agra to see the Taj Mahal, as I mentioned at the start of this post. After a long day of travelling and sightseeing, I was starving by the time I finally got to sit down at a restaurant for a (very) late lunch! I stuck with things that I knew I loved - mulligatawny soup, freshly made butter naan, and a mango lassi to wash it down. It wasn't the best lassi I've had (since mango season is over), but the naan was so good!


We were also fed pretty well during the conference days. I looked forward to our morning and afternoon refreshment breaks because they always had delicious drinks and snacks waiting for us! My favourite drink was the masala tea (what we Canadians would call chai) - it was perfectly spiced and milky, and I liked the little clay pots that it was served in!


They also offered a different cold beverage each time, and it was always in a new colour! These were a few of the options - rose milk water (a bit strange), khus sharbat, and ginger juice.


I also enjoyed my vegetarian lunch box, which came with a salad, croquette, mini roti rolls filled with paneer, rice, and yogurt, with a sweet almond halva and a banana for dessert - pretty good for a boxed lunch!  I was a bit disappointed when they switched to a Western style lunch the next day...


On the first conference night, I was a bit tuckered out and not feeling up to venturing out in the city at night, so I ordered room service instead and was so glad that I did! Not only did I enjoy the elaborate table setup, but the khichdi that I ordered was really good too. Khichdi (a mix of rice and lentils with spices and tomato) is my idea of Indian comfort food and one of the only dishes that I learned to make when I was in India the last time - I'll have to post a recipe on the blog soon for you guys!


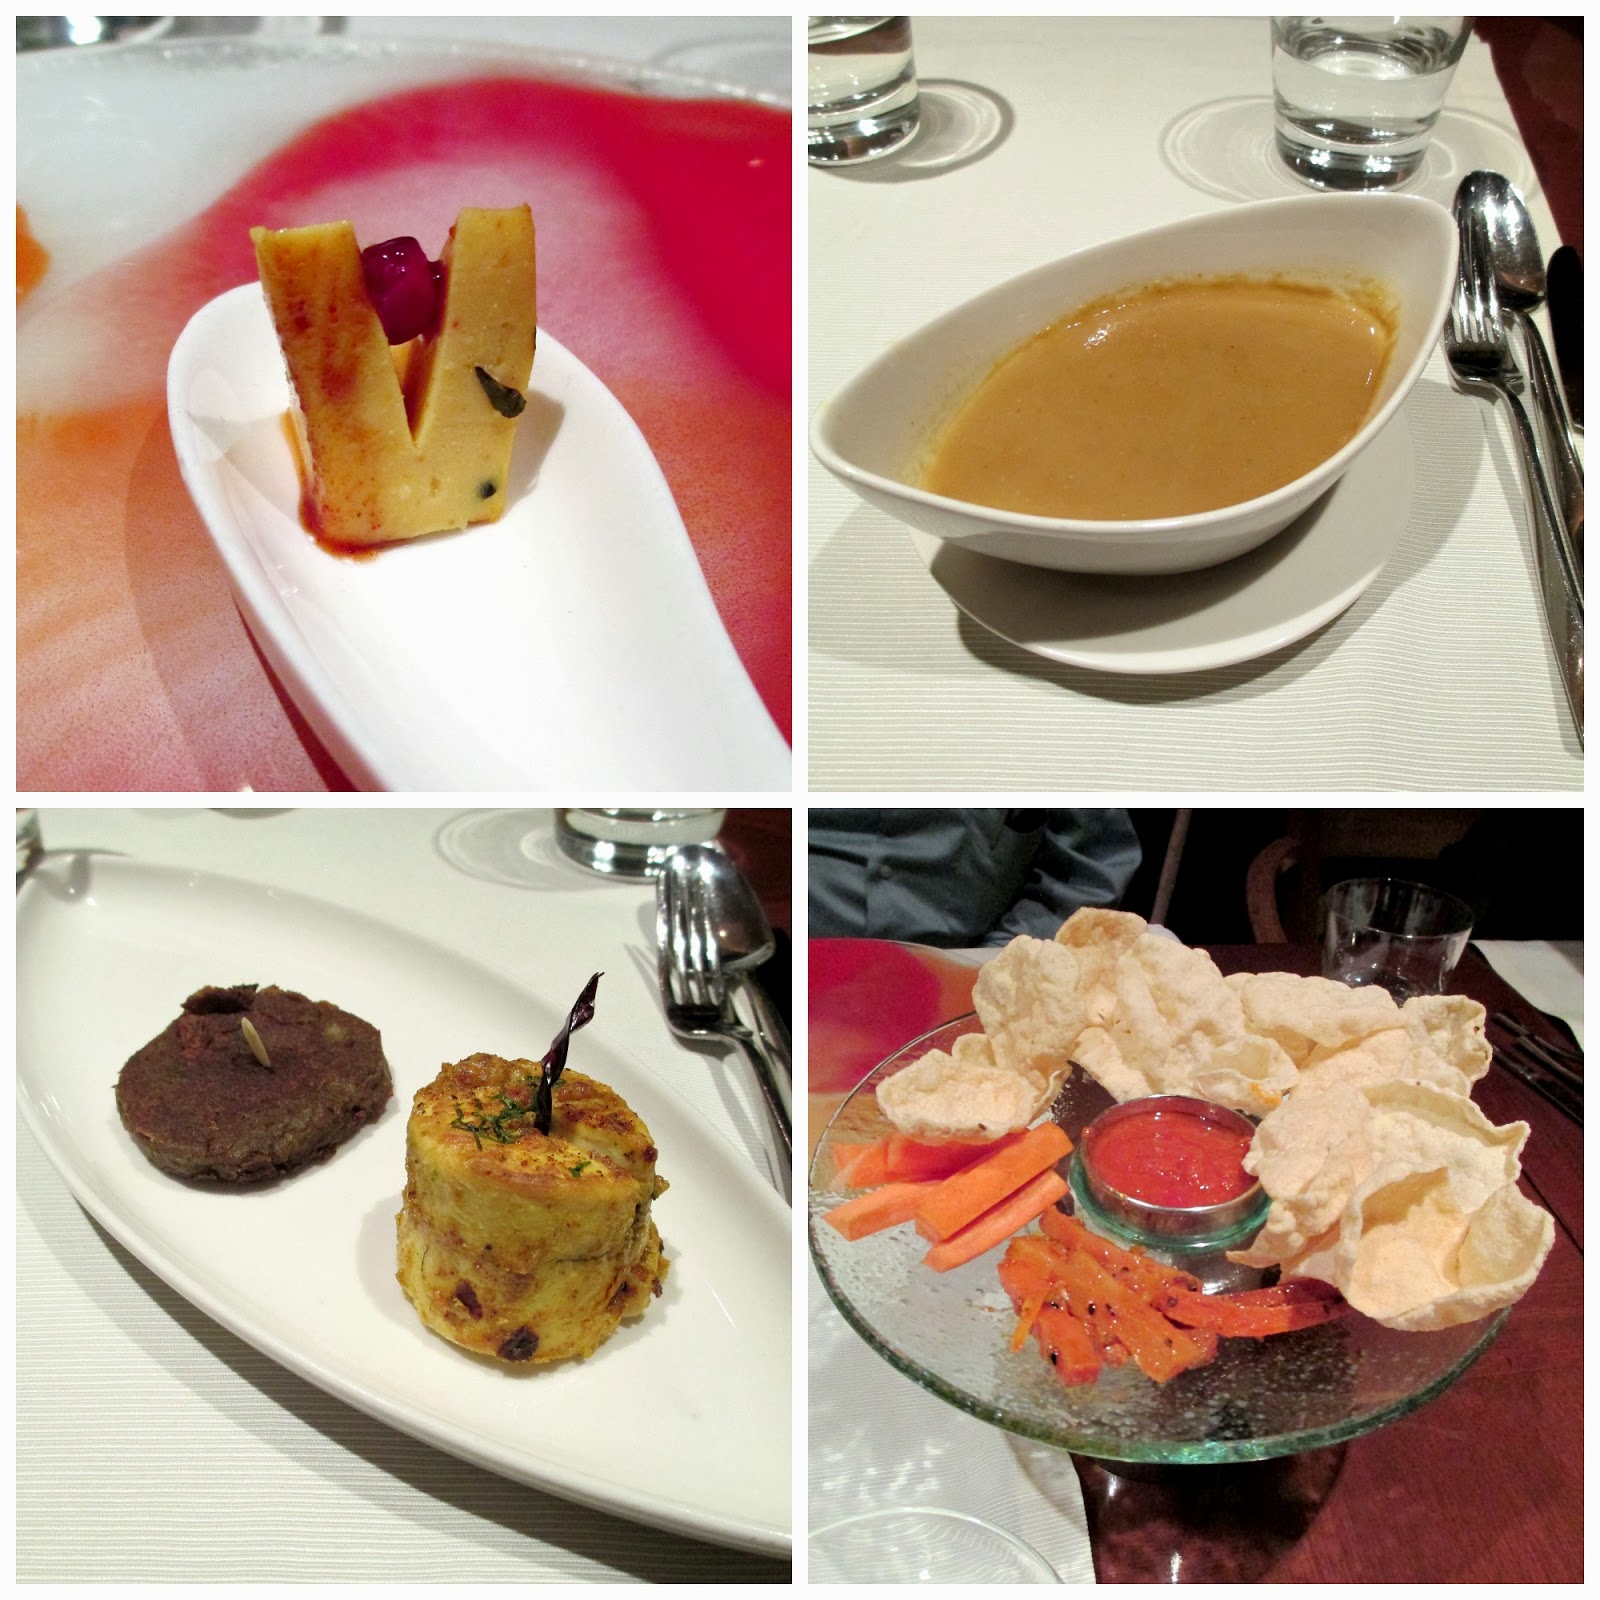
On the last night of the conference, we had a group dinner and I ordered the vegetarian set menu, which ended up being a ton of food! The meal started off with a tasty amuse-bouche of paneer with a pomegranate seed (top left), followed by a corn soup (top right), and two appetizers: a lentil patty and paneer tikka (bottom left). Plus we had a selection of pre-dinner appetizers - carrot sticks, mango pickle, and crispy pappadums with chutney (bottom right).


For the main courses, we were each served portions of several shared dishes (vegetarian or non vegetarian depending on preference). My vegetarian choices (clockwise) included a vegetable mixture, creamy malai kofta, very rich lentils, creamed spinach with corn (not pictured) and biryani, served with a few different types of naan. Since everything was in the North Indian style of food, it was a bit too rich for me, but still very good!


And as if that wasn't enough food, we also got three different desserts: gulab juman (which tasted like an extremely sweet fried donut soaked in sugar syrup), chenna payas (cottage cheese balls soaked in coconut milk), and kulfi (Indian style ice cream served on a stick). The kulfi was definitely my favourite of the desserts!

Most Indian meals at restaurants end with a selection of mouth fresheners, which usually includes fennel seeds, sugar crystals, and other seeds. This tray also came with areca nut (which almost broke a tooth!) and paan leaves, none of which I was adventurous enough to try!


On the last day, I wanted to try something other than North Indian food (since I was still recovering from the previous night's dinner!) so I ordered a South Indian dish for lunch - uttapam! Uttapam is like a giant pancake made from soaked and ground rice and lentils, with extra ingredients like onion and tomato mixed in. I loved the pancake on its own, but it's even better topped with tomato and coconut chutneys and the sambar (spicy vegetable stew) that it comes with!


If you're still reading, thanks for sticking with me through so many pictures! If you love Indian food as much as I do, then hopefully you enjoyed seeing a reminder of what makes the cuisine so good! And if you're not that familiar with Indian food, then maybe you'll be inspired to go out and try some of the variety of dishes, or to try some Indian cooking at home!

I'll be back later this week with a new recipe inspired by my trip!


January 21, 2013

Paneer & Spinach Quesadillas with Cilantro Chutney


After making my "PLT" sandwiches, I wanted to come up with another use for the rest of my paneer cheese, and my first thought was to use it in quesadillas!

I took my inspiration for these quesadillas from one of my favourite things that I ate when I was in India - parathas.  Parathas are basically an Indian flatbread stuffed with a variety of fillings, from the classic potato (aloo) paratha to more unique combinations like cauliflower and daikon, or onion with mushrooms.

One of my favourite parathas to order used to be paneer with spinach (also known as palak-paneer paratha), cooked until the outside is golden brown and served with spicy green chutney and cool yogurt. Here's a look at my actual order from a paratha restaurant in India:


While I could have attempted to recreate this at home, I decided to try to take the filling ingredients and use them in tortillas shells instead to make these quesadillas!

And since quesadillas are so much better with toppings like salsa and sour cream, I took the typical paratha condiments, cilantro chutney and plain yogurt, and used them to top my quesadillas.


After not having much success with my last attempt to make quesadillas, I was super excited that these turned out the way I wanted! The only caveat is that the paneer doesn't melt easily, so if you want an extra gooey, cheesy filling, just stick the cooked quesadillas in a warm oven or the microwave briefly after you've cooked them. This also works well with any leftovers - I thought they were even better after being reheated!

Since the paneer is rather flavourless on its own, the spinach cooked with onion, chili and ginger helped to spice up the filling.  But what really took these quesadillas over the top taste-wise was the cilantro chutney. While I think that any storebought chutney would still taste great as a condiment here, I was so glad I took the extra effort of making my own.

The chutney was super spicy for my taste (even with only one green chili), but the heat was balanced out by the lemon juice that I added.  Swirling some creamy plain yogurt into the chutney as you spread it on your quesadillas also helped to mellow out the spicy bite!


Paneer & Spinach Quesadillas

~5 cups packed spinach leaves
1 tbsp vegetable oil
1 small yellow onion, diced
2 tsp fresh ginger, minced
1 green chili, minced
1/2 tsp cumin
Dash of salt
~2 cups (200 grams) paneer cheese, grated
6 small whole wheat tortillas
Cilantro chutney (storebought, or recipe below)
Plain yogurt

Wash the spinach and let dry in a colander, squeezing out any excess moisture with your hands.

Heat the vegetable oil in a large saucepan over medium heat. Add the onion, ginger, chili, and cumin and cook, stirring often, until the onion softens (about 4 minutes).  Add the spinach leaves and a dash of salt. Cook until the spinach leaves are wilted and most of the moisture has evaporated, about 6-8 minutes, stirring occasionally. Remove from heat and transfer mixture to a bowl.

To make quesadillas, heat a large non-stick skillet over medium heat. Lay a tortilla in the pan and sprinkle about 1/3 cup of the grated paneer over half of the tortilla.  Top with about 1/4 cup of the spinach mixture. Fold the quesadilla, bring the empty side down over the filling, and press down with a spatula. Once the bottom side is lightly browned (about 2-3 minutes), flip and cook the other side for another couple of minutes.  Remove from pan and transfer to a plate. (If you are making a larger batch, you can transfer the cooked quesadillas to a baking sheet and keep in a warm oven (200°F) while you cook the remaining quesadillas).

Repeat the process until the cheese and spinach mixture are used up – mine made enough for 6 small sized tortillas. Serve warm, with the cilantro chutney and plain yogurt.


Cilantro Chutney
Slightly adapted from Vegan Eats World

2 cups packed cilantro leaves (it’s okay to leave some thin stems in)
1/4 cup unsweetened shredded coconut
3 cloves garlic, peeled and roughly chopped
1 green chili, minced
1 ¼ tsp garam masala
1/2 tsp salt
2 tbsp fresh lemon juice
1/4 cup water (plus more if necessary)

Add all the ingredients except for the water to a food processor or blender. Blend until everything is mixed together.  Add half of the water and blend again. Continue to blend, gradually adding more water as necessary, until the mixture is as smooth as possible (I used 1/4 cup plus 1 tsp water).

Transfer to a small container and store in the fridge.


January 17, 2013

"PLT" Sandwich (Paneer Sandwich)


After our Indian Feast on New Year's Eve recently, I seem to have rediscovered my love of paneer - a soft and mild-tasting cottage cheese that is featured in many popular Indian dishes like saag paneer. If you have a well-stocked grocery store or an ethnic food shop in your local area, then you should be able to buy paneer to use in your own homemade Indian-inspired dishes, like this sandwich!

The recipe, which comes from British chef Anjum Anand, is modelled after a BLT sandwich.  Of course, it's not quite the same as a BLT as it has paneer cheese instead of bacon (hence the name PLT), but I think this vegetarian version is much tastier anyway!

The basic components are slices of paneer that have been marinated in a spiced yogurt mixture, fresh tomato, lettuce, and (vegan) mayo.  I decided to replace the lettuce with spinach, since spinach and paneer pair so well together, and I added some curry powder to the mayo spread to give it more flavour.


Even though it looks like a pretty simple sandwich, all of the spices and textures made it much more exciting than the name "PLT" implies! The paneer is broiled so that it has a chewy texture that reminded me a lot of firm tofu (actually, you could probably confuse the two if you didn't know it was paneer!).

I loved the mild Indian flavours that the paneer soaked up, and the curried mayo added a nice creamy and tangy element.

I made my sandwich with a thin sandwich bun, but you could also use toasted bread if you prefer a more traditional sandwich. The recipe makes enough for two sandwiches, but you could easily double the amount of paneer and keep it in the fridge to put together more "PLT"s throughout the week!


"PLT" (Paneer, Lettuce & Tomato) Sandwich
Adapted from Anjum's Indian Vegetarian Feast

For the paneer (makes enough for 2 sandwiches):
~150g paneer cheese, sliced into 1” thick slices (I cut two long slices, then cut each slice in half for 4 pieces)
1/3 cup plain low-fat yogurt
2 tsp fresh ginger, minced
2 cloves garlic, minced
1/2 tsp each paprika, chili powder and cumin
1/4 tsp Indian curry paste (optional for more flavour)
1 tbsp + 1 tsp fresh lemon juice
Salt to taste

For each sandwich (double amounts if you are making two sandwiches):
Sandwich bun or 2 pieces of toasted bread
2 tsp vegan mayonnaise or regular mayo
1/4 tsp curry powder
1 tsp lemon juice
Half of the cooked paneer slices
Handful of spinach leaves, stems removed
2 slices of tomato, seasoned with salt and pepper


First, make the marinade for the paneer.  In a bowl, whisk together the yogurt, ginger, garlic, spices, curry paste and lemon juice. Add a dash of salt.  Coat the paneer slices in the marinade and let sit in a ziplock bag or a shallow bowl or container for at least 30 minutes.

Preheat the oven broiler. When broiler is ready, transfer the paneer with marinade to a small baking dish and cook in the top half of the oven for 8-10 minutes. Flip paneer pieces and cook the other side for about 8 more minutes, until the edges are starting to brown. Remove from oven and let cool slightly.

To assemble sandwich, mix together the mayo, curry powder, and lemon juice until smooth. Spread mixture on the top side of your bread or bun. Lay some spinach on the bottom half, and place two pieces of paneer on top. Next, add the tomato slices and top with a bit more spinach. Close sandwich and serve immediately.

Makes enough for 2 sandwiches. 

January 07, 2013

New Years Eve Indian Feast

Last year on New Years' Eve, my family and I enjoyed a huge spread of Asian inspired food, including peanut noodles, mango salad, fresh rolls, lettuce wraps, dumplings, and more.  We liked it so much that my sister suggested doing a similar thing this year, but changing the theme.

The theme we decided on this year was Indian food and since I love Indian cuisine so much, I claimed the right to plan out our menu, which I wanted to share on my blog with you!

After last year's experience of spending all day on New Year's Eve in the kitchen, I wanted to use purchased ingredients as much as possible this time to limit the amount of work I'd have to do!  A couple of trips to ethnic shops got me all of the ingredients I'd need, and we ended up with a delicious spread with a nice variety of dishes.

Appetizers


First, we had a round of drinks and cold snacks as appetizers.  My sister made the Indian-inspired drinks to start off the evening, which were these fruity mango bellinis made with fresh mango puree and champagne - delish!


For the food, I knew I wanted to include bhel puri, a savory and spicy snack of puffed rice, crushed papdis, peanuts and crispy sev noodles (shown below). All you have to do to prepare this is buy a packaged mix of bhel puri (although you can make your own if you feel like it!), and stir in two kinds of chutneys (the mix comes with little packets of sweet and spicy chutneys) to add even more flavour. I also added some chopped tomatoes and cilantro after this pic was taken.


This is a good snack mix for sharing with a group of people - although it should be eaten immediately before it starts getting soggy from the sauces.

Another easy snack to put together was this masala papad - crispy pappadum that I cooked on the stovetop, topped with a mixture of tomato, red onion, cucumber, green chili, cilantro and spices. Just break it into pieces and enjoy as a refreshing appetizer!


And now for the highlight of the appetizers round - these dahi batata sev puri (I'm not exactly sure of the proper name for them, as I've seen them called many different names!). I bought a package of premade puri shells and broke holes into each one so that I could add the filling. The filling was a simple mixture of boiled potato and chickpeas with finely chopped red onion and chaat masala spice.  Here's a picture of the filled puri shells:


Next, I poured in a spoonful of cool plain yogurt into each one, followed by a spicy cilantro chutney and sweet date-tamarind chutney. The final topping was a bit of chopped fresh cilantro, some sev, and another sprinkling of chaat masala.  It took longer than I planned for filling each one, but luckily my sister came along to help out with the last few steps!


These were definitely everyone's favourite appetizer - they've got the perfect balance of sweet and spicy flavours that explode once you pop the whole thing into your mouth! If you want to try making them yourself, here's one of the guides that I followed.

Finally, I also made a raita to serve along with the appetizers. I followed this recipe for rainbow raita from Vegetarian Times, except I replaced the mint with cilantro. This cool and soothing dip was much appreciated  once all of our mouths were set on fire from the spicy food!


Hot Food

After the appetizers, it was time for some cooked Indian food!

I considered making my own samosas, but figured I should save the time and effort by buying some fresh samosas from the local Indian food store instead (they were still homemade, but by someone else!)


I bought two kinds of vegetarian samosas - the smaller ones were filled with spinach and paneer cheese, and the bigger ones were the more traditional potato and pea filling. I thought both kinds were delicious, especially served with tamarind and cilantro chutneys!


For the homemade food, I put together two vegetarian main dishes. First were these skewers of paneer cheese and peppers, marinated in a creamy tikka masala sauce and cooked on the stovetop. They were pretty easy to make, especially since I cheated a bit by using a premade sauce, and they tasted great too - I loved the soft, crumbly paneer!


I also made a tofu dish using a recipe from one of my new cookbooks, Vegan Eats World.  Slices of pressed tofu were marinated in a yogurt sauce with lots of spices (this time I did make the sauce from scratch!)  and baked in the oven along with lots of sliced red onion on top.


I'm not sure if this dish is authentic tandoori, or if you could even find something similar in India, but all that mattered to me was that it tasted good! If I had to choose a favourite out of the hot dishes, this would be it. I thought the texture of the tofu was perfect, and I loved the flavours. Too bad I was already full by this point so I only ate a couple pieces of it (but I did get to enjoy the leftovers afterwards)!


Since this post is already getting long, I'll try to summarize the rest of our meal without pictures!  Along with the tofu, we had tandoori chicken kebabs for the non-vegetarians that were marinated in the same sauce as the tofu.

I also heated up some storebought naan bread (another time saver, although I would have preferred homemade!), and made some basmati rice that I ate with more raita mixed in.

Overall, it was a great meal and a delicious way to end 2012!  And if you have any questions about any of the dishes, feel free to leave a comment - I just didn't want to make this post too long by giving detailed instructions for each dish!

October 12, 2012

Aloo Channa Chaat Roti Wraps


As promised, I'm back with a recipe that I had made before my trip!

If you've been reading my blog for awhile, then you already know that I love Indian food.  And while I do enjoy bowls of rich curry, my favourite type of Indian food is chaats - street food and snacks.   I love the mix of sweet, spicy, and sour flavours and the combination of fresh toppings, chutneys and cool, creamy yogurt that are typically featured in chaats.

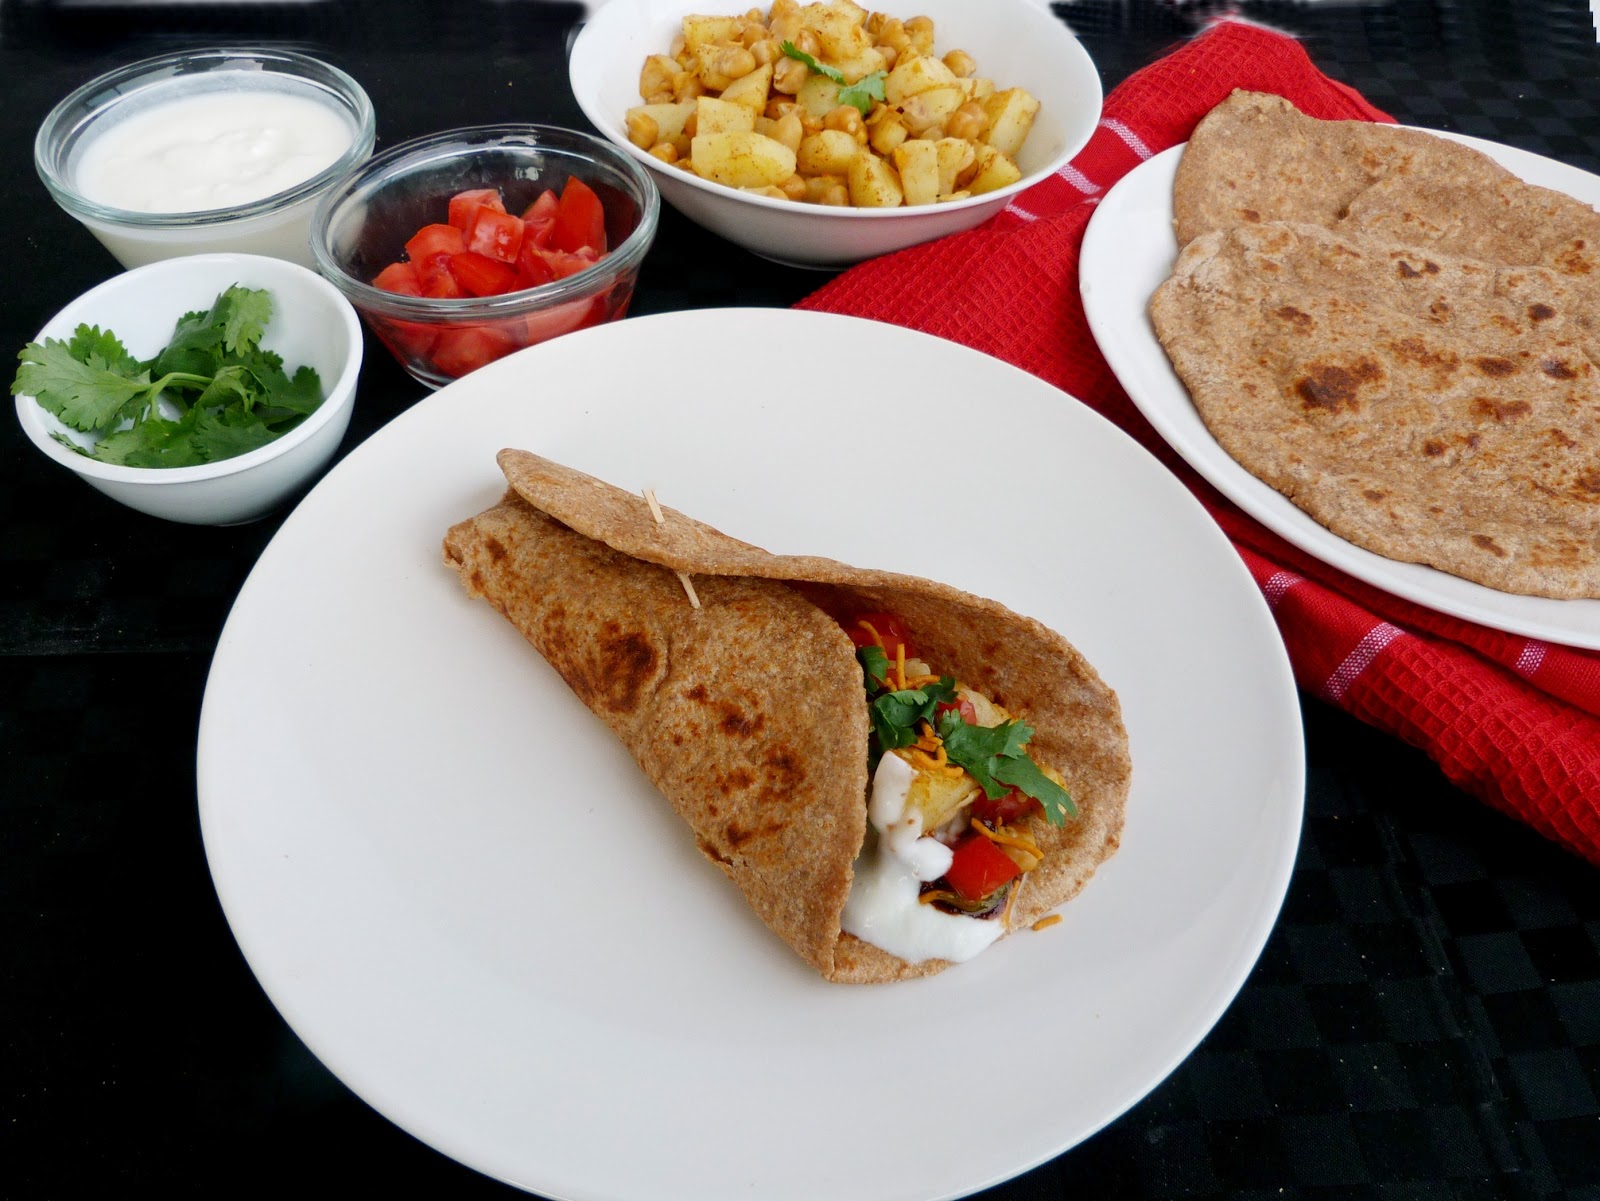
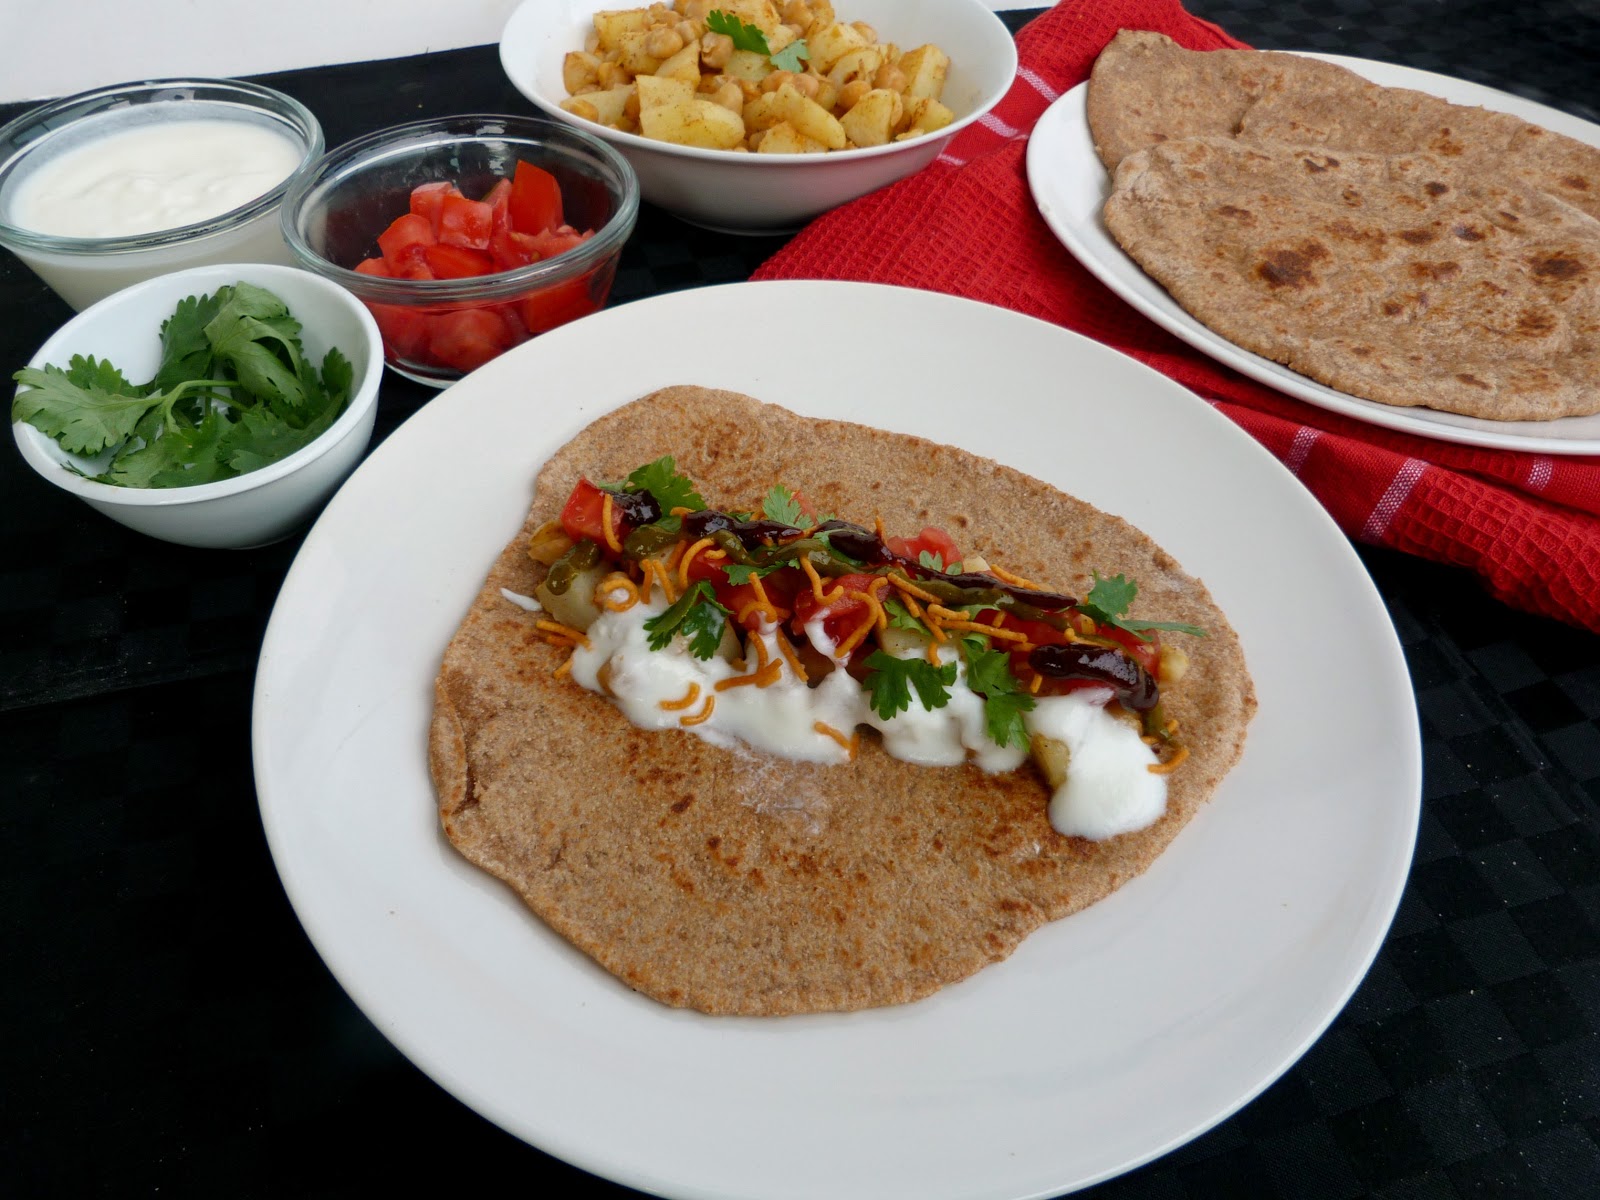
This roti wrap is my own take on Indian chaat.  I made a simple aloo channa (potatoes and chickpea) filling, which I layered onto a freshly made roti bread, topped with chopped tomatoes, cilantro, sev, yogurt, and two types of chutney.


It may sound like a lot of work to make your own bread, make the filling, and prepare all of the topping ingredients separately, but there are a couple of shortcuts you can take to make the process even easier, like making the roti and filling ahead of time.

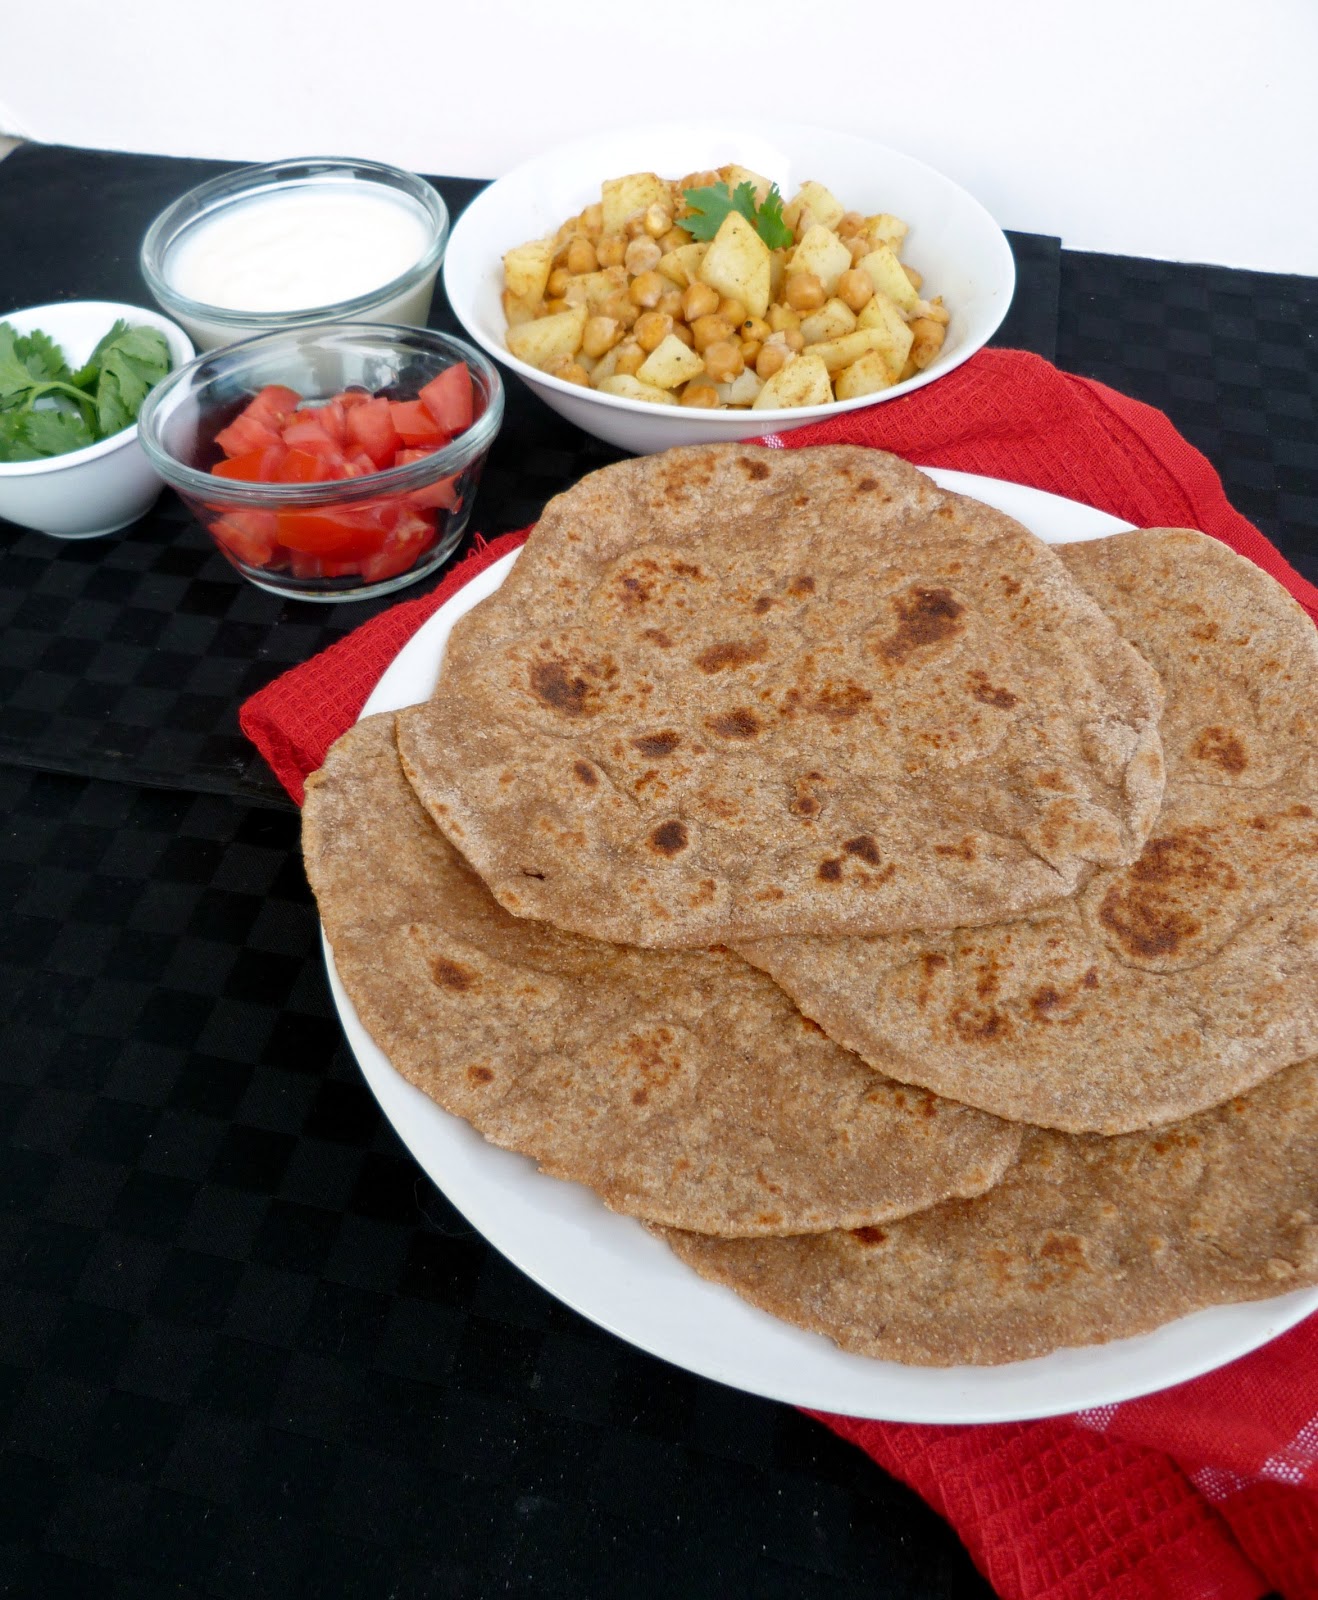
For the roti, I used this recipe for 5-minute whole wheat naan from Food Doodles.  I would recommend this recipe to anyone who has never made Indian flatbread before, since it's very easy to follow. And once you get some practice at making your own roti, the process becomes really easy - you just mix a simple dough, let it sit, roll it out, and cook it on the stovetop for a few minutes!

This particular recipe gives you 4 thin and flexible wraps that are perfect for rolling up around any filling you like. They are best eaten fresh and warm, but if you have leftovers, they can be wrapped up and stored on the counter or in the freezer.


Once the rotis and the filling are made, you can customize your wraps with the amount of toppings that you like!  (Note: you can even make the filling ahead of time and reheat it when you're ready to eat).

I like to eat mine with lots of tomatoes and cilantro, and I also added some sev noodles (a crispy fried Indian snack) that I had in my pantry for some extra crunch and spice.

The best part, in my opinion, is to pour on lots of plain yogurt and  generous squeezes of both tamarind and spicy green chutneys. I like to use about equal amounts of each one, but it depends on how spicy you like your food!


I loved the combination of ingredients in this wrap - it was spicy mixed with sweet and tangy; warm, cool, and fresh - all at the same time!

I doubt you would ever find anything exactly like this on the streets of India, but the flavours definitely brought me back to the time I spent there and some of the delicious street food that I ate!


Aloo Channa Chaat Roti Wraps

1 recipe whole wheat naan from Food Doodles

Filling:
5-6 oz small white potatoes, peeled
1 cup canned chickpeas, drained and rinsed
Chili powder to taste
Dash of salt
1/2 tsp chaat masala spice
2 tsp lemon juice

Topping:
~ 2 tbsp diced tomatoes
1-2 tbsp fresh cilantro
~1 tbsp sev (optional)
Plain yogurt
Cilantro chutney
Tamarind chutney

Make dough for naan, following the instructions in the link above.

Place potatoes in a pot of water and bring to a boil.  Reduce heat to medium-high and simmer, uncovered, until tender when pierced with a fork, about 15-20 minutes. Drain and cut into small pieces. Set aside.

Heat skillet for cooking the naan.  When naan is finished, keep covered with a towel.  Reduce heat on the stove to medium-low and add a bit of vegetable oil to the skillet.  Add the chickpeas and heat for a couple of minutes.  Add the potatoes, a couple dashes of chili powder, a dash of salt, chaat masala, and lemon juice.  Stir and cook for a couple more minutes, until heated through. (Note: you can leave the chickpeas whole, or mash them a bit for a smoother filling). 

To assemble wraps, spoon some of the chickpea-potato mixture down the middle of a piece of naan.  Top with your choice of toppings – I recommend a couple spoonfuls of plain yogurt, diced tomatoes, cilantro, a pinch of sev noodles, and equal amounts of spicy green cilantro chutney and sweet tamarind chutney. 

Close wrap and enjoy!

Makes enough for at least 4 wraps.

June 10, 2012

Curried Cauliflower, Apple & Brussels Sprout Salad with Naan Croutons


Good morning and hope everyone is enjoying this beautiful weather! On a hot, sunny day like today, all I want to eat is smoothies, popsicles, and fresh salads.  While I don't have any new smoothie or popsicle recipes for you today, I can share this salad that I made recently with cauliflower, apples and brussels sprouts!

I've had this salad on my mind for a long time, ever since I made a version of it about a year ago from a recipe that I found online.  I've tried searching for it again many times since then, but no matter how many different search terms I use, I can't seem to find it anywhere!  So finally I took matters into my own hands and came up with my own version.

The star of this salad is the curried cauliflower, which I roasted in the oven with some Indian spices to give it lots of flavour and a deep yellow colour.  The warm, softened cauliflower is then tossed with some crisp apple slices and shredded raw brussels sprouts.  I also added some sultana raisins because I love the way raisins complement Indian-inspired dishes.

Finally, the salad is topped with a handful of naan "croutons", which I made by toasting storebought naan bread in the oven and breaking it into bite-sized pieces. I'm not a fan of super crunchy croutons, so I kept my naan a bit on the softer side, which worked perfectly in my salad.

You can toss this salad with any dressing that you like. I decided to pair mine with this recipe for Hummus Salad Dressing from the blog Healthful Pursuit.  The dressing is made with standard hummus ingredients like tahini, lemon juice, garlic, and spices, and it gets really thick and creamy from the addition of chickpea flour. If you don't have chickpea flour, or if you prefer a thinner salad dressing, I think the dressing from this Apple and Brussels Sprout Salad from Bran Appetit would work really well here too!

Overall, I loved the mix of textures in this dish and it definitely had a lot of flavour from the curried cauliflower and the tangy, spicy hummus dressing. I liked eating this salad warm, but you can eat it at room temperature or chilled if you prefer. You can also change it up by using romaine lettuce or mixed greens instead of the brussels sprouts. The recipe is flexible, so enjoy it however you like!


Curried Cauliflower, Apple & Brussels Sprout Salad with Naan Croutons
*Note: storebought naan bread can be non-vegan friendly, so check ingredients or use a homemade version or other type of flatbread for a completely vegan recipe

Half a head cauliflower, chopped
1 tbsp olive oil
1/2 tbsp curry powder
1/2 tsp turmeric
dash of salt
~12 oz Brussels sprouts
1 piece of naan bread (storebought or homemade)
1 apple
2-3 tbsp sultana raisins

Spicy Hummus Salad Dressing
Recipe available at Healthful Pursuit
- I made 1/4 of the recipe, which was enough for my two servings of salad
- the only change I made was to add 1 tsp of sriracha chili sauce for a spicier version
-  

Preheat oven to 425°F. Toss the cauliflower pieces with the olive oil, curry powder, turmeric and salt and place in a baking dish. Roast in the oven for 30-35 minutes, until tender and browned. When it is done, remove from oven and let cool slightly. Keep the oven turned on.

Meanwhile, prepare the dressing by adding all ingredients to a blender and puree until smooth. Keep in the fridge until you are ready to make the salad.

Prepare the brussels sprouts by cutting off the bottoms and removing the outer leaves. Cut each one in half, then slice each half into thin slices or shreds.  Transfer to a large bowl.

Place the naan bread on a baking sheet. Spray with a bit of cooking spray and place in the preheated oven for about 7 minutes, until it is toasted.

Cut the apple into thin slices and add to the bowl with the brussels sprouts. Add the raisins and cauliflower to the bowl.  Pour the dressing over the salad and toss to combine (use as much dressing as you like to coat everything).

When the naan is toasted, slice into bite-sized pieces and add the pieces to the salad.


Serve warm, or at room temperature.

Makes 2 large servings.

March 08, 2012

Indian-Spiced Red Lentil & Mango Bites


If you follow my sister's blog Once Upon a Cutting Board, you would have learned yesterday that Canadian Lentils is holding a recipe contest for Canadian food bloggers. When my sister first told me about the contest, I didn't think too much about it...I figured that every idea for lentil recipes has already been created, and that I wouldn't be able to come up with anything new or creative for the contest.

But the more I thought about it, the more determined I became to develop a recipe, and now I'm excited to share what I came up with: these red lentil bites with dried mango and Indian spices.

I decided to go with red lentils because I knew they would pair well with some of the flavours and ingredients that I like to cook with. Instead of making a soup or stew, which I would normally do with red lentils, I decided to use them in an appetizer.

I also knew that you could make tasty and healthy little oven-baked balls using chickpeas, fava beans, or sweet potatoes, so I figured why not use pureed red lentils instead?


I started by cooking the red lentils on the stove until they had softened and dried up.  Then they went into the food processor along with cilantro, lemon juice, spices, coconut and chopped dried mango. All the ingredients were pureed into a creamy mixture like a hummus, then rolled into balls and baked in the oven.

It took a few tries to get the recipe just right, but after some tweaking, they turned out just how I had envisioned - soft on the inside and slightly crispy on the outside, with a nice balance of spices and sweetness from the mango.  These are the perfect little snack to pop in your mouth on their own, or you could pair them with a dipping sauce - I think they would taste great with mango chutney!

And if you like the sounds of this recipe, I would really appreciate your support in the contest!  Besides taste, appeal, use of lentils, and simplicity, one of the judging criteria is social media popularity.  So if you have a minute, I would love to receive any comments from you on this post, or you can head over to the Canadian Lentils Facebook page and click "like" on my entry that is posted on their wall.  You might find some other entries in the contest that you like there too - like these lentil peanut butter granola bars!


Indian-Spiced Red Lentil & Mango Bites

1/2 cup dried red lentils, picked over to remove debris and rinsed
1 cup water
1 tsp minced fresh ginger
1/4 tsp cumin
1/4 tsp ground coriander
pinch of cayenne
pinch of salt
1 tbsp fresh lemon juice
2 tbsp chopped fresh cilantro
2 tbsp unsweetened shredded coconut
2 tbsp dried mango, finely chopped

Place the lentils and water in a medium-sized saucepan. Bring to a boil over high heat, then reduce heat to medium-low. Simmer for about 20 minutes, until liquid has dried up, stirring occasionally to prevent lentils from sticking to the bottom of the pan.

Remove lentils from heat and transfer to a food processor. Preheat the oven to 350°F and spray a glass baking pan (or baking sheet) with cooking spray.

Add the remaining ingredients except for coconut and dried mango to the food processor with the lentils and process until everything is fully mixed together. Add the coconut and mango and process again until the mixture has started to form a thick dough (Note: unless you have a really strong food processor, the mango probably won’t fully break down).

Scoop out the mixture using a tablespoon measure and form into small balls using your hands.  Place balls in the prepared baking pan. Bake for about 20-25 minutes, until the balls are slightly firm to the touch and the bottoms are lightly browned (don't worry if they still feel a bit soft, they will firm up more after cooling).

Remove from oven and let cool completely before eating.  Store in the refrigerator. 

Makes 12 balls (recipe can easily be doubled for a larger batch).


January 31, 2012

Indian Six-Layer Dip


Since Super Bowl recipes seem to be pretty popular right now, I thought I would follow up my last post with another appetizer that would be a great addition to any game day party menu.

In my last post, I shared a recipe for an appetizer that I'd never made before, but it turned out amazing!  Today I'm sharing a recipe that I've already made many times before, so I know it's good!

This Indian-inspired dip is based on the idea of a traditional layered dip, but it becomes much more interesting by adding some Indian flavours and ingredients that you wouldn't normally think to put in a dip!

The bottom layer is a combination of curry powder and sour cream, which is topped with a layer of shredded cheese, then a mixture of yogurt and mango chutney, and finished off with a generous sprinkling of coconut flakes, peanuts and cilantro.  All of the layers come together to make a delicious dip that combines sweet and spicy, creamy and crunchy, all in one bite!

I like to serve this with toasted pappadums (a thin crispy Indian wafer), but if you can't find any, then it would also go well with pita chips or plain tortilla chips.

So if you want to change up your traditional chips and dip this year, I hope you'll give this recipe a try!


Indian Six-Layer Dip
Adapted from The Monterey County Herald

1/4 cup light sour cream
1 tsp curry powder
1/4 cup shredded marble cheese
1/4 cup low-fat plain yogurt
2 tbsp mango chutney
2 tbsp unsweetened coconut flakes (or shredded coconut)
2 tbsp chopped fresh cilantro
2 tbsp chopped roasted peanuts
pappadums, pita chips or tortilla chips for serving

In a small bowl, mix the sour cream and curry powder, stirring well until the curry powder is completely incorporated. Transfer to the bottom of your serving dish, spreading evenly. Top with shredded cheese.

In a separate bowl, mix the yogurt and mango chutney together. Pour over the cheese, spreading evenly across the top of the dish. If you are making this ahead of time, stop here and refigerate the dip before adding the remaining toppings (otherwise they will get soggy).

When you are ready to serve,sprinkle the coconut, cilantro, and peanuts over top of the dip, making sure each component is evenly distributed.


Serves 2-3 as an appetizer, or one person as a meal (which I like to do!).  If you are making this for a party, you will want to double or triple the recipe.


On a different note, I wanted to share an update on the 2011 Ninjamatics Canadian Weblog Awards....I mentioned a couple of weeks ago that my blog was included in the top five nominations for Best New Weblog and Best Weblog About Food and Drink.

Well, the team at Ninjamatics has been working hard since then to choose the final winners, and I was super excited to learn this morning that Vanilla & Spice was awarded second place in both categories!!

2011 Canadian Weblog Awards winners

I still can't quite believe that I even made it to the top five, let alone being chosen as one of the winners.  There are so many wonderful Canadian food blogs out there, so I'm very grateful to have my blog acknowledged this way!

I just wanted to say thank you to Ninjamatics and the team of jurors, and congratulations to the other winners and nominees.  Be sure to check out the other two food blogs who won first and third place in the Food & Drink category - Crumb and Cookin' Canuck!


LinkWithin

Related Posts Plugin for WordPress, Blogger...