Showing posts with label cookies. Show all posts

April 01, 2014

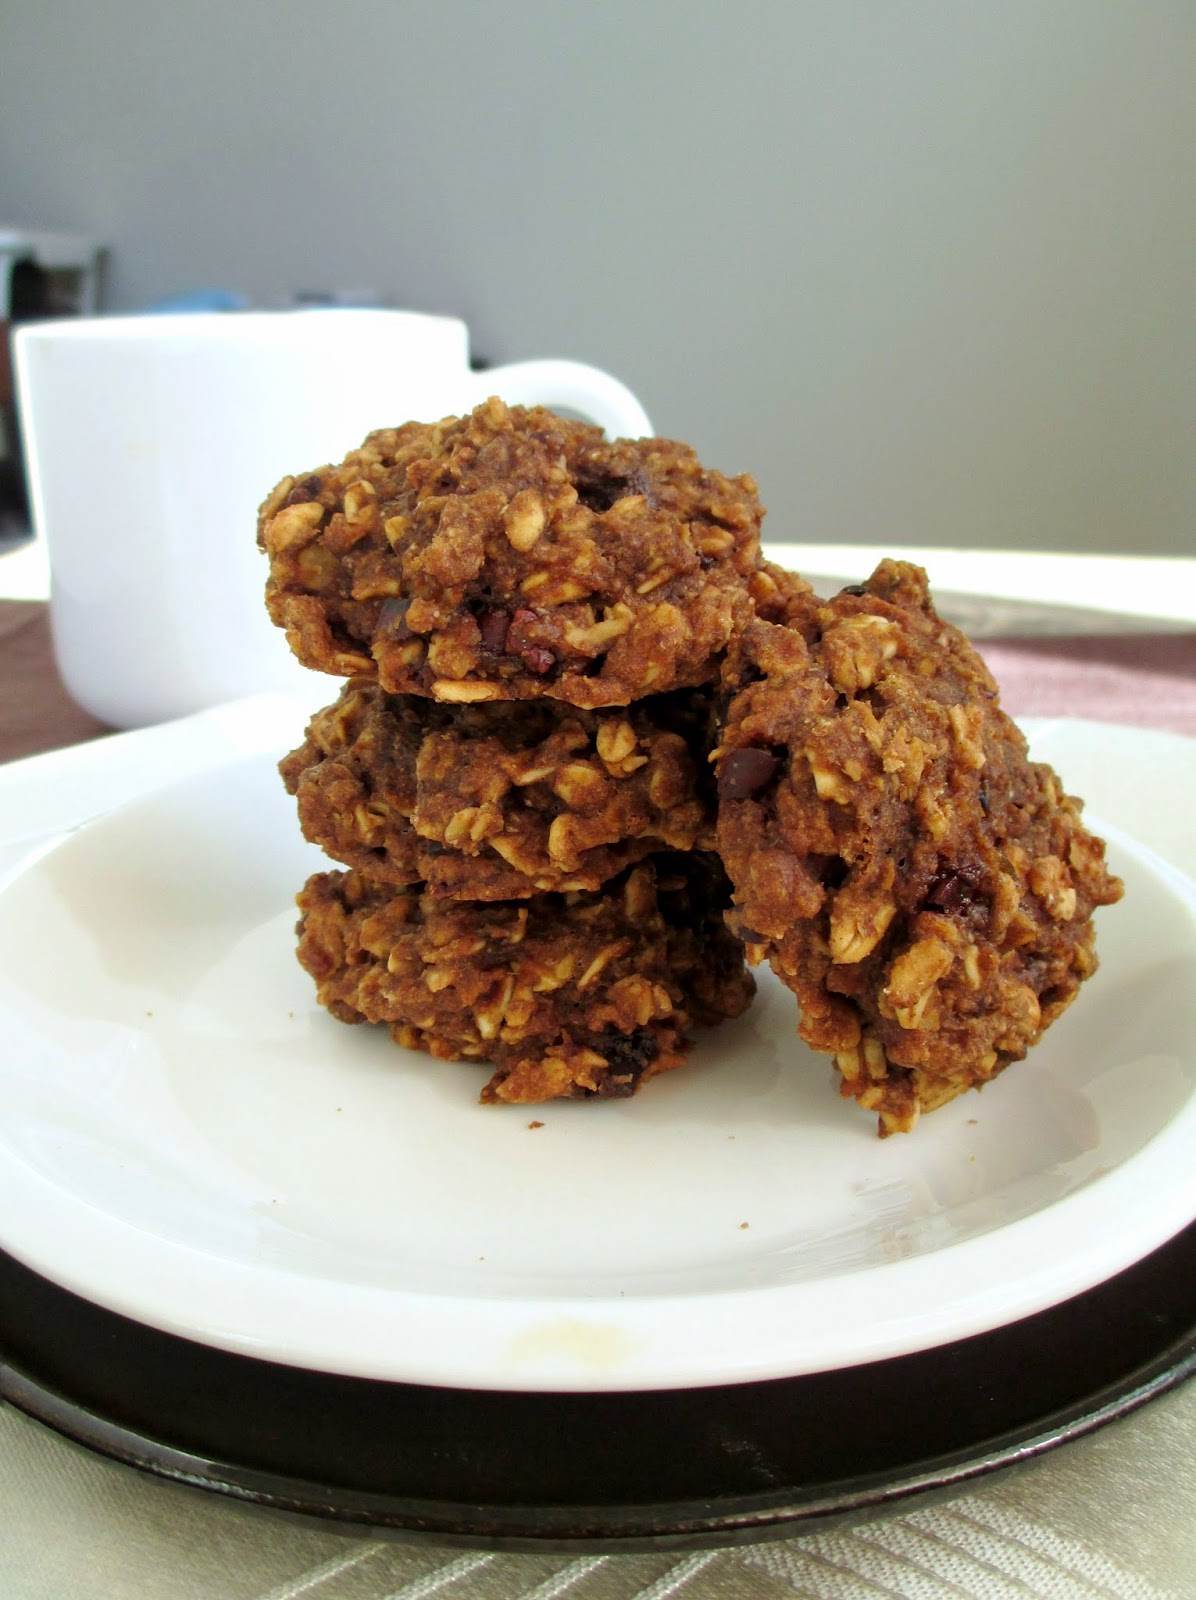
Dirty Chai Breakfast Cookies


A chai latte has always been one of my favourite drinks to order at coffee shops, but most of the time when I go Starbucks or other places, I'm in need of a bit more of a caffeine kick so I end up ordering some kind of latte (for those of you in Canada, I recommend the new maple macchiato!).

For those times when you're craving a chai latte but also want a bit more caffeine, a "dirty chai" - chai latte with a shot of espresso - should do the trick!  Or if don't feel like going out to a coffee shop, you could make these cookies inspired by that drink (and by these caffeinated cookies from Healthy Food for Living) instead!


The original recipe was for healthier oat cookies with a dose of both brewed coffee and instant espresso in them. For my version, I used strong brewed chai tea for the liquid, with both instant chai and instant coffee added to the dry ingredients. And for even more chai flavour, I added some spices like cinnamon, ginger, allspice, and cardamom.

The first time I made these, I found them a bit too dry and not quite strong enough in the coffee flavour, so I adjusted the recipe a bit by reducing the flour and increasing the amount of coffee, and they came out just how I wanted - a soft and cakey cookie with a mix of both chai and coffee flavours!

I also replaced the oil with coconut oil and reduced the amount a bit to keep these cookies healthy enough to eat for breakfast, or any time of the day when you need a bit of an energy boost!

Dirty Chai Breakfast Cookies
Inspired by Healthy Food For Living

3/4 cup whole wheat flour 
1 cup rolled oats
1 tbsp instant coffee 
1 tsp dry chai mix powder (optional)
1/4 tsp baking powder
1/4 tsp baking soda
1/4 tsp salt
1/4 tsp cinnamon
1/4 tsp ginger
1/8 tsp allspice
Dash of cardamom
1/2 cup strong chai tea (I steeped one bag in ½ cup boiling water for about 5 minutes)
2 tbsp pure maple syrup
2 tbsp brown sugar 
2 tbsp melted coconut oil
1/2 tbsp ground flax
1/2 tsp vanilla extract
2 tbsp finely chopped dates (about 3 dates)
2 tbsp cacao nibs


Preheat oven to 350°F and line a baking sheet with parchment paper.

In a large bowl, whisk together the dry ingredients (flour to cardamom).

In a separate bowl, stir together the chai tea, maple syrup, brown sugar, coconut oil, flax, and vanilla. Let cool a bit, then pour this mixture into the dry ingredients and stir until the dry ingredients are incorporated. Mix in the dates and cacao nibs.

Drop spoonfuls of the cookie mixture onto the prepared baking sheet and press down slightly to form a cookie shape. Since the dough will still be a bit warm (from the tea), place the baking sheet in the freezer for about 5 minutes so the cookies firm up. Bake in the preheated oven for about 12 minutes. Let sit on the pan for a few minutes, then transfer to a wire rack to cool completely.

Makes 12-13 cookies.


November 22, 2013

Recipe Round-Up: Comfort Food & Cookies

It's been a while since I've posted a round up of recipes I've tried from other blogs - other than all the pumpkin recipes that I've enjoyed this year!

My meals lately have definitely transitioned from fresh and light salads to warm and comforting bowls of roasted veggies and hearty soups and stews. I've also tried out a few vegan cookie recipes recently that I wanted to share with you too!


Warm Chickpea and Artichoke Salad  from the taste space


I've made this dish a couple of times in the past and it's just as good every time I go back to it. All you need is some canned artichokes and chickpeas, slivered almonds, and some flavourings in the form of garlic, lemon juice, and dried herbs. It seems like a simple combination, but when you eat everything together warm, it tastes a lot more special!


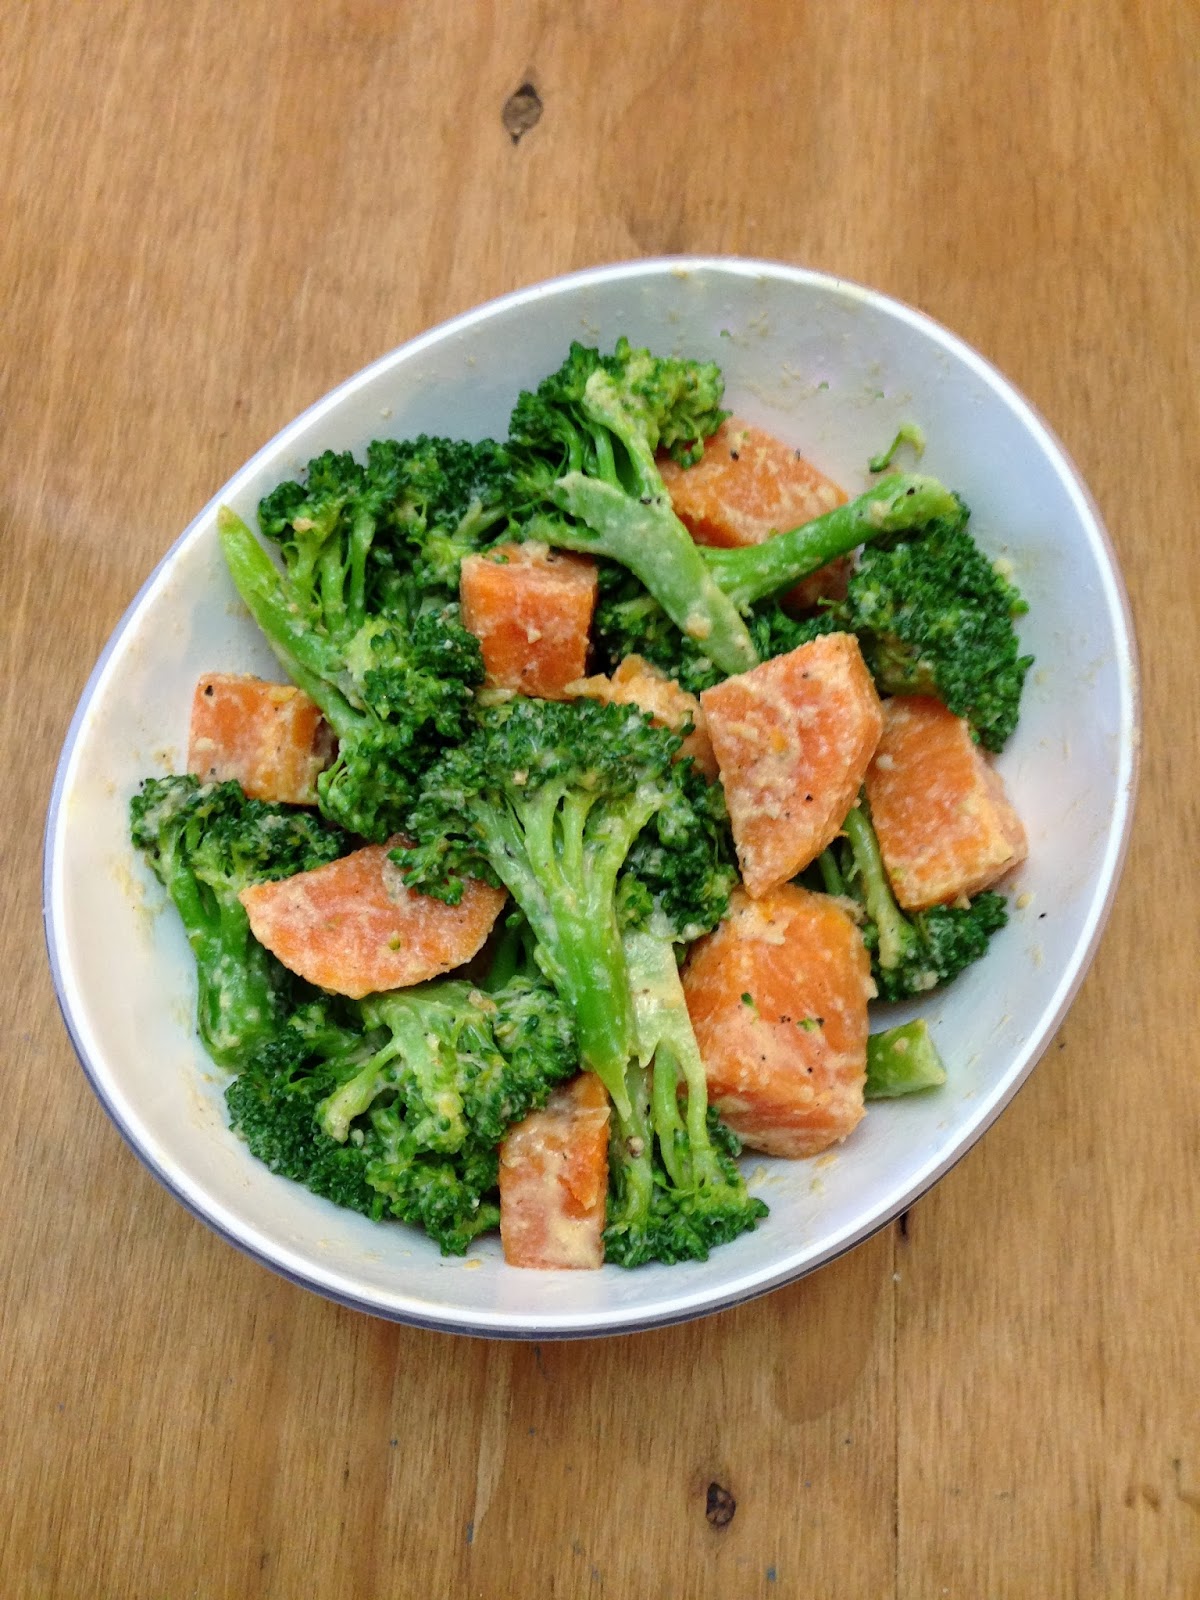
Sweet Potato Broccoli Bowl from Coffee & Quinoa


Sometimes all I want for dinner is a bowl of veggies, but to make it a bit more dinner-worthy, I'll whip up some kind of sauce to pour over top - usually with tahini and lemon juice. I didn't follow this recipe exactly, but this is the kind of creamy-yet-still-healthy sauce that I think goes perfectly over roasted veggies. To save more time, you can steam the veggies like I did, and use leftover quinoa or even leave out the quinoa.


Red Lentil and Squash Curry Stew from Oh She Glows


When I thought I might be coming down with the flu last week, I made this healthy stew that had lots of nutritious ingredients in it: garlic, ginger, onion, squash, sweet potato (which I added because I didn't have enough squash), red lentils, and spinach. I even added extra spinach (I used a whole bunch rather than 1 cup) because it cooks down a lot. This was just what I was craving, and while I'm not making any claims as to the powers of this stew, I did manage to fight off any sickness!


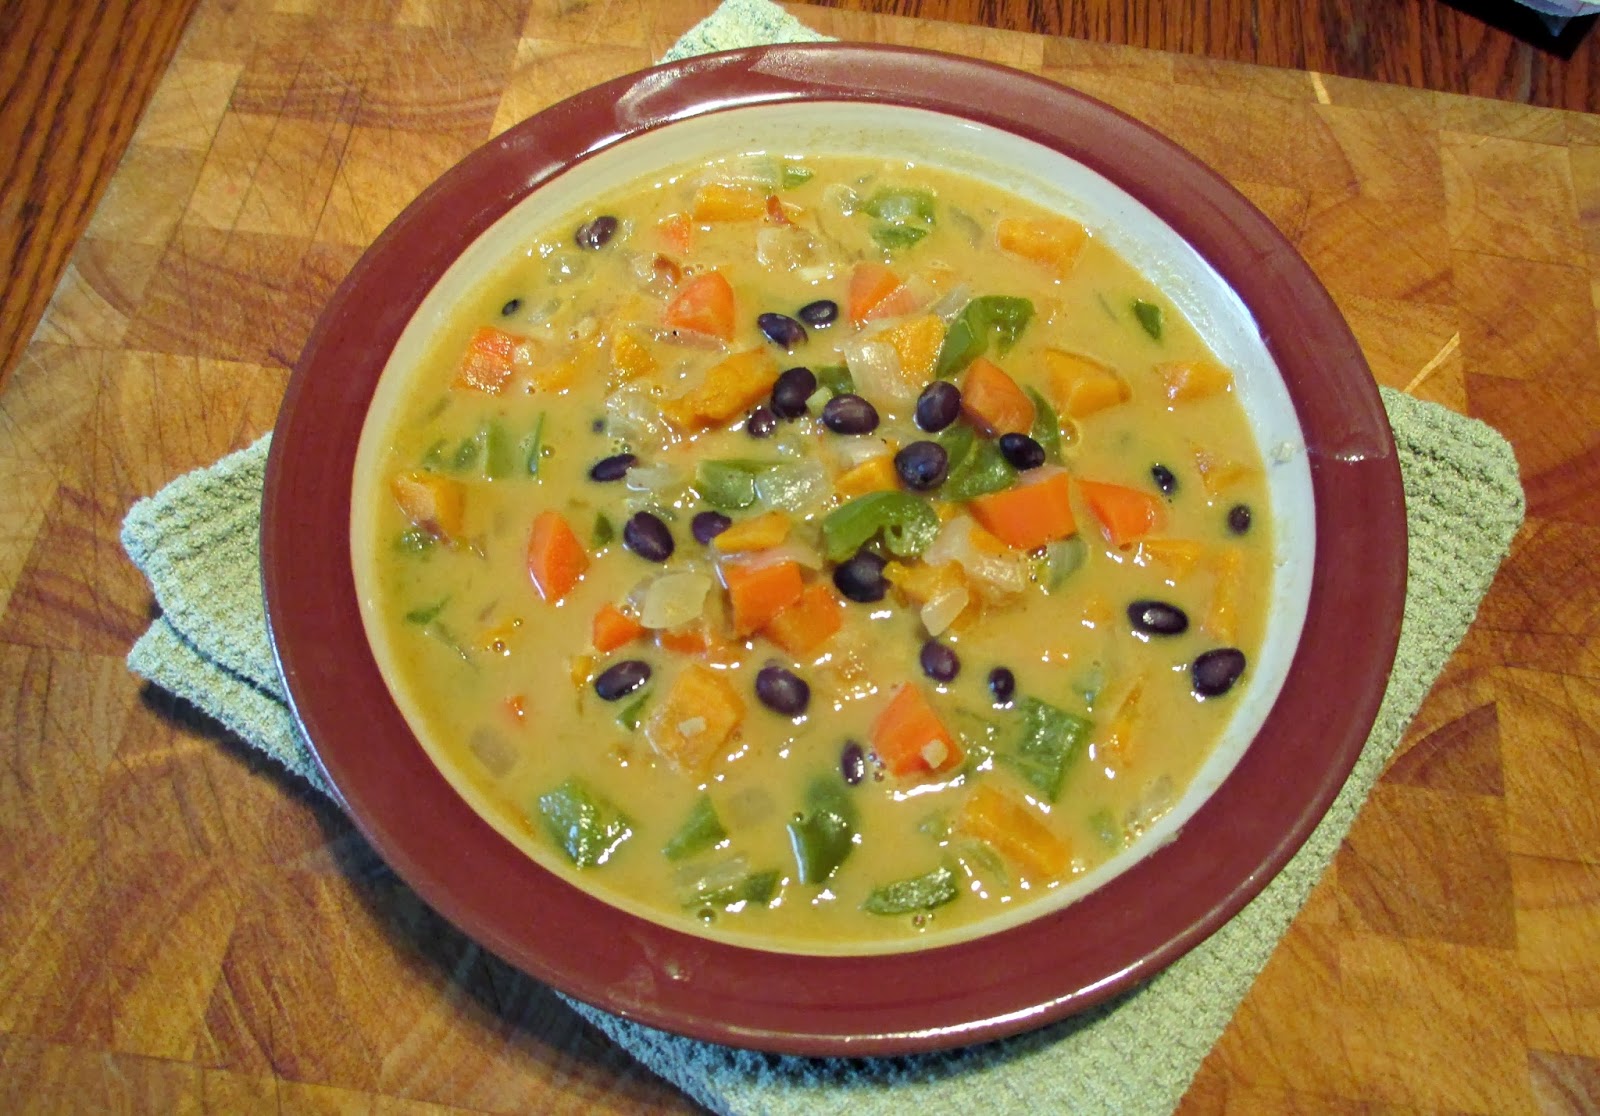
West African Peanut Stew from Sing for Your Supper


Another easy stew that I tried recently was a variation on this african peanut stew, which I made for my parents the last time I visited. I love anything with peanut butter and spices so I knew I would like it, but I wasn't sure if my parents would. Turned out I was wrong - they both raved about it! The only changes I made were to replace the chicken broth with vegetable broth and I added a hot pepper and some black beans to make it a bit more filling. I liked it just on its own, but it would also work well over rice or couscous!


Mini No-Yeast Cinnamon Rolls from Krissy's Creations


Out of all the recipes in this post, these were probably the least healthy, but I made them as a treat for a special occasion (my mom's birthday). I was looking for a no-yeast cinnamon roll recipe because I didn't have a lot of time in the morning, and these were perfect. Plus they were a nice small size so we could still eat a couple for breakfast and not be too full for lunch later! While they weren't quite as tasty as the yeast kind, I thought they were a really close substitution, especially fresh from the oven! 


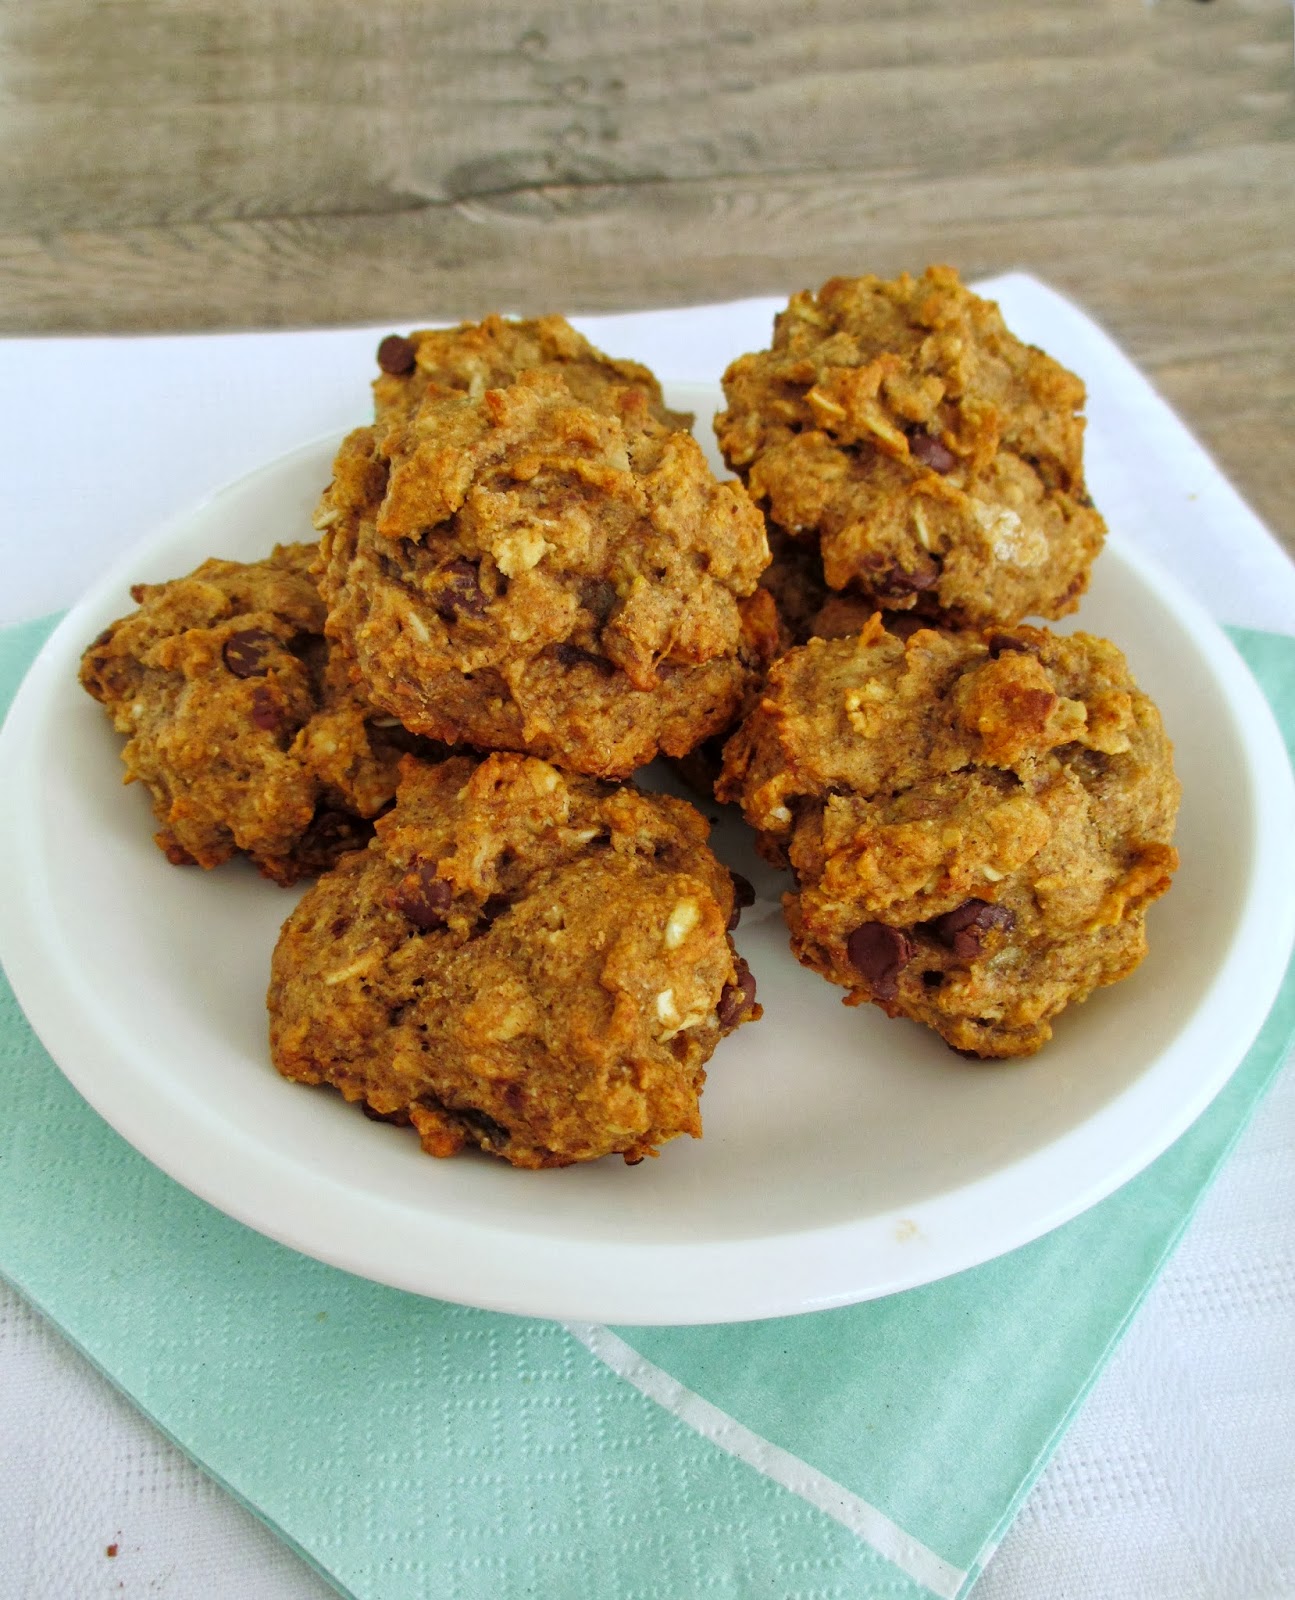
Chocolate Chip Banana Bread Bites from Minimalist Baker


I may have posted these cookies before because this is the second time I've made them, but I can't resist a healthy cookie with the combination of banana, peanut butter, and chocolate chips! These are super easy to make and you probably already have all of the ingredients in your kitchen, so you can whip them up anytime as a snack!


Chocolate Banana Cookies from Katy's Kitchen


I've recently discovered Katy's blog and I'm constantly bookmarking or pinning her recipes to try! These cookies are pretty healthy and had the perfect balance of banana and chocolate flavours. I also liked that they were nice and soft and fluffy - my favourite kind of cookie!


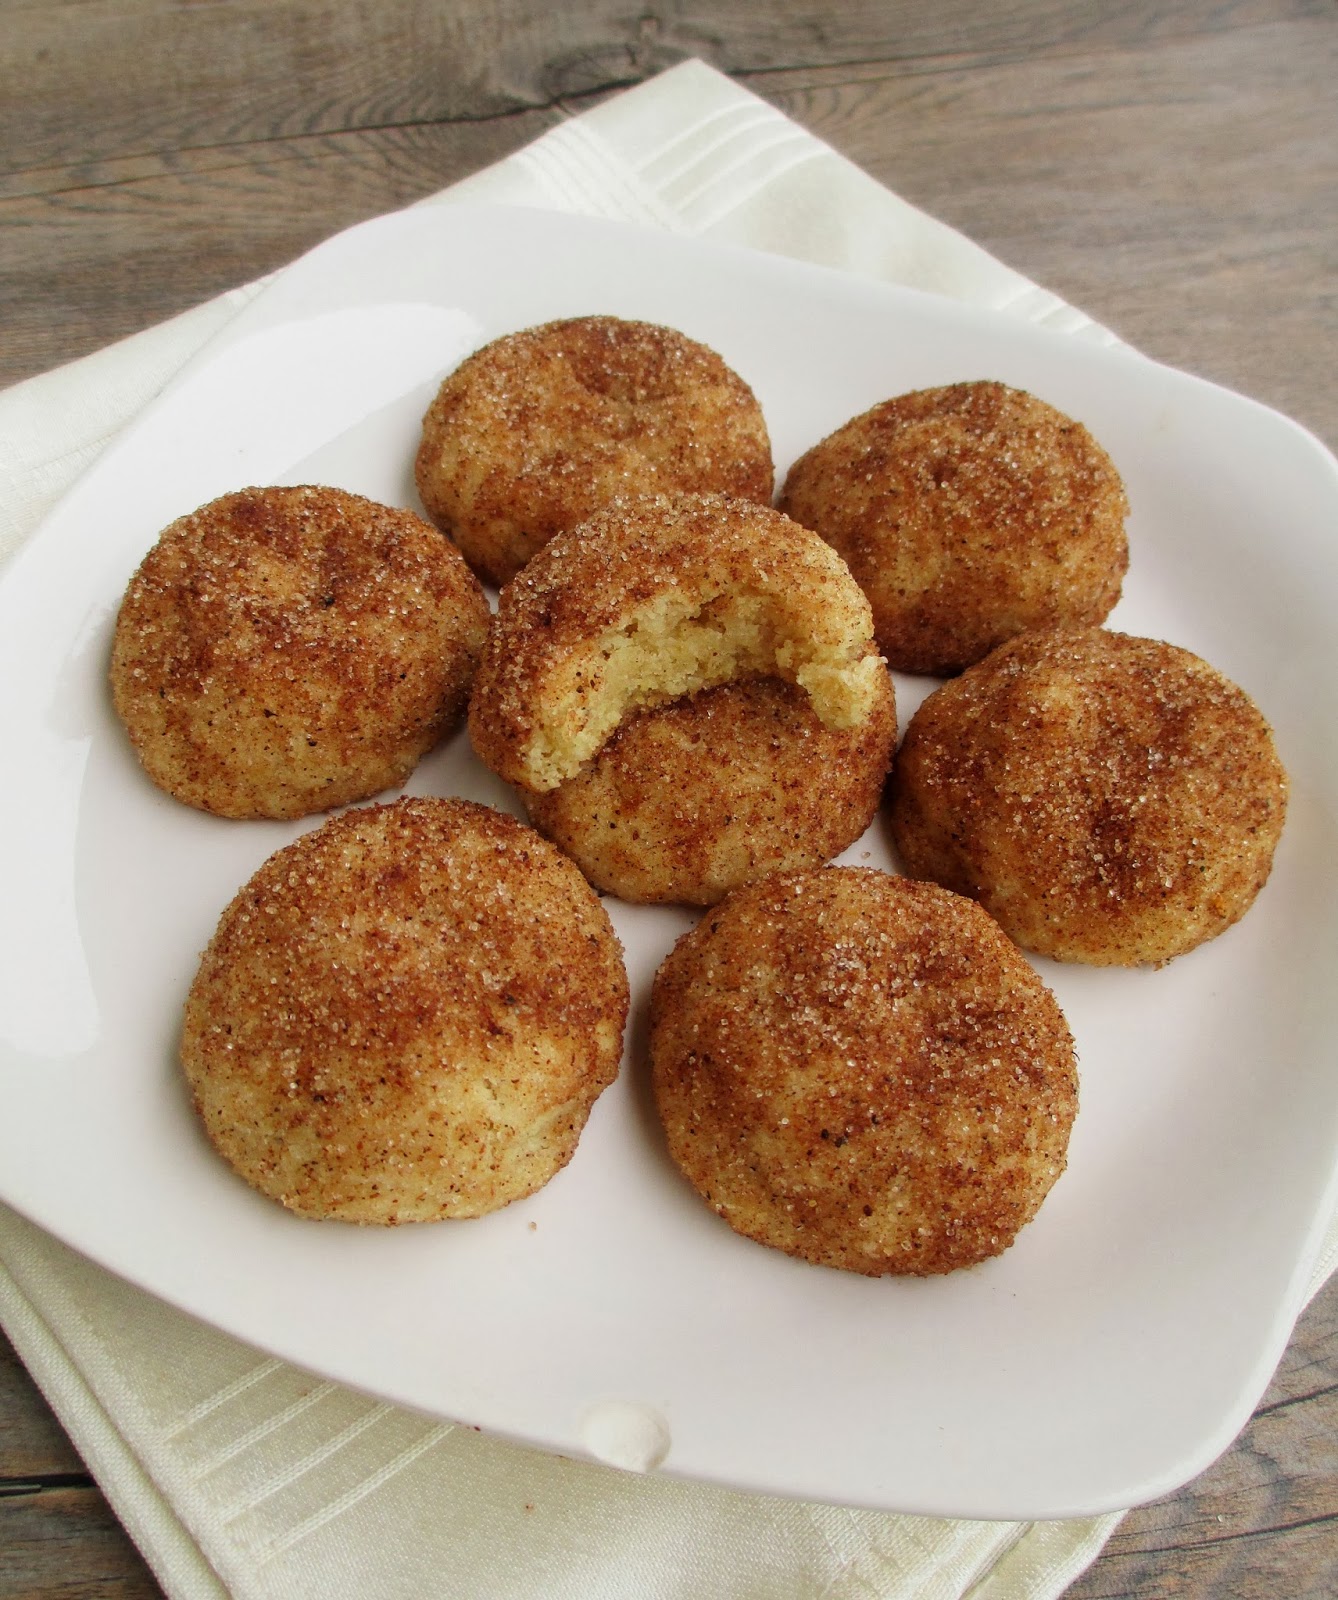
Skinny Snickerdoodles from Chocolate Covered Katie


Another healthier cookie that didn't taste "healthy" were these snickerdoodles. I loved the texture - pillowy and soft inside with a bit of crunch on the outside from the sugar, and they're a nice small size so you can eat lots of them! I changed up the spices a bit, adding some chai spices to the coating for a bit of a twist on the usual cinnamon-sugar combo.

I might consider adding these to my holiday baking wish list, or if you have any other good cookie recipe recommendations that I could make for our annual cookie swap next week, feel free to let me know in the comments!

Have a great weekend!


June 24, 2013

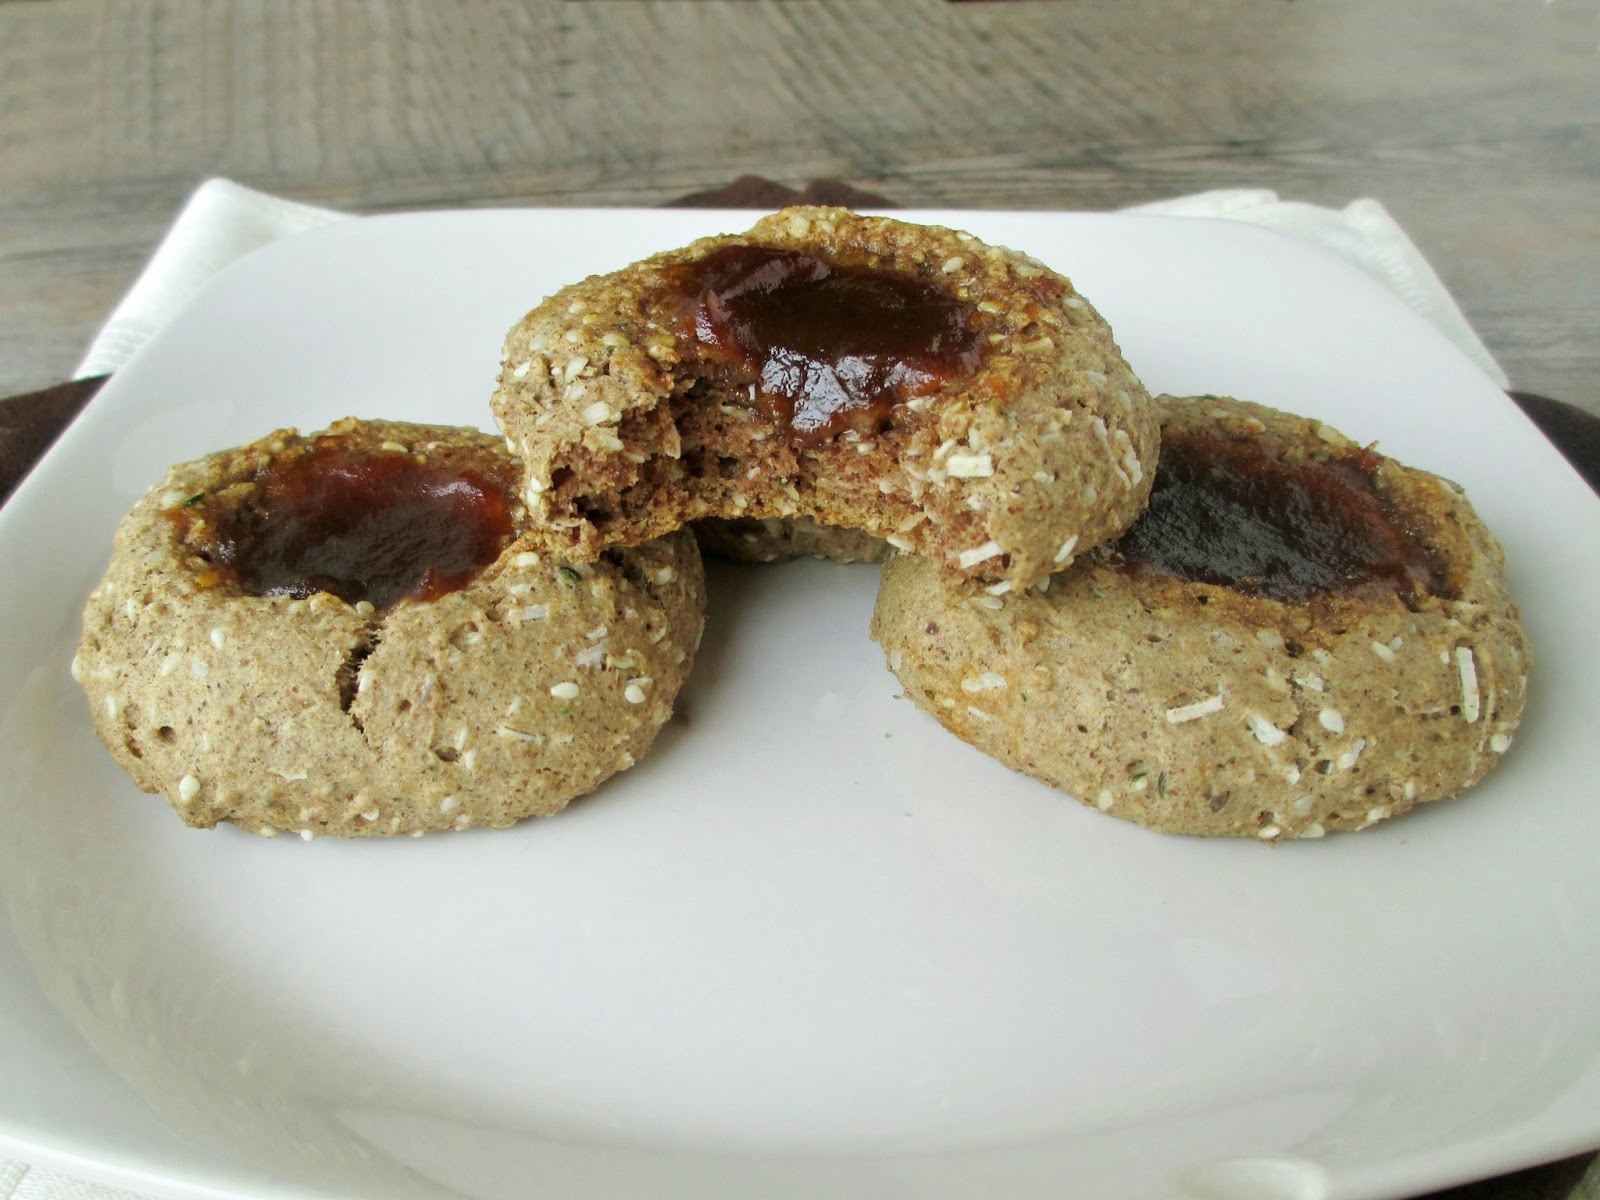
Thumbprint Energy Cookies with Apple Butter


One question I get asked the most as a blogger is where I get the inspiration for my recipes. My answer is never a simple one, as my inspiration comes from many different sources: the farmer's market, the seasons, cookbooks, and other blogs.

With these cookies though, my inspiration was super specific, since I wanted to try to recreate an energy explosion cookie that I had tried recently.  I'm not sure if they're only a local treat, but I've seen them around town at organic stores and bakeries, sold as a healthier treat option.

The version that I tried was gluten-free, made with brown rice rice flour, ground almonds, sesame seeds, and a bit of maple syrup and cinnamon for flavour. What I liked the most about them was the rich, velvety apple butter filling in the centre, which made these different from the usual thumbprint cookies that are filled with jam.


It took me a few tries to get my cookies right (which is why they look slightly different in these photos!), going from dry and overbaked to too soft and muffin-like with no flavour. While the final version is still not exactly like the original, I'm happy with my homemade knock-off!

My cookies are made with whole grain spelt flour, with a mixture of sesame seeds, hemp seeds, and coconut for texture. I added a bit of almond butter and pure maple syrup for flavour, and a generous spoonful of apple butter in the middle.

I liked that the cookies themselves aren't too sweet, since the apple butter adds plenty of natural sweetness in each bite. These are more of a soft cakey cookie, with lots of texture from the seeds and coconut. And the best part is that all of the ingredients are healthy, especially the hemp seeds which are full of protein, fibre and vitamins, so you can feel good about eating these as a nutritious snack!


Thumbprint Energy Cookies with Apple Butter
Inspired by these "Energy Explosion" Cookies and Kitchen Grrrls' Thumbprint Cookies

1 cup whole grain spelt flour
1 tsp baking soda
1 tsp cinnamon
1/8 tsp salt
1/4 cup unsweetened shredded coconut
2 tbsp shelled hemp seeds* 
2 tbsp sesame seeds
1/4 cup pure maple syrup
2 tbsp almond butter
2 tsp vanilla extract
1/4 cup unsweetened almond milk
1 tbsp melted coconut oil
~2-4 tbsp organic apple butter (I got mine from Bulk Barn)

Preheat oven to 350°F and prepare a baking sheet by lining with parchment paper.

Whisk the dry ingredients (flour to sesame seeds) together in a medium sized bowl.  In a separate bowl, mix the wet ingredients (maple syrup to coconut oil). Gently mix the wet ingredients into the dry ingredients, stirring just until the dry ingredients are incorporated. Place dough in the fridge for 10-15 minutes to firm up.

Roll dough into equal sized balls (I got eight balls) and set them on the prepared baking sheet. Press down in the centre of each ball using a 1/2 tsp measure or your thumb to flatten the cookie and make an indentation. Fill each indentation with a heaping 1/2 tsp of apple butter.

Bake in the preheated oven for 11-13 minutes, until firm and lightly browned. I like to add a bit more apple butter to the centres once they come out of the oven because the filling will have reduced a bit in the oven. Let cool on a wire rack.

Makes 8 large cookies.

*Note: hemp seeds can have a slightly bitter taste, so if you've never used them before or you don't like the taste, you can just leave them out of the recipe (I didn't notice any bitterness, but my sister did when she tried one of the cookies). 

May 02, 2013

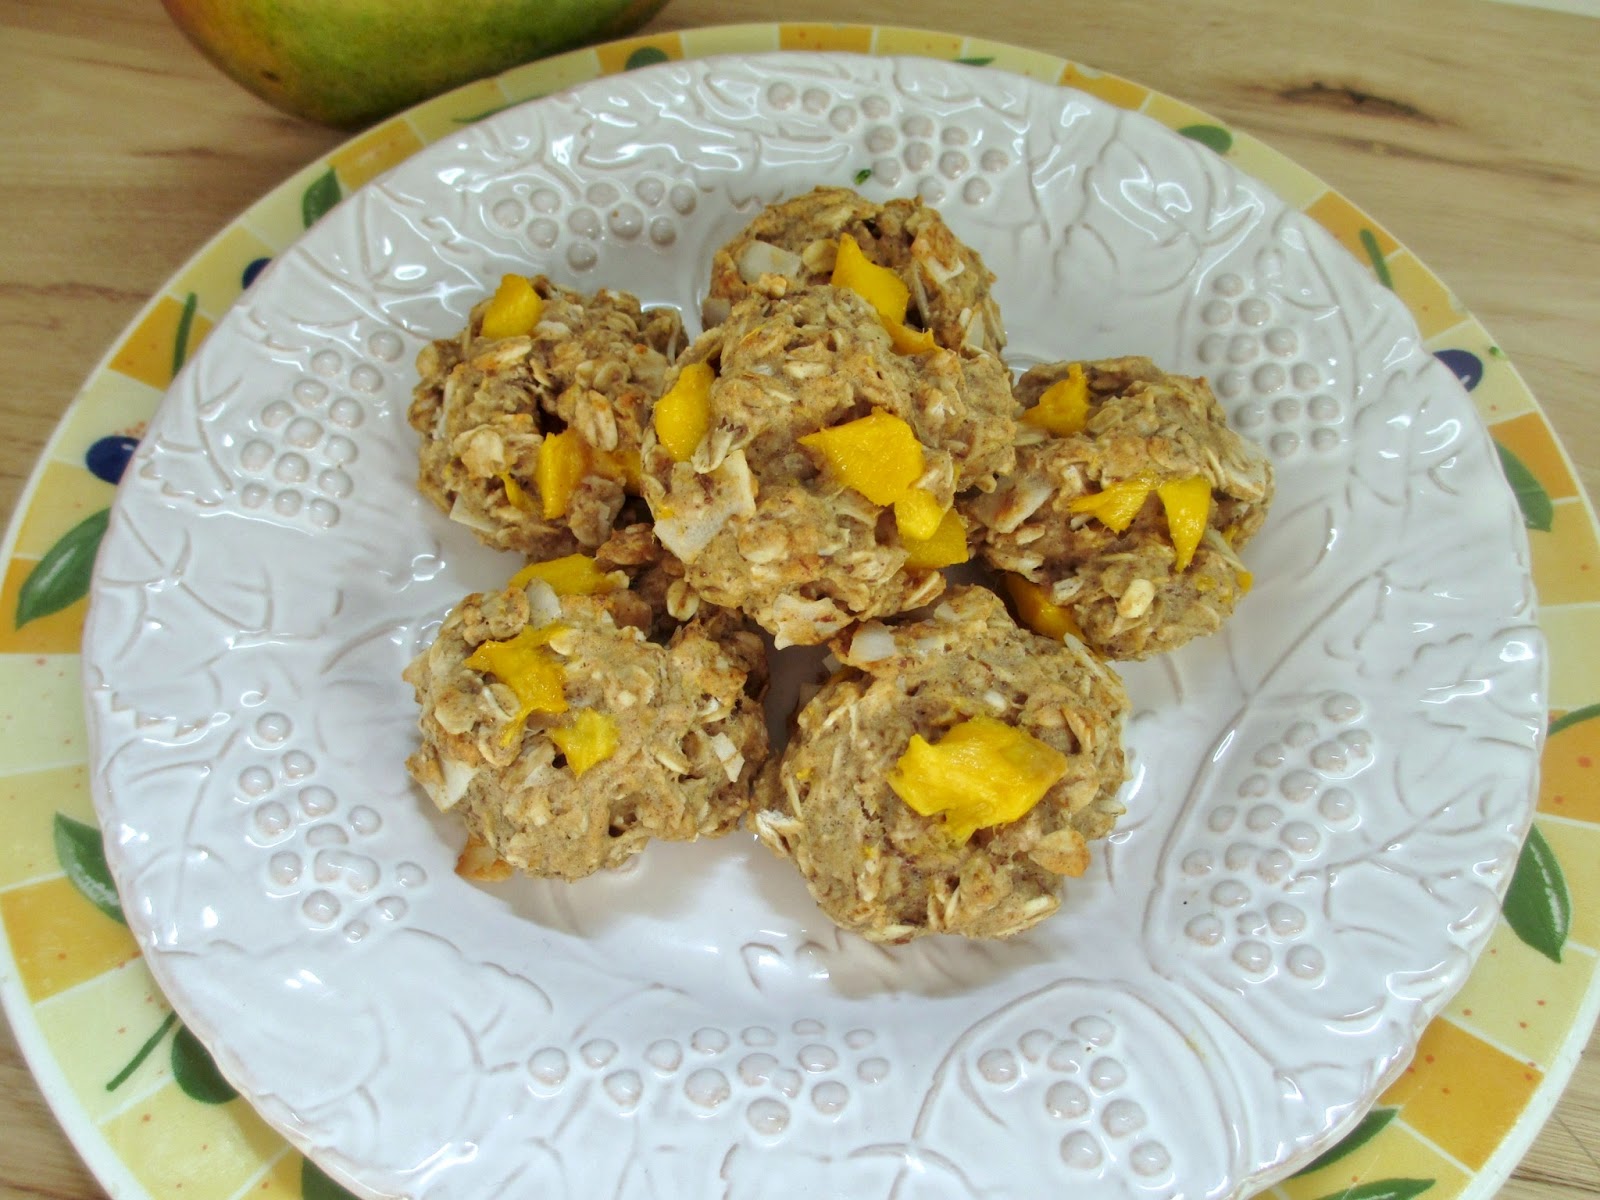
Mango Oat Cookies


The past week and a half has been pretty busy, with family events, birthdays, chores, and nice weather to enjoy, which meant that my blog and recipe development has been a bit neglected! I also feel like anything I've tried to bake recently has ended up somewhere on a scale from lacking flavour to strange texture to flatout inedible.

The one successful recipe I've managed to produce this past week was these mango cookies, which I made for a few family members and friends who needed a little something to brighten their day.

The inspiration for these cookies came from this recipe for strawberry banana nut oatmeal cookies on Vegan Yack Attack. I made a few modifications to the recipe, replacing the strawberries with mango, leaving out the nuts and adding coconut for a more tropical flair.

I wasn't sure if fresh mango would really work in a baked cookie recipe, but they turned out just how I was hoping! The cookies were nice and chewy from the oats and had just enough sweetness. I loved the addition of the coconut chips and the burst of ripe mango in every bite.

These are best eaten on the day they're made, but the recipe makes a smallish batch and the cookies themselves are pretty light tasting, so you shouldn't have a problem finishing them quickly!


Mango Oat Cookies
Adapted from Vegan Yack Attack

1 tbsp ground flax
3 tbsp water
1 cup all purpose flour (next time I would use at least half whole wheat flour)
1.5 cups rolled oats
1/2 tsp baking powder
1/2 tsp baking soda
1/4 tsp salt
1 tsp cinnamon
1 medium-large ripe banana, mashed
1/4 cup pure maple syrup
1/4 cup melted coconut oil
1 tsp vanilla extract
Heaping 1/2 cup diced ripe mango
1/4 cup coconut chips (or coconut flakes)

First, mix the flax with water and set aside to thicken. Preheat oven to 350°F and prepare a baking sheet by lining with parchment paper or spraying with cooking spray.

In a large bowl, whisk together the dry ingredients (flour to cinnamon). In a separate bowl, mix the mashed banana, maple syrup, coconut oil, vanilla, and the flax mixture.  Add wet ingredients to the dry ingredients and stir until the dry ingredients are incorporated.  Gently fold in the mango and coconut chips until they are evenly distributed.

Scoop out cookie dough in about 2-tablespoon sized portions and place on the prepared baking sheet about 1-2 inches apart. (Note: I found it easier to chill my dough for about 10 minutes before scooping to make it easier to work with). 

Bake for 15 minutes, until golden on the bottom and firm on top. Remove from oven and let cool on a wire rack.

Makes about 19 cookies. 

Note: These are best eaten on the day they are made, but can be stored in a sealed container at room temperature.


February 01, 2013

Recipe Round Up: Healthy Snacks

The month of January is a popular time for people to start new diet resolutions, or at least try to eat healthier.  Now that the month is over, I thought this was a good time to share another round-up of healthy recipes that I've tried from other blogs!

This time, the theme is healthy snacks - including portable snacks to power you through the day's activities, and homemade versions of snacks that you might usually buy at the grocery store.

Peanut Butter, Coconut & Dried Fruit Granola Bars
First up are these granola bars from Peanut Butter Runner. I never seem to make the same granola bars twice because I like to experiment with new combinations, and this recipe was the latest version that I've tried. I used dried apricots and dates for the fruit, which provided most of the sweetness and they were nice and hearty from the oats. These bars have been fueling me through my new schedule of exercise classes - they make a great pre- or post-workout snack!


Chili Garlic Crackers
I usually buy crackers from the store, but I saw this recipe on Versatile Vegetarian Kitchen and wanted to try making my own. These aren't necessarily the healthiest crackers, as they still have a bit of butter and sugar, but I like to think that since they're homemade and have less of the processed ingredients, they're still a pretty healthy snack choice!
They had a lot of flavour from the addition of garlic and green chilies and were super spicy for my taste, which I liked! They were also perfect on a charcuterie board to eat with different types of cheeses and tapenades.


Almond Joy Cookie Bites
I just bookmarked this recipe from Oh, Ladycakes, as seen on Vegan Yack Attack last week, and had a chance to make them this morning because I had almost all of the ingredients on hand. I did have to make a couple of substitutions which I think compromised the full flavour potential of these cookies (like leaving out the dark chocolate and using a different type of nut butter, plus my coconut had lost its freshness).  I still liked the combination of almonds, coconut and cacao nibs, so I'm excited to try the raw version of this recipe from Ashlae next!


Lentil Trail Mix
I was very curious about this trail mix when I first saw it on Healthful Pursuit and I finally had the chance to make it earlier this month to bring along as a snack on a family day trip.  I made a few changes based on what I had on hand, like using chopped dried mango and papaya for the fruit, along with the cranberries. I admit it was a bit odd at first and not everyone who tried it was a fan, but I personally loved the crunchiness of the red lentils and the sweetness of the dried tropical fruit!


Oat Snackles
These cookie bites from Let them Eat Vegan, as seen on Plant-Powered Kitchen, were another snack that I made for our family day trip that we spent outdoors at a provincial park.  They were nice and chewy and I liked the addition of the raisins and chocolate chips. Next time I would use less lemon zest, since the combination of zest with dried fruit reminded me too much of fruitcake, but other than that, they made a great healthy and portable snack!


Baked Plantain Chips
I've been wanting to try making my own plantain chips, since it sounds so easy, so I bought a plantain the other weekend and followed this recipe from the Kitchn.  I made half of the chips with a mandolin so that they came out super thin (at the bottom in the pic below), and the other half I cut with a knife a bit thicker (the top half of the plate). 
The thinner pieces turned out more like actual crispy chips and made a nice light snack, while the thicker ones were good for dipping in salsa. I liked them both ways, and this is definitely a snack that I want to make more often - maybe for Super Bowl this weekend!


Have a great weekend everyone, and I'll have some new recipes to share with you next week!

December 24, 2012

Recipe Round Up: Holiday Treats 2012

Merry Christmas Eve!  I hope those of you who are celebrating Christmas are ready for the big day tomorrow and are enjoying spending time with loved ones over the next couple of days. I've been home for a few days already and I've been loving the homecooked meals, watching Christmas movies, and making treats to have around!

Last year around this time, I did a round-up of no-bake, bite-sized vegan treats that I had tried from other blogs, and I thought I would continue that tradition this year. Not all of the treats are no-bake and vegan this time, but they're still small bites that won't weigh you down too much with richness or sweetness!

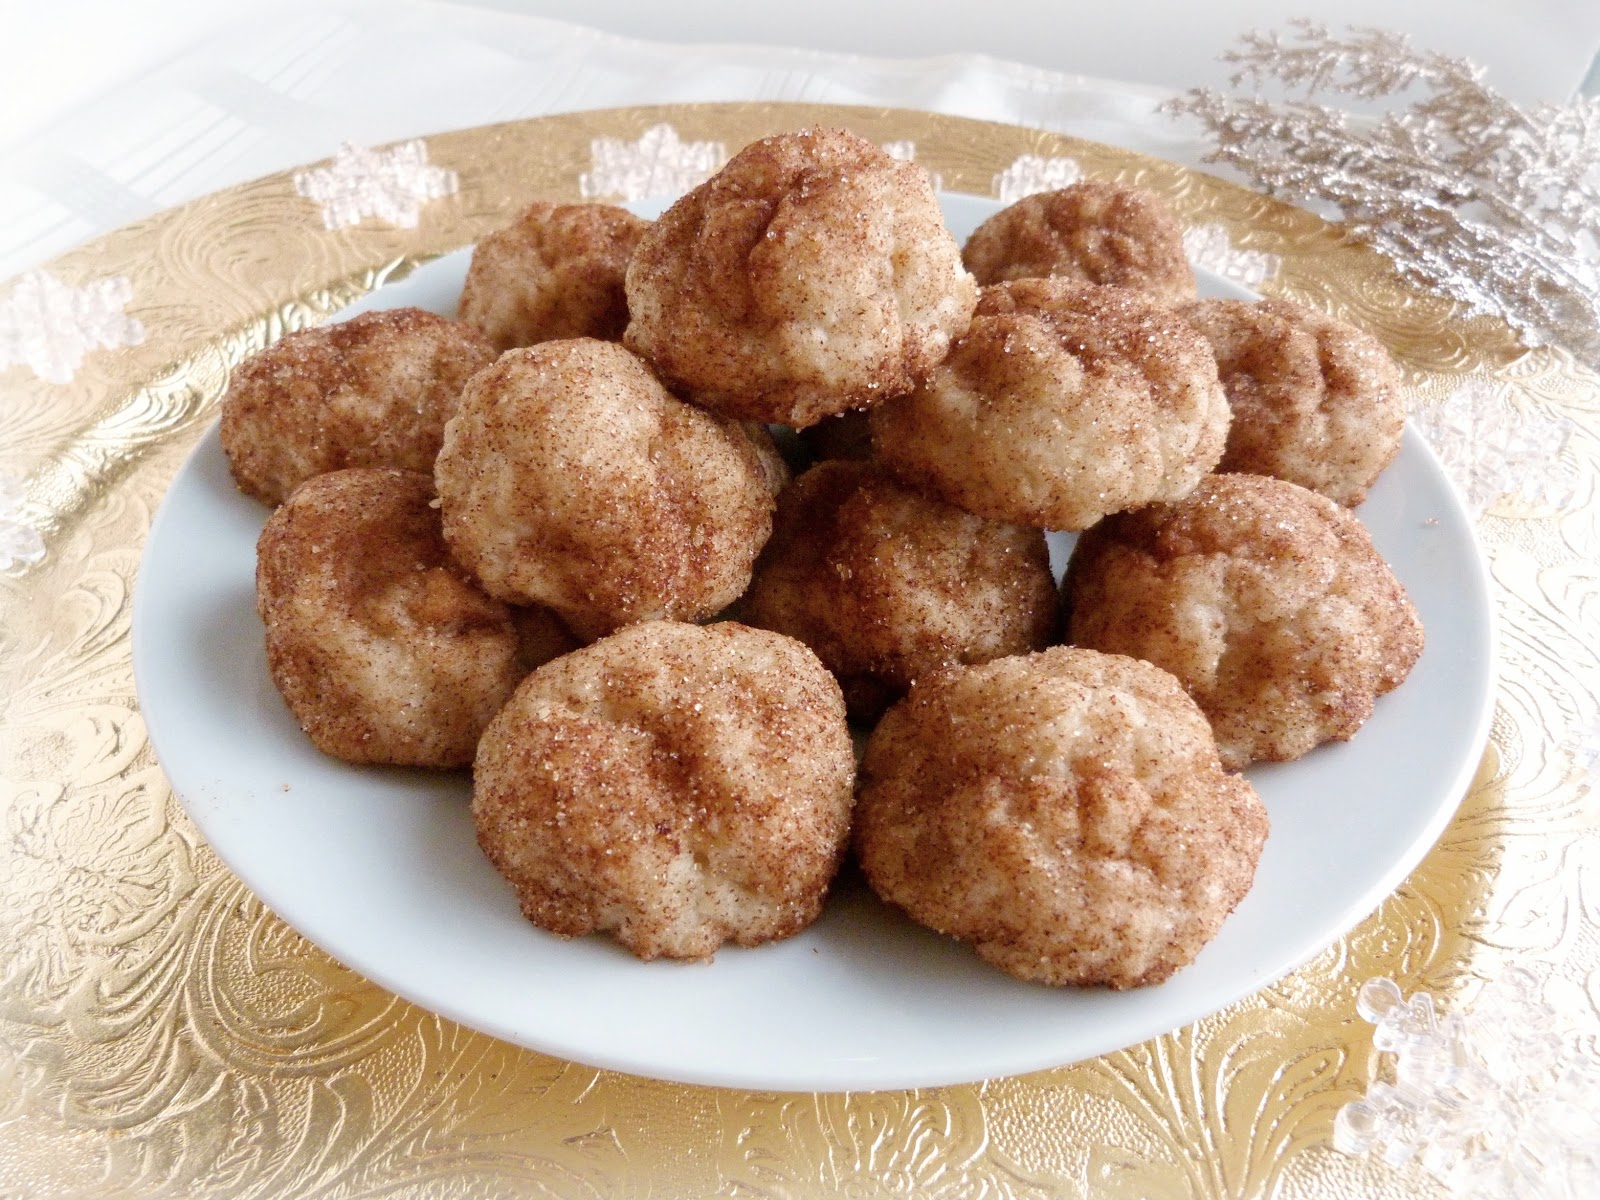
Cheesecake-Stuffed Cinnamon-Sugar Pillow Cookies

First up are these cookies that I adapted from Chocolate Covered Katie. The cookie dough is kind of like a cross between a sugar cookie and a snickerdoodle, and each one is stuffed with a cream cheese filling in the middle. I loved how soft and "pillowy" these were, and the cream cheese surprise inside made them extra tasty! I brought these to our cookie swap and they got lots of compliments (and disappeared quickly too!)


Notes: I doubled the recipe, which got me 23 small cookies. For the cookies, I used all-purpose flour and coconut oil, and I had to increase the amount of milk slightly to about 3-4 tbsp for the double batch, until the dough could stick together. I rolled my cookies in a mixture of 2 tbsp sugar + 2 tsp cinnamon.  I also changed the filling ingredients to the following:

Heaping 1/4 cup low fat cream cheese, softened
2 tsp melted white chocolate
2 tbsp powdered sugar

Stir all ingredients together until smooth.  Use about 1/2 tsp of filling per cookie.


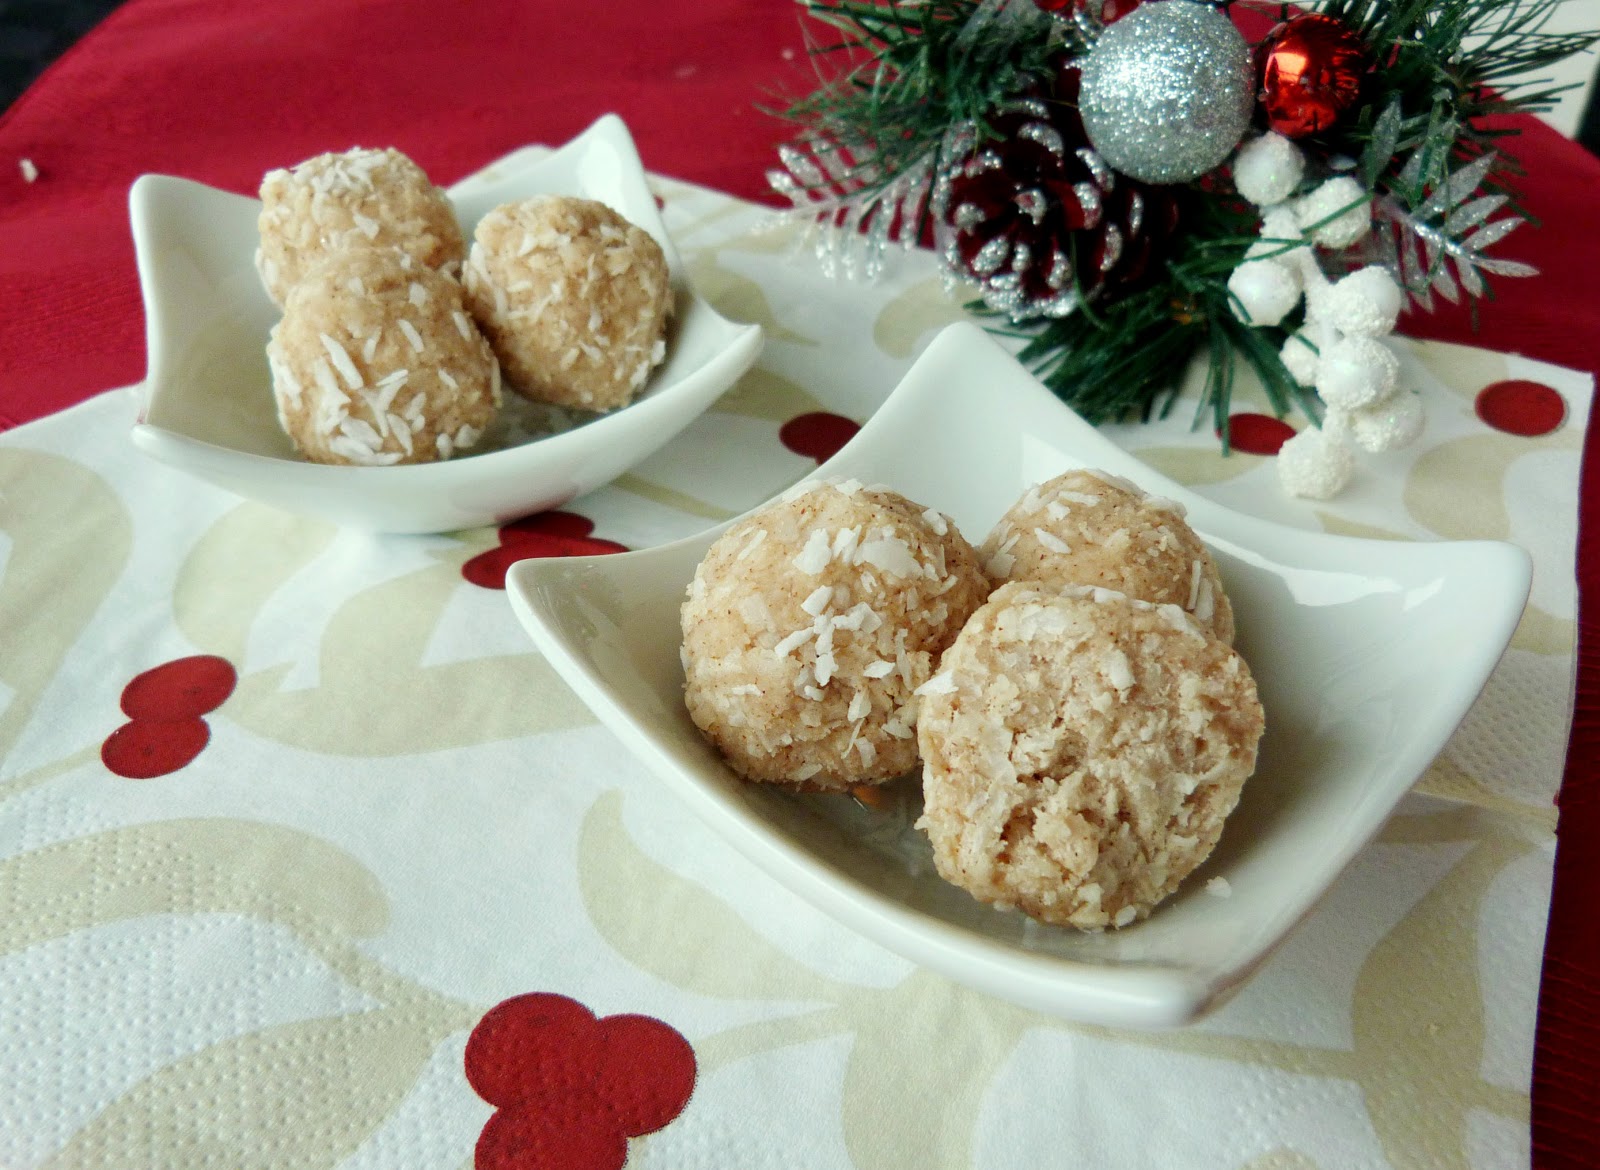
No-Bake Coconut Snowballs

These were one of the healthier treats that I made and gave away as a homemade gift for a friend (one who doesn't like most sweets because of all the butter and sugar that usually go into them).

The recipe is from the Kitchn, and the only change I made was to use a bit less maple syrup because I didn't want them to be too sweet. They had a very chewy texture from all the coconut without being too dry, and I liked that I could eat them as a snack or as a non-sweet dessert!


No-Bake Sweet Potato Pie Truffles

Another treat with coconut that I made recently was these sweet potato pie truffles from Cara's Cravings, as seen on Clean Eating's website.  I made them mainly because I love anything with sweet potato, but also as an excuse to use some of my coconut flour.


I have to say, these got mixed reviews. I personally loved them - I thought they tasted just like sweet potato pie in bite-sized form, and I liked that the natural sweetness of the sweet potato came through without needing a lot of additional sweetener. When I tried sharing them with my family, however, they didn't go over very well - they all thought they weren't sweet enough to be a dessert and tasted more like a dinner side dish!

So I would still recommend the recipe, but with the caution that to enjoy them as much as I did, you have to love sweet potatoes, and be okay with less-sweet desserts!


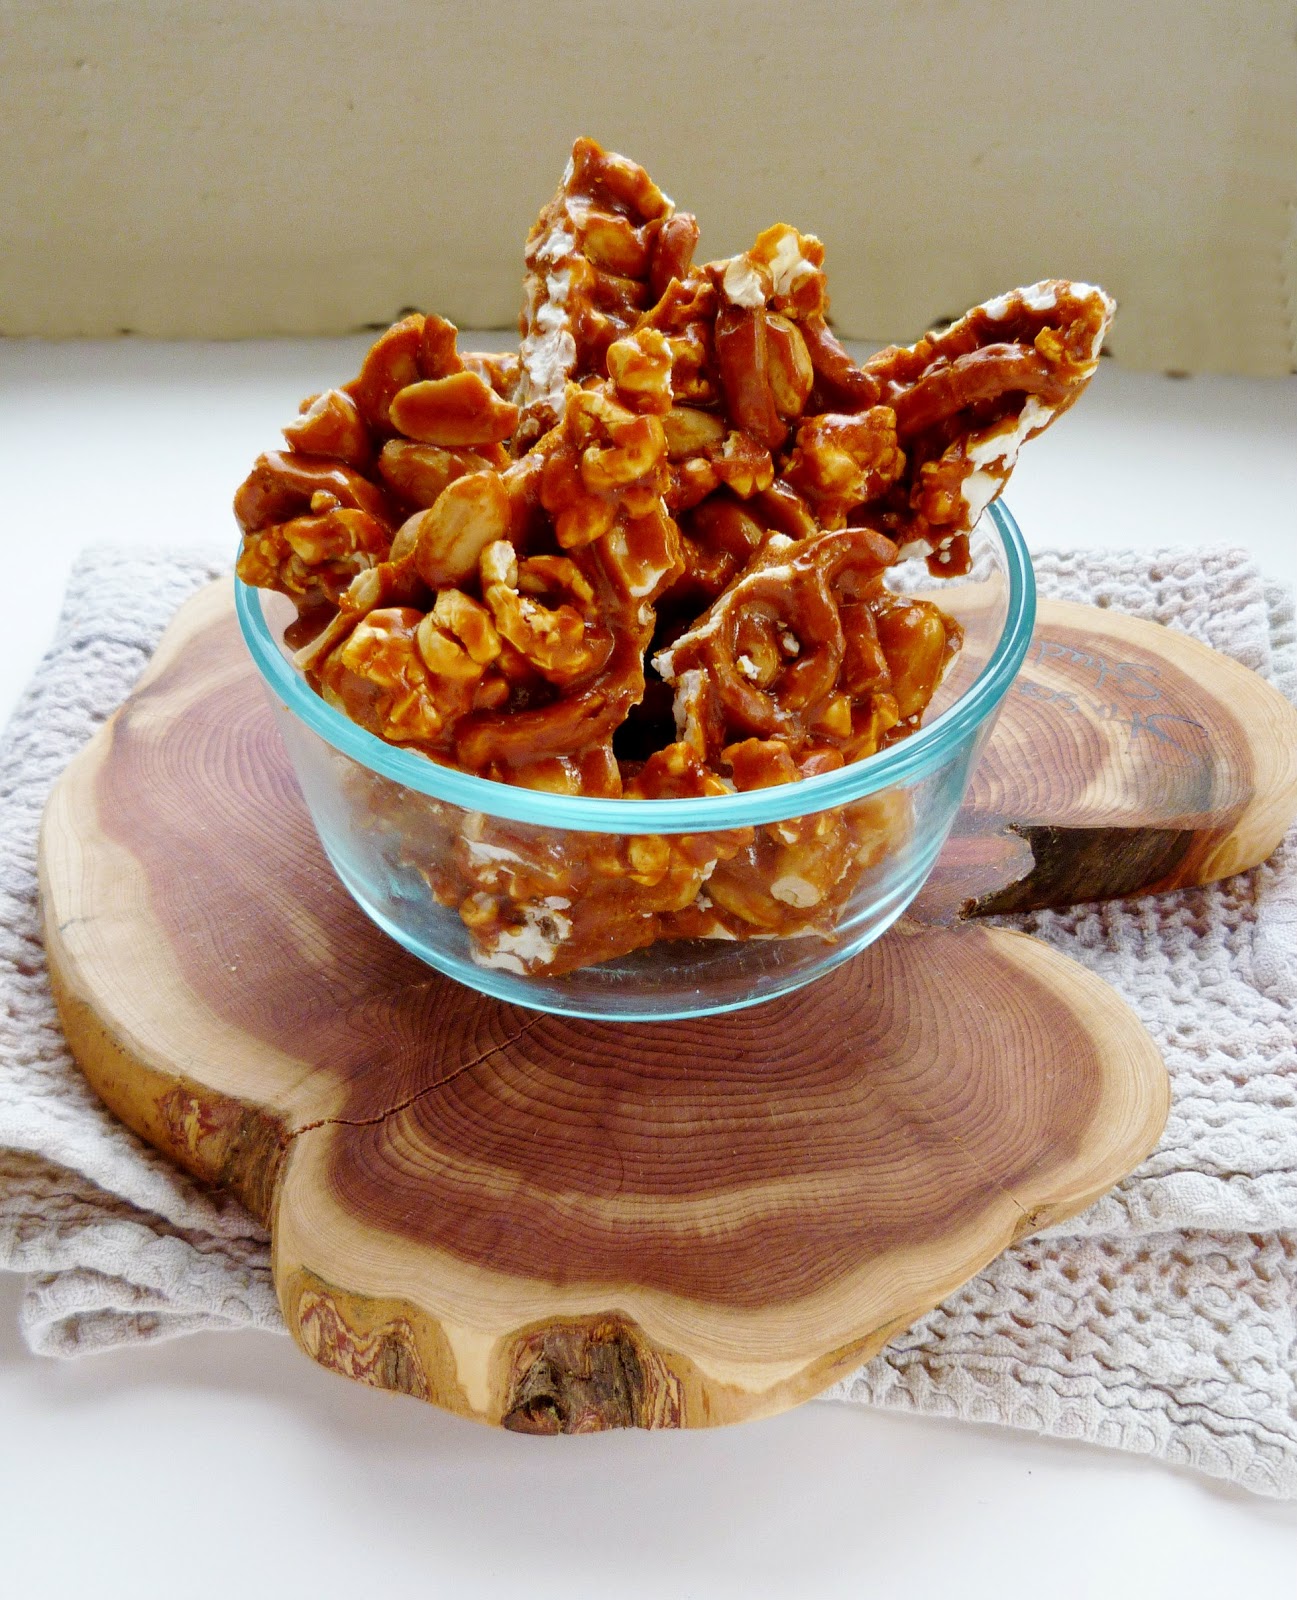
Popcorn, Pretzel & Peanut Brittle

I love trying out different kinds of bark and brittle around the holidays.  I can never seem to get brittle quite right though, and this time was no different!  The original recipe for this popcorn peanut brittle came from Ezra Pound Cake. I increased the amount of popcorn a bit and added 1 cup of broken pretzel pieces, since I figured they would go well with popcorn and peanuts.


Despite using a candy thermometer, I still managed to overcook my sugar mixture so the brittle ended up much darker than it should have been. It did taste a tad on the burnt side, but we all still enjoyed it! It was super crunchy and sticks in your teeth, but was actually quite addictive! I would definitely try this again but keep a better eye on the syrup next time!


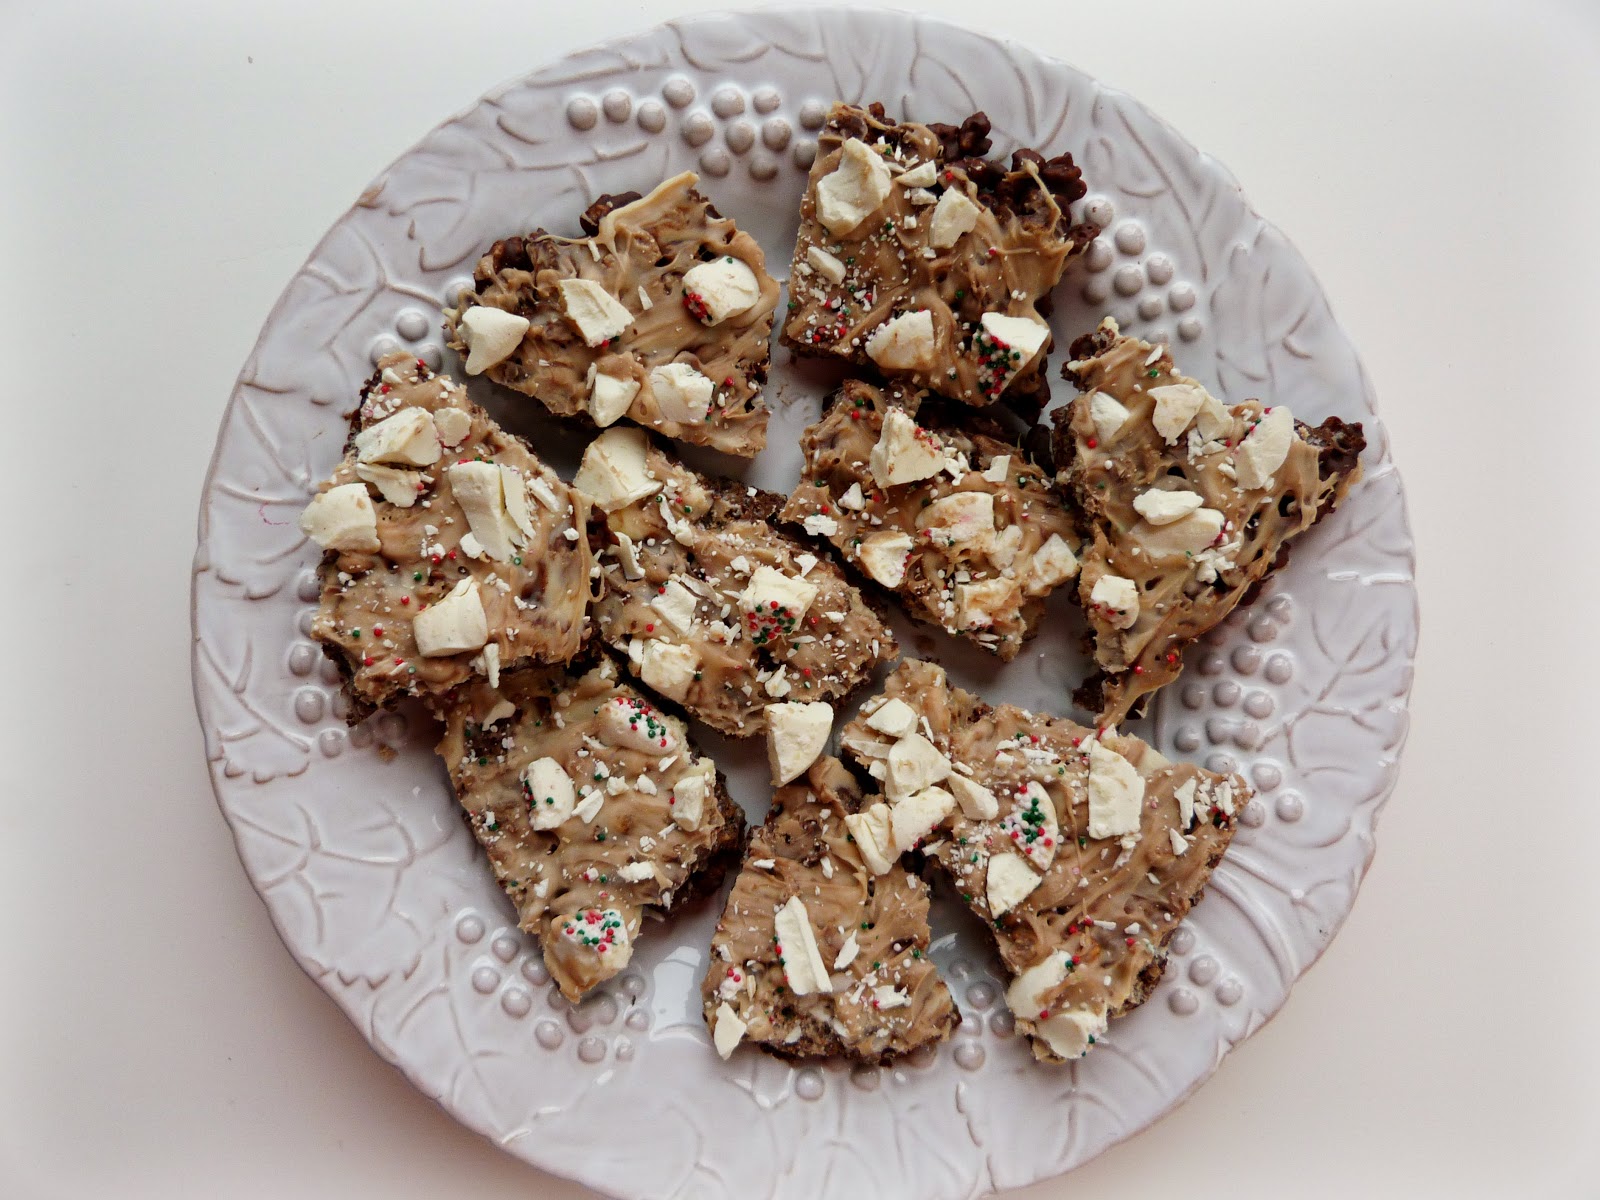
Peppermint Crispy Bark

After I made the peanut brittle, I wanted to make a chocolate bark to have one more dessert option around the house. I decided to go back to a recipe that I made last year and loved, this peppermint rice crispy chocolate bark.

I made a couple of changes this time, like adding a layer of melted white chocolate on top of the rice crispy layer, and instead of using Hershey's candy cane kisses (which I couldn't find, probably because it was the weekend before Christmas!), I chopped up those white christmas mint nonpareils that you can find in bulk bins.

This had tons of minty flavour and was nice and light and crispy - just what I was going for!


And here are a few other vegan holiday treat ideas that I didn't have time to make this year, but they're on my list for next year!

Persimmon Oatmeal Cookies - Vegan Yack Attack as seen on Keepin' it Kind
Chocolate Dipped Peppermint Coconut Snowflakes - Purely Twins as seen on Cara's Cravings
White Chocolate Peppermint Rounds - Sunday Morning Banana Pancakes
Gingerbread Muffin Cookies - The Kabocha Fashionista
Gingerbead Granola Bars - Yummy Mummy Kitchen
Eggnog Cheesecake Thumbprints - The Sweet Life

Now I'm off to prepare some food for our Christmas Eve hors d'oeuvre party with family tonight!  I'm looking forward to stuffing myself with lots of appetizers and desserts, and for my part I'll be contributing these bourbon peanuts and goat cheese & pistachio covered grapes, plus some gingerbread cream cheese truffles and the leftover peppermint bark!

Merry Christmas everyone!

December 19, 2012

Tangerine Coconut Cookies


It seems like time is flying by these last couple of weeks - there's less than a week left until Christmas, and I feel like I haven't done all the Christmasy things that I've wanted to yet, like watching all my favourite movies, spending evenings shopping in the crazy busy malls, driving around to look at Christmas lights, and going to see the lights display in the park.

One thing I have managed to is some holiday baking! Our annual cookie swap at school took place a couple of weeks ago, and in the last few days I've made 4 more kinds of little treats.  The latest treat to come out of my kitchen was these tangerine coconut cookies.

I had bookmarked the original recipe for mandarin coconut cookies from Whole Foods, and I was inspired to try them after a fellow student brought some clementine cookies to our cookie swap that I really liked.


These cookies are kind of like a cross between a sugar cookie and shortbread, and they're made vegan by using coconut oil instead of butter.  Because the baking time is a bit longer, they come out with a crisp, crumbly texture (perfect as a tea biscuit!) and if you place them in the freezer before baking, they stay nice and thick without spreading.

These are studded with lots of coconut and full of tangerine flavour.  I love anything with coconut, but I'm actually a bit picky with orange-flavoured treats as I find the zest can be a bit overpowering.  That wasn't the case with these cookies though - the tangerine zest and juice added lots of flavour, but it was balanced out really well by the coconut at the same time.

I also loved the pretty effect of pressing the cookies with a small glass to create the ridges around the edges. Plus the coconut-sugar mixture that I rolled the cookies in makes them look like they were dusted with snow!

If you're still looking for more cookie ideas, I plan on doing a round-up post of some of the other treats I've made lately, so stay tuned!


Tangerine Coconut Cookies
Adapted from Whole Foods

1 tangerine (can substitute with a clementine instead)
6 tbsp (1/4 cup + 2 tbsp) coconut oil, softened
1/2 cup powdered sugar
1/2 tsp vanilla extract
1/2 tsp coconut extract
1 ¼ cups all-purpose flour
1/4 cup + 2 tbsp unsweetened shredded coconut
1.5 tbsp cornstarch
1/2 tsp baking powder
1/4 tsp salt
2 tbsp cane sugar

Preheat oven to 325°F and prepare a baking sheet by lining with parchment paper.

Wash the tangerine and use a zester to remove the zest. Set aside the zest and cut the tangerine in half with a knife.  Use a lemon juicer and juice one half of the tangerine – you should get at least 2 tbsp of juice. Save the other half of the tangerine for another use.

Cream the coconut oil and powdered sugar together in a large bowl, until fluffy.  Add the vanilla and coconut extracts, 2 tbsp of the tangerine juice, and ½ tbsp of zest. Beat until mixed.

Add the flour, 1/4 cup of coconut, cornstarch, baking powder, and salt and beat again until all the dry ingredients are incorporated. Use your hands to form the mixture into a smooth dough.

Combine the remaining 2 tbsp of coconut and the cane sugar. Use a blender or food processor to grind until coarse.

Form the dough into small balls.  Roll each ball in the coconut-sugar mixture and place on the baking sheet. Take a small glass (I used a shot glass) and dip the bottom in water, then in the coconut-sugar mixture. Press the glass into each cookie ball to flatten (You will need to wipe off the bottom of the glass and re-dip in the water a few times).

Bake cookies in the preheated oven for 15 minutes, until firm and lightly golden on the bottom. Transfer to a wire rack to cool.

Makes about 19 small cookies.

Note: If you prefer a softer, chewier cookie, you can try baking them for less time, but I haven't tested this!

December 04, 2012

Vegan Eggnog Pudding in Raw Ginger Cookie Cups


I hope you're all getting as excited for Christmas as I am (or the holiday season in general if you don't celebrate Christmas), because I've got another Christmas-themed recipe to share with you today!

I've already shared a recipe featuring cranberries, and now I've got a recipe featuring two of my other favourite holiday flavours - gingerbread and eggnog!

I bought two bottles of So Nice Noel Nog (an eggnog flavoured soy milk)  recently, and one of the ways I wanted to use this tasty beverage was in a pudding.  But instead of serving the pudding on its own, I thought it would be fun to serve it in miniature cookie cups.

And to keep these on the healthier - and easier - side, I decided to make raw cookie cups that taste like gingerbread!  There's no baking involved in these cookie cups - just mix together some ingredients in your food processor and press them into mini muffin pans.  Stick the pan in the freezer and voila, you have raw ginger cookies that serve double duty as a cup for your eggnog pudding!

Here's what an unfilled cup looked like...


These started out as an idea in my head that I wasn't sure would work, but luckily they turned out just how I wanted!  The pudding was cool, creamy, and sweet, with a distinct eggnog flavour - even though it was made without "real" eggnog!

I also added a touch of spiced rum to bring out the eggnog flavour even more - I only used a hint of rum because I didn't want it to be overpowering, but feel free to increase the amount for a more grown-up tasting dessert!

The cookie cups were chewy and held their shape well. I loved the mix of salty and spicy notes in the crust, and I thought they made the perfect base to pair with the eggnog flavour. The only caution I would give is that the pudding was a bit on the thin side, so be careful if you bite into a filled cookie cup or you might end up with some pudding spilling out - and you won't want to waste any!

With this recipe, you really get three treats that you can eat any way you like - the pudding is great on its own, the cookie cups can be eaten plain, or you can put them both together and get the best of both combined into one dessert!


Vegan Eggnog Pudding in Raw Ginger Cookie Cups

Pudding
Adapted from this recipe for vanilla pudding

1.5 tbsp cane sugar
1.5 tbsp cornstarch
Pinch of nutmeg
1 cup soy nog
1/2 tsp vanilla extract
1 tsp to 1 tbsp spiced rum (optional)

Place the sugar, cornstarch, salt and spices in a medium saucepan and heat over medium-low heat. Gradually add the soy nog, whisking constantly to remove any lumps. Continue to heat, stirring constantly, for 5-10 minutes, until the mixture thickens.  Continue heating for 2-3 more minutes, stirring occasionally.  

Remove from heat and stir in the vanilla extract and 1 tsp rum. Taste and add more rum if desired (I only used 1 tsp).  Transfer to a container and chill in the fridge for at least 2 hours.

Note: You may want to double the pudding recipe if you want to have enough for all the cookie cups, plus more for eating on its own. Or, you can only make half the recipe for the cookie cups, which is what I did. 

Cookie Cups

2/3 cup chopped pecans
2/3 cup chopped raw cashews
2/3 cup rolled oats
dash of sea salt
2 tsp cinnamon
1/2 tsp ginger
1/4 tsp cloves
2 tsp molasses
2 tbsp maple syrup
1/2 tsp vanilla extract
2 tbsp non-dairy milk

Place pecans, cashews, and oats in a food processor and process until the mixture is finely ground. Add the salt, spices, molasses, and maple syrup and process again until the mixture starts to stick together.  Add the vanilla and milk and pulse until the dough comes together (you should be able to pinch it into a ball with your fingers).  

Remove mixture from food processor and divide into 14-15 mini-muffin pan cups. For each cup, press the dough down with your fingers so that it moulds in a thin layer around the bottom and up the sides of the muffin cup. 

Place the muffin tin in the freezer for at least 30 minutes, until the cookie cups are firm.  Run a knife around the edges of each cookie cup to carefully remove them. Transfer to a container and return to the freezer to keep them firm.

Makes about 14 cups 

To assemble:
Keep the pudding and cookie cups separate until you are ready to serve. Once the pudding is firm, spoon it into each cookie cup (be careful not to fill them too much or they will overflow when you try to eat them!).  Sprinkle a bit of ground nutmeg over each filled cookie cup.

Note: You may end up with extra cookie cups, depending on how full you fill them with the pudding. Feel free to re-shape any empty cups into cookie dough balls instead! 
Also, you may want to eat these over a plate or napkin - once you bite in, some of the pudding might spill out!  Or you can just eat them the way my sister's boyfriend did - by putting the entire thing in your mouth at once!


This was submitted to Wellness Weekend at Diet, Dessert & Dogs and Bringing in the Holidays Potluck Party at Lifeologia. 

June 05, 2012

Zucchini Bread Cookies


It occurred to me recently that I hadn't made a dessert recipe for the blog in a while.  I don't make a lot of desserts in general because I don't want to be left with an entire cake or batch of cookies for myself and not know what to do with them all!  But I do like being able to share treats with others, so I decided to make some cookies that I could bring into the office for my colleagues in our lab to eat up.

For some reason, I had zucchini on my mind and really wanted to come up with a sweet treat that featured zucchini.  Most recipes for zucchini baked goods are in the form of muffins, loaves or cakes.  There are hardly any zucchini cookie recipes out there, so I saw this as an opportunity to contribute one myself!

I've successfully switched carrots for zucchini in the past, so I figured I could use a recipe for carrot cookies and make some changes to turn them into the zucchini cookies that I wanted.

I've had this recipe for carrot "hippie" cookies from Running to the Kitchen bookmarked for a while, so I used that recipe as my base and modified it to come up with these zucchini bread cookies.  The main change that I made was substituting grated zucchini for the carrot.  I also used a different type of flour, cinnamon instead of ginger, left out the lemon zest, used a bit less maple syrup, changed the amounts of walnuts and raisins, and added some cacao nibs for extra flavour and a bit of crunch.


These cookies turned out way better than I expected!  They were soft and chewy, with a texture that was very similar to a muffin. The cookies themselves weren't very sweet, but the raisins added a bit of extra sweetness.

I actually thought they tasted just like a cross between an oatmeal raisin cookie and zucchini bread.  I also liked the slight bitterness of the cacao nibs, but you could substitute chocolate chips for more of a decadent treat.

Even though I had set out to make a dessert, these actually ended up being more like a breakfast cookie, and considering the list of ingredients, I would definitely say they're healthy enough to eat throughout the day, not just for dessert!

And if you need further proof, I can tell you that they certainly disappeared very quickly when I brought them to a morning meeting (and when I noticed people taking seconds, I could tell they were a hit!).


Zucchini Bread Cookies
Adapted from Running to the Kitchen

1 cup rolled oats
1 cup whole spelt flour
1 tsp baking powder
1 tsp cinnamon
1/2 tsp salt
1/4 cup melted coconut oil
1/4 cup unsweetened applesauce
1/4 cup + 2 tbsp pure maple syrup
1 cup grated zucchini (you can leave the skin on)
1/3 cup chopped walnuts
1/4 cup raisins
2 tbsp cacao nibs (optional; or use chocolate chips)

Preheat oven to 375°F.  Prepare a large baking sheet by spraying with cooking spray or lining with parchment paper.

In a large bowl, whisk together the dry ingredients (oats to salt).  In a separate bowl, mix the coconut oil, applesauce and maple syrup.

Add the wet ingredients to the dry ingredients and stir until the dry ingredients are incorporated.  Gently stir in the zucchini.  Fold in the walnuts, raisins, and cacao nibs.

Take spoonfuls of the batter and roll into golf ball sized cookies. Place each cookie on the prepared baking sheet and press down to flatten slightly.

Bake in the preheated oven for 10-13 minutes, until cookies feel firm on top and are lightly browned on the bottom (mine took 13 minutes).

Let cool on baking sheet for a few minutes to firm up a bit more, then transfer to a wire rack to finish cooling. Store in an airtight container.

Makes about 22 cookies.

January 15, 2012

Peanut Butter & Banana Oatmeal Cookies


After a week of posting about healthy dinner ideas, I figured it was time to share another treat! But these vegan peanut butter banana cookies would hardly qualify as an indulgence - they contain healthy fats from almond butter and peanut butter, very little oil, and the only added sweetener is a touch of pure maple syrup.

I made these cookies for my family just after New Years, but since nobody really wanted another dessert lying around the house after the holidays, I only made a small batch and reassured everyone that they were "healthy" cookies.

I guess I should have made a bigger batch because all the cookies disappeared pretty quickly! They were soft and thick (my favourite kind!) and had a nice balance of flavors between the almond butter and peanut butter with a hint of banana.


2011 Canadian Weblog Awards

Before I get to the recipe, I wanted to share a bit of exciting news that I received this morning - the Ninjamatics 2011 Canadian Weblog Awards just announced their shortlist of nominees for blogs in a variety of categories, and I was so happy to find out that I made the top five for two categories - Best New Weblog and Best Weblog About Food and Drink!

Even if I don't make it any further to the final round, I'm honoured just to be chosen among all the other great blogs that were nominated! Congratulations to the other Canadian nominees on the shortlist!


Peanut Butter & Banana Oatmeal Cookies
Adapted from Food Doodles

1 cup rolled oats
2.5 tbsp shredded unsweetened coconut
1/2 tsp baking powder
1/4 tsp cinnamon
1/4 tsp salt
1 large ripe banana
2 tbsp each almond butter and peanut butter (or ¼ cup peanut butter)
1.5 tbsp canola oil
1/2 tsp vanilla
3/4 tbsp pure maple syrup
Handful of chocolate chips
Handful of raisins

Preheat oven to 350°.

In a large bowl combine all the dry ingredients (oats through to salt).

In a separate bowl, mash the banana. Add the nut butters, oil, vanilla and maple syrup and whisk until smooth. Add the wet ingredients to the dry ingredients and stir until all the dry ingredients are incorporated. Fold in the chocolate chips and raisins.

Line a large baking sheet with parchment paper or coat with baking spray. Scoop out the dough and drop cookies onto the baking sheet about 1” apart. Bake for 12-14 minutes, until they start to turn golden. Let cool on the baking sheet for a few minutes to help them firm up, then transfer to a wire rack to finish cooling.

Makes about 13 cookies (You may want to double the recipe for a bigger batch!) 


December 23, 2011

Recipe Round-Up: Vegan No-Bake, Bite-Sized Holiday Treats


With Christmas right around the corner, there's just enough time to share one more post featuring holiday treats! 

I've already eaten my share of not-so-healthy desserts lately, but with so many temptations everywhere this time of year, I thought it would be a good idea to keep some healthier dessert options around to snack on.  So in the last couple weeks, I've made a few different bite-sized treats that I've been enjoying myself and sharing with others...and now I can share them with you too! 

These are all easy to make, store well, and don't involve baking (except for the last one), so you can whip them up quickly and enjoy them through the rest of the holidays!

Notes: All recipes are vegan. I have not included the recipes here, so you can click on the links to find the original recipes. All photos are my own versions.


Raw Gingersnap Truffles from Young Married Chic


These may have been my favourite of the bunch! They had just the right balance of gingerbread flavors in a chewy bite-sized ball made of ground nuts, oats and spices. 
Notes: I made 1/4 of the recipe, which gave me 9 small balls. I also added 1/2 tsp of molasses to enhance the gingerbread flavor even more. 


Apricot Coconut Snowballs from Healthy Blender Recipes


The original recipe for these balls called for dried mango, but I substituted dried apricots instead. These came together well and had a nice balance of sweet and sour. I thought the apricot flavor was stronger than the coconut, so as long as you like apricots, you will like these! 
Note: I made half the recipe and still got about 20 small balls. 


Peanut Butter & Jam Thumbprints from Alisa Cooks


These no-bake thumbprints tasted exactly like a peanut butter and jam sandwich with a nice crumbly texture from the graham crackers. I filled them with strawberry-rhubarb jam but another flavour like raspberry would work just as well! I regretted not making a bigger batch of these!
Notes: I made half the recipe, which only got me 2 thumbprints. These will start to soften and melt quickly so you should eat them straight from the fridge or freezer.


Banana Coconut Date Macaroons from About.com


These macaroons have just three ingredients - banana, coconut and dates. They had a strong banana flavor - which I liked because I love bananas, but they definitely aren't the same as a traditional macaroon cookie. They make a great mid-morning snack!
Notes: My dates never fully broke down in the food processor, so I would suggest chopping them finely by hand first, or soaking them first to soften them up.


Almond Butter Rice Krispy Treats from Oh She Glows


These are a slightly healthier version of rice krispie bars (since they use almond butter and leave out the marshmallows). Not only were they easier to make, but I also liked the taste better than traditional rice krispie treats! Next time I would make the bars a bit thicker though.
Notes: I used a mix of rice krispies and rice puff cereal. I also left out the Earth Balance and added some unsweetened shredded coconut. 


Quinoa Cherry Chocolate Chip Balls from Running to the Kitchen


These were my second-favourite of the bunch! Don't be scared of the idea of using cooked quinoa in a dessert - they tasted amazing and I loved the unique texture! The combination of dried cherries with chocolate chips and almonds was sooo good!
Notes: The balls were very difficult and messy to roll, but as Gina says, it just means you get more to lick off your hands while you're making them! I also baked mine for slightly less time then the recipe called for. I recommend storing them in the fridge.


Mini M&M Christmas Funfetti Cookies adapted from my previous Funfetti Cookies, originally from Chocolate Covered Katie


I made these cute little dough balls once before, and since I liked them so much the first time, I wanted to do a holiday version! So I replaced the chocolate chips with red and green M&M's (I spent a long time in the bulk bin meticulously trying to pick out only red and green m&m's with the huge scoop) and Christmas coloured sprinkles. I think I messed up the proportions a bit when I tried to make a larger batch but I made them again using the original recipe for only 3 cookies and they turned out better that time!


Hopefully you will find a bit of time in your busy schedules over the next couple of days to make at least one (or even a few!) of these treats!  Now that I've finished my Christmas shopping and the treats are covered, I have to figure out which recipes I want to contribute to our Christmas Eve feast!

December 16, 2011

Cherry Chia Carob Cookies


I made these cookies a few weeks ago for a cookie swap and I couldn't wait to post about them, since I think they would make a great addition to your Christmas cookie trays!

I was looking for a healthier vegan cookie to bring to the cookie swap, and I liked the sounds of these soft chia carob cookies that I saw on the blog Pure2Raw. So I started with their recipe, but I ended up changing a lot so my version looks nothing like theirs...but they still tasted amazing!


I decided to add carob chips in addition to the carob powder that's already in the dough, and then my favourite part of these cookies was the dried cherries that I added. The cherries are a bit more expensive than other dried fruit, but they are definitely worth it! The combination of the tart cherries with the carob worked really well!

I also liked the texture of the cookies - the outside was firm and crunchy but the inside was soft and chewy, and the chia seeds added another unique dimension.

Another great thing about these cookies is that they are much healthier than most Christmas cookies so you can feel better about eating them, but at the same time, they don't taste like a "healthy" cookie. You might even be able to trick people into thinking they are decadent chocolate cookies - although true chocolate lovers (a category that does not include me!) will probably notice the difference with the carob.


Cherry Chia Carob Cookies
Adapted from Pure2Raw

1.5 cups all purpose flour
1/2 cup brown sugar
1 tsp baking powder
1 tsp cardamom
1 tsp cinnamon
1/2 tsp salt
1/4 cup + 2 tbsp carob powder
1/4 cup chia seeds
1/4 cup almond milk
1/4 cup applesauce
1.5 tbsp vanilla extract
1/4 cup coconut oil, melted
1/3 cup carob chips
1/3 cup dried cherries

Preheat the oven to 350°.

Combine the dry ingredients (flour to chia seeds) in a large bowl.

Add the almond milk, applesauce and vanilla to the bowl and stir to mix. Then add the coconut oil and stir until the dry ingredients are all incorporated (if the dough is still too dry, add a bit of water, 1 tsp at a time).

Fold in the carob chips and dried cherries.

Roll the dough into small balls and place on a baking sheet. For rounder cookies (like the ones in the pictures), place the whole baking sheet in the freezer for about 10 minutes before baking.

Bake in preheated oven for 12-15 minutes.

Makes 28 cookies.


LinkWithin

Related Posts Plugin for WordPress, Blogger...