Showing posts with label lemon. Show all posts

June 11, 2013

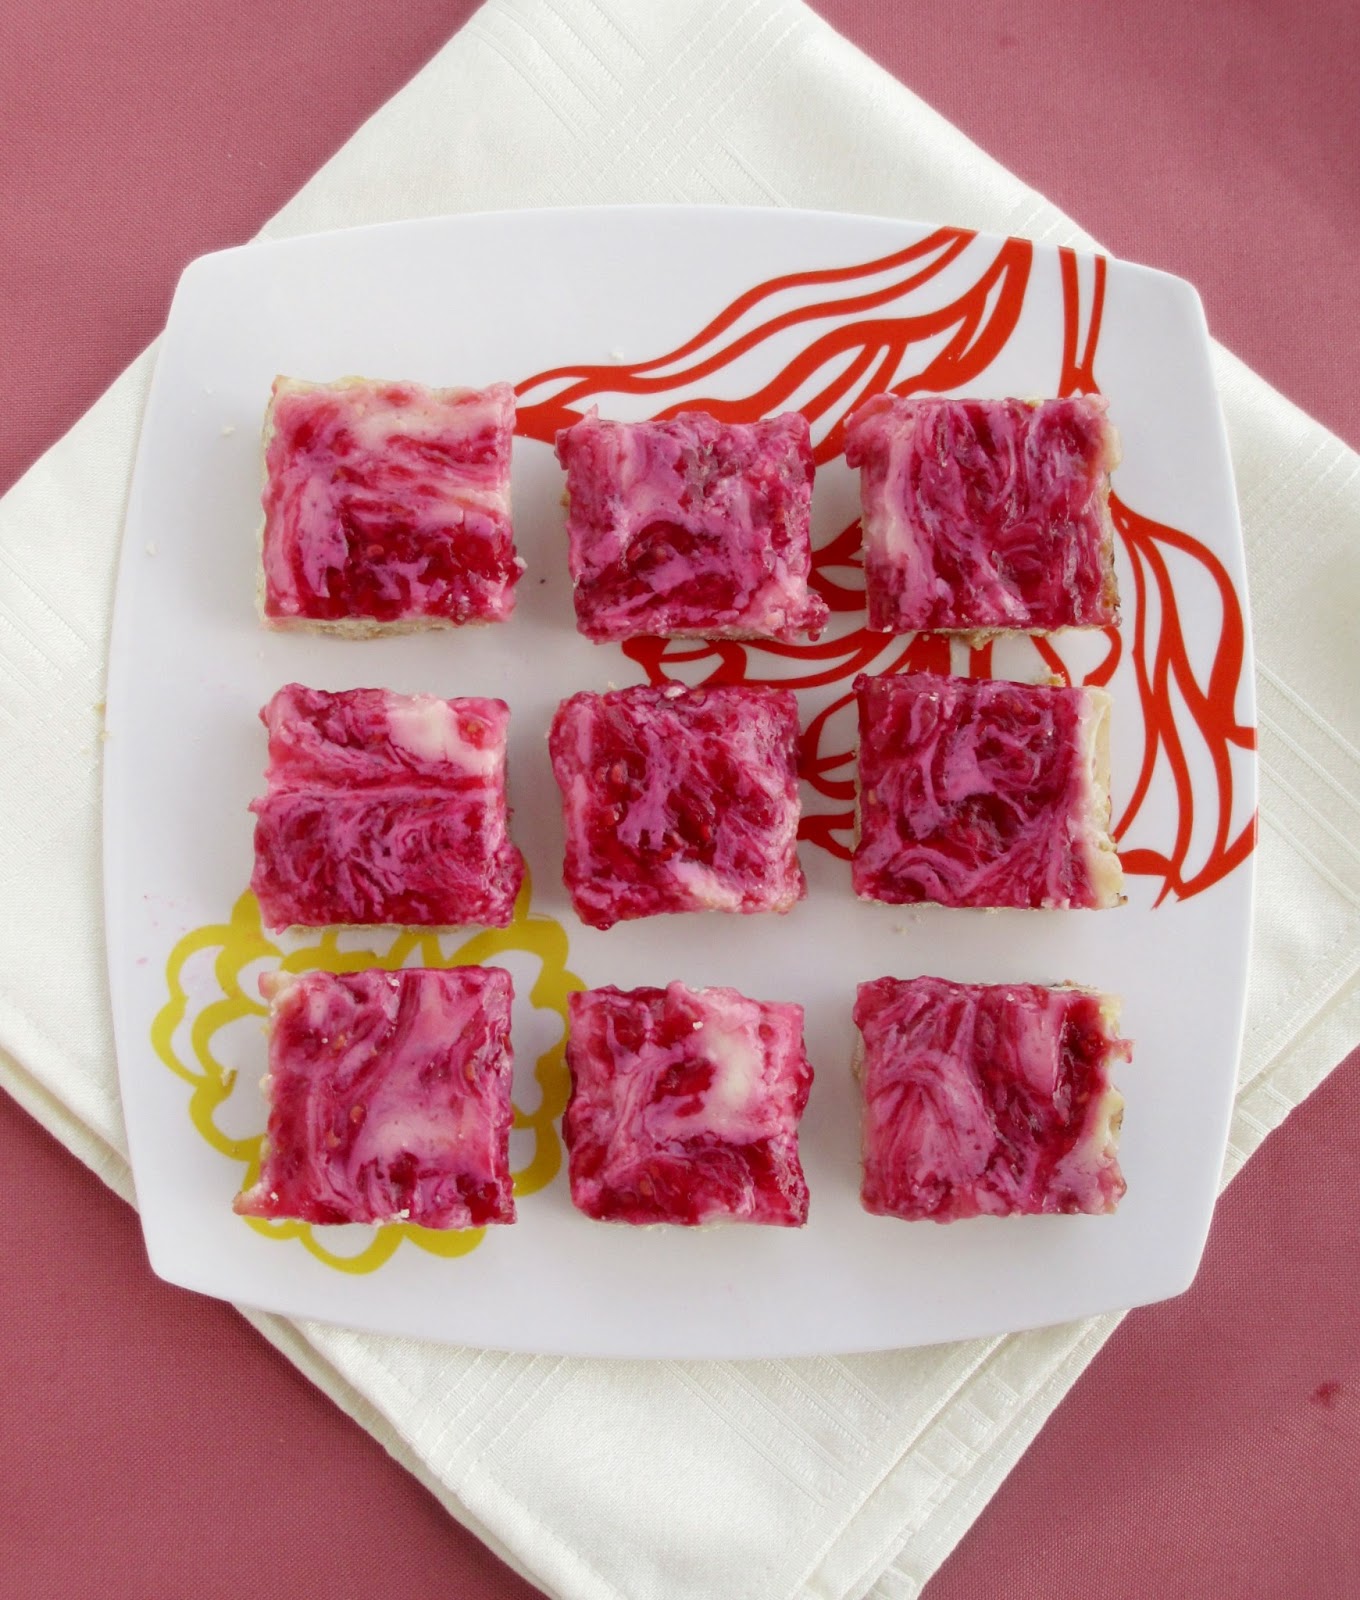
Vegan Lemon Raspberry Bars


A couple of weeks ago, one of my friends was having a party to celebrate her Canadian citizenship and I jumped at the chance to try out a new dessert recipe that I could bring with me.

I considered making a pie or cake, but the downside of one of those options is that you can't exactly test it before serving it (unless you want to serve a pie with a slice already taken out of it), and since the group I was serving were mostly people I didn't know very well, I wanted to make a good first impression!

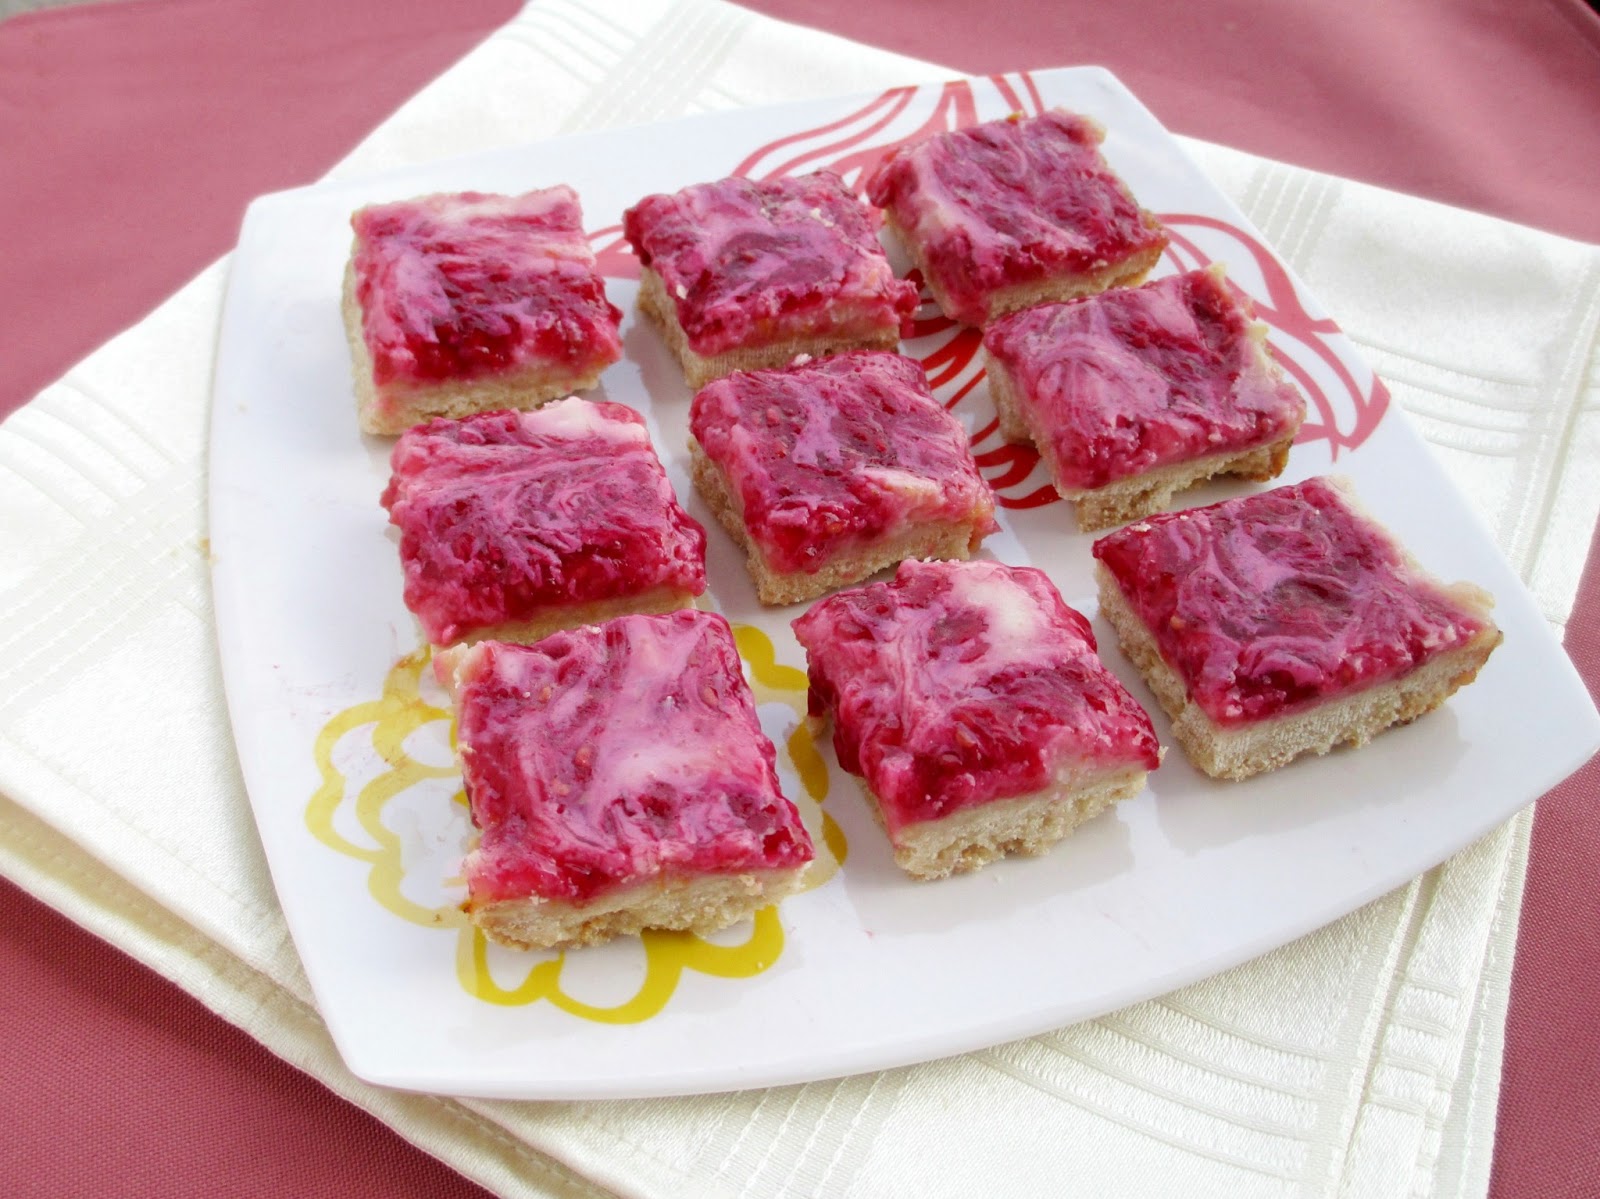
So I decided that squares or cookies were my best bet, since they can easily be taste-tested first to make sure they're party-worthy (which I happily did with these squares!). Lemon bars seemed appropriate for a late spring backyard BBQ, and to go with the Canadian theme, I thought of adding a red raspberry swirl to the filling (even though it turned out more pink than red).

My next problem was how to make the filling: most lemon bars get their creamy, silky texture from lots of eggs in the filling, but I knew I wanted to make an eggless version. After researching a few different recipes, it seemed like silken tofu would make the best substitute to get the right texture. 

I haven't had a lot of success using tofu in dessert recipes in the past, but luckily with these bars, the tart lemon and raspberry flavours were so dominant that you would never guess the main ingredient was tofu. I tried not to tell the people I was serving them to either in case the thought of eating a tofu square for dessert scared them off! 

I loved the taste of the creamy filling with the combination of lemon and fresh raspberries, and the crust turned out nice and firm and crumbly, almost like shortbread despite being made with coconut oil instead of butter.  I also thought the ratio of crust to filling was just right - the crust was thick enough to support the filling so that you could easily eat these with your hands without making a mess.   

I think these would be a great dessert option for a Canada Day BBQ, or any other occasion this summer!



Vegan Lemon Bars with Raspberry Swirl
My own recipe, inspired by a few other lemon-tofu square recipes

Crust
1 cup all purpose flour
1/2 cup whole spelt flour (or whole wheat)
1/4 cup unsweetened shredded coconut
1/4 tsp salt
1/4 cup icing sugar
1/2 cup melted coconut oil
1/2 tsp vanilla extract

Raspberry Swirl
1 cup raspberries
1 tbsp organic cane sugar
3 tbsp water, divided
1 scant tbsp arrowroot flour

Filling
1/2 cup silken firm tofu
1/2 cup organic cane sugar
1/4 cup + 1 tbsp fresh lemon juice (from one large lemon)
Zest of 1 large lemon
1 tbsp arrowroot flour


Preheat oven to 350°F. Line an 8x8” square pan with parchment paper (leave enough to hang over the edges of the pan a bit) and spray with cooking spray.

First, make the crust: Whisk together the flours, coconut, salt, and icing sugar. Add the coconut oil and vanilla and stir until the mixture forms a smooth dough. Press dough into prepared pan in an even layer.  Bake in the preheated oven for 15-20 minutes, until firm and lightly golden. Remove and let cool on a wire rack until the filling is ready.

While the crust is cooking, place the raspberries in a small saucepan with the sugar and 1 tbsp of the water and bring to a boil. Mix the remaining water with the arrowroot in a small bowl until smooth. Add this mixture to the pan and stir continuously for another 1-2 minutes, until raspberries have broken down. Remove from heat and set aside.

To make the filling, blend the tofu in a blender or food processor until smooth. Add the remaining filling ingredients and continue to blend until smooth again.

Pour filling on top of the baked crust, using a spatula if necessary to spread in an even layer (it should be liquidy enough to spread on its own). Drop spoonfuls of the raspberry mixture all over the top of the filling, and use a knife or spatula to swirl it around a bit (you may not need all of the raspberry mixture - I used almost all of it, which is why my bars look mostly red on top).

Return pan to the oven and bake for another 25-30 minutes, until the filling is mostly set. Remove and let cool on a wire rack. Cool completely (I transferred mine to the fridge) before cutting into squares and serving.

Makes 20-25 squares.

This was submitted to Wellness Weekend at Diet, Dessert and Dogs.

May 28, 2013

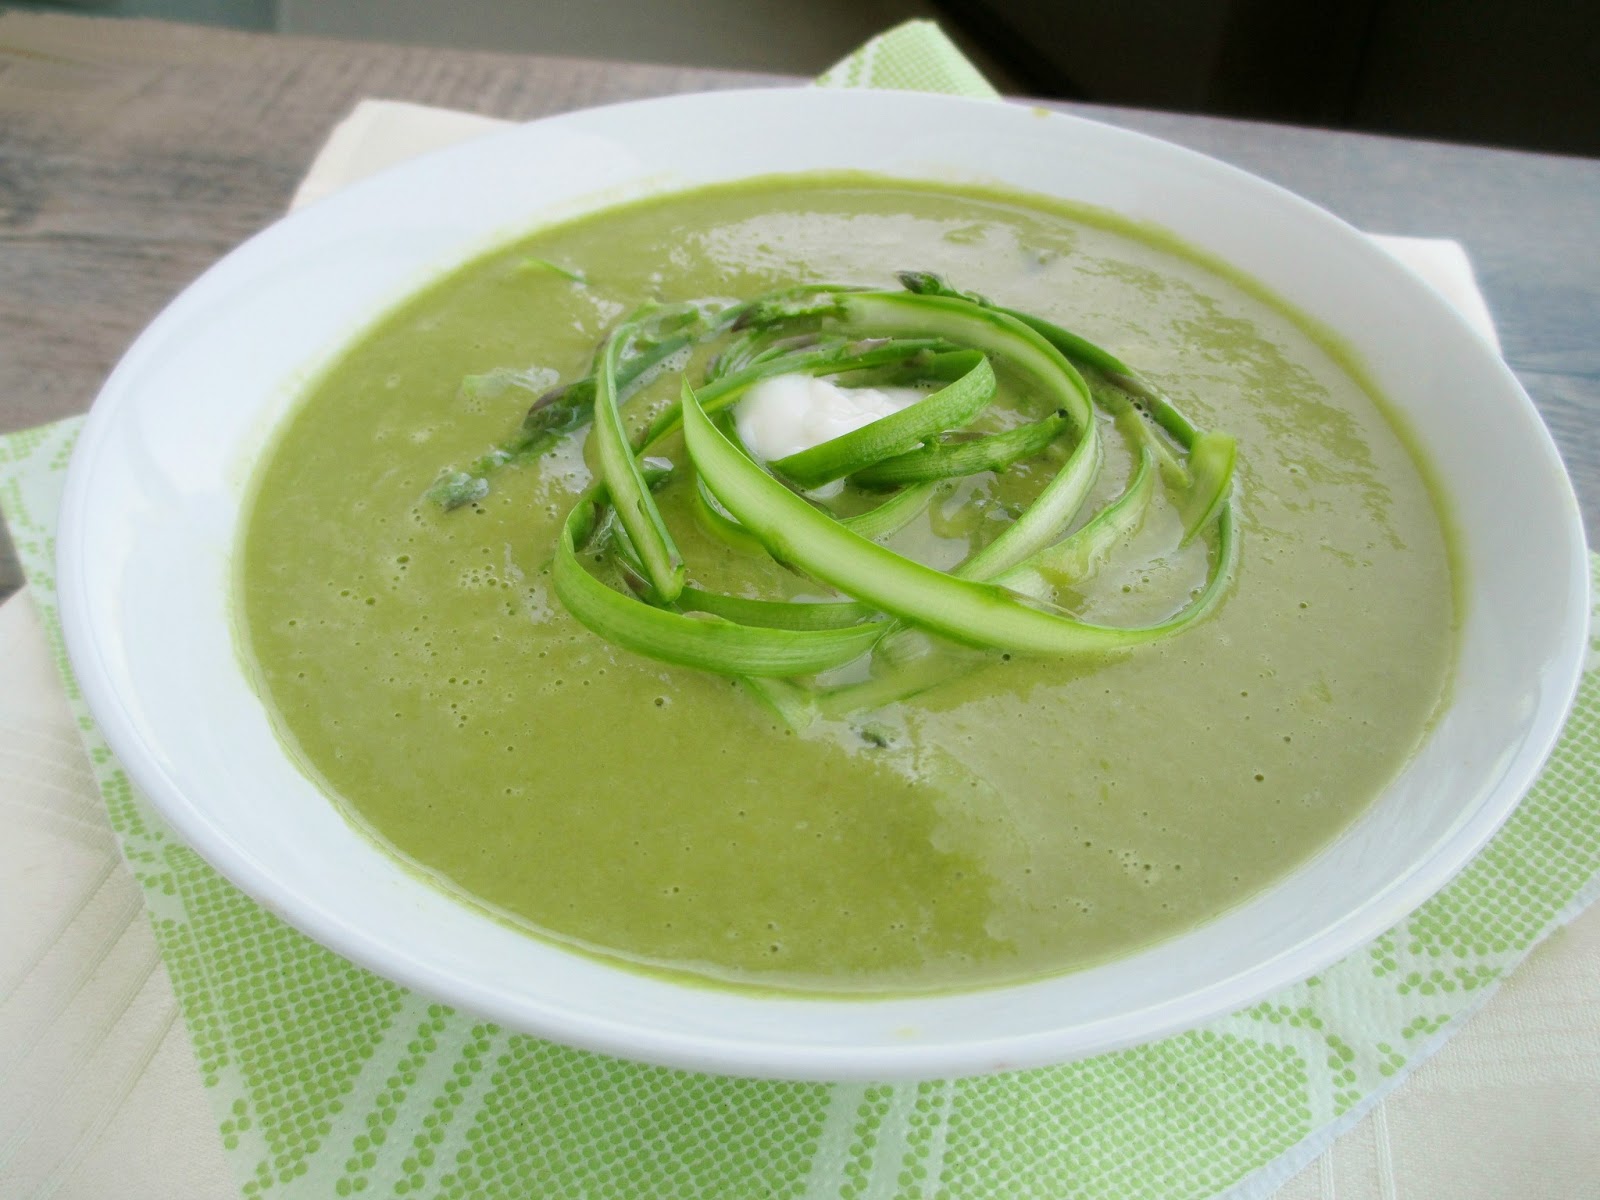
Hot or Cold Asparagus Soup


It feels like local asparagus season arrived late here in Ontario, and now that it's finally available I feel pressured to make the most of it before it's gone again! So this past weekend when I saw some beautiful super-thin spears of asparagus at the farmers' market, I was sure to pick some up.

And since I knew that fresh picked asparagus only lasts a couple of days, I wanted to make a recipe that would use up the entire bunch in one dish, which is why I made this asparagus soup!

You may be thinking that soup is the last thing you want now that temperatures are warmer, but the good thing about this particular soup is that it can be eaten hot or cold and it tastes great either way!


Another bonus is that the ingredient list is very minimal. The base of the soup is just water (although you could use vegetable broth for more flavour if you like), and the main ingredients are asparagus, onion, and garlic, with a bit of yogurt and lemon added at the end.

With such a simple soup, the flavour of the asparagus is really the highlight, which was what I was aiming for!

I tried eating it both hot and cold and I couldn't decide which version I liked better!  I appreciated the cold, creamy version as a light refreshing meal on a warm day, and I think I'll heat up my last serving for lunch today since it's a cool, rainy day and a warm bowl of soup would be nice!


Hot or Cold Asparagus Soup
Adapted from Food 52

1 tbsp olive oil
2 large cloves garlic, minced
1 yellow onion, diced
1 lb asparagus, divided
3-4 cups water (I used 3)
1/2 tsp kosher salt
1/2 tsp white pepper
1/2 cup plain low-fat yogurt, plus more for serving (could substitute vegan yogurt)
1 tsp lemon zest
1 tbsp lemon juice
Extra lemon slices for serving if desired

Break the woody stems off the asparagus. Reserve a few stalks to use as garnish and chop the rest into pieces.

Heat olive oil in a large pot over medium heat. Add garlic, onion and asparagus pieces and sauté for about 5 minutes, stirring occasionally, until the onion and asparagus have softened.

Add water, salt and pepper and bring to a simmer. Let simmer for 10-15 minutes, until asparagus is very soft. Remove from heat.

Transfer soup to blender in batches and puree until smooth. Add the yogurt, lemon zest and lemon juice and blend again. Taste and add more seasoning.

Serve hot, or refrigerate until cold and eat as a chilled soup. For the garnish, use a vegetable peeler to shave the reserved asparagus into thin slices. Top each serving with the asparagus shavings and an extra spoonful of yogurt if desired. 

Makes 3-4 servings.


May 14, 2013

Frosted Blueberry Lemon Cake


Even though blueberry season is still quite a ways away (we only just got local asparagus and rhubarb in the last week here in Ontario, let alone berries), I've already made my first blueberry dessert of the year!

Our department was having an end of the year pizza lunch for everyone last week, and the students in each division were assigned to bring additional dishes. This year, our division finally graduated from salads to desserts, and I spent a lot of time deciding what kind of dessert I wanted to bring!

Eventually I chose this vegan frosted blueberry cake from Kathy of The Lunchbox Bunch. I figured a single layer cake was a nice size and could be cut into small pieces, since there were a lot of people to feed! I also wanted to offer a vegan option for anyone with dairy intolerances or other dietary restrictions.


With my recent string of bad luck in the baking department, I didn't have high hopes for this cake actually turning out and was prepared to have to run to the store for a backup dessert, but luckily this recipe was a success!

The cake was soft with a light crumb and stayed nice and moist even after making it a day in advance. I reduced the amount of sugar so that the cake itself wasn't very sweet, letting the blueberries shine. You could serve the cake by itself as a more plain breakfast or snack cake, but I went ahead and added a frosting to make it more of a sweet dessert cake.


The frosting is made with Earth Balance to resemble a traditional thick buttercream frosting, and I added some lemon juice to try to cut some of the sweetness. Next time I would use a bit less frosting since it was still a touch too sweet for my tastes, but if you have more of a sweet tooth, then go ahead and use a thick layer of it!

My cake was a hit at our department lunch, along with a lot of other great desserts like mini strawberry pies from Natalie, banana bread, lemon blondies, raspberry-coconut squares, cupcakes and even mini creme brulees! I was asked for the cake recipe by another student (who recently became vegan), so here it is!


Frosted Vegan Blueberry Lemon Cake
Adapted from The Lunchbox Bunch

2 tbsp ground flax
2/3 cup warm water
1 cup whole wheat flour
1/2 cup all purpose flour
1 tbsp baking powder
1/2 tsp salt
1/2 tsp cinnamon
1/2 cup sugar
3 tbsp rolled oats
1/3 cup almond milk
1/4 cup unsweetened applesauce
3 tbsp fresh lemon juice
1 tsp lemon zest
1/2 tsp vanilla extract
3/4 cup blueberries
Extra blueberries for topping

Frosting
1/3 cup vegan buttery spread
2 1/4 cups icing sugar
2-3 tsp fresh lemon juice
1-2 almond milk
1/2 tsp lemon zest


Preheat oven to 350°F and prepare a 9" cake pan by spraying with cooking spray and dusting the bottom and sides with flour.

Mix the flax with water and set aside. 

In a large bowl, whisk together the dry ingredients (flours through to oats). In a separate bowl, mix the wet ingredients (almond milk through to vanilla extract). Add the flax-water mixture to the wet ingredients.

Pour the wet ingredients into the dry ingredients and stir just until the dry ingredients are incorporated. Fold in the blueberries. 

Pour batter into prepared cake pan and bake in the preheated oven for 25-30 minutes, until the sides are starting to brown and pull away from the edges of the pan, and the top feels firm and springy when you touch it. A toothpick inserted into the center of the cake should also come out clean. Remove cake from oven and let cool in the pan for at least 10 minutes, then remove from the pan and let cool completely on a wire rack.

To make the frosting, beat the buttery spread with the icing sugar using a hand mixer or stand mixer until the icing sugar is incorporated. Add 2 tsp lemon juice and 1 tsp almond milk and beat again until the frosting becomes creamy. If you want it creamier, add another teaspoon of almond milk. Add another teaspoon of lemon juice if you want more lemon flavour. Beat or stir in the lemon zest. 

Once the cake is cooled, spread the frosting onto the top (I left the sides bare) using a rubber spatula. Press blueberries into the frosting for decoration, in whatever pattern you like! 

Makes 1 single layer 9" cake.

Note: I stored my frosted cake in the fridge overnight and let it sit at room temperature for the morning before serving at lunchtime. 

April 17, 2013

Vegan Fettuccine Alfredo with Asparagus


I should probably start this post by admitting I've never really been a fan of creamy pasta. I've always preferred a tomato sauce or even a simple oil based dressing rather than any cream based pasta sauce like alfredo. That being said, I've finally found a creamy pasta that I really enjoy in this vegan version of fettuccine alfredo!

Instead of butter, cheese and heavy cream, the creaminess from this pasta sauce comes from tahini (sesame seed paste) mixed with almond milk. To add even more flavour and thickness, the liquid base is stirred into a mixture of pureed onion and garlic that's been sauteed on the stovetop.

The result is a rich and creamy sauce that coats each noodle perfectly and really does resemble a traditional alfredo sauce, but with much more flavour in my opinion!


The original recipe was a simple dish of noodles with sauce, but I always like to include extra vegetables in my pasta to make it more interesting. My first thought was to add asparagus, since its long shape goes well with noodles and it seemed like a fresh seasonal choice for this time of year!

I steamed the asparagus to avoid having to turn on the oven, and tossed it in a bit of lemon zest. A healthy dose of fresh lemon juice and parsley were the final touches to brighten up the dish.

I was actually surprised at how filling this pasta was because of the tahini, which also makes it the perfect transitional meal from hearty winter dinners to lighter spring and summer dishes!


Vegan Fettuccine Alfredo with Asparagus
Adapted from Get it Ripe

~8-9 oz dry linguine or fettucine
1 tbsp olive oil
3/4 cup pureed onion (from 2 small yellow onions, peeled and pureed in a food processor - mine was still a bit chunky)
3 cloves garlic, finely minced
1.5 cups almond milk
1/2 cup tahini
1 tsp sea salt
1/4 tsp nutmeg
Freshly ground pepper
1/4 cup chopped parsley, plus more for garnish
2 tbsp lemon juice
1/2 lb asparagus (about half a bunch)
1/2 tsp lemon zest (optional)
Lemon wedges for serving

Bring a large pot of salted water to a boil. Once boiling, add the noodles and cook until al dente, according to package directions. Drain.

Meanwhile, heat olive oil in a medium skillet over medium-high heat. Add onion and garlic and cook, stirring often, for about 8 minutes, until browned.

Stir together almond milk, tahini, salt and nutmeg until tahini is fully mixed in. Pour into skillet with the onion mixture and stir. Reduce heat to medium. Add freshly ground pepper and cook, stirring often, for about 5 minutes. Add the parsley and lemon juice and cook for another minute. Remove from heat.

Snap the woody ends off the asparagus and discard. Add the asparagus to a steamer basket and steam, covered, for 3-5 minutes, until bright green and crisp-tender. Remove from steamer basket and chop each asparagus stalk into three pieces. Toss asparagus with a drizzle of olive oil, salt and pepper, and lemon zest.

Return the drained pasta to its cooking pot. Add the sauce and stir well to mix (you may not need all of the sauce). Add the asparagus.

Serve warm. Season each serving with additional salt and pepper if desired and squeeze a lemon wedge over top.  Top with additional parsley.

Makes 4 servings.


June 01, 2012

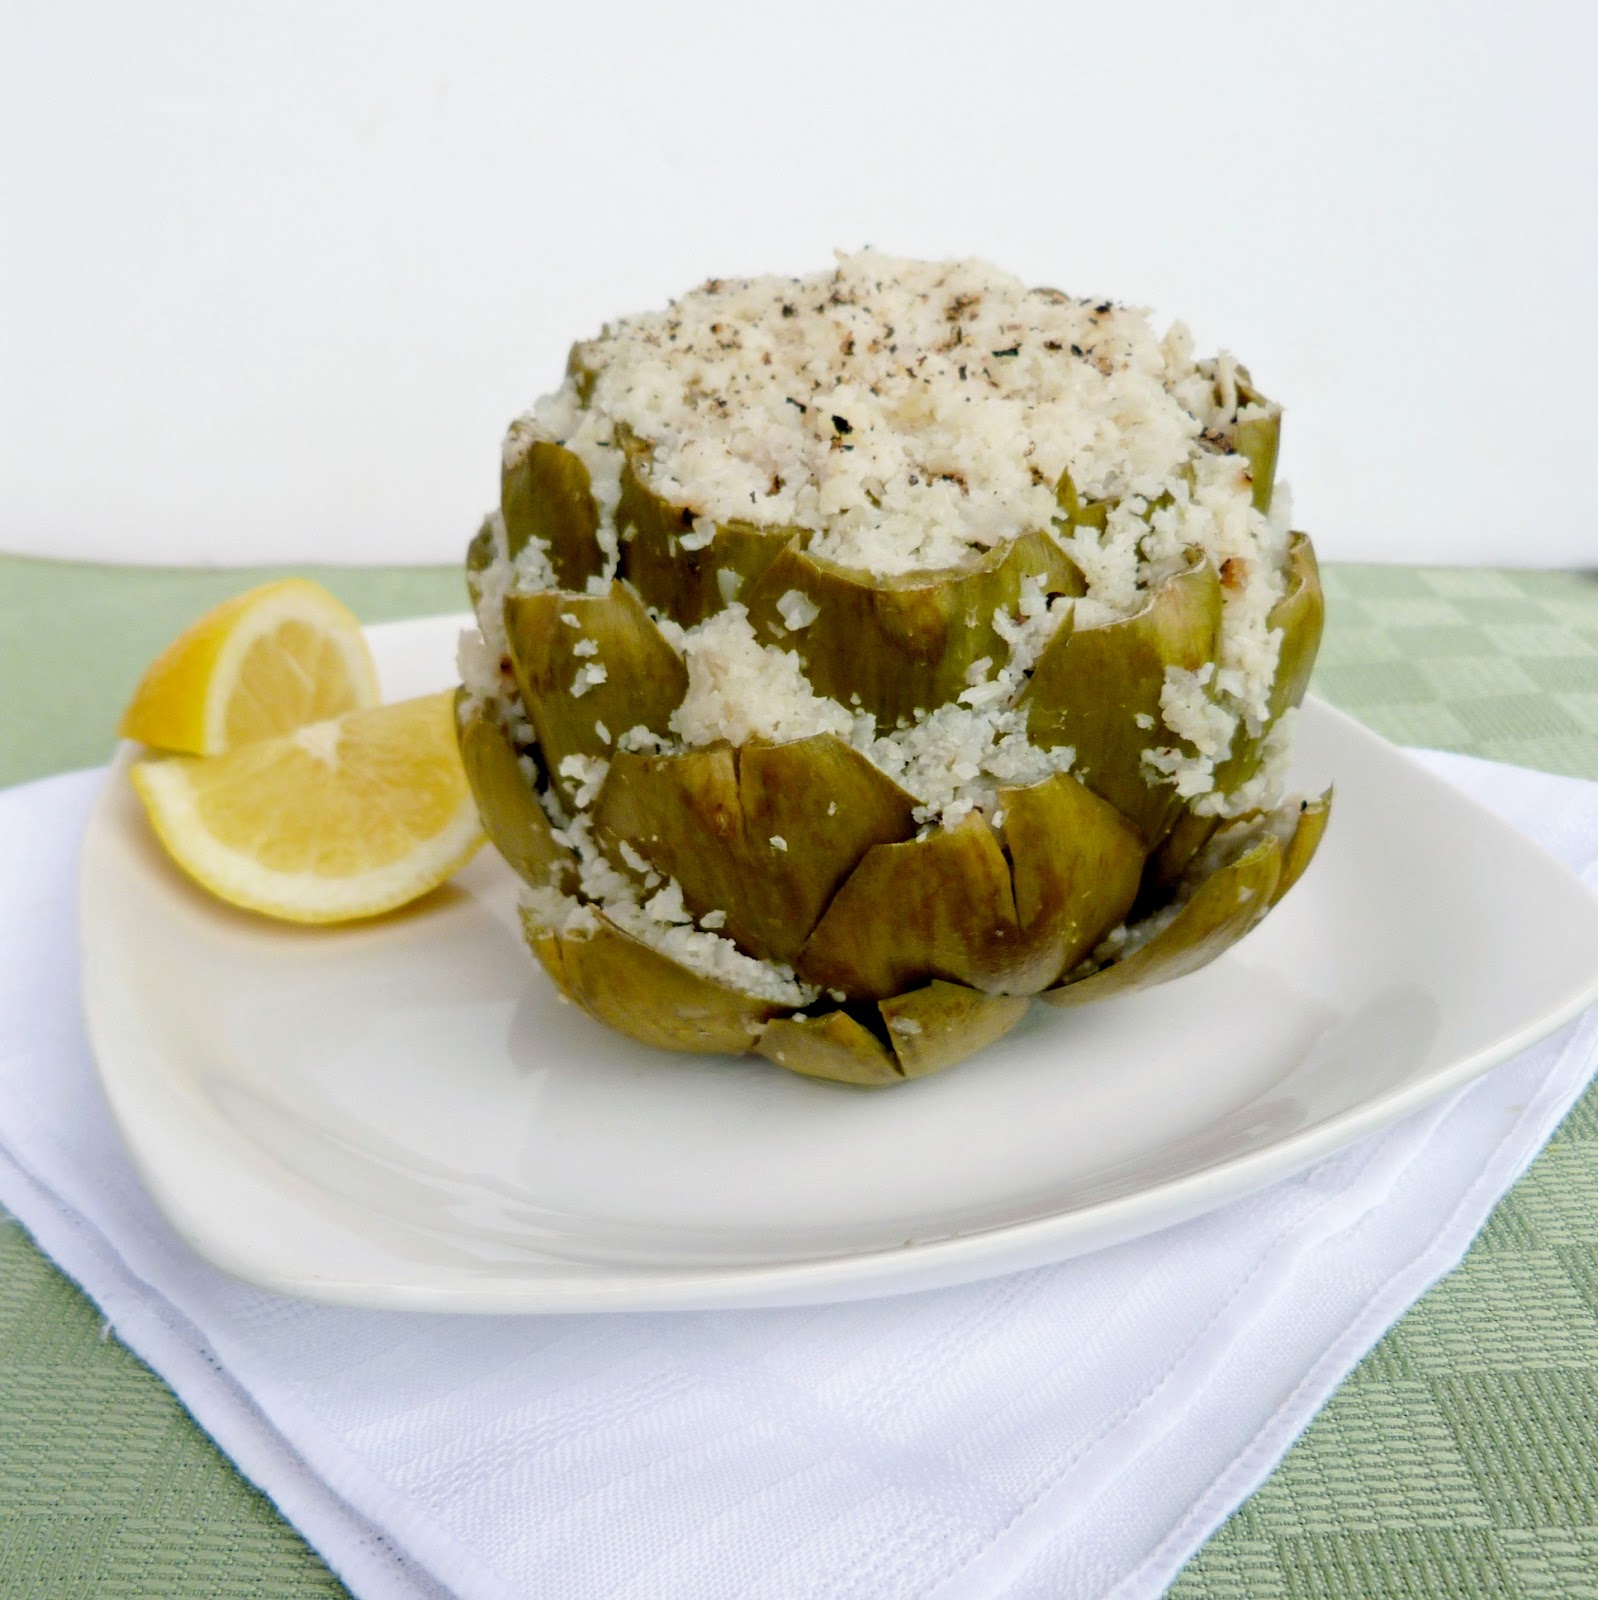
Cauliflower-Stuffed Artichoke


I have a small confession to make: I've never had a real artichoke before. Even though I'm a huge fan of vegetables and I consider myself pretty adventurous when it comes to trying new foods, for some reason I've always been too scared of artichokes to buy any.

So this past weekend, I decided to it was time to change this situation and I specifically sought out an artichoke when I went to the farmers' market. There was only one stall that had them and at $2.50 per artichoke, they weren't exactly the cheapest vegetable around!  But I didn't let the price scare me off and I picked one out to take home.

The main thing that scared me about artichokes was that I didn't even know how to eat them, let alone how to cook them. So I spent some time doing some research and learned that there are different parts of an artichoke - some edible and some not.  For example, you can eat the "meat" at the bottom of each leaf, but not the leaves themselves.  You can also eat the artichoke heart in the middle, but not the fuzzy "choke" at the very centre.

I also learned that you have to clean and trim your artichoke before you can start cooking it.  This involves trimming the pointy ends off each of the leaves, slicing off the top and bottom, and scooping out the inner choke.

Even though it sounded like a lot of work just to eat one vegetable, I was determined to go ahead, hoping that the end result would be worth it!

Here's how mine looked in the steamer basket after I scooped out the choke:


Once the initial preparations were done, I had to decide how I wanted to eat it.  I could have left the artichoke plain and dipped the leaves in a sauce, like many recipes call for.  But instead, I decided to make a filling to create a stuffed artichoke.

Since I had some cauliflower in the fridge, I came up with the idea of a cauliflower stuffing. I've seen some recipes for cauilflower "rice" or "couscous", which is just caulilfower that's been pulverized in the food processor to resemble grains of rice. I thought that seemed like the perfect simple and nutritious stuffing for my artichoke!

The cauliflower couscous was really easy to make, and it was actually pretty fun stuffing it into the hollow artichoke and in between each of the leaves.

Once it's stuffed and ready to go, all that's left to do is place the whole thing in a steamer basket and wait patiently...but I can assure you, the wait is definitely worth it! I was so excited to finally try the artichoke and it did not disappoint!


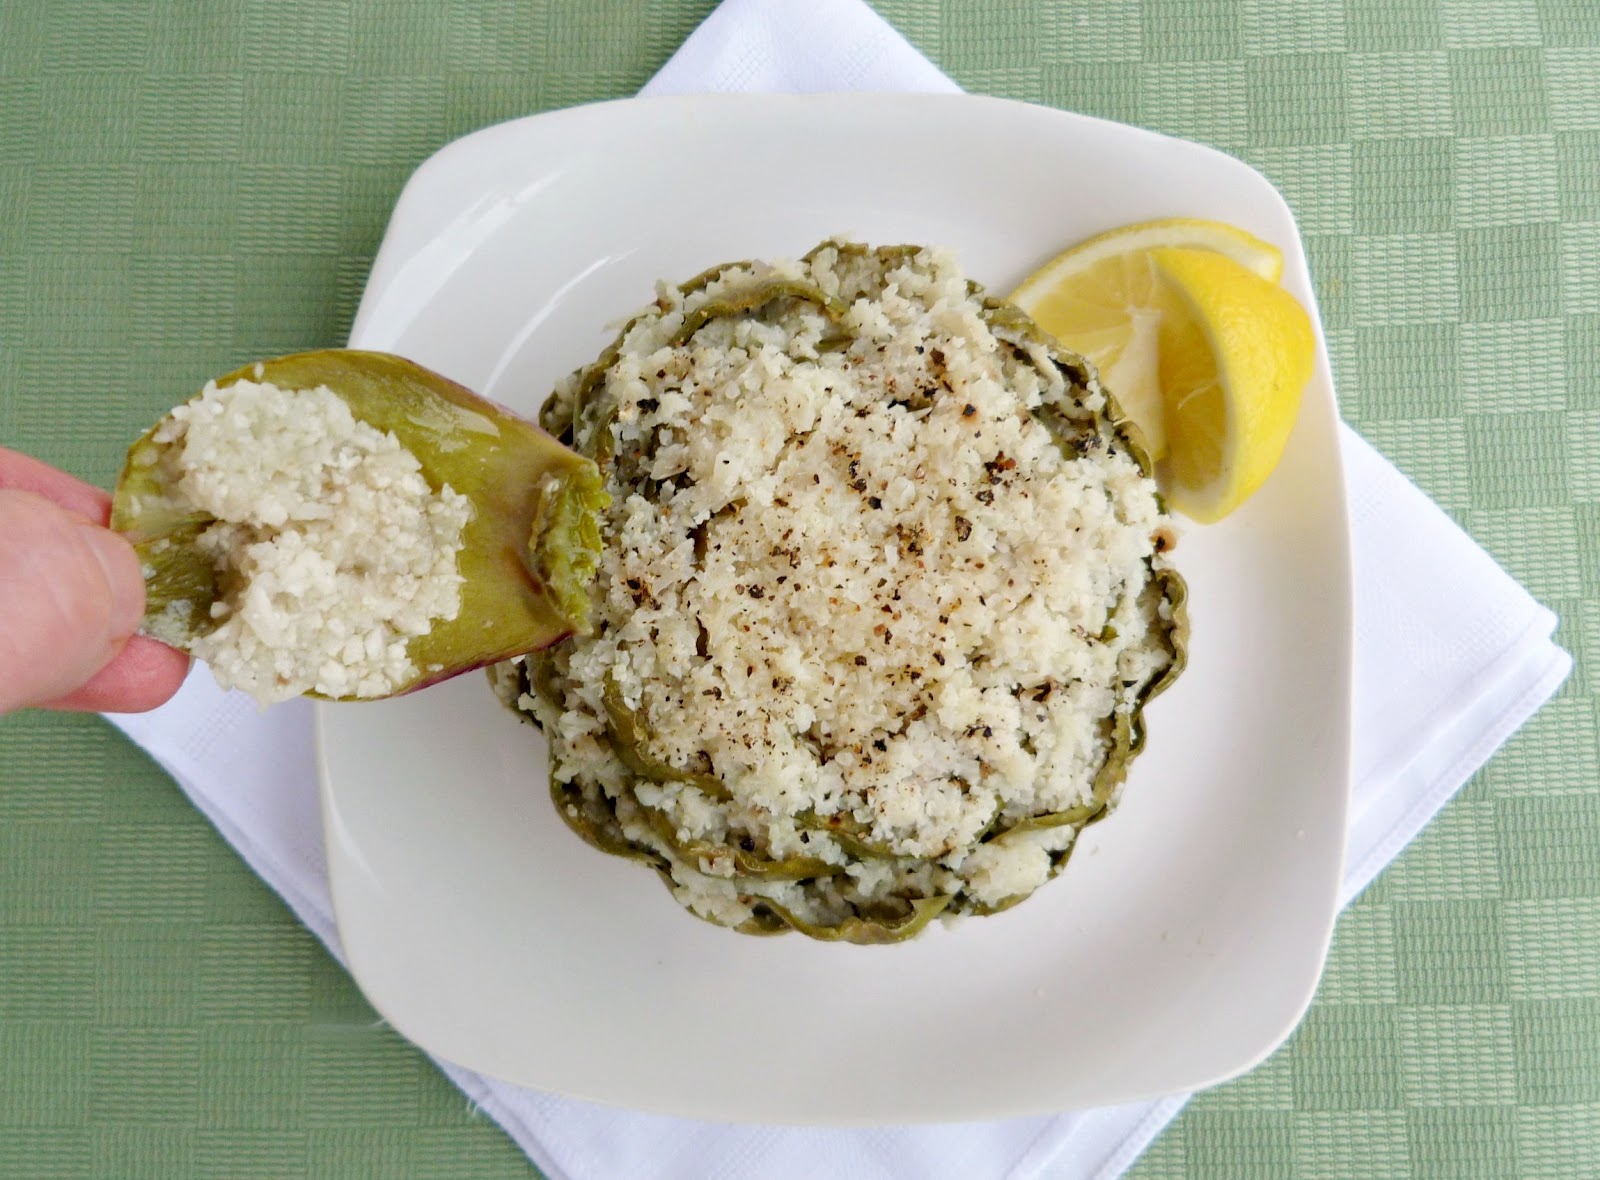
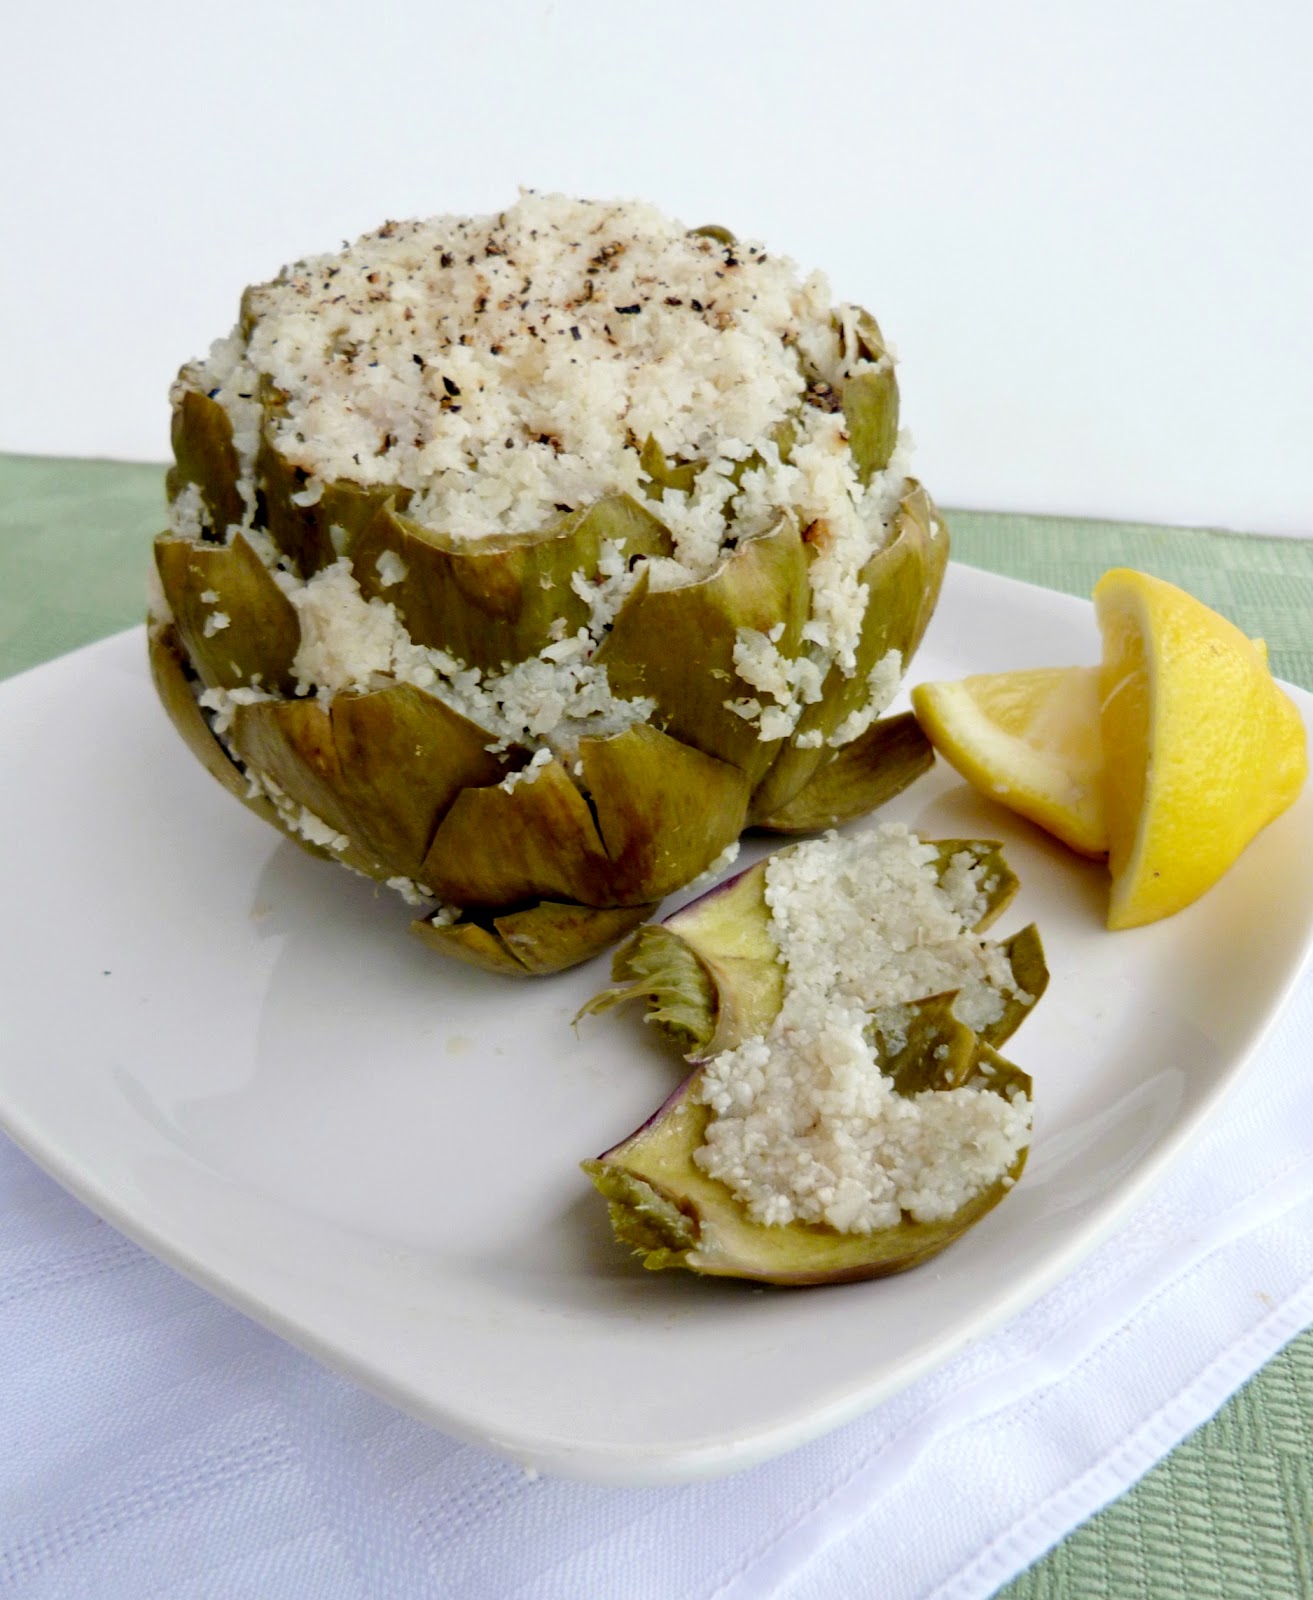
The cauliflower stuffing was soft and moist and had just enough flavour without overpowering the artichoke. And if you've stuffed it well, then each leaf should have a bit of cauliflower on it that you can scrape off with your teeth along with the artichoke meat.

Of course, a big part of the experience is enjoying the process of pulling off each leaf and finding more and more of that delicious artichoke meat as you get closer to the center.

And when you reach the heart in the middle, you'll finally understand why people go to all the work of preparing an artichoke!  The heart of a real artichoke is so much better than any you find in a can or jar - it's so tender and creamy and tastes amazing both on its own and when combined with the cauliflower stuffing.

The whole dish is made even better when it's served with a couple of lemon wedges that you can squeeze over the leaves and stuffing. Artichokes and lemon complement each other really well, so I would definitely recommend that you don't leave that part out!

So if you're like me and have never tried an artichoke, then hopefully I've convinced you to change your mind!  And if you're already a fan of them, then I hope I've at least given you a new idea for a delicious way to enjoy them!


Cauliflower-Stuffed Artichoke


1/4 of a head of cauliflower, chopped (~1/2 lb)
1 shallot, chopped
1 clove garlic, minced
Salt and pepper
1 large globe artichoke
Olive oil (optional)
Lemon wedges for serving

First, prepare the cauliflower stuffing:  
Roughly chop the cauliflower into pieces and add to a food processor through the feed tube, using the grater blade (this should turn it into finely chopped pieces). Replace grater blade with the regular blade.  Add the shallot and garlic to the food processor with the cauliflower and pulse a few times. Season with salt and pepper to taste. Transfer mixture to a bowl and set aside (you should have about 2 cups).

Next, prepare your artichoke: 
Slice off the stem at the bottom so that you have a flat base and the artichoke can stand upright. Trim the pointy tips of the artichoke leaves using kitchen scissors and discard. Slice off about 3/4” from the top of the artichoke so that the leaves can open up and be pulled apart.  Spread the leaves so that you can see the inside of the artichoke – the flowery, hairy part (the choke) is the part you want to scoop out.  Use a small spoon or ice cream scoop to scoop out the inner choke.  Once it is clean inside, squeeze some lemon juice all over the artichoke to prevent browning.

Prepare your steamer by bringing a pot with filled about a couple inches of water to a boil on the stove.

Meanwhile, stuff your artichoke: First, spoon the cauliflower mixture into the hollow centre of the artichoke. Keep stuffing, packing it down as you go, until you can’t fit any more inside.  With the remaining stuffing, fill the inner side of each of the outside leaves, using a small spoon or your fingers to push the mixture down into the leaves.  Drizzle a bit of olive oil over the stuffed artichoke.

To cook:
Place your stuffed artichoke into a steamer basket and insert into the pot of boiling water.  Reduce heat to a simmer, cover the pot, and steam for 30-40 minutes (once you can easily pull off one of the outer leaves, it should be done). Keep an eye on the water level and if it starts to get too low, add some more hot water to the pot.

To eat:
Carefully remove artichoke from steamer and transfer to a plate.  Season with additional ground pepper and serve with lemon wedges to squeeze over top.

Begin by pulling off the outer leaves one by one. Use your teeth to scrape off the stuffing and the “meat” at the base of the leaf, and discard the rest of the leaf. (Note: you’ll notice that as you get closer to the inner layer,  the leaves will have more white meat on them). You can spoon some more of the stuffing from the center onto the leaves as you go if you like. Once you get to the middle, you’ll be left with the artichoke heart, which is the best part – you can eat all of it, along with the rest of your stuffing!

Serves 1.

This was submitted to Wellness Weekend at Diet, Dessert and Dogs.

May 21, 2012

Avocado Potato Salad for a Virtual Potluck


Today is an official holiday here in Canada for Victoria Day, and it's also the unofficial start to the summer!  With summer comes the start of patio season, BBQ season, and enjoying meals outdoors in the company of friends and family.

So today seems like the perfect day to have a potluck with some of the wonderful people I've met through blogging!  Since we can't all be together in person, Courtney of The Fig Tree blog came up with the idea of having a virtual potluck - that way we can share all of our dishes with each other and with our readers!

The rules were pretty simple - we each had to come up with at least one vegan or vegetarian dish that we would "bring" to the potluck, focusing on a spring/summer theme. Each of us will post our recipe on our blogs today, and link up to the other participating blogs.

For my dish, I decided to bring a traditional potluck item - potato salad, but with an updated and more interesting twist!


If you've ever been to a potluck, chances are that somebody brought a potato salad.  While there are some good potato salads out there, the majority are not vegetarian or vegan-friendly, since they often contain bacon or sausage and are covered in a heavy mayonnaise or sour cream dressing. In my opinion, the worst offenders are those containers of gloop from the grocery store deli section - I'm sure there are some people who love those potato salads and I've eaten them in the past too, but to me it's not a real potato salad if you can't even distinguish the pieces of actual potato in it!

For my potato salad, I used mini red potatoes that I boiled and diced into bite-sized pieces.  I tossed the potatoes with bright red cherry tomatoes and garlic, and lots of fresh lemon juice and dill to brighten it up.  Finally, I mashed a ripe avocado and mixed that into the salad so that everything became coated in a thick  layer of avocado dressing.

I loved how creamy and filling the potato salad was with the mashed avocado, and the flavours all went so well together!  This would be a great dish to make in the summer for those backyard BBQs or potlucks, and I'm sure your guests would be excited to try a new take on the old potato salad!


Avocado Potato Salad
Inspired by this recipe from Gourmet

12 oz mini red potatoes
1.5-2 tbsp olive oil
1 tsp lemon zest
2 tbsp fresh lemon juice
3 tbsp fresh dill, minced
1 clove garlic, minced
About 10 cherry tomatoes, halved or quartered
1 ripe avocado
Salt and pepper

Place the potatoes in a saucepan and cover  with water. Bring to a boil and add a dash of salt to the water, then reduce heat to medium and simmer for 15-20 minutes, until potatoes are tender.  Remove from heat and drain.

Once they are cool enough to handle, cut potatoes into quarters and place in a bowl. Toss with the olive oil, lemon zest, lemon juice, dill, and garlic.  Add cherry tomatoes to the bowl and stir to combine.  Mash the avocado with a fork (I like to leave it a bit chunky) and add it to the bowl.  Stir until the potatoes are evenly coated with the avocado.  Season with salt and pepper to taste. 

Serve warm or at room temperature.

Makes 2-4 servings (2 as a main dish or 4 as a side). *Note: I only made a smaller salad, so if you wanted to make this for a larger crowd, you should double or triple the recipe


Now that you've seen my dish, it's time to check out what everyone else brought to our virtual potluck - just click on the picture to see each post with the recipes!

We ended up with a pretty good mix of appetizers, side dishes, main course and dessert...and this wasn't planned, but there also seemed to be a bit of an avocado theme going on!

Starting with snacks and appetizers, we have this unique Broccoflower Guacamole from Elaina of the blog Flavour - if you've ever wondered what to do with a broccoflower, try this recipe!


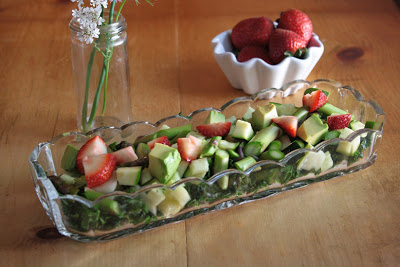
Two people brought beautiful fresh salads with a mix of fruit, veggies and avocado - first up is this Super Green Salad with Strawberries from Caitlin of The Vegan Chickpea with lots of good-for-you green ingredients!


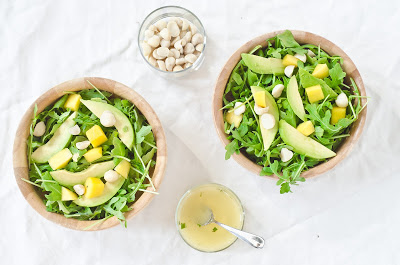
And second is this gorgeous Mango Avocado Salad with Pineapple Mint Dressing from our lovely host Courtney of The Fig Tree blog - I love all the tropical ingredients in this salad!


For our main course, Helena of Peaches and Cream brought this Big Bertha Burger - a hearty veggie burger made with oats, herbs and spices


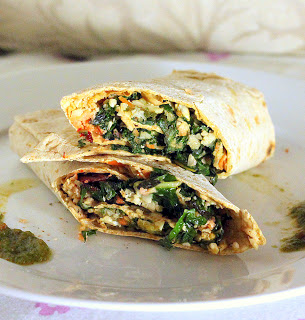
Richa of the blog Hobby and More brought another main course dish full of Indian flavors - these Chard Cauliflower Carrot Wraps with Mint Thyme Tomato Chutney. I would love to eat these wraps for lunch any day, and the mint chutney would have so many other uses too!


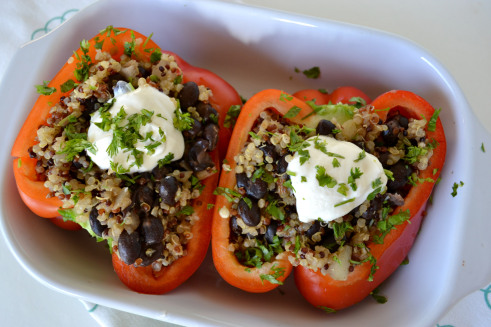
And lucky us - we got a third main course from Cara of Fork and Beans, who made Stuffed Peppers (I say lucky because in normal circumstances, there might be none or just one vegetarian main course option at potlucks, so to have three means we would be very well fed!)


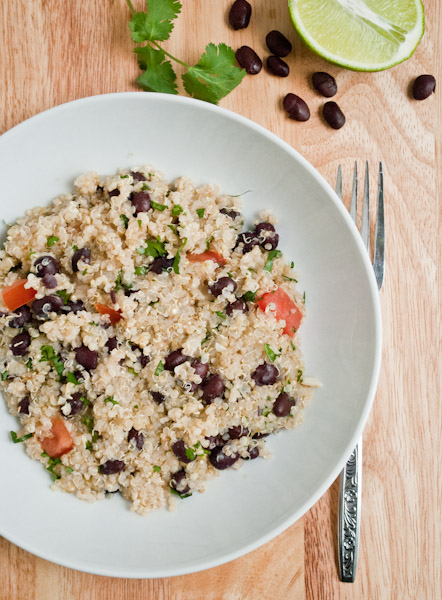
Next, Destini of The Healthy Wife made another quinoa dish - this Lime Cilantro Black Bean Quinoa Salad - I think it sounds so flavourful and it would be a filling side dish for vegetarians with the beans and quinoa!


And of course, what's a potluck without dessert?  The dessert options at our virtual potluck sound pretty amazing and feature lots of seasonal  fruit...plus they're on the healthy side so you don't have to feel guilty about ending your meal with one of these options!

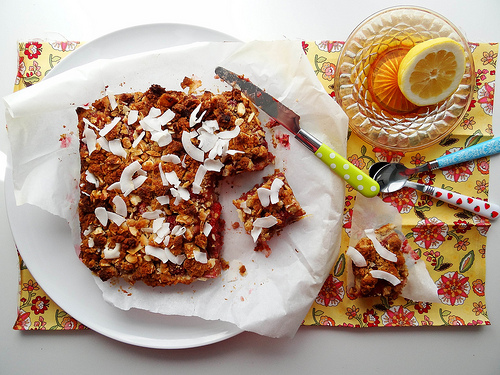
First up for dessert are these Strawberry Rhubarb Coconut Crumb Bars from Heather of Sunday Morning Banana Pancakes - I was immediately hooked after reading the title because I love the combination of strawberries and rhubarb, and adding coconut sounds even better!


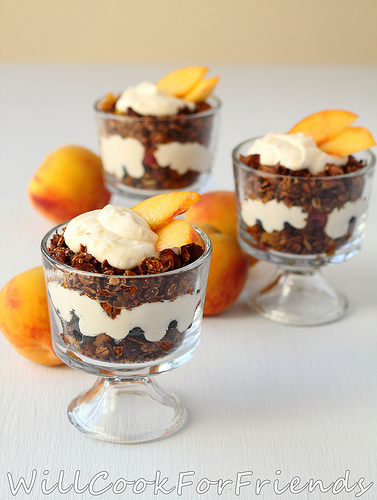
Next, Willow of Will Cook for Friends brought these beautiful Peaches and Cream Granola Parfaits - homemade granola layered with a peach and yogurt puree, topped with peach slices...I would be happy to eat this for breakfast or dessert!


Finally, Natasha of the blog VIMWAC (A Vegetarian in Manitoba Without a Clue) brought these Chocolate and Banana Rolled Oat Bites - I love easy no-bake desserts like this, and I'm sure they would disappear quickly at a potluck!


Everything looks so good that I wish this was a real-life event so I could try it all!  Thanks for joining our virtual potluck and hope everyone has a great week!


May 06, 2012

Lemon Artichoke Hummus


Hope you're all having a great weekend and enjoying the warm weather!  Yesterday morning I walked to the farmer's market and picked up my usual fruits and veggies.  This was the first time this year that the market was held outdoors, and also my first sighting of local radishes and rhubarb, so I was sure to pick those up!  I've already made one recipe with the rhubarb that I can't wait to share!

After my shopping, I hung out upstairs at the market where they were having some Cinco de Mayo festivities.  I listened to some songs and sat in on a free Mexican cooking class where the chef showed us how to make salsa and a roasted red pepper soup in a pressure cooker - both of which were very fresh tasting and definitely had some heat to them too!

I'm looking forward to getting outside in the sun again today, but first I have a recipe to share with you!  I actually made this hummus a few months ago when it was still winter.  I loved the bright citrusy flavor but I thought it was more suitable for springtime, so I've been saving the recipe until now!


Along with the standard hummus ingredients of chickpeas, tahini, olive oil, garlic, salt and pepper, this recipe includes marinated artichokes, fresh lemon juice and zest, a bit of parsley and some spices.

I love the combination of artichokes, chickpeas and lemon in other dishes, like one of my favourite salads, so I knew that I would love these flavours together in a hummus too!

The lemon and artichokes both provided a nice amount of acidity to the hummus, and the spices and parsley added more layers of flavor.  This was also one of the creamiest hummuses I've ever made - the secret is adding some of the chickpea liquid and artichoke liquid at the end.

This would be a nice snack to serve with crackers, pita chips, or any other dippers that you like.  This was definitely a big hit in my house, so if you have a potluck or picnic coming up, this hummus would be a great item to bring!


Lemon Artichoke Hummus 
Adapted from What's Cookin' Chicago?


1 15 ounce can chickpeas, drained and rinsed (reserve some liquid)
1 cup drained and chopped artichokes from a jar (reserve some liquid)
Zest and juice of one lemon
1/4 cup tahini
1 tbsp olive oil
2 garlic cloves, minced
1/2 tsp salt
freshly ground pepper to taste
1/2 tsp cumin
Pinch cayenne
1 tbsp chopped fresh parsley
1 tsp artichoke liquid
1-2 tsp chickpea liquid

Place all ingredients except for the artichoke and chickpea liquids in a food processor and process until everything is fully broken down and mixed together, scraping down the sides of the bowl if necessary. 

Add the artichoke liquid and 1 tsp of the chickpea liquid and process until it is incorporated.  If the hummus looks like it needs a bit more liquid, add the remaining teaspoon of chickpea liquid and process again.  Taste and adjust seasoning if desired. 

Serve with veggies, pitas, or crackers.  Store in the refrigerator. 


This was submitted to Wellness Weekend at Diet, Dessert, & Dogs. 

March 11, 2012

Broccoli Pesto Pasta with Chickpeas


During the summertime when fresh herbs are so abundant, one way that I like to use them up is by making a pesto sauce.  Pesto pasta seems to be one of those things that people can either love or hate, but I've always loved it!

Up until now, I haven't expanded much beyond the traditional basil pesto, but I'm intrigued by other types of pesto I've seen on food blogs, like arugula, cilantro, kale, roasted pepper, and most recently - broccoli pesto.  So the last time I picked up some broccoli with no specific plans for it, I decided to try making broccoli pesto.

The pesto itself was pretty easy to make - the broccoli is blanched in boiling water, then blended with the traditional pesto ingredients of olive oil, garlic and lemon. I also added some fresh parsley and tahini because I I like the combination of tahini and lemon in sauces. Finally, instead of using parmesan cheese, I added some nutritional yeast to give the sauce a bit of cheesy flavour.

For the pasta, I tossed some cavatappi with the pesto sauce and added chickpeas to make it more of a complete meal (the original recipe that I used for inspiration suggested using white beans, so you could try that too, although I prefer chickpeas).

I liked how the taste of the broccoli came through in the pesto without being overpowering - if you have picky eaters in your family, this could be a good way to get them to eat their veggies!  Topped with a big squeeze of lemon juice, this was a nice bright and flavourful meal that made me even more excited for summer!


Broccoli Pesto Pasta with Chickpeas
Adapted from Mrs. Regueiro's Plate

Half a head of broccoli, chopped (about 2.5 cups)
About 7 oz short dried pasta (I used cavatappi)
2 tbsp olive oil
2 tbsp tahini
1 tbsp nutritional yeast
1-2 cloves garlic, minced
1/4 cup fresh parsley
1 tsp lemon zest
Juice of half a lemon,
Pinch of salt
1 cup canned chickpeas, rinsed and drained
Additional lemon wedges for serving


Bring a large pot of salted water to a boil. Add the broccoli pieces and boil until they are tender and bright green, about 4 minutes. Remove immediately using a slotted spoon and place in a food processor.

Bring the water back to a boil and add the pasta. Cook according to package directions, then drain, reserving about 1 cup of the pasta water. Return pasta to the pot and set aside.

Meanwhile, prepare the pesto by adding the olive oil, tahini, nutritional yeast, garlic, parsley, lemon zest, lemon juice and salt to the food processor with the broccoli. Process until completely smooth. If the pesto looks thick, add some of the reserved pasta water, a tablespoon at a time, to thin it out (I added 2 tbsp of water).

Transfer the pesto to the pot with the pasta and stir until all the pasta is coated (you can add more of the pasta water here if needed). Stir in the chickpeas.  If you want the dish to be served hot, turn the stove on medium-low and heat until the pasta and chickpeas are warmed through.

Taste and season with more salt and pepper if desired. Serve with additional lemon wedges.

Makes 3 servings.


LinkWithin

Related Posts Plugin for WordPress, Blogger...