Showing posts with label yogurt. Show all posts

August 19, 2014

Roasted Strawberry & Goat Cheese Crostini


Yikes, how has it been over a month since my last post? Sorry I haven't been around here in awhile, but life has been pretty busy lately with trying to finish my degree and helping to plan my sister's wedding, and as much as I wanted to keep up with my blog, I just haven't had the time.

While I expect to still be busy over the next couple weeks, I wanted to at least squeeze in a quick recipe to say that I'm still here, for anyone who might still be reading!

I actually made this recipe at the end of July for a strawberry-themed potluck, and I wasn't planning on sharing it on my blog but it turned out so tasty that I changed my mind!

When I was trying to think of a strawberry recipe that I could make for the potluck, I remembered this roasted strawberry, basil and goat cheese crostini from Confections of a Foodie Bride that I had made once and loved. I took that idea but changed things up a bit this time, adding some lemon flavoured greek yogurt to the goat cheese to make a super creamy and lemony spread. Instead of making a basil syrup or using fresh basil as a garnish, I added some basil to the goat cheese mixture instead.


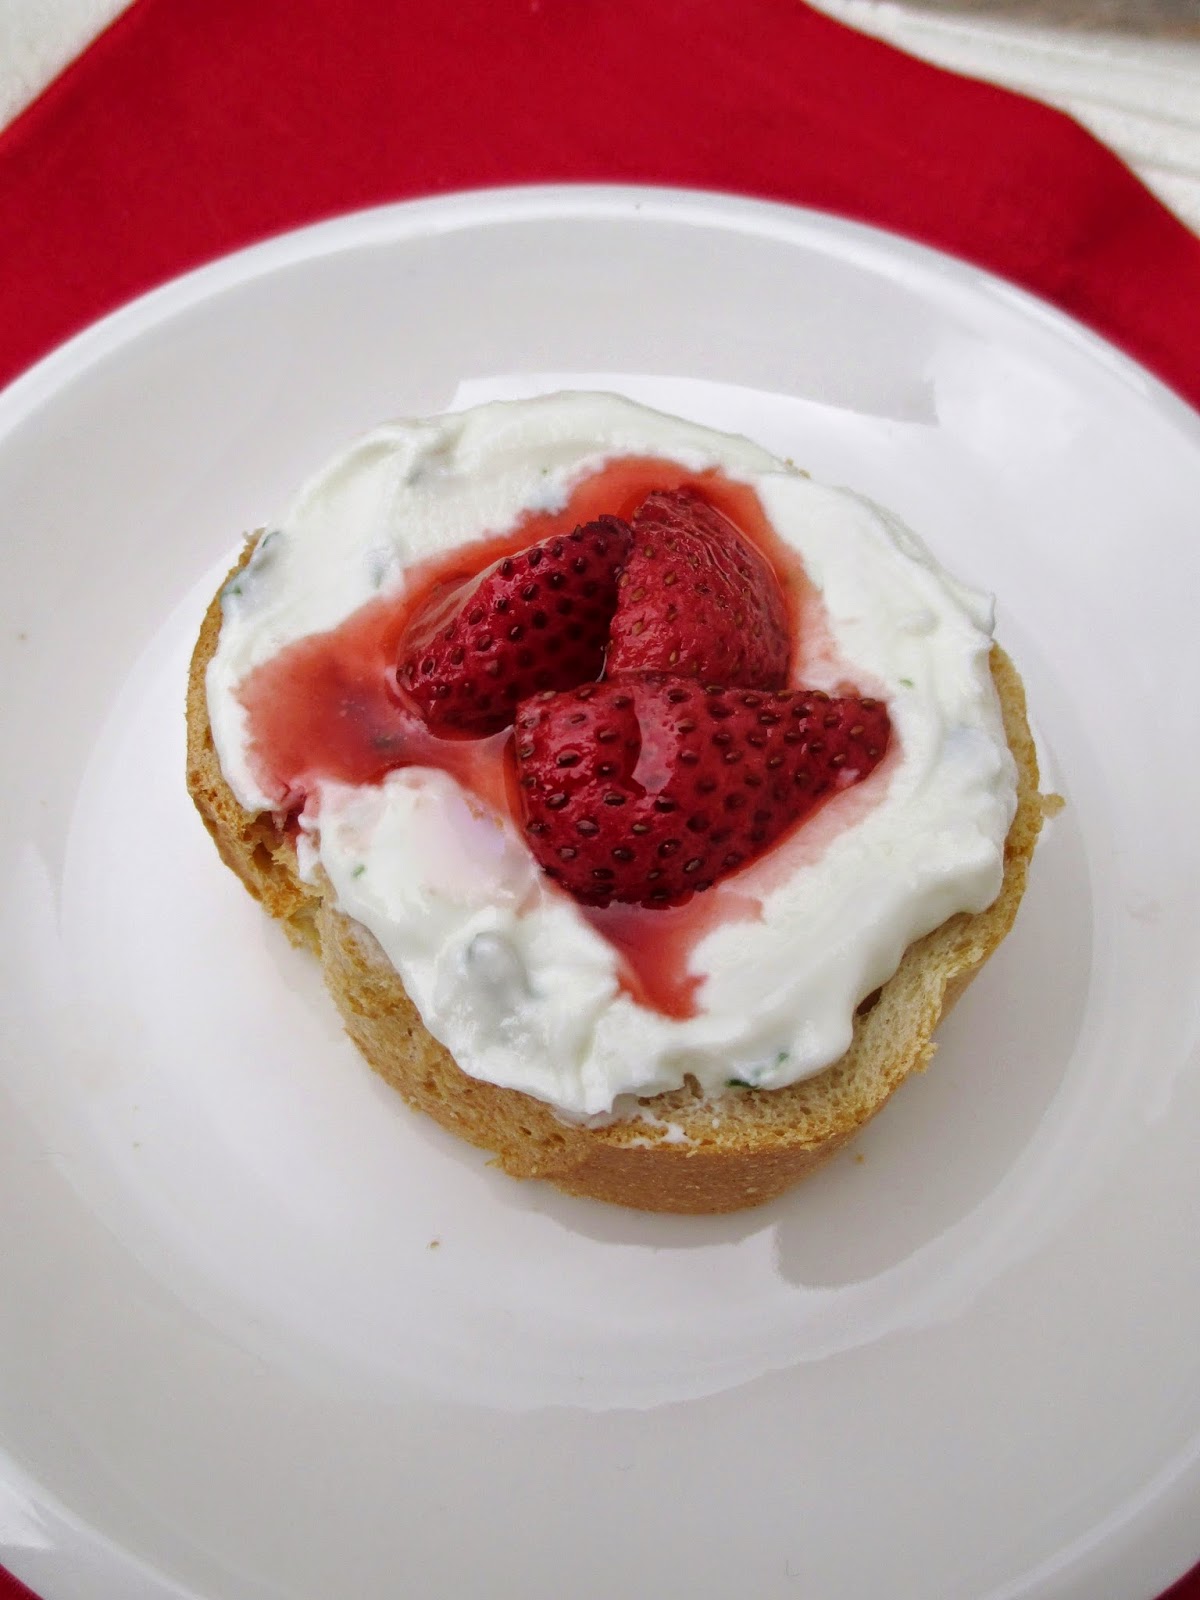
The strawberries are roasted in the oven with maple syrup and balsamic so they get nice and sweet and juicy. Since I was making this ahead of time, I combined both components (the goat cheese-yogurt spread and the strawberries) into one dip that I spooned onto slices of bread (pictured above). For a prettier presentation, you could keep the components separate and assemble individual crostini pieces to serve instead (which I did with one piece for photo purposes before taking the rest to the potluck!).

This almost tastes more like a dessert than an appetizer with the sweet strawberries, their juices and the yogurt, but I'm a fan of using fruit in my meals, so I loved this! If you did want to serve this as a dessert though, I think it would work well spread onto graham crackers or cinnamon sugar pita chips too!


Roasted Strawberry & Goat Cheese Crostini
Inspired by Confections of a Foodie Bride

2 cups chopped strawberries
1 tbsp pure maple syrup
1 tbsp balsamic
1 113g package plain goat cheese
2 100g containers lemon greek yogurt
2 tbsp chopped fresh basil
Baguette or crackers for serving


Preheat oven to 375°F. 

Place strawberries in a baking dish and toss with the maple syrup and balsamic. Roast in the preheated oven for 10-15 minutes, until the strawberries are soft. Remove from oven and let cool. 

Meanwhile, mix together the goat cheese, yogurt, and basil in a small bowl until smooth. 

Option 1: Transfer the goat cheese mixture to a shallow bowl or container and smooth out into an even layer. Top with the roasted strawberries (you can add some of the leftover juices if you like, but I left most of the liquid behind). Cover and refrigerate until serving time. When ready to serve, slice a baguette (you can toast it first in the oven if you prefer, but I just left mine untoasted and it was good that way too) and serve as a dip to spread onto slices.

Option 2: Slice your baguette and toast in the oven if desired. Spread some of the goat cheese mixture onto each slice and top with a spoonful of the strawberries.

Option 2 is a prettier presentation but both ways taste equally delicious!


June 25, 2014

Chilled Zucchini Avocado Soup


Lately when I come home to my hot and humid apartment, the last thing I want to do is turn on the stove and add even more heat to my place, so refreshing no-bake meals are definitely needed!

This week, I decided that I wanted to make a chilled soup - one of my favourite things to eat in the summertime (and if you check the soup category in my Recipe Index, you'll find quite a few chilled ones there!).

I had a nice zucchini from the market sitting in my fridge, so I used that as my inspiration for this chilled zucchini avocado soup. While this is a no-bake recipe, it does require a bit of cooking on the stovetop first to saute some garlic and green onion, and get the zucchini nice and tender so that it will blend easily.

To make the soup extra creamy, I added an avocado and some plain yogurt which get blended up with the zucchini mixture until smooth. Finally, some fresh basil, lemon juice and a dash of cumin add even more layers of flavour to highlight the zucchini.


I loved how easy this was to whip up - I made it on a day when I got home late from the gym and then grocery shopping and I wanted dinner to be ready quickly, which it was!

The only hard part is waiting for it to chill, but you could definitely eat it warm if you like too. I actually ate it warm the first night and really enjoyed it that way, and then had the leftovers chilled, which was even more tasty and super refreshing!

This is also a very adaptable recipe, so feel free to add other herbs or veggies to the soup or as garnishes - some sliced radish, cucumber, or tomato would probably work well stirred in if you like extra texture in your soup!


Chilled Zucchini Avocado Soup
Partly inspired by this recipe

1 tbsp olive oil
2 large cloves garlic, minced
~4 green onions (about half a bunch), sliced
1 large zucchini, thinly sliced
2 cups water or vegetable stock (I used water)
1 ripe avocado, roughly chopped
2 tbsp fresh basil (can substitute another herb)
1/2 cup plain low-fat yogurt
2 tbsp fresh lemon juice
1/2 tsp salt
1/4 tsp cumin
Ground pepper


Heat oil in a medium saucepan on medium heat. Add garlic and green onion and cook for 3-4 minutes, stirring occasionally. Add zucchini and sprinkle with salt and pepper. Cook for a couple of minutes, then add the water. Bring to a boil, cover pot and simmer for about 5 minutes, until zucchini is tender. Remove from heat and let cool slightly.

Pour contents of the pot into a blender (I did it in just one batch but you could do two batches if your liquid is still very hot to avoid it exploding!). Blend until smooth. Add the remaining ingredients and blend again until smooth.  Taste and adjust seasoning if desired. Transfer to a container and refrigerate until chilled.

Serve warm or chilled, with extra yogurt and basil on top if desired. (Note: the soup might thicken up after sitting in the fridge, so feel free to add extra water to thin it out if you prefer).

Makes 2-3 servings

October 30, 2013

Mango Curry Tofu Salad


Things have been a bit busy for me lately, and between schoolwork and weekend trips, I haven't been able to spend as much time blogging as usual (sadly I won't have a new Halloween recipe this year!). I've still been cooking and making recipes, but I've been leaning more towards easy and quick dishes that can be made with minimal ingredients, like this one!

This mango curry tofu salad was the perfect meal to have around for lunches last week - with no cooking involved, it can be thrown together pretty quickly, and it will keep in the fridge for a couple of days so you can make it ahead of time and bring the leftovers for lunch. 

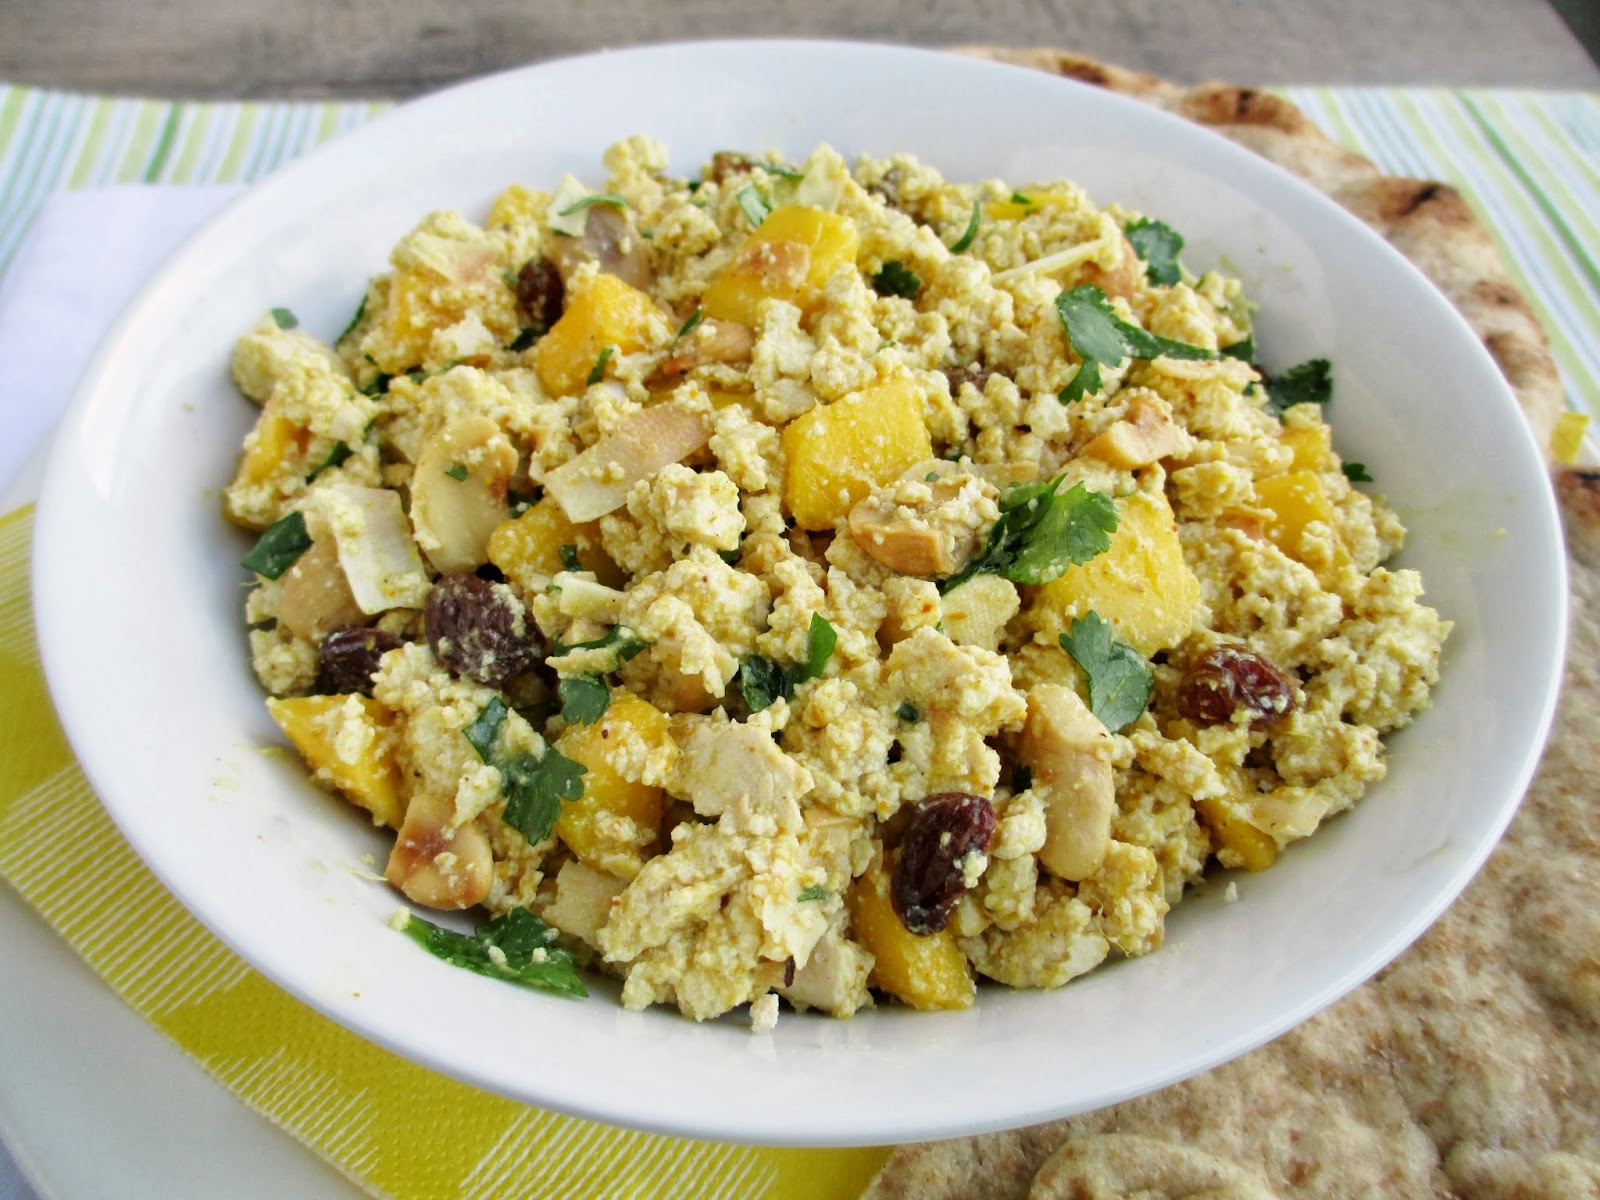
If you've never had tofu salad, it's basically uncooked firm tofu that you crumble up into pieces to resemble egg salad. Whip up a creamy dressing and add in some fruit, veggies, or fresh herbs and you get a refreshing and light lunch that can be eaten on its own or stuffed into a wrap or pita. 


I usually make a simple tofu salad with apples and a mustard dressing, but this time I changed things up a bit and made an Indian-inspired version.  I left out the mayo in the dressing and used yogurt instead, mixed with curry powder and mango chutney for a sweet-and-spicy combo.

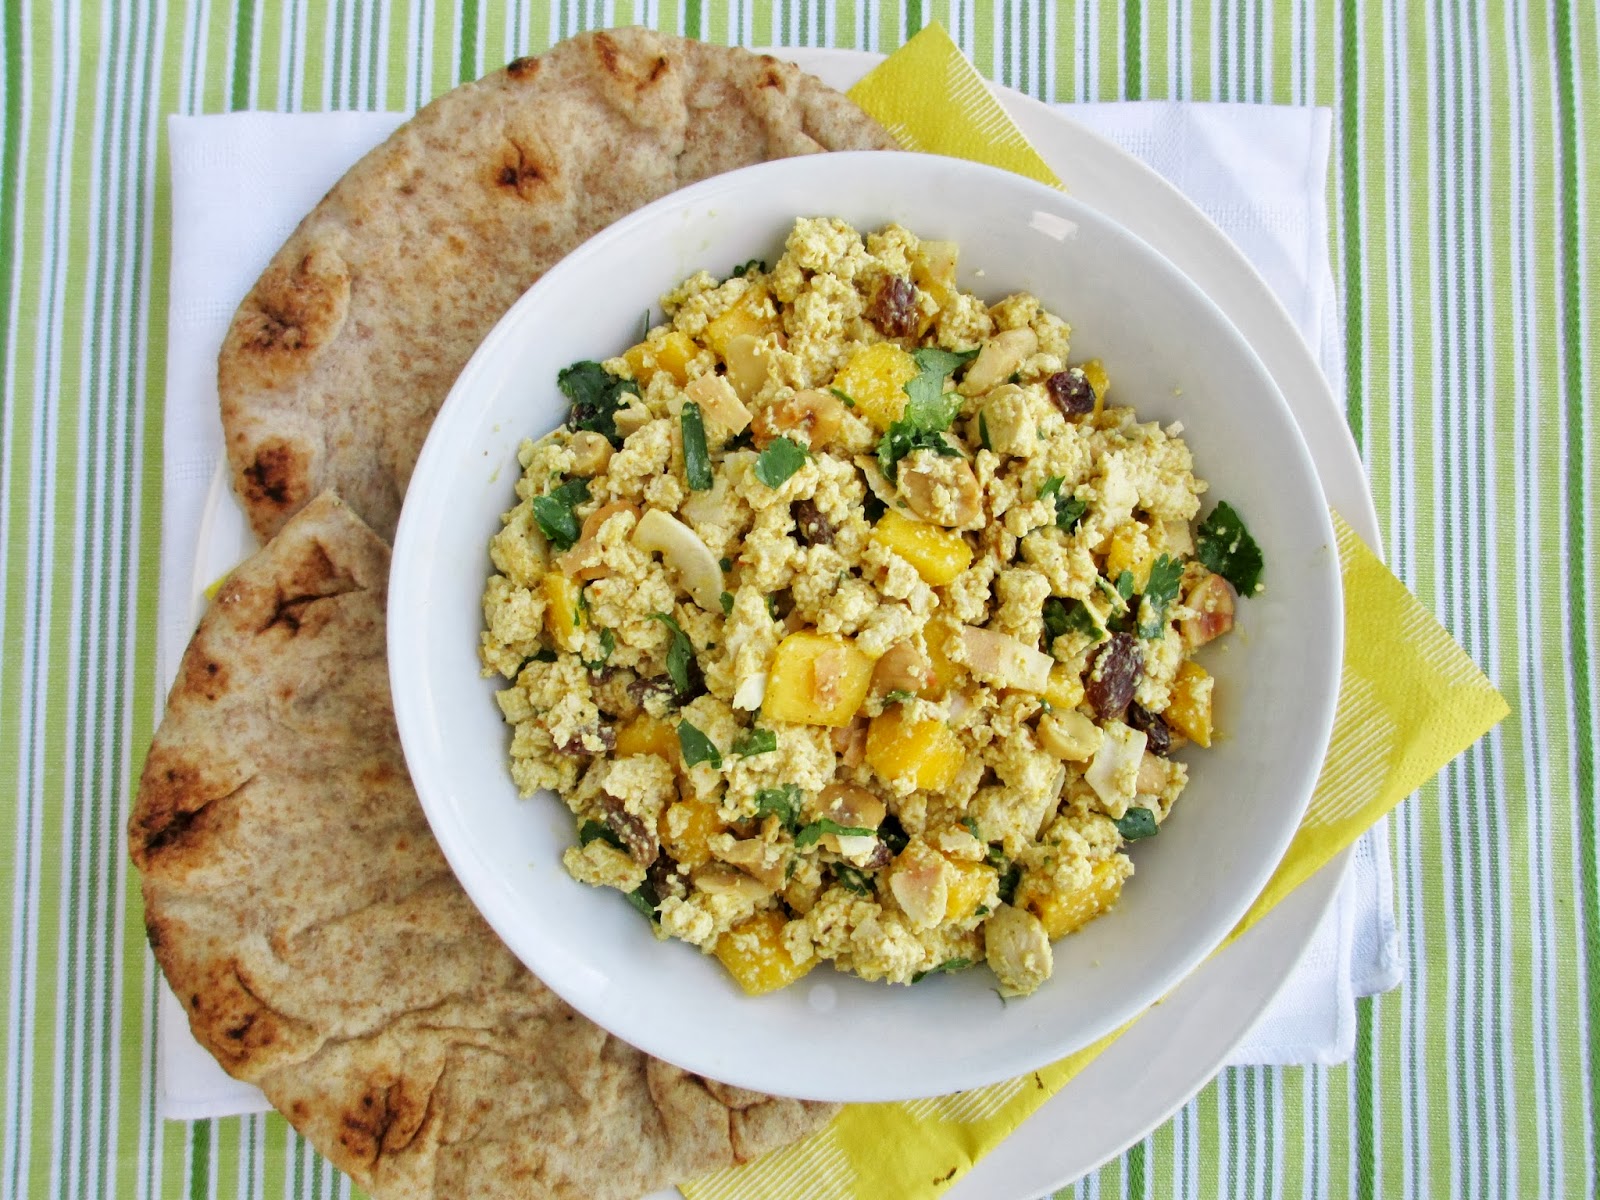
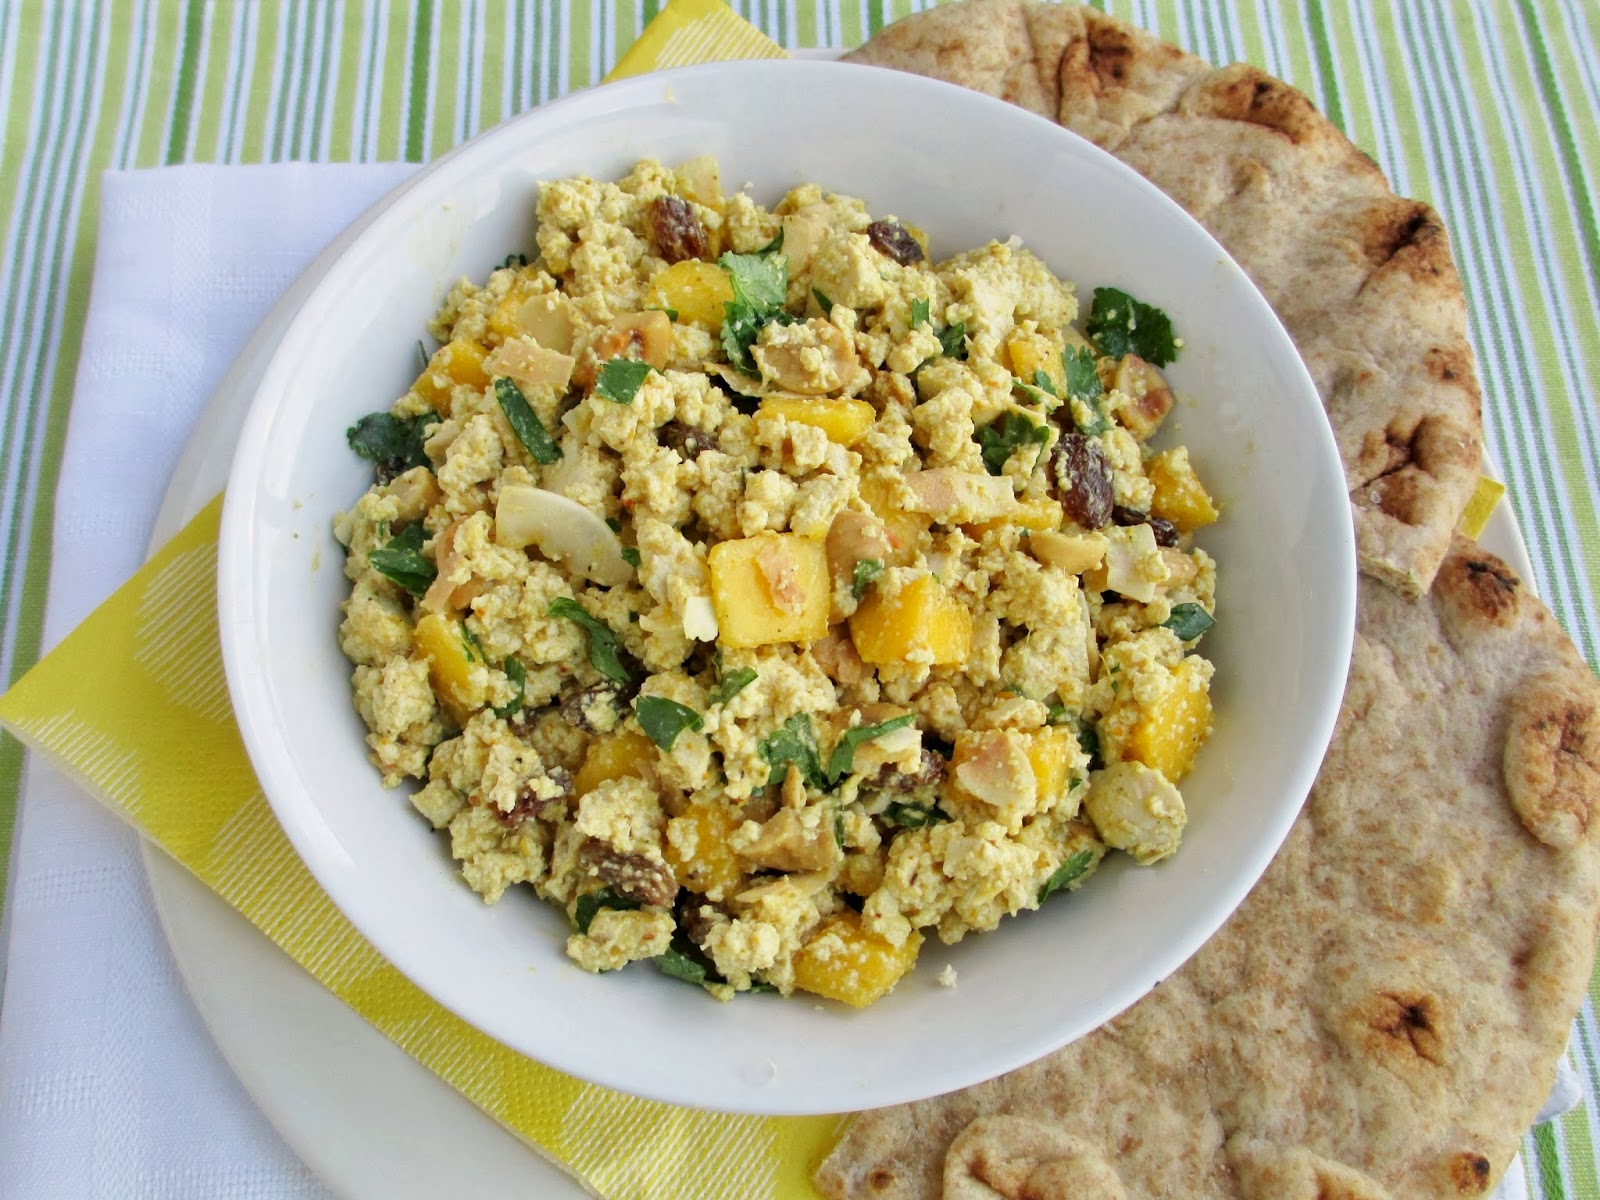
Along with the tofu, I added fresh chopped mango, cilantro, raisins, cashews, and toasted coconut for a mix of textures. The tofu soaked up the dressing to become extra creamy and cool, and I loved the burst of fruitiness from the mango along with the crunchy nuts and chewy coconut. 

I liked eating this both on its own and inside of a pita, or you could try toasting some naan bread to make naan "chips" and eating it like a dip! 


Mango Curry Tofu Salad
Inspired by Whole Foods Market and Eating Well

1 small package (175g) firm tofu
1/2 a large ripe mango, chopped into small pieces (about ½ cup)
2 tbsp unsweetened flaked coconut
2 tbsp chopped roasted cashews
2 tbsp sultana raisins
2 tbsp chopped fresh cilantro
1/4 cup plain low-fat yogurt (use vegan yogurt if desired)
2 tbsp mango chutney
1 tsp curry powder
Dash of salt and pepper

Slice the tofu in half and press between layers of paper towel under a heavy book for about 15 minutes to remove some of the water. Crumble the tofu using your hands or a fork into a bowl. Add the mango to the bowl.

Heat a small skillet over medium-low heat. Add the coconut flakes and toast just until they start to turn light brown. Immediately remove from pan and add to the tofu mixture.  Add the cashews, raisins, and cilantro to the bowl as well and toss to mix everything.

In a separate small bowl, stir together the yogurt, mango chutney, curry powder, salt and pepper. Pour this mixture over the tofu salad and stir well to mix.

Chill in the fridge until ready to serve.  Eat on its own, with naan bread, crackers, or stuffed into pitas.

Makes 2 servings.


July 25, 2013

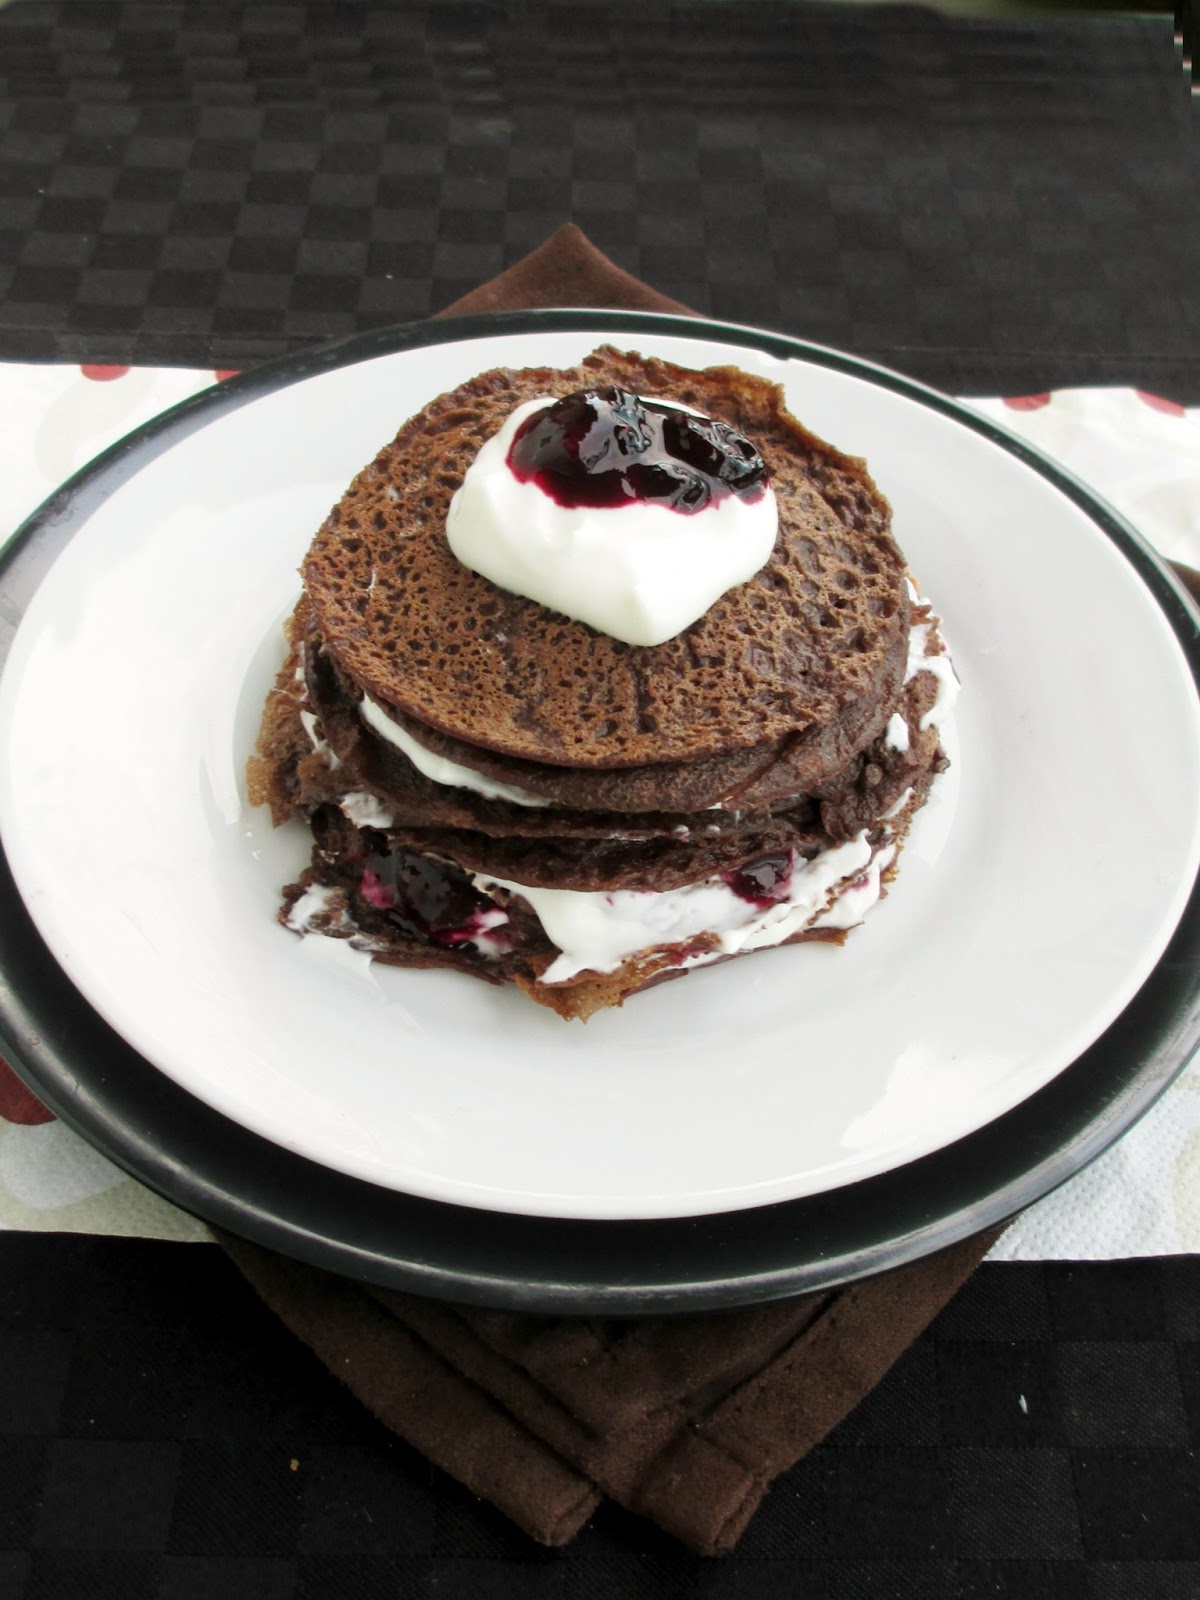
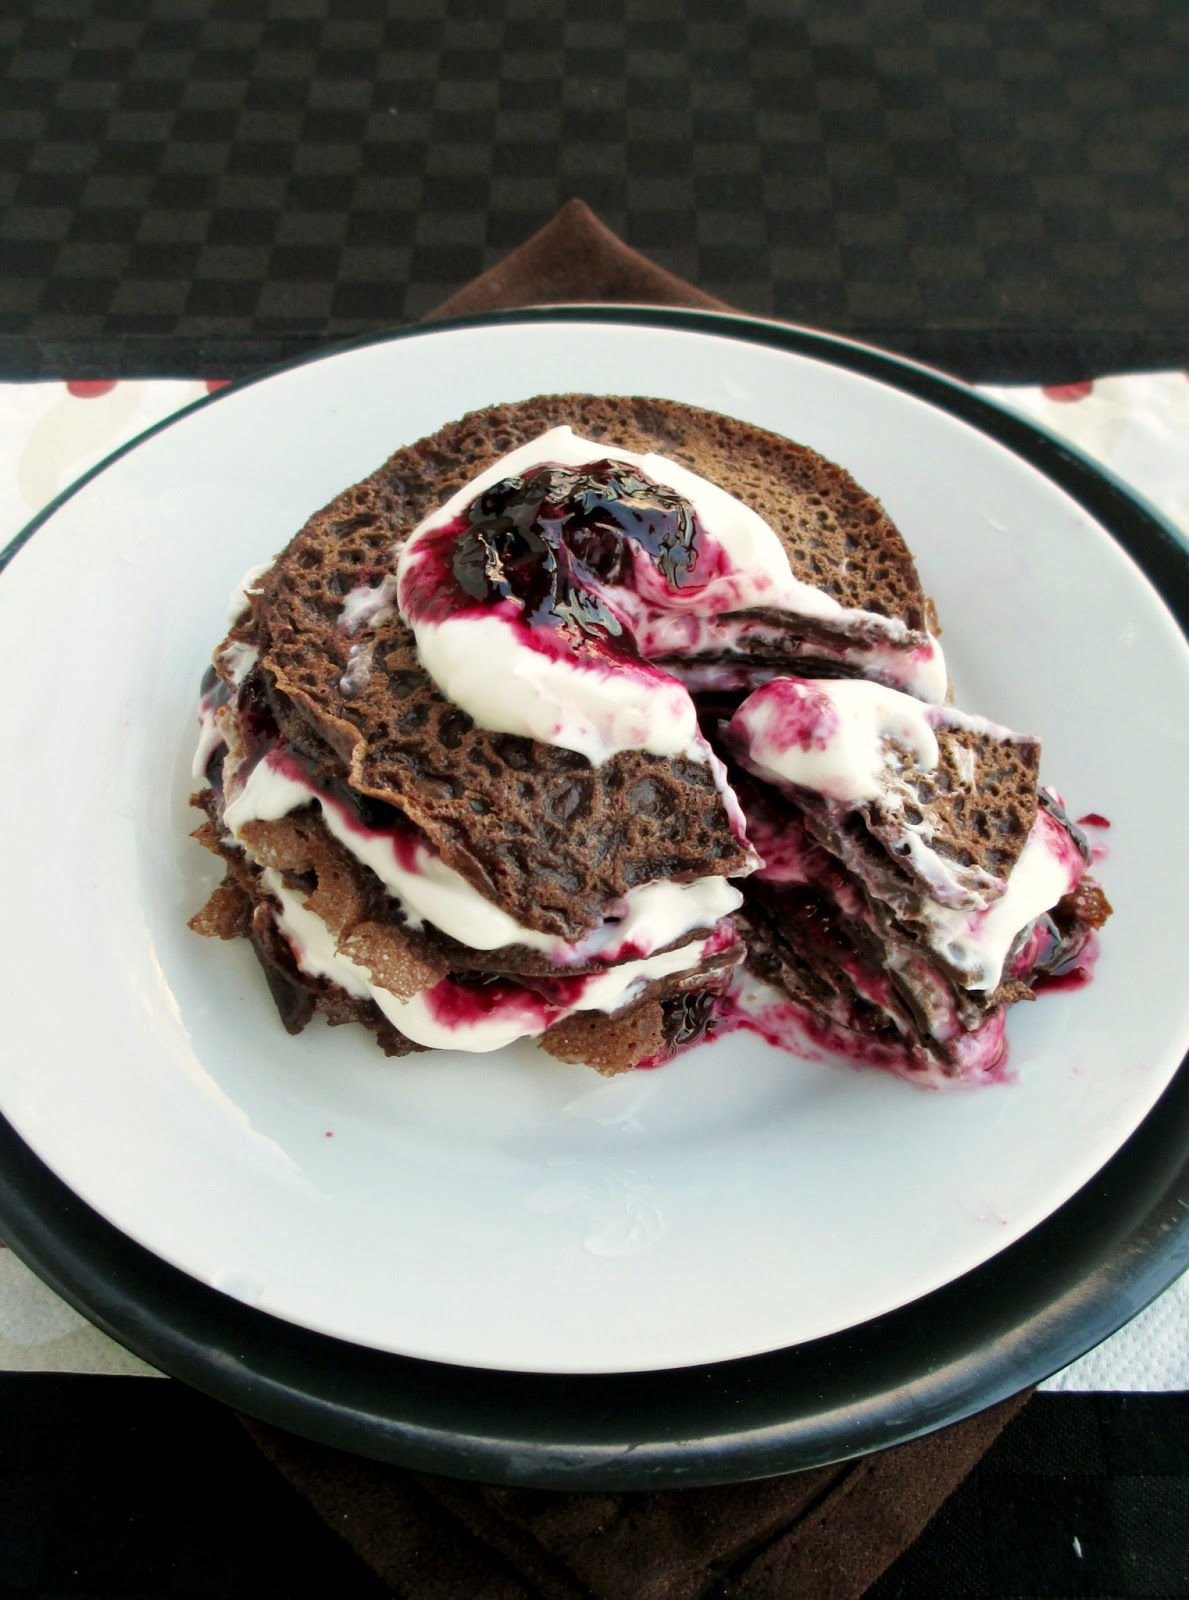
Miniature Chocolate-Cherry Crepe Cake & 2nd Blogiversary


Today is a bit of a special day here on Vanilla & Spice - it's my 2nd Blogiversary!

I can't believe that this little space has been active for two whole years already, but I guess when you're doing something that you love like cooking, baking, photographing food, and sharing recipes with amazing readers, time flies by!

Rather than reflecting on the past year of blogging like I did last year, I think I'll just stick to writing about today's recipe this time (and with more photos than usual because I had a hard time choosing) - after all, that's why you come here in the first place!


To celebrate the occasion, I wanted to make a special treat, but since I'm not really much of a cake or cupcake person, I thought I would do something a bit different.

I'm actually really excited about this recipe because it's something I've been wanting to make for quite a while - my very own personal sized crepe cake!

I'm sure you've all seen at least one version of a crepe cake before, but if not, the idea is that you layer a batch of regular crepes with a thick filling or frosting in between the layers to help them stick together, and add whatever toppings you like - fruit, nuts, whipped cream, caramel sauce - basically whatever you could imagine for a cake!


For my version, I knew I wanted to do a chocolate-cherry combination, since I still had some amazing fresh cherries stored in my freezer that I had picked a couple of weeks ago.

I'm actually a novice when it comes to crepe making (especially vegan crepes), but I did some research and chose a recipe that uses part chickpea flour because crepes usually rely on eggs as a main ingredient, and chickpea flour is an ingredient that I know works well in other "eggy" vegan recipes, like vegan scrambled eggs.

I modified the original recipe to make it a bit more decadent by adding cinnamon and cocoa powder, a bit of maple syrup for a touch of sweetness, and using chocolate almond milk for more chocolatey flavour.


My first crepe was a bit of a disaster, but that's expected when you're making crepes for the first time! Luckily, I quickly got the hang of it and ended up with evenly thin, chewy crepes with just enough of a chocolate taste for my liking.

For the cake filling, I kept it pretty simple and used a combo of fresh cherry-blueberry sauce and coconut flavoured greek yogurt.

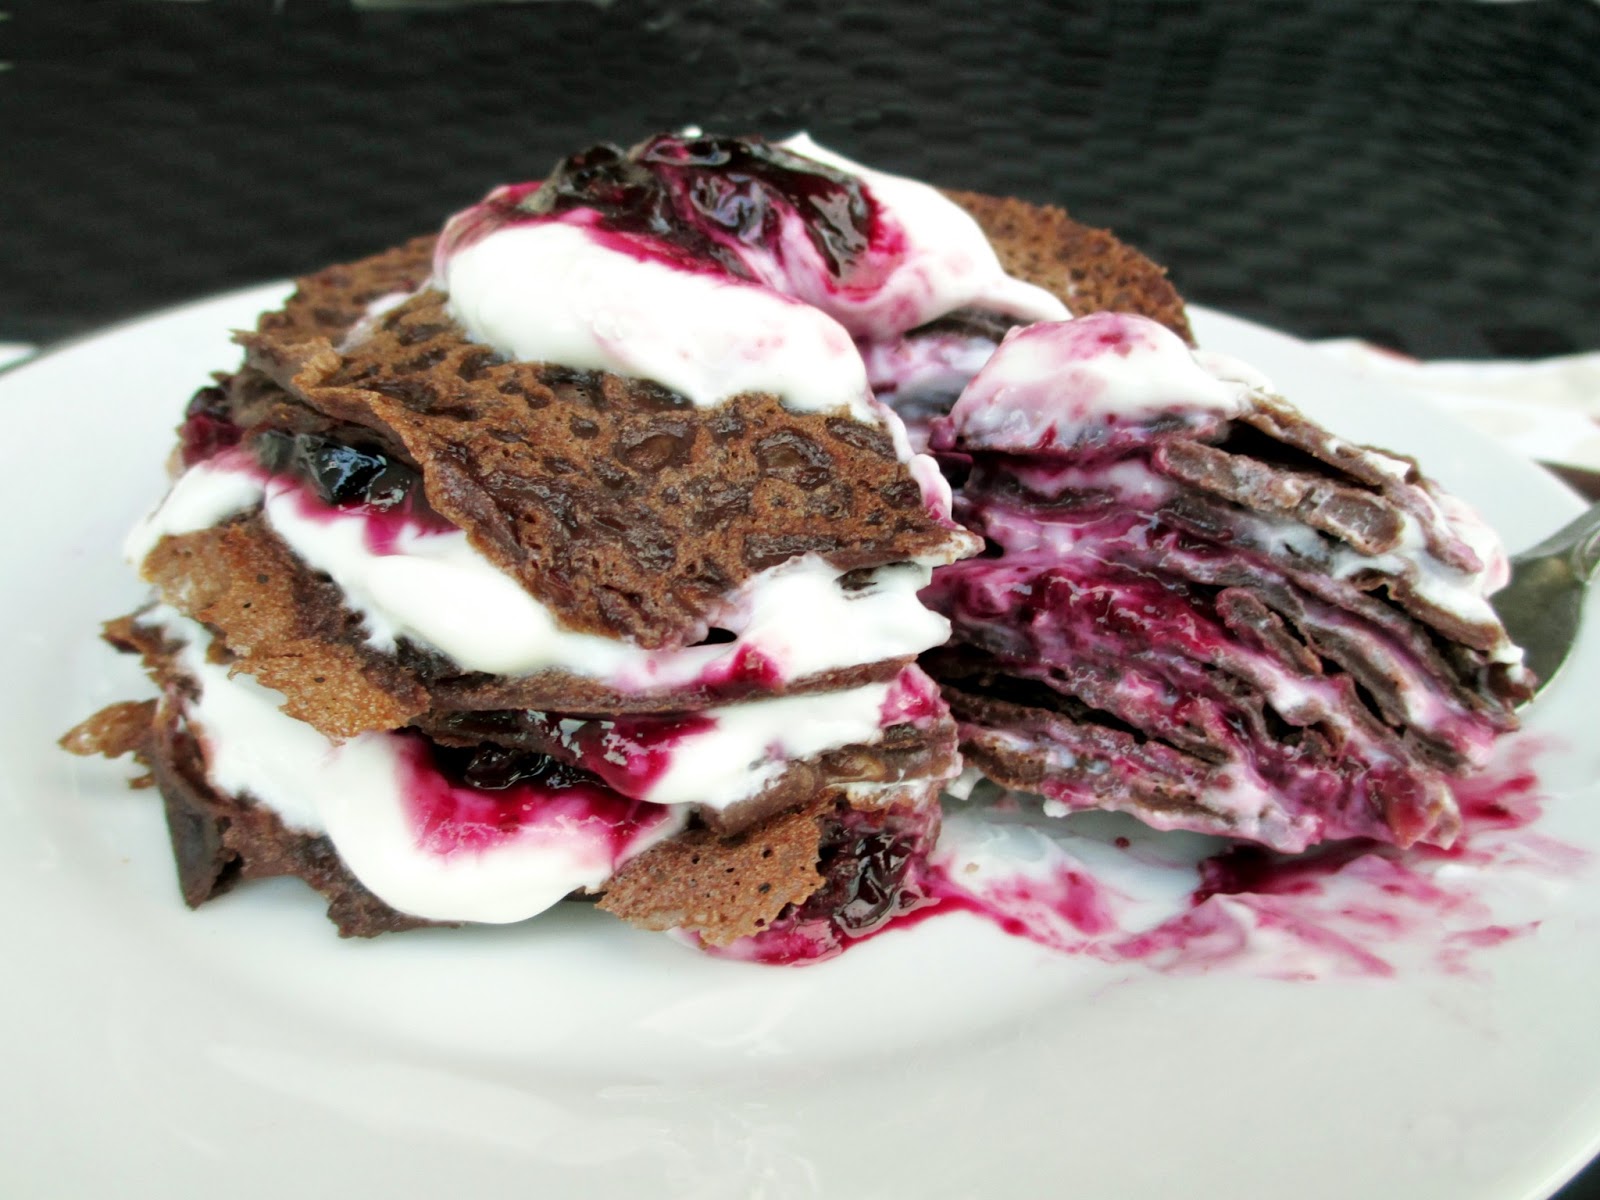
I loved each component on its own, but all came together to make an even tastier creation! The sauce was thick and fruity, with a nice balance of sweet and tart notes, and I thought it paired perfectly with the chocolate crepes and the creamy coconut yogurt.


Once you have all the components ready, it's pretty easy (and fun) to assemble the cake. First, you cut smaller circles out of each large crepe so that you have enough to stack into a tall enough miniature-sized crepe cake. Then a spoonful of yogurt and cherry sauce is spread in between each crepe layer as you build it, so that you end up with a mix of everything in each bite.

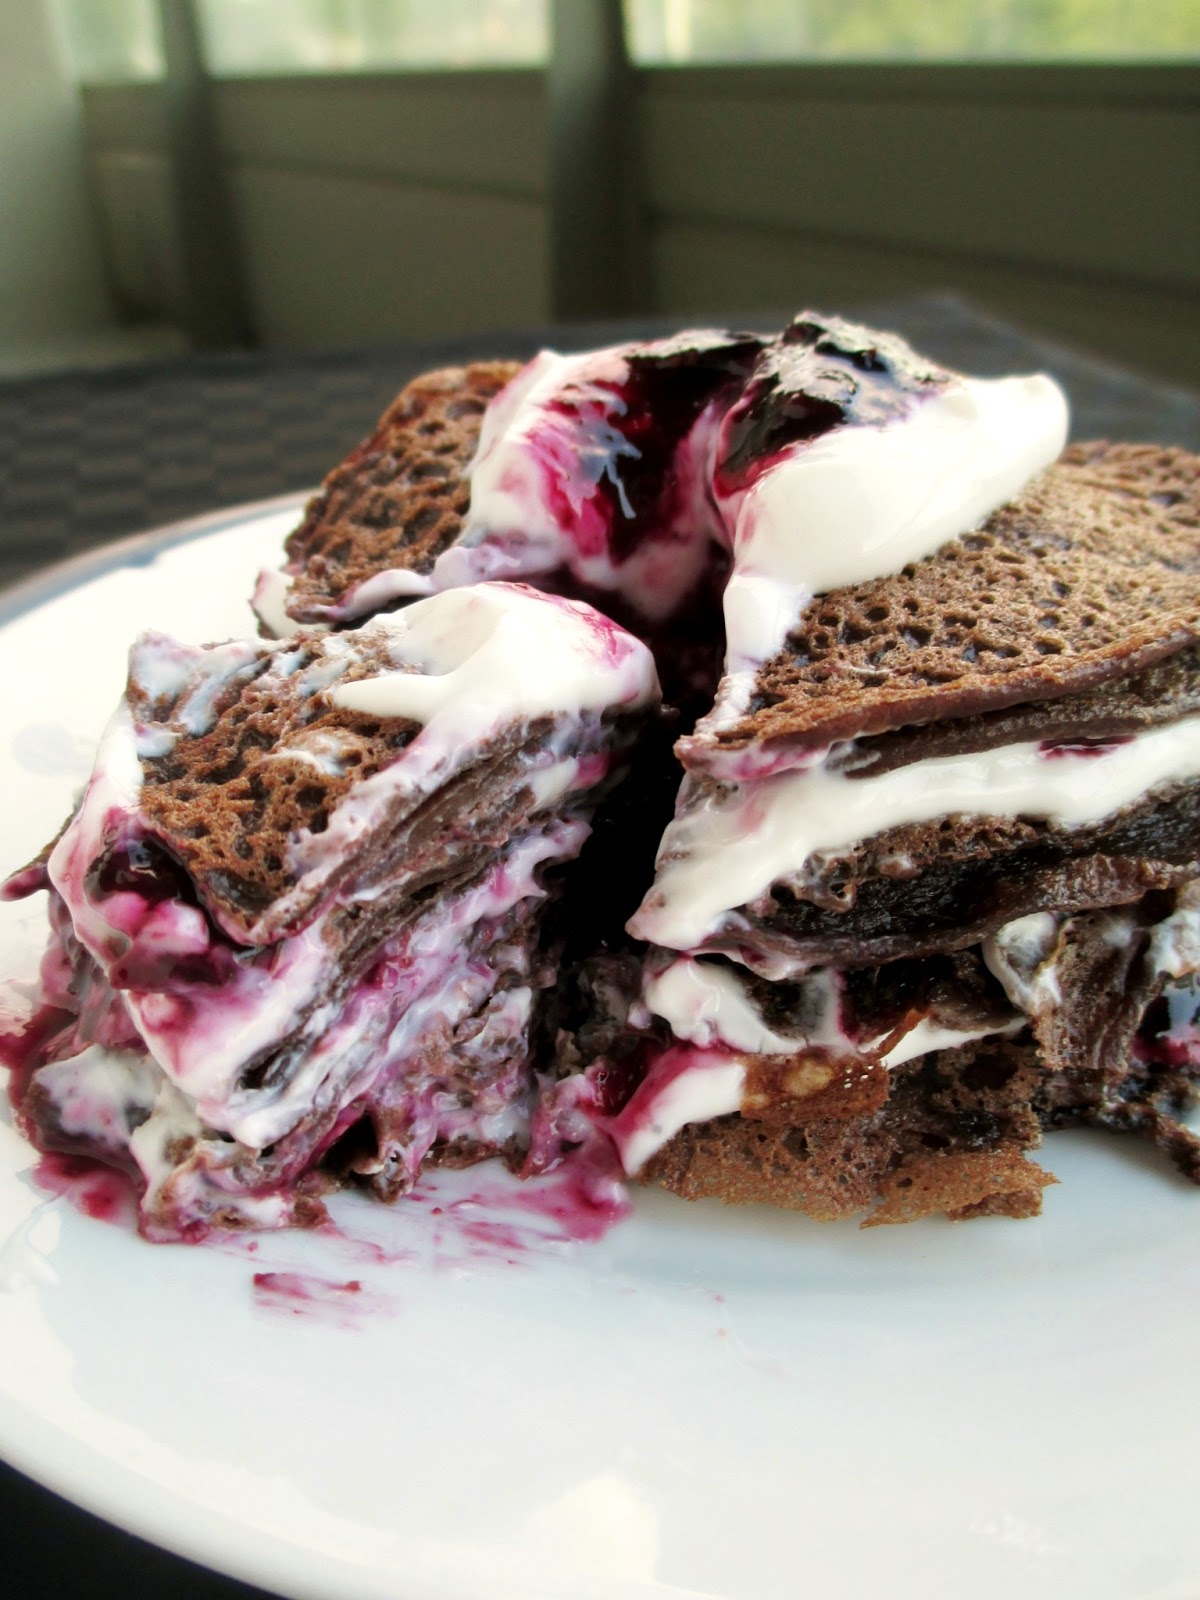
I assembled mine when everything was still a bit warm, but when I came back for the leftovers the next morning after it had been sitting in the fridge overnight, everything had firmed up more and it was a bit easier to slice and eat.  But either way - warm or chilled - this makes a delicious dessert or even a special breakfast treat!

I'm so glad I finally got around to trying out a crepe cake, and a blog anniversary seems like the perfect occasion to try something new in the kitchen! I think I might be making this again for future celebrations - I'm already dreaming of new combinations that I could try for my next birthday cake!

I know this has been a long post, but I just wanted to end by saying thanks for reading and for all of your comments this past year - I wouldn't still be doing this without the support from all of you! And one last shout-out to my sister Natalie of Once Upon a Cutting Board, who is also celebrating her blogiversary!


Miniature Chocolate-Cherry Crepe Cake
Crepe recipe adapted from Vegan Eats World, everything else my own
Note: My crepes were vegan, but not the yogurt. Feel free to adapt the recipe by using your own favourite crepe recipe and whatever kind of greek yogurt you like (vegan or not)!

Crepes
3/4 cup chocolate almond milk
1/4 cup water
1/4 cup + 2 tbsp all-purpose flour
2 tbsp + 2 tsp chickpea flour
1/2 tbsp cornstarch
1 tbsp cocoa powder
1/4 tsp salt
dash of cinnamon
1 tsp olive oil
1 tsp maple syrup

Filling
1/2 cup fresh or frozen cherries (or a mix of cherries and blueberries, which is what I did because I didn't have enough cherries)
1 tsp lemon juice
1 tbsp maple syrup
1 100g container greek yogurt (I used Oikos fat-free coconut greek yogurt but vanilla would work too)


To make the crepe batter, add all ingredients to a blender and puree until smooth. Transfer mixture to a container, cover, and let sit in the fridge for at least an hour.

When ready to make crepes, heat a large skillet over medium heat and spray with cooking spray.  Working quickly, pour 1/3 cup of the batter into the pan, swirling the pan around so that the liquid coats the pan evenly all the way to the edges. Let cook for one and a half to two and a half minutes, until the surface looks dry and cooked, and the edges have started to crisp up. Run a spatula around the edges of the crepe and carefully flip it over. Cook the other side for about one minute. Carefully remove the crepe from the pan and transfer to a plate.  Repeat with the rest of the batter (I got four 7" crepes out of mine, but it depends on the size of pan you use).

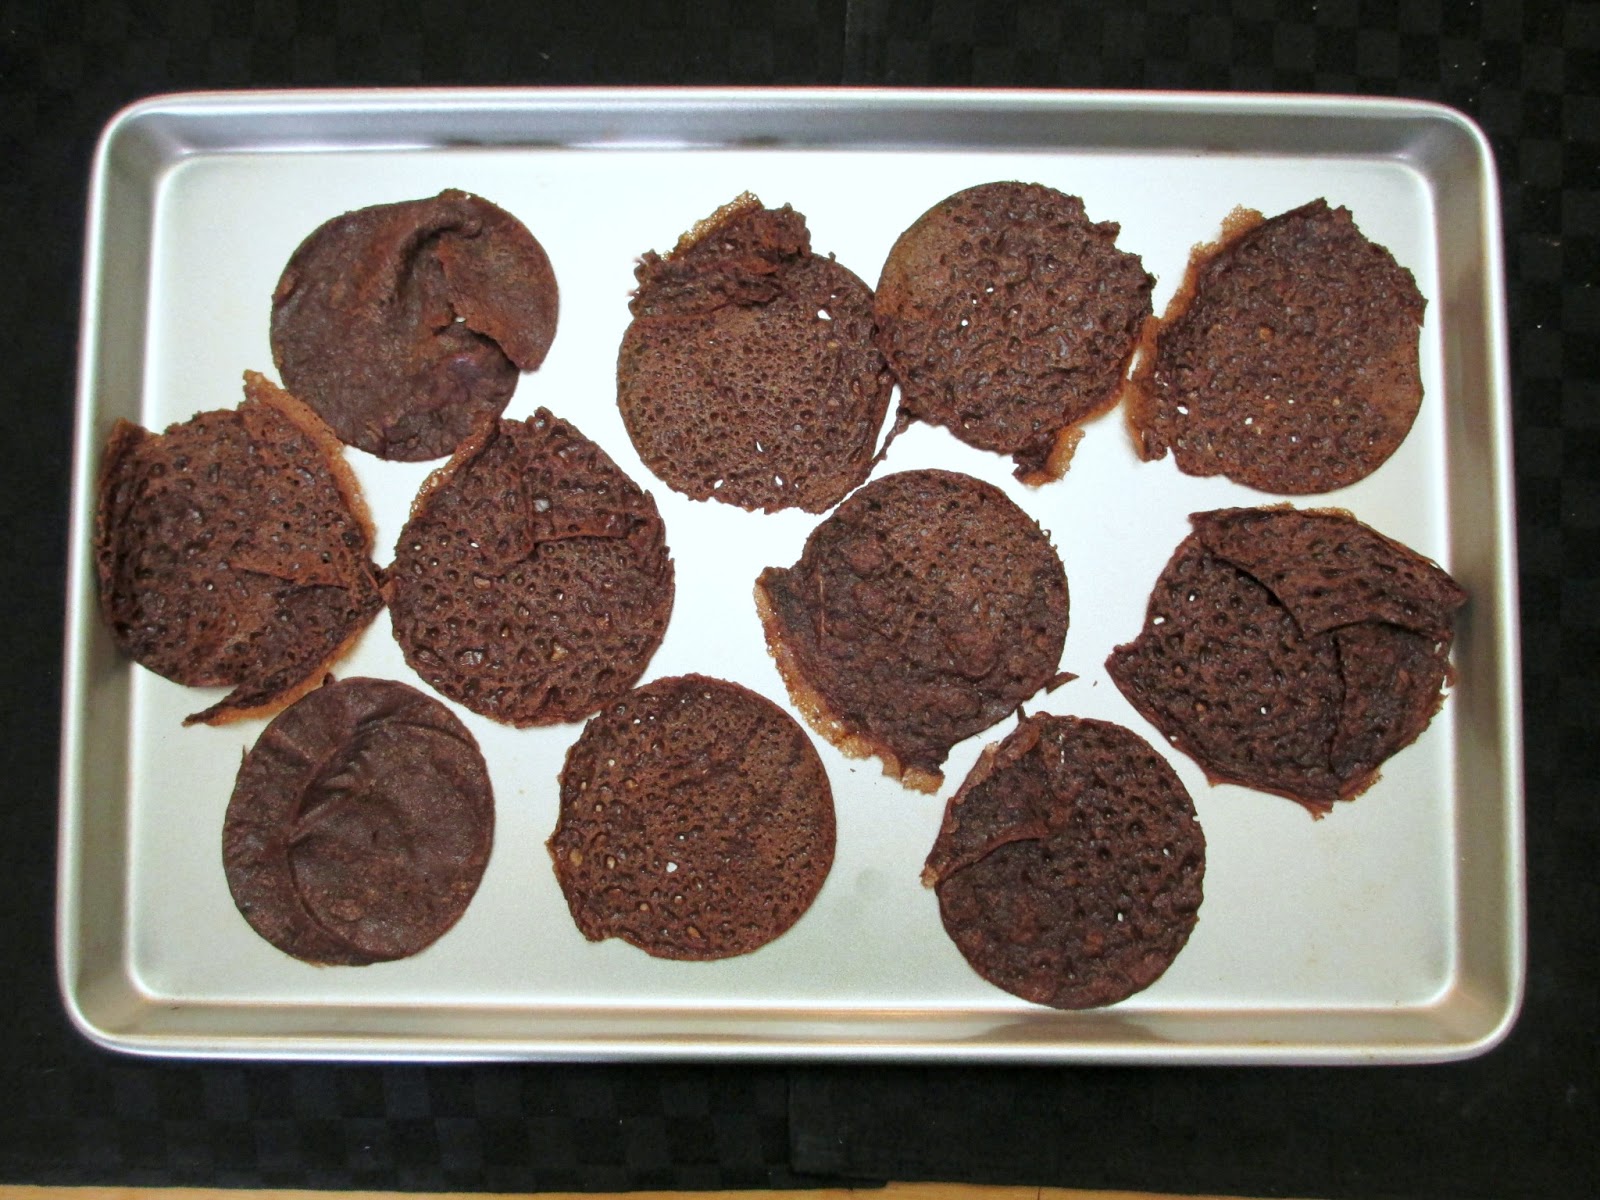
Use a circular cookie cutter or the lid of any jar about 3" in diameter to cut circles out of each crepe (I used a peanut butter jar lid). You should get one full circle plus two partial circles out of each crepe, but that's okay - they don't all need to be perfect circles. For the partial circles, just arrange some of the leftover pieces to fill in the gaps so that you have somewhat complete circles. You should end up with 11-12 3" crepe circles (see picture of mine below).


To make the sauce, place the berries, lemon juice, and maple syrup in a small saucepan and let cook on medium-high heat until the berries are broken down and the mixture has thickened a bit, stirring often (5-10 minutes). Remove from heat and let cool.

To assemble the cake, lay one or two crepe circles on a plate. Top with a spoonful of the greek yogurt and a spoonful of the cherry sauce (don't use too much sauce, as you don't want to run out!). Follow with another layer of crepes (I found it easier to put two thin crepes together as one layer), and another layer of yogurt and cherry sauce. Repeat until you've layered all of the crepes, ending with a spoonful of yogurt and cherry sauce on top.

Serve at room temperature, or chill in the fridge for 1-2 hours to firm up a bit before serving.

Serves 1 (if you're hungry) or 2 people.


May 28, 2013

Hot or Cold Asparagus Soup


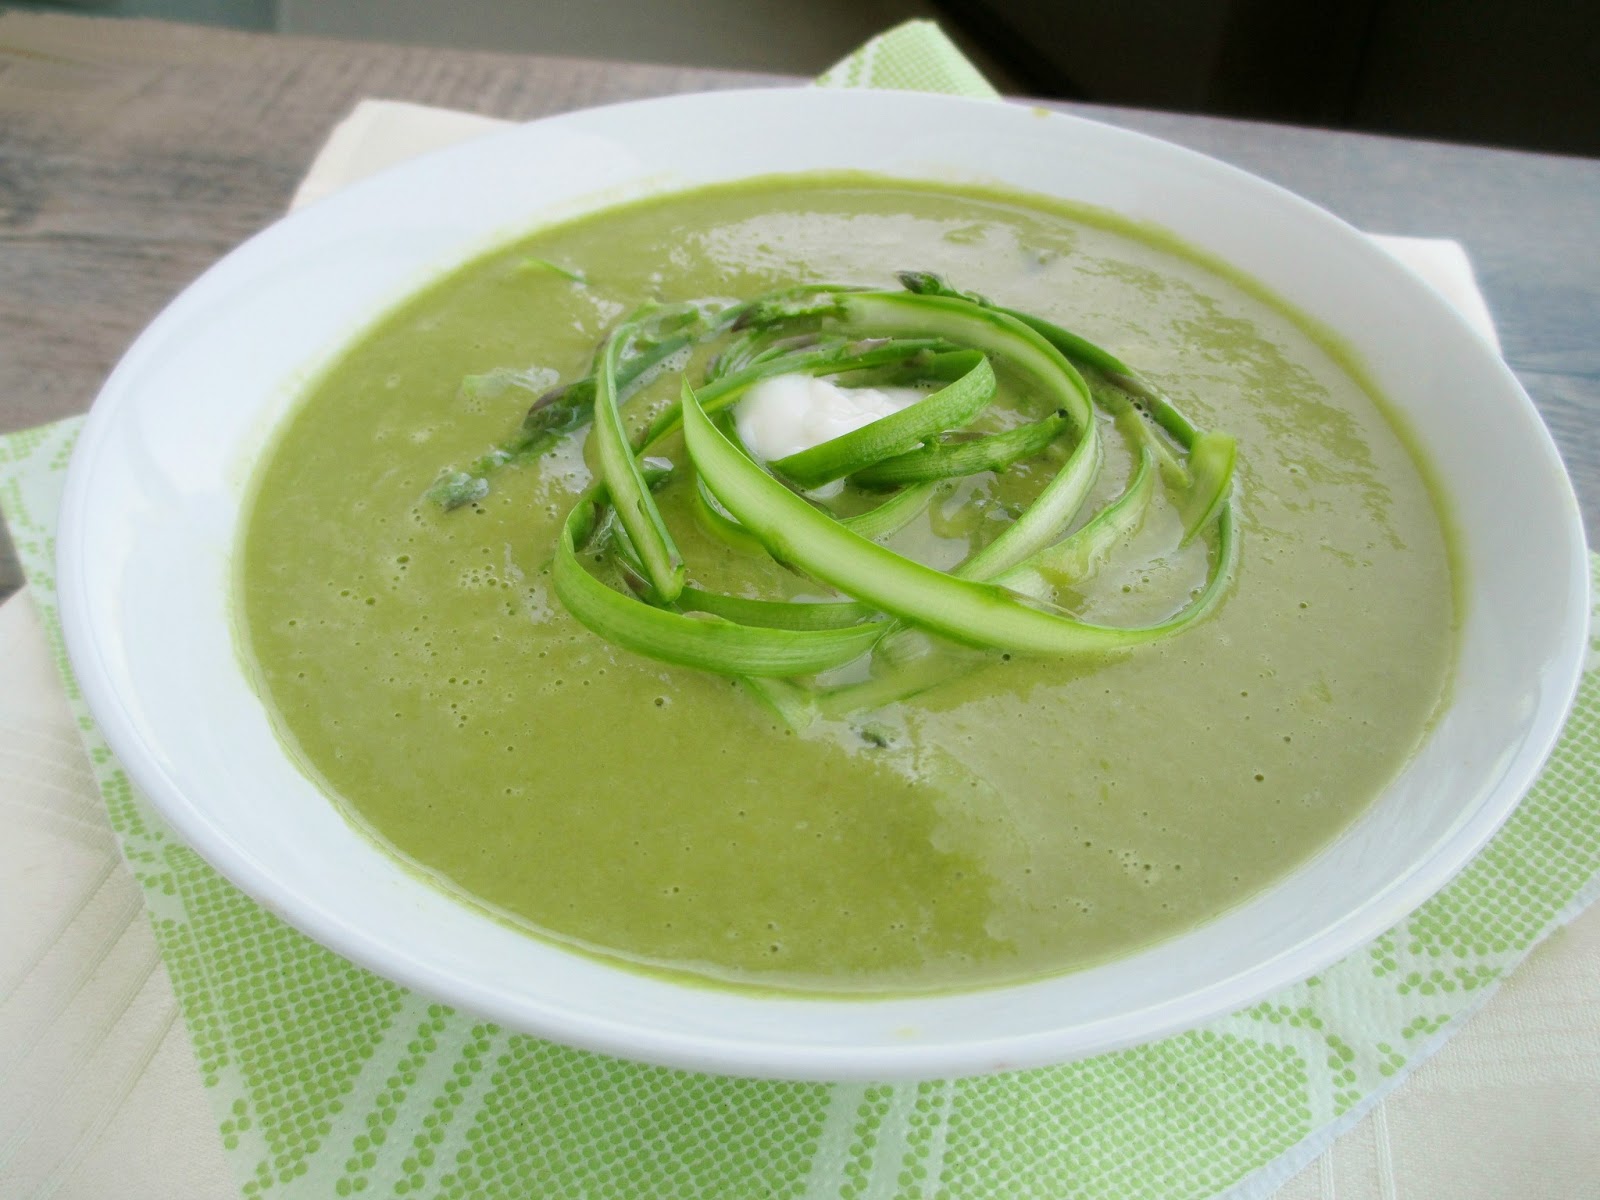
It feels like local asparagus season arrived late here in Ontario, and now that it's finally available I feel pressured to make the most of it before it's gone again! So this past weekend when I saw some beautiful super-thin spears of asparagus at the farmers' market, I was sure to pick some up.

And since I knew that fresh picked asparagus only lasts a couple of days, I wanted to make a recipe that would use up the entire bunch in one dish, which is why I made this asparagus soup!

You may be thinking that soup is the last thing you want now that temperatures are warmer, but the good thing about this particular soup is that it can be eaten hot or cold and it tastes great either way!


Another bonus is that the ingredient list is very minimal. The base of the soup is just water (although you could use vegetable broth for more flavour if you like), and the main ingredients are asparagus, onion, and garlic, with a bit of yogurt and lemon added at the end.

With such a simple soup, the flavour of the asparagus is really the highlight, which was what I was aiming for!

I tried eating it both hot and cold and I couldn't decide which version I liked better!  I appreciated the cold, creamy version as a light refreshing meal on a warm day, and I think I'll heat up my last serving for lunch today since it's a cool, rainy day and a warm bowl of soup would be nice!


Hot or Cold Asparagus Soup
Adapted from Food 52

1 tbsp olive oil
2 large cloves garlic, minced
1 yellow onion, diced
1 lb asparagus, divided
3-4 cups water (I used 3)
1/2 tsp kosher salt
1/2 tsp white pepper
1/2 cup plain low-fat yogurt, plus more for serving (could substitute vegan yogurt)
1 tsp lemon zest
1 tbsp lemon juice
Extra lemon slices for serving if desired

Break the woody stems off the asparagus. Reserve a few stalks to use as garnish and chop the rest into pieces.

Heat olive oil in a large pot over medium heat. Add garlic, onion and asparagus pieces and sauté for about 5 minutes, stirring occasionally, until the onion and asparagus have softened.

Add water, salt and pepper and bring to a simmer. Let simmer for 10-15 minutes, until asparagus is very soft. Remove from heat.

Transfer soup to blender in batches and puree until smooth. Add the yogurt, lemon zest and lemon juice and blend again. Taste and add more seasoning.

Serve hot, or refrigerate until cold and eat as a chilled soup. For the garnish, use a vegetable peeler to shave the reserved asparagus into thin slices. Top each serving with the asparagus shavings and an extra spoonful of yogurt if desired. 

Makes 3-4 servings.


January 29, 2013

Layered Sweet Potato Dip


With the Super Bowl coming up this weekend, I've been thinking about snacks that I could make to eat while watching the game. I'm not a big football fan by any means, but watching the Super Bowl is a tradition for me, and along with watching comes eating a meal of football food!

My traditional Super Bowl snack is usually a dip to eat with tortilla chips.  In the past, I've made an Indian inspired layer dip, my favourite plantain guacamole, and the standard layer dip that usually includes shredded cheese, sour cream, guacamole and salsa.
This year, I wanted to change things up a bit, and I found the perfect inspiration from Two Saucy Sisters blog, who put a unique spin on layer dip by adding a layer of mashed sweet potato.  I loved this idea, but I thought the sweet potato on its own might be a bit plain, so I decided to make a sweet potato hummus to use as one of the layers instead.


The sweet potato hummus came out super thick and creamy and was spiced up a bit with flavourful ingredients like garlic, lemon juice, and notes of cumin, cayenne and smoked paprika. And that's just one layer of this dip!

In addition to the hummus, you add a layer of mashed avocado with lime juice, then some salsa, and finally you top it off with plain yogurt. You can also add a sprinkle of chopped cilantro and a drizzle of sriracha sauce to give the dip even more of a kick.

This is actually really easy to put together, especially if you make the sweet potato layer ahead of time.  I loved how creamy the dip was and the way the layers mixed together when you dug in.  I think a great layer dip is one where each component tastes great on its own, but they come together to make something that tastes even better, and this dip definitely does that!

You can serve this in one larger dish for easier sharing, or divide it up into small cups to make fun individual dip portions, like I did. Just dig your spoon all the way to the bottom to get a bit of everything, and spread onto a tortilla chip - or just enjoy straight from the spoon!

If you're watching the game this Sunday, I hope you have fun cheering on your favourite team and of course cooking and eating lots of good food!  Also, I've set up a new Superbowl tag for some of the recipes on here that I think would make good Super Bowl food (like quesadillas, salsa, dips and fries), so feel free to check that out for more ideas!


Layered Sweet Potato Dip
Adapted from Two Saucy Sisters

*Note: I didn’t include specific amounts here – just use as much of each as you like, as long as you include approximately equal amounts of all four main components (sweet potato hummus, avocado mash, salsa, and plain yogurt or sour cream).

Sweet potato hummus (recipe below)
1 ripe avocado
1 tbsp lime juice
Salt and pepper
Taco seasoning (optional)
Prepared salsa (I used a mango salsa)
Plain yogurt (can substitute sour cream)
Fresh cilantro (optional)
Sriracha (optional)

First, make the sweet potato hummus (see instructions below). 

Next, make the avocado layer: Chop the avocado and place in a bowl. Give it a rough mash, then add the lime juice. Season with as much salt and pepper as you like, and sprinkle with taco seasoning. Continue mashing until smooth.

To serve in individual sized cups: Start by placing a large spoonful of the hummus in the bottom of each cup. Next, add an equal amount of the avocado mash. Top with as much salsa as you like. Finally, add a spoonful or two of plain yogurt or sour cream (Note: I added one more spoonful after taking these photos). Garnish with chopped fresh cilantro and a drizzle of sriracha if desired.

To serve in one container: Layer ingredients in the same order, spreading each one out to fill the container.

Serve with tortilla chips and spoons for scooping.


Makes enough for 4 individual sized cups. You will have lots of sweet potato hummus left over, so if you want to make more cups, just double the amounts for the avocado layer and use more salsa and yogurt.


Sweet Potato Hummus
1/2 lb sweet potato, peeled and cut into chunks
1 cup canned chickpeas, drained and rinsed
1 clove garlic, peeled and chopped
1.5 tbsp tahini
1.5 tbsp fresh lemon juice
1 tbsp olive oil
1/2 tsp cumin
1/4 tsp cayenne
1/4 tsp smoked paprika
1/8 tsp salt

Place sweet potato chunks in a steamer basket and steam, covered, until tender (about 10 minutes). Remove from heat but keep the cooking liquid aside.

Place cooked sweet potato and all remaining ingredients in a food processor and puree until smooth. If the mixture is too thick, add some of the cooking liquid from the sweet potatoes to thin it out (I added 1 tbsp). Taste and add more seasoning if desired.

Transfer hummus to a bowl and keep refrigerated.


January 07, 2013

New Years Eve Indian Feast

Last year on New Years' Eve, my family and I enjoyed a huge spread of Asian inspired food, including peanut noodles, mango salad, fresh rolls, lettuce wraps, dumplings, and more.  We liked it so much that my sister suggested doing a similar thing this year, but changing the theme.

The theme we decided on this year was Indian food and since I love Indian cuisine so much, I claimed the right to plan out our menu, which I wanted to share on my blog with you!

After last year's experience of spending all day on New Year's Eve in the kitchen, I wanted to use purchased ingredients as much as possible this time to limit the amount of work I'd have to do!  A couple of trips to ethnic shops got me all of the ingredients I'd need, and we ended up with a delicious spread with a nice variety of dishes.

Appetizers


First, we had a round of drinks and cold snacks as appetizers.  My sister made the Indian-inspired drinks to start off the evening, which were these fruity mango bellinis made with fresh mango puree and champagne - delish!


For the food, I knew I wanted to include bhel puri, a savory and spicy snack of puffed rice, crushed papdis, peanuts and crispy sev noodles (shown below). All you have to do to prepare this is buy a packaged mix of bhel puri (although you can make your own if you feel like it!), and stir in two kinds of chutneys (the mix comes with little packets of sweet and spicy chutneys) to add even more flavour. I also added some chopped tomatoes and cilantro after this pic was taken.


This is a good snack mix for sharing with a group of people - although it should be eaten immediately before it starts getting soggy from the sauces.

Another easy snack to put together was this masala papad - crispy pappadum that I cooked on the stovetop, topped with a mixture of tomato, red onion, cucumber, green chili, cilantro and spices. Just break it into pieces and enjoy as a refreshing appetizer!


And now for the highlight of the appetizers round - these dahi batata sev puri (I'm not exactly sure of the proper name for them, as I've seen them called many different names!). I bought a package of premade puri shells and broke holes into each one so that I could add the filling. The filling was a simple mixture of boiled potato and chickpeas with finely chopped red onion and chaat masala spice.  Here's a picture of the filled puri shells:


Next, I poured in a spoonful of cool plain yogurt into each one, followed by a spicy cilantro chutney and sweet date-tamarind chutney. The final topping was a bit of chopped fresh cilantro, some sev, and another sprinkling of chaat masala.  It took longer than I planned for filling each one, but luckily my sister came along to help out with the last few steps!


These were definitely everyone's favourite appetizer - they've got the perfect balance of sweet and spicy flavours that explode once you pop the whole thing into your mouth! If you want to try making them yourself, here's one of the guides that I followed.

Finally, I also made a raita to serve along with the appetizers. I followed this recipe for rainbow raita from Vegetarian Times, except I replaced the mint with cilantro. This cool and soothing dip was much appreciated  once all of our mouths were set on fire from the spicy food!


Hot Food

After the appetizers, it was time for some cooked Indian food!

I considered making my own samosas, but figured I should save the time and effort by buying some fresh samosas from the local Indian food store instead (they were still homemade, but by someone else!)


I bought two kinds of vegetarian samosas - the smaller ones were filled with spinach and paneer cheese, and the bigger ones were the more traditional potato and pea filling. I thought both kinds were delicious, especially served with tamarind and cilantro chutneys!


For the homemade food, I put together two vegetarian main dishes. First were these skewers of paneer cheese and peppers, marinated in a creamy tikka masala sauce and cooked on the stovetop. They were pretty easy to make, especially since I cheated a bit by using a premade sauce, and they tasted great too - I loved the soft, crumbly paneer!


I also made a tofu dish using a recipe from one of my new cookbooks, Vegan Eats World.  Slices of pressed tofu were marinated in a yogurt sauce with lots of spices (this time I did make the sauce from scratch!)  and baked in the oven along with lots of sliced red onion on top.


I'm not sure if this dish is authentic tandoori, or if you could even find something similar in India, but all that mattered to me was that it tasted good! If I had to choose a favourite out of the hot dishes, this would be it. I thought the texture of the tofu was perfect, and I loved the flavours. Too bad I was already full by this point so I only ate a couple pieces of it (but I did get to enjoy the leftovers afterwards)!


Since this post is already getting long, I'll try to summarize the rest of our meal without pictures!  Along with the tofu, we had tandoori chicken kebabs for the non-vegetarians that were marinated in the same sauce as the tofu.

I also heated up some storebought naan bread (another time saver, although I would have preferred homemade!), and made some basmati rice that I ate with more raita mixed in.

Overall, it was a great meal and a delicious way to end 2012!  And if you have any questions about any of the dishes, feel free to leave a comment - I just didn't want to make this post too long by giving detailed instructions for each dish!

July 23, 2012

Recipe Round-Up: Popsicle Ideas!

With the sweltering heat we've been having so far this summer in Ontario, I've been wishing more every day that I had a pool in my backyard to cool off in.  But since I'm not that lucky, a more affordable way for me to beat the heat is by making my own popsicles!

I finally bought my first popsicle mold at the start of the summer and I've already made good use of my purchase, having made five different kinds of popsicles for myself so far. I usually make small batches of 2-4 popsicles of each flavour, so that I can even have two different types of popsicles in my freezer at the same time.

Some of the flavours I've tried have been really simple and don't really require a "recipe", so I thought that instead of doing separate blog posts for each one, I'd combine them all into one post with ideas for five different kinds of popsicles you can easily make yourself at home if you have a mold.

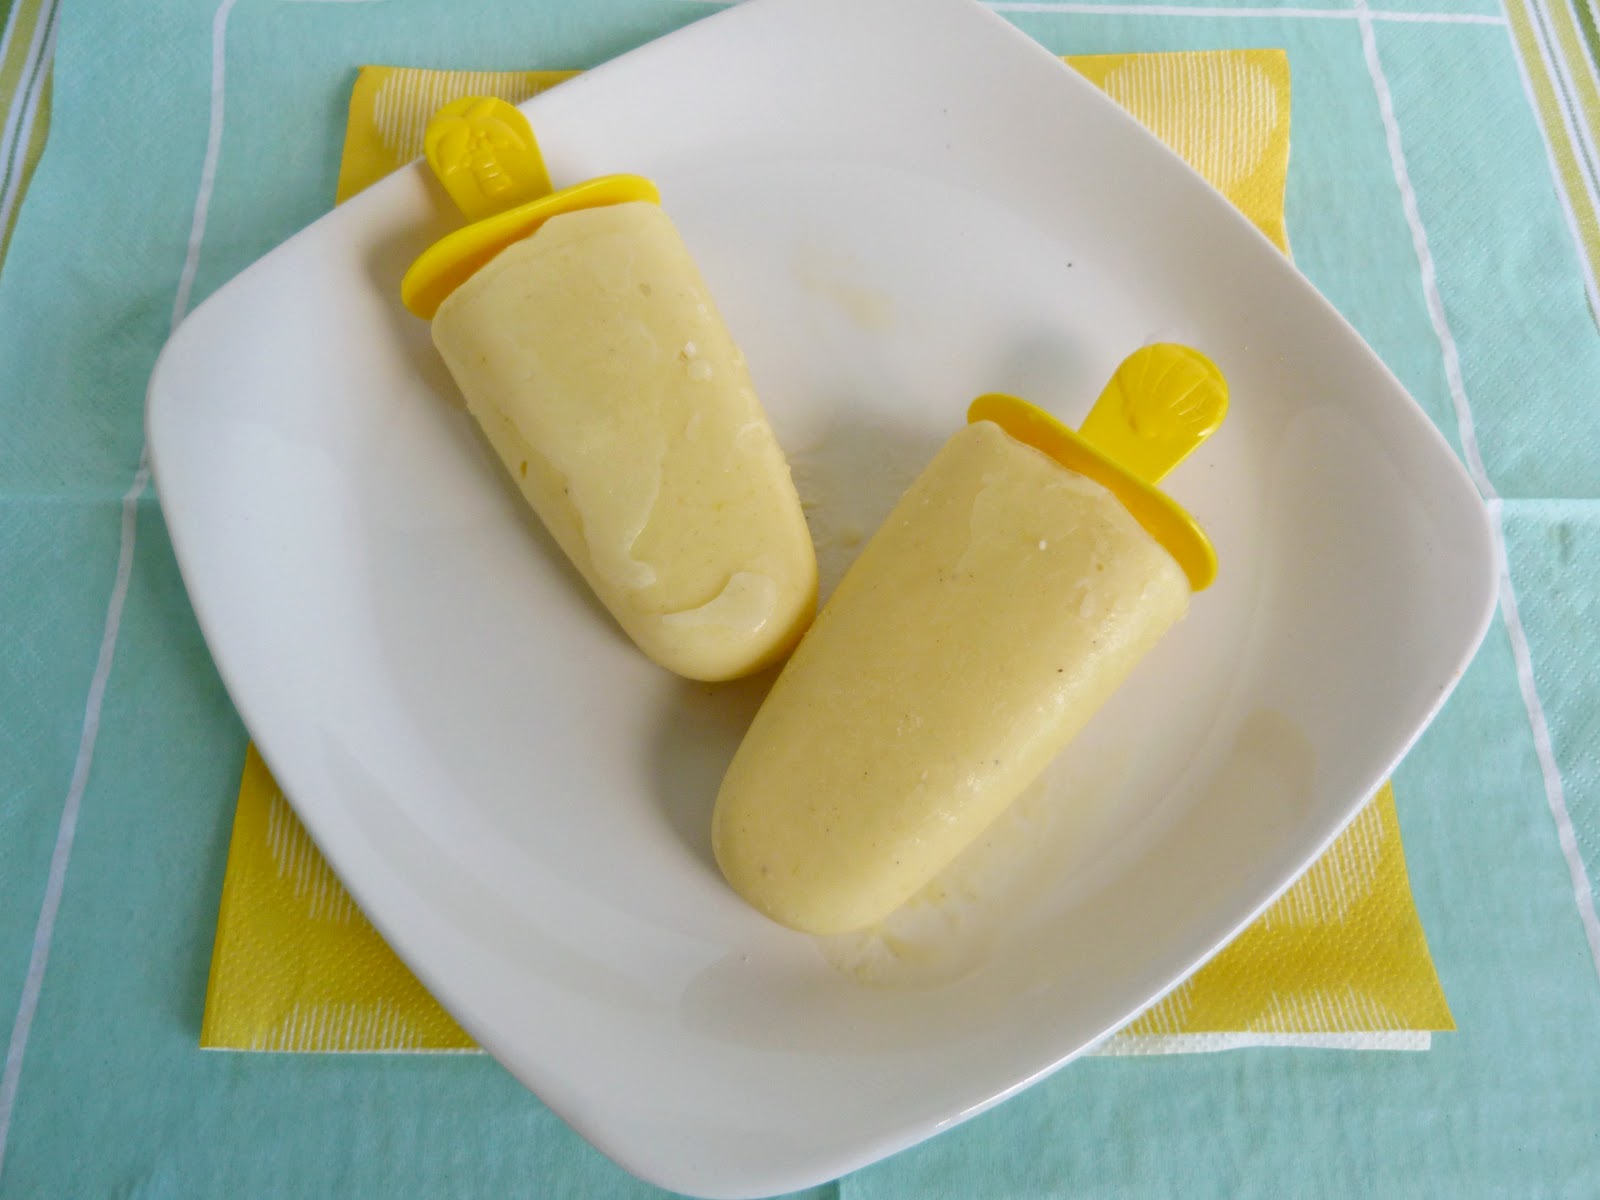
1. Mango Lassi Popsicles


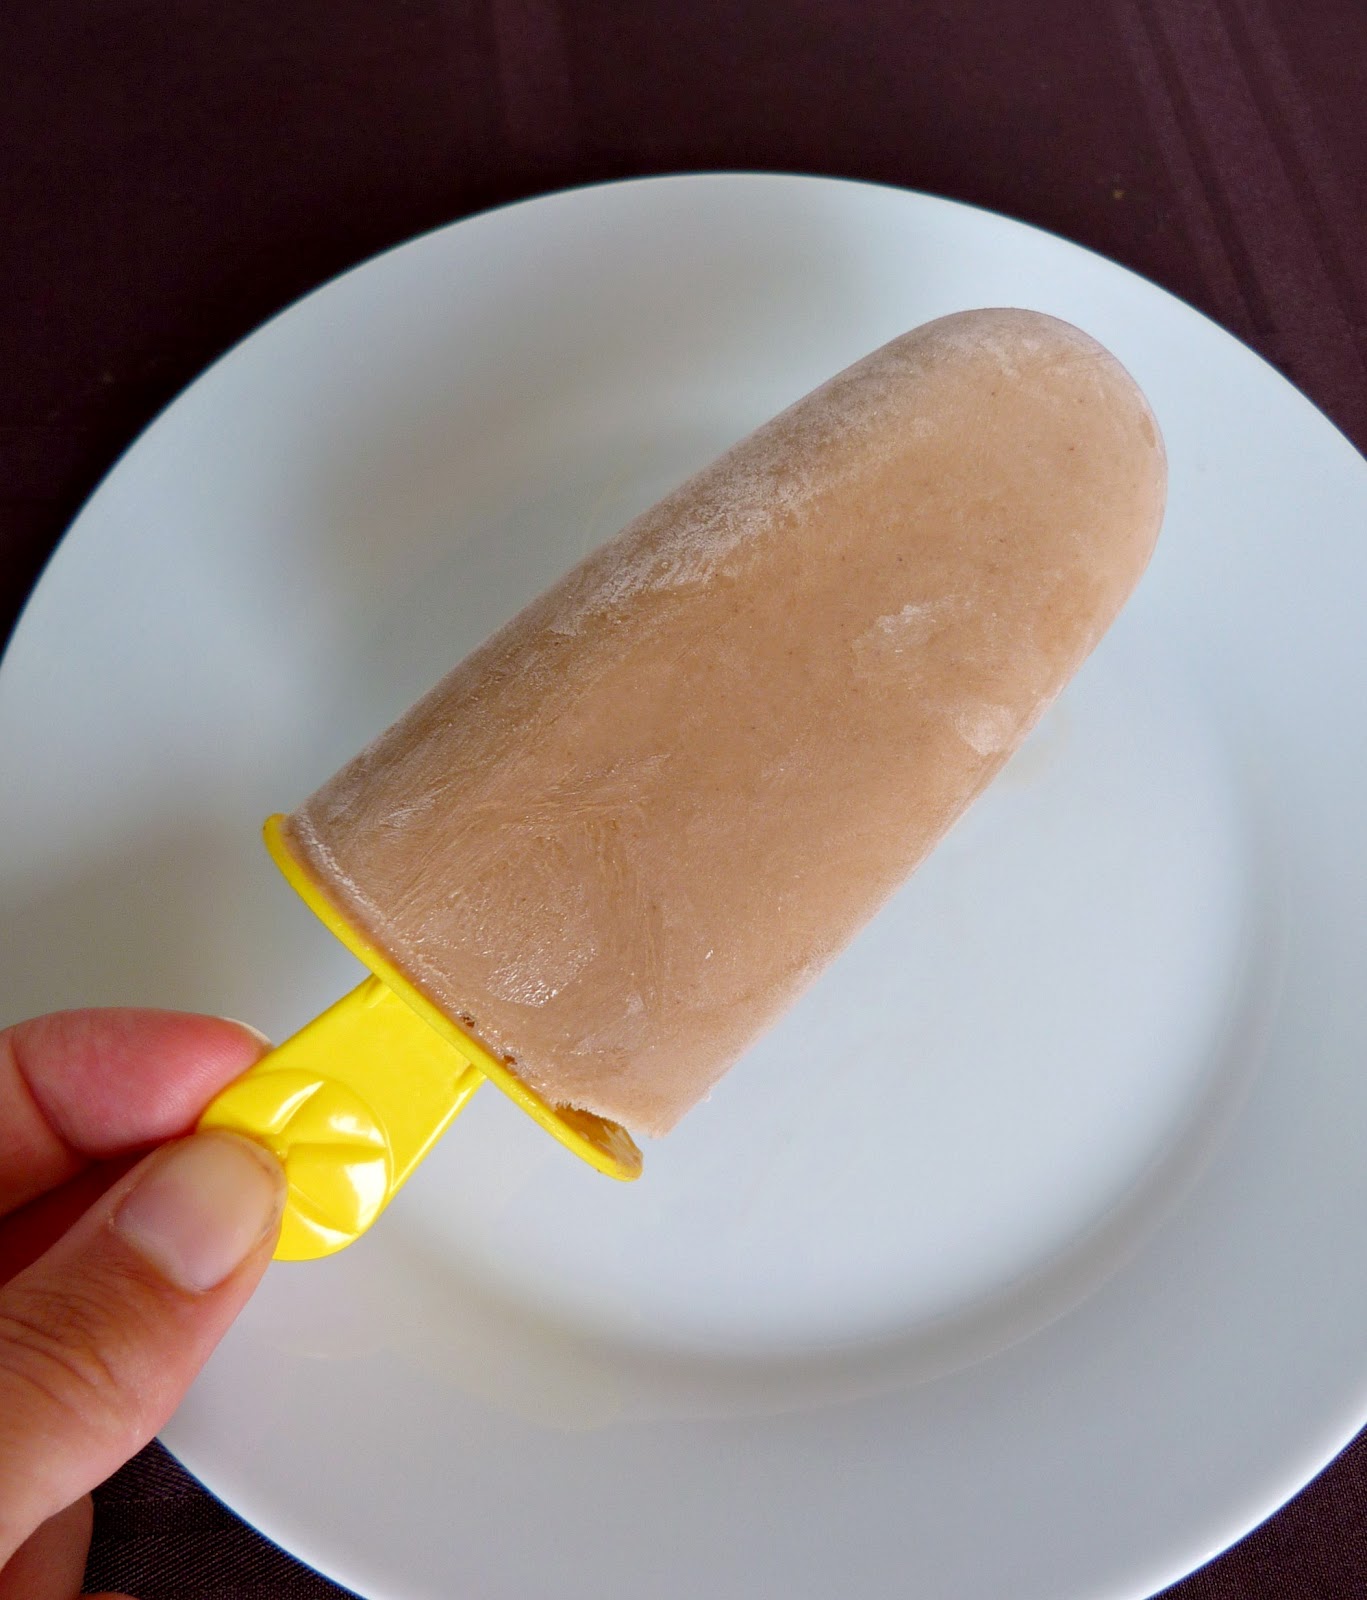
The first popsicles that I made were these mango lassi popsicles, and I've already made a second batch!  I found the recipe for these on Desserts for Breakfast and made a couple of minor changes, like using almond milk and honey instead of the sugar. If you ever have leftover mango, these popsicles are a great way to use it up! They were super creamy from the yogurt, and even though they didn't taste quite the same as an authentic mango lassi drink, I still loved them!

2. Cantaloupe & Mint Popsicles


Next up was these cantaloupe-mint popsicles.  I was inspired to make them with my leftover ingredients from this cold cantaloupe-mint soup, and it turned out those flavours worked just as well together in a popsicle!  They were very juicy, and more of an ice-pop texture as opposed to the creamy mango ones.  I will warn you, however, that these are more of a grown-up popsicle - I wouldn't recommend adding the mint if you plan on making these for kids.  You also have to like cantaloupe, since that's the dominant taste in these popsicles, and I know I lot of people have strong feelings against cantaloupe!

If you'd like to try these, here's the recipe I followed:

Cantaloupe-Mint Popsicles
2 cups chopped cantaloupe
1 tbsp lemon juice
½ tbsp chopped mint leaves
1 tsp honey
Dash of ginger


Add all ingredients to a blender and puree until smooth. Pour mixture into a popsicle mold and freeze until solid.

Makes 4 large popsicles 

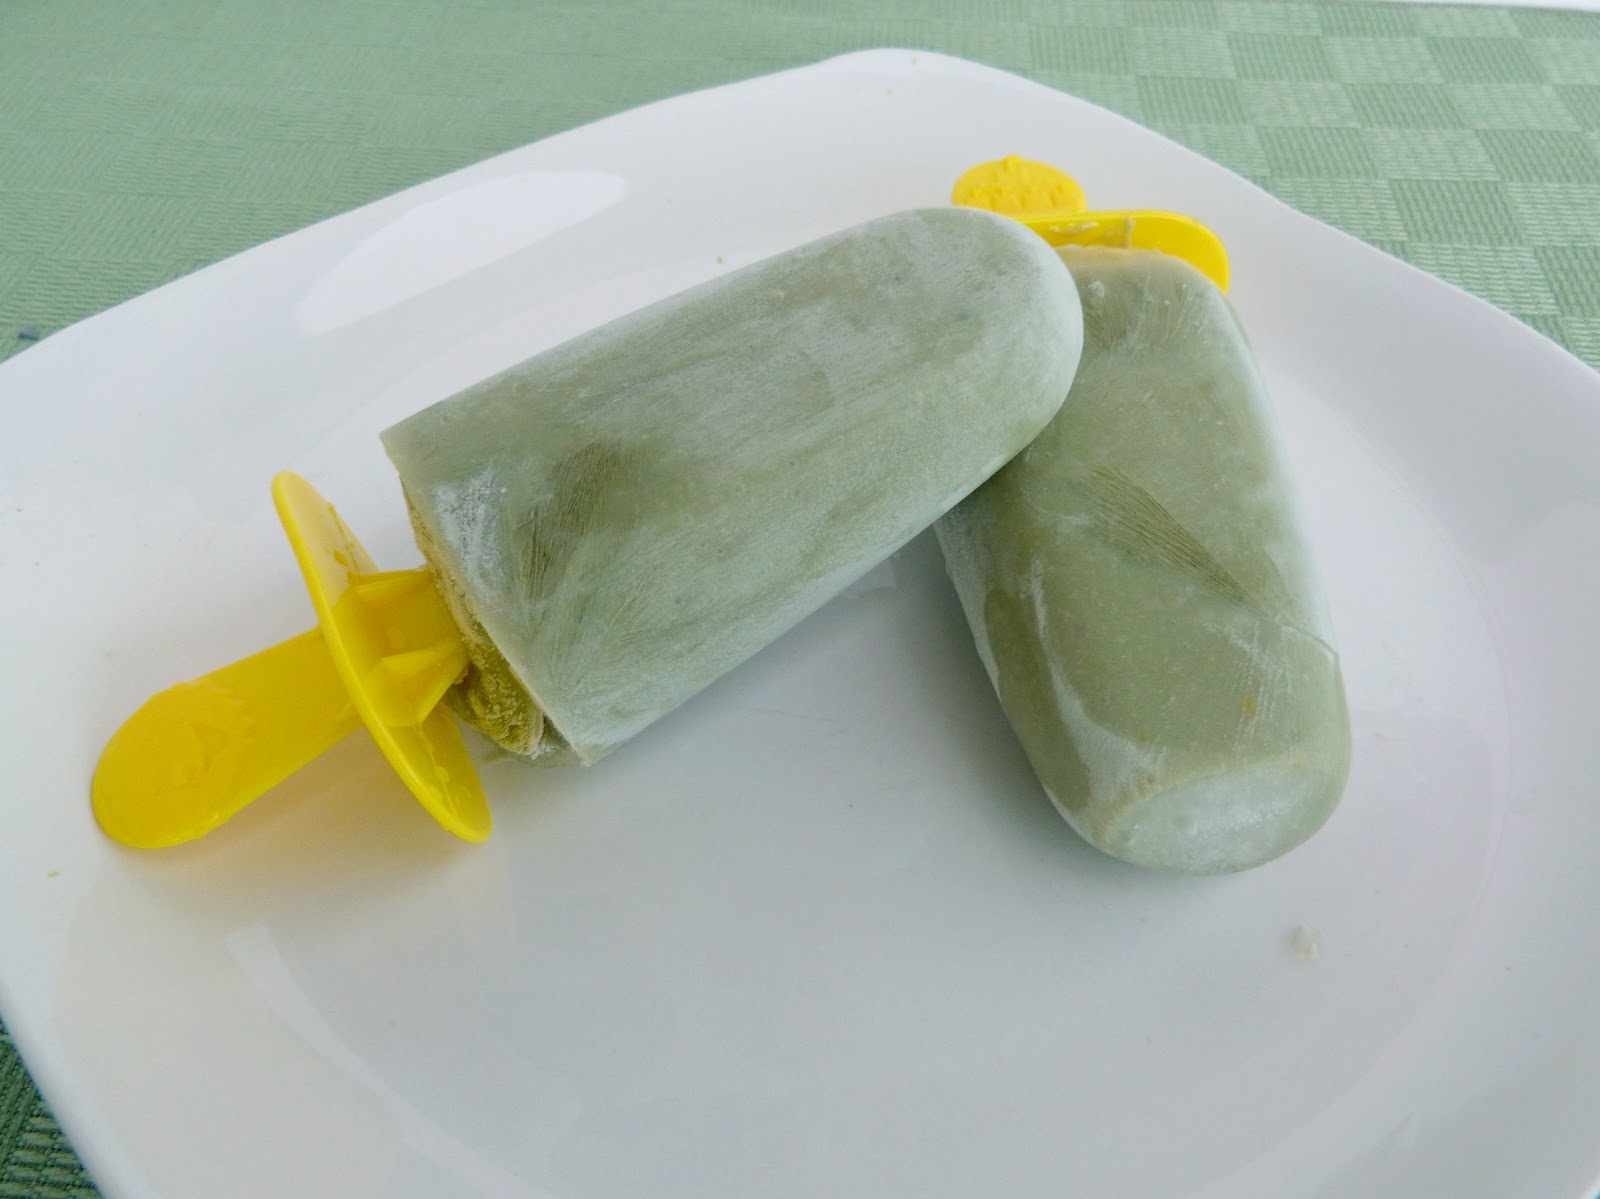
3. Matcha Yogurt Popsicles


Another recipe that turned out better than I expected was these matcha yogurt popsicles, which I found on All Day I Dream About Food. I only made a third of the recipe, and I didn't have quite enough yogurt so I had to substitute some almond milk instead.  They still turned out nice and creamy, and I loved the way the green tea flavour came through without being too strong, and it was complemented well by the lemon juice, sweetener (I used powdered stevia), and vanilla yogurt. If you're a fan of matcha, you should definitely make these!

4. Chocolate Coconut Water Popsicles


Since I had seen popsicle recipes made from pretty much every type of drink or liquid, I started wondering whether I could just freeze coconut water into a popsicle mould to get the ultimate refreshing and hydrating frozen popsicle! I bought a bottle of my favourite kind of coconut water - Zico Chocolate - and poured some into a couple of my popsicle molds.  I also tried adding a splash of coconut milk beverage to the remaining molds (about 2 tbsp per 1/2 cup of coconut water), to see if adding coconut milk would improve the texture.

They came out just as I was hoping - they had all the taste of the chocolate coconut water, but in a solid icy form!  Both of my versions worked out well, but I preferred the ones that had the extra coconut milk added to them. I haven't tried making popsicles out of unflavoured coconut water, so if anyone has tried that, let me know how you like them!

5. Coconut Chai Popsicles


Finally, my favourite popsicles that I've made so far were these coconut chai popsicles.  All I did was heat equal amounts of So Delicious coconut milk beverage and canned coconut milk on the stove and once it was simmering, I whisked in some instant chai powdered beverage mix (1 tbsp of mix per 1/2 cup of liquid).  Once the powder is fully dissolved, let the mixture cool and then pour into popsicle molds.

These came out so soft and creamy, similar to a fudgsicle texture, and I loved the sweet coconut and chai flavours. If you don't have instant chai mix, you could try just adding a mixture of actual chai spices like ginger, cinnamon, nutmeg and cardamom, but I haven't tried this myself so I'm not sure if the spices would be too strong this way.


I can't wait to try out more flavors of popsicles before the summer ends! I've already started thinking of ways to incorporate some of my other favourite ingredients like bananas, avocado and nut butter, and now that local peaches are in season, I'll definitely have to make some peach popsicles!

Hope you're all staying cool too!

February 06, 2012

Pretty in Pink Pasta (aka Beet Pasta)


Now that Super Bowl is over, it's time to post some Valentine's recipes!

Valentine's Day doesn't really have much significance for me, but I still like to celebrate it by watching romantic movies (hence the title of this post) and making treats to fit the holiday theme!  This year, I made two recipes (a dinner and dessert) that both feature a secret ingredient to make them a beautiful Valentine's pink ... beets!

For my dinner recipe, I made this pasta with a colourful beet sauce.  The beets are first roasted in the oven and then pureed with yogurt, lemon, garlic and spices to make a creamy and flavorful coating for the noodles. I also added some toasted pine nuts and fresh parsley on top of my pasta, which I thought made it more special and enhanced the presentation factor, but you can leave the pine nuts out for a more budget-friendly dish.

Since I love beets in any form, especially the flavor of roasted beets, it was no surprise that I loved this pasta! But if you do decide to make this for someone special, make sure they're a fan of beets first because they are definitely the star of this dish!

Stay tuned later this week for my Valentine's dessert with beets!


Beet Pasta
Adapted from Moderate Oven

4-5 oz dried pasta - wide noodles like fettucine or pappardelle work best (make sure they are egg-free for a vegan dish - I used durum wheat ribbons in parsley-garlic flavour)

2 medium beets
1 tbsp olive oil
2 cloves garlic, peeled and minced
1 tbsp lemon juice
1/4 cup low-fat plain yogurt (or soy yogurt)
1/2 tsp cumin
Pinch of cayenne pepper
Salt and pepper
2-3 tbsp pine nuts
about 1/4 cup chopped fresh parsley for garnishing


First, roast the beets. Wrap whole beets in tin foil and place on a baking sheet. Cook in the oven at 400° for about 60 minutes, until they are tender. When the beets are done roasting, peel and slice off the ends. Cut into quarters, then place in a blender.

In a small skillet, heat the olive oil over medium heat. Add the garlic and cook for about 30 seconds, until lightly browned. Transfer the contents of the skillet to the blender with the beets.  Add the lemon juice, yogurt, cumin, cayenne, and a pinch of salt and pepper to the blender.  Puree until you have a smooth sauce. 


Meanwhile, cook the pasta in a large pot of boiling water according to the package directions. Drain and set aside.

Toast the pine nuts in a dry skillet for a few minutes, until they are lightly browned and fragrant.

To serve, toss the cooked pasta with the beet sauce.  If the sauce and pasta have already cooled, you can heat a large skillet on the stove, then toss the pasta and sauce together in the skillet and heat until warm.  Top with toasted pine nuts and fresh parsley.

Makes 2 servings. 

December 27, 2011

Grilled Sweet Potato & Avocado Sandwich


Hope everyone had a wonderful Christmas! I had a great weekend spent with my family eating lots of delicious food! Our tradition is to prepare lots of small appetizers for Christmas Eve instead of a big meal, and for my contribution I made some stuffed dates, these chai-spiced roasted almonds from Healthful Pursuit and these rosemary apricot chickpea bites from spabettie.

Then on Christmas morning, we enjoyed our annual overnight stuffed blueberry french toast that my mom makes (topped with some coconut agave syrup that Santa brought me!), followed by a family dinner later that evening. I was stuffed by the end of the night, but in a good way!

I'm also enjoying being on holidays and having plenty of time to just relax and be lazy. Another bonus of being on holidays is that you can prepare a freshly made lunch that can be eaten right away, so its my chance to make things I wouldn't normally get to eat for lunch!


This sandwich is one of the lunches I made on a recent day off. I had half an avocado to use up, and I couldn't get the idea of a grilled avocado sandwich out of my head. I also happened to have part of a sweet potato in my fridge, so I decided to mash it and spread it on the sandwich too.

A simple avocado-sweet potato combination would be great on its own, but I also added a quick sauce made of tahini, yogurt and lemon juice. I think tahini pairs really well with both avocado and sweet potato, but you could easily leave it out or substitute a different sauce (I'm thinking mango chutney would be delicious too!)

This is an easy and fairly quick sandwich to put together, and being able to eat a warm toasted sandwich hot off the stove definitely made this a more memorable lunch than usual!


Grilled Sweet Potato & Avocado Sandwich
2 slices of bread (I like to use multigrain)
Coconut oil
1/2 an avocado, peeled and sliced
1/2 a sweet potato (about 4 oz)
1 tbsp plain low-fat or soy yogurt 
1 tbsp tahini
1/2 to 1 tsp lemon juice
Salt and pepper

Peel the sweet potato and microwave on high until soft (about 3 minutes). Once it is cool enough to handle, mash it until smooth.

Mix the yogurt, tahini and lemon juice in small bowl (start with the smaller amount of lemon juice, then taste and add more if desired). Add some salt and pepper.

Heat a small skillet on the stove over medium heat. Spread a bit of coconut oil on one side of each piece of bread (this will be the outside of the sandwich). On the other side of one piece, spread the mashed sweet potato. Spread the tahini sauce on the other piece of bread. Lay the avocado slices over the sauce. Season generously with salt and pepper.

Put the sandwich together carefully. Place in the preheated skillet and press down with a spatula. Grill each side for about 1-2 minutes. Remove and slice in half. 

Makes 1 sandwich.

September 19, 2011

Yellow Split Pea Salad


Before the Fall season officially starts in just a few days, I have one more recipe from this summer to post!

I have cooked yellow split peas a number of times when making dhal and soups, but I had never tried them in a salad before. Then when I saw a recipe for a yellow split pea, tomato and avocado salad on Taste of Beirut, I thought it sounded so good and couldn't wait to try it!

I changed the recipe slightly by using grape tomatoes instead of chopped tomatoes, dried parsley instead of fresh (only because I didn't have any), and I added some chopped peanuts for extra texture.

The result was a rich, creamy and delicious salad! It was actually very filling for a vegetarian salad. I also though the tahini dressing went really well with it, and I loved how colourful the ingredients looked together before I mixed in the dressing:


Yellow Split Pea Salad
Adapted from Taste of Beirut

1/2 cup dried yellow split peas
heaping 1/2 cup grape tomatoes, halved
1 avocado, diced
1/4 cup chopped parsley (or use about 1/2 tsp dried parsley)
2-3 tbsp roughly chopped unsalted peanuts (optional)

Dressing:
2 tbsp tahini
2 tbsp plain low-fat yogurt
2 tbsp lemon juice
2 tbsp olive oil
1-2 garlic cloves, minced
pinch of cumin
salt and pepper to taste

Bring about 2 cups of water to a boil in a medium saucepan. Add the peas and reduce heat to medium. Cook for about 25 minutes, until softened (they should be soft enough to chew, but still firm enough that they would not mash easily). Note: keep an eye on the pot during the last half of cooking time - if the water starts to dry up, add some more to prevent the peas from burning or sticking to the bottom of the pot.

Drain the peas and rinse with cold water. Place the peas in a large bowl, and add the diced tomato, avocado, and parsley.

In a separate bowl, stir together all of the ingredients for the dressing. Pour the dressing over the salad and mix well. Add more seasoning if necessary.

Garnish with the chopped peanuts, if desired.

Makes 2 servings.

LinkWithin

Related Posts Plugin for WordPress, Blogger...