Showing posts with label blueberries. Show all posts

July 15, 2014

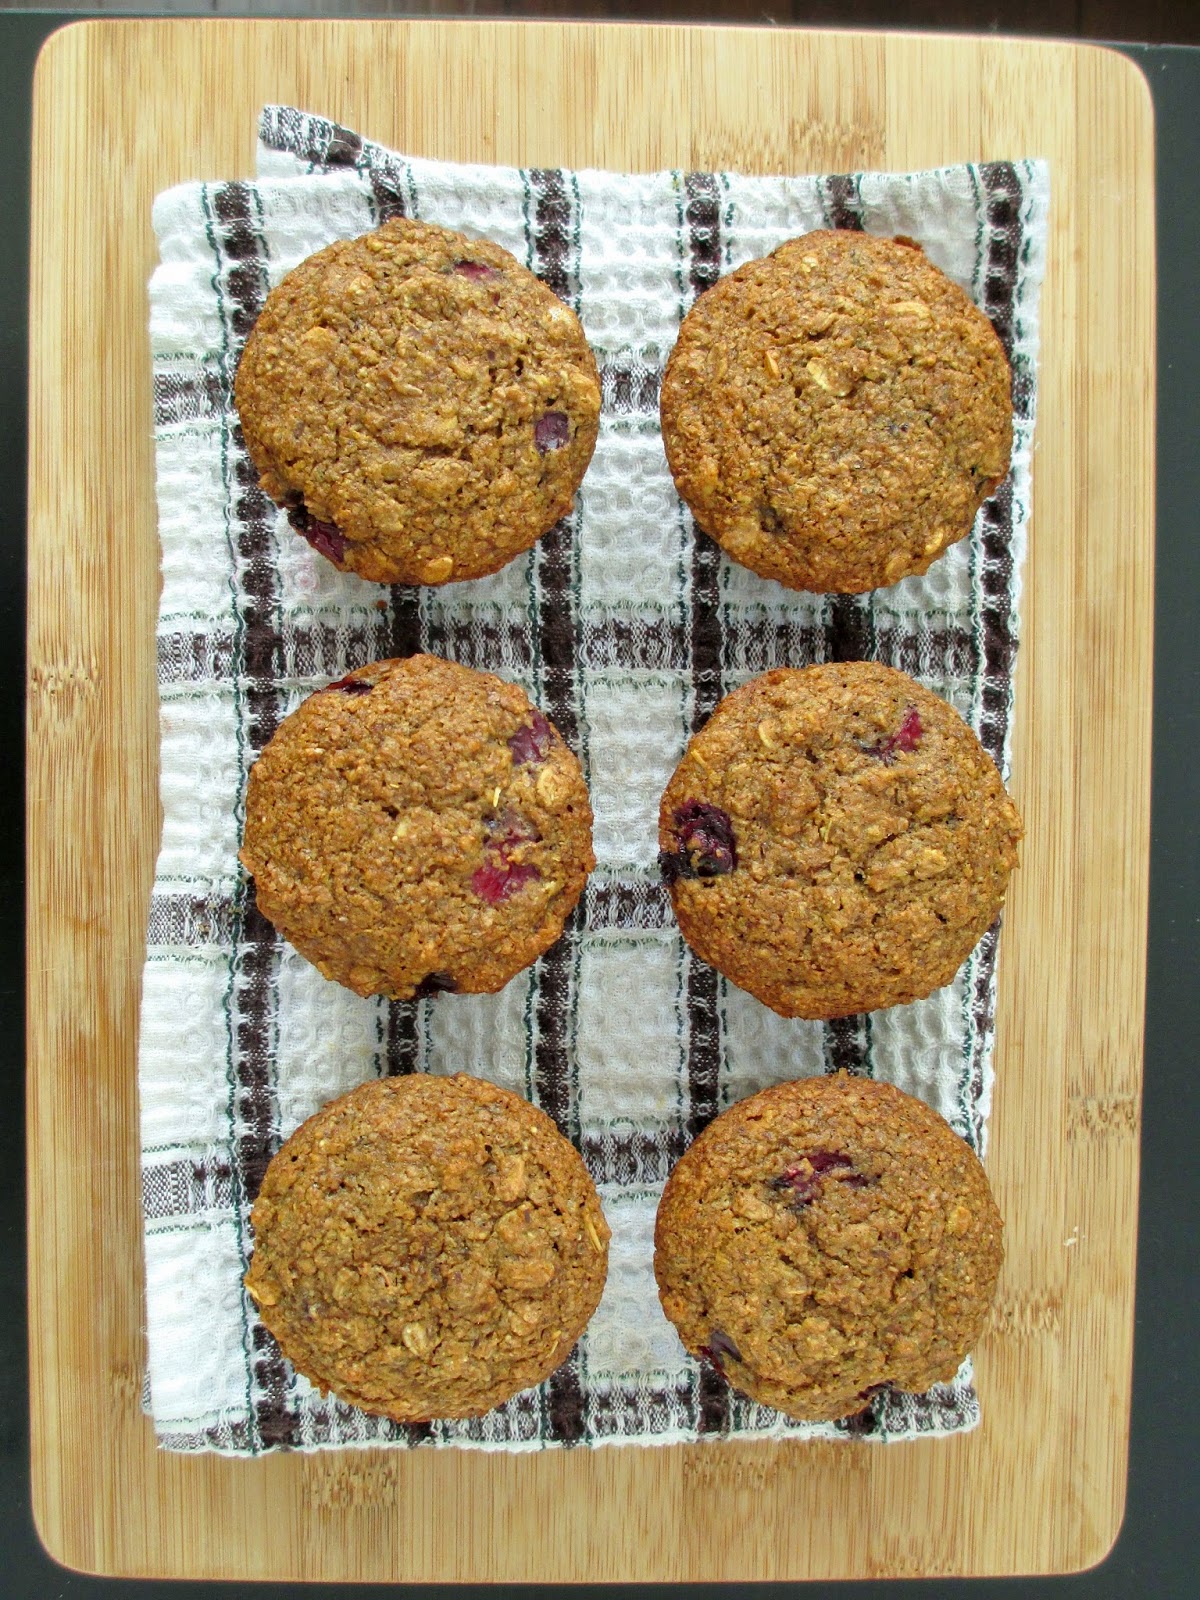
Cherry Blueberry Bran Muffins


Hope you're not sick of cherry season yet, because I've got another cherry recipe to share with you today! After making my roasted cherry brownies, I still some more cherries to use up, so I thought they would be the perfect addition to some healthy breakfast muffins.

I'd had my eye on a recipe for blackberry bran muffins from the Straight From the Earth cookbook, so I used that recipe as my inspiration for these cherry blueberry muffins!

Besides using different fruits, I made a few other minor changes to the recipe, including the method of mixing the ingredients, and reducing the sugar a bit. I also added a touch of maple extract to add a bit more sweetness along with the fruit.


The bran was definitely the dominant flavour in these, so if you like bran muffins, you will love the flavour and texture of these muffins.

I liked how they tasted a bit nutty, they weren't too sweet, and they were just dense and hearty enough without being too filling. Of course, my favourite part was all the blueberries and cherries in every bite!

While bran muffins may not be the most popular muffin on the block, I ended up liking them a lot more than I was expecting to! And besides, if I'm going to eat a muffin for breakfast, I want it to still be somewhat nutritious, so I can feel good about eating one of these in the morning - my only complaint was that they were a little on the small side, but they still make a great addition to a smoothie or yogurt!


Cherry Blueberry Bran Muffins
Adapted from Straight From the Earth cookbook, as seen here

1 cup almond milk
1 tbsp vinegar or lemon juice
2 tbsp ground flax
1/4 cup warm water
2 cups wheat bran
1 1/4 cups whole wheat pastry flour
1/2 cup rolled oats
1 tsp baking powder
1 tsp baking soda
1/2 tsp cinnamon
1/2 tsp salt
1/2 cup sugar
1/2 cup unsweetened applesauce
1/4 cup melted coconut oil (can substitute another oil)
1 tsp vanilla extract
1/2 tsp maple extract (optional)
1/2 cup chopped fresh cherries (pit removed)
1/2 cup blueberries


Preheat oven to 350°F and spray a 12-cup muffin tin with cooking spray.

In a medium sized bowl, stir together the almond milk and vinegar and let sit for 5-10 minutes. In a separate small bowl, stir together the flax and water and let sit 5-10 minutes as well.

In a large bowl, whisk together the wheat bran, flour, oats, baking powder, baking soda, cinnamon, and salt.

Add the sugar, applesauce, oil, and extracts to the almond milk mixture and stir well to dissolve the sugar. Add the flax mixture and stir again. Pour wet ingredients into the dry ingredients and stir gently just until the dry ingredients are incorporated. Fold in the cherries and blueberries.

Divide batter into muffin cups, then bake in the preheated oven for about 25-30 minutes, until the muffins feel firm on top and a toothpick inserted into the centers comes out clean. Remove from oven and let cool in the pan for at least 5 minutes before removing muffins and transferring them to a wire rack to finish cooling.

Makes 12 small muffins.


June 04, 2014

Blueberry Banana Snack Cake


I can't believe it's already June, but I'm so excited because that means not only will summer officially begin this month, but local summer fruits and veggies will be here soon too! I only just had my first rhubarb treats this past weekend (a delicious strawberry rhubarb pie that my sister made, and a rhubarb sauce that I made to eat on toast and in yogurt), and I can't wait for strawberries to arrive next!

Two years ago, I made a healthy strawberry banana snack cake that I really loved, so when I was looking through my old recipes for inspiration the other day, I wanted to try that cake out again.

This time, since local strawberries weren't available yet, I decided to use blueberries instead. I made a couple of other small changes to the recipe, like replacing the spelt flour with oat flour for a slightly different flavour and texture, adding cinnamon, a bit of lemon juice and zest, and a touch of coconut oil, and leaving out the nuts and extra sugar to make this cake less sweet.


I had mentioned in my original post that I thought blueberries would work well in this cake, and now I can say for sure that they do!

I loved the way all the fruit bursts after baking, and the blueberries paired perfectly with the coconut and banana flavours. I also love the chewy, dense texture of this cake, and how light it tastes at the same time - so you can easily eat a couple pieces for a mid-morning or afternoon snack!

As I mentioned in my last post, I'm still getting used to a new oven, so my cake browned just a tad too much even at the minimum baking time. Just be sure to keep an eye on yours, and in the meantime I'll have to test my oven temperature!


Blueberry Banana Snack Cake
Adapted from my previous recipe for Strawberry Banana Snack Cake

1 cup whole wheat flour
1 cup oat flour (I ground my own rolled oats in the blender)
1/2 cup unsweetened shredded coconut
1 tsp cinnamon
1 tsp baking powder
3/4 tsp baking soda
1/2 tsp salt
3 ripe medium-sized bananas, mashed
1/3 cup unsweetened applesauce
1/4 cup pure maple syrup*
1 tbsp melted coconut oil
1 tsp lemon zest
1 tbsp lemon juice
1 tsp vanilla extract
1 cup blueberries

*Note: You may want to add an extra 2 tbsp of sugar or cane sugar if you prefer a sweeter cake. 


Preheat oven to 350°F. Spray an 8x8 pan with cooking spray.

Whisk the dry ingredients in a large bowl (flours through to salt). In a separate bowl, mix the wet ingredients (mashed banana through to vanilla extract).

Add the wet ingredients to the dry ingredients and stir just until the dry ingredients are incorporated.  Gently fold in the blueberries.

Pour batter into prepared pan and bake in the preheated oven for about 35-45 minutes, until the sides start to brown and pull away from the pan, the top feels firm, and a toothpick inserted into the center of the cake comes out clean.

Let cool in the pan for a few minutes, then invert onto a wire rack to finish cooling before cutting into squares.

Makes about 16 squares. 


July 23, 2013

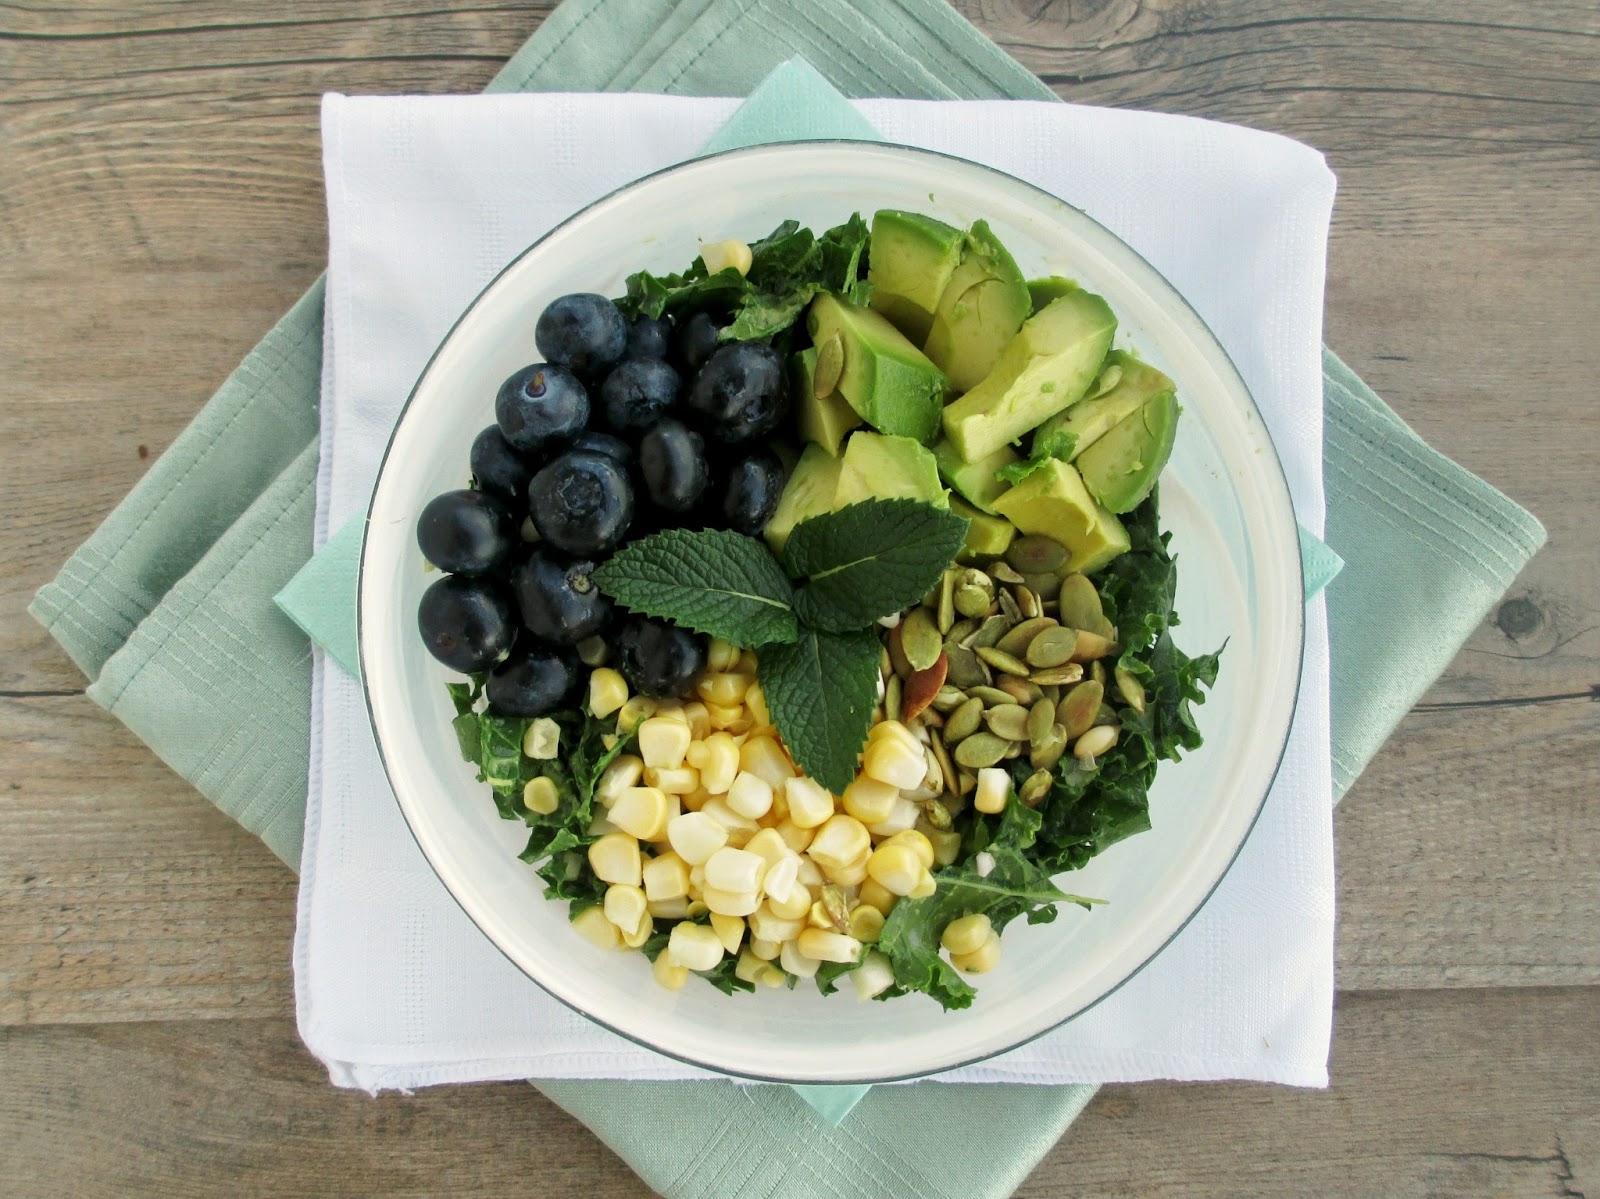
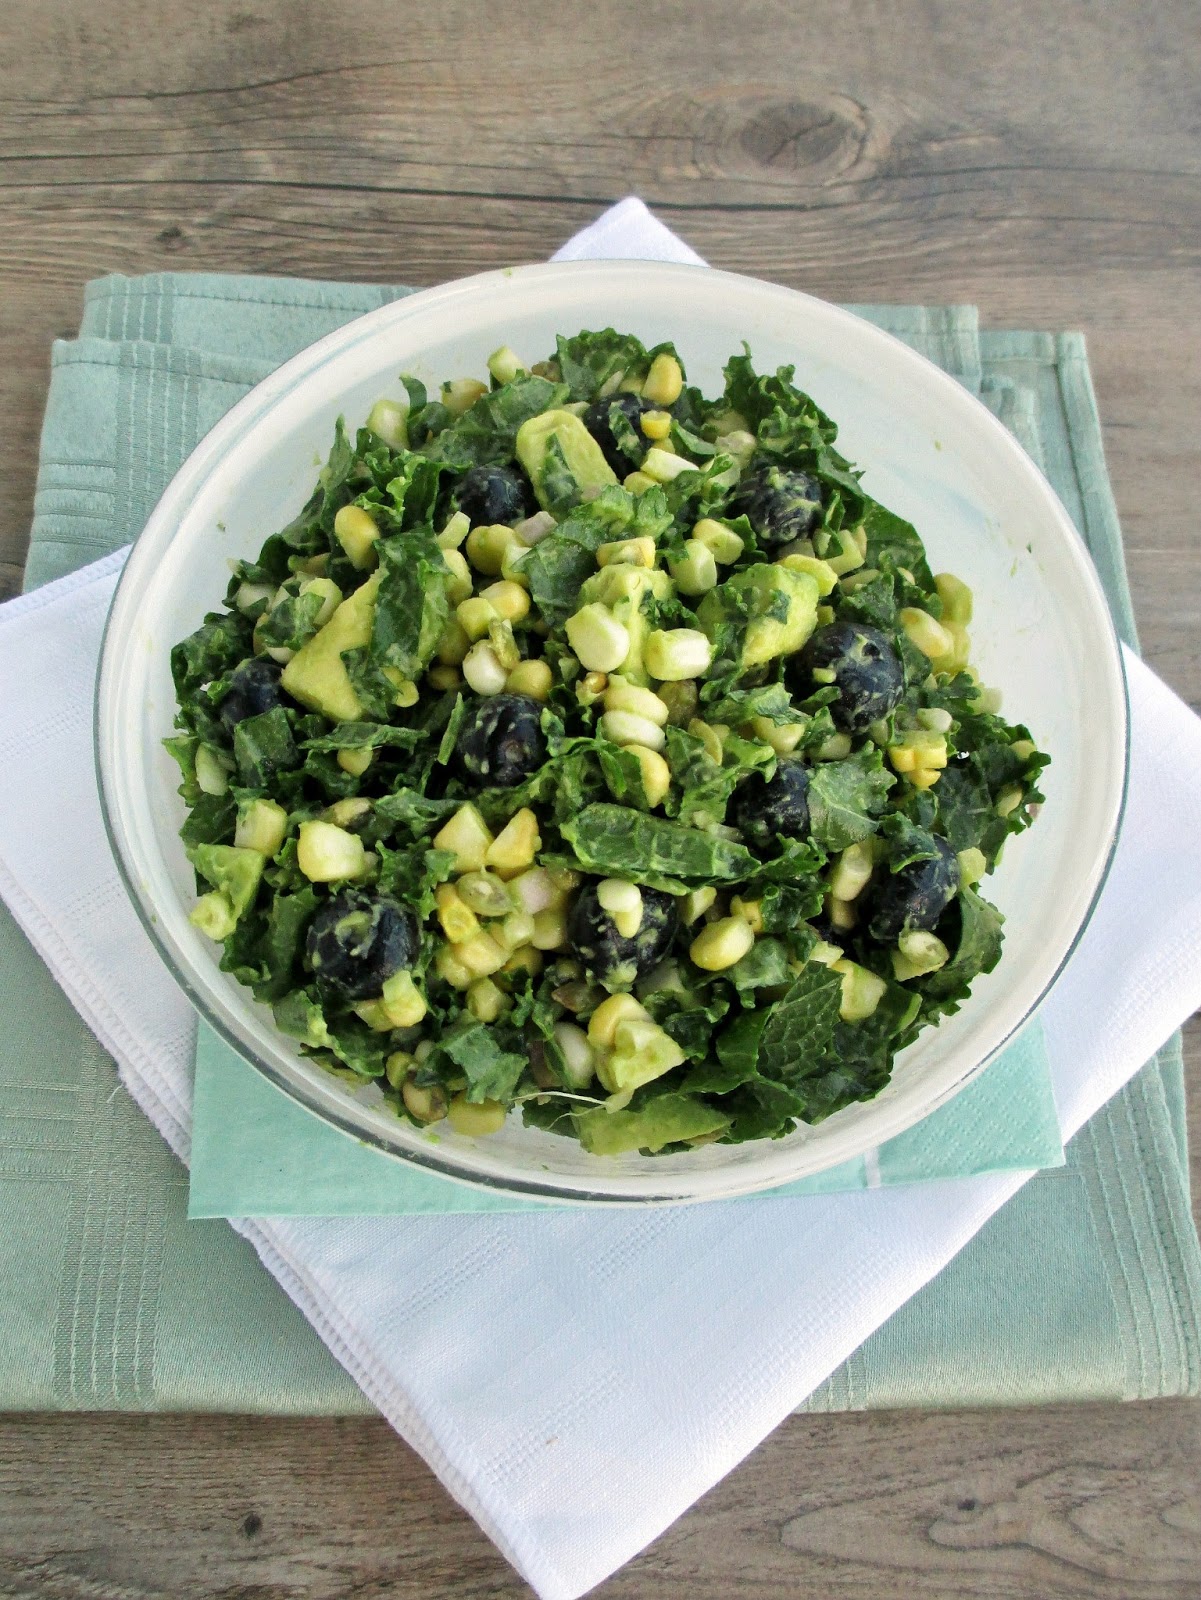
Corn, Avocado & Blueberry Kale Salad


I know I've been posting a lot of blueberry recipes lately, but when Ontario fruits are in season, I try to use them in as many ways as possible before they're gone!

My last two blueberry recipes were both breakfast items, so today I'm sharing a recipe for a salad featuring blueberries along with fresh corn, avocado, kale, mint, and pumpkin seeds.


I first discovered the combination of corn and blueberries last summer after trying a version of this salad from Two Peas and Their Pod. I thought the natural sweetness of fresh corn off the cob paired well with blueberries and their shapes and textures complemented each other too.

This summer, I wanted to make my own version of a corn and blueberry salad. I considered just making a really simple salad of those two ingredients, but instead I wanted to bulk it up a bit more so I used shredded kale as the base of the dish and added an avocado in both the dressing and the salad itself to make it a bit more filling.

The dressing is a simple oil-vinegar-agave mixture but with pureed avocado to make it thick and creamy, mint leaves for a refreshing note and some minced shallot for a bit of a bite.


Once you've made the dressing, the rest of the salad can just be quickly thrown together - I didn't even bother to cook the corn first, since I wanted the kernels to keep their firm texture in the salad. If you've never tried raw corn before, I recommend eating it that way!

I love salads that have lots of different layers of texture like this one, from the juicy blueberries to the creamy avocado, with some crunch from the raw corn and toasted pumpkin seeds. I also love salads that are filling enough to eat as a main course for dinner, and this one fits that criteria too!

I have a feeling I'll be posting more corn recipes soon, since I just heard that Ontario corn is now available - yay!


Corn, Avocado & Blueberry Kale Salad

Dressing
1/2 a ripe avocado (you'll use the other half in the salad)
1 tbsp chopped fresh mint
Juice of half a lime
1/2 tbsp white wine vinegar
1/2 tbsp olive oil
1/2 tsp agave nectar or other sweetener
1-2 tbsp water
Herbamare (or salt) and pepper
1 small shallot, minced

Salad
~2.5 cups shredded kale
2 tbsp pumpkin seeds
1 cob sweet corn (I prefer it raw in this recipe but you can cook it first if you like)
1/2 cup blueberries
1/2 a ripe avocado, diced
~10 small mint leaves, thinly sliced


To make the dressing, place the first six ingredients in a blender or food processor and puree. Add enough water so that you can puree the ingredients until smooth (it should still be thick). Season to taste with herbamare and ground pepper. Stir in the minced shallot. Set aside.

To make the salad, place the shredded kale in a large bowl. Add about half of the dressing and massage it into the kale with your hands.

Toast the pumpkin seeds in a dry skillet on medium heat for a few minutes, until they are fragrant and lightly browned. Remove from pan and add to the kale. Slice the kernels off the corn and add them to the bowl, along with the blueberries, avocado, and sliced mint. Add the rest of the dressing and stir until is everything is mixed well. Season with additional salt and pepper if desired.

Makes 1 large serving or 2 smaller servings.


July 16, 2013

Blueberry Breakfast Muffins with Quinoa


This past weekend, I did my first blueberry picking of the season (and actually, my first blueberry picking in years - I can't remember the last time I did that!).  Since the blueberries had just become ready, I was worried that they wouldn't be very good yet, but I was wrong!

They were perfectly sweet, and I had a hard time stopping myself from eating them right off the branches. Actually, the only thing that stopped me from staying and picking all the blueberries (besides how much it would cost) was the insane heat wave we've been having here in Southern Ontario these past few days, which has been keeping me from spending too much time outside lately.

But with this heat, I'm craving refreshing fruit all the time, so it's a good thing that blueberries, cherries, and raspberries are just coming into season here now!


Besides just eating them on their own, one of my favourite ways to eat blueberries is in muffins. I'm not a huge fan of blueberry desserts like pie or cobbler, but I love biting into muffins bursting with juicy blueberries.

I actually made these muffins before the local ones were available, but they still turned out so good that I wanted to share them now, so that you can go make them with those fresh local blueberries (although I know they're not in season for all of you right now)!

The recipe for these muffins was adapted from BitterSweet blog. I loved her idea of adding quinoa to make breakfast muffins even healthier and full of protein so that they can sustain you a bit longer.

As usual, I made some changes to the recipe to suit my own tastes, like adding lemon juice and zest instead of orange juice, reducing the sweetener, using pecans instead of walnuts, and adding some buckwheat flour for a deeper flavour.


I loved the texture of these muffins - they were dense and hearty, with some chewiness from the cooked quinoa and a bit of crunch from the pecans. They weren't very sweet either, which meant those bursts of juicy blueberries really stood out even more! 

The muffins didn't rise much in the oven so they turned out to be a bit on the small size, making them a good snack muffin or a pretty healthy breakfast along with some fruit or yogurt. 

I can't wait to try out more blueberry recipes before their season is over!


Blueberry Breakfast Muffins with Quinoa
Adapted from BitterSweet

1/4 cup dry quinoa + 1/2 cup water
3/4 cup whole wheat pastry flour
1/4 cup buckwheat flour (can substitute with another flour)
1/4 cup rolled oats
1/2 tbsp ground flax
1/2 tsp cinnamon
1/2 tsp baking powder
1/4 tsp baking soda
1/4 tsp salt
1 tsp lemon zest
1/4 cup chopped pecans
1/2 cup blueberries
1 small ripe banana, mashed
1/4 cup almond milk
2 tbsp pure maple syrup (add 1-2 more tablespoons if you like a sweeter muffin)
2 tbsp fresh lemon juice
1/2 tsp vanilla extract
Turbinado sugar (optional)

First, prepare the quinoa: Bring 1/2 cup water to a boil. Add the quinoa and cook on low heat, covered, for about 15 minutes. Remove from heat and let sit for 5 minutes, then remove lid and fluff with a fork. You should have about 1 cup cooked quinoa (it's okay if you have a little less).

Preheat oven to 375°F and prepare a muffin tin by spraying with cooking spray.

In a large bowl, whisk together the flours, oats, flax, cinnamon, baking powder, baking soda, and salt. Add the lemon zest and pecans and whisk again. Gently stir in the blueberries.

In a separate bowl, mix the mashed banana, almond milk, maple syrup, lemon juice, and vanilla. Stir in the cooked quinoa.  Pour this wet mixture into the bowl of dry ingredients and gently mix with a rubber spatula just until all of the dry ingredients are incorporated.

Divide batter into prepared muffin tin, filling each cup almost full (mine filled 7 muffin cups). Sprinkle the tops with a bit of turbinado sugar if desired (this will make the tops crunchy). Place muffin pan in preheated oven and bake for 22-25 minutes, until a toothpick comes out clean and muffins feel firm on top. Let sit in the pan for a few minutes before transfering the muffins to a wire rack to cool.

Makes 7 small muffins.


July 09, 2013

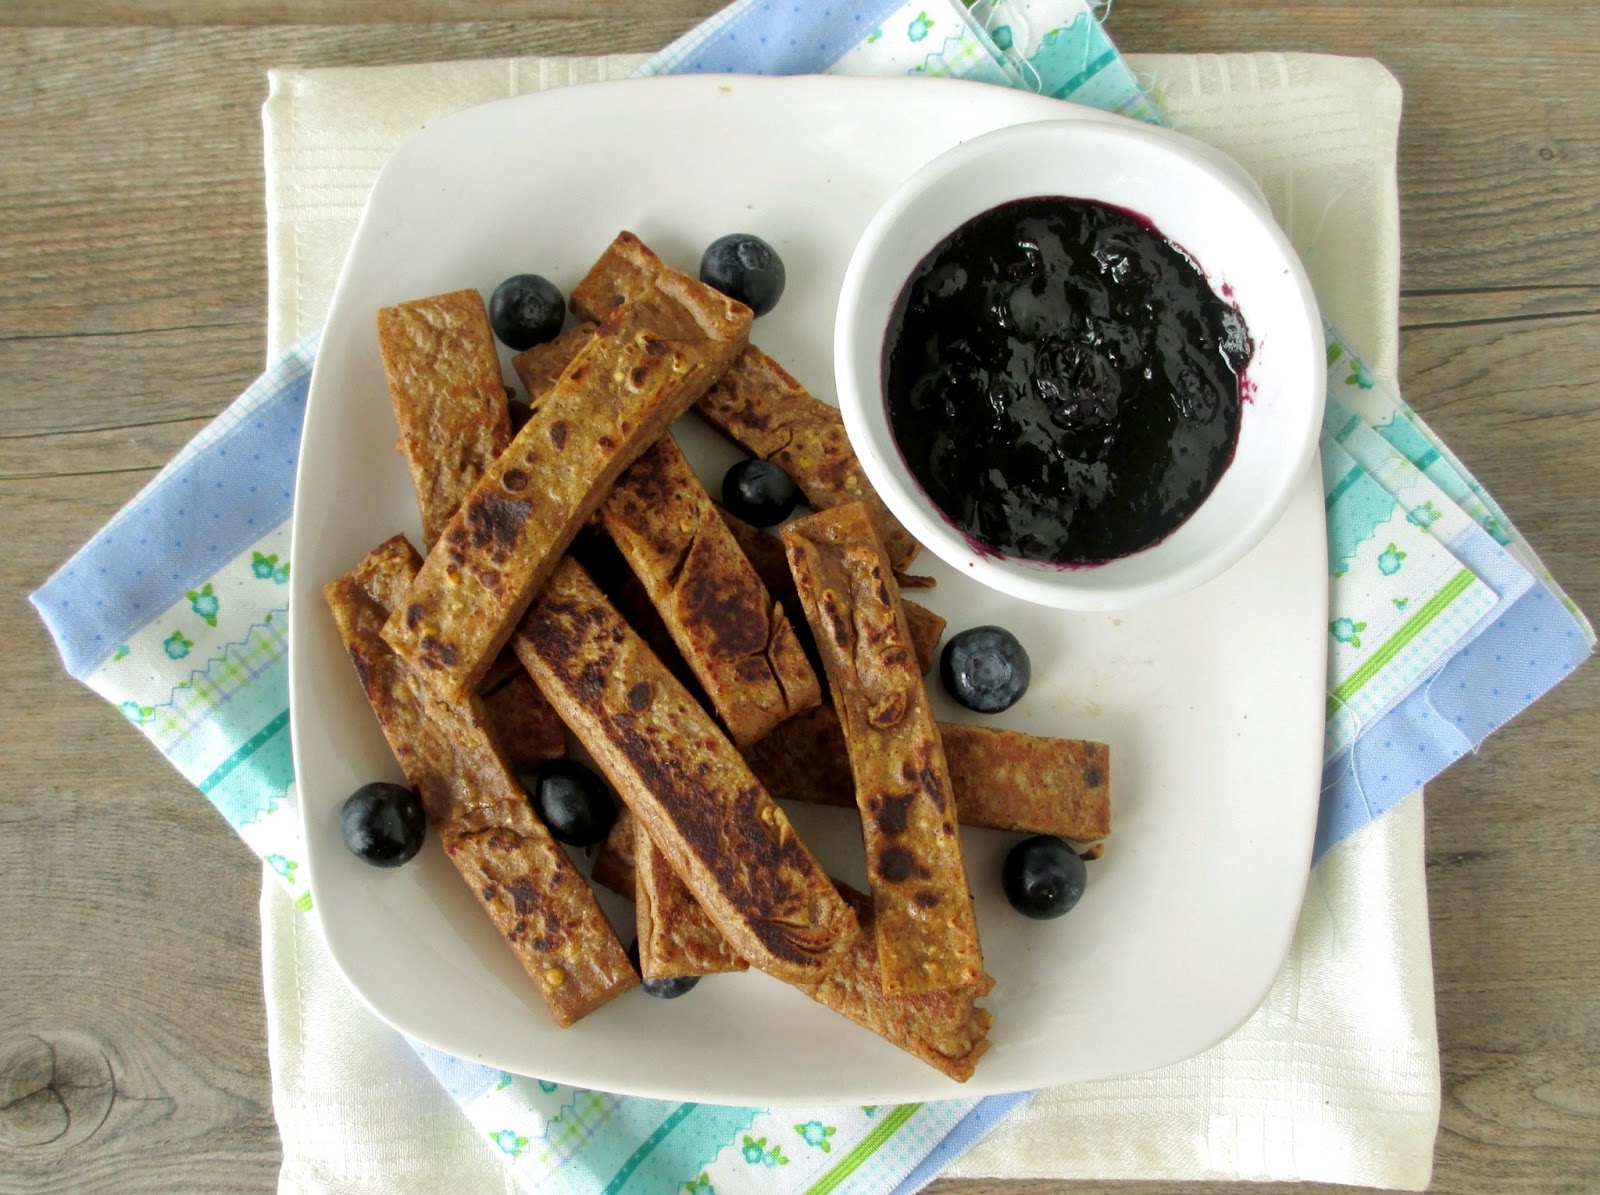
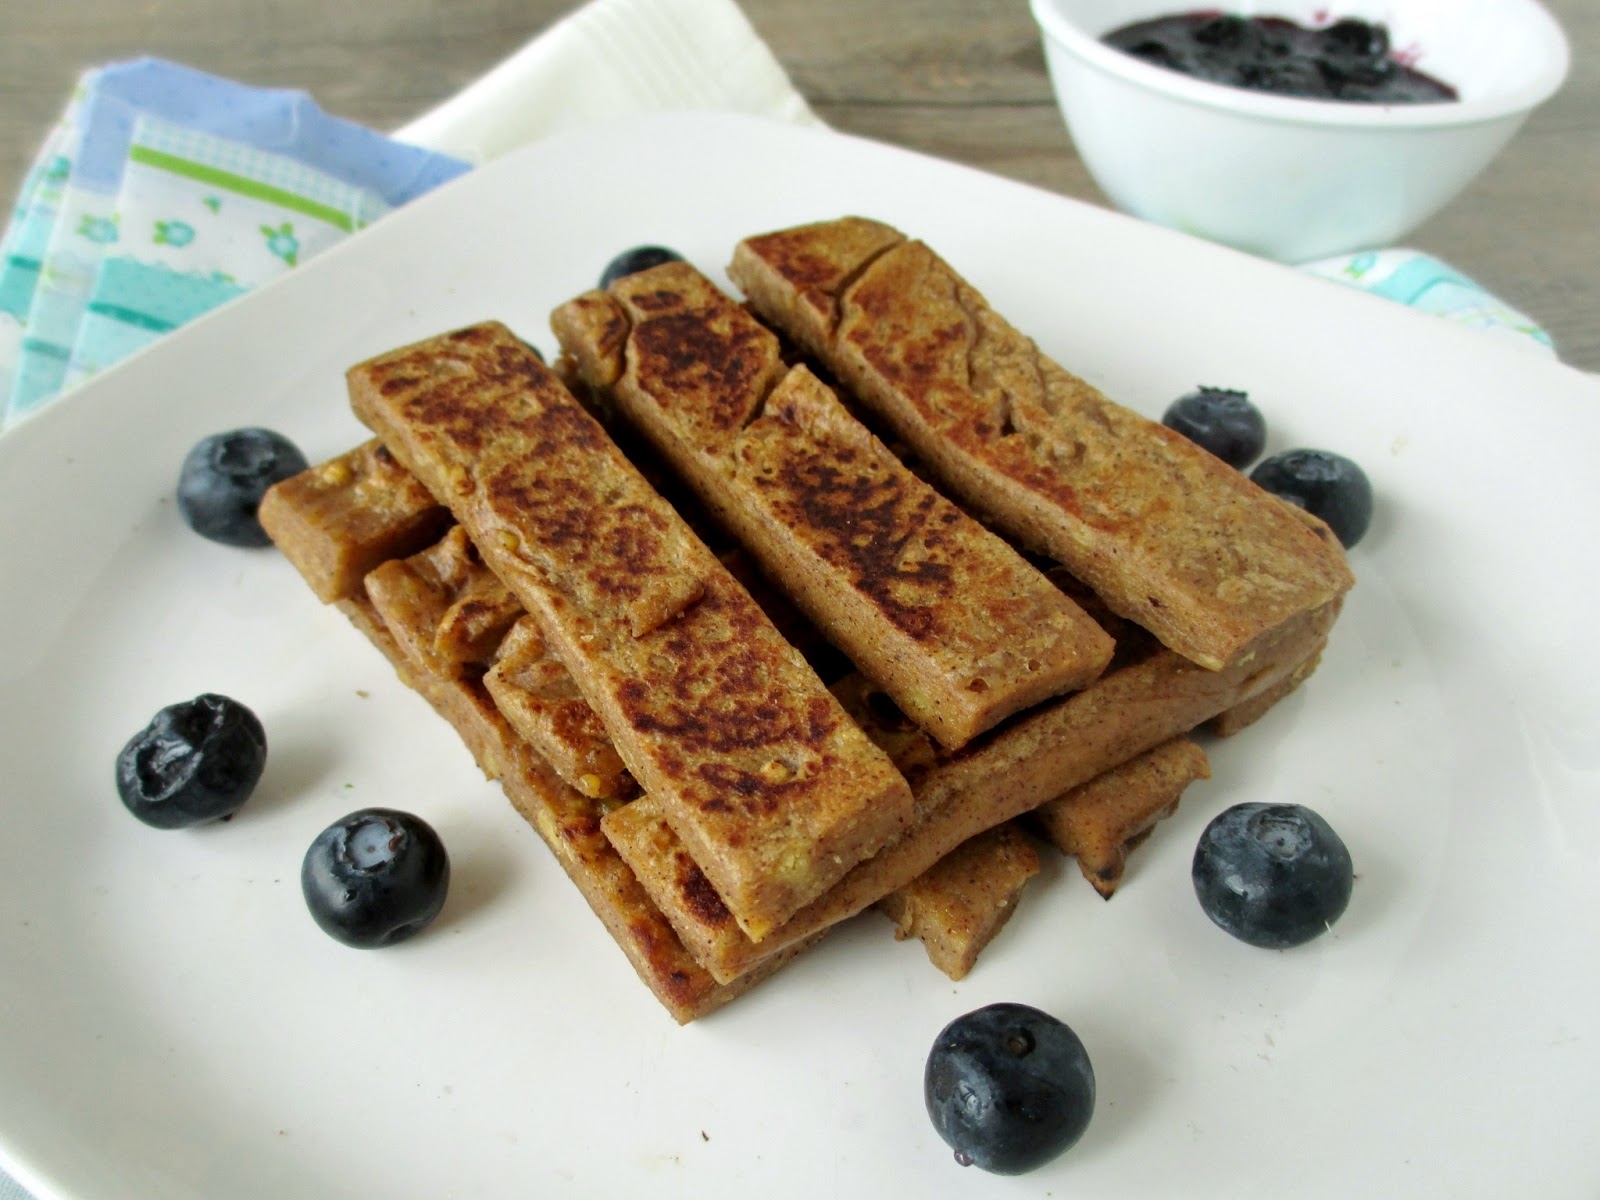
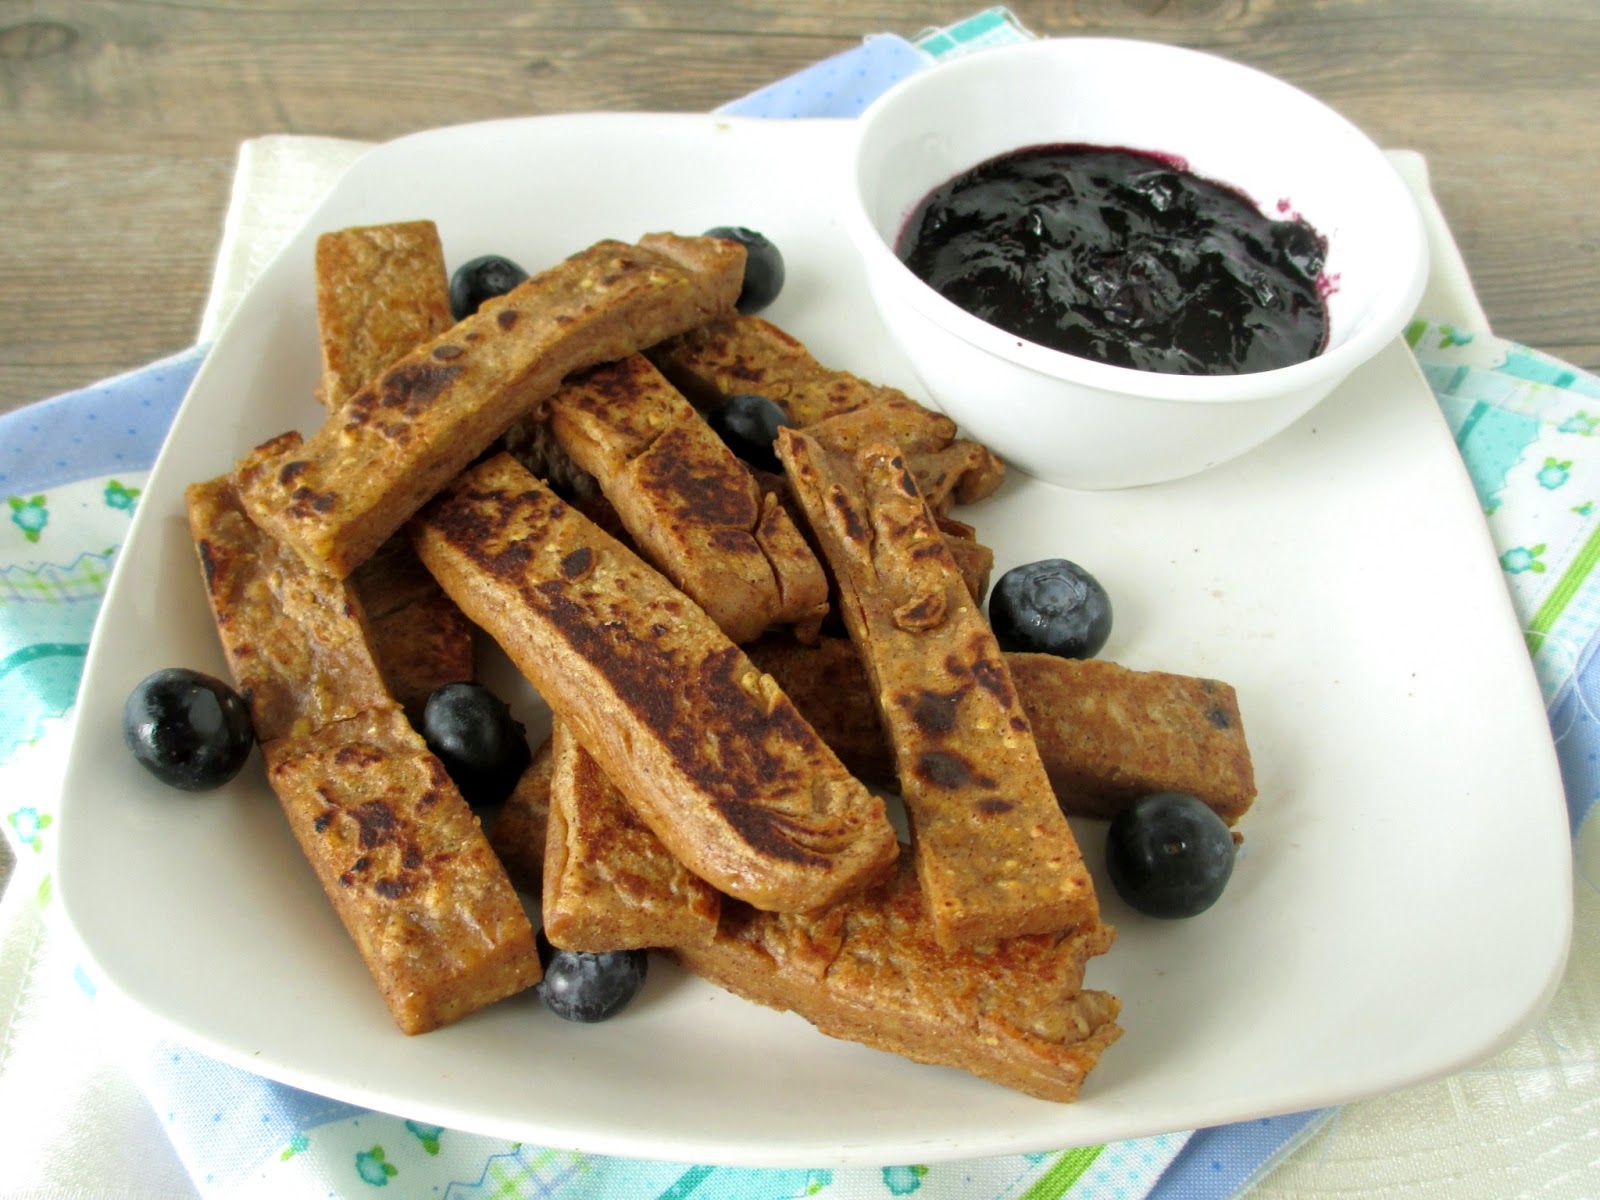
Breakfast Chickpea Fries with Blueberry Sauce


I don't post a lot of breakfast ideas on my blog, mostly because my breakfasts are typically pretty boring! I'll usually bring some yogurt with fruit and granola to eat when I get to my office, or if I have some homemade muffins or other baked goods stored in my freezer, I'll grab one of those to go. 

Occasionally though, I'll make the effort to prepare something a bit fancier on the weekend, like pancakes or french toast. This past weekend, I tried something new that turned out to be one of the most interesting and tasty breakfasts that I've had in a while!


I saw a recipe for french toast polenta sticks on the blog Tasty Yummies recently and thought it was such a creative idea to make a sweeter version of baked polenta "fries" that could be eaten for breakfast.

That recipe inspired me to try out a similar idea with chickpea flour instead of polenta. I've made chickpea flour "fries", also called panisse, many times in the past - they were actually one of the first recipes I posted on my blog! The basic idea is that by whisking chickpea flour into a simmering liquid on the stovetop, you can create a batter that thickens up just like polenta, and can then be cut into shapes and baked or fried.

My original version of chickpea fries was a simple mixture of chickpea flour, water, oil, salt and pepper, so to make a breakfast version, I used almond milk for the liquid and added cinnamon and vanilla extract to the batter.


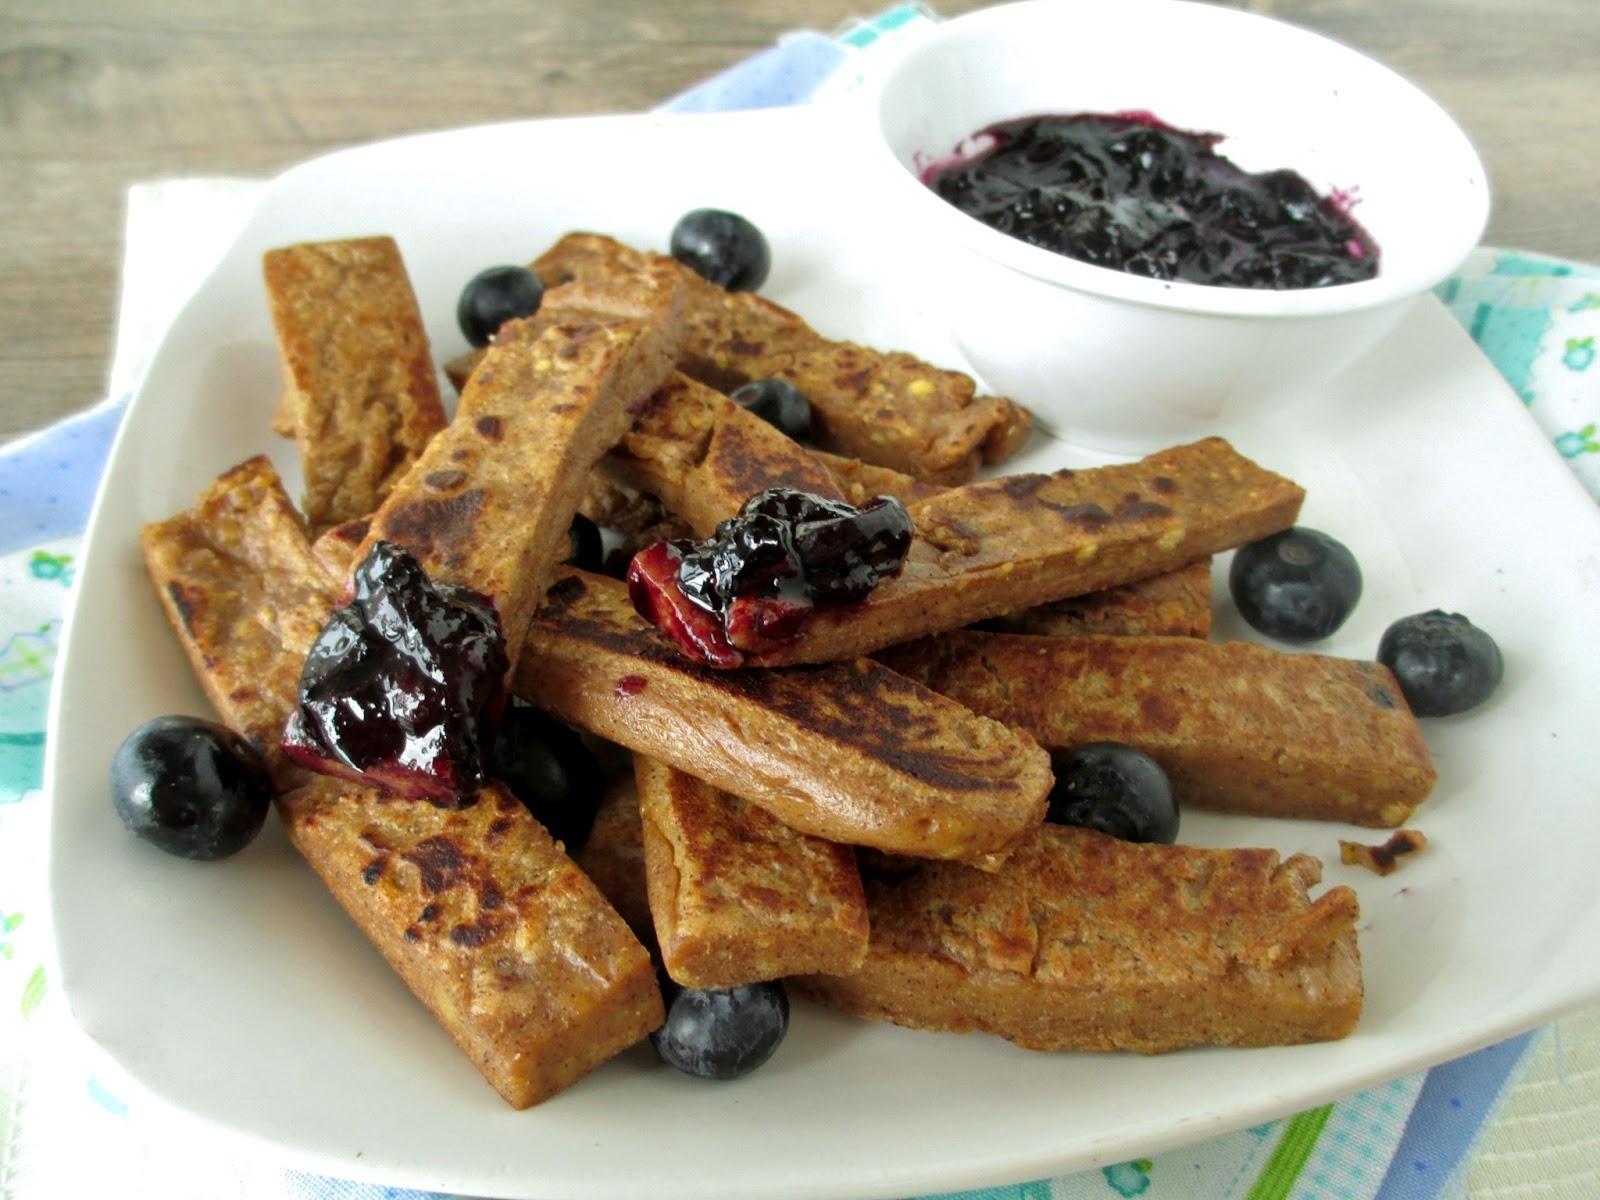
You could serve the fries with maple syrup drizzled on top, but I wanted to make a dipping sauce for mine.  I had some blueberries that I had just picked up from the market, so I simmered them on the stovetop with a bit of maple syrup until they thickened up into a dippable sauce.

I thought the fries had the perfect texture - soft on the inside and slightly crispy on the outside, and the fries themselves weren't sweet, which made them the perfect base for covering in the warm blueberry sauce.

They actually reminded me of eating french toast sticks but without the batter part, which I actually prefer because it means they weren't soggy or eggy tasting like french toast can sometimes be. Not only are these fries vegan, but they're naturally gluten-free as well, making this a fun breakfast treat for everybody!


Breakfast Chickpea Fries with Blueberry Sauce
Inspired by Tasty Yummies and adapted from my original chickpea fries
Note: This recipe requires some advance preparation. I recommend making the chickpea batter the night before, then the next morning you just need to make the blueberry sauce and cook the chickpea fries.

1 cup non-dairy milk (I used vanilla almond milk)
1 tbsp olive oil
1 tsp cinnamon
Pinch of salt
1/2 tsp vanilla extract 
1/2 cup + 1 tbsp chickpea flour

Sauce
1/2 cup blueberries
1 tsp lemon juice
1 tbsp pure maple syrup


First, prepare the chickpea batter: Heat the milk, olive oil, cinnamon, salt, and vanilla in a small saucepan over high heat. Heat until the liquid is hot but not quite simmering.

Reduce heat to medium. Whisk in the chickpea flour slowly. Continue to whisk constantly for 2 minutes, then switch to a wooden spoon and cook for 8-10 more minutes, stirring constantly (your arm will get very sore!). Scrape down the sides of the saucepan occasionally as you stir. The batter will gradually get thicker and will start to pull away from the sides of the pan and clump together. Once it is very thick and can hold its shape, remove the pan from the heat.

Scrape the batter into a greased square cake pan or loaf pan (try to work quickly as the batter will begin to set almost immediately). It should fill about half of a square pan. Smooth the top with a spatula. Let the mixture cool for at least an hour or overnight in the refrigerator, until it is completely set.

Once cooled, invert the pan onto a cutting board. Cut the batter into sticks about 1/2”-3/4” wide.

Start making the blueberry sauce: Add blueberries and lemon juice to a small saucepan and heat over medium-high heat. Let cook until the blueberries have broken down into a chunky sauce, stirring occasionally, about 8-10 minutes. Add the maple syrup and let cook for a couple more minutes, until the liquid has reduced a bit. Keep on low heat until the fries are ready.

Heat a large skillet over medium-high heat and spray with cooking spray or add a pat of vegan butter. Add the fries to the pan and fry for about 5-6 minutes, flipping over halfway through, until they are lightly browned. (The amount here will fit into one skillet, but if you are making a larger amount, you will need to cook them in batches, keeping the finished fries warm while you cook the rest).

Serve fries with blueberry sauce on the side for dipping. I liked to sprinkle my fries with extra cinnamon, and you can also drizzle them with maple syrup if desired.

Makes 1 large serving.


May 14, 2013

Frosted Blueberry Lemon Cake


Even though blueberry season is still quite a ways away (we only just got local asparagus and rhubarb in the last week here in Ontario, let alone berries), I've already made my first blueberry dessert of the year!

Our department was having an end of the year pizza lunch for everyone last week, and the students in each division were assigned to bring additional dishes. This year, our division finally graduated from salads to desserts, and I spent a lot of time deciding what kind of dessert I wanted to bring!

Eventually I chose this vegan frosted blueberry cake from Kathy of The Lunchbox Bunch. I figured a single layer cake was a nice size and could be cut into small pieces, since there were a lot of people to feed! I also wanted to offer a vegan option for anyone with dairy intolerances or other dietary restrictions.


With my recent string of bad luck in the baking department, I didn't have high hopes for this cake actually turning out and was prepared to have to run to the store for a backup dessert, but luckily this recipe was a success!

The cake was soft with a light crumb and stayed nice and moist even after making it a day in advance. I reduced the amount of sugar so that the cake itself wasn't very sweet, letting the blueberries shine. You could serve the cake by itself as a more plain breakfast or snack cake, but I went ahead and added a frosting to make it more of a sweet dessert cake.


The frosting is made with Earth Balance to resemble a traditional thick buttercream frosting, and I added some lemon juice to try to cut some of the sweetness. Next time I would use a bit less frosting since it was still a touch too sweet for my tastes, but if you have more of a sweet tooth, then go ahead and use a thick layer of it!

My cake was a hit at our department lunch, along with a lot of other great desserts like mini strawberry pies from Natalie, banana bread, lemon blondies, raspberry-coconut squares, cupcakes and even mini creme brulees! I was asked for the cake recipe by another student (who recently became vegan), so here it is!


Frosted Vegan Blueberry Lemon Cake
Adapted from The Lunchbox Bunch

2 tbsp ground flax
2/3 cup warm water
1 cup whole wheat flour
1/2 cup all purpose flour
1 tbsp baking powder
1/2 tsp salt
1/2 tsp cinnamon
1/2 cup sugar
3 tbsp rolled oats
1/3 cup almond milk
1/4 cup unsweetened applesauce
3 tbsp fresh lemon juice
1 tsp lemon zest
1/2 tsp vanilla extract
3/4 cup blueberries
Extra blueberries for topping

Frosting
1/3 cup vegan buttery spread
2 1/4 cups icing sugar
2-3 tsp fresh lemon juice
1-2 almond milk
1/2 tsp lemon zest


Preheat oven to 350°F and prepare a 9" cake pan by spraying with cooking spray and dusting the bottom and sides with flour.

Mix the flax with water and set aside. 

In a large bowl, whisk together the dry ingredients (flours through to oats). In a separate bowl, mix the wet ingredients (almond milk through to vanilla extract). Add the flax-water mixture to the wet ingredients.

Pour the wet ingredients into the dry ingredients and stir just until the dry ingredients are incorporated. Fold in the blueberries. 

Pour batter into prepared cake pan and bake in the preheated oven for 25-30 minutes, until the sides are starting to brown and pull away from the edges of the pan, and the top feels firm and springy when you touch it. A toothpick inserted into the center of the cake should also come out clean. Remove cake from oven and let cool in the pan for at least 10 minutes, then remove from the pan and let cool completely on a wire rack.

To make the frosting, beat the buttery spread with the icing sugar using a hand mixer or stand mixer until the icing sugar is incorporated. Add 2 tsp lemon juice and 1 tsp almond milk and beat again until the frosting becomes creamy. If you want it creamier, add another teaspoon of almond milk. Add another teaspoon of lemon juice if you want more lemon flavour. Beat or stir in the lemon zest. 

Once the cake is cooled, spread the frosting onto the top (I left the sides bare) using a rubber spatula. Press blueberries into the frosting for decoration, in whatever pattern you like! 

Makes 1 single layer 9" cake.

Note: I stored my frosted cake in the fridge overnight and let it sit at room temperature for the morning before serving at lunchtime. 

March 04, 2013

Raw Rainbow "Ice Cream" Cake with Coconut Whipped Cream for St. Patrick's Day


With St. Patrick's Day coming up in less than two weeks, I wanted to experiment with a recipe to celebrate the occasion. It seems like pretty much every traditional Irish recipe from soda bread to colcannon has already been posted several times, and I've seen tons of different green tinted foods and beer infused foods on the web too. 

So instead of going with something green, alcoholic, or Irish, I looked for inspiration from another St. Patrick's Day icon: the pot o'gold at the end of a rainbow!

My mind immediately started spinning with ideas for how to create a rainbow themed recipe, and in the end, I came up with this layered cake made with a raw crust, four layers of "ice cream" made solely from fruit, and a coconut whipped cream topping to resemble a cloud. And of course, the final touch that I added just for photo purposes was a pile of gold coins (chocolate, not real gold unfortunately)!


I was so happy with how this cake turned out - it was just how I had pictured it in my mind. And since I loved how it looked so much, this post is going to be more picture-heavy than usual!

While the recipe may look long and it was a bit time consuming to make, there wasn't that much actual hands-on time and as long as you've got some ripe fruit and a food processor, you can easily make this yourself!


The crust is a simple mixture of raw nuts, dates and coconut that gets crushed up and pressed down into the bottom of your cake pan.

Once the crust is ready, the next step is making the layers for the cake one at a time.  The base of each layer is a frozen banana, which as many of you probably already know, turns into a creamy ice cream-like consistency when you blend it in a food processor (although it firms up quite a bit after being in the freezer).

By adding different coloured fruits along with the banana, I was able to make four distinct layers to represent (some of) the colours of the rainbow: purple from blueberries and blackberries; pink from strawberries; yellow from mango; and green from avocado.


I actually made enough for two small cakes, in different shapes.  Pictured above is a round cake made with a miniature springform cake pan (which makes removal much easier!), and below is a rectangular cake made by forming the layers in one side of a square cake pan.

I liked the look of both shapes, so feel free to use whichever size pan is more convenient. As long the pan has edges to hold in the layers, you can build your cake in pretty much any shape you like!


While you could eat the ice cream cake on its own, I highly recommend making the coconut whipped cream topping. If you've never made whipped cream from coconut milk before, you can find step-by-step guides at the Kitchn and Oh She Glows to use as references.

I sweetened the whipped cream with a bit of icing sugar and added a dash of coconut extract to bring out the coconut flavour even more.  I loved how light and fluffy the whipped cream was and it tasted so good with the fruity ice cream layers.


If you love rainbow sherbert, then you'll love this cake because that's pretty much what it tastes like when you take a bite of all the layers together.  And if you're worried about the avocado, don't be - it actually blends well with the other flavours and you don't really notice a pronounced avocado taste when you eat everything together.

And can you believe that there's no added sugar or sweetener of any kind in the whole cake (not including the whipped cream)? As long as you have ripe fruits, they should provide all the natural sweetness you need!

I doubt my cakes will last until St. Patrick's Day, but you don't need a holiday to make this - I think it would brighten up any day :)


Raw Rainbow "Ice Cream" Cake with Coconut Whipped Cream

Note: This recipe does require some preparation at least a day in advance. Before you start making it, make sure you have at least 3 ripe bananas in your freezer and a can of coconut milk chilling in the fridge.

Crust
1/4 cup natural almonds
1/4 cup raw cashews
2 tbsp unsweetened shredded coconut
1 tbsp ground flax
Dash of salt
1/2 cup (heaping) chopped dates

Purple Layer
1 small-medium frozen ripe banana, chopped
1/4 cup blueberries and blackberries

Pink Layer
1 small-medium frozen ripe banana, chopped
1/4 cup chopped strawberries

Yellow Layer
1/2 a large frozen ripe banana, chopped
1/2 heaping cup chopped ripe mango

Green Layer
1/2 a large frozen ripe banana, chopped
1/2 a ripe avocado (about ½ cup)
1/2 tsp lime zest

Topping
1 can full fat coconut milk, chilled in the fridge overnight unopened
1 tbsp icing sugar
1/2 tsp coconut extract (can substitute vanilla extract if desired)


To make the crust, place the almonds and cashews in the small bowl of a food processor and process until the nuts are ground. Add the coconut, flax, and salt and process again until ingredients are combined. Add the dates and process until the dates are broken down. The mixture should stick together if you squeeze it together with your fingers.

Transfer the crust to the bottom of your desired pans.  I filled one round mini cake pan (4-inch wide, 2-inch deep pan with a removable bottom) and used the remaining crust to make a rectangular shaped cake by filling an 8x8 square pan (lined with a piece of parchment paper) about one-third to one-half full. Press the crust mixture down firmly, making sure it is evenly spread.  Store the crust in the fridge or freezer while you make the remaining layers.

Make the ice cream layers one a time, in whichever order you like. For each layer, place the ingredients in the small bowl of your food processor and process until smooth, scraping down the sides of the bowl with a spatula if necessary. Once you’ve made one layer, spread it evenly over the crust in your pan(s). Let it sit in the freezer until it starts to firm up, at least 15-30 minutes.

Continue with the next ice cream layer, following the same process as before. Let each layer firm up in the freezer before adding the next one. 

Here's how the cakes looked before frosting:


To make the whipped cream, open your can of coconut milk (do not shake it first). Scoop out the thick white cream that should have formed on top into a bowl (leave the watery part in the can). Use a hand mixer (or stand mixer) to beat the cream until it starts to firm up. Add the icing sugar and coconut extract and continue beating until the cream is nice and thick and fluffy like whipped cream, about 3-5 minutes.

Keep ice cream cake(s) stored in the freezer. For the best defrosting results, transfer cake to the fridge for about 1 hour prior to serving, then let sit at room temperature for 5-10 minutes, until the ice cream starts to soften slightly. Top cake(s) with whipped cream (Note: If you are storing the cake in the freezer, I would recommend keeping the whipped cream separate in the fridge, and adding it to individual servings when you're ready to eat, otherwise it will become a frozen block of whipped cream, as I learned!). 

Makes 2 small cakes or 1 larger cake.


February 12, 2013

Blueberry Pancakes with Persimmon Topping


As I'm sure all of you know, Valentine's Day is coming up in just a couple of days. Perhaps lesser known is the fact that there are actually two special holidays this week, and today is one of my favourite holidays of the year: Pancake Tuesday!

Pancake Tuesday, also known as Fat Tuesday or Shrove Tuesday, is a holiday that I've grown up with. For those of you who aren't familiar with it, today is the last day before Lent and was traditionally associated with eating a rich meal to use up ingredients like eggs and milk, which is how pancakes became the customary meal eaten on this day!

For my family and I, we just liked having a reason to eat breakfast for dinner once a year, and we always looked forward to making a big batch of different types of pancakes to enjoy together.

So in honour of that tradition, I have a new pancake recipe to share with you today! I actually made these about a month ago when I picked up my first persimmons ever from the market and needed to come up with ideas for ways to use them.


Persimmons look sort of like tomatoes and taste similar to apricots, with notes of spices like cinnamon and nutmeg. The Fuyu variety (which I bought) has a firm texture that softens up a bit when cooked, so I thought they would make an amazing pancake topping.  All you need to do is chop your persimmons and simmer them on the stove with warm spices and maple syrup until they get nice and soft, warm and gooey. The best way I think to describe the flavour of the topping was that it tasted like Christmas!

Since I also had some blueberries on hand, I decided to make blueberry pancakes as the base for my persimmon topping, which turned out to be the perfect choice! Blueberry pancakes were always my favourite kind of pancake to eat on Pancake Tuesday, and they paired so well with the persimmons.

The pancakes themselves were super thick and fluffy from the addition of coconut flour - a tip I picked up from Peachy Palate (who has tons of other vegan pancake recipes on her blog too!). These were on the denser side though, so if you prefer a lighter pancake, feel free to use your own vegan pancake recipe as the base, but I highly recommend adding the blueberries!

I thought these hearty blueberry spelt pancakes with the warm persimmon topping made for a nice filling winter breakfast, and they could also be a great dinner tonight for those of you planning to celebrate Pancake Tuesday!


Single Serving Vegan Blueberry Pancakes with Persimmon Topping
Note: I used this pancake recipe from Peachy Palate, but feel free to use your own favourite vegan pancake recipe, with blueberries added to the batter (see directions below).

Persimmon Topping
1 ripe Fuyu persimmon, peeled and chopped
1/2 tsp cinnamon
Pinch each of cardamom, nutmeg and cloves
3 tbsp water
1 tbsp maple syrup

Place all ingredients in a small saucepan and bring to a boil.  Reduce heat to medium-low and simmer for 10-15 minutes, until the persimmons are soft. If it starts to look too dry, add another tablespoon of water.

Keep warm on low heat until the pancakes are ready.

Pancakes
1 recipe for coconut flour pancakes (just the pancakes, not the toppings)
Note: I added 1/2 tsp cinnamon and 1/2 tsp vanilla to the batter for more flavour
~1/3 cup blueberries

Follow the recipe directions for the pancakes in the link above. When you add the batter to the pan to cook the pancakes, add a handful of blueberries to each pancake, distributing them evenly and pressing them into the batter with your fingers. Flip and cook the other side of the pancake.

Serve warm, topped with persimmon sauce and more maple syrup if desired.


Makes 1 large serving (3 pancakes)


August 09, 2012

Peach, Blueberry & Mint Cornmeal Cake


In my last post, I mentioned that I wanted to make a couple of recipes featuring fresh local blueberries that I picked up at the market.  After adding some of my blueberries to a fruity kale salad, I wanted to use the rest in some kind of baked treat.

When trying to choose a recipe, I went through some of my old saved bookmarks and came across a couple different recipes for peach cakes that I had wanted to make last summer but never got around to.  I decided that peaches and blueberries would make a great combination in a cake, so I combined two recipes from different blogs and added my own variations to come up with this vegan peach and blueberry cornmeal cake!

Each of the recipes called for adding a fresh herb to the cake - one used rosemary and the other used basil.  I liked the idea of adding another layer of flavour with fresh herbs, and since I had some mint leftover from my salad, I decided to use mint leaves in my cake.


I was nervous that the cake would turn out to be a disaster, but thankfully it turned out just as I was hoping! The cake itself was dense and moist, with a bit of crunchiness from the cornmeal that I really liked. Pretty much every bite was filled with juicy fruit, and I loved the combination of the sweet peaches with the blueberries.

I thought the mint added an interesting dimension too, but if you're not a fan of mint, you could easily leave it out and the cake would be just as delicious! Or you could try substituting the mint with another herb like basil.

If you like cornbread, I think you would love this cake - it's basically like a big piece of cornbread studded with summer fruits that you can eat as a dessert or even as a breakfast cake. I did reduce the amount of sugar because I figured with all the fresh fruit, I wouldn't want the cake itself to be too sweet, but if you have more of a sweet tooth, you might want to increase the sugar to make this more like a dessert.

Hopefully I'll be able to fit in a couple more peach and blueberry recipes before their season ends!


Vegan Peach, Blueberry & Mint Cornmeal Cake
Adapted from Bella Eats and deli-cute-essen

1.5 cups non-dairy milk (I used unsweetened coconut milk beverage)
1 tbsp apple cider vinegar
3/4 cup light spelt flour
1/2 cup whole wheat pastry flour
3/4 cup organic cornmeal
2 tsp baking powder
1/2 tsp baking soda
1/2 tsp salt
1/2 cup cane sugar (could use 3/4-1 cup for a slightly sweeter cake)
1/2 cup olive oil
1 tsp vanilla extract
1 cup peeled and diced ripe peaches
1 cup blueberries
1/3 cup fresh mint, julienned (optional)

Preheat oven to 350°F and spray a 9 inch cake pan with cooking spray.

Stir together the non-dairy milk and apple cider vinegar and let sit for at least 5 minutes.

Meanwhile, whisk together the dry ingredients (flours through to sugar) in a large bowl.  In a separate bowl, mix the olive oil, vanilla extract, and the milk-vinegar mixture.

Pour the wet ingredients into the dry ingredients and gently stir just until the dry ingredients are incorporated. Fold in the peaches, blueberries and mint.

Pour batter into prepared cake pan and bake in the preheated oven for 40-50 minutes, until the top is slightly firm, the edges are starting to pull away from the pan, and a toothpick inserted into the cake comes out dry.

Let cool in the pan for about 5 minutes, then invert onto a wire rack and cool completely before slicing. 

Makes one 9" cake 

*Note: I stored mine loosely covered in a large cake pan and it stayed good at room temperature for 2-3 days.  I don't recommend covering it with saran wrap as the cake will get very mushy. 

This was submitted to Wellness Weekend at Diet, Dessert & Dogs, and to Healthy Vegan Fridays. 

August 06, 2012

Blueberry-Jicama Kale Salad


Last weekend, I bought my first pint of local blueberries this summer from the farmers' market.  I don't usually consider blueberries to be one of my favourite fruits, but eating the local ones reminded me how sweet, juicy and flavourful they can be!

After eating some of my blueberries by the handful, I wanted to save the rest to use in a couple of recipes that I had planned.  One of those recipes was a fruity kale salad that I had marked in my new Blissful Bites cookbook from vegan chef Christy Morgan.  The recipe called for strawberries as the main fruit in the salad, but since strawberry season has pretty much ended, I thought blueberries would make a nice substitution and would pair well with the other salad ingredients.

The other main ingredient in the recipe was sliced jicama. Jicama - a Mexican root vegetable that tastes like a cross between an apple and a turnip - is one of my favourite ingredients to eat raw because it's so crisp and juicy. If you haven't tried jicama, I definitely recommend seeking it out at either your local market or an Asian grocery store!

I also added a few of my other favourite salad ingredients: cucumbers, pumpkin seeds and dried cranberries.  To keep it from being boring or bland, the recipe also calls for fresh mint and flaked coconut, which I toasted first in a pan, and finally everything is tossed in a sweet maple and lime dressing.

This was such a fresh salad with both the crisp veggies and juicy berries. I thought all of the ingredients came together so well and the maple syrup in the dressing added just the right amount of sweetness. If you like raw kale, this is a nice way to dress it up with seasonal ingredients!


Blueberry-Jicama Kale Salad
Adapted from Blissful Bites: Vegan Meals That Nourish Mind, Body, and Planet

~2 cups chopped kale leaves
1 tsp olive oil
1 tsp white balsamic vinegar
1/8 tsp herbamare seasoning (can substitute with a pinch of salt if you don't have this)
1/2 cup jicama, peeled and sliced into matchsticks
1/4 cup diced cucumber
1/4 cup blueberries
1 tsp freshly squeezed lime juice
1 tsp pure maple syrup
1 tsbp fresh mint (about 5 leaves), chopped
1 tbsp large flaked coconut, toasted in a dry skillet if desired
2 tbsp dried cranberries
1 tbsp pumpkin seeds or sunflower seeds

Place the kale in a bowl and drizzle with the olive oil, balsamic and herbamare.  Massage the leaves with your fingers for a couple minutes, until they are softened.  Add the jicama, cucumber and blueberries to the bowl.  Pour the lime juice and maple syrup over everything and toss to combine.

Stir in the mint, coconut, cranberries and seeds. Let sit for 10-15 minutes before serving.

Makes 1 large serving or 2-3 side salads.

-       

LinkWithin

Related Posts Plugin for WordPress, Blogger...