Showing posts with label fruit. Show all posts

August 19, 2014

Roasted Strawberry & Goat Cheese Crostini


Yikes, how has it been over a month since my last post? Sorry I haven't been around here in awhile, but life has been pretty busy lately with trying to finish my degree and helping to plan my sister's wedding, and as much as I wanted to keep up with my blog, I just haven't had the time.

While I expect to still be busy over the next couple weeks, I wanted to at least squeeze in a quick recipe to say that I'm still here, for anyone who might still be reading!

I actually made this recipe at the end of July for a strawberry-themed potluck, and I wasn't planning on sharing it on my blog but it turned out so tasty that I changed my mind!

When I was trying to think of a strawberry recipe that I could make for the potluck, I remembered this roasted strawberry, basil and goat cheese crostini from Confections of a Foodie Bride that I had made once and loved. I took that idea but changed things up a bit this time, adding some lemon flavoured greek yogurt to the goat cheese to make a super creamy and lemony spread. Instead of making a basil syrup or using fresh basil as a garnish, I added some basil to the goat cheese mixture instead.


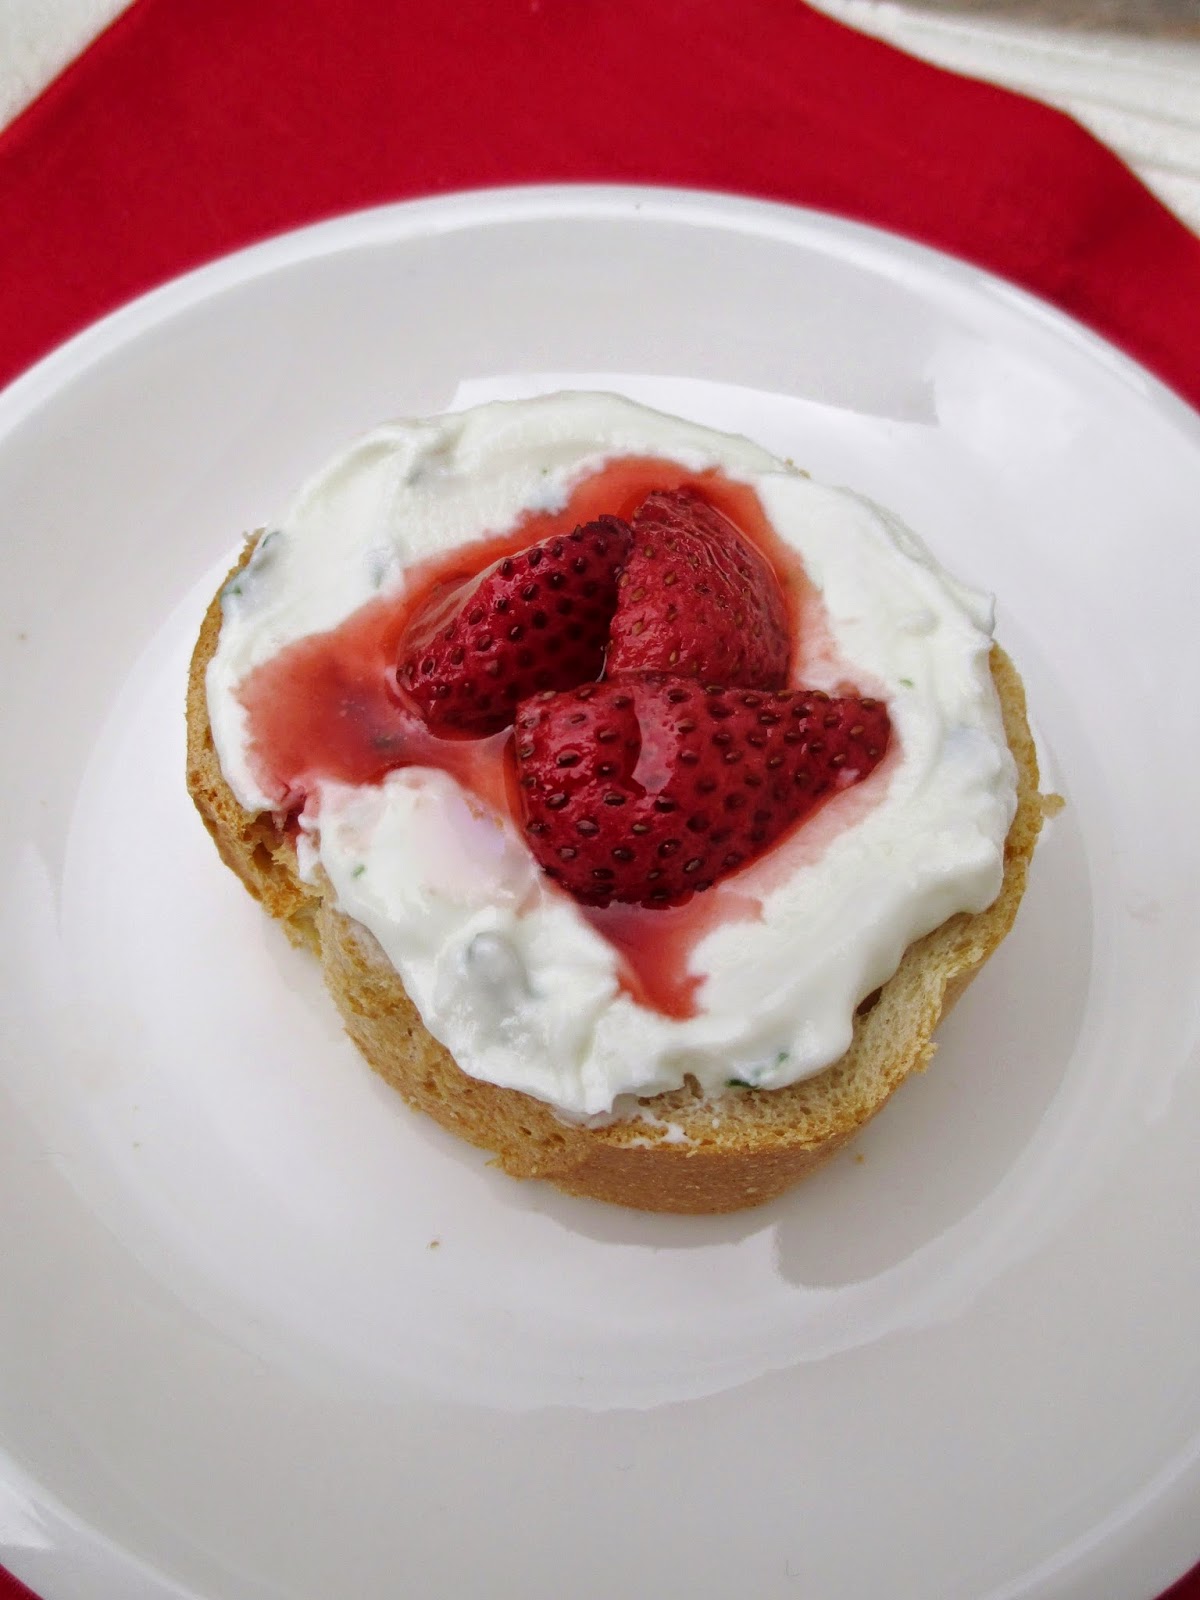
The strawberries are roasted in the oven with maple syrup and balsamic so they get nice and sweet and juicy. Since I was making this ahead of time, I combined both components (the goat cheese-yogurt spread and the strawberries) into one dip that I spooned onto slices of bread (pictured above). For a prettier presentation, you could keep the components separate and assemble individual crostini pieces to serve instead (which I did with one piece for photo purposes before taking the rest to the potluck!).

This almost tastes more like a dessert than an appetizer with the sweet strawberries, their juices and the yogurt, but I'm a fan of using fruit in my meals, so I loved this! If you did want to serve this as a dessert though, I think it would work well spread onto graham crackers or cinnamon sugar pita chips too!


Roasted Strawberry & Goat Cheese Crostini
Inspired by Confections of a Foodie Bride

2 cups chopped strawberries
1 tbsp pure maple syrup
1 tbsp balsamic
1 113g package plain goat cheese
2 100g containers lemon greek yogurt
2 tbsp chopped fresh basil
Baguette or crackers for serving


Preheat oven to 375°F. 

Place strawberries in a baking dish and toss with the maple syrup and balsamic. Roast in the preheated oven for 10-15 minutes, until the strawberries are soft. Remove from oven and let cool. 

Meanwhile, mix together the goat cheese, yogurt, and basil in a small bowl until smooth. 

Option 1: Transfer the goat cheese mixture to a shallow bowl or container and smooth out into an even layer. Top with the roasted strawberries (you can add some of the leftover juices if you like, but I left most of the liquid behind). Cover and refrigerate until serving time. When ready to serve, slice a baguette (you can toast it first in the oven if you prefer, but I just left mine untoasted and it was good that way too) and serve as a dip to spread onto slices.

Option 2: Slice your baguette and toast in the oven if desired. Spread some of the goat cheese mixture onto each slice and top with a spoonful of the strawberries.

Option 2 is a prettier presentation but both ways taste equally delicious!


July 25, 2013

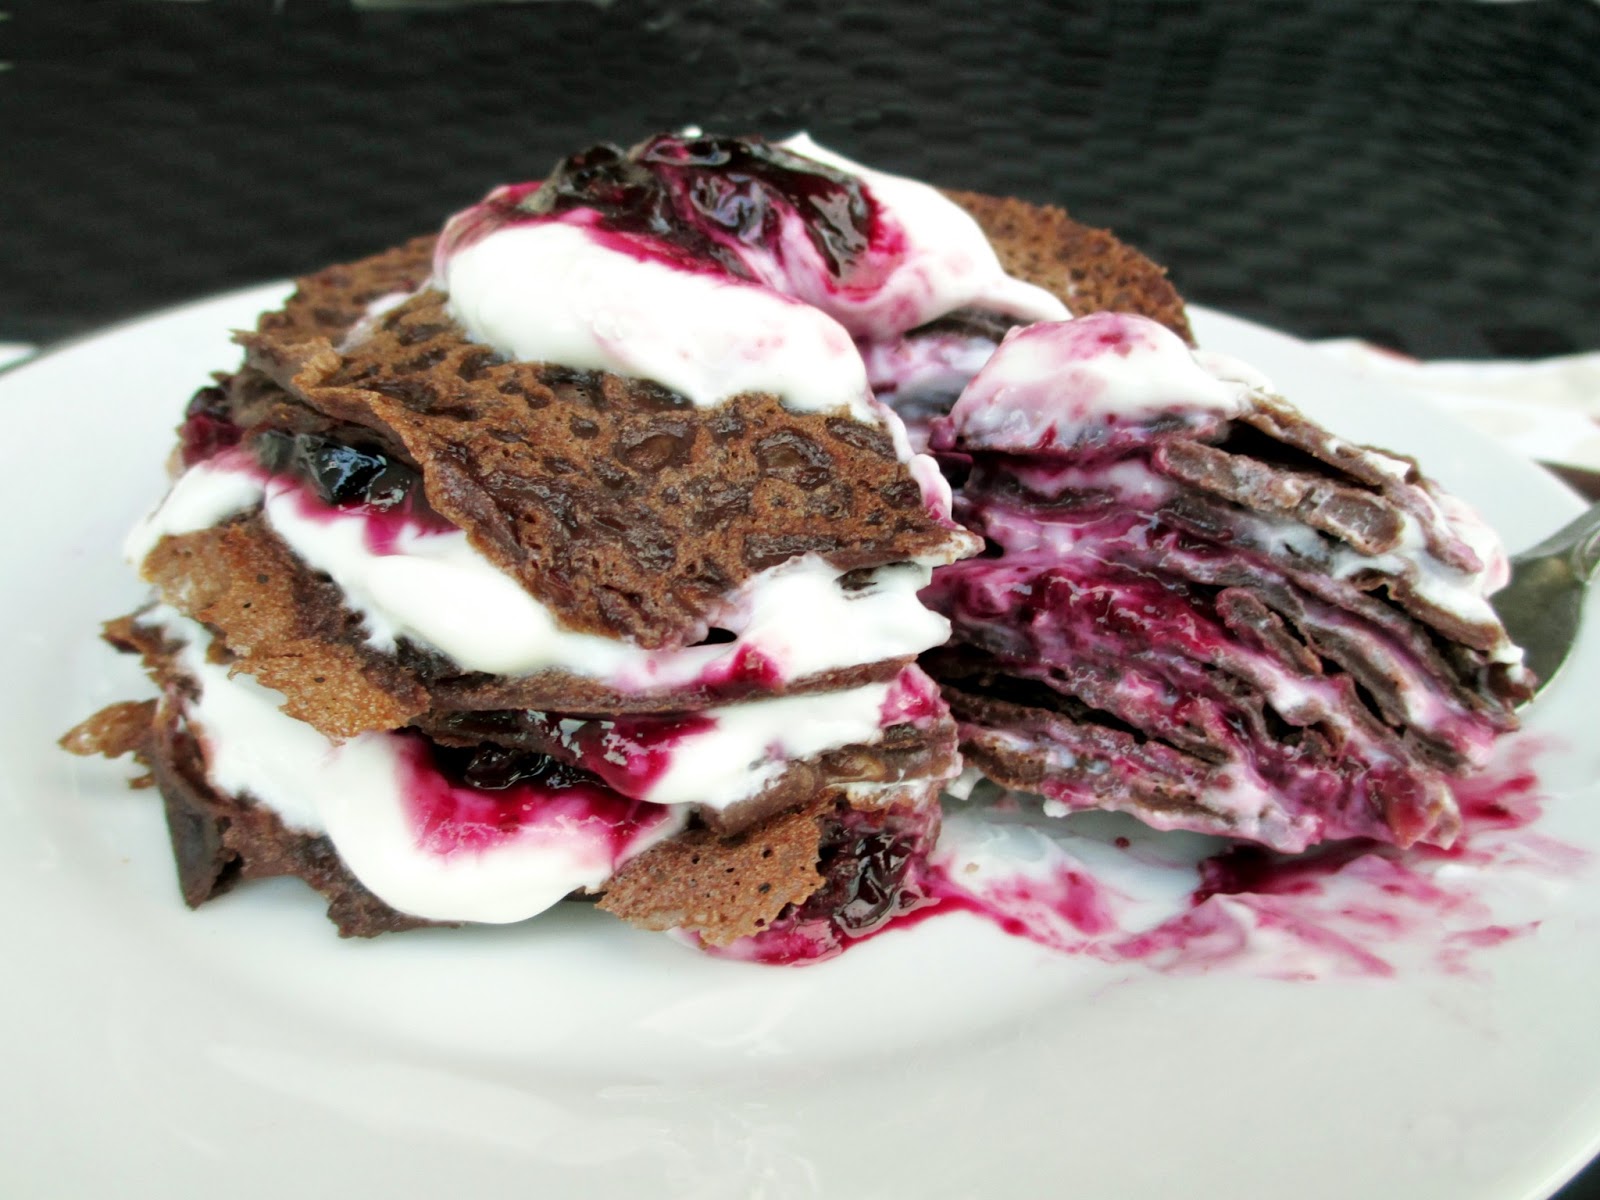
Miniature Chocolate-Cherry Crepe Cake & 2nd Blogiversary


Today is a bit of a special day here on Vanilla & Spice - it's my 2nd Blogiversary!

I can't believe that this little space has been active for two whole years already, but I guess when you're doing something that you love like cooking, baking, photographing food, and sharing recipes with amazing readers, time flies by!

Rather than reflecting on the past year of blogging like I did last year, I think I'll just stick to writing about today's recipe this time (and with more photos than usual because I had a hard time choosing) - after all, that's why you come here in the first place!


To celebrate the occasion, I wanted to make a special treat, but since I'm not really much of a cake or cupcake person, I thought I would do something a bit different.

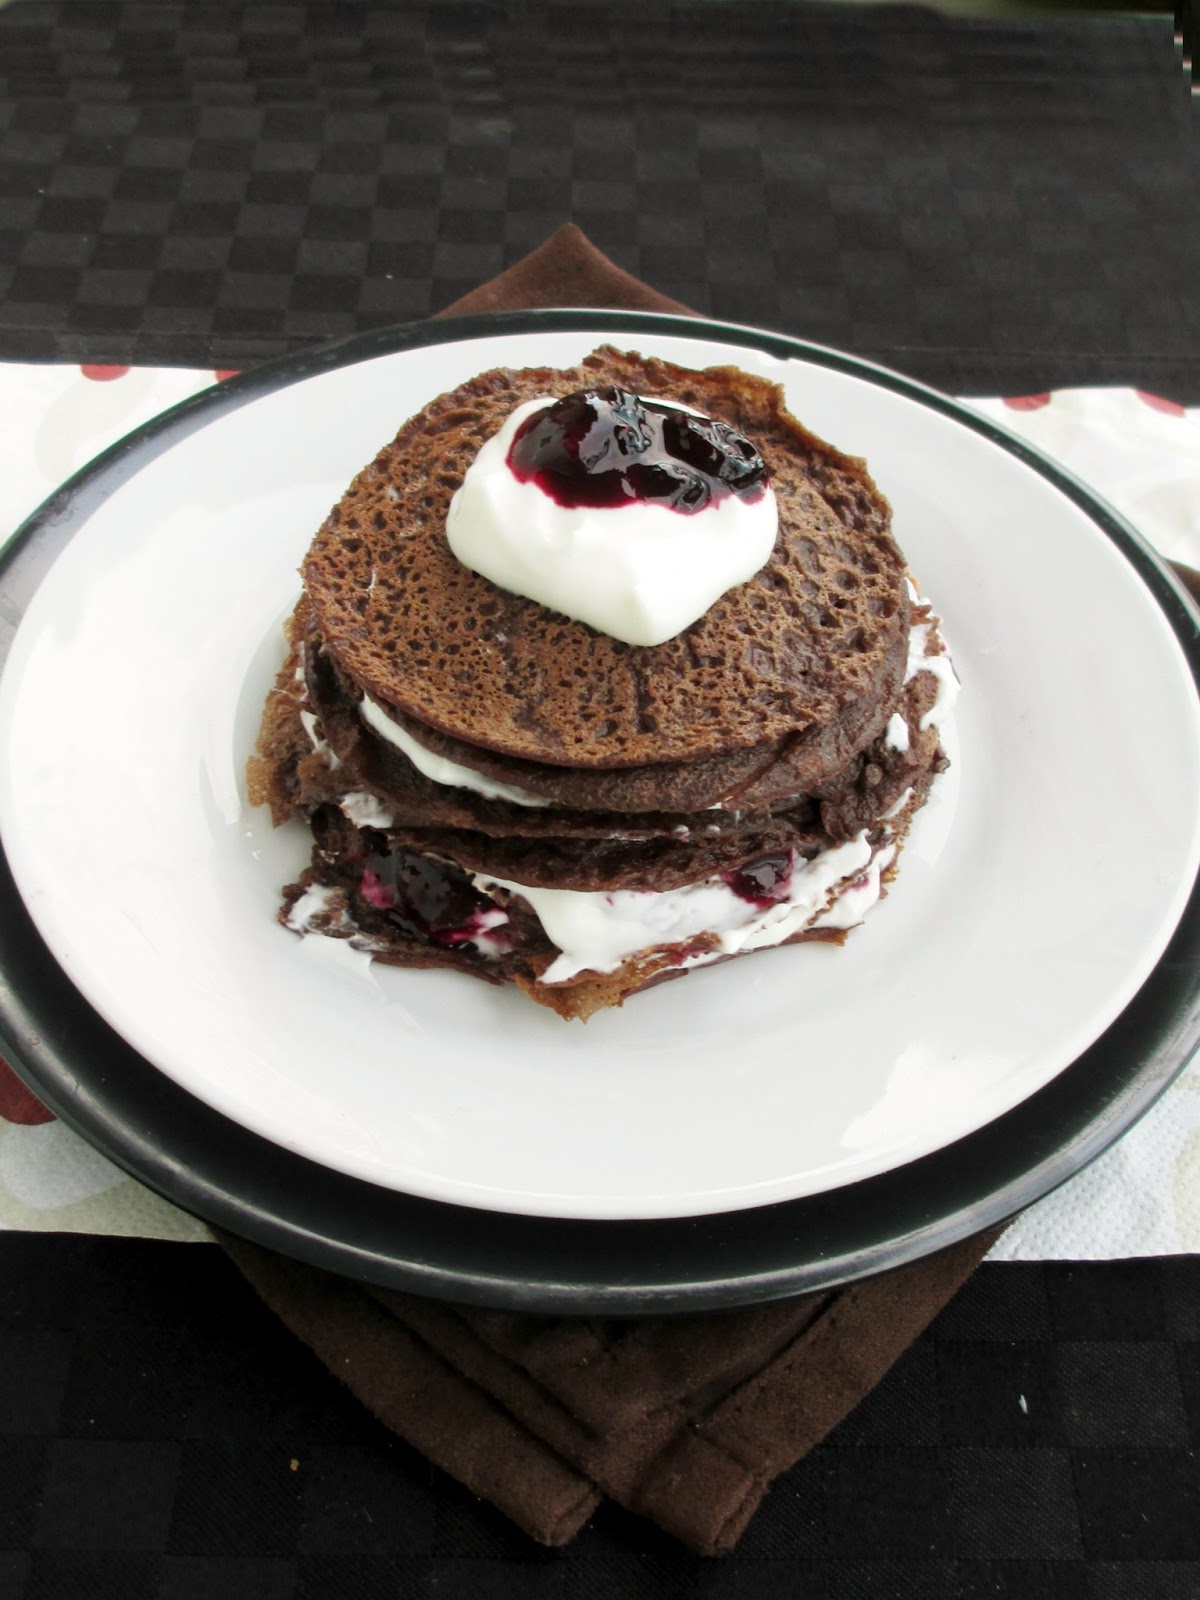
I'm actually really excited about this recipe because it's something I've been wanting to make for quite a while - my very own personal sized crepe cake!

I'm sure you've all seen at least one version of a crepe cake before, but if not, the idea is that you layer a batch of regular crepes with a thick filling or frosting in between the layers to help them stick together, and add whatever toppings you like - fruit, nuts, whipped cream, caramel sauce - basically whatever you could imagine for a cake!


For my version, I knew I wanted to do a chocolate-cherry combination, since I still had some amazing fresh cherries stored in my freezer that I had picked a couple of weeks ago.

I'm actually a novice when it comes to crepe making (especially vegan crepes), but I did some research and chose a recipe that uses part chickpea flour because crepes usually rely on eggs as a main ingredient, and chickpea flour is an ingredient that I know works well in other "eggy" vegan recipes, like vegan scrambled eggs.

I modified the original recipe to make it a bit more decadent by adding cinnamon and cocoa powder, a bit of maple syrup for a touch of sweetness, and using chocolate almond milk for more chocolatey flavour.


My first crepe was a bit of a disaster, but that's expected when you're making crepes for the first time! Luckily, I quickly got the hang of it and ended up with evenly thin, chewy crepes with just enough of a chocolate taste for my liking.

For the cake filling, I kept it pretty simple and used a combo of fresh cherry-blueberry sauce and coconut flavoured greek yogurt.

I loved each component on its own, but all came together to make an even tastier creation! The sauce was thick and fruity, with a nice balance of sweet and tart notes, and I thought it paired perfectly with the chocolate crepes and the creamy coconut yogurt.


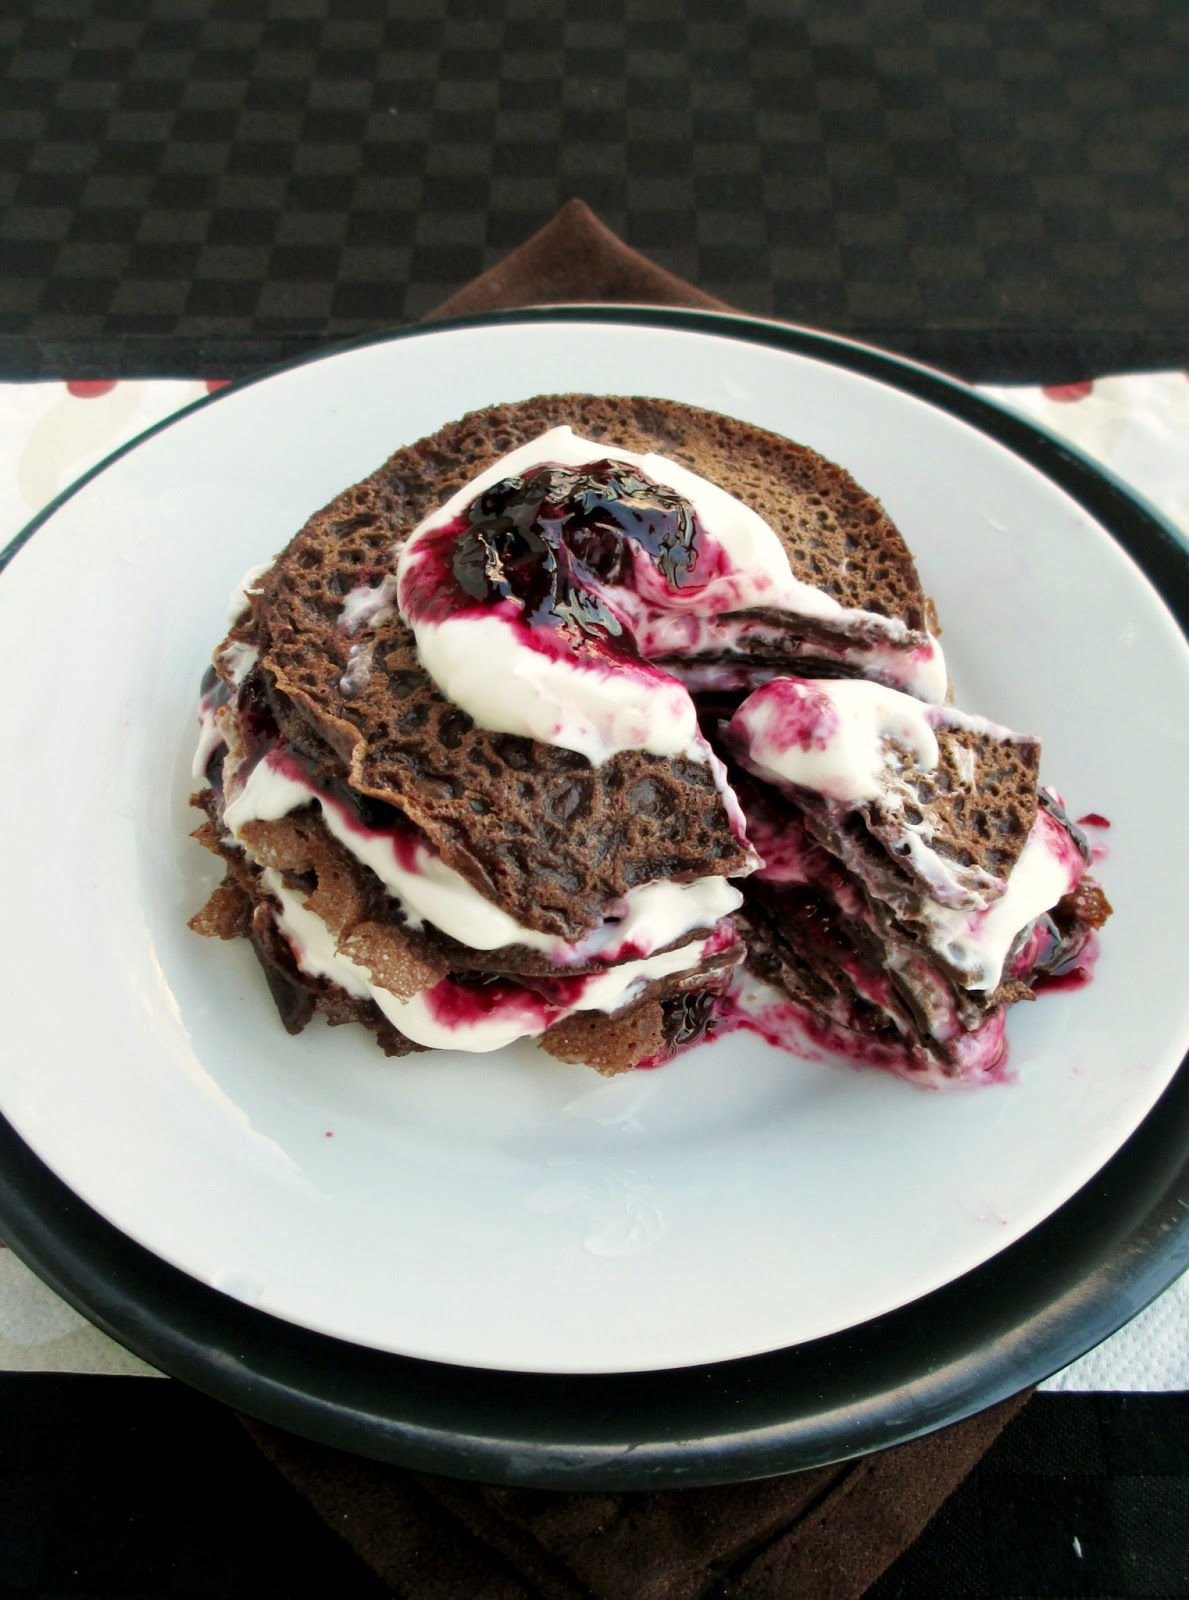
Once you have all the components ready, it's pretty easy (and fun) to assemble the cake. First, you cut smaller circles out of each large crepe so that you have enough to stack into a tall enough miniature-sized crepe cake. Then a spoonful of yogurt and cherry sauce is spread in between each crepe layer as you build it, so that you end up with a mix of everything in each bite.

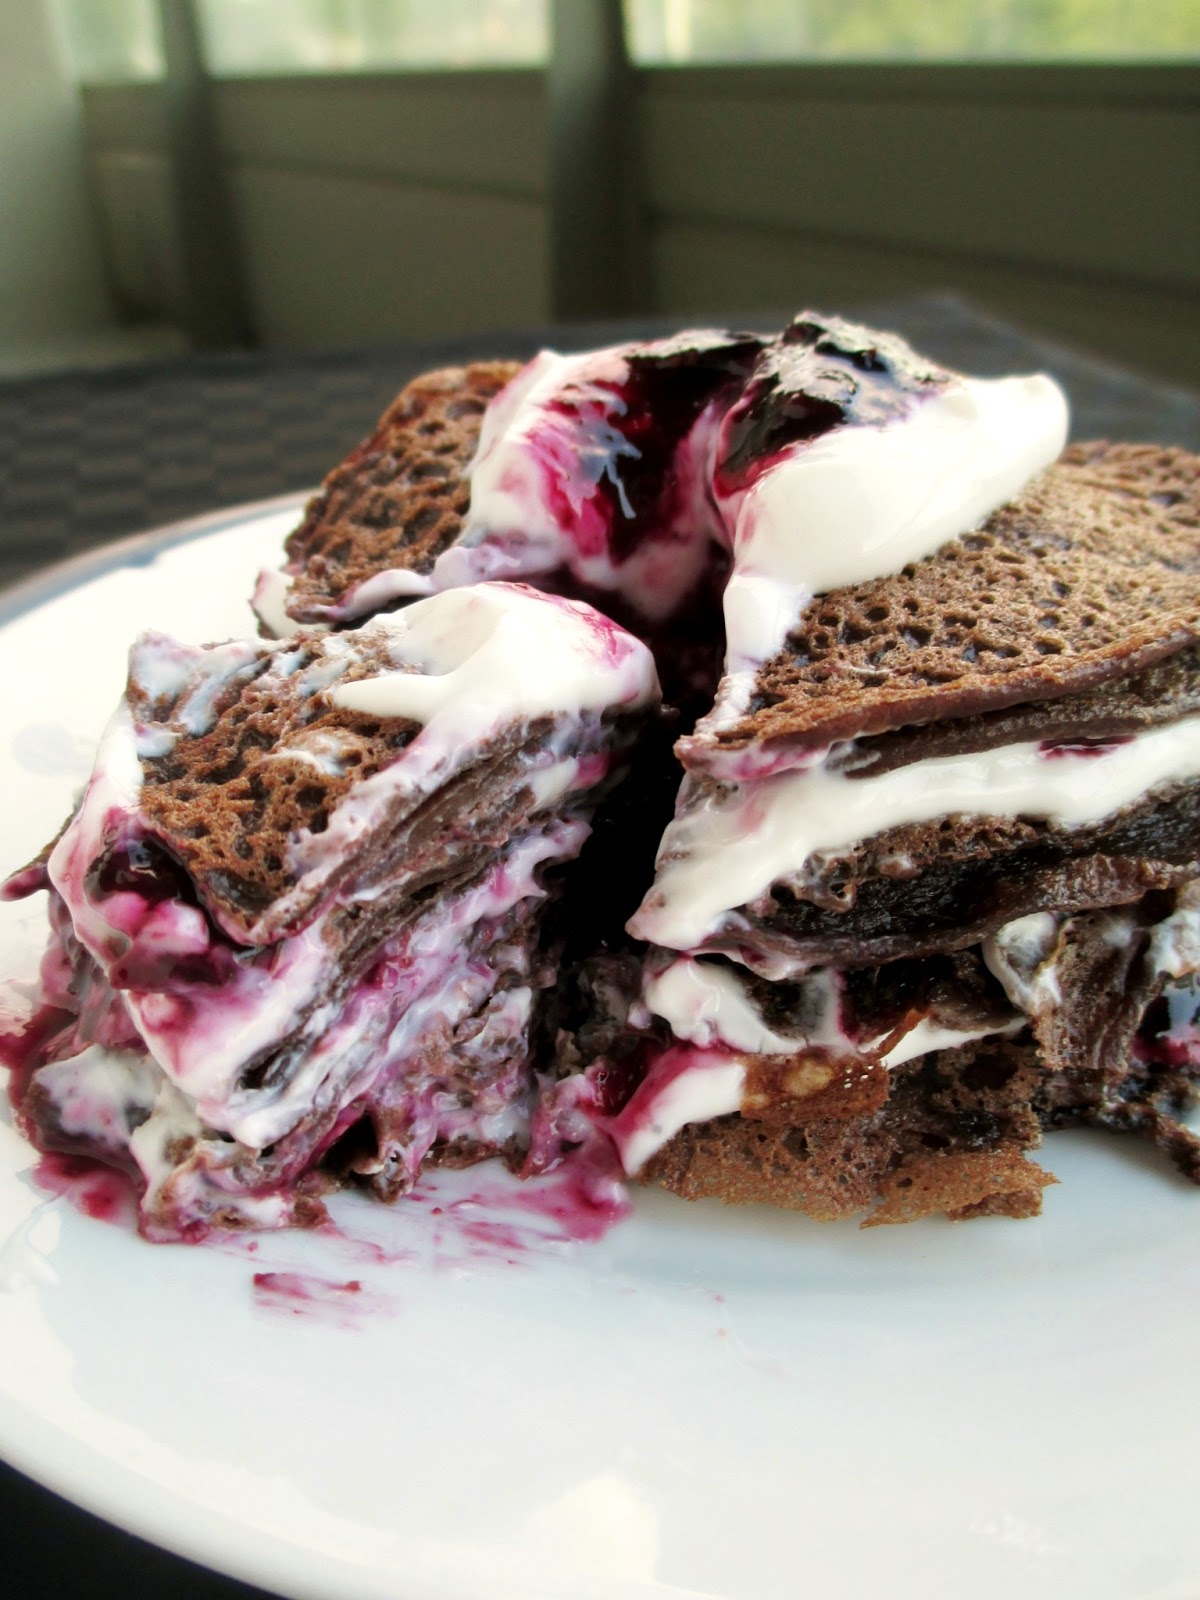
I assembled mine when everything was still a bit warm, but when I came back for the leftovers the next morning after it had been sitting in the fridge overnight, everything had firmed up more and it was a bit easier to slice and eat.  But either way - warm or chilled - this makes a delicious dessert or even a special breakfast treat!

I'm so glad I finally got around to trying out a crepe cake, and a blog anniversary seems like the perfect occasion to try something new in the kitchen! I think I might be making this again for future celebrations - I'm already dreaming of new combinations that I could try for my next birthday cake!

I know this has been a long post, but I just wanted to end by saying thanks for reading and for all of your comments this past year - I wouldn't still be doing this without the support from all of you! And one last shout-out to my sister Natalie of Once Upon a Cutting Board, who is also celebrating her blogiversary!


Miniature Chocolate-Cherry Crepe Cake
Crepe recipe adapted from Vegan Eats World, everything else my own
Note: My crepes were vegan, but not the yogurt. Feel free to adapt the recipe by using your own favourite crepe recipe and whatever kind of greek yogurt you like (vegan or not)!

Crepes
3/4 cup chocolate almond milk
1/4 cup water
1/4 cup + 2 tbsp all-purpose flour
2 tbsp + 2 tsp chickpea flour
1/2 tbsp cornstarch
1 tbsp cocoa powder
1/4 tsp salt
dash of cinnamon
1 tsp olive oil
1 tsp maple syrup

Filling
1/2 cup fresh or frozen cherries (or a mix of cherries and blueberries, which is what I did because I didn't have enough cherries)
1 tsp lemon juice
1 tbsp maple syrup
1 100g container greek yogurt (I used Oikos fat-free coconut greek yogurt but vanilla would work too)


To make the crepe batter, add all ingredients to a blender and puree until smooth. Transfer mixture to a container, cover, and let sit in the fridge for at least an hour.

When ready to make crepes, heat a large skillet over medium heat and spray with cooking spray.  Working quickly, pour 1/3 cup of the batter into the pan, swirling the pan around so that the liquid coats the pan evenly all the way to the edges. Let cook for one and a half to two and a half minutes, until the surface looks dry and cooked, and the edges have started to crisp up. Run a spatula around the edges of the crepe and carefully flip it over. Cook the other side for about one minute. Carefully remove the crepe from the pan and transfer to a plate.  Repeat with the rest of the batter (I got four 7" crepes out of mine, but it depends on the size of pan you use).

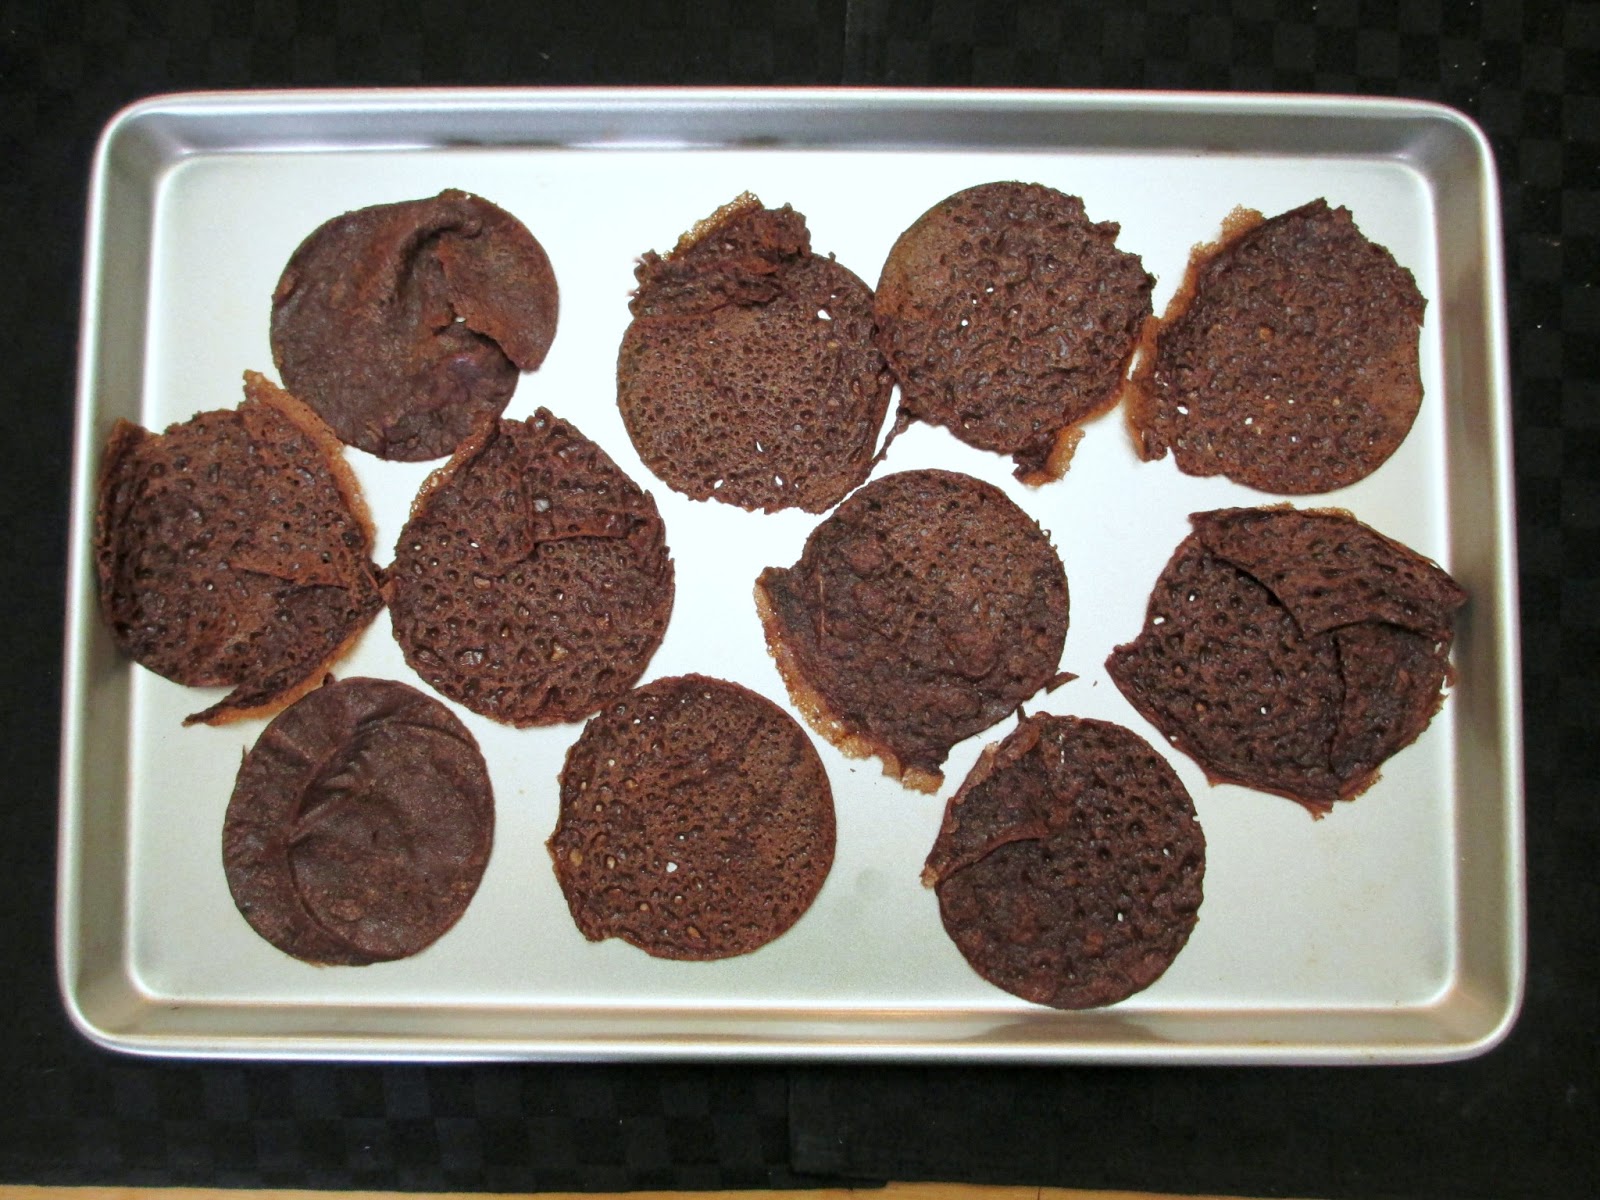
Use a circular cookie cutter or the lid of any jar about 3" in diameter to cut circles out of each crepe (I used a peanut butter jar lid). You should get one full circle plus two partial circles out of each crepe, but that's okay - they don't all need to be perfect circles. For the partial circles, just arrange some of the leftover pieces to fill in the gaps so that you have somewhat complete circles. You should end up with 11-12 3" crepe circles (see picture of mine below).


To make the sauce, place the berries, lemon juice, and maple syrup in a small saucepan and let cook on medium-high heat until the berries are broken down and the mixture has thickened a bit, stirring often (5-10 minutes). Remove from heat and let cool.

To assemble the cake, lay one or two crepe circles on a plate. Top with a spoonful of the greek yogurt and a spoonful of the cherry sauce (don't use too much sauce, as you don't want to run out!). Follow with another layer of crepes (I found it easier to put two thin crepes together as one layer), and another layer of yogurt and cherry sauce. Repeat until you've layered all of the crepes, ending with a spoonful of yogurt and cherry sauce on top.

Serve at room temperature, or chill in the fridge for 1-2 hours to firm up a bit before serving.

Serves 1 (if you're hungry) or 2 people.


July 09, 2013

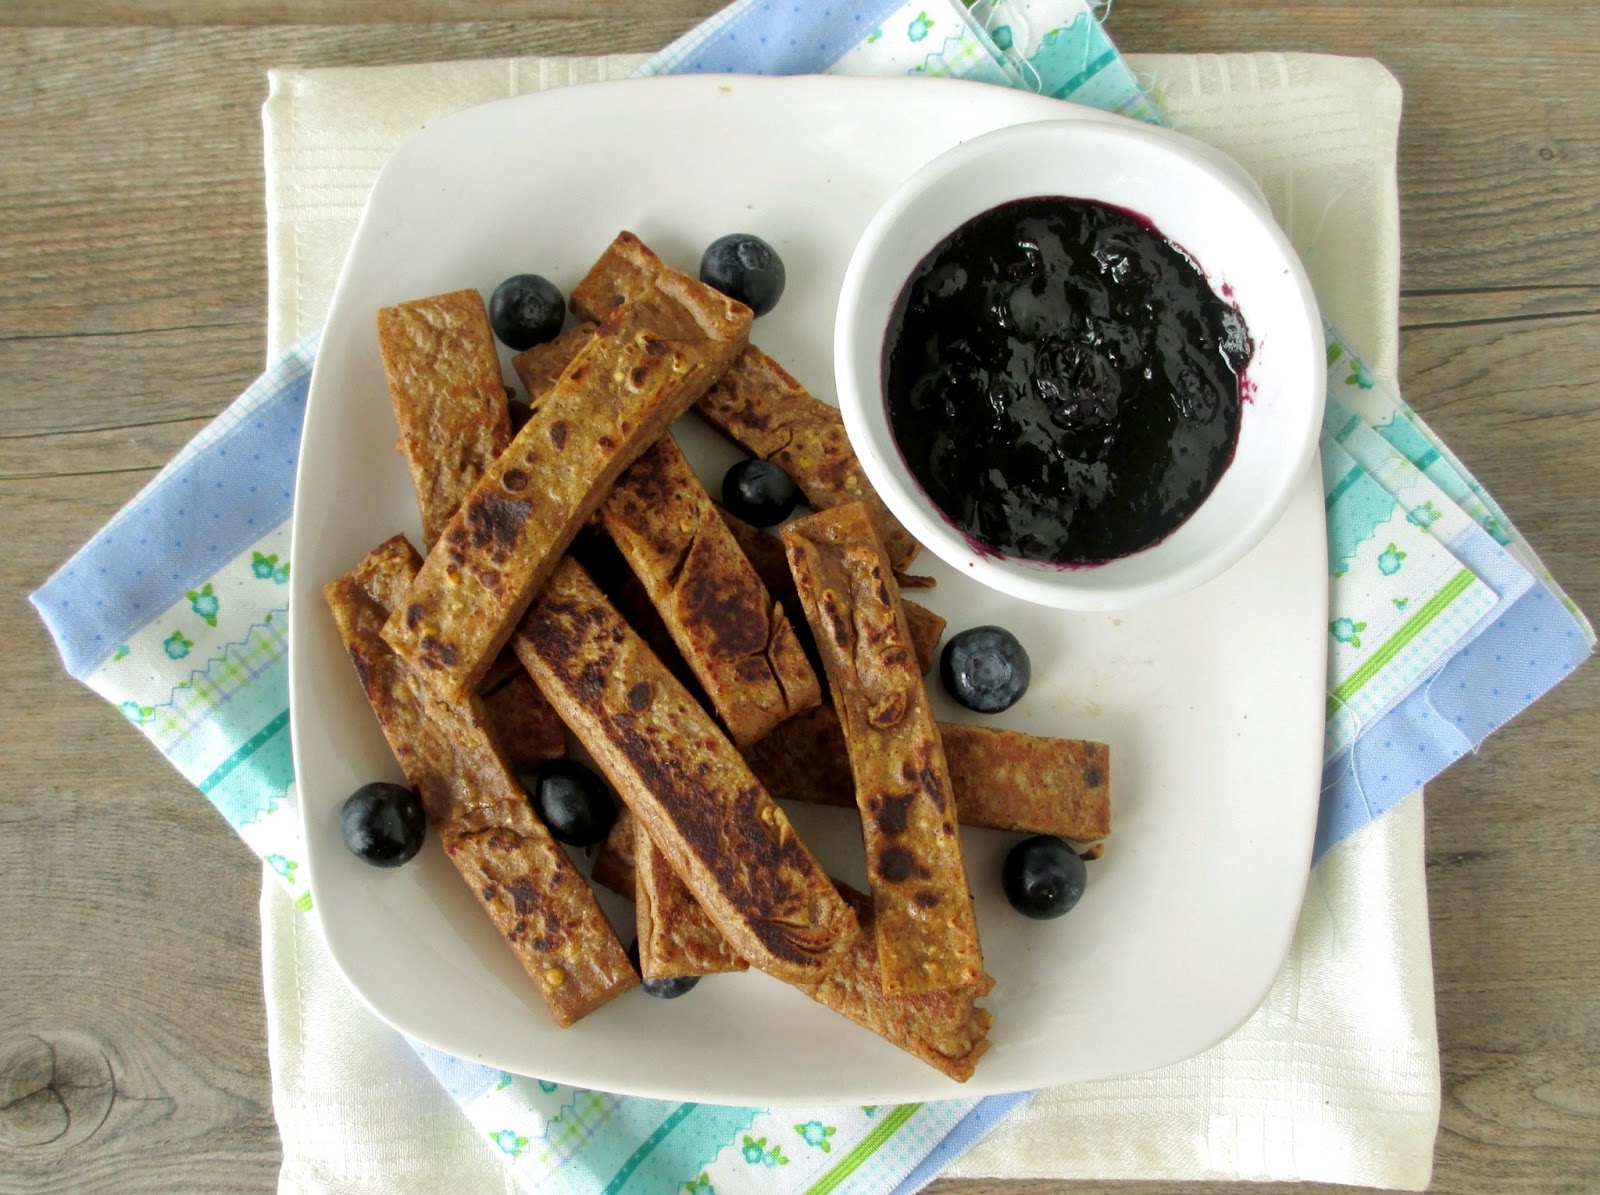
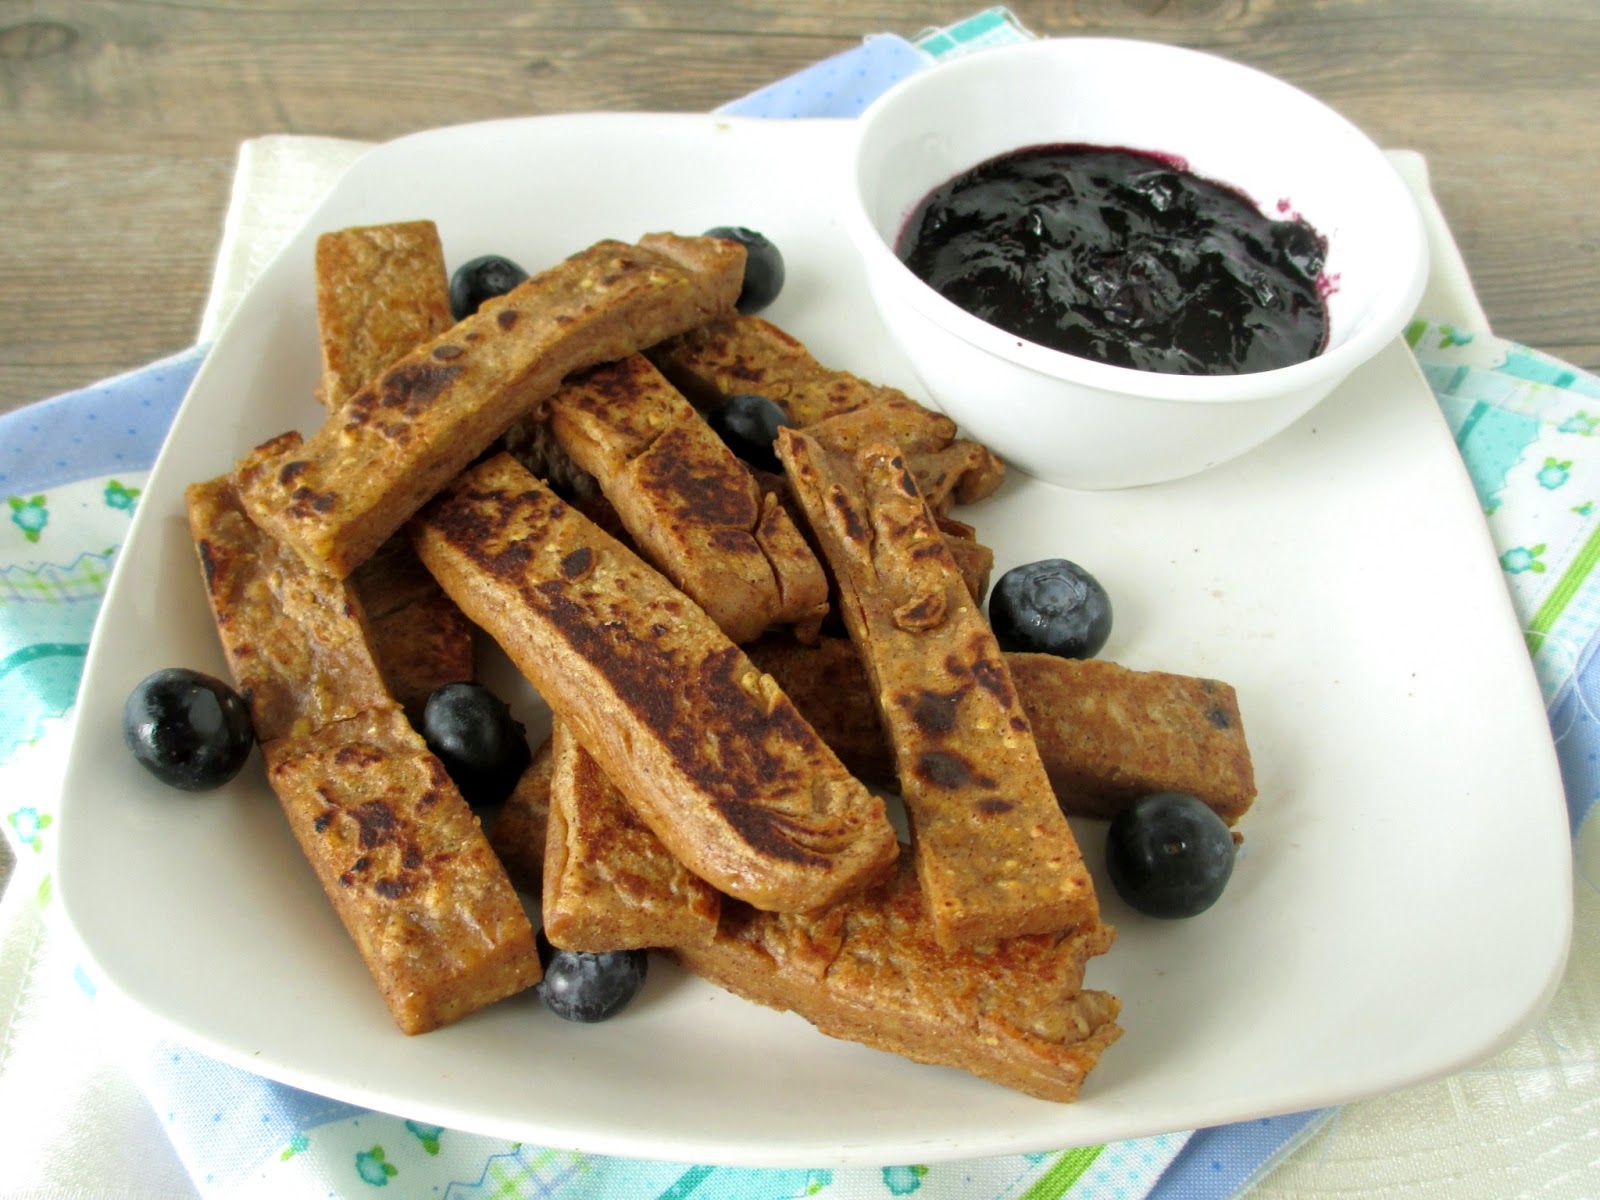
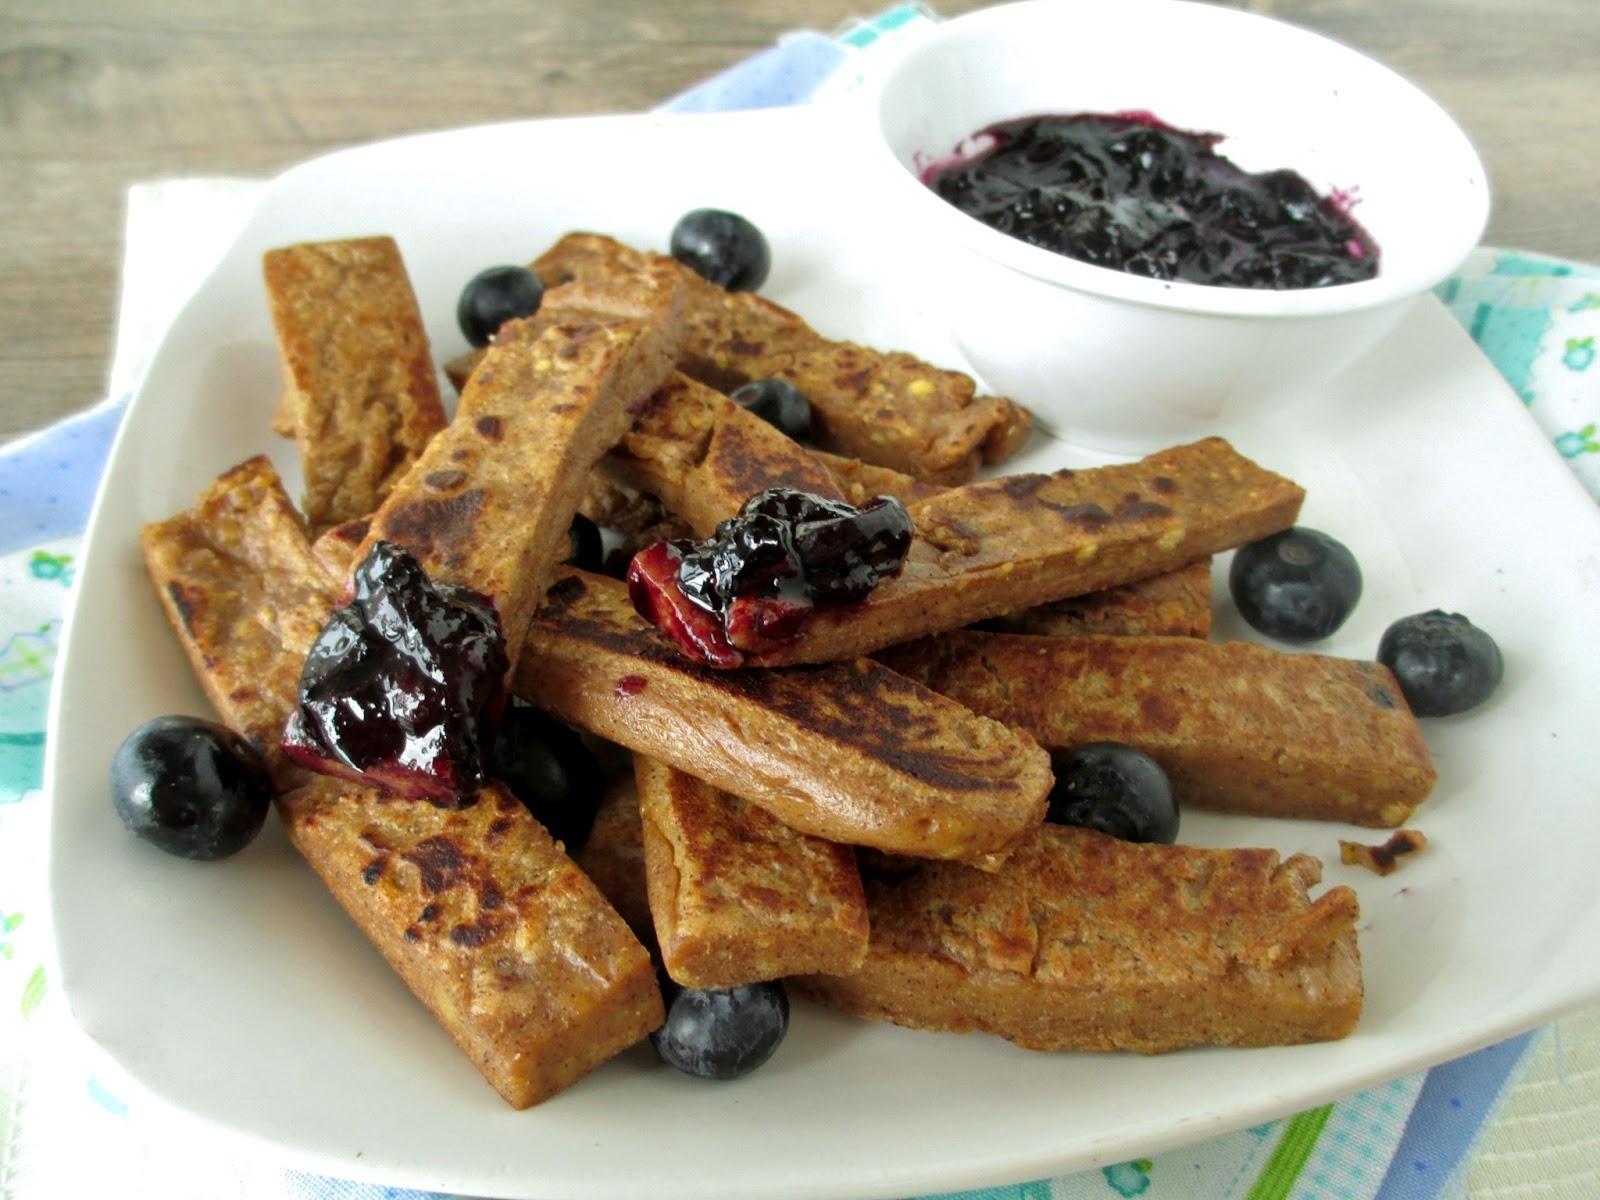
Breakfast Chickpea Fries with Blueberry Sauce


I don't post a lot of breakfast ideas on my blog, mostly because my breakfasts are typically pretty boring! I'll usually bring some yogurt with fruit and granola to eat when I get to my office, or if I have some homemade muffins or other baked goods stored in my freezer, I'll grab one of those to go. 

Occasionally though, I'll make the effort to prepare something a bit fancier on the weekend, like pancakes or french toast. This past weekend, I tried something new that turned out to be one of the most interesting and tasty breakfasts that I've had in a while!


I saw a recipe for french toast polenta sticks on the blog Tasty Yummies recently and thought it was such a creative idea to make a sweeter version of baked polenta "fries" that could be eaten for breakfast.

That recipe inspired me to try out a similar idea with chickpea flour instead of polenta. I've made chickpea flour "fries", also called panisse, many times in the past - they were actually one of the first recipes I posted on my blog! The basic idea is that by whisking chickpea flour into a simmering liquid on the stovetop, you can create a batter that thickens up just like polenta, and can then be cut into shapes and baked or fried.

My original version of chickpea fries was a simple mixture of chickpea flour, water, oil, salt and pepper, so to make a breakfast version, I used almond milk for the liquid and added cinnamon and vanilla extract to the batter.


You could serve the fries with maple syrup drizzled on top, but I wanted to make a dipping sauce for mine.  I had some blueberries that I had just picked up from the market, so I simmered them on the stovetop with a bit of maple syrup until they thickened up into a dippable sauce.

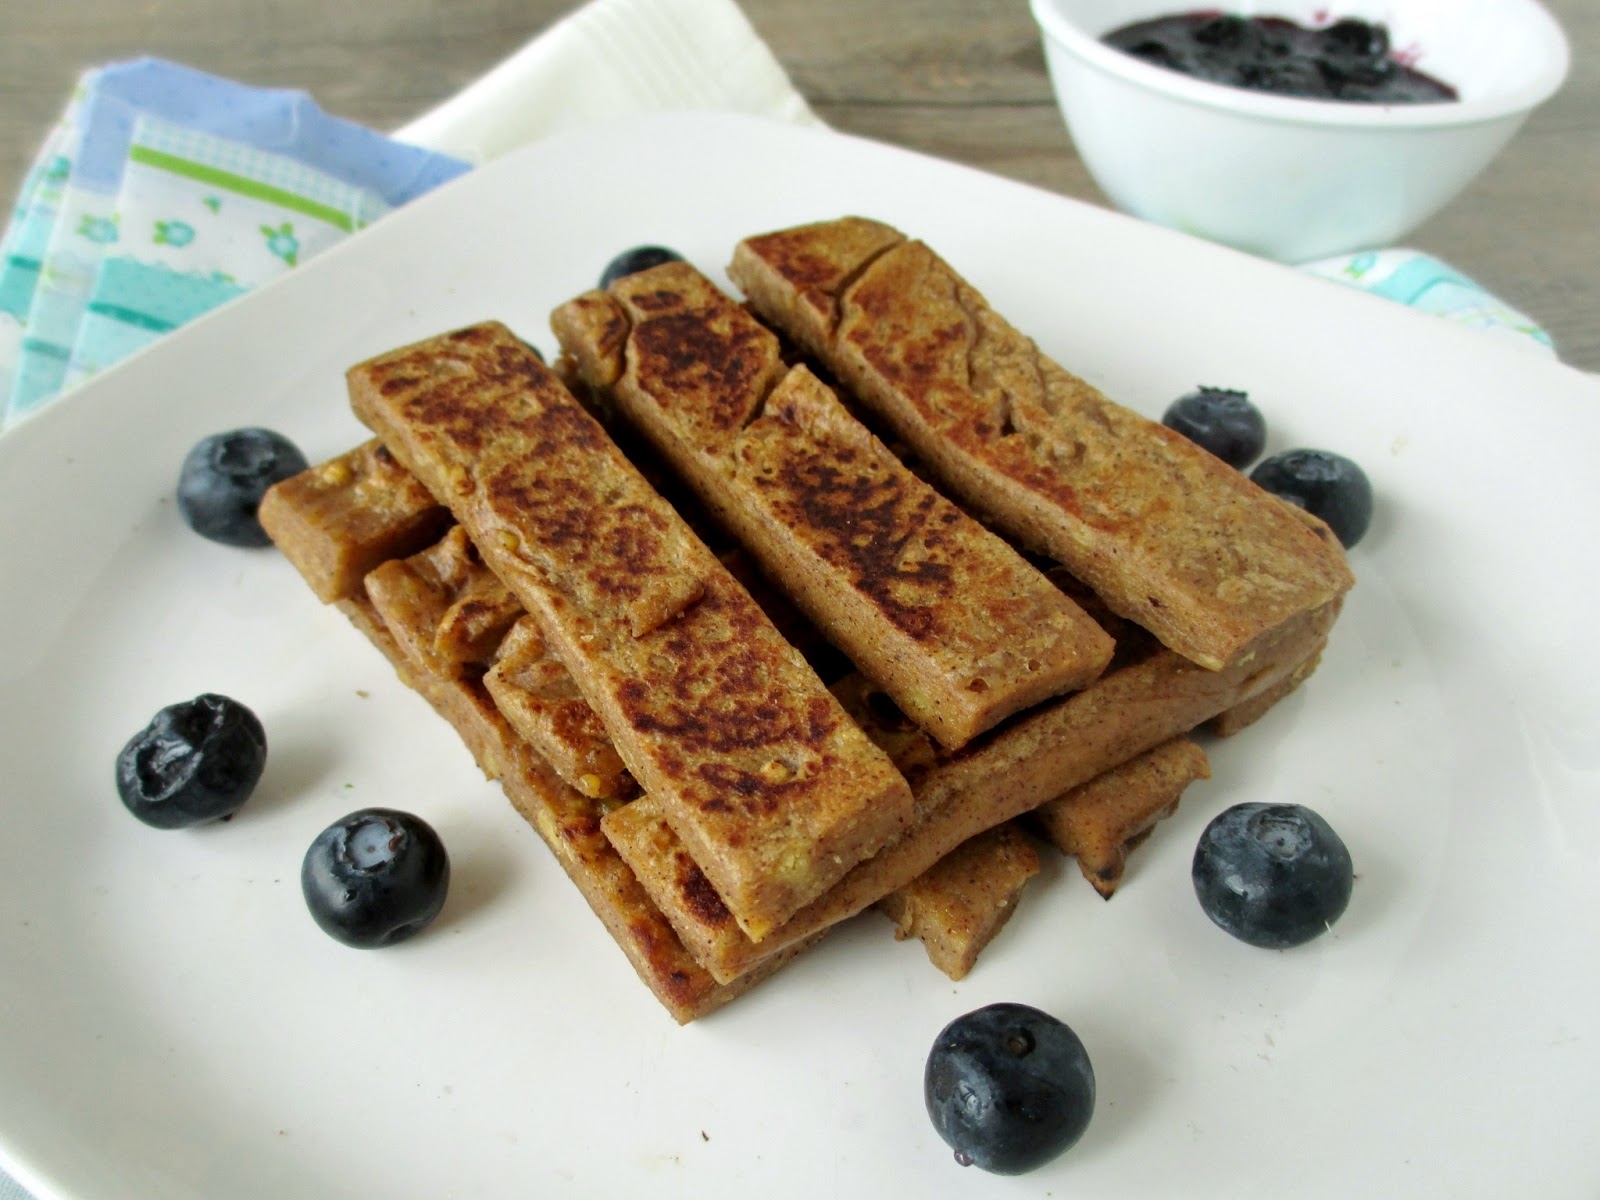
I thought the fries had the perfect texture - soft on the inside and slightly crispy on the outside, and the fries themselves weren't sweet, which made them the perfect base for covering in the warm blueberry sauce.

They actually reminded me of eating french toast sticks but without the batter part, which I actually prefer because it means they weren't soggy or eggy tasting like french toast can sometimes be. Not only are these fries vegan, but they're naturally gluten-free as well, making this a fun breakfast treat for everybody!


Breakfast Chickpea Fries with Blueberry Sauce
Inspired by Tasty Yummies and adapted from my original chickpea fries
Note: This recipe requires some advance preparation. I recommend making the chickpea batter the night before, then the next morning you just need to make the blueberry sauce and cook the chickpea fries.

1 cup non-dairy milk (I used vanilla almond milk)
1 tbsp olive oil
1 tsp cinnamon
Pinch of salt
1/2 tsp vanilla extract 
1/2 cup + 1 tbsp chickpea flour

Sauce
1/2 cup blueberries
1 tsp lemon juice
1 tbsp pure maple syrup


First, prepare the chickpea batter: Heat the milk, olive oil, cinnamon, salt, and vanilla in a small saucepan over high heat. Heat until the liquid is hot but not quite simmering.

Reduce heat to medium. Whisk in the chickpea flour slowly. Continue to whisk constantly for 2 minutes, then switch to a wooden spoon and cook for 8-10 more minutes, stirring constantly (your arm will get very sore!). Scrape down the sides of the saucepan occasionally as you stir. The batter will gradually get thicker and will start to pull away from the sides of the pan and clump together. Once it is very thick and can hold its shape, remove the pan from the heat.

Scrape the batter into a greased square cake pan or loaf pan (try to work quickly as the batter will begin to set almost immediately). It should fill about half of a square pan. Smooth the top with a spatula. Let the mixture cool for at least an hour or overnight in the refrigerator, until it is completely set.

Once cooled, invert the pan onto a cutting board. Cut the batter into sticks about 1/2”-3/4” wide.

Start making the blueberry sauce: Add blueberries and lemon juice to a small saucepan and heat over medium-high heat. Let cook until the blueberries have broken down into a chunky sauce, stirring occasionally, about 8-10 minutes. Add the maple syrup and let cook for a couple more minutes, until the liquid has reduced a bit. Keep on low heat until the fries are ready.

Heat a large skillet over medium-high heat and spray with cooking spray or add a pat of vegan butter. Add the fries to the pan and fry for about 5-6 minutes, flipping over halfway through, until they are lightly browned. (The amount here will fit into one skillet, but if you are making a larger amount, you will need to cook them in batches, keeping the finished fries warm while you cook the rest).

Serve fries with blueberry sauce on the side for dipping. I liked to sprinkle my fries with extra cinnamon, and you can also drizzle them with maple syrup if desired.

Makes 1 large serving.


July 03, 2013

Avocado, Mango & Orange Salad


Who doesn't love a refreshing, juicy fruit salad in the summer? I love adding fruit to my salads, whether it's a leafy salad or a grain-based salad, like this quinoa version.

This fruit salad is a bit different, in that it doesn't really have a base ingredient like lettuce or quinoa. Instead, it's just a simple combination of ripe fruits with fresh herbs, all marinated in a dressing made with freshly squeezed citrus juice.

I had made a version of the original recipe for my family recently as a way to use up some ripe fruits that were lying around, and we all loved it so much that I had to make it again. I changed things up a bit this time, adding some grape tomatoes and chopped cashews for a bit of crunch.

This salad had a lot of bright flavours, and I loved the creaminess of the avocado and mango with the juicy bursts of orange.

This would make a great side dish for a summer BBQ, or you can also eat it like a salsa on top of chips or quesadillas. And if you're in Canada with a Sobeys store nearby, I recommend picking up some of their "light and airy pop crisps" and using them as a base to eat this salad with!


Avocado, Mango & Orange Salad
Adapted from Saveur 

1 ripe mango, diced (I recommend using a champagne/Ataulfo mango)
1/2 cup chopped grape or cherry tomatoes
1 ripe avocado, diced
1/2 a jalapeno, minced
1/4 cup chopped cilantro
1 medium orange (I used a navel orange)
1.5 tbsp fresh lime juice
1/2 tbsp olive oil
Salt and white pepper
1/4 cup chopped roasted cashews

Combine the diced mango, tomatoes, and avocado in a bowl. Add the minced jalapeno and chopped cilantro and stir to combine. Peel the orange, using a knife to slice off all of the white parts of the skin. Carefully slice the orange into wedges.  Take 2 slices and squeeze all of the juice out of them into a small bowl. Measure 1 tbsp of orange juice and set aside (if you don't get 1 tbsp, use another orange slice until you have enough juice). Chop the remaining orange slices into pieces and add them to the salad (you should have about ¾ cup).

Add the lime juice and olive oil to the bowl with the orange juice. Season with salt and white pepper to taste. Stir or whisk to combine, then pour dressing over the salad, tossing to mix.

Let salad chill in the refrigerator until serving time. Sprinkle chopped cashews over the salad when you are ready to serve.

Makes 2 servings. 

June 06, 2013

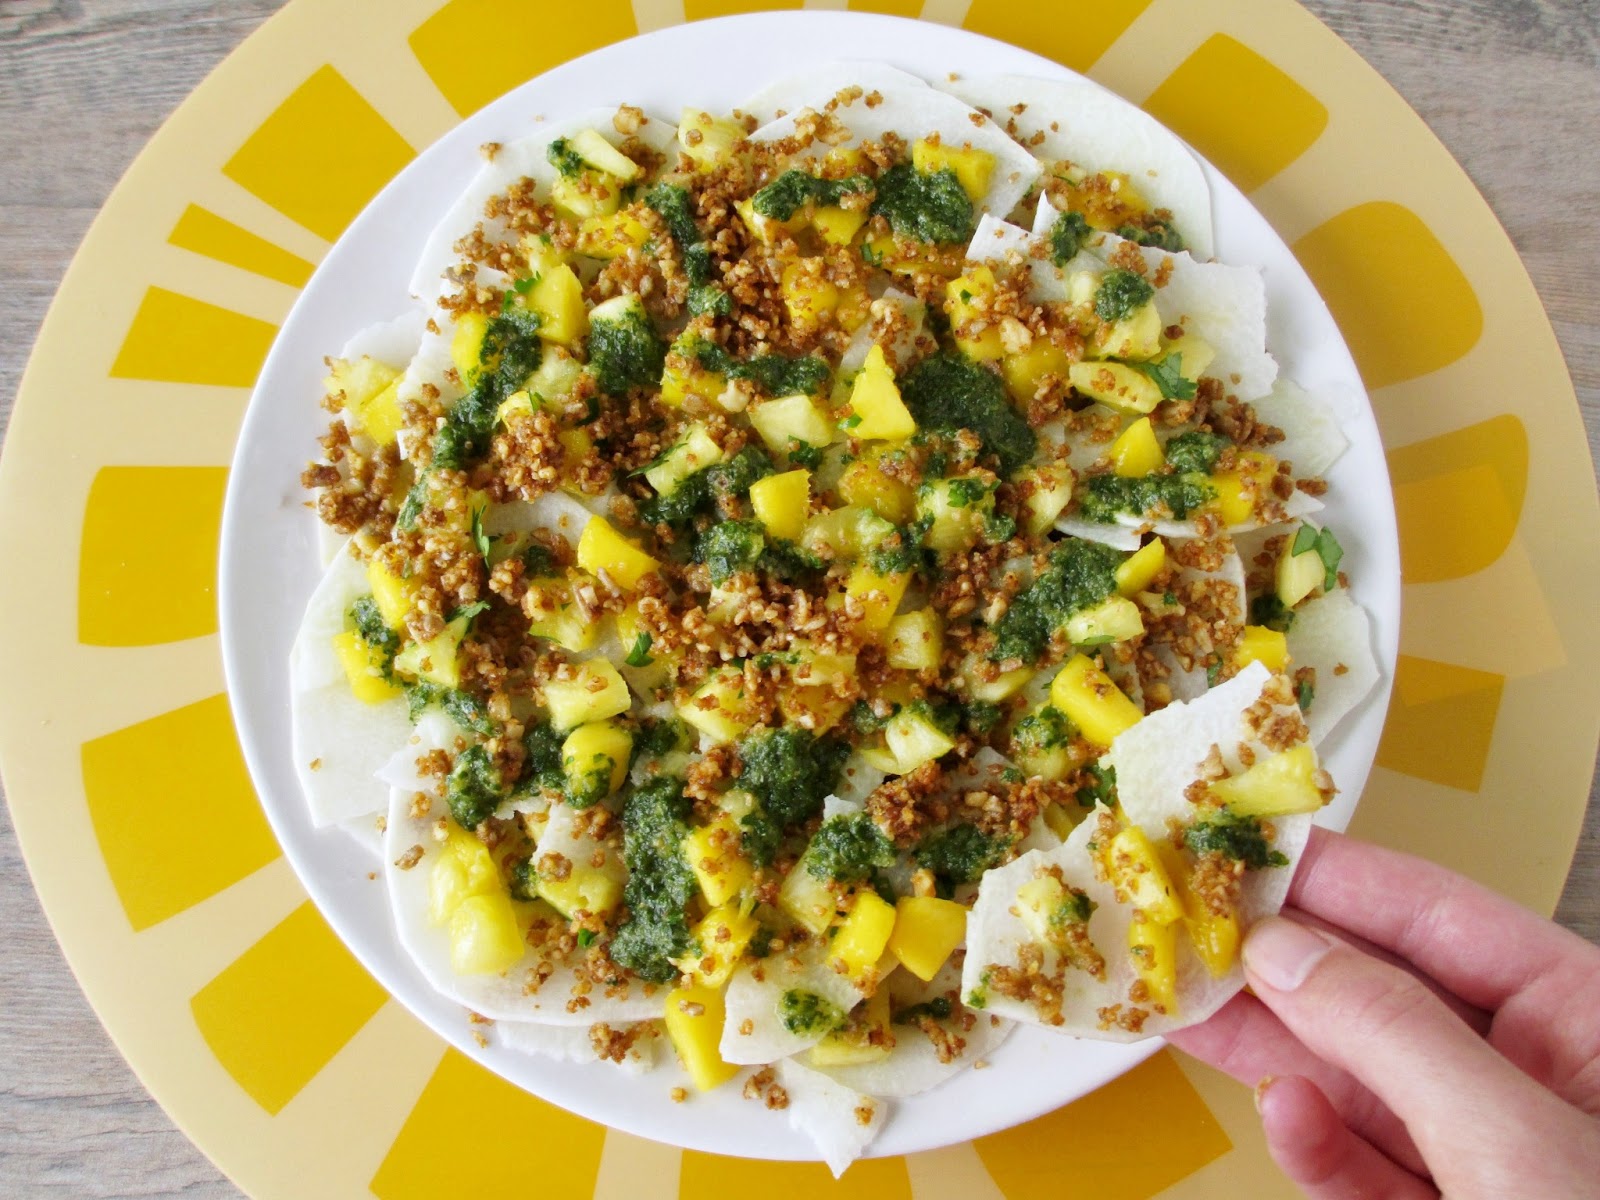
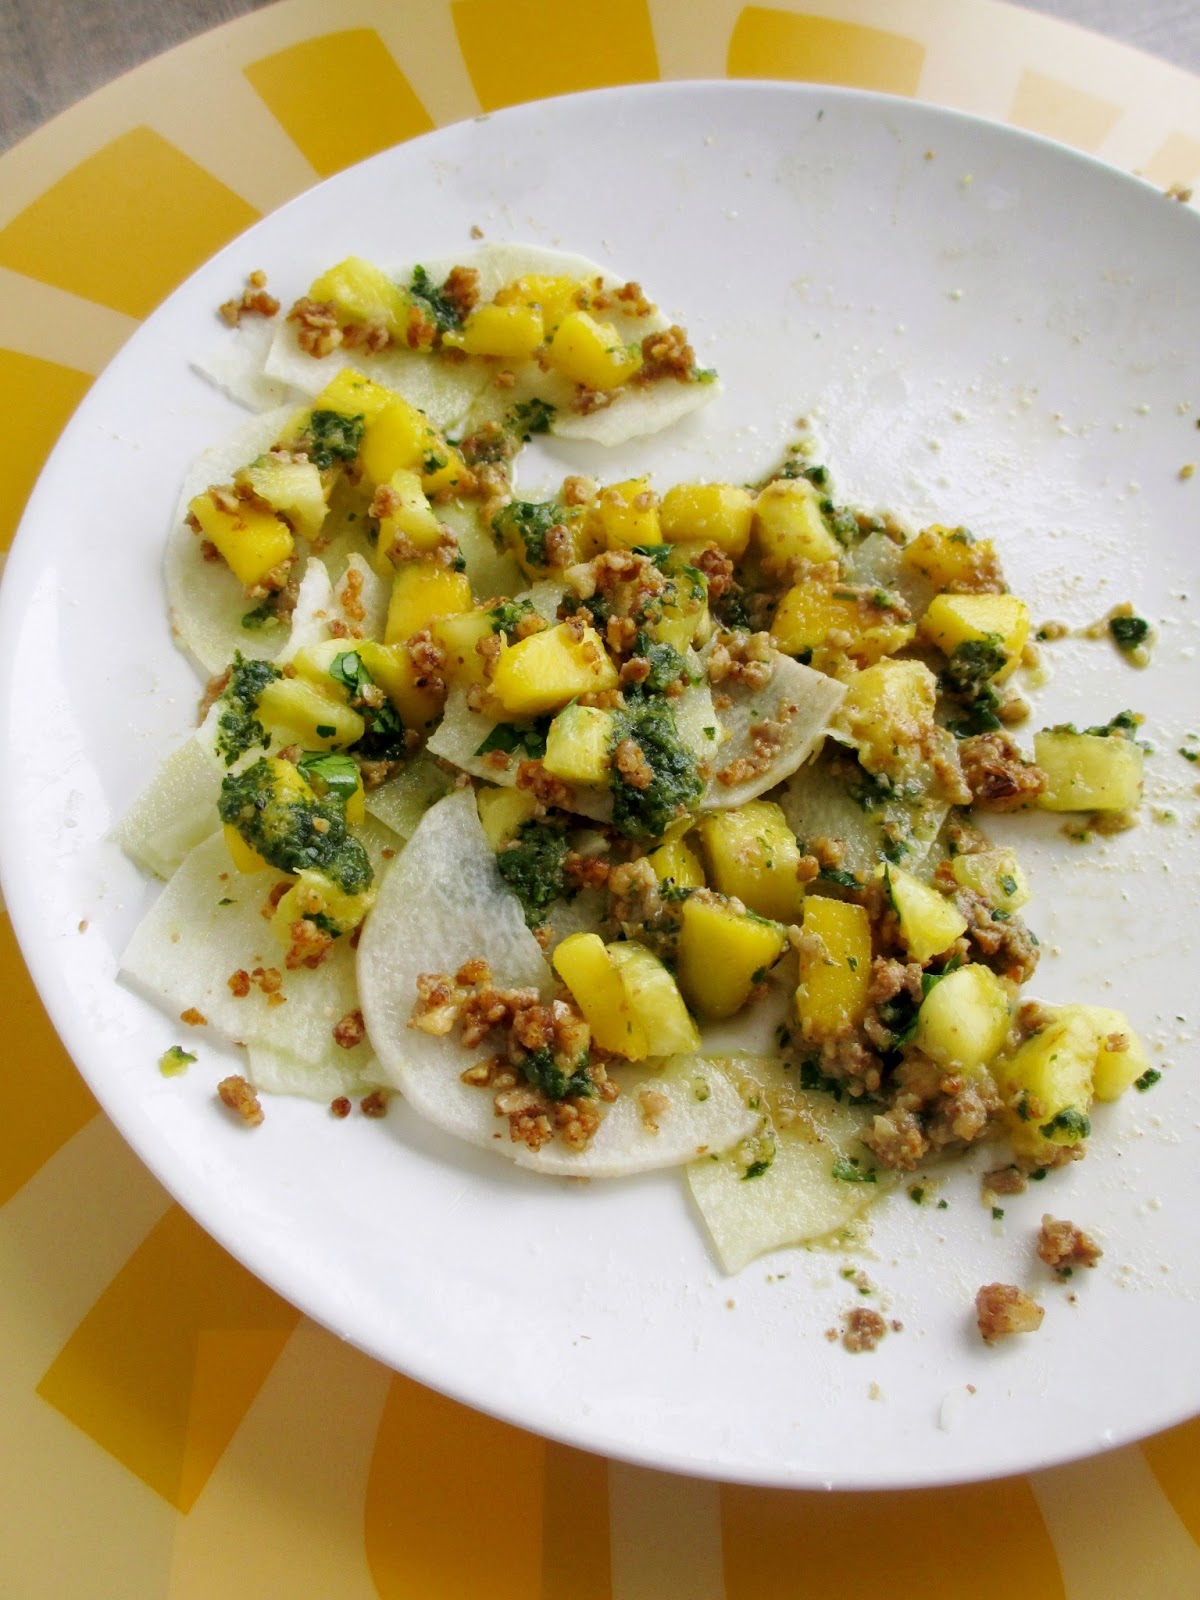
Raw Jicama Nachos with Fruit Salsa and Taco Nut Crumbles


In my last post, I shared an idea for healthy nachos using thinly sliced apples as the base, and today I have another raw nacho idea for you!  While the apple nachos went in more of a dessert direction, these nachos go the savoury route, making them a fun option for a light lunch.

This time, the nachos are made up of very thin slices of jicama, the Mexican root vegetable that resembles a turnip. I love jicama, but I find it hard to get a perfectly sweet and crisp one - more often than not, I end up with one that's rotten inside or too grainy and bitter tasting. So if anyone has any tips on how to select a good jicama, I'd love to hear them!

When you do get a good jicama though, they're just so refreshing to eat, since they're composed mostly of water, like cucumbers. And that's the perfect word to describe these nachos: refreshing!


To make these nachos, layers of super thin, crisp jicama slices are topped with a juicy, sweet tropical fruit salsa, a spicy taco nut "meat" crumble, and a bright, fresh lime-cilantro sauce to bring everything together.

While it did take some time to prepare each of the components, it was worth the effort for all of the fresh flavours that complemented each other so well. Plus one bonus of raw nachos is that once you've assembled your plate, they're ready to eat - no waiting in the oven for them to cook first!

Of course, the other bonus with raw nachos is that they taste so much lighter than the cheese and sour cream covered tortilla chip version. I loved that I could eat a whole plate of these nachos myself and still feel good afterwards - I had planned on only eating half, but I found it too hard to stop eating them, so you might want to make a double batch if you plan on sharing these!


Raw Jicama Nachos with Fruit Salsa and Taco Nut Crumbles
Inspired by Fragrant Vanilla Cake

Salsa
1/2 cup finely diced pineapple
1/2 cup finely diced ripe mango
1-2 tbsp chopped cilantro

Sauce
1/2 cup packed cilantro
Juice of one lime
1/4 tsp cumin
1/2 tbsp raw agave or honey
1/4 cup diced pineapple

Taco Nut Crumble
1/4 cup + 2 tbsp raw walnuts
2 tbsp raw sunflower seeds
1/2 tsp chili powder*
1/4 tsp cumin*
1/8 tsp cayenne*
Dash of salt
1/2 tsp tamari
1 tsp olive oil

Nachos
About half of a medium jicama, peeled (about ¾ - 1 lb)

*can substitute spices with about 3/4 tsp taco seasoning instead


To make the salsa: combine all ingredients in a bowl and stir to mix. Set aside.

To make the sauce: Place all ingredients in a food processor or blender and process until smooth. Set aside.

To make the crumble: Place walnuts and sunflower seeds in a food processor and process until chunky and broken down. Add remaining ingredients and process until the mixture resembles coarse, sticky crumbs. Set aside.

Place the jicama in your spiralizer and use the widest blade setting to slice it into very thin pieces. (Note: If you don't have a spiralizer, you could use a mandolin or a knife to slice it into shavings as thin as possible).

To assemble: Arrange a layer of the jicama slices evenly on a large plate. Top with about half of the nut crumble, half the salsa, and half the sauce. Add another layer of jicama slices and top with the remaining toppings.  Serve immediately. 

Serves 1 hungry person or 2-3 smaller servings.

Note: You can eat these with your hands like I did, but it does get a bit messy so feel free to use utensils!

This was submitted to Wellness Weekend at Diet, Dessert & Dogs.

September 21, 2011

Banana Blueberry Mango Muffins


I tend to be finicky about blueberries - I don't particularly like eating them on their own, but I will put them in my yogurt ... blueberry pies don't appeal to me, but I do like them in other baked goods.  Blueberry muffins are one baked good that are definitely on my "like" list! Especially when they're combined with other fruits like bananas and mangoes!

The idea for these muffins came from a recipe for blueberry flax muffins from the blog Cupcakes and Kale. The recipe was full of healthy ingredients, and I was especially intrigued by the rye flour - I love the taste of it in bread, but had never thought to put it in muffins before.

Since I wanted to make them into banana-blueberry muffins, I used mashed bananas instead of the applesauce. I also decided to add diced mangoes to make them extra fruit-filled! I was a little worried when I cut one of the muffins open that I had gone overboard with the amount of fruit - as you can see, this one was completely blue inside:


But once I gave them more time to cool, I really liked them! These muffins had a lot going on - with the coconut topping, the subtle banana flavour throughout, and the juicy burst of actual fruit pieces in every bite.  I will definitely try to use rye flour in my baking more often too - I loved the colour and the sweet, nutty taste that it gave the muffins.

These are also vegan and contain no added fats (other than the coconut on top, which you can leave off if you prefer) - so you can feel good about eating them for breakfast, or any other time of the day!


Vegan Banana Blueberry Mango Muffins
Heavily adapted from Cupcakes and Kale

3/4 cup all purpose flour
1/4 cup rye flour
2 tbsp wheat bran or oat bran
2.5 tbsp ground flax
1/4 cup brown sugar
1 tsp baking powder
1/2 tsp baking soda
1/2 tsp cinnamon
1/4 tsp nutmeg
1/4 tsp salt
1/4 cup + 1 tbsp mashed banana
3/4 cup almond milk (or other non-dairy milk)
3/4 tsp vanilla
1/2 cup blueberries
1/2 cup diced mango
unsweetened shredded coconut for topping

Preheat the oven to 375 degrees and prepare a muffin pan by spraying with cooking spray.

In a large bowl, whisk together the dry ingredients (flour through to salt).

In a separate bowl, mix together the mashed banana, almond milk and vanilla. 

Add the wet ingredients to the dry and mix just until the dry ingredients are incorporated. Fold in the blueberries and mango. 

Spoon the batter into your muffin pan and sprinkle the coconut on top, pressing in gently to make sure it sticks. 

Bake in the preheated oven for 22-25 minutes, until a toothpick comes out clean (Note: it might be hard to test when they are done because of all the fruit inside, so try to find a dry spot in the muffins to insert your toothpick tester).

Makes about 9 muffins.

August 24, 2011

Quinoa Almond Fruit Salad


Since I became a vegetarian, I've been eating a lot of quinoa. Its a complete protein, its very easy to cook, and there are endless possibilities for turning it into a delicious meal, so I never have a problem using it up if I have leftovers. I've tried wrapping it up in a tortilla with some veggies, and even eating it for breakfast layered with yogurt to make a parfait!

Quinoa also goes well with just about any kind of fruit, and this salad is proof of that! I saw the recipe on Oh She Glows, and have made it a couple of times since then. The first time, I didn't think it was anything special, but now I realize the reason I didn't love it was because I decided to use blackberries instead of blueberries. I guess blackberries are one fruit that actually don't belong in quinoa, at least for my personal taste - I just didn't like the texture of their crunchy seeds mixed with everything else in the dish.

So the next time I made it, I used a different combination of fruits that turned out really well! I kept the strawberries and blueberries from the original recipe, and also added mango (because clearly I love mango!). I thought the flavour and texture of the mango went perfectly with everything else, and also added a nice burst of colour. Next time, I might even include kiwi too for one more bright colour to go with the red, blue, and yellow!

Usually, I find that quinoa doesn't need much of a dressing, but it does soak up the flavour of any dressing that you do add. I loved the dressing in this recipe - the taste of the lime definitely came through, but it was balanced by the subtle sweetness of the maple syrup and the balsamic. I also like when a dressing is oil-free!

Here is the recipe with my changes. Aside from the addition of mango, I also added lime zest and two types of almonds. And since I was bringing this to a potluck, I used more quinoa than the original recipe, and one and a half times the amount of dressing.


Quinoa Almond Fruit Salad
Adapted from Oh She Glows

About 1 cup dry quinoa
1 pint strawberries, diced (about 2.5 cups)
6 oz blueberries
2 small mangos, diced
1/3 cup raw almonds, chopped
1/3 cup slivered almonds

Dressing:
3 tbsp pure maple syrup
1.5 tsp balsamic vinegar
1.5 tbsp fresh lime juice
zest of one lime
pinch of kosher salt

Cook the quinoa according to the package instructions. Let cool and fluff with a fork.

Meanwhile, chop up your fruit and almonds and set aside. (I toasted the almonds first because I prefer them that way).

Make the dressing by whisking all ingredients in a small bowl.

Transfer the cooked quinoa to a large bowl. Add in the fruit and almonds and stir to combine. Pour the dressing on and mix well. Chill the salad in the fridge until serving time.


Makes a large amount (I'm not sure how many servings this made because I brought it to a potluck, but it fed lots of people!)


August 16, 2011

Broiled Apricots with Goat Cheese and a Peach Salad


I picked up some apricots at the farmer’s market last weekend without any idea of what I would do with them. I’m not sure if I’ve ever even eaten a fresh apricot before, but they had little samples out to try, and I liked it so much that I bought two immediately!

After searching for recipe ideas, I decided to caramelize my apricots under the broiler and top them with goat cheese, chopped nuts and basil. I used honey-flavoured goat cheese, which went nicely with the apricots but made for a pretty sweet dish overall combined with the caramelized sugar and honey on top. I also paired them with a fresh peach salad to which I added more goat cheese, plus the leftover chopped nuts and basil.

I don’t know what possessed me to think that two whole apricots (plus the peach salad) was an appropriate serving size just for myself...I must have neglected to take into account the fact that two apricots actually equals four portions once you cut them in half. Oh well, I still enjoyed every bite! But I definitely would have appreciated the meal more if I had have been left wanting more rather than feeling stuffed!

So if you can still find fresh apricots and local peaches, give this recipe a try – just adjust the proportions of everything depending on how many people you are serving.


Caramelized Apricots with Goat Cheese, Basil and Almonds
Adapted from The Flourishing Foodie

2 apricots
1 tsp coconut sugar (or brown sugar)
1.5-2 tbsp goat cheese (I used honey flavour)
about 3-4 leaves of fresh basil, chopped
2 tbsp chopped toasted almonds
honey for drizzling (optional)

Cut the apricots in half and remove the pit. Sprinkle the tops with coconut sugar and put on a baking sheet. Broil in the oven (500 degrees) for 10-15 minutes.

Meanwhile, mix the goat cheese with the chopped basil.

Remove apricots from oven and fill the halves with the goat cheese mixture. Sprinkle with chopped almonds and more basil (you won't need all the almonds, so save the rest for the salad). Drizzle with honey if desired.

Serve warm.


Peach Salad with Goat Cheese, Almonds and Balsamic Vinaigrette

You don't need an exact recipe for this, just arrange the ingredients on a plate and top with a simple dressing to let the flavours of the salad shine!

lettuce or mixed greens
1 large peach, sliced
goat cheese, crumbled
sliced toasted almonds (I used the leftovers from the apricots)
chopped basil
balsamic vinegar (reduced in a saucepan)
olive oil

LinkWithin

Related Posts Plugin for WordPress, Blogger...