Showing posts with label lime. Show all posts

June 06, 2013

Raw Jicama Nachos with Fruit Salsa and Taco Nut Crumbles


In my last post, I shared an idea for healthy nachos using thinly sliced apples as the base, and today I have another raw nacho idea for you!  While the apple nachos went in more of a dessert direction, these nachos go the savoury route, making them a fun option for a light lunch.

This time, the nachos are made up of very thin slices of jicama, the Mexican root vegetable that resembles a turnip. I love jicama, but I find it hard to get a perfectly sweet and crisp one - more often than not, I end up with one that's rotten inside or too grainy and bitter tasting. So if anyone has any tips on how to select a good jicama, I'd love to hear them!

When you do get a good jicama though, they're just so refreshing to eat, since they're composed mostly of water, like cucumbers. And that's the perfect word to describe these nachos: refreshing!
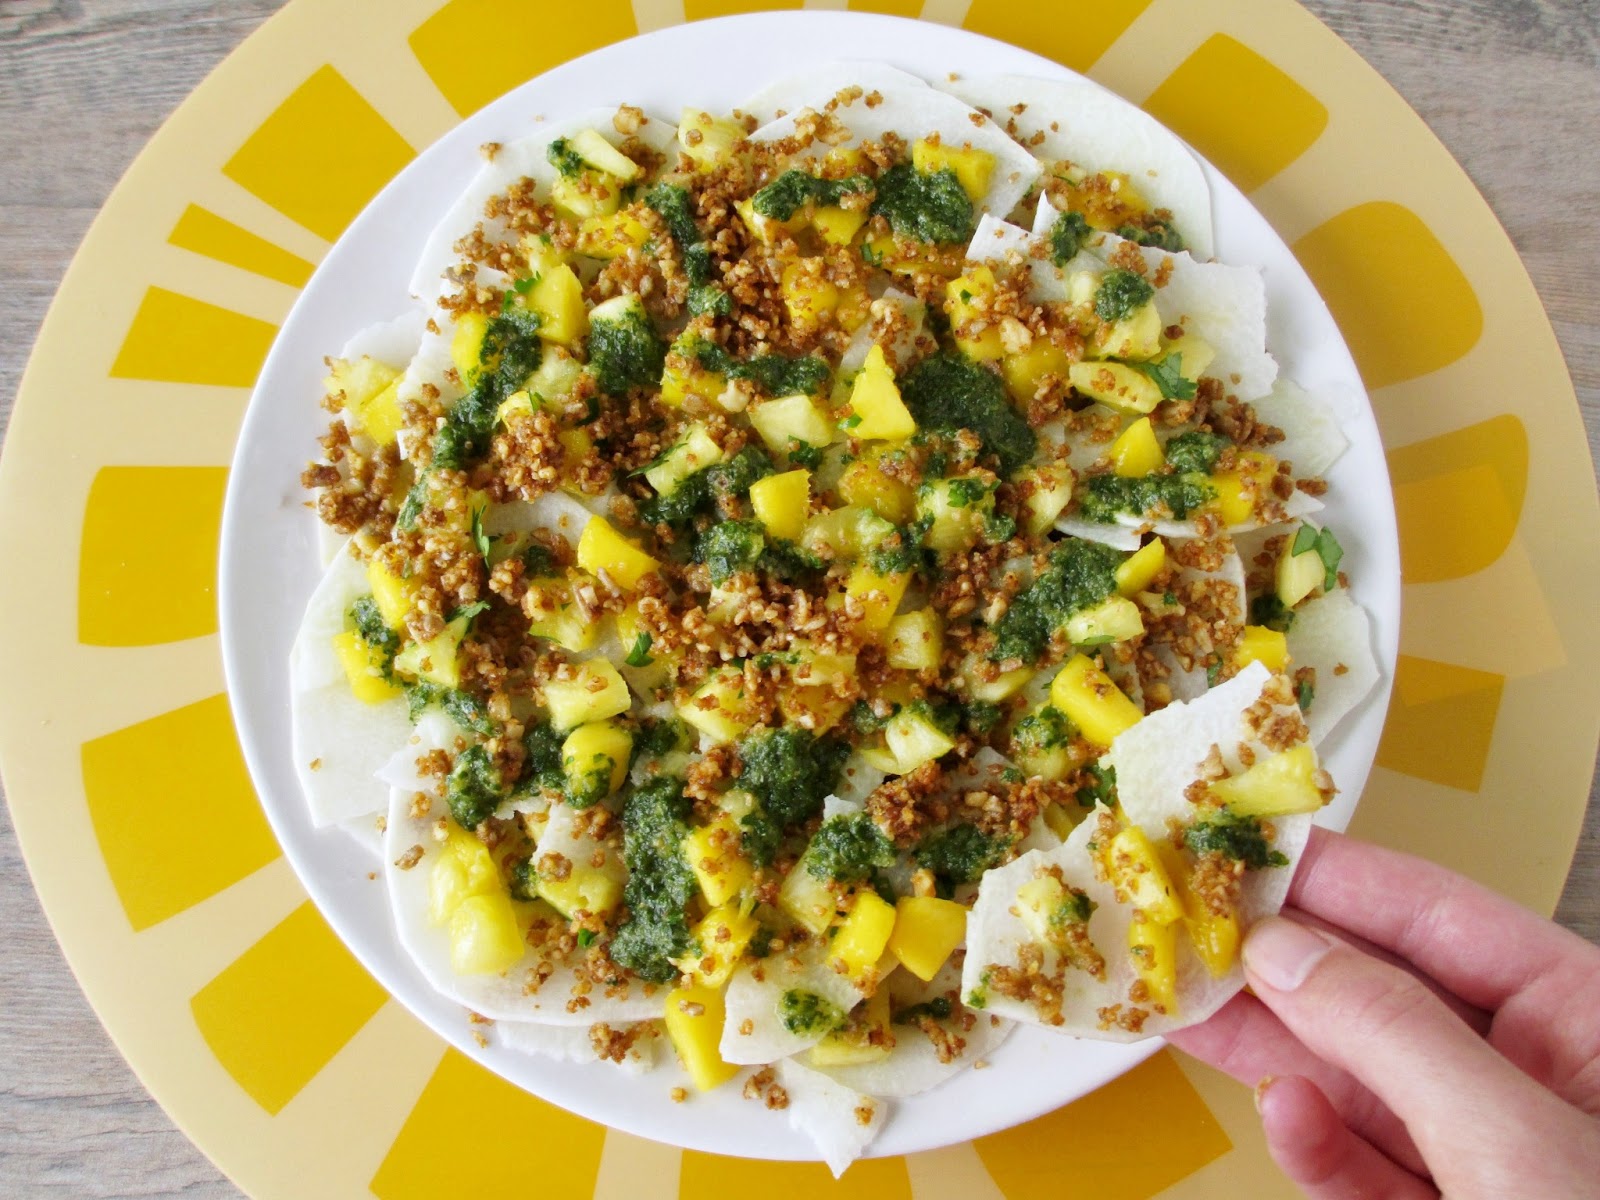

To make these nachos, layers of super thin, crisp jicama slices are topped with a juicy, sweet tropical fruit salsa, a spicy taco nut "meat" crumble, and a bright, fresh lime-cilantro sauce to bring everything together.

While it did take some time to prepare each of the components, it was worth the effort for all of the fresh flavours that complemented each other so well. Plus one bonus of raw nachos is that once you've assembled your plate, they're ready to eat - no waiting in the oven for them to cook first!

Of course, the other bonus with raw nachos is that they taste so much lighter than the cheese and sour cream covered tortilla chip version. I loved that I could eat a whole plate of these nachos myself and still feel good afterwards - I had planned on only eating half, but I found it too hard to stop eating them, so you might want to make a double batch if you plan on sharing these!
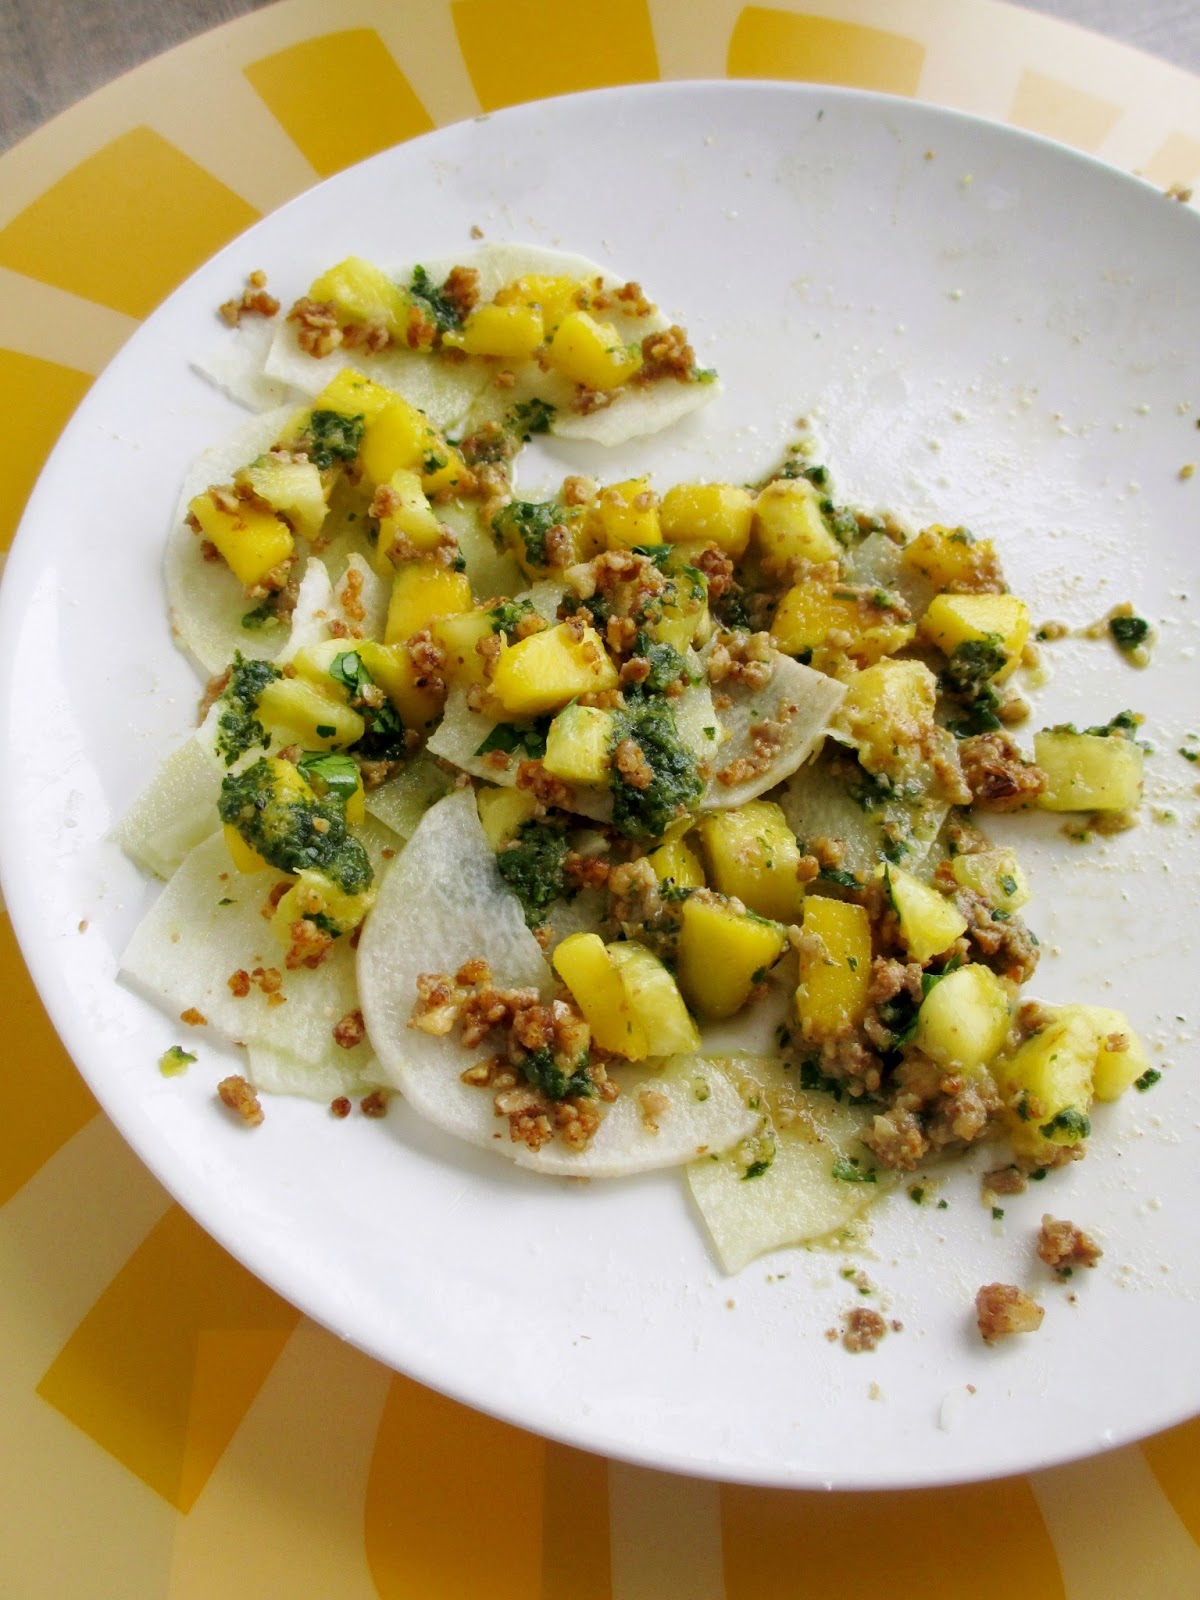


Raw Jicama Nachos with Fruit Salsa and Taco Nut Crumbles
Inspired by Fragrant Vanilla Cake

Salsa
1/2 cup finely diced pineapple
1/2 cup finely diced ripe mango
1-2 tbsp chopped cilantro

Sauce
1/2 cup packed cilantro
Juice of one lime
1/4 tsp cumin
1/2 tbsp raw agave or honey
1/4 cup diced pineapple

Taco Nut Crumble
1/4 cup + 2 tbsp raw walnuts
2 tbsp raw sunflower seeds
1/2 tsp chili powder*
1/4 tsp cumin*
1/8 tsp cayenne*
Dash of salt
1/2 tsp tamari
1 tsp olive oil

Nachos
About half of a medium jicama, peeled (about ¾ - 1 lb)

*can substitute spices with about 3/4 tsp taco seasoning instead


To make the salsa: combine all ingredients in a bowl and stir to mix. Set aside.

To make the sauce: Place all ingredients in a food processor or blender and process until smooth. Set aside.

To make the crumble: Place walnuts and sunflower seeds in a food processor and process until chunky and broken down. Add remaining ingredients and process until the mixture resembles coarse, sticky crumbs. Set aside.

Place the jicama in your spiralizer and use the widest blade setting to slice it into very thin pieces. (Note: If you don't have a spiralizer, you could use a mandolin or a knife to slice it into shavings as thin as possible).

To assemble: Arrange a layer of the jicama slices evenly on a large plate. Top with about half of the nut crumble, half the salsa, and half the sauce. Add another layer of jicama slices and top with the remaining toppings.  Serve immediately. 

Serves 1 hungry person or 2-3 smaller servings.

Note: You can eat these with your hands like I did, but it does get a bit messy so feel free to use utensils!

This was submitted to Wellness Weekend at Diet, Dessert & Dogs.

May 31, 2013

Roasted Corn & Pineapple Salad


Another week has flown by and with lots of events going on this weekend, I couldn't be happier that it's Friday! One of my favourite things about summertime is all of the outdoor activities and festivals happening - it seems like there's always something to do on the weekend, and it's a bonus when some of those activities are free!

This weekend, I'll be going to a friend's potluck party (and bringing a dessert that I plan on sharing with you soon!), and there are at least four other events going on - a free outdoor music show, a nighttime block party downtown, the local air show, and a food-crafts-art show in the park near my apartment. I can't wait to spend the weekend outside, as long as the weather holds up!

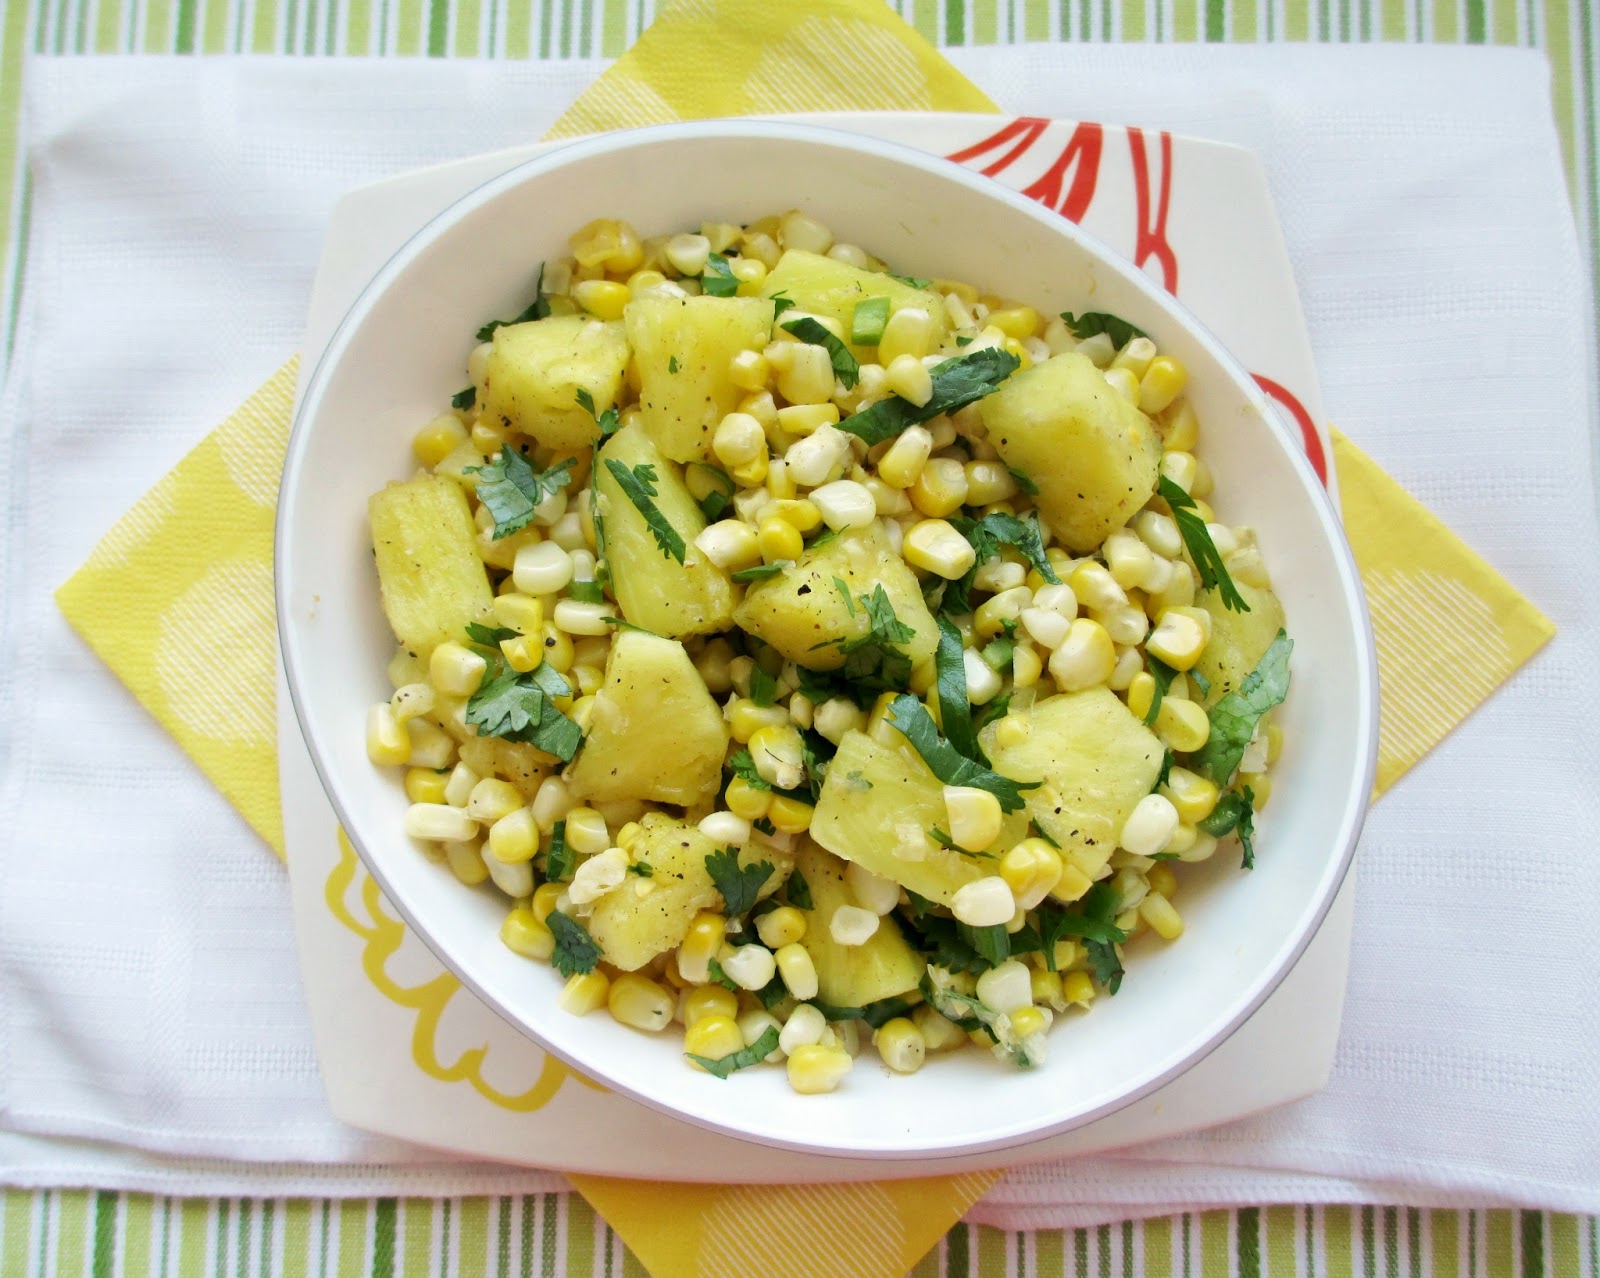
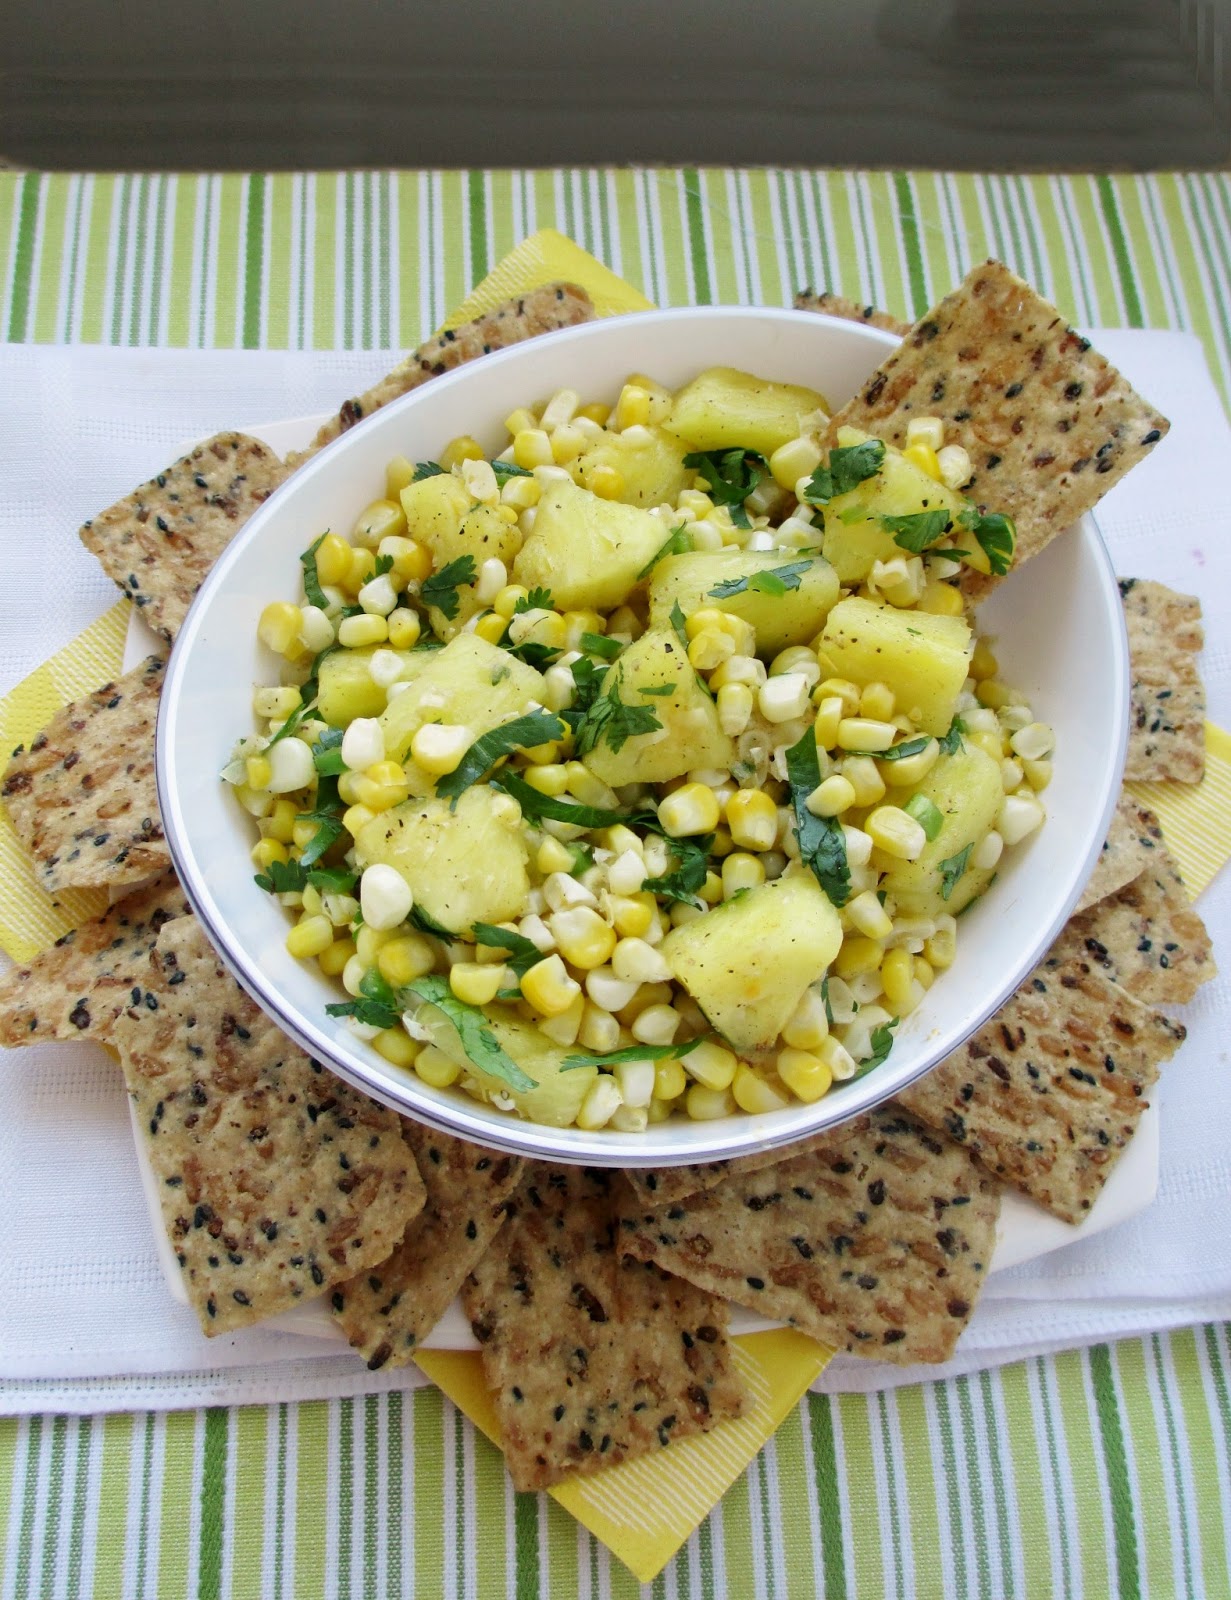
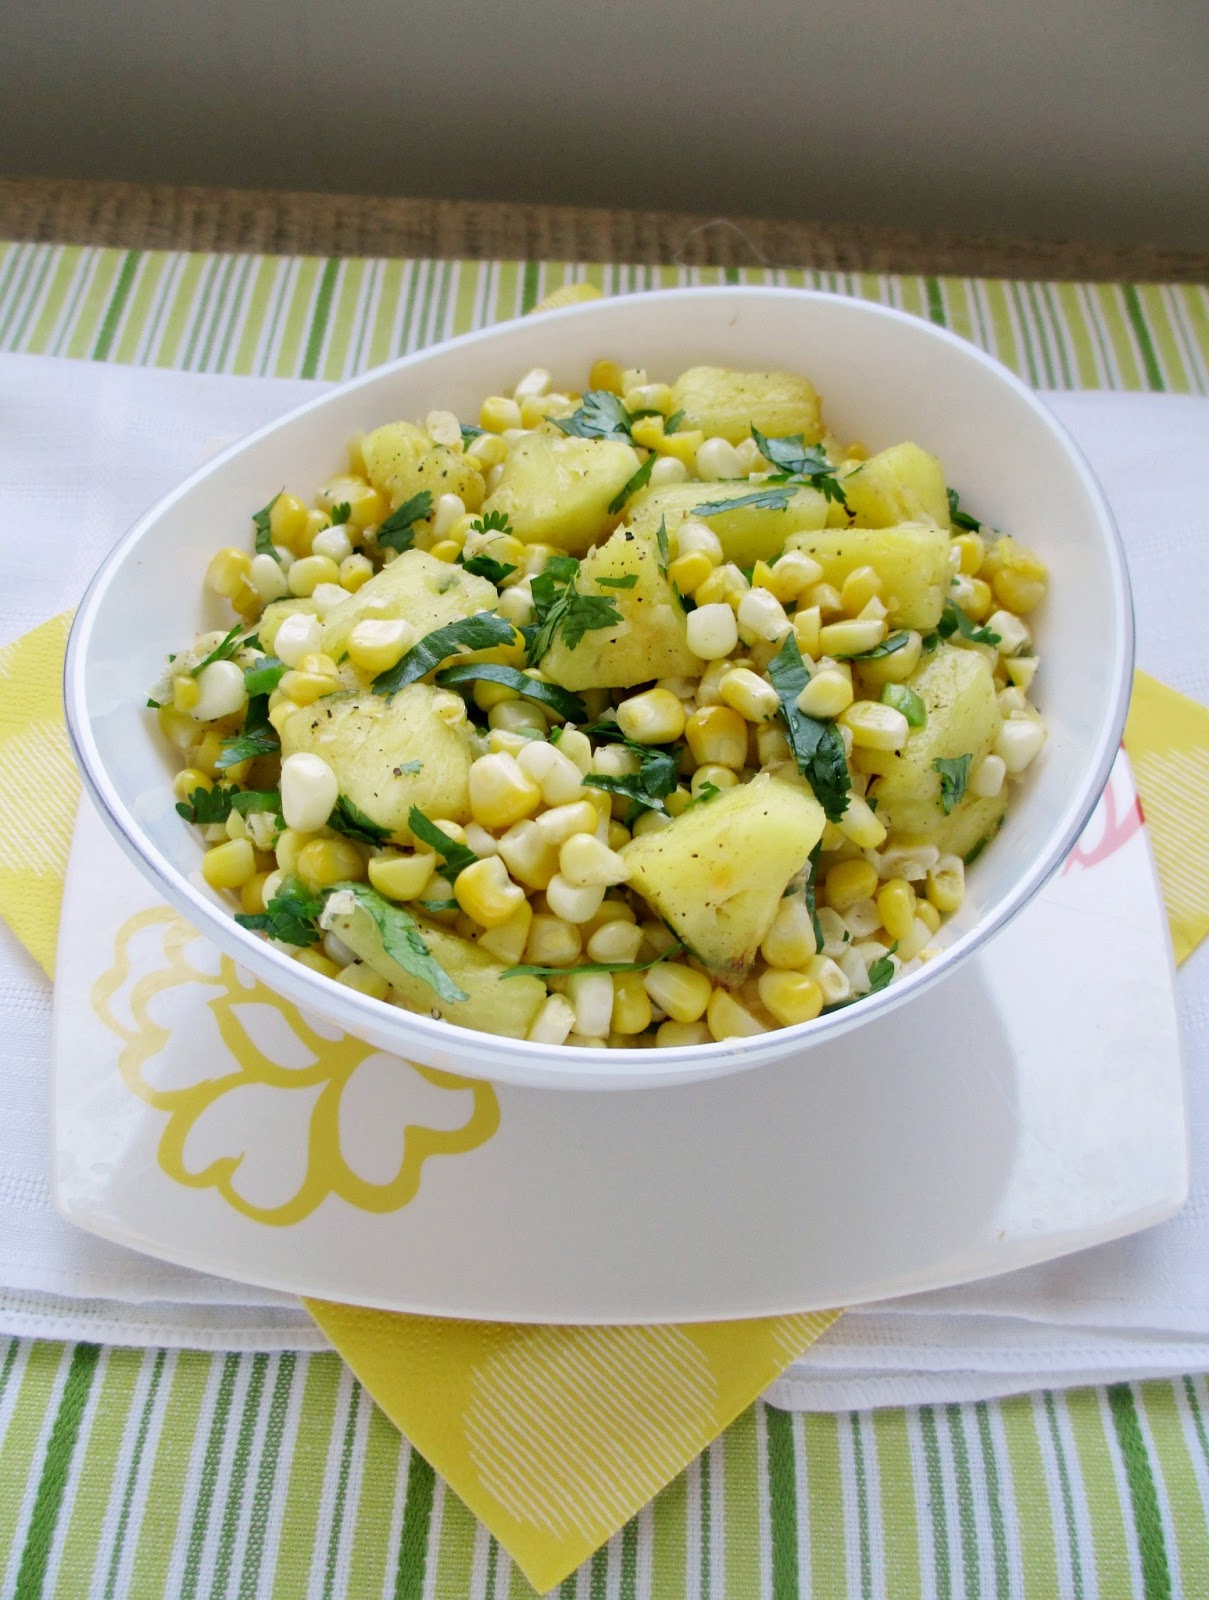
This salad that I made last weekend also feels like summer to me - it has roasted corn, warm pineapple, lots of fresh lime juice and cilantro, all combined into a fresh and flavourful dish that can be eaten on its own as a salad or as a salsa with chips.


If you haven't tried roasting corn in the oven before, I highly recommend it as an easy and fuss-free method for cooking corn - it's as simple as tossing the whole cob, husks and all, into the oven and leaving it in there for half an hour.

Along with the roasted corn, this salad also uses pineapple in my favourite form - hot! I love grilled pineapple, but since I don't own a BBQ, I broiled it in the oven instead, coated in a glaze of lime juice and agave to get a more intense sweet and sour flavour.

I liked this best eaten on its own, especially when I dug my spoon down to the bottom of the bowl to get all the juices, but I also ate some as a snack with some rice & bean based tortilla chips.

I will definitely be making this salad again this summer, especially once local corn is ready! Hope you all have a fun weekend and enjoy the sunshine!


Roasted Corn & Pineapple Salad

2 cobs corn
2 cups diced fresh pineapple
Juice of one lime (really squeeze it well to get all the juice)
1 tbsp agave nectar (can substitute honey for non-vegan version)
1/2 tsp cumin
1/2 a large jalapeno, minced
1/4 cup chopped cilantro
Salt and pepper

Preheat oven to 350°F. Trim a few of the outer leaves from the corn and remove some of the silk from the top. When oven is ready, put the corn in directly on the rack (leave the husks on). Let roast for half an hour.

Meanwhile, place the pineapple in a bowl. Mix the lime juice and agave together and pour over the pineapple, tossing to coat. Add the cumin and toss again. Transfer pineapple and the juices to a small baking dish.

When corn is done, remove from oven and set aside to cool. Turn on the broiler.

When broiler is ready, place the pineapple in the oven and cook for 5 minutes. Stir, then cook another 4 minutes. Remove from oven.

While pineapple is cooking, remove husks from the corn and slice off the kernels with a knife into a large bowl. Add the cooked pineapple with its juices to the bowl. Add the jalapeno and cilantro, tossing to mix. Season with salt and pepper to taste.

Serve warm on its own as a salad; with tortilla chips; or as a topping for quesadillas or tacos. 

Makes 2-4 servings.

This was submitted to Wellness Weekend at Diet, Dessert & Dogs.
April 23, 2013

Layered Verrines with Coconut Quinoa, Avocado & Sauteed Plantains


It's a gorgeous day here in Ontario, so today's post will be a short one so that I can get outside and make the most of it before the rain returns tomorrow!

Plantains are one of my favourite things to eat, especially when combined with avocado and other tropical flavours like coconut. My plantain guacamole is one of my favourite recipes on the blog, and it also helped to inspire this dish.

The idea for layered quinoa avocado verrines first came from a recipe that I've made before from Vegetarian Times. While their recipe was more Mexican-flavoured and was topped with sprouts, I went for a tropical version topped with sauteed plantains.


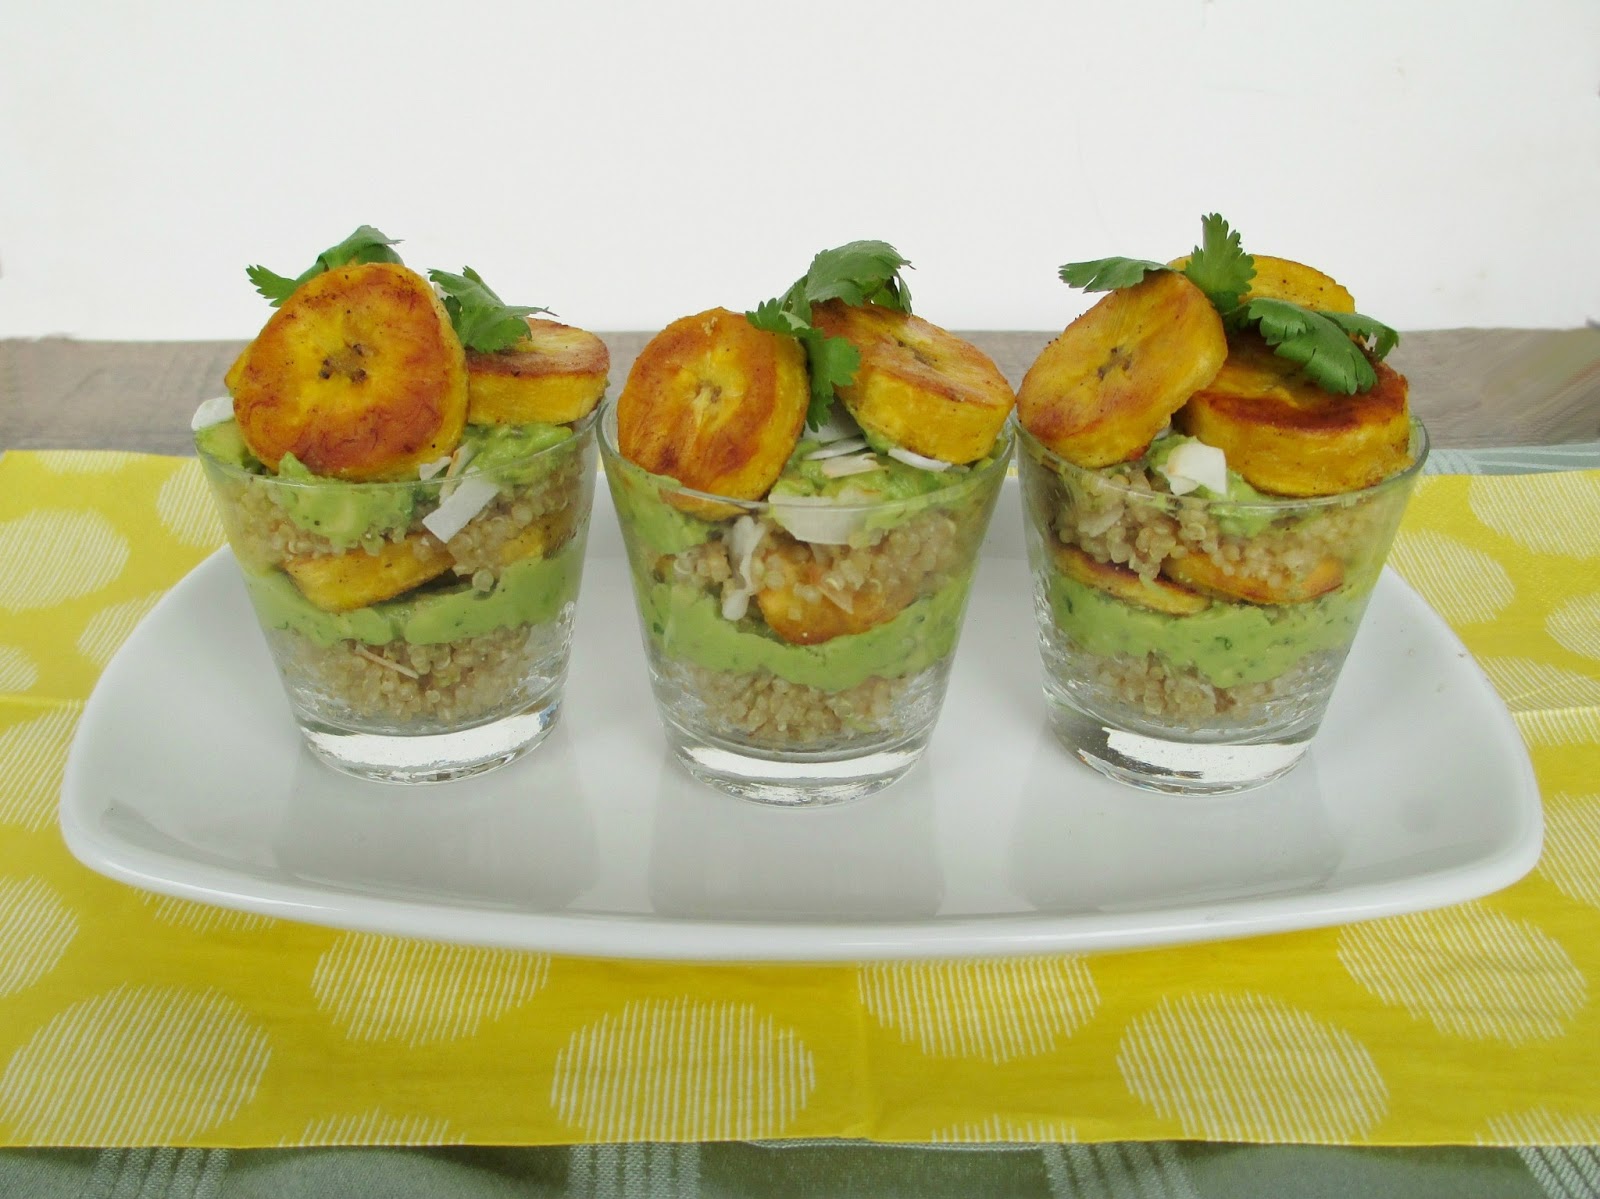
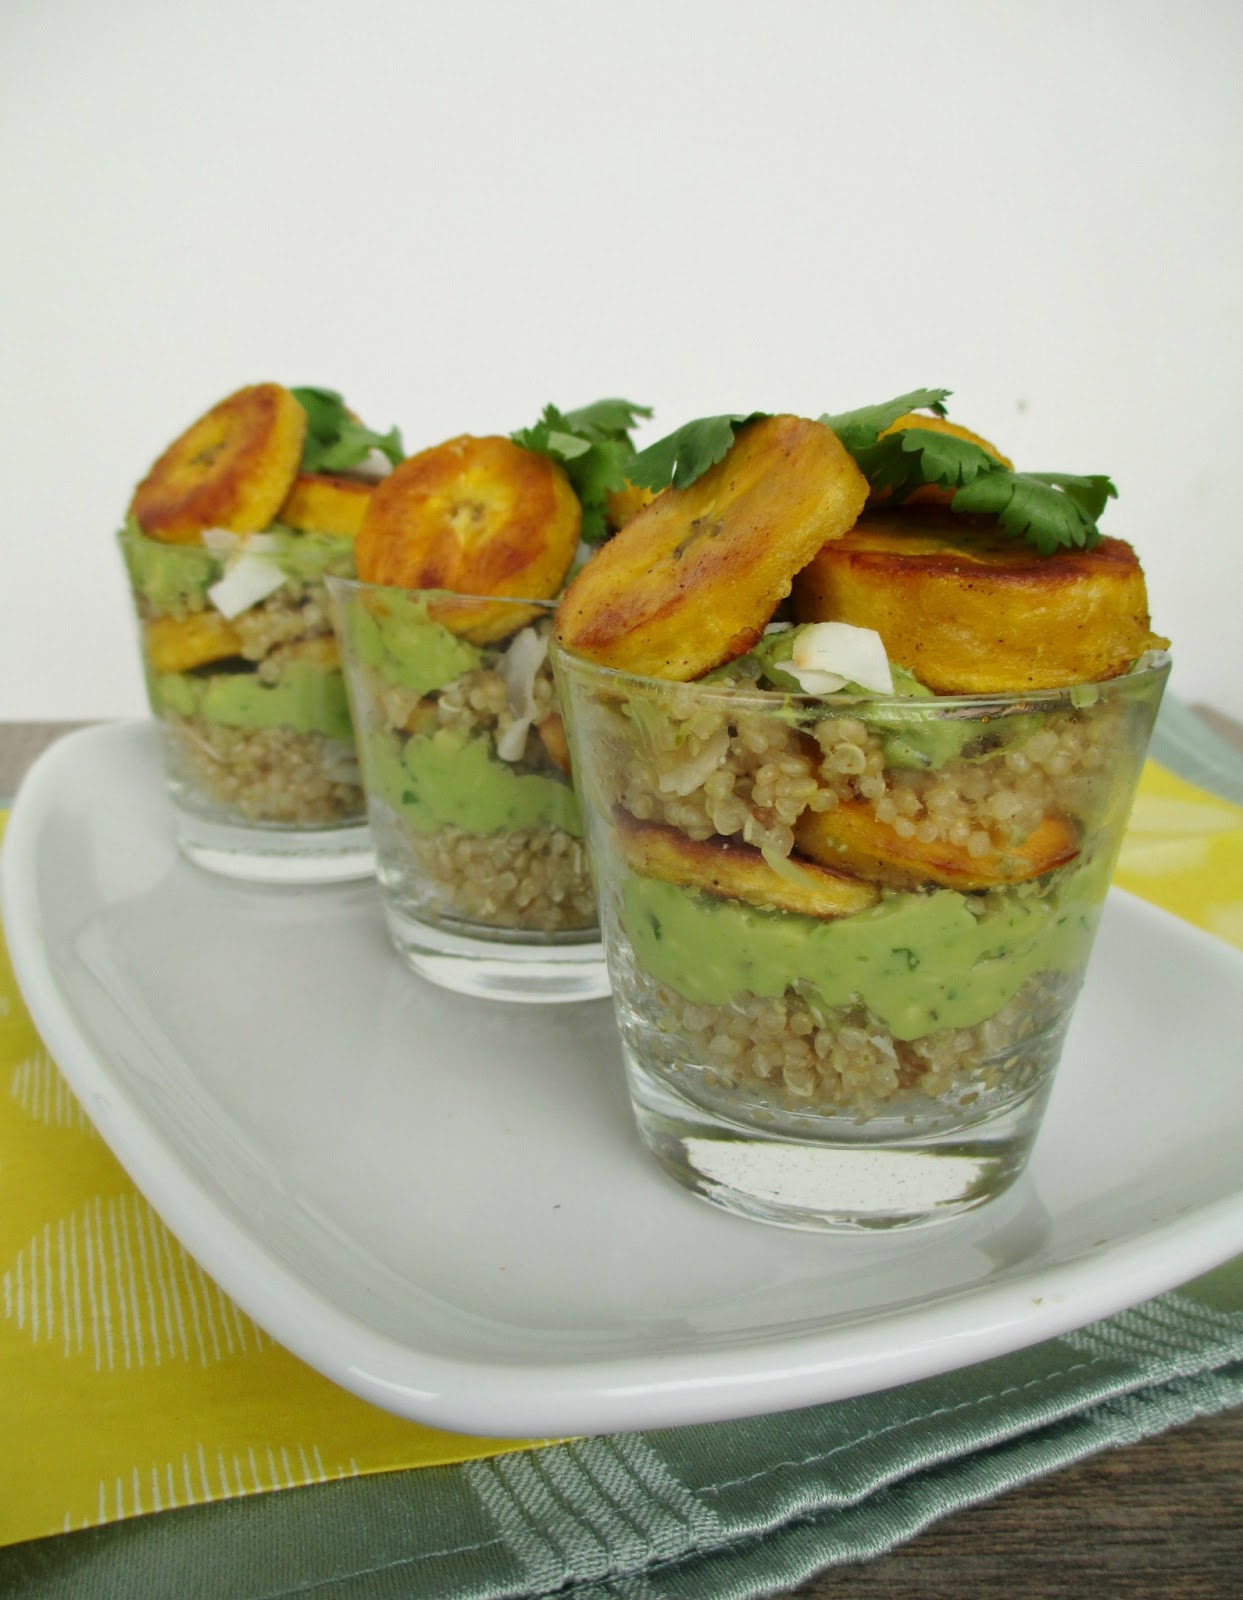
The three components to this recipe all have tropical notes: first is a coconut quinoa made by cooking the quinoa in coconut milk and stirring in a bit of lime zest and toasted coconut flakes; next is a layer of avocado pureed with lime juice and cilantro; and the final component is a layer of sweet ripe plantain slices cooked in coconut oil with a dash of spices.

I could happily eat any of the layers on their own, but they combine to make a creamy and flavourful dish that can either be served in small portions as an appetizer or in larger portions as a main dish. Layering each of the components into a little glass or cup makes for a fun presentation that you can even prepare ahead of time if you're serving them to a group.

Hopefully these tropical flavours will help you get through the last of the cold weather for those of you who are still seeing snow, and let's hope the warmer weather is here to stay!


Layered Verrines with Coconut Quinoa, Avocado and Sauteed Plantains
Inspired by Vegetarian Times

Quinoa:
2/3 cup canned coconut milk or coconut milk beverage
1/3 cup dry quinoa
1/4 tsp ground ginger
Pinch of salt
½ tsp lime zest
2 tbsp coconut flakes

1 ripe avocado
1.5 tbsp lime juice
2 tbsp chopped fresh cilantro
Salt and pepper
1 tbsp coconut oil
1 ripe yellow plantain, peeled and sliced
Dash of cumin
Dash of chili powder
Salt to taste

Heat the coconut milk in a small saucepan over medium-high heat. Once it starts to boil, stir in the quinoa, ginger, and a pinch of salt. Cover, reduce heat to low and simmer for about 15 minutes. Remove from heat and keep covered for 5 minutes. Remove lid, fluff quinoa with a fork and stir in the lime zest and coconut flakes. Keep aside.

Meanwhile, make the avocado sauce: Place the avocado, lime juice, and cilantro in a food processor. Season generously with salt and pepper. Puree until smooth. Set aside.

Heat a large skillet over medium heat. Add the coconut oil. Once the coconut oil is melted, add the sliced plantains and sprinkle them with cumin, chili powder, and salt to taste. Let cook for 5-6 minutes total, flipping the slices halfway through. Remove from the pan and let drain on a plate lined with paper towel.

To assemble, place a portion of the quinoa in the bottom of each glass (use about 2/3 of the quinoa for this layer). Top with a thick layer of the avocado puree. Next, add a few plaintain slices. Repeat the layers once more, ending with the rest of the plantains on top. Garnish with extra cilantro and coconut flakes if desired.

Makes 3 servings.

May 29, 2012

Pad Thai with Scrambled Tofu


Has anyone tried shirataki noodles? I've seen a few bloggers post about these "zero calorie" noodles, which are a chewy, translucent noodle made from japanese yams that can be added to soups and other dishes in place of regular noodles.  Even though I'm not on a diet, I was still curious about these noodles so I finally bought a package (the Miracle Noodle brand) so that I could try them myself.

A few weeks ago, I had a craving for pad thai.  Then I remembered the package of shirataki noodles sitting in my cupboard, and I figured they would be perfect to use instead of the usual rice noodles!

The noodles come packaged in a watery solution that can have a very strong "funky" smell, according to other people who have tried them.  I was pretty nervous when I opened mine up, but they actually didn't smell that bad, and once you rinse them off, they're quite easy to prepare since they're precooked.

To complete my pad thai, I wanted to make it as authentic as possible.  So I thought back to the amazing pad thai I ate in Thailand a couple months ago and tried to remember as best as I could exactly what was in it.  I knew it had to have a spicy component from chilies, but since I couldn't find Thai chilies, I just used a jalapeno.  I also remembered my pad thai having shallots, bean sprouts and green onions, so I included those as well.  And for presentation, the authentic dish that I had was served with lime wedges and a handful of crushed peanuts on the side, which were mixed in to the noodles as you ate, so I tried to replicate that on my own plate.


Next came the sauce.  I've seen versions of pad thai that use ketchup in the sauce, but I think the real key ingredient to get the pad thai flavour is tamarind paste, which you should be able to find for a cheap price from an Asian food mart.  I ended up using this recipe for pad thai sauce but I replaced the peanut flour with peanut butter and used sriracha sauce instead of chili powder.

The final component that I would need to create a pad thai that matched the one I had eaten in Thailand would have been to add scrambled eggs to the dish.  But since I don't usually eat eggs or have them around, I decided to just leave that part out.  But then I came up with a new idea -  why not use scrambled tofu instead?

I've actually never made scrambled tofu before, but I've seen lots of recipes for it and I knew that the texture  and consistency would be very similar to eggs. So I added some crumbled tofu to the pan and stirred it around as you would with scrambled eggs, and luckily, my little experiment turned out perfectly! The tofu had just the right texture that I wanted, and it really soaked up the extra sauce, giving it lots of flavor. The addition of the tofu also helped give the dish a bit more substance and protein, since the noodles didn't provide any calories or nutrition.

Overall, my vegan pad thai may not have been truly authentic, but I thought the mixture of flavours and textures was pretty close to the original version that I tried in Thailand! I especially loved the extra dimensions of flavour from the lime juice and peanuts, so you definitely shouldn't leave those out!

I also really liked the thick, chewy shirataki noodles, but you could easily replace them with rice noodles if you prefer - just follow the cooking instructions on the package.


Pad Thai with Scrambled Tofu

Sauce:
Adapted from The Wannabe Chef

2 tbsp peanut butter
2 tbsp tamarind paste
2 tsp soy sauce
1/2 tbsp rice vinegar
1/2 tbsp sesame oil
1/2-1 tsp sriracha (to taste)

Pad Thai:

1 package (7 oz) shirataki noodles (can substitute rice noodles)
1 tbsp vegetable oil
1 shallot, diced
1 clove garlic, minced
1/2 a jalapeno pepper, minced
~4 oz firm tofu, crumbled
2 green onions, minced
1/2 cup bean sprouts
Lime wedges and crushed peanuts for serving

To make the sauce, whisk or stir all ingredients together in a small bowl. Set aside.

Drain the shirataki noodles from their package and rinse under cold water.  Let the noodles soak in a bowl of water for about 10-15 minutes.

Meanwhile, heat the vegetable oil in a large skillet over medium heat.  Add the shallots and cook, stirring, for about 1 minute. Add the garlic and jalapeno and cook for another 30 seconds.  Add the crumbled tofu and cook, stirring occasionally, for about 5 minutes, until the tofu is softened and lightly browned. (You can leave the tofu in larger chunks, or break it up into smaller pieces using a wooden spoon as you cook).

Drain the noodles and add to the skillet.  Add the sauce and a splash of water and stir the sauce into the noodles. Once the sauce and noodles are hot, add the green onions and bean sprouts.  Stir for about 1 minute, until everything is heated through and coated in the sauce.

Transfer the contents to two plates. Garnish each plate with a handful of crushed peanuts and additional bean sprouts if desired.  Serve with lime wedges.

Makes 2 servings. 


This was submitted to Wellness Weekend at Diet, Dessert and Dogs. 

February 28, 2012

Indonesian Tempeh Stew


With the winter weather still hanging on here in Ontario, I thought this would be a good time to post some tropical recipes to try to ward off the winter blues.  So I bought myself a pineapple at a much higher price than I would usually be willing to pay, and I easily used it all up within a few days!

Most of that pineapple went into smoothies and a mini loaf, but the rest was used in this Indonesian-inspired stew from the Vegan Planet cookbook. The original recipe called for a mixture of tempeh and sweet potato simmered in a spicy tomato and coconut milk broth.  I wanted to include a couple more ingredients to make the stew a bit more interesting, so I added pineapple and yellow beans, which I thought would go well with the other Indonesian flavours.

After tasting the stew, I was really glad I added the pineapple! The pieces of fresh pineapple were my favourite part of the dish, and they gave it a nice overall balance between sweet and spicy.

This was also the first time I've ever used tempeh in a recipe and I have to admit, I was a bit nervous when I first took the tempeh out of its package and cooked it - the smell was not very appealing and I didn't really like the taste of it plain.  But all of my worries disappeared when I tasted the final product! I really liked the texture of the tempeh and the way it soaked up the flavours of the stew.  I'm not really a fan of meat substitutes that taste or look a lot like actual meat, but with tempeh (which is made from fermented soybeans) I found that the taste and texture are more nutty rather than meaty, which I liked.

Overall, I loved the combination of flavours and textures in this stew, and it was the perfect mix of a hearty, warm stew for winter with notes of brighter tropical flavours.  And don't leave out the finishing touches of the lime juice and cilantro, they really helped bring everything together!


Indonesian Tempeh Stew
Adapted from Vegan Planet

One 8 oz package tempeh
2 tbsp olive oil, divided
3 shallots, peeled and diced
3 cloves of garlic, peeled and minced
1 small chili pepper, seeded and minced (I used jalapeno)
1/4 tsp chili flakes (optional if you like more heat)
1 tsp minced fresh ginger
1 large sweet potato, peeled and diced
1 cup water
1 14.5 oz can crushed tomatoes (or half of a 28 oz can)
1 tbsp soy sauce
1 cup unsweetened coconut milk (I used the kind from a carton)
1.5 cups chopped fresh pineapple
About 4 oz green or yellow beans, trimmed and cut in half
Salt and pepper (to taste)
Zest and juice of half a lime
2 tbsp chopped fresh cilantro

First, poach the tempeh – place the block of tempeh in a saucepan and cover with water. Bring to a simmer and continue simmering for 10 minutes. Drain and pat dry. Cut tempeh into cubes.

Heat 1 tablespoon of olive oil in a large skillet over medium-high heat. Add the tempeh and cook for about 5 minutes, turning occasionally to brown all sides. Remove from heat and set aside.

Heat the remaining 1 tablespoon olive oil in a large saucepan over medium heat. Add the shallots, garlic, chili pepper, chili flakes (if using) and ginger. Cover and cook until onion is softened, 4-5 minutes, stirring occasionally.

Stir in the sweet potato, water, crushed tomatoes and soy sauce. Cover and cook until potato is tender, about 20 minutes, stirring occasionally.

Remove lid and reduce heat to low. Add the coconut milk, cooked tempeh, pineapple, beans, salt and pepper. Simmer, stirring occasionally, until thickened, about 10 minutes.

Add the lime zest and juice and cilantro just before serving.  Garnish with additional cilantro and lime wedges if desired.

Makes 4 servings. 

September 07, 2011

Chickpea Salad with Mexican Mango Dressing


I first saw the recipe for this salad on the blog My New Roots more than a year ago and thought it looked and sounded amazing. Somehow, it took me until now to finally make it, and now that I've tasted it, I wish I had tried it sooner!

This was such a bright, colourful, refreshing and delicious meal. I also loved the different textures from the raw crunchy vegetables, the soft chickpeas and the creamy avocado. But my favourite part was the dressing - smooth mango blended with lime juice and mexican spices...definitely a dressing you will want to slurp off your plate!

I did make a few changes to the original recipe, so my version is below. Since I couldn't find any jicama, I used kohlrabi because it has a similar texture. I also completely forgot to include the spinach, but I think it worked out better that way, because I didn't want the leftovers to get soggy in the fridge (which I was afraid would happen if the spinach soaked up the dressing). I would also recommend adding the avocado to the salad itself as I did, rather than only serving it on the side.

I hope you try this recipe, and don't wait as long as I did to make it - you won't regret it!


Chickpea Salad with Mexican Mango Dressing
Adapted from My New Roots

1 can (19 oz) chickpeas, drained and rinsed
1 red pepper
3 carrots
1/2 a kohlrabi (or jicama)
1 avocado, diced
1/2 cup chopped cilantro
handful of toasted pumpkin seeds (optional)

Dressing:
1 ripe mango, peeled and diced
1/4 cup fresh lime juice
2 tbsp olive oil
1/4 tsp sea salt
pinch of cayenne + pinch of chili flakes (or 1/4 tsp of any chili spice you like)

To make the dressing, place all ingredients in a blender and puree until smooth. Season to taste.

Peel and chop all the vegetables for the salad - you should aim for uniformly thin slices of red pepper, carrots and kohlrabi.

Place the drained chickpeas in a large bowl and pour the dressing over top. Add in the sliced vegetables, avocado and cilantro, and stir until the dressing is completely mixed in.

Keep in refrigerator until you are ready to eat. Garnish each serving with toasted pumpkin seeds if desired.

Makes at least 3-4 servings. This will keep well in the fridge for a few days (I think I liked it even more after it had been sitting in the fridge!)


This is my submission to My Legume Love Affair hosted by What Would Cathy Eat 

September 02, 2011

Mango, Cucumber & Squash Rice Salad


I made this salad a couple of weeks ago and I wanted to make sure I shared it before the summer ends!

The recipe comes from the summer issue of Food Network Magazine, which I love reading. I must have passed over this recipe when I first saw it in the magazine, but then when it appeared on Perry's Plate, it suddenly became much more appealing and I knew I wanted to make it!

This is a cold rice salad that uses a mix of grains, a light dressing and a combination of fresh ingredients that make it a healthy and refreshing summer meal. In addition to the mango and cucumber, I added some raw pattypan squash - I saw it at my local natural food store the day I planned on making this salad and it was so adorable that I had to buy some! The salad would still be great without it, but I liked having an extra vegetable in there.


If you're looking for a nice summery dish to make this Labour Day weekend, I recommend this recipe! It would also be great to bring to a potluck or a BBQ as a side dish because it makes a large amount.

Mango, Cucumber & Squash Rice Salad
Adapted from Food Network Magazine, as seen on Perry's Plate

1.5 cups uncooked rice blend (I just used a packaged mix of long grain and wild rice)
1/4 cup uncooked quinoa
1 large mango, peeled and diced
About 1/2 to 2/3 of an English cucumber, peeled, seeded and diced
2 pattypan squash (or 1 summer squash), diced
1 jalapeno, seeded and minced
1/3 cup chopped almonds
1/2 cup chopped cilantro
zest and juice of one lime
2 tbsp canola oil
1 tsp agave nectar
Pinch of salt and ground pepper

First, cook the rice and quinoa. If you are using microwaveable rice: Cook the rice according to package directions. Bring a small pot of water to a boil on the stove. Add the quinoa and reduce heat to low. Cook for about 15 minutes, then turn off the heat and let sit for 5 minutes before lifting the lid and fluffing the quinoa with a fork.

If you are not using microwaveable rice: Bring a large pot of water to a boil. Add the rice and cook about 15 minutes. Then add the quinoa to the water and cook an additional 15 minutes.

When the rice and quinoa are done cooking, drain and spread out on a baking sheet or shallow dish. Put the dish in the freezer to cool down.

Meanwhile, whisk together the lime juice, zest, oil, agave, salt and pepper in a small bowl.

Prepare the remaining ingredients (mango, cucumber, squash, jalapeno, nuts and cilantro).

When the rice and quinoa have cooled, transfer them to a large bowl. Add the remaining salad ingredients and pour the dressing overtop. Toss to combine.

Refrigerate until ready to serve. Season with additional salt and pepper, and a squeeze of lime juice when serving if desired.

Makes about 4.5 cups.


August 24, 2011

Quinoa Almond Fruit Salad


Since I became a vegetarian, I've been eating a lot of quinoa. Its a complete protein, its very easy to cook, and there are endless possibilities for turning it into a delicious meal, so I never have a problem using it up if I have leftovers. I've tried wrapping it up in a tortilla with some veggies, and even eating it for breakfast layered with yogurt to make a parfait!

Quinoa also goes well with just about any kind of fruit, and this salad is proof of that! I saw the recipe on Oh She Glows, and have made it a couple of times since then. The first time, I didn't think it was anything special, but now I realize the reason I didn't love it was because I decided to use blackberries instead of blueberries. I guess blackberries are one fruit that actually don't belong in quinoa, at least for my personal taste - I just didn't like the texture of their crunchy seeds mixed with everything else in the dish.

So the next time I made it, I used a different combination of fruits that turned out really well! I kept the strawberries and blueberries from the original recipe, and also added mango (because clearly I love mango!). I thought the flavour and texture of the mango went perfectly with everything else, and also added a nice burst of colour. Next time, I might even include kiwi too for one more bright colour to go with the red, blue, and yellow!

Usually, I find that quinoa doesn't need much of a dressing, but it does soak up the flavour of any dressing that you do add. I loved the dressing in this recipe - the taste of the lime definitely came through, but it was balanced by the subtle sweetness of the maple syrup and the balsamic. I also like when a dressing is oil-free!

Here is the recipe with my changes. Aside from the addition of mango, I also added lime zest and two types of almonds. And since I was bringing this to a potluck, I used more quinoa than the original recipe, and one and a half times the amount of dressing.


Quinoa Almond Fruit Salad
Adapted from Oh She Glows

About 1 cup dry quinoa
1 pint strawberries, diced (about 2.5 cups)
6 oz blueberries
2 small mangos, diced
1/3 cup raw almonds, chopped
1/3 cup slivered almonds

Dressing:
3 tbsp pure maple syrup
1.5 tsp balsamic vinegar
1.5 tbsp fresh lime juice
zest of one lime
pinch of kosher salt

Cook the quinoa according to the package instructions. Let cool and fluff with a fork.

Meanwhile, chop up your fruit and almonds and set aside. (I toasted the almonds first because I prefer them that way).

Make the dressing by whisking all ingredients in a small bowl.

Transfer the cooked quinoa to a large bowl. Add in the fruit and almonds and stir to combine. Pour the dressing on and mix well. Chill the salad in the fridge until serving time.


Makes a large amount (I'm not sure how many servings this made because I brought it to a potluck, but it fed lots of people!)


August 14, 2011

Mango Coconut Soft Serve


I'm so excited to share this treat with you today because I absolutely loved it! The combination of tropical flavours and cold, creamy texture make this the perfect refreshing dessert for the end of summer! Plus its vegan and super easy to make!

I happened to have all the ingredients on hand for this mango-coconut sherbet I had seen on The Novice Chef's blog. But I wanted to adapt it so that it was more of a soft-serve consistency - for one thing, I don't have an ice cream maker, and secondly, I've always preferred soft-serve ice cream to the harder type.

So I figured I could use the concept of the popular banana soft-serve and still incorporate the mango, lime and coconut. By using frozen fruit and a smaller amount of liquid than the original recipe, I managed to get an ice cream-like consistency that I could enjoy right away, without needing to wait hours for it to freeze first! I was also able to reduce the amount of sugar by using ripe fruit.

I thought it was best when eaten immediately, but since this recipe makes a lot, you can also freeze the leftovers and then thaw on the counter before serving to let it soften again.

I also loved the addition of the crunchy toasted coconut on top, so don't leave that out!


Mango Coconut Soft Serve
Adapted from Cooking Light, as seen on The Novice Chef

2 cups mango chunks, frozen (I used one whole mango)
1 medium frozen banana, chopped
1/4 cup sugar
1 tbsp fresh lime juice
Zest of one lime
1 cup coconut milk from the carton (I used the vanilla flavour)
Lightly toasted unsweetened shredded coconut for topping (as much as you like!)

Place all ingredients (except the coconut) in a blender and process until smooth.

Serve immediately, with toasted coconut sprinkled on top. Freeze any leftovers in a freezer-safe container to enjoy later!

Makes about 2 cups.


LinkWithin

Related Posts Plugin for WordPress, Blogger...