Showing posts with label cilantro. Show all posts

June 06, 2013

Raw Jicama Nachos with Fruit Salsa and Taco Nut Crumbles


In my last post, I shared an idea for healthy nachos using thinly sliced apples as the base, and today I have another raw nacho idea for you!  While the apple nachos went in more of a dessert direction, these nachos go the savoury route, making them a fun option for a light lunch.

This time, the nachos are made up of very thin slices of jicama, the Mexican root vegetable that resembles a turnip. I love jicama, but I find it hard to get a perfectly sweet and crisp one - more often than not, I end up with one that's rotten inside or too grainy and bitter tasting. So if anyone has any tips on how to select a good jicama, I'd love to hear them!

When you do get a good jicama though, they're just so refreshing to eat, since they're composed mostly of water, like cucumbers. And that's the perfect word to describe these nachos: refreshing!
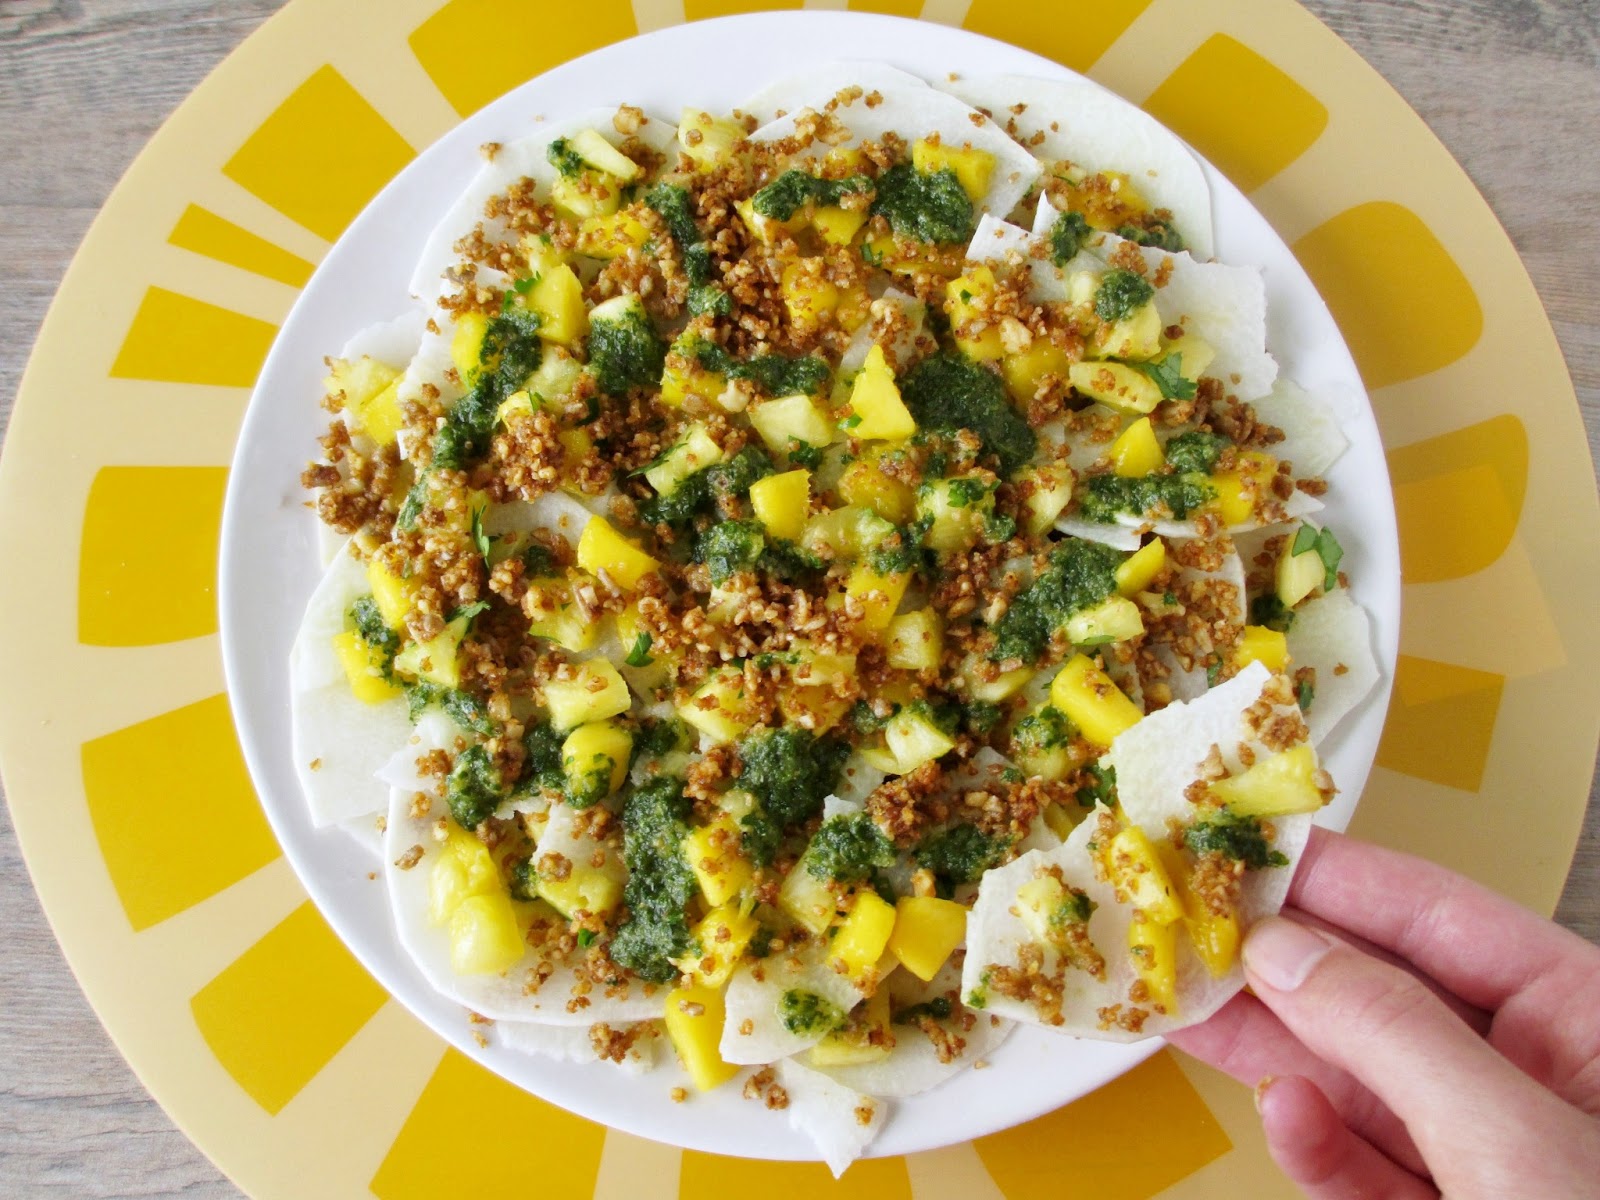

To make these nachos, layers of super thin, crisp jicama slices are topped with a juicy, sweet tropical fruit salsa, a spicy taco nut "meat" crumble, and a bright, fresh lime-cilantro sauce to bring everything together.

While it did take some time to prepare each of the components, it was worth the effort for all of the fresh flavours that complemented each other so well. Plus one bonus of raw nachos is that once you've assembled your plate, they're ready to eat - no waiting in the oven for them to cook first!

Of course, the other bonus with raw nachos is that they taste so much lighter than the cheese and sour cream covered tortilla chip version. I loved that I could eat a whole plate of these nachos myself and still feel good afterwards - I had planned on only eating half, but I found it too hard to stop eating them, so you might want to make a double batch if you plan on sharing these!
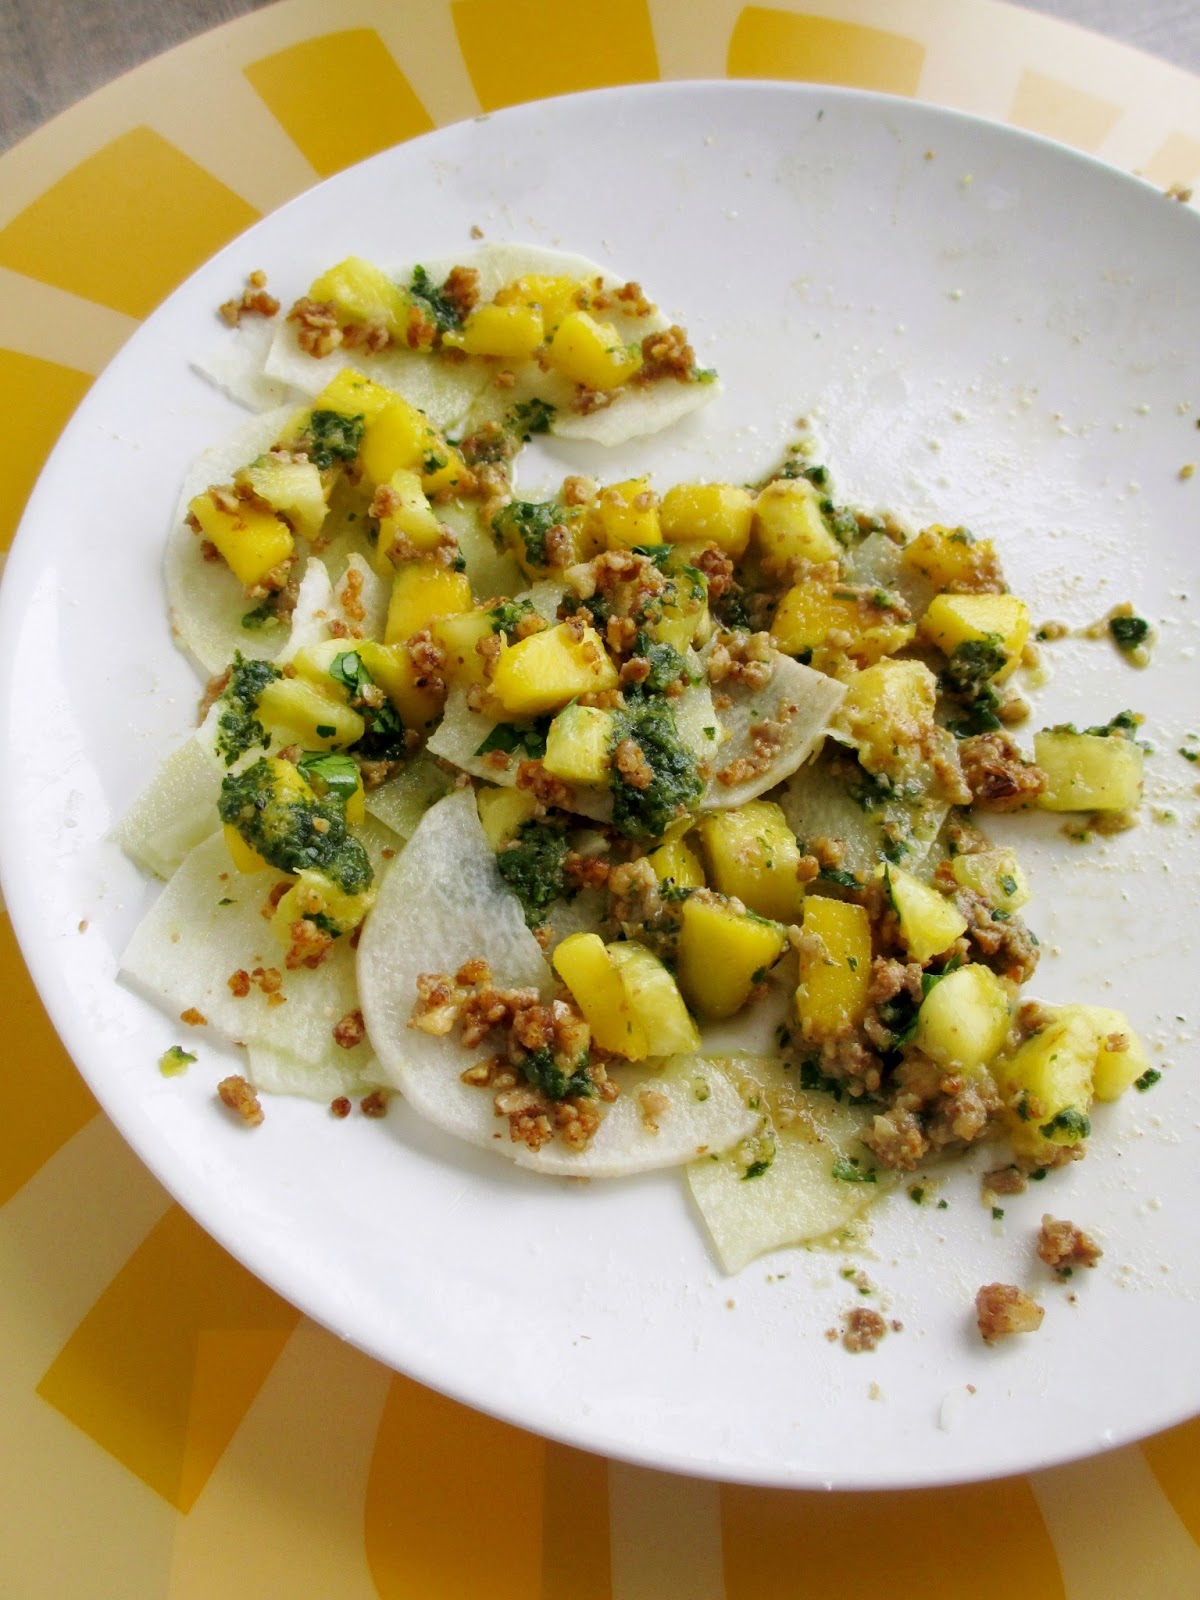


Raw Jicama Nachos with Fruit Salsa and Taco Nut Crumbles
Inspired by Fragrant Vanilla Cake

Salsa
1/2 cup finely diced pineapple
1/2 cup finely diced ripe mango
1-2 tbsp chopped cilantro

Sauce
1/2 cup packed cilantro
Juice of one lime
1/4 tsp cumin
1/2 tbsp raw agave or honey
1/4 cup diced pineapple

Taco Nut Crumble
1/4 cup + 2 tbsp raw walnuts
2 tbsp raw sunflower seeds
1/2 tsp chili powder*
1/4 tsp cumin*
1/8 tsp cayenne*
Dash of salt
1/2 tsp tamari
1 tsp olive oil

Nachos
About half of a medium jicama, peeled (about ¾ - 1 lb)

*can substitute spices with about 3/4 tsp taco seasoning instead


To make the salsa: combine all ingredients in a bowl and stir to mix. Set aside.

To make the sauce: Place all ingredients in a food processor or blender and process until smooth. Set aside.

To make the crumble: Place walnuts and sunflower seeds in a food processor and process until chunky and broken down. Add remaining ingredients and process until the mixture resembles coarse, sticky crumbs. Set aside.

Place the jicama in your spiralizer and use the widest blade setting to slice it into very thin pieces. (Note: If you don't have a spiralizer, you could use a mandolin or a knife to slice it into shavings as thin as possible).

To assemble: Arrange a layer of the jicama slices evenly on a large plate. Top with about half of the nut crumble, half the salsa, and half the sauce. Add another layer of jicama slices and top with the remaining toppings.  Serve immediately. 

Serves 1 hungry person or 2-3 smaller servings.

Note: You can eat these with your hands like I did, but it does get a bit messy so feel free to use utensils!

This was submitted to Wellness Weekend at Diet, Dessert & Dogs.

May 31, 2013

Roasted Corn & Pineapple Salad


Another week has flown by and with lots of events going on this weekend, I couldn't be happier that it's Friday! One of my favourite things about summertime is all of the outdoor activities and festivals happening - it seems like there's always something to do on the weekend, and it's a bonus when some of those activities are free!

This weekend, I'll be going to a friend's potluck party (and bringing a dessert that I plan on sharing with you soon!), and there are at least four other events going on - a free outdoor music show, a nighttime block party downtown, the local air show, and a food-crafts-art show in the park near my apartment. I can't wait to spend the weekend outside, as long as the weather holds up!

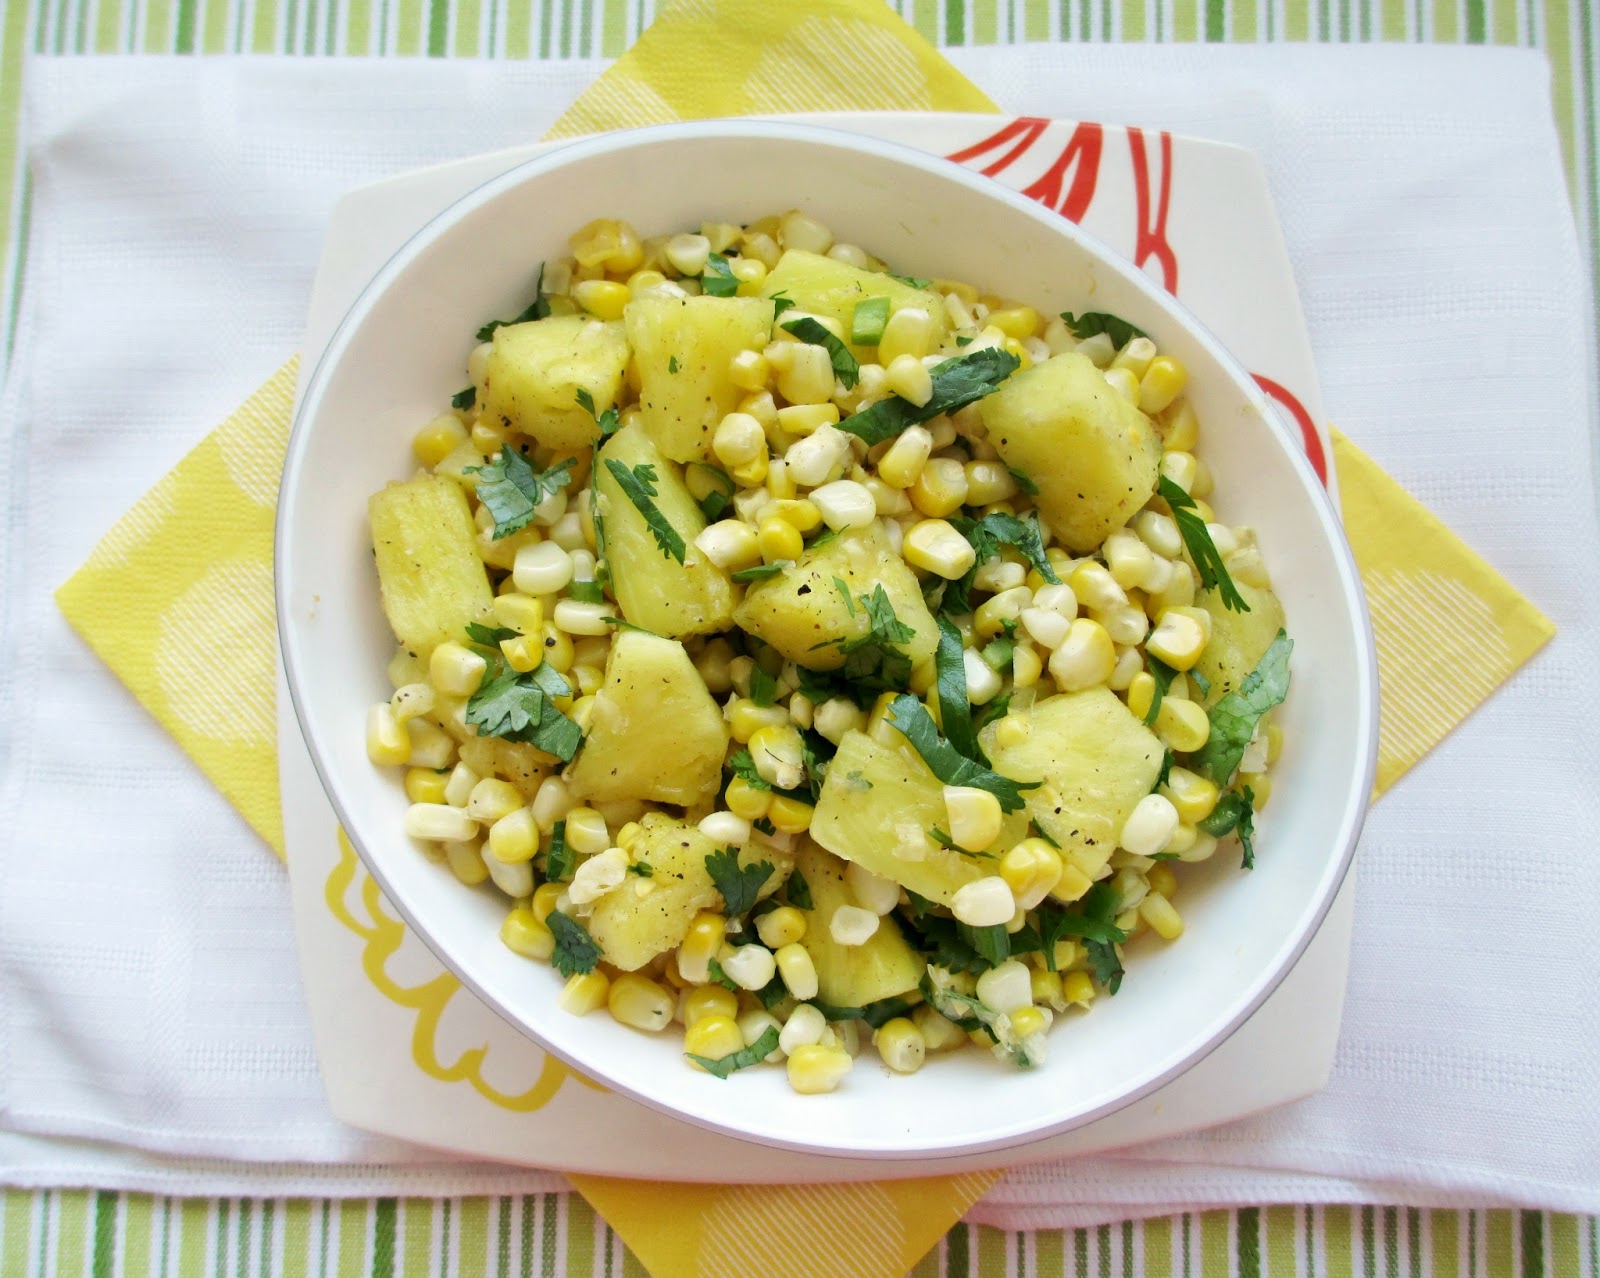
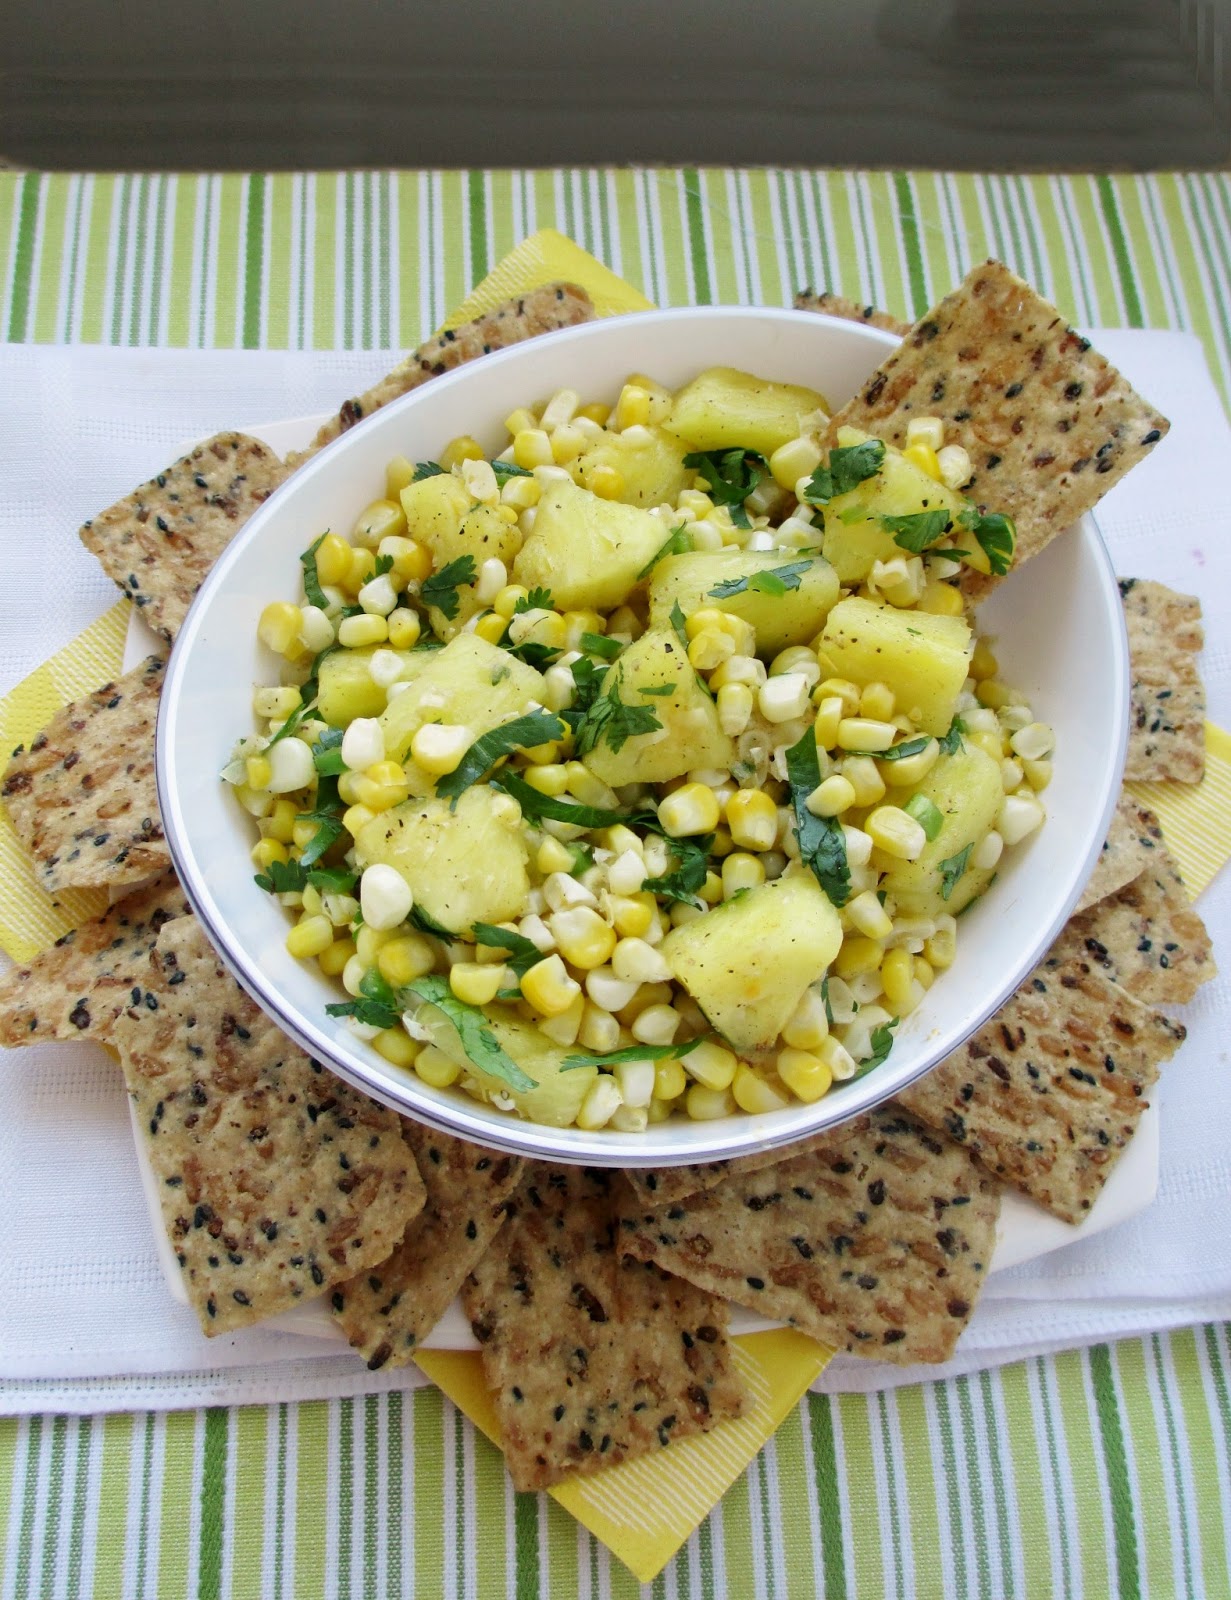
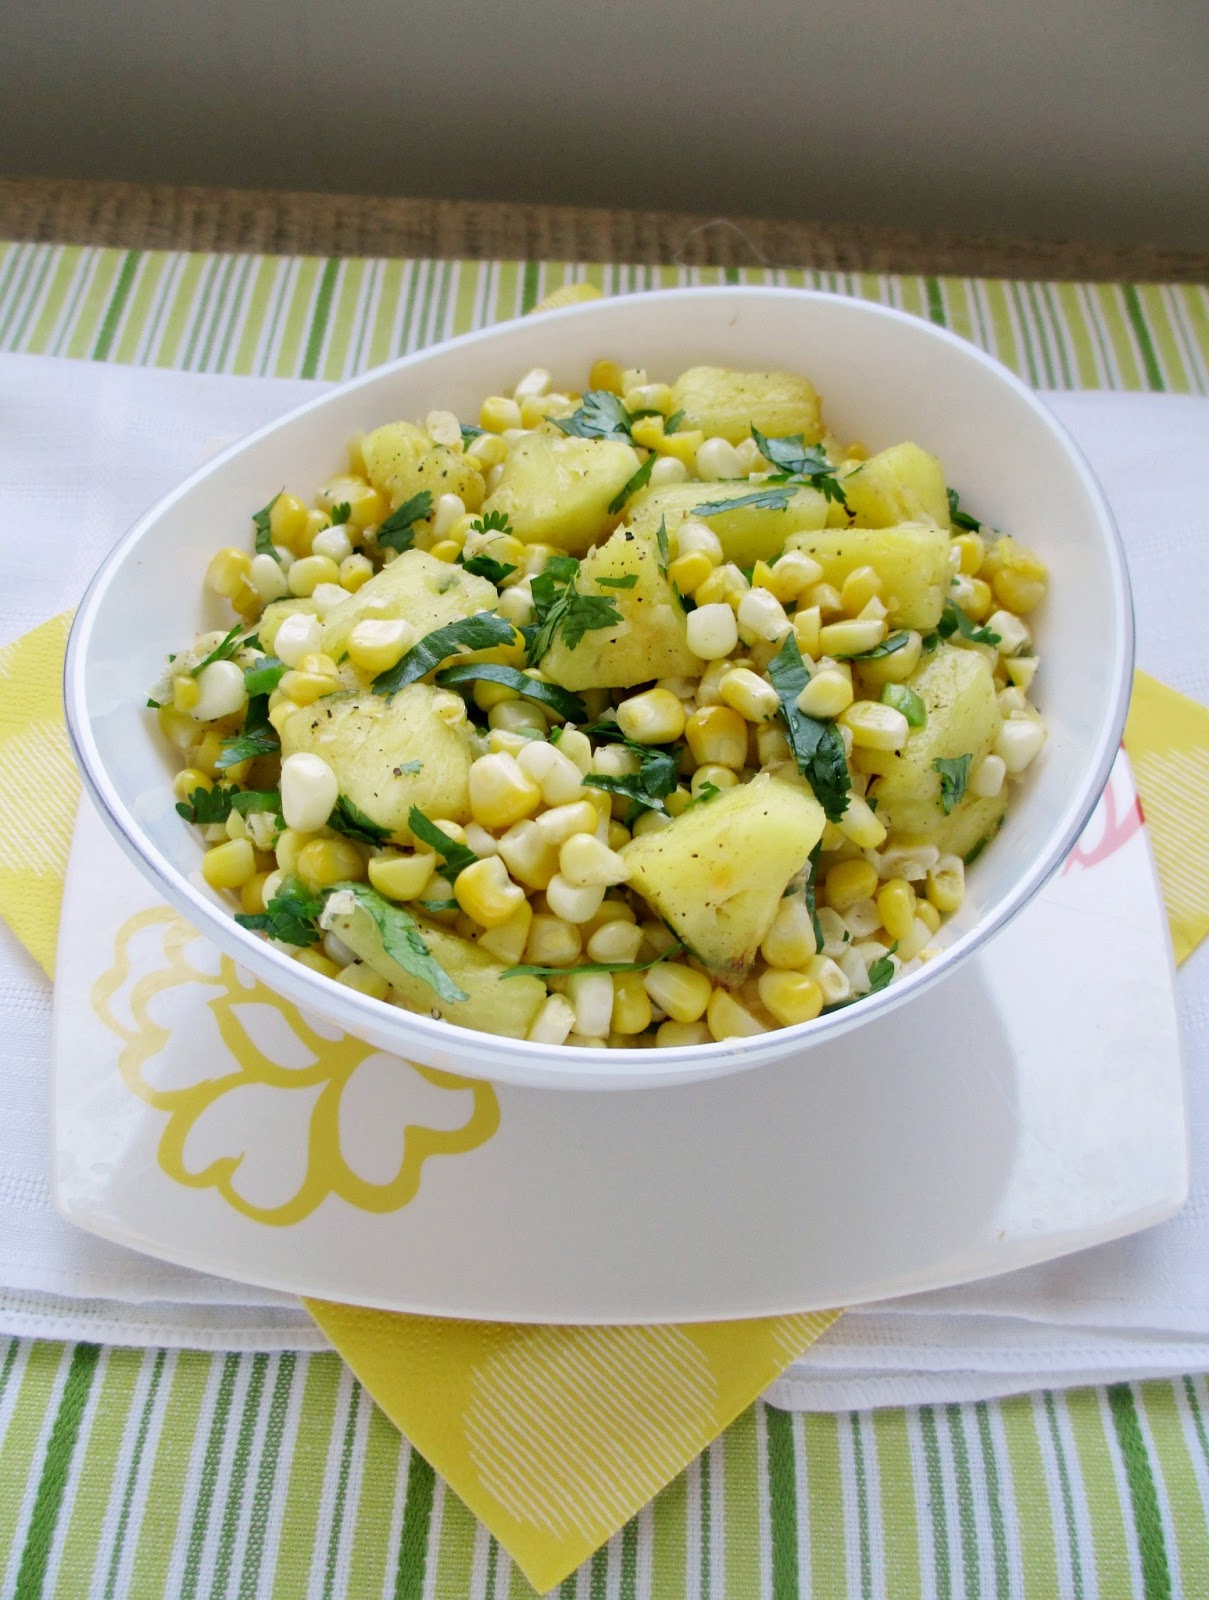
This salad that I made last weekend also feels like summer to me - it has roasted corn, warm pineapple, lots of fresh lime juice and cilantro, all combined into a fresh and flavourful dish that can be eaten on its own as a salad or as a salsa with chips.


If you haven't tried roasting corn in the oven before, I highly recommend it as an easy and fuss-free method for cooking corn - it's as simple as tossing the whole cob, husks and all, into the oven and leaving it in there for half an hour.

Along with the roasted corn, this salad also uses pineapple in my favourite form - hot! I love grilled pineapple, but since I don't own a BBQ, I broiled it in the oven instead, coated in a glaze of lime juice and agave to get a more intense sweet and sour flavour.

I liked this best eaten on its own, especially when I dug my spoon down to the bottom of the bowl to get all the juices, but I also ate some as a snack with some rice & bean based tortilla chips.

I will definitely be making this salad again this summer, especially once local corn is ready! Hope you all have a fun weekend and enjoy the sunshine!


Roasted Corn & Pineapple Salad

2 cobs corn
2 cups diced fresh pineapple
Juice of one lime (really squeeze it well to get all the juice)
1 tbsp agave nectar (can substitute honey for non-vegan version)
1/2 tsp cumin
1/2 a large jalapeno, minced
1/4 cup chopped cilantro
Salt and pepper

Preheat oven to 350°F. Trim a few of the outer leaves from the corn and remove some of the silk from the top. When oven is ready, put the corn in directly on the rack (leave the husks on). Let roast for half an hour.

Meanwhile, place the pineapple in a bowl. Mix the lime juice and agave together and pour over the pineapple, tossing to coat. Add the cumin and toss again. Transfer pineapple and the juices to a small baking dish.

When corn is done, remove from oven and set aside to cool. Turn on the broiler.

When broiler is ready, place the pineapple in the oven and cook for 5 minutes. Stir, then cook another 4 minutes. Remove from oven.

While pineapple is cooking, remove husks from the corn and slice off the kernels with a knife into a large bowl. Add the cooked pineapple with its juices to the bowl. Add the jalapeno and cilantro, tossing to mix. Season with salt and pepper to taste.

Serve warm on its own as a salad; with tortilla chips; or as a topping for quesadillas or tacos. 

Makes 2-4 servings.

This was submitted to Wellness Weekend at Diet, Dessert & Dogs.
March 20, 2013

Tropical Detox Salad


I spent a few days in Boston last week at a conference - hence the lack of activity around here - and I came back home craving fresh and healthy meals, which always happens when I go away on trips. So this detox salad is what I'm eating this week!

I'm sure there are plenty of great vegetarian places to eat in Boston, but I didn't have any time to explore the city on my own, so my only meals consisted of the Starbucks in the lobby for breakfast, boxed lunches provided by the conference, and dinners at a restaurant nearby chosen by the group. That meant my options on the menu were somewhat limited to things like cheese pizza or pasta with tomato sauce, but I still had a good time which is what counts!

Needless to say, I couldn't wait to get back into my own kitchen and make a huge fresh salad to enjoy. The only vegetable remaining in my fridge was the rest of the parsnips from this recipe, so I searched through my bookmarks for other parsnip ideas and was reminded of this raw parsnip rice with pineapple from the taste space.

A raw salad full of fresh ingredients sounded like just the thing I wanted, so I headed out to the grocery store to pick up the rest of the components.


I ended up changing up Janet's recipe quite a bit to squeeze in even more fruits and veggies and turn the dish into more of a tropical inspired salad than her Thai version.

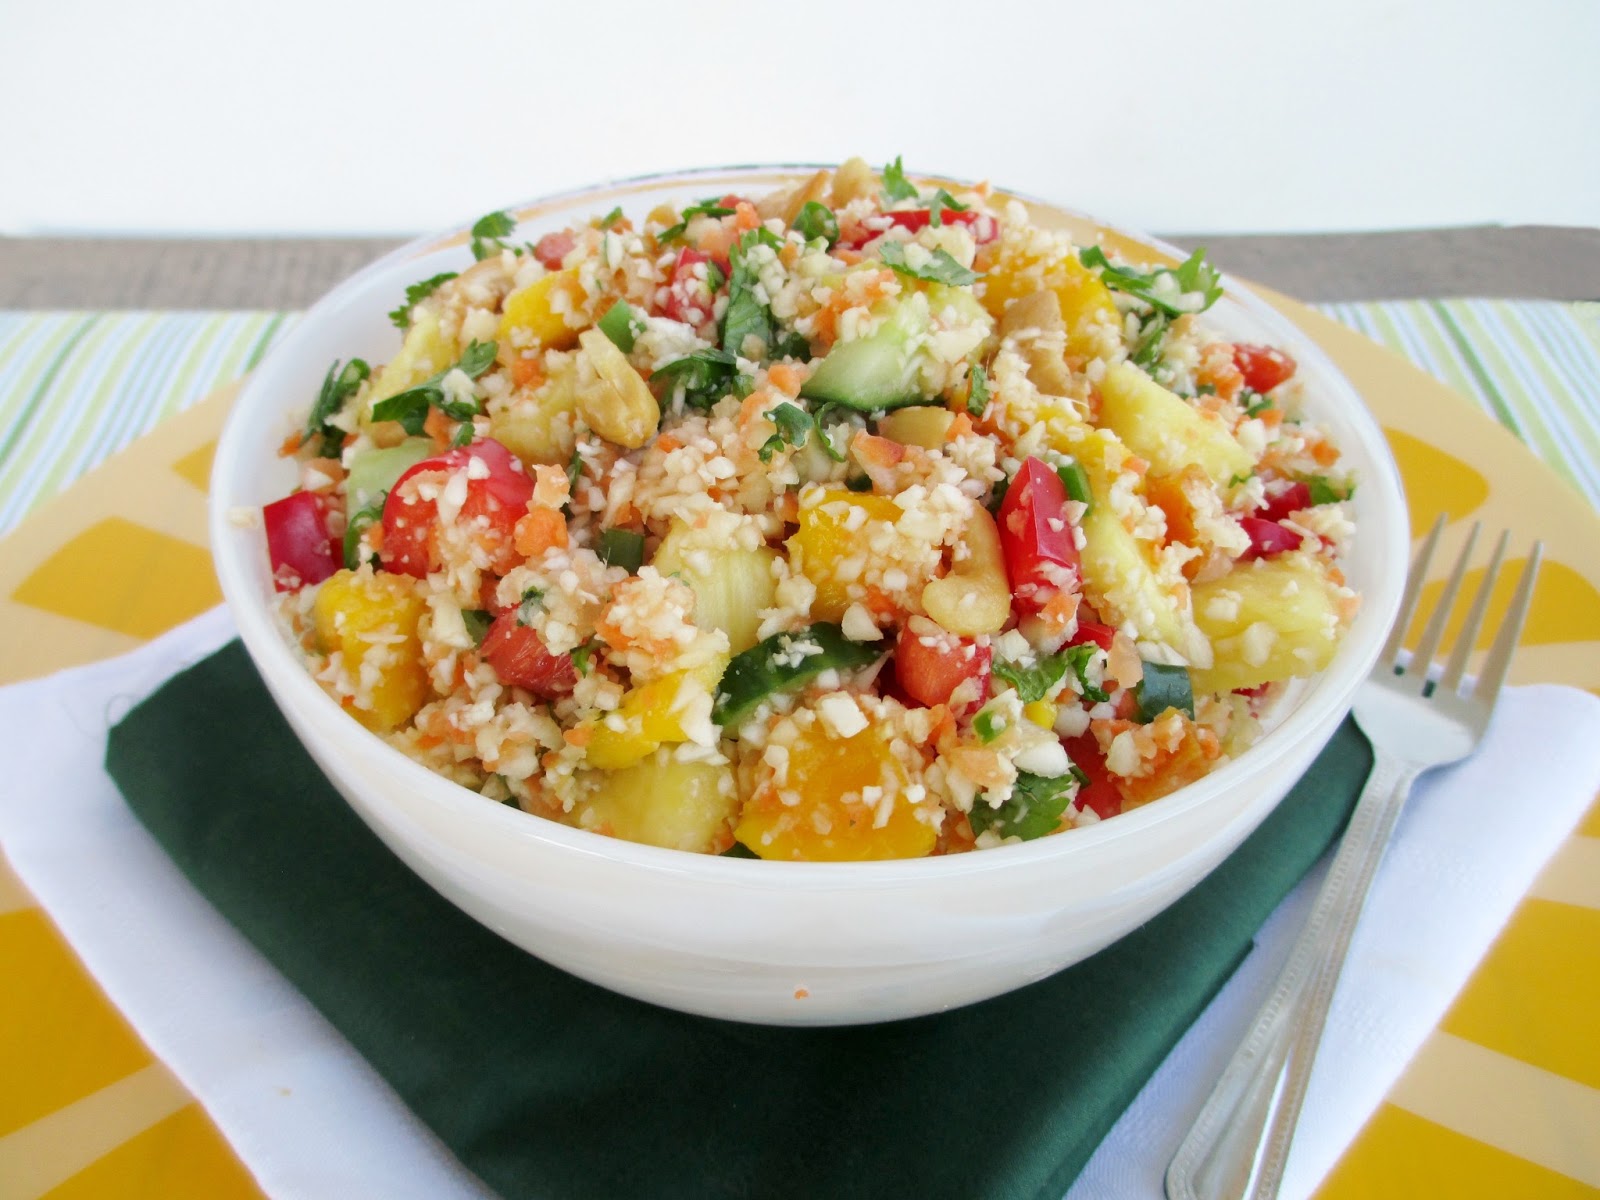
The base of the salad is a mixture of raw parsnips, carrot, and cauliflower all ground up to resemble the texture of couscous. Next, I added fresh pineapple, mango, red pepper and cucumber, plus some dried apricots, all finely diced to the same size.

Once you've got your fruits and veggies, the next component is to add more layers of flavour with lots of herbs - I used cilantro, mint, and green onion. And of course a great salad in my mind needs some kind of nuts, so I went with Janet's suggestion of adding chopped roasted cashews.

Finally, to bring everything together, I made a light and fruity dressing by pureeing more pineapple with some lime juice and ginger.


This turned out to be exactly what I was craving! The best way to describe this salad is that it's super refreshing, and how could it not be, with all of those raw ingredients? I loved the combination of sweet ripe tropical fruits with the crisp veggies, crunchy cashews, and fresh herbs.

My favourite salads are ones with lots of different ingredients so that every bite is interesting, and I thought all of the components in this salad were balanced out nicely so that one flavour didn't dominate.

This recipe also makes a big batch, and I'm happy to have a full container of it to eat for meals over the next few days until my cravings for comfort food come back!


Tropical Detox Salad
Inspired by the taste space

2 medium parsnips, peeled and chopped
1 large carrot, peeled and chopped
1/2 a small head of cauliflower, chopped
1/2 a large red pepper, finely diced (about 1 cup)
1 cup finely diced cucumber
1 ripe mango, finely diced
1.5 cups diced fresh pineapple
1/2 cup thinly sliced scallions
1/2 cup chopped fresh cilantro
2 tbsp chopped fresh mint
1 jalapeno, seeded and minced
5-6 tbsp chopped cashews (I used unsalted roasted cashews)
1/4 cup finely diced apricots

Dressing
1/2 cup chopped fresh pineapple
Juice of one lime
1 tbsp minced fresh ginger
1 tsp tamari
1 tsp mirin
1 tsp honey or agave nectar
1 tsp olive oil
Dash of herbamare or salt

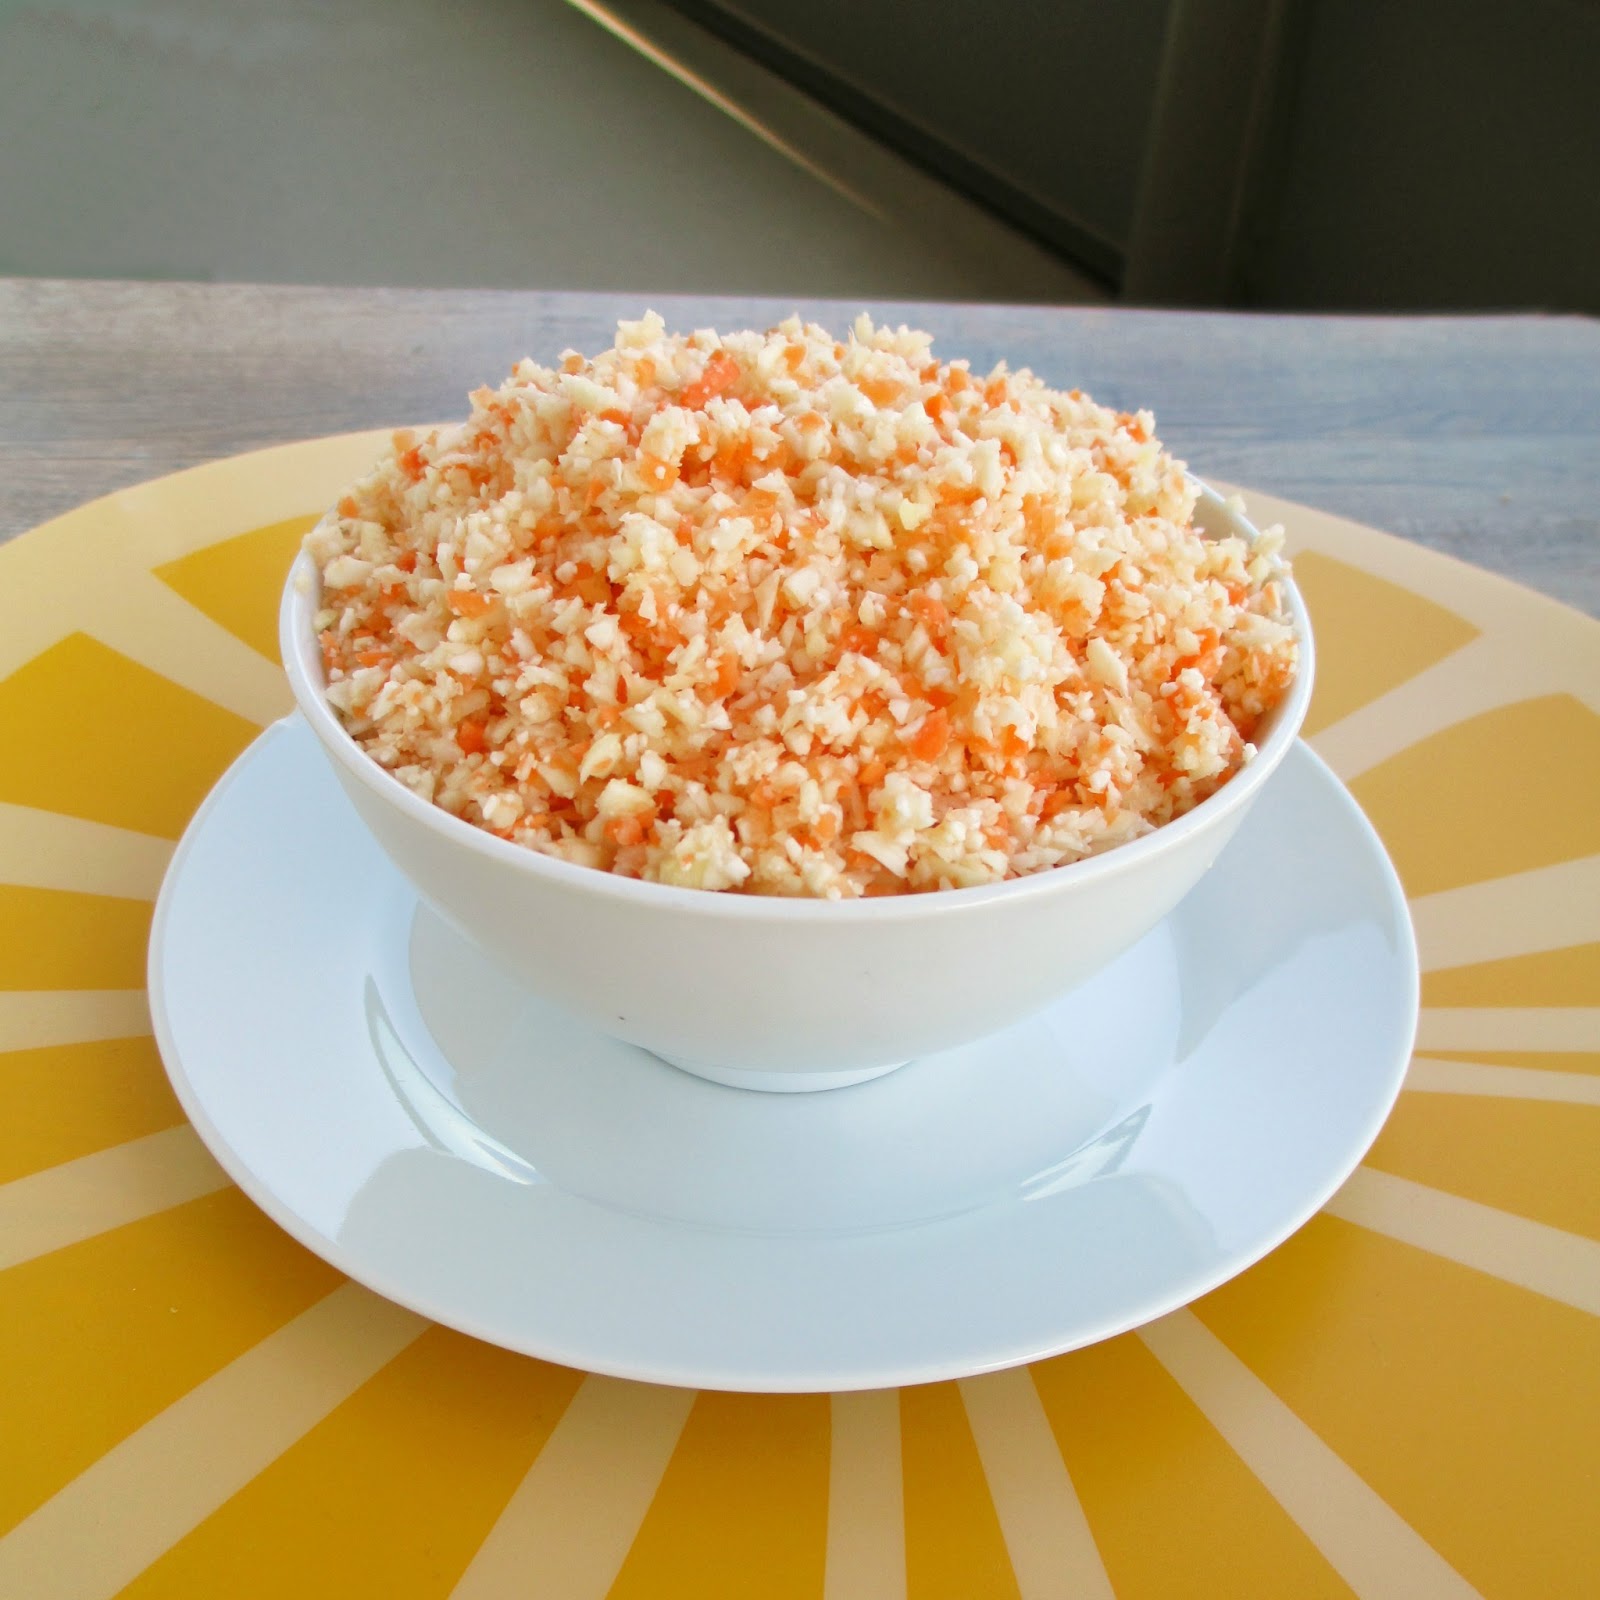
Add the parsnips, carrot, and cauliflower to the large bowl of a food processor. Pulse until veggies are finely minced, but not pureed (the texture should resemble rice).  Transfer to a large bowl.   It should look like this: 


Add the remaining ingredients to the bowl, stirring to mix thoroughly.

To make the dressing, add all ingredients to a blender and puree until smooth. Taste and adjust seasoning if desired.  Pour dressing over salad and toss to mix.

Store salad in the fridge until ready to eat. Serve cold or at room temperature.  Season each serving with additional lime juice and/or herbamare if desired.

Makes 4-5 large servings.

January 21, 2013

Paneer & Spinach Quesadillas with Cilantro Chutney


After making my "PLT" sandwiches, I wanted to come up with another use for the rest of my paneer cheese, and my first thought was to use it in quesadillas!

I took my inspiration for these quesadillas from one of my favourite things that I ate when I was in India - parathas.  Parathas are basically an Indian flatbread stuffed with a variety of fillings, from the classic potato (aloo) paratha to more unique combinations like cauliflower and daikon, or onion with mushrooms.

One of my favourite parathas to order used to be paneer with spinach (also known as palak-paneer paratha), cooked until the outside is golden brown and served with spicy green chutney and cool yogurt. Here's a look at my actual order from a paratha restaurant in India:


While I could have attempted to recreate this at home, I decided to try to take the filling ingredients and use them in tortillas shells instead to make these quesadillas!

And since quesadillas are so much better with toppings like salsa and sour cream, I took the typical paratha condiments, cilantro chutney and plain yogurt, and used them to top my quesadillas.


After not having much success with my last attempt to make quesadillas, I was super excited that these turned out the way I wanted! The only caveat is that the paneer doesn't melt easily, so if you want an extra gooey, cheesy filling, just stick the cooked quesadillas in a warm oven or the microwave briefly after you've cooked them. This also works well with any leftovers - I thought they were even better after being reheated!

Since the paneer is rather flavourless on its own, the spinach cooked with onion, chili and ginger helped to spice up the filling.  But what really took these quesadillas over the top taste-wise was the cilantro chutney. While I think that any storebought chutney would still taste great as a condiment here, I was so glad I took the extra effort of making my own.

The chutney was super spicy for my taste (even with only one green chili), but the heat was balanced out by the lemon juice that I added.  Swirling some creamy plain yogurt into the chutney as you spread it on your quesadillas also helped to mellow out the spicy bite!


Paneer & Spinach Quesadillas

~5 cups packed spinach leaves
1 tbsp vegetable oil
1 small yellow onion, diced
2 tsp fresh ginger, minced
1 green chili, minced
1/2 tsp cumin
Dash of salt
~2 cups (200 grams) paneer cheese, grated
6 small whole wheat tortillas
Cilantro chutney (storebought, or recipe below)
Plain yogurt

Wash the spinach and let dry in a colander, squeezing out any excess moisture with your hands.

Heat the vegetable oil in a large saucepan over medium heat. Add the onion, ginger, chili, and cumin and cook, stirring often, until the onion softens (about 4 minutes).  Add the spinach leaves and a dash of salt. Cook until the spinach leaves are wilted and most of the moisture has evaporated, about 6-8 minutes, stirring occasionally. Remove from heat and transfer mixture to a bowl.

To make quesadillas, heat a large non-stick skillet over medium heat. Lay a tortilla in the pan and sprinkle about 1/3 cup of the grated paneer over half of the tortilla.  Top with about 1/4 cup of the spinach mixture. Fold the quesadilla, bring the empty side down over the filling, and press down with a spatula. Once the bottom side is lightly browned (about 2-3 minutes), flip and cook the other side for another couple of minutes.  Remove from pan and transfer to a plate. (If you are making a larger batch, you can transfer the cooked quesadillas to a baking sheet and keep in a warm oven (200°F) while you cook the remaining quesadillas).

Repeat the process until the cheese and spinach mixture are used up – mine made enough for 6 small sized tortillas. Serve warm, with the cilantro chutney and plain yogurt.


Cilantro Chutney
Slightly adapted from Vegan Eats World

2 cups packed cilantro leaves (it’s okay to leave some thin stems in)
1/4 cup unsweetened shredded coconut
3 cloves garlic, peeled and roughly chopped
1 green chili, minced
1 ¼ tsp garam masala
1/2 tsp salt
2 tbsp fresh lemon juice
1/4 cup water (plus more if necessary)

Add all the ingredients except for the water to a food processor or blender. Blend until everything is mixed together.  Add half of the water and blend again. Continue to blend, gradually adding more water as necessary, until the mixture is as smooth as possible (I used 1/4 cup plus 1 tsp water).

Transfer to a small container and store in the fridge.


May 16, 2012

Tofu Banh Mi


I don't post a lot of sandwich recipes on my blog because the ones I eat are usually pretty simple, like hummus and veggies on a bagel, tofu salad in a pita, or even plain old peanut butter and jam.

Up until now, my favourite sandwich combination was this pumpernickel sandwich with avocado, sprouts and a white bean spread.  But now there's a new sandwich in town and its ready to take over the number one spot - the banh mi!  Whereas the pumpernickel was soft, creamy, and comforting, this one is sharp, spicy, and in-your-face!

If you haven't heard of banh mi, it's a Vietnamese baguette that is usually made with some kind of meat filling and topped with pickled carrot and daikon radish, cucumber slices, fresh cilantro and a spicy mayonnaise and chili spread.  I had seen recipes for both vegetarian and non-vegetarian versions of this sandwich online, but I had never tried one until a few months ago, when I came across a small take-out restaurant nearby that actually specializes in these popular sandwiches.

They offered a lot of different kinds of banh mi, and luckily there was one vegetarian option on the menu! I watched as the bun was toasted and spread with mayonnaise, then topped with a layer of tofu, followed by pickled vegetables, and whole sprigs of cilantro.  When I got my sandwich home and tried it, I fell in love with the flavour combination.  Even though my mouth was on fire from the spiciness, I couldn't stop eating!


Ever since then, I've wanted to recreate the banh mi myself.  So when I read through the new Vegetarian Times special edition ("Healthy recipes from around the globe") that I received for my birthday and saw a recipe for a tofu bahn mi, I knew I had to make it!

The recipe does require a bit more work than your typical sandwich, because you have to prepare a lot of ingredients and marinate both the tofu and the veggies, but I promise it's worth the effort!  The tofu is marinated in soy sauce and ginger, then sauteed on the stove.  While the tofu is marinating, the carrot and daikon are soaked in a rice vinegar mixture to make them pickled. For the rest of the toppings, you need a large section of cucumber that you can peel lengthwise, and some fresh cilantro with the stems on (this may be the only time I've ever eaten the stems!)

Once all the components are ready, you just need to assemble the sandwich and spread on a layer of mayonnaise (or vegenaise) and as much spicy chili sauce as you like!


I have to say, I definitely enjoyed my homemade version better than the one I got from the restaurant (as is usually the case with homemade vs fast food).  I loved the way each of the flavours played off each other with every bite - the spice from the chili sauce and red pepper flakes, sourness from the pickled veggies, the bite from the fresh cilantro, and even a touch of sweetness.  The tofu had a nice texture and really soaked up the flavours of the marinade.

This was definitely not your ordinary or everyday sandwich, but it was so refreshing to try a new combination of ingredients and toppings!  I made a big batch of each of the components so that I could make a fresh sandwich for dinner three nights in a row, and I enjoyed them just as much each time!

Just make sure you use a sturdy bun because you don't want it get too soggy from the sauces - Vietnamese subs would be best if you can find them, but I just used a French baguette from the grocery store.  You can also toast the bread before hand, but I liked mine soft - it's up to you!


Tofu Banh Mi
Adapted from Vegetarian Times


Per sandwich:
4 oz firm tofu
3/4 tbsp soy sauce
1/2 - 1 tsp minced fresh ginger
1/4 cup rice vinegar
1/2 tsp kosher salt
2 tsp sugar
1/2 tsp red pepper flakes
1/4 cup grated or julienned carrot
1/4 cup grated daikon radish
1/2 tbsp vegetable oil
Vietnamese sub or French baguette
1 tbsp vegenaise or low-fat mayonnaise
1 tsp chili sauce (sriracha), or to taste
~ 6 sprigs of fresh cilantro (including stems)
2 thin slices of cucumber, about 6 inches long

Drain the tofu and slice lengthwise into 1/2 inch thick slices (I used a 12 oz package and got three rectangular slices – enough for three large sandwiches). Press tofu strips between layers of paper towel with a heavy book on top.  Let sit for about 20-30 minutes.

Mix the soy sauce and ginger in a shallow pan or bowl.  Lay the tofu strips in the pan and let marinate for at least 30 minutes, flipping halfway through to coat all sides.

Mix the rice vinegar, salt, sugar, and red pepper flakes in a small bowl and add the grated carrot and daikon. Let sit for about 30 minutes, stirring occasionally.

When the tofu is ready, heat the oil in a large skillet over medium heat. Add the tofu and cook for 3-4 minutes per side.  Remove from heat and transfer to a paper-towel lined plate.

To arrange the sandwich, slice the bun or baguette in half (*Note: you can toast the baguette first if desired by placing it under the broiler for about 5 minutes). Spread the vegenaise on the top half and dot with the chili sauce.  Place the cilantro on the top half.

Place the tofu slice on the bottom half of the baguette. Lay the cucumber slices over the tofu.  Drain the carrot-daikon mixture and place on top of the cucumber. Close sandwich and enjoy!

Makes 1 large sandwich.

May 03, 2012

Spicy Rice Noodle Salad with Tofu


My wishes for warmer weather have finally been answered - today is the first day we've had in weeks where the sun has stayed out and the breeze is nice and warm.  It felt so good to be outside that I actually willingly went for a brief run around the park near my apartment when I got home (trust me, it's been a long time since I've done that!).

The recipe that I have to share with you today is perfect for this weather - a big salad made with rice noodles and full of fruit, veggies, and some tofu for protein, all coated in a spicy pineapple dressing!

The recipe comes from Vegetarian Times, although I made some changes as usual.  I was actually inspired to make it because it called for green curry paste, and I still had some homemade green curry paste leftover from the Thai Green Curry that I made a while ago.

Along with the curry paste, the rest of the dressing is made by blending pineapple juice with other Asian ingredients like soy sauce, ginger, garlic and rice vinegar.  For the salad, I used the red pepper and carrot that the original recipe called for, and I also added bean sprouts, mango and edamame beans.  Since I wanted this to be filling enough to serve as a main course for dinner, I added some tofu that I sliced into thin pieces and sauteed briefly on the stove.

The dish is finished off with a generous sprinkling of fresh cilantro, some hot chilies, and a handful of chopped peanuts.  The result was a very colourful plate with lots of flavour! I also liked that it tasted good warmed up, at room temperature, and straight from the fridge.  I did find it pretty spicy, so feel free to reduce or eliminate the extra red chilies.  I also think fresh pineapple would work well instead of mango.

I hope you're all enjoying the warm weather too... I'm off to make another big salad for tonight's dinner!


Spicy Rice Noodle Salad with Tofu
Adapted from Vegetarian Times


Dressing:
1/2 cup pineapple juice
2 tbsp reduced-sodium soy sauce
3 tbsp fresh ginger, peeled and chopped
3 cloves of garlic, peeled and minced
2 tbsp rice vinegar
1 tbsp vegetable oil
2 tsp Thai green curry paste (I used homemade)
1 tsp palm sugar (or brown sugar)

Salad:
7 oz rice noodles
3 tsp vegetable oil, divided
1 red pepper, thinly sliced
1 ripe mango, thinly sliced
1/2 cup shelled frozen edamame, thawed
1 cup shredded carrot
2 cups bean sprouts
1/2 cup chopped scallion
1/2 cup chopped cilantro, divided
1-2 red chilies, minced (optional)
12-14 oz package firm tofu, drained and pressed with towels for at least 15 minutes
About 1/2 cup finely chopped or crushed peanuts

Place all ingredients for the dressing in a blender and puree until smooth. Set aside.

Place the rice noodles in a bowl or saucepan and cover with boiling water. Let sit for 5-10 minutes, until the noodles are soft (check your package directions – mine needed at least 10-15 minutes).  Drain and rinse with cold water.  Transfer noodles back to the bowl or saucepan and toss with 2 tsp vegetable oil. 

Meanwhile, prepare all the vegetables (red pepper through to chilies) and transfer them to a large bowl. Set aside half of the cilantro for topping. 

Slice the tofu into thin strips.  Heat about 1 tsp of the vegetable oil in a large skillet on medium heat.  Add the tofu pieces and sauté for about 4-5 minutes, stirring often, until lightly browned.

Combine the noodles with the vegetables.  Pour about half of the dressing on top and toss to mix thoroughly, until all the noodles and vegetables are coated.  Add the tofu pieces and pour a bit more dressing over top.  Stir to mix again.  Add more dressing if necessary (you might not need all of it).

Serve immediately, or place salad in the refrigerator to chill until serving time.  Garnish each serving with the remaining cilantro and a handful of crushed peanuts.  


Makes 4-6 servings.


March 08, 2012

Indian-Spiced Red Lentil & Mango Bites


If you follow my sister's blog Once Upon a Cutting Board, you would have learned yesterday that Canadian Lentils is holding a recipe contest for Canadian food bloggers. When my sister first told me about the contest, I didn't think too much about it...I figured that every idea for lentil recipes has already been created, and that I wouldn't be able to come up with anything new or creative for the contest.

But the more I thought about it, the more determined I became to develop a recipe, and now I'm excited to share what I came up with: these red lentil bites with dried mango and Indian spices.

I decided to go with red lentils because I knew they would pair well with some of the flavours and ingredients that I like to cook with. Instead of making a soup or stew, which I would normally do with red lentils, I decided to use them in an appetizer.

I also knew that you could make tasty and healthy little oven-baked balls using chickpeas, fava beans, or sweet potatoes, so I figured why not use pureed red lentils instead?


I started by cooking the red lentils on the stove until they had softened and dried up.  Then they went into the food processor along with cilantro, lemon juice, spices, coconut and chopped dried mango. All the ingredients were pureed into a creamy mixture like a hummus, then rolled into balls and baked in the oven.

It took a few tries to get the recipe just right, but after some tweaking, they turned out just how I had envisioned - soft on the inside and slightly crispy on the outside, with a nice balance of spices and sweetness from the mango.  These are the perfect little snack to pop in your mouth on their own, or you could pair them with a dipping sauce - I think they would taste great with mango chutney!

And if you like the sounds of this recipe, I would really appreciate your support in the contest!  Besides taste, appeal, use of lentils, and simplicity, one of the judging criteria is social media popularity.  So if you have a minute, I would love to receive any comments from you on this post, or you can head over to the Canadian Lentils Facebook page and click "like" on my entry that is posted on their wall.  You might find some other entries in the contest that you like there too - like these lentil peanut butter granola bars!


Indian-Spiced Red Lentil & Mango Bites

1/2 cup dried red lentils, picked over to remove debris and rinsed
1 cup water
1 tsp minced fresh ginger
1/4 tsp cumin
1/4 tsp ground coriander
pinch of cayenne
pinch of salt
1 tbsp fresh lemon juice
2 tbsp chopped fresh cilantro
2 tbsp unsweetened shredded coconut
2 tbsp dried mango, finely chopped

Place the lentils and water in a medium-sized saucepan. Bring to a boil over high heat, then reduce heat to medium-low. Simmer for about 20 minutes, until liquid has dried up, stirring occasionally to prevent lentils from sticking to the bottom of the pan.

Remove lentils from heat and transfer to a food processor. Preheat the oven to 350°F and spray a glass baking pan (or baking sheet) with cooking spray.

Add the remaining ingredients except for coconut and dried mango to the food processor with the lentils and process until everything is fully mixed together. Add the coconut and mango and process again until the mixture has started to form a thick dough (Note: unless you have a really strong food processor, the mango probably won’t fully break down).

Scoop out the mixture using a tablespoon measure and form into small balls using your hands.  Place balls in the prepared baking pan. Bake for about 20-25 minutes, until the balls are slightly firm to the touch and the bottoms are lightly browned (don't worry if they still feel a bit soft, they will firm up more after cooling).

Remove from oven and let cool completely before eating.  Store in the refrigerator. 

Makes 12 balls (recipe can easily be doubled for a larger batch).


February 28, 2012

Indonesian Tempeh Stew


With the winter weather still hanging on here in Ontario, I thought this would be a good time to post some tropical recipes to try to ward off the winter blues.  So I bought myself a pineapple at a much higher price than I would usually be willing to pay, and I easily used it all up within a few days!

Most of that pineapple went into smoothies and a mini loaf, but the rest was used in this Indonesian-inspired stew from the Vegan Planet cookbook. The original recipe called for a mixture of tempeh and sweet potato simmered in a spicy tomato and coconut milk broth.  I wanted to include a couple more ingredients to make the stew a bit more interesting, so I added pineapple and yellow beans, which I thought would go well with the other Indonesian flavours.

After tasting the stew, I was really glad I added the pineapple! The pieces of fresh pineapple were my favourite part of the dish, and they gave it a nice overall balance between sweet and spicy.

This was also the first time I've ever used tempeh in a recipe and I have to admit, I was a bit nervous when I first took the tempeh out of its package and cooked it - the smell was not very appealing and I didn't really like the taste of it plain.  But all of my worries disappeared when I tasted the final product! I really liked the texture of the tempeh and the way it soaked up the flavours of the stew.  I'm not really a fan of meat substitutes that taste or look a lot like actual meat, but with tempeh (which is made from fermented soybeans) I found that the taste and texture are more nutty rather than meaty, which I liked.

Overall, I loved the combination of flavours and textures in this stew, and it was the perfect mix of a hearty, warm stew for winter with notes of brighter tropical flavours.  And don't leave out the finishing touches of the lime juice and cilantro, they really helped bring everything together!


Indonesian Tempeh Stew
Adapted from Vegan Planet

One 8 oz package tempeh
2 tbsp olive oil, divided
3 shallots, peeled and diced
3 cloves of garlic, peeled and minced
1 small chili pepper, seeded and minced (I used jalapeno)
1/4 tsp chili flakes (optional if you like more heat)
1 tsp minced fresh ginger
1 large sweet potato, peeled and diced
1 cup water
1 14.5 oz can crushed tomatoes (or half of a 28 oz can)
1 tbsp soy sauce
1 cup unsweetened coconut milk (I used the kind from a carton)
1.5 cups chopped fresh pineapple
About 4 oz green or yellow beans, trimmed and cut in half
Salt and pepper (to taste)
Zest and juice of half a lime
2 tbsp chopped fresh cilantro

First, poach the tempeh – place the block of tempeh in a saucepan and cover with water. Bring to a simmer and continue simmering for 10 minutes. Drain and pat dry. Cut tempeh into cubes.

Heat 1 tablespoon of olive oil in a large skillet over medium-high heat. Add the tempeh and cook for about 5 minutes, turning occasionally to brown all sides. Remove from heat and set aside.

Heat the remaining 1 tablespoon olive oil in a large saucepan over medium heat. Add the shallots, garlic, chili pepper, chili flakes (if using) and ginger. Cover and cook until onion is softened, 4-5 minutes, stirring occasionally.

Stir in the sweet potato, water, crushed tomatoes and soy sauce. Cover and cook until potato is tender, about 20 minutes, stirring occasionally.

Remove lid and reduce heat to low. Add the coconut milk, cooked tempeh, pineapple, beans, salt and pepper. Simmer, stirring occasionally, until thickened, about 10 minutes.

Add the lime zest and juice and cilantro just before serving.  Garnish with additional cilantro and lime wedges if desired.

Makes 4 servings. 

January 09, 2012

Sweet Potato Coconut Cashew Rice


A lot of people probably think of rice as a boring side dish, but this sweet potato coconut cashew rice bowl definitely proves that plain rice can be transformed into an incredibly tasty meal!

I love both sweet potatoes and coconut in any form, so when I saw this recipe on The Family Kitchen, I knew I would be making it myself as soon as possible!

You actually get a double dose of coconut in this dish - I changed the recipe so that the rice is cooked in coconut milk to soak up the flavor better, and then you toast some shredded coconut and mix that into the cooked rice.  I love the smell and taste of toasted coconut, and even though it is usually used in dessert recipes, I thought it fit perfectly in this rice dish!

Between the chunks of sweet potato, the coconut, the raisins and the maple syrup, this meal was a bit on the sweeter side, but it was also balanced out by the spices, cilantro and some chopped spinach that I added to increase the nutritional value a bit more!

So as long as you have a bit of a sweet tooth and you like coconut as much as I do, I'm sure you will love this rice too!


Sweet Potato Coconut Cashew Rice
Adapted from The Family Kitchen

1 large sweet potato, peeled and diced
1/3 cup unsweetened shredded coconut
1/3 cup chopped cashews
2 tsp olive oil
1 small yellow onion, peeled and diced
1 tsp minced fresh ginger
1 clove garlic, peeled and minced
1 cup Jasmine or Basmati white rice (I used Jasmine)
1 cup water
1 cup coconut milk
1 bay leaf
1/2 tsp ground ginger
pinch of salt
pinch of cinnamon
2-3 tbsp sultana raisins
2 tbsp pure maple syrup
2 cups chopped spinach
chopped fresh cilantro for garnish


Preheat the oven to 400°. Place the diced sweet potato on a baking sheet and toss with a bit of olive oil. Roast in the oven for 20-25 minutes, until tender. 

Heat a medium-sized saucepan over medium heat. Add the coconut and cashews. Cook for a few minutes, stirring often, until the coconut is lightly toasted and the cashews are lightly browned. Remove from pan and set aside.

Add the olive oil to the pan.  Once the oil is hot, add the onion and cook for about 4-5 minutes, stirring occasionally, until softened and lightly browned. Add the ginger and garlic and cook for about 30 more seconds. 

Add the rice, water and coconut milk to the pan. Stir in the spices and bay leaf. Bring to a boil, then reduce heat to low, cover and simmer for about 12 minutes (or cook according to rice package directions).

Once the rice is done, remove the pot from the heat, take out the bay leaf and add the raisins. Cover and let sit for 5 minutes. Remove lid and fluff the rice with a fork. 

Stir in the maple syrup and spinach, and the reserved sweet potato, coconut and cashews.

Serve warm. Garnish with cilantro. 

Makes about 4 servings. 


November 14, 2011

Indian Butternut Squash, Coconut & Split Pea Stew


In my last post, I mentioned a couple of Food Network chefs that I like.  Last time, I featured a recipe from Bal Arneson, and today I have a recipe from Aarti Sequeira.

I found the recipe for Aarti's "Indian Summer Stew" on Janet's blog, and after reading her description of it, I had to try it for myself!  I already knew that I loved all the ingredients that the recipe called for (butternut squash, coconut, yellow split peas, cilantro and Indian spices), so I was pretty sure that combining all of those ingredients would make an amazing stew!

Once I tasted it, I was so glad I gave it a chance! The recipe might look a bit intimidating with the number of ingredients required, but it was easier than I thought to put together....Plus it makes a lot of stew, so you can enjoy the leftovers for a while!

This is one of those dishes that makes me appreciate home-cooked meals so much! All it takes is the right ingredients and a bit of time, and you can have a healthy and delicious meal full of flavour and texture that you really enjoy eating!

I actually wasn't planning on posting this recipe initially, since it's not my own creation, but I liked it so much that I decided I had to share it on my blog!


Indian Butternut Squash, Coconut & Split Pea Stew

Instead of posting the recipe again here, I will direct you to the sources where I got it from:

Recipe from The Food Network
As seen on the taste space

My Tips:
- I pre-soaked the split peas to help them soften up a bit before cooking.
- I followed Janet's tip to use large flake coconut instead of the shredded coconut in the original recipe (although I might reduce the amount slightly next time - *Update: I recommend using ~1/3 cup large flake coconut).
- I also used 1 regular tomato instead of a Roma tomato.
- You can use either honey or agave for the sweetener, depending on whether you want the stew to be completely vegan or not.
- Update: I made this again recently and added one diced yellow onion, which worked well in the recipe. Just saute the onion for a few minutes in a bit of oil before adding everything else. I also reduced the oil when cooking the spices to 1 tbsp

Makes 4-5 servings.

November 10, 2011

Sweet Potato Patties


As promised in my last post, I have another delicious sweet potato recipe for you today!

I usually don't make recipes that I see on the Food Network channel on tv, but the few that I've tried from their website have turned out really well. In particular, I like a lot of the recipes by two of the Food Network's Indian chefs - Aarti Sequeira and Bal Arneson.

These sweet potato patties are courtesy of the "Spice Goddess" Bal Arneson, and I would definitely say that this is another success from the Food Network!

I followed the recipe pretty closely, other than changing some of the spices. The patties were soft but held together well, and I really liked the balance of flavours from the sweet potato with the Indian spices. I served them with mango chutney as the original recipe suggested, and I thought it went really well with the patties. You could also eat them plain or with another type of chutney, or top them with yogurt.

These also save well in the freezer, so you can make a batch and then store them to keep on hand for a quick dinner anytime!


Sweet Potato Patties
Adapted from Bal Arneson

2 cups cooked mashed sweet potatoes
1/2 cup chickpea flour
2 tsp cumin
1 tbsp fresh ginger, minced
1 clove garlic, peeled and minced
1/4 cup chopped cilantro
1/4 tsp cayenne or chili flakes
pinch of salt and pepper
2 tbsp plain yogurt
1 tbsp canola oil
prepared mango chutney for serving

Place the mashed sweet potatoes in a bowl (I used 3 small sweet potatoes, peeled and boiled for about 10 minutes). Add the chickpea flour, cumin, ginger, garlic, cilantro, cayenne, salt and pepper and yogurt. Mix well. Form the dough into small patties with your hands, pressing to make sure they are firmly held together.

Heat the oil in a large skillet over medium heat. Add the patties to the pan (you may need to cook them in batches if they don't all fit). Fry for about 2-3 minutes, then flip and cook another 2-3 minutes on the other side. Remove from pan and cook the remaining patties.

Serve with mango chutney.

Makes 8 small patties.

November 04, 2011

Thai Red Curry Noodles with Tofu


I apologize for the lack of posts this week, but I was away at a conference in Toronto, which kept me very busy!  After a week of eating out and being away from my kitchen, I always appreciate coming back to homemade meals. This is one of the meals I made before I left and stocked the leftovers in my freezer so that I didn't have to come home to an empty fridge!

I made this dish after seeing a recipe for Khai Soi on Cate's World Kitchen, and even though I had never heard of it, I thought the combination of thai red curry paste with coconut milk, noodles and tofu sounded so good! I had also bookmarked a similar recipe for Curry Noodle Soup from Soup Chick, so I combined the two recipes to create my own version.

Once I tried it, I was happy I had leftovers since it was so flavourful!  I loved slurping up the thick rice noodles with the spicy broth, and the bean sprouts provided some crisp texture. The coconut milk made it richer than I expected, and the lime juice really helped to brighten the whole dish up. The addition of the tofu made this a complete meal, but you could also substitute chicken for a non-vegetarian version.

I did find it to be quite spicy, so you may want to reduce the amount of curry paste or ginger if you prefer less spicy dishes. You could also try adding some red pepper or another vegetable, but the simple combination of noodles, broth and tofu is definitely good enough on its own!


Thai Red Curry Noodles with Tofu
Adapted from Cate's World Kitchen and Soup Chick

1 package firm tofu (8 oz)
8 oz dry rice noodles
1-2 tbsp vegetable oil
1/4 cup Thai red curry paste
1 tsp curry powder
1/2 tsp turmeric
1 small onion, peeled and diced
1 inch piece of ginger, peeled and minced
1 can light coconut milk
1/2 tsp palm sugar (or another type of sugar)
1 tsp soy sauce
2 cups vegetable broth
Bean sprouts
Fresh cilantro
Limes for serving

Drain the water from tofu and press it under a heavy book for about half an hour to get rid of the remaining moisture, then cut into cubes.

Meanwhile, bring a large pot of water to a boil and cook the rice noodles according to package directions (I boiled mine for 3 minutes). Drain, rinse, and set aside.

Heat the vegetable oil in another large pot over medium-high heat. Stir in the red curry paste and sauté until fragrant, stirring constantly (1-2 minutes). Stir in the curry powder and turmeric.

Add the onion and ginger to the pan, along with the tofu pieces. Cook for about 2-3 minutes, stirring to coat the tofu.

Pour the coconut milk into the pot and bring to a boil. Add the palm sugar and soy sauce and stir to mix. Add the vegetable broth and reduce heat to a simmer. Cook, covered, for about 5 more minutes.

To serve, place the rice noodles in the bottom of each bowl. Ladle the soup mixture with the tofu over top of the noodles. Garnish each serving with a handful of bean sprouts and chopped cilantro. Serve with a slice of lime to squeeze over the soup.

Makes 4 servings.

Note: You can store the leftovers in the refrigerator, but the noodles might soak up some of the broth. If this happens, just add a bit of water before re-heating.

September 23, 2011

Ginger-Peanut Noodles


While I don't like to repeat meals and recipes often, one thing that I do make regularly for a quick and easy dinner is Asian noodles with veggies. I have tried a few different variations on this dish - changing up the vegetables or the sauce, but my favourite version is peanut noodles. I love peanut sauce and it's so easy to make yourself using ingredients from your pantry.

I know there are a ton of recipes out there for peanut noodles already, but this one for a soba noodle salad with ginger peanut dressing from Vegetarian Times that I tried recently was so good that I had to post about it! One thing that makes it different from any other recipe that I've seen is that you actually blend cilantro into the sauce as well as adding fresh cilantro on top. The sauce was delicious - it had the right amount of peanut butter and it was a bit tangy, which I liked.

Another part of this recipe that made it stand out from others was that it includes sliced cucumber, which I have never tried adding to my noodles before, but it was perfect in this recipe!

I loved this recipe on its own, but I think it would also be good with some tofu added in for a more substantial meal.


Ginger-Peanut Noodles
Adapted from Vegetarian Times

6 oz dried noodles, preferable soba noodles but spaghetti would also work (I used kamut udon noodles)
1 red pepper, sliced thinly
about 1/2 to 2/3 of a large English cucumber, peeled, seeded and sliced into half moons
1 large carrot, peeled and grated
1/4 cup chopped fresh cilantro
1/4 cup chopped peanuts

Dressing:
1/2 cup smooth peanut butter
1/4 cup rice vinegar
1 tbsp agave nectar or maple syrup
2 tsp soy sauce
zest and juice of one lime
1 tbsp minced fresh ginger
1 clove of garlic, minced
1/4 cup cilantro
a dash or two of hot sauce, such as Sriracha (optional)

Cook the noodles according to package directions. Drain and rinse with cold water, then set aside.

Prepare all the vegetables (red pepper, cucumber and carrot) and add to noodles.

Add all ingredients for the dressing to a blender or food processor and puree until smooth. Add 1-2 tbsp of water to thin out if necessary.

Pour the dressing over noodles and mix thoroughly. Serve at room temperature or refrigerate until serving time. Garnish each serving with the chopped cilantro and peanuts.

Makes 4 servings.

This recipe was submitted to Wellness Weekends at Diet Dessert & Dogs.

LinkWithin

Related Posts Plugin for WordPress, Blogger...