Showing posts with label banana. Show all posts

June 04, 2014

Blueberry Banana Snack Cake


I can't believe it's already June, but I'm so excited because that means not only will summer officially begin this month, but local summer fruits and veggies will be here soon too! I only just had my first rhubarb treats this past weekend (a delicious strawberry rhubarb pie that my sister made, and a rhubarb sauce that I made to eat on toast and in yogurt), and I can't wait for strawberries to arrive next!

Two years ago, I made a healthy strawberry banana snack cake that I really loved, so when I was looking through my old recipes for inspiration the other day, I wanted to try that cake out again.

This time, since local strawberries weren't available yet, I decided to use blueberries instead. I made a couple of other small changes to the recipe, like replacing the spelt flour with oat flour for a slightly different flavour and texture, adding cinnamon, a bit of lemon juice and zest, and a touch of coconut oil, and leaving out the nuts and extra sugar to make this cake less sweet.


I had mentioned in my original post that I thought blueberries would work well in this cake, and now I can say for sure that they do!

I loved the way all the fruit bursts after baking, and the blueberries paired perfectly with the coconut and banana flavours. I also love the chewy, dense texture of this cake, and how light it tastes at the same time - so you can easily eat a couple pieces for a mid-morning or afternoon snack!

As I mentioned in my last post, I'm still getting used to a new oven, so my cake browned just a tad too much even at the minimum baking time. Just be sure to keep an eye on yours, and in the meantime I'll have to test my oven temperature!


Blueberry Banana Snack Cake
Adapted from my previous recipe for Strawberry Banana Snack Cake

1 cup whole wheat flour
1 cup oat flour (I ground my own rolled oats in the blender)
1/2 cup unsweetened shredded coconut
1 tsp cinnamon
1 tsp baking powder
3/4 tsp baking soda
1/2 tsp salt
3 ripe medium-sized bananas, mashed
1/3 cup unsweetened applesauce
1/4 cup pure maple syrup*
1 tbsp melted coconut oil
1 tsp lemon zest
1 tbsp lemon juice
1 tsp vanilla extract
1 cup blueberries

*Note: You may want to add an extra 2 tbsp of sugar or cane sugar if you prefer a sweeter cake. 


Preheat oven to 350°F. Spray an 8x8 pan with cooking spray.

Whisk the dry ingredients in a large bowl (flours through to salt). In a separate bowl, mix the wet ingredients (mashed banana through to vanilla extract).

Add the wet ingredients to the dry ingredients and stir just until the dry ingredients are incorporated.  Gently fold in the blueberries.

Pour batter into prepared pan and bake in the preheated oven for about 35-45 minutes, until the sides start to brown and pull away from the pan, the top feels firm, and a toothpick inserted into the center of the cake comes out clean.

Let cool in the pan for a few minutes, then invert onto a wire rack to finish cooling before cutting into squares.

Makes about 16 squares. 


March 12, 2014

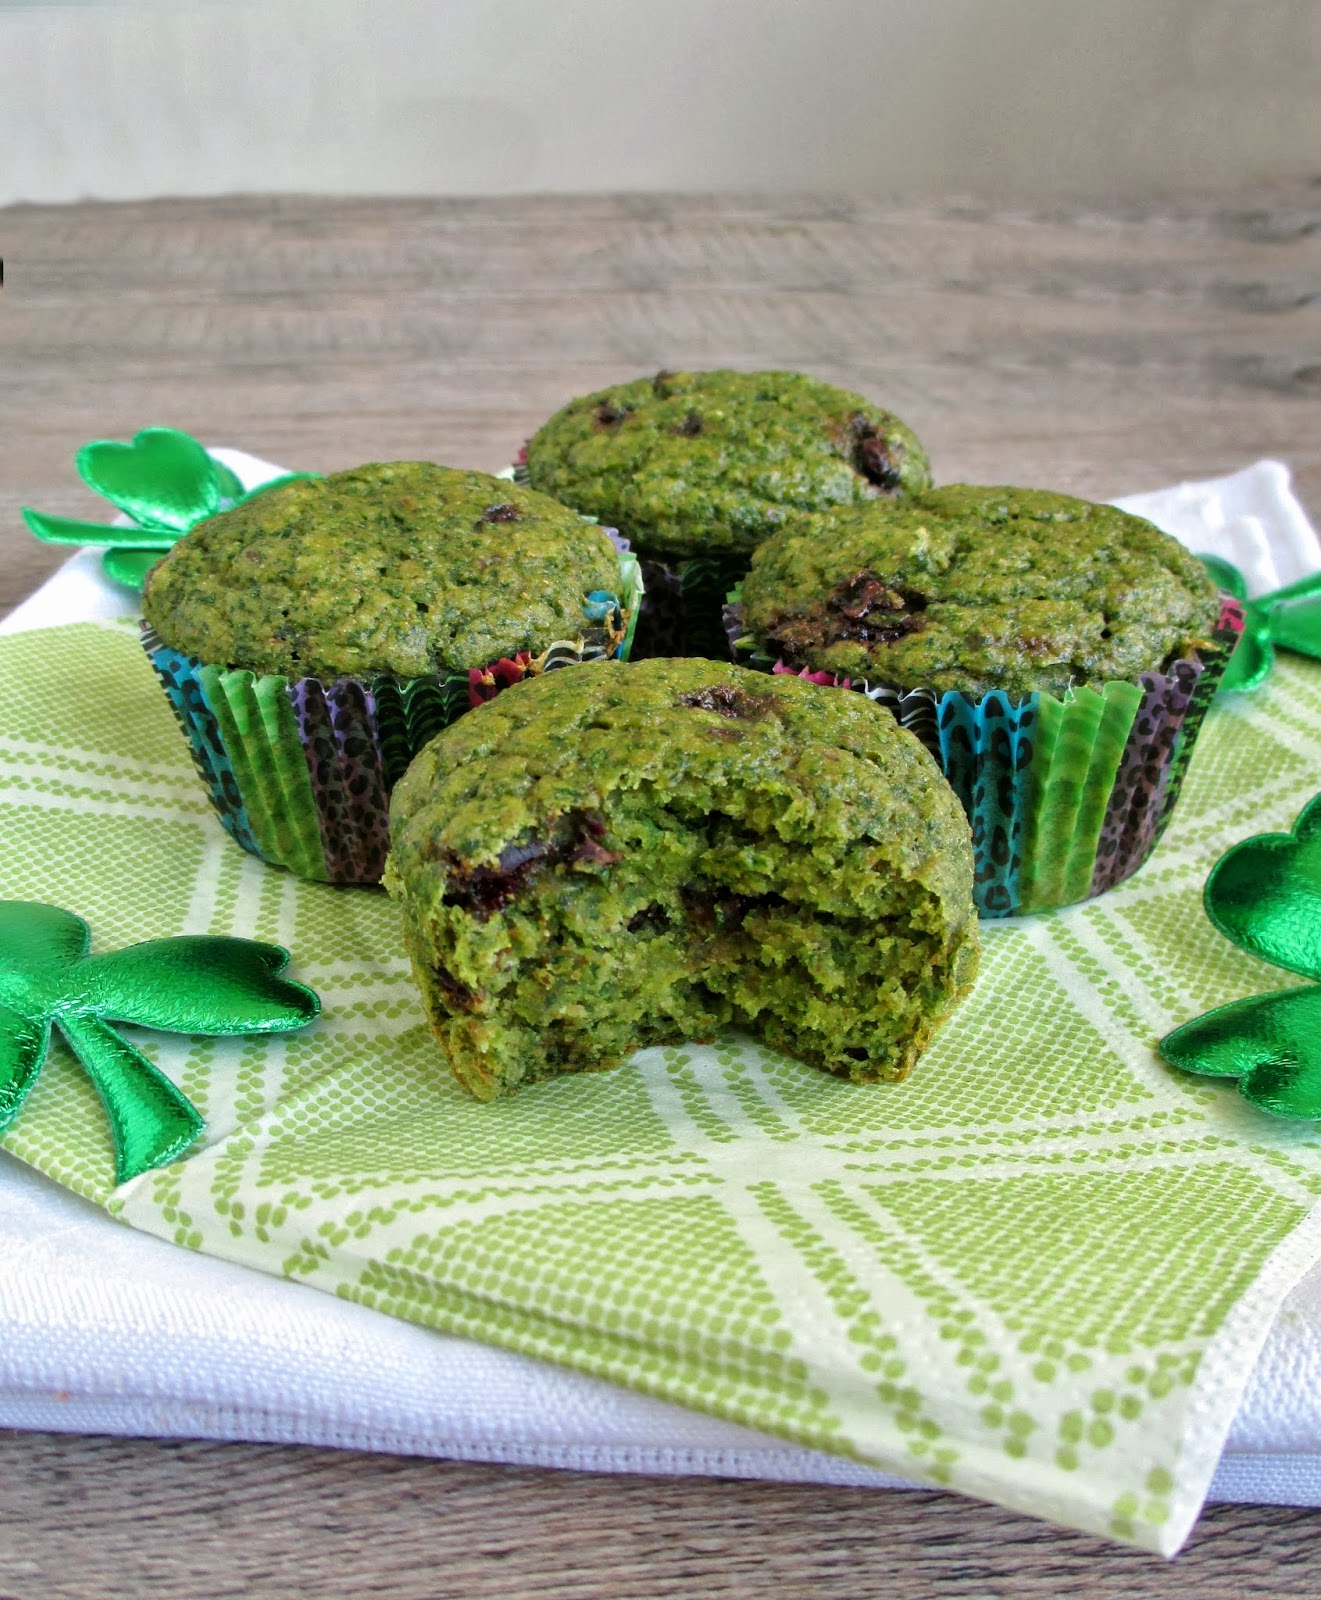
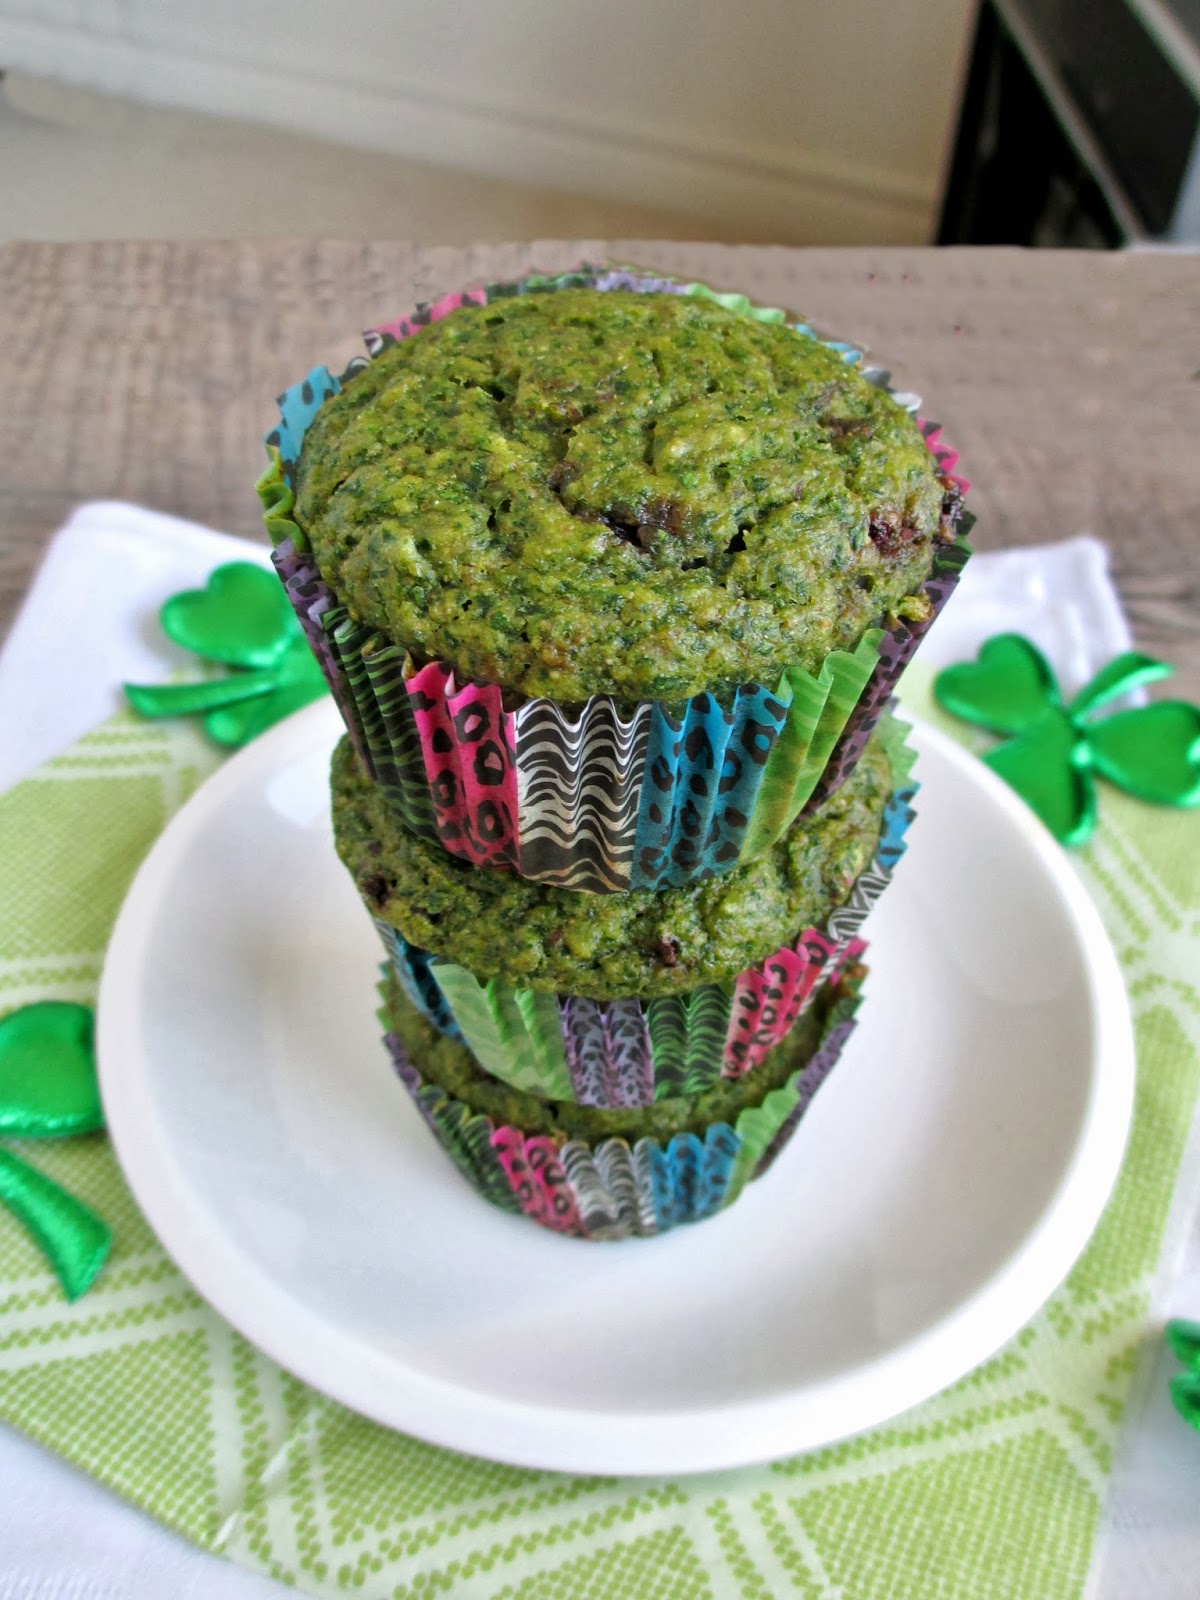
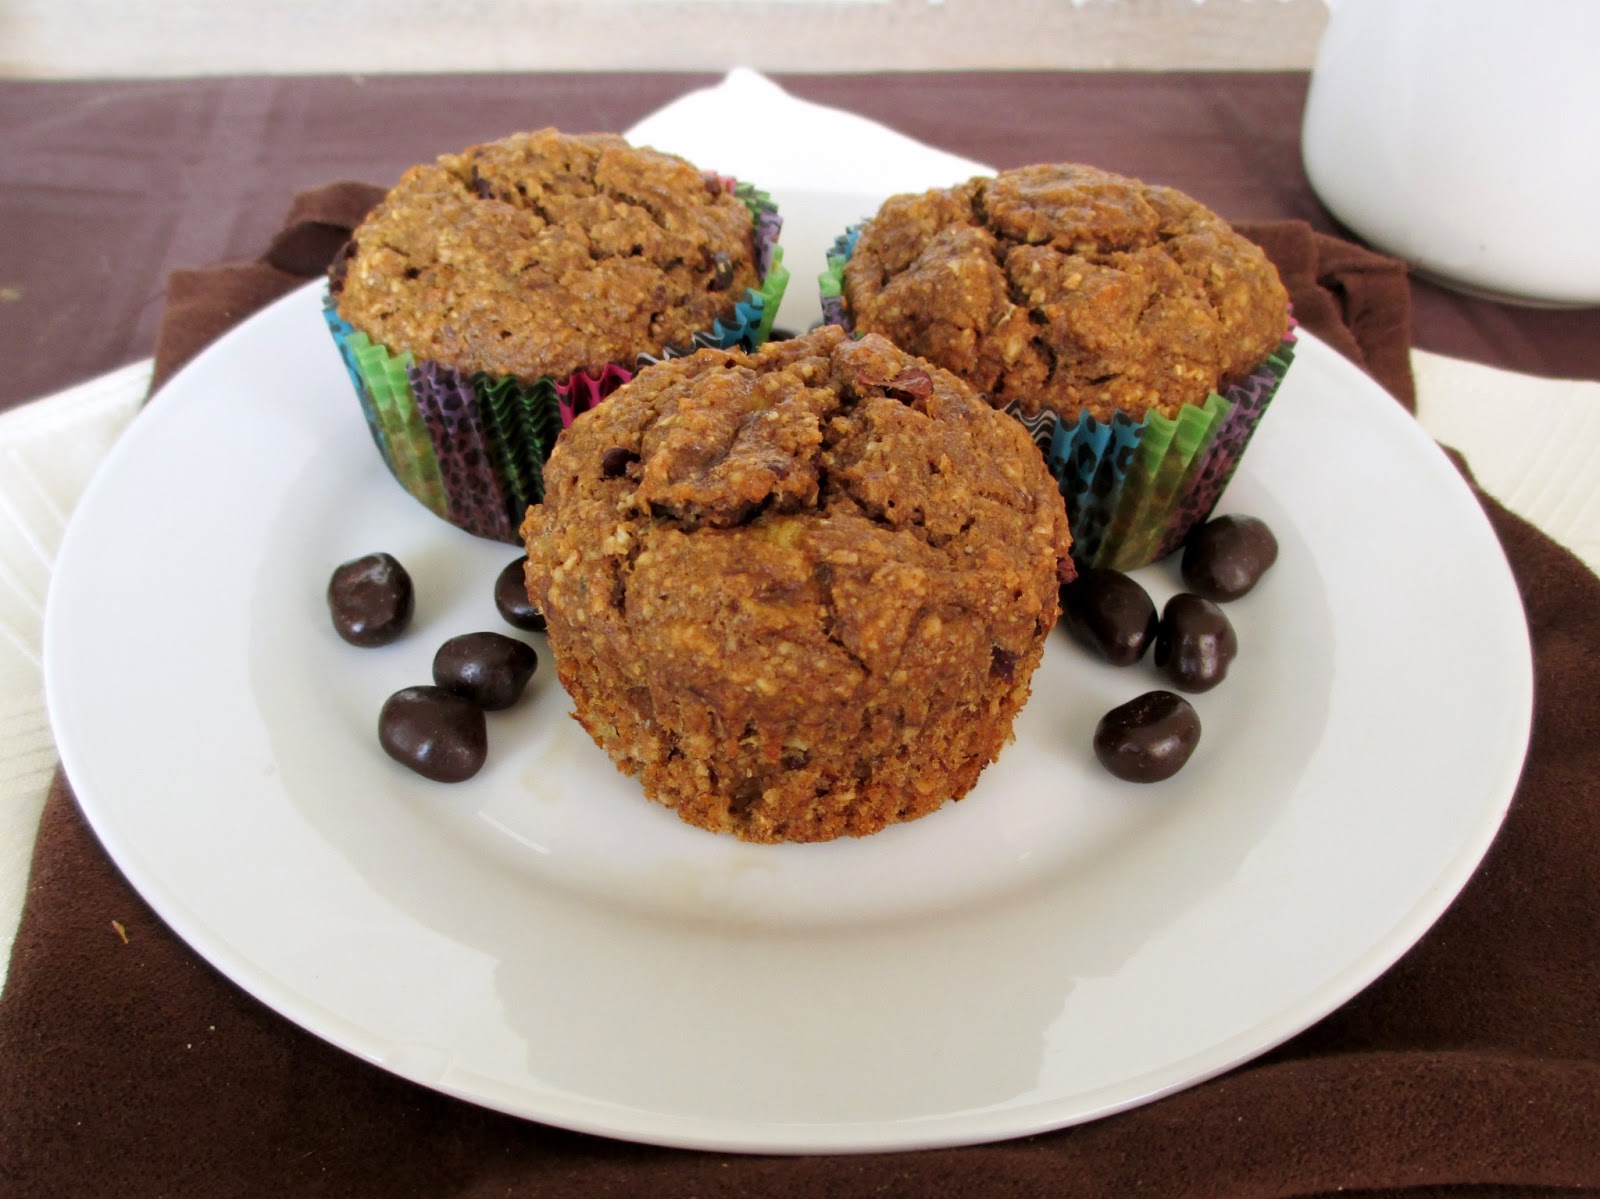
Green Spinach Banana Muffins for St. Patrick's Day


With St. Patrick's Day coming up in less than a week, I've been trying to think of something green and festive to make for it. I don't usually celebrate the holiday itself in any special way (I think I've only gone out to an Irish pub once), but I do like to wear green at least! 

We're also doing a green-themed potluck in our office, so it should be fun to see what everyone comes up with! Last year I made pasta salad with a green avocado yogurt sauce, and this year I'm thinking of cucumber rollups (like these), but we'll see!


Besides the potluck, I wanted to share something green on my blog too. I figured that if blended spinach can make a green smoothie, why not use it in another breakfast food - healthy muffins! 

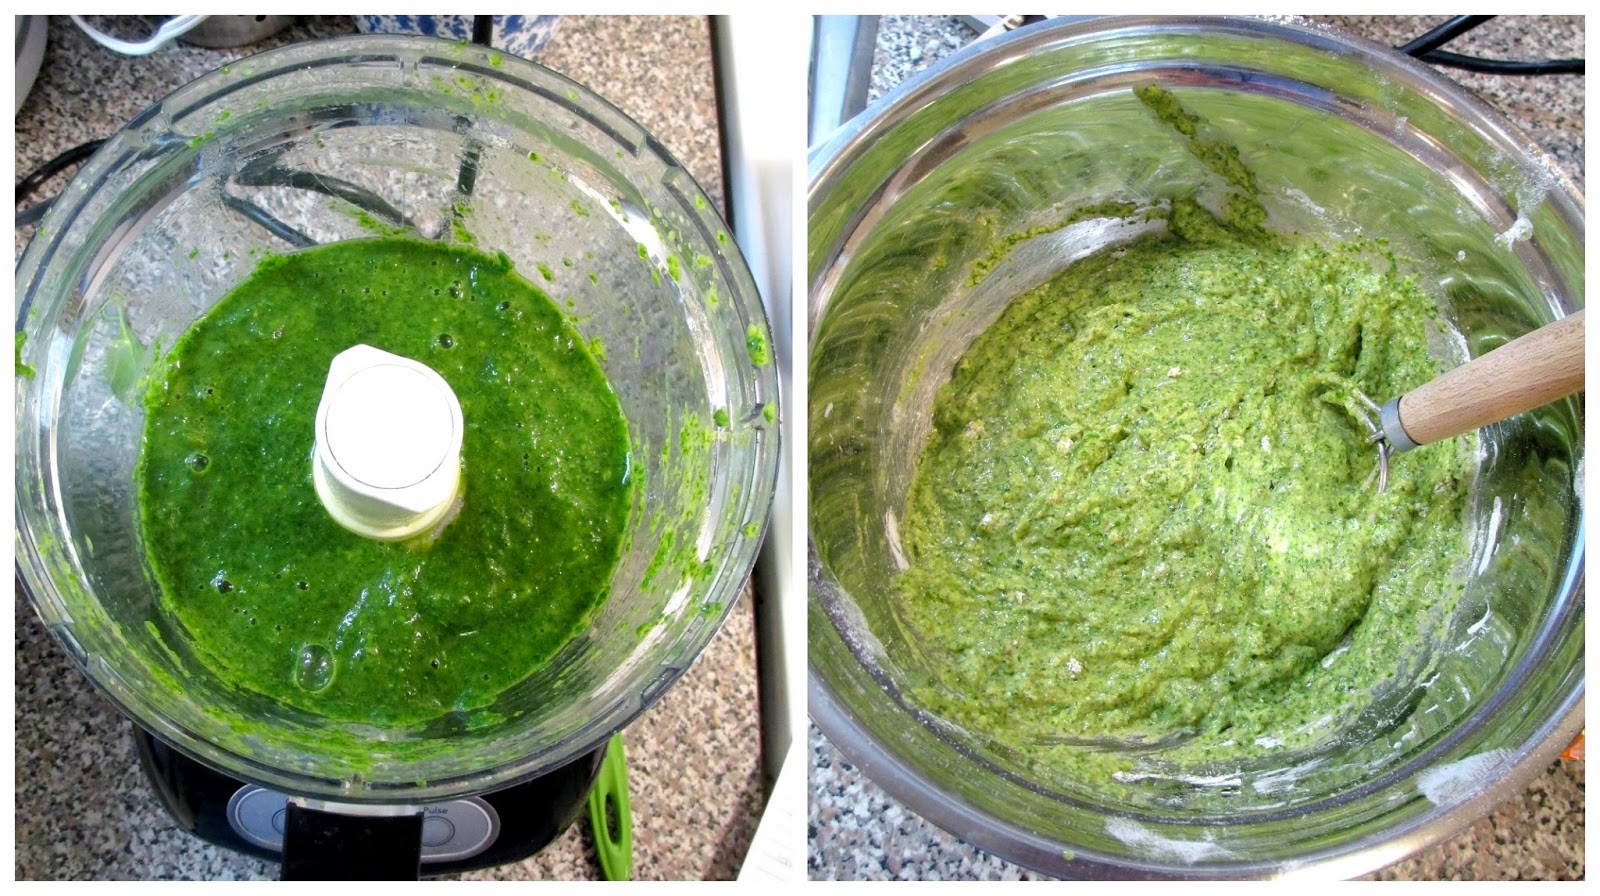
It turns out I'm not the only one to try this idea, and this recipe for popeye muffins from The Green Forks looked perfect for adapting into my own version. By pureeing baby spinach with the wet ingredients, you end up with a pretty intense green batter (see below) that actually keeps its colour after baking. 


To make my muffins a bit more nutritious, I reduced the sugar in the original recipe from 3/4 cup down to just 1/4 cup, since the recipe also uses a ripe banana to add some natural sweetness, and I replaced the oil with applesauce to make them fat-free. I also used a mix of spelt and whole wheat flours, added a flax egg, and mixed in some cacao nibs for a bit of chocolately crunch (chocolate chips would work really well too!). 

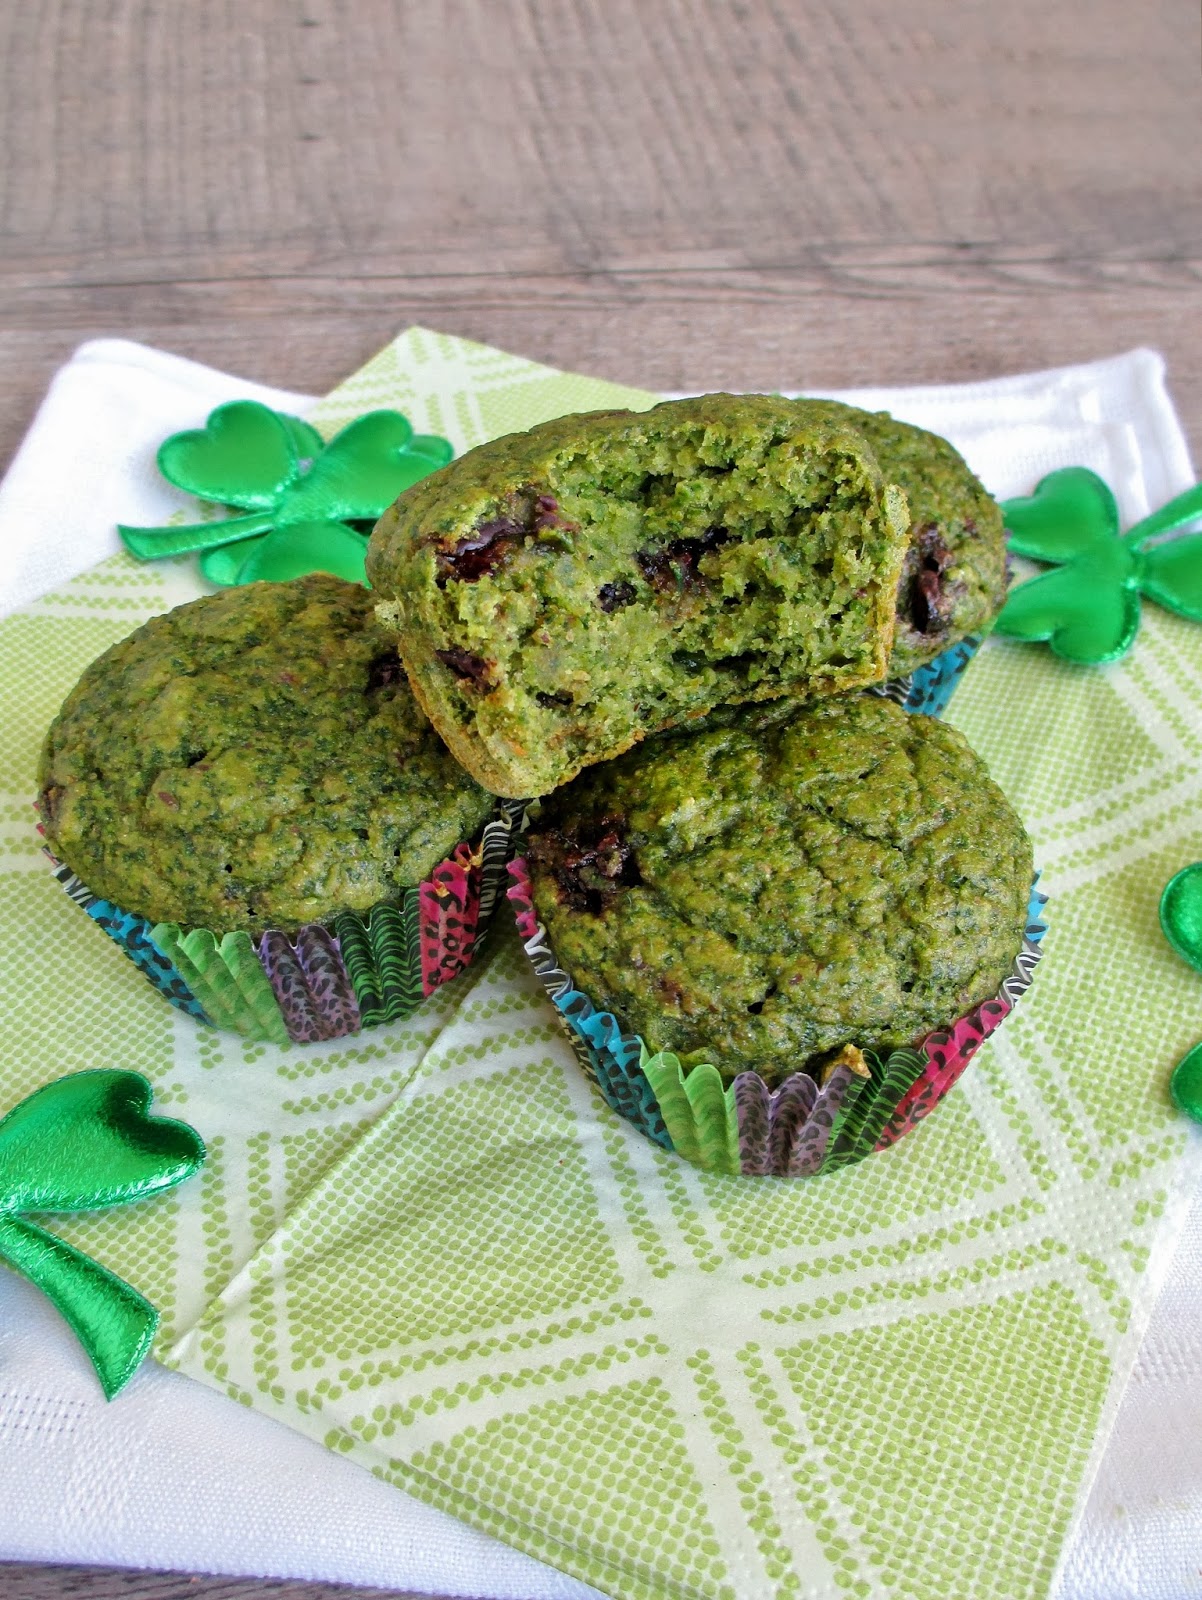
I loved the texture of these muffins - fluffy and moist inside, and they had a nice mild taste with a hint of banana. And if you're worried about the spinach, I couldn't really taste it (although I did detect a slight spinach smell by the second day). 

These would make a fun treat for St. Patrick's Day, or a healthy snack any time!


Spinach Banana Muffins
Adapted from The Green Forks

1 tbsp flax + 3 tbsp water
1 cup whole wheat pastry flour
1 cup light spelt flour (or all purpose, or more whole wheat)
1/4 cup cane sugar (increase to 1/2 cup if you like a sweeter muffin)
2 tbsp baking powder
1/2 tsp baking soda
1/2 tsp salt
1 (5-6 oz) container baby spinach
1/2 cup mashed ripe banana (1 large banana)
1/4 cup unsweetened applesauce*
3/4 cup almond milk (or other non-dairy milk)
1.5 tsp vanilla extract
2 tbsp cacao nibs (can substitute desired amount of chocolate chips)

*Note: If you don't like the texture of fat-free baked goods, feel free to use oil instead of the applesauce. You can also make these less "healthy" tasting by increasing the sugar and adding chocolate chips!


Preheat oven to 350°F and prepare a 12-cup muffin tin by lining with paper cups and spraying with cooking spray.

In a small bowl, stir together the flax and water and let sit for at least five minutes to thicken.

In a large bowl, whisk together the dry ingredients (flours to salt). In a blender or food processor, add the spinach, banana, applesauce, milk, and vanilla and puree until smooth. Pour the spinach mixture into the dry ingredients and add the flax mixture. Stir gently just until all the dry ingredients are incorporated. Fold in the cacao nibs.

Divide batter evenly into the muffin cups, filling each one about 2/3 full. Bake in the preheated oven for 20-25 minutes, until the muffins feel firm on top and a toothpick inserted in the center comes out clean.

Let muffins sit in pan for a few minutes, then remove them from the pan and let cool on a wire rack.

Makes 12 small muffins.


March 04, 2013

Raw Rainbow "Ice Cream" Cake with Coconut Whipped Cream for St. Patrick's Day


With St. Patrick's Day coming up in less than two weeks, I wanted to experiment with a recipe to celebrate the occasion. It seems like pretty much every traditional Irish recipe from soda bread to colcannon has already been posted several times, and I've seen tons of different green tinted foods and beer infused foods on the web too. 

So instead of going with something green, alcoholic, or Irish, I looked for inspiration from another St. Patrick's Day icon: the pot o'gold at the end of a rainbow!

My mind immediately started spinning with ideas for how to create a rainbow themed recipe, and in the end, I came up with this layered cake made with a raw crust, four layers of "ice cream" made solely from fruit, and a coconut whipped cream topping to resemble a cloud. And of course, the final touch that I added just for photo purposes was a pile of gold coins (chocolate, not real gold unfortunately)!


I was so happy with how this cake turned out - it was just how I had pictured it in my mind. And since I loved how it looked so much, this post is going to be more picture-heavy than usual!

While the recipe may look long and it was a bit time consuming to make, there wasn't that much actual hands-on time and as long as you've got some ripe fruit and a food processor, you can easily make this yourself!


The crust is a simple mixture of raw nuts, dates and coconut that gets crushed up and pressed down into the bottom of your cake pan.

Once the crust is ready, the next step is making the layers for the cake one at a time.  The base of each layer is a frozen banana, which as many of you probably already know, turns into a creamy ice cream-like consistency when you blend it in a food processor (although it firms up quite a bit after being in the freezer).

By adding different coloured fruits along with the banana, I was able to make four distinct layers to represent (some of) the colours of the rainbow: purple from blueberries and blackberries; pink from strawberries; yellow from mango; and green from avocado.


I actually made enough for two small cakes, in different shapes.  Pictured above is a round cake made with a miniature springform cake pan (which makes removal much easier!), and below is a rectangular cake made by forming the layers in one side of a square cake pan.

I liked the look of both shapes, so feel free to use whichever size pan is more convenient. As long the pan has edges to hold in the layers, you can build your cake in pretty much any shape you like!


While you could eat the ice cream cake on its own, I highly recommend making the coconut whipped cream topping. If you've never made whipped cream from coconut milk before, you can find step-by-step guides at the Kitchn and Oh She Glows to use as references.

I sweetened the whipped cream with a bit of icing sugar and added a dash of coconut extract to bring out the coconut flavour even more.  I loved how light and fluffy the whipped cream was and it tasted so good with the fruity ice cream layers.


If you love rainbow sherbert, then you'll love this cake because that's pretty much what it tastes like when you take a bite of all the layers together.  And if you're worried about the avocado, don't be - it actually blends well with the other flavours and you don't really notice a pronounced avocado taste when you eat everything together.

And can you believe that there's no added sugar or sweetener of any kind in the whole cake (not including the whipped cream)? As long as you have ripe fruits, they should provide all the natural sweetness you need!

I doubt my cakes will last until St. Patrick's Day, but you don't need a holiday to make this - I think it would brighten up any day :)


Raw Rainbow "Ice Cream" Cake with Coconut Whipped Cream

Note: This recipe does require some preparation at least a day in advance. Before you start making it, make sure you have at least 3 ripe bananas in your freezer and a can of coconut milk chilling in the fridge.

Crust
1/4 cup natural almonds
1/4 cup raw cashews
2 tbsp unsweetened shredded coconut
1 tbsp ground flax
Dash of salt
1/2 cup (heaping) chopped dates

Purple Layer
1 small-medium frozen ripe banana, chopped
1/4 cup blueberries and blackberries

Pink Layer
1 small-medium frozen ripe banana, chopped
1/4 cup chopped strawberries

Yellow Layer
1/2 a large frozen ripe banana, chopped
1/2 heaping cup chopped ripe mango

Green Layer
1/2 a large frozen ripe banana, chopped
1/2 a ripe avocado (about ½ cup)
1/2 tsp lime zest

Topping
1 can full fat coconut milk, chilled in the fridge overnight unopened
1 tbsp icing sugar
1/2 tsp coconut extract (can substitute vanilla extract if desired)


To make the crust, place the almonds and cashews in the small bowl of a food processor and process until the nuts are ground. Add the coconut, flax, and salt and process again until ingredients are combined. Add the dates and process until the dates are broken down. The mixture should stick together if you squeeze it together with your fingers.

Transfer the crust to the bottom of your desired pans.  I filled one round mini cake pan (4-inch wide, 2-inch deep pan with a removable bottom) and used the remaining crust to make a rectangular shaped cake by filling an 8x8 square pan (lined with a piece of parchment paper) about one-third to one-half full. Press the crust mixture down firmly, making sure it is evenly spread.  Store the crust in the fridge or freezer while you make the remaining layers.

Make the ice cream layers one a time, in whichever order you like. For each layer, place the ingredients in the small bowl of your food processor and process until smooth, scraping down the sides of the bowl with a spatula if necessary. Once you’ve made one layer, spread it evenly over the crust in your pan(s). Let it sit in the freezer until it starts to firm up, at least 15-30 minutes.

Continue with the next ice cream layer, following the same process as before. Let each layer firm up in the freezer before adding the next one. 

Here's how the cakes looked before frosting:


To make the whipped cream, open your can of coconut milk (do not shake it first). Scoop out the thick white cream that should have formed on top into a bowl (leave the watery part in the can). Use a hand mixer (or stand mixer) to beat the cream until it starts to firm up. Add the icing sugar and coconut extract and continue beating until the cream is nice and thick and fluffy like whipped cream, about 3-5 minutes.

Keep ice cream cake(s) stored in the freezer. For the best defrosting results, transfer cake to the fridge for about 1 hour prior to serving, then let sit at room temperature for 5-10 minutes, until the ice cream starts to soften slightly. Top cake(s) with whipped cream (Note: If you are storing the cake in the freezer, I would recommend keeping the whipped cream separate in the fridge, and adding it to individual servings when you're ready to eat, otherwise it will become a frozen block of whipped cream, as I learned!). 

Makes 2 small cakes or 1 larger cake.


February 20, 2013

Coffee Banana Muffins


On a snowy, chilly day like today, nothing sounds better than sitting down with a warm mug of coffee and a freshly baked treat like banana bread. And with these muffins, you can have both coffee and banana bread combined into one!

I discovered my love for the combination of coffee + bananas a few years ago when I got into making my own smoothies. In the summertime when it was just too hot to fathom drinking a hot coffee in the morning, I started making cold coffee smoothies by blending up a frozen banana with milk and instant coffee.

I've been wanting to try this combination in baked form for a while, and now I can say that it lived up to my expectations!


I thought both the banana and coffee flavours came through pretty strongly in these muffins, and in perfect balance with each other. 

Besides those two ingredients, these muffins have a couple of other special additions that take them beyond regular banana bread. First, instead of using chocolate chips, I added raw cacao nibs for a bit of crunch and a hint of chocolate flavour, while still keeping them healthy enough to eat for breakfast.

Second, I replaced half of the flour with ground up cinnamon cereal.  This idea came from a muffin recipe I had seen on Diet, Dessert & Dogs, and I was curious to try it out for myself. I was a bit worried that the cereal would make the muffins too dry, but it seemed to do just the opposite - the muffins had such a nice texture and were super moist. 

I have to say, these are some of my favourite muffins that I've made lately - they're vegan and pretty healthy overall, but without tasting too healthy. I also think the recipe would work well turned into a loaf instead of muffins, so I'll have to give that a try the next time I have a bunch of ripe bananas to use up!


Vegan Coffee Banana Muffins
Inspired by Flavor in Spades and Diet, Dessert & Dogs

1/2 tbsp ground flax
3 tbsp water
2/3-1 cup flake cereal* 
1/2 cup whole wheat flour
1/2 tsp baking soda
1/4 tsp salt
1/4 tsp cinnamon
2 medium ripe bananas, mashed
1/2 tbsp instant coffee mixed with 3 tbsp soy milk
1/4 cup pure maple syrup
1/2 tsp vanilla extract
2 tbsp melted coconut oil
2 tbsp cacao nibs

*Note: A cinnamon flavoured cereal works well in this recipe. I would also recommend choosing a brand with low sugar, so that your muffins don’t end up too sweet. I used a homemade cinnamon flavoured cereal with very low sugar. 
Update: If you don't have cereal, I made this recipe again with 1/2 cup oat flour (from rolled oats that I ground myself) instead of the ground cereal and it worked well too!

Preheat oven to 350°F and prepare a muffin pan by spraying the muffin cups with cooking spray or lining with paper liners.

Mix the flax with the water and set aside to thicken for at least 5 minutes.

To make the ground cereal, start with about 2/3 cup to 1 cup of cereal (the amount you will need depends on the size of the flakes – use more with larger flakes and less with smaller flakes). Place the cereal in a blender or food processor and grind until it resembles a flour.

Place 1/2 cup of the ground cereal, along with the whole wheat flour, baking soda, salt and cinnamon in a large bowl. Whisk to mix thoroughly.

In a separate bowl, mix the mashed bananas, coffee-milk mixture, maple syrup and vanilla. Add this wet mixture to the dry ingredients and give it a stir. Add the flax mixture and the melted coconut oil. Use a spatula or a wooden spoon to mix all the ingredients gently, just until the dry ingredients are incorporated. Fold in the cacao nibs.

Divide batter evenly into six prepared muffin cups. Bake in the preheated oven for 25-30 minutes, until the tops feel firm and a toothpick inserted in the center comes out clean (mine took about 28 minutes).

Remove muffins from pan and let cool on a wire rack.

Makes 6 muffins.

This was submitted to Wellness Weekend at Diet, Dessert & Dogs.

February 07, 2013

Baked Banana, Chocolate & Strawberry Wontons


Valentine's Day is one week away, and even though I don't particularly care for the holiday itself one way or another, I still wanted to make some kind of dessert recipe for my blog in honour of the spirit of love that Valentine's Day celebrates!

The inspiration for this recipe came from Oh My Veggies, who posted these baked banana wontons a while ago. I loved the idea of filling wonton wrappers with fruit and baking them in the oven for a healthier option than frying. I also thought they made a fancy looking dessert that would be fun to serve for Valentine's Day, so I decided to make my own version.

I liked the idea of using banana in the filling, but I also wanted to incorporate more traditional Valentine's themed ingredients so I added chocolate and red strawberries to both the filling and the topping for the wontons.


Stuffed inside each wonton is a mixture of mashed banana with strawberry jam, along with a piece of milk chocolate.  Once you've assembled all of your wontons, they go into the oven to bake and when they come out, the filling is warm and gooey so that you taste chocolate melted together with banana and jam with each bite.  For a non-chocolate lover like myself, these have a nice balance of light fruit and rich chocolate, without any of the ingredients being too dominant.

Since the wontons would have looked a little plain on their own, I made an easy strawberry sauce by simmering fresh strawberries on the stovetop with a bit of agave, vinegar and vanilla extract for more flavour. Finally, a drizzle of melted chocolate and a light dusting of powdered sugar turns this into a fancier looking dessert that you can serve to your loved ones or treat yourself with on Valentine's Day.

I ended up eating most of these myself immediately after I made them (telling myself that wontons can count as dinner), so you don't need a holiday to enjoy them either!

Feel free to play around a bit with the ingredients too - I liked the combination of strawberries with banana, but I think raspberries would also make a delicious sauce, and a sprinkle of toasted almonds or pistachios would add a nice crunch. You can also try baking them at a higher temperature if you want the wontons to be more crispy, but I personally preferred the way these came out with a soft middle and chewy edges.


Baked Banana, Chocolate & Strawberry Wontons
Inspired by Oh My Veggies and Weight Watchers
Note: My version of this dessert was not vegan, but if you can find eggless wonton wrappers and vegan chocolate, you can make a vegan version!

Strawberry Sauce
1 cup chopped strawberries, tops removed
2 tbsp agave nectar
1/2 tbsp white balsamic vinegar
1/2 tsp vanilla extract

Wontons
12-15 square wonton wrappers
1 medium banana, mashed
2-3 tbsp strawberry jam 
Half of a Hershey’s milk chocolate bar (or another chocolate bar)
1 ¼ tsp melted coconut oil, divided
~1 oz dark chocolate
Icing sugar for serving
More chopped strawberries for serving (optional)


Preheat oven to 350°F and prepare a large baking sheet with parchment paper.

First, make the sauce: Place strawberries, agave, and balsamic in a small saucepan over medium-high heat. Once the mixture starts bubbling, reduce heat to medium-low and let simmer for about 10 minutes. Remove from heat and stir in the vanilla. Mash the strawberries up a bit to get a smoother sauce. Keep warm on low heat while you make the wontons.

For the wontons, lay out one wrapper and place one heaping teaspoon of banana in the middle. Top with ½ tsp of strawberry jam and half of a rectangle of Hershey’s chocolate (or an equivalent amount of another chocolate if you use a different kind). 


Wet the edges of the wrapper with water, then gently fold over one half so that it forms a triangle. Seal the edges together with your fingers tightly, being careful not to let the filling squeeze out.

Keep a small bowl with 1 tsp melted coconut oil aside. Brush both sides of the wonton with melted coconut oil and lay on the prepared baking sheet. 

Repeat with remaining ingredients until the banana mixture is used up – I got 12 wontons.

Place baking sheet in the preheated oven and bake for 8-10 minutes, until the outside is starting to brown on the edges.

Meanwhile, melt the dark chocolate in the microwave. Heat on high for 30 seconds, then add ¼ tsp coconut oil and microwave again in 15 second intervals, stirring each time, until the chocolate is smooth and melted.

To serve, lay wontons on a plate and top with a few spoonfuls of the strawberry sauce. Drizzle some of the chocolate sauce over top and use a sieve to add a dusting of icing sugar.  Add some chopped fresh strawberries as a garnish if desired.  Serve warm.

Makes about 12 wontons, or 3-4 servings.

Note: These are best eaten fresh as the edges will get chewier the longer they sit out, but if you have leftovers, you can store them in the fridge and reheat briefly (only 10-20 seconds) in the microwave. 

September 04, 2012

Chewy Almond Butter & Banana Granola Bars


Here in Ontario, today marks the official start of another school year.  As I mentioned in my last post, this doesn't mean as much to me anymore, but I'm sure a lot of you have either been dreading or looking forward to this day for a while!

Even though I don't have kids of my own, I'm well aware that back to school time means having to scramble each morning to put together a healthy lunch (or two...or three...).  A storebought packaged granola bar is a good option to throw into lunchbags as a snack, but if you can pack homemade granola bars with whole grains, natural ingredients and no added sugar instead, that could be an even better idea!

I thought this would be the perfect time to share the latest granola bars to come out of my kitchen. For this particular batch, I went with a base of rolled oats, almonds, millet, mixed seeds, and dried fruit, held together with a mixture of almond butter and mashed banana.  I almost left out sweetener completely, since I figured the banana and dried fruit would add plenty of natural sweetness, but I ended up adding just a tablespoon of coconut nectar because its thick and syrupy texture would help bind the ingredients even more.


I thought these granola bars held together well and had just the right amount of sweetness for my tastes.  They also had a good textural balance of chewy and crunchy - my favourite parts were the tart dried cherries that I added, and the extra bits of crunchiness from the tiny grains of millet.

I also liked that these granola bars were nice and hearty - one bar filled me up for two or three hours, unlike some of the granola bars you can buy from the grocery store.  Or if you're looking for a lighter snack, you could also cut them into smaller squares.

So whether or not you have any lunchbags to pack this week (for yourself or your kids), these granola bars are a great healthy option, and they're pretty easy to make too - you probably have a lot of the ingredients in your pantry already, and if not, they're very adaptable to what you have on hand!


Chewy Almond Butter & Banana Granola Bars
Adapted from Anja's Food 4 Thought, as seen on Eat Good 4 Life

1/2 cup raw almonds
1/4 cup chopped dates
1/4 cup mixed dried fruit (I used cranberries, blueberries and cherries)
1 cup rolled oats
2 tbsp dry millet
1/4 cup mixed seeds (I used half pumpkin seeds and half sunflower seeds)
1 tsp cinnamon
1/2 tsp salt
2 tbsp ground flax
1/2 cup almond butter (could substitute another nut butter)
2 ripe bananas, mashed
1 tsp vanilla extract
1 tbsp coconut nectar or another liquid sweetener (optional - could leave out)

Preheat oven to 350°F and prepare an 8x8 inch pan by spraying with cooking spray or lining with parchment paper.

Place almonds, dates, and dried fruit in food processor and process until roughly chopped (alternately, you can chop by hand with a knife).

Transfer to a large bowl and add oats, millet, seeds, cinnamon, salt, and flax. Use a whisk to mix thoroughly.

Place almond butter and mashed bananas together in a small bowl and microwave for about 30 seconds. Stir or whisk until smooth (you may need to microwave it again for another 15 seconds before it is smooth enough).   Stir in the vanilla and coconut nectar.

Pour the wet mixture into the dry ingredients and stir with a rubber spatula until all the dry ingredients are moist and evenly coated.

Pour mixture into prepared pan and press down firmly with a rubber spatula. Bake for 22-27 minutes, until the edges are browned and the top is firm.

Let cool in the pan for a few minutes, then invert onto a wire rack to finish cooling.  Once completely cool, cut into bars.

Makes about 10 bars.

August 23, 2012

Triple Layer Avocado Banana Carob Pudding


I've been known to experiment with some unusual or less common ingredients in my baking, like beets, daikon radish and chickpeas.  Sometimes these experiments turn out well (in the case of my raw beet cheesecake and chickpea granola bars) but other times they've sadly ended up in the garbage.

Another "abnormal" ingredient that I've been wanting to incorporate into a dessert for a while now is avocado.  I've seen many versions of avocado pudding around the blogosphere lately and I've been curious to try it, but a couple of factors have prevented me from making it so far:

1) Most of recipes I've seen are for chocolate pudding, and I'm not a big fan of chocolate desserts
2) I don't often make dessert just for myself and I wasn't sure how my family would feel about me serving them a pudding made with avocado for dessert!

But last week, I had a ripe avocado that I had no plans for, and I was craving a cool and creamy dessert, so I decided to go ahead and make my own single-serving version of avocado pudding.


Instead of making a one-dimensional chocolate pudding, I wanted to try different variations and flavours that I could layer on top of each other like a parfait.  I decided on a simple avocado-banana version with lemon as one flavour, and a carob version since I find carob a bit milder and sweeter than chocolate.  To separate the two avocado layers, I made a banana pudding with a bit of peanut butter, which I thought would go well with the carob and avocado.

This pudding actually came together really quickly and since I used frozen bananas, it was already thick and cold enough to eat without needing to chill in the fridge first (although you could still make it ahead of time and keep it in the fridge until you're ready to eat it).

The texture was so smooth and creamy from the avocado, and I loved each of the flavours - both separately and combined!  I liked that the carob layer had a hint of chocolate flavour without being too rich, and I loved the burst of lemon and coconut in the top layer.  Finally, a garnish of shredded coconut and raw cacao nibs adds some welcome texture and crunch.

And in case you're worried about eating avocado for dessert, I actually thought it contributed more in terms of texture rather than flavour - I probably wouldn't have guessed it was made with avocado if I hadn't known!

Now that I've finally tried avocado pudding, I can't believe I waited so long!  I ate half of my "dessert" in the afternoon immediately after I photographed it and had to stop myself from eating it all at once because I wanted to save some for a second dessert later.  And I even think I could get away with serving this non-traditional vegan pudding to my family without any complaints!


Triple Layer Avocado Banana Carob Pudding

1.5 frozen small bananas
Half a ripe avocado
1/4 cup + 1-2 tbsp non-dairy coconut milk beverage (or almond milk)
1 tbsp + 1/2 tsp agave nectar
1/2 tbsp carob powder
1 tbsp fresh lemon juice
1/4 tsp coconut extract (optional)
1/2 tbsp peanut butter
Shredded coconut and cacao nibs for topping

Place 1 small frozen banana and the avocado in a food processor. Add ¼ cup coconut milk and 1 tbsp agave and process until all chunks are broken down and mixture is smooth.

Divide mixture evenly into two small bowls.  Add carob powder to one bowl and whisk until incorporated. Add lemon juice and coconut extract to the other bowl and stir to mix. Place both bowls in the fridge while you prepare the other layer.

Rinse out the food processor and place the other half frozen banana in the small bowl of the food processor. Add 1-2 tbsp coconut milk beverage, 1/2 tsp agave and 1/2 tbsp peanut butter and process until smooth.  Place in the freezer to chill.

When ready to serve, layer each of the three mixtures into a parfait glass or bowl (I put the carob on the bottom, the banana in the middle, and the avocado-lemon on top).  Sprinkle with shredded coconut and cacao nibs if desired.  Serve cold.

Makes 1 large serving or 2 small servings.

July 02, 2012

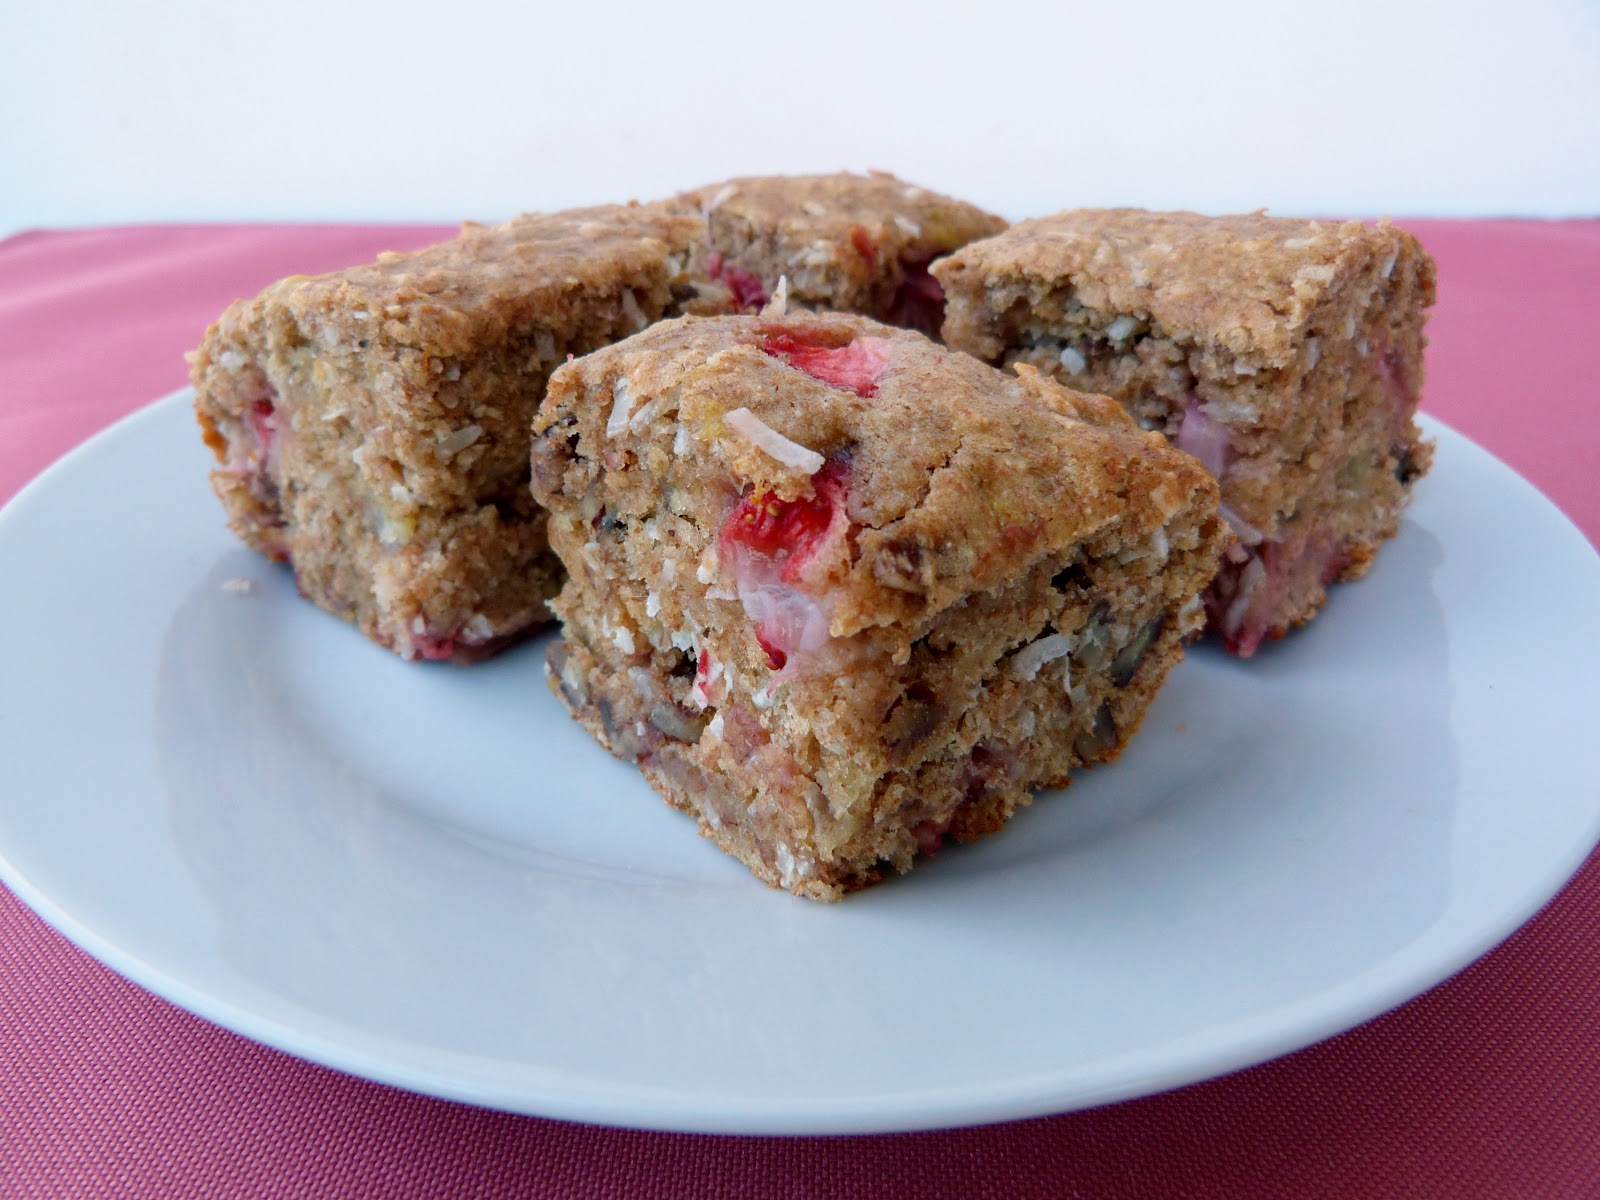
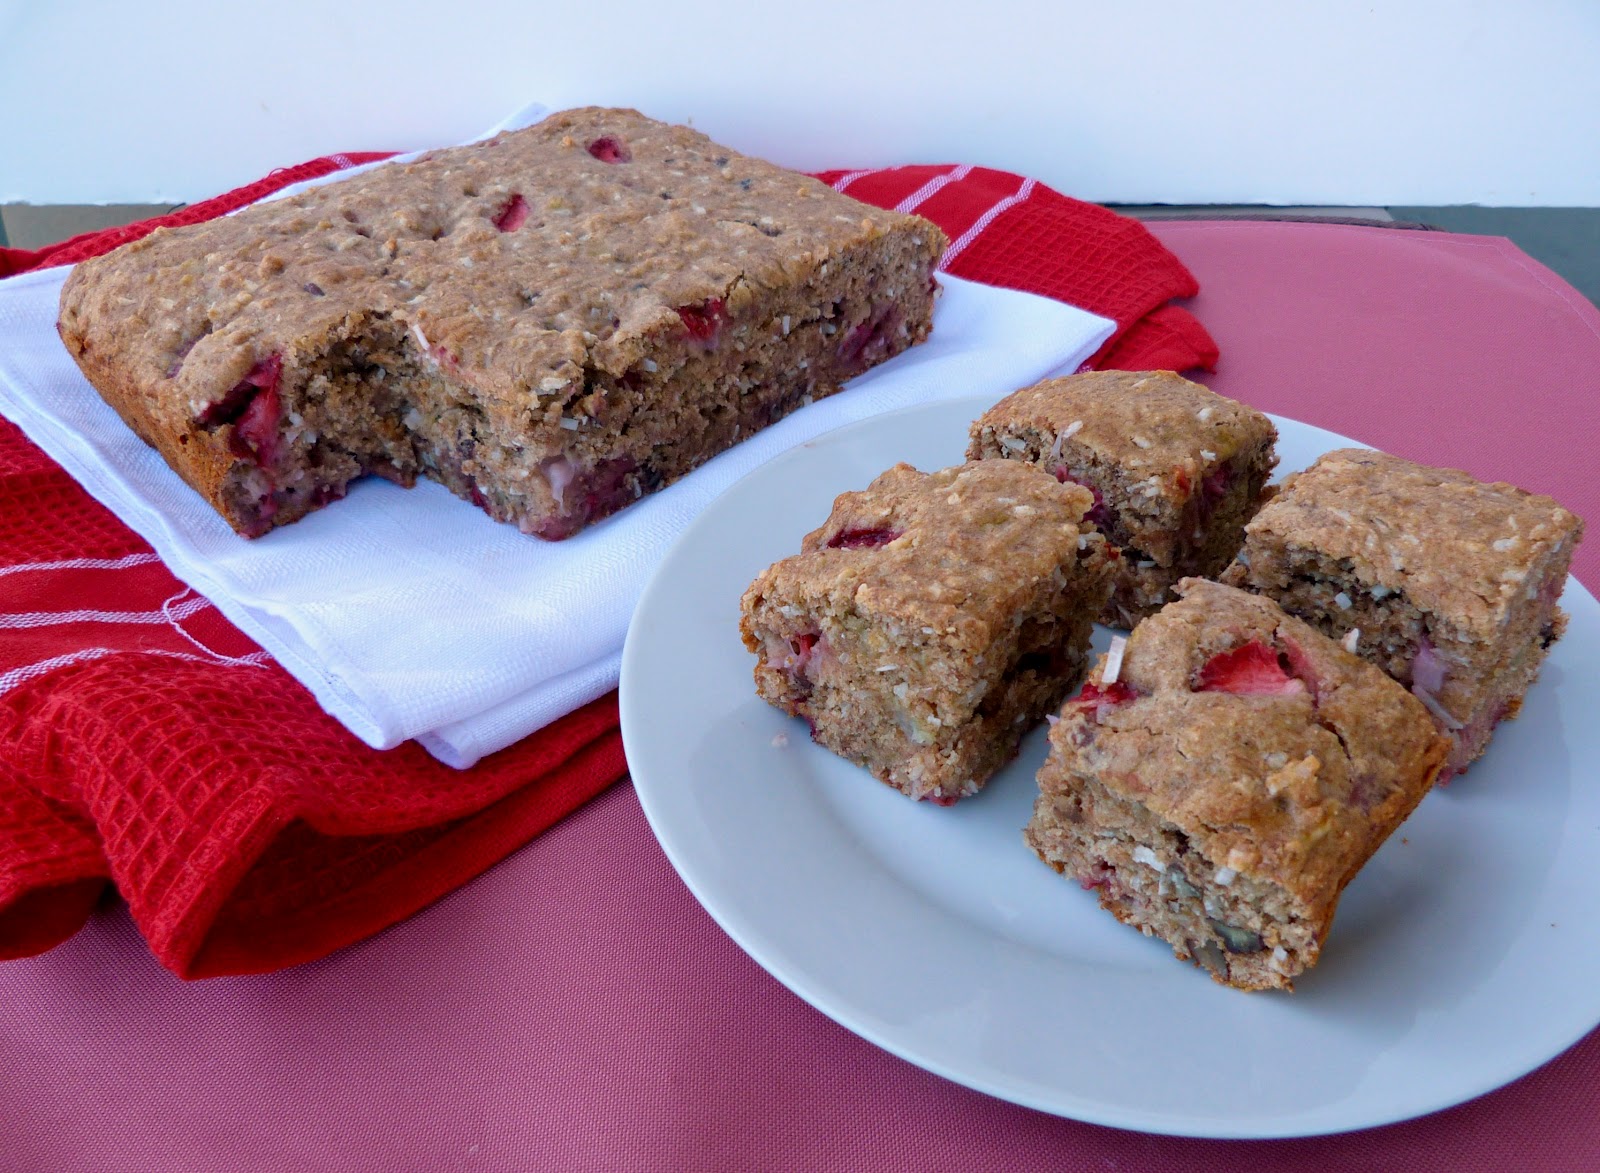
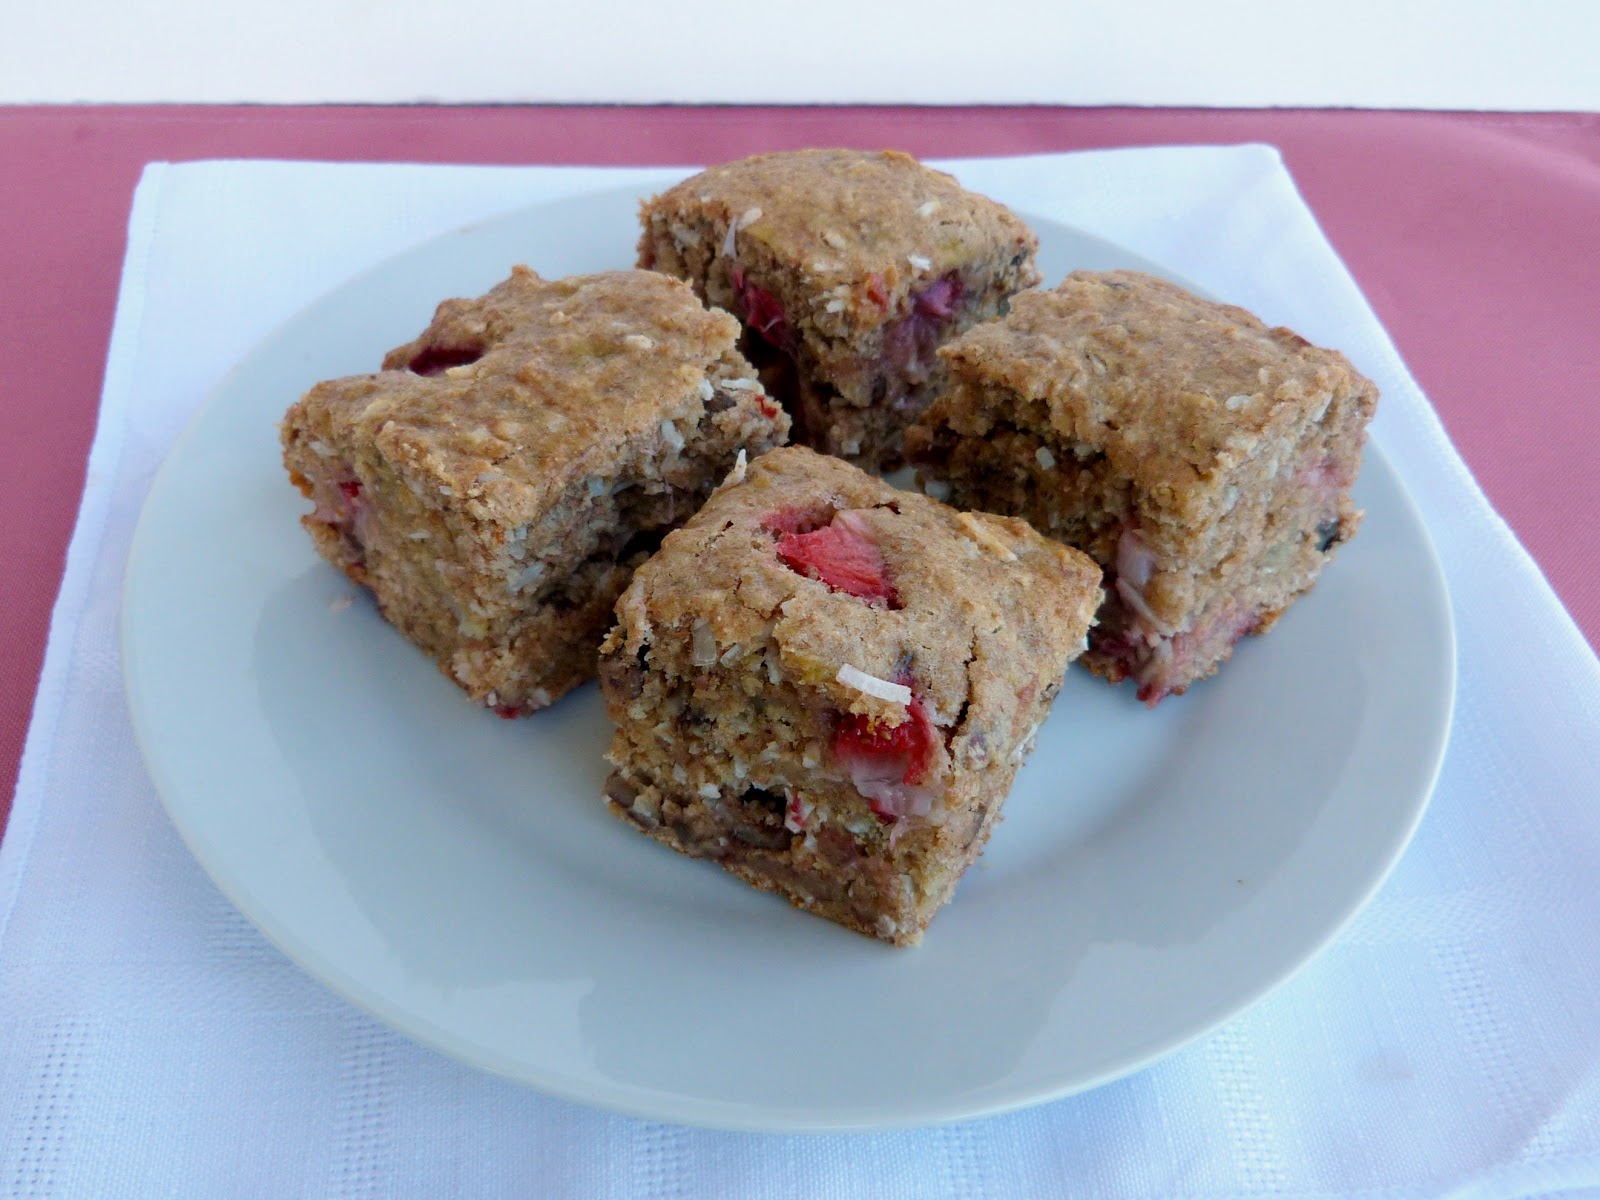
Strawberry Banana Snack Cake


I mentioned last week that I still had another strawberry recipe coming up, and I couldn't wait any longer to share it with you!

I love making healthy snack cakes because they're usually so easy to put together - just mix the batter and pour it all into one pan.  I also like that you can eat them whenever and however you like - I enjoyed these as part of my breakfast, as morning and afternoon snacks, and for dessert!

I was inspired to make this snack cake by a recipe I had bookmarked from Sweet & Natural for banana coconut bars.  Since I also had some local strawberries that I wanted to incorporate into some kind of baked treat, I decided to modify the recipe by adding chopped strawberries to the cake.
I made a few other changes to the recipe as well, like substituting spelt flour for half of the whole wheat flour,  adding vanilla extract, replacing the molasses with cane sugar, and eliminating the agave syrup because I thought the cake would be sweet enough already.  I also added some chopped pecans for extra texture and crunch.


I have to say, this may be one of my favourite snack cakes I've made yet! The texture turned out the way a lot of low-fat baked goods tend to be, which I happen to love - dense and slightly chewy, and super moist.

I thought the strawberry, banana and coconut flavors all came through in just the right balance, and it had just the right amount of sweetness too (I actually would have preferred it a bit less sweet, but I think my sweet tooth is lacking a bit - my sister assured me it was perfect the way it was!)


I shared some of this cake with my family, and they all loved it too. It's a nice treat to have around for snacking, especially because it's pretty healthy and light, so you can eat a couple pieces without feeling stuffed. It also keeps well for a few days in a container, although it might not last that long!

This would be a great way to use up any strawberries you might still have, but don't worry if you can't get local ones anymore - I think the store-bought ones would work well in this recipe too.  Or you could try the recipe with another summer fruit - I think blueberries would taste amazing with the banana and coconut!


Low-Fat Strawberry Banana Snack Cake
Adapted from Sweet and Natural 

1 cup whole wheat flour

1 cup light spelt flour
1/2 cup shredded coconut (I used sweetened but next time I would try unsweetened)
1 tsp baking powder
3/4 tsp baking soda
1/2 tsp salt
3 ripe bananas, mashed
1/3 cup unsweetened applesauce
1/4 cup pure maple syrup
2 tsbp cane sugar
1 tsp vanilla extract
1 cup chopped strawberries
1/3 cup chopped pecans

Preheat oven to 350°F. Spray an 8x8 pan with cooking spray.

Whisk the dry ingredients in a large bowl (flours through to salt). In a separate bowl, mix the wet ingredients (mashed banana through to vanilla extract).

Add the wet ingredients to the dry ingredients and stir just until the dry ingredients are incorporated.  Gently fold in the strawberries and pecans.

Pour batter into prepared pan and bake in the preheated oven for about 35-45 minutes, until the sides start to pull away from the pan, the top feels firm, and a toothpick inserted into the center of the cake comes out clean.

Let cool in the pan for a few minutes, then invert onto a wire rack to finish cooling before cutting into squares.

Makes about 16 squares. 

May 25, 2012

Tropical Granola


If I had to choose my favourite thing to eat for breakfast, it would probably have to be a bowl of yogurt with sliced fruit and granola.  Even though I eat a lot of granola, surprisingly I haven't posted a recipe for it yet on my blog, so I thought it was about time to change that!

Typically, what I look for in a granola is a mix of textures and ingredients that tastes good both eaten on its own as a snack, and also mixed into yogurt.  My favourite storebought brand of granola right now is Nature's Path Love Crunch granola in their Carrot Cake flavour. I love the combination of the sweet chunks of granola, crunchy pecans, chewy dried pineapple and the yogurt chips.

While there are some great packaged brands of granola, they can be a bit expensive.  I've learned that it's pretty easy to make your own homemade granola, and the best part is that you can customize it with whatever ingredients you like!


Since I love tropical flavors like banana, pineapple, and coconut, I knew that I wanted to create my own tropical granola.  I actually decided to make this granola as part of my Mother's Day gift to my mom, who also loves coconut!

To get the tropical flavour I wanted, I used four different coconut products: coconut butter (which I made from processing unsweetened coconut in a food processor), coconut nectar, coconut flakes, and coconut extract.  I also added dried pineapple and cranberries, banana chips, sliced almonds and pecans.

I loved that this granola was chock-full of different ingredients so that every handful or spoonful had something special in it! This was a light and crunchy granola that was a great snack to eat on its own, but I also liked it in yogurt - a thicker yogurt works best. I actually tried it in this Liberte coconut yogurt and it was amazing!

Although I didn't get to taste-test much of this granola because I gave it away as a gift, my Mom told me that she really liked it too, and confirmed that the recipe was blog-worthy!


Tropical Granola

2.5 cups rolled oats
1 cup puffed rice
1/2 cup chopped pecans
1/4 tsp salt
2 tbsp melted coconut butter (homemade or from a jar)
1/4 cup applesauce (at room temperature)
1/4 cup coconut nectar
2 tbsp pure maple syrup
1 tsp coconut extract
1/2 cup unsweetened coconut flakes
1/2 cup sliced almonds
1/3 cup chopped banana chips
1/3 cup dried cranberries
1/3 cup chopped dried pineapple

Preheat oven to 325°. Line a large baking sheet with parchment paper.

Mix the first four ingredients together in a large bowl.  Mix the wet ingredients (coconut butter to coconut extract) in a separate bowl, stirring until the mixture is smooth. Add the wet ingredients to the dry ingredients and stir gently with a spatula until all the dry ingredients are coated.

Spread mixture onto the prepared baking sheet in an even layer and bake in the preheated oven for 30 minutes, stirring once halfway through.

Remove from oven, give the granola one more stir, and add the sliced almonds and coconut flakes.  Return to oven for 10-15 more minutes, until the coconut and almonds are lightly toasted (be careful not to burn them).

Remove from oven and add the banana chips and dried fruit. Let cool completely before transferring to a container. 

April 04, 2012

Tropical Lassi


Now that I'm settled back in Canada after experiencing the sunny days and scorching temperatures over in Asia, I'm even more anxious for summer to finally arrive!  But in the meantime, I can at least enjoy some of the tastes of summer by sipping on tropical inspired drinks, like this lassi!

I make a lot of smoothies at home, but I don't usually post the recipes for them, for a couple of reasons: 1) there are already so many smoothie recipes out there, and 2) I don't usually measure my ingredients, I just throw them in the blender and adjust the amounts until it tastes the way I want it.

This smoothie that I made a while ago was so good though that I had to share it with you!  I'm actually calling it a lassi instead of a smoothie because the main ingredient is yogurt.  To get the tropical flavor that I was looking for, I used So Delicious Coconut Milk Yogurt and blended it with fresh pineapple and banana. The fruit provided enough sweetness that I didn't need to add any extra sugar or sweetener. And like traditional Indian lassis, I added a pinch of cardamom for a subtle touch of spice.

This lassi turned out super thick and creamy, and I absolutely loved the flavours - I found the taste of the pineapple came through the strongest, but it combined really well with the banana and coconut.  And for an extra special touch, I recommend topping your lassi with a sprinkle of toasted coconut and some chopped fresh pineapple!


Tropical Lassi

1/2 a frozen banana, chopped
1 cup fresh pineapple, diced
1/2 cup coconut milk yogurt (I used So Delicious Vanilla)
Pinch of ground cardamom (optional)
1 tbsp sweetened shredded coconut, lightly toasted (I toasted it in a dry skillet)


Place the banana, pineapple and yogurt in a blender and process until smooth. Add the cardamom and blend again.

Top with extra pineapple chunks and toasted coconut. Serve immediately.

Makes 1 serving.


This was submitted to Wellness Weekends at Diet, Dessert & Dogs.

January 15, 2012

Peanut Butter & Banana Oatmeal Cookies


After a week of posting about healthy dinner ideas, I figured it was time to share another treat! But these vegan peanut butter banana cookies would hardly qualify as an indulgence - they contain healthy fats from almond butter and peanut butter, very little oil, and the only added sweetener is a touch of pure maple syrup.

I made these cookies for my family just after New Years, but since nobody really wanted another dessert lying around the house after the holidays, I only made a small batch and reassured everyone that they were "healthy" cookies.

I guess I should have made a bigger batch because all the cookies disappeared pretty quickly! They were soft and thick (my favourite kind!) and had a nice balance of flavors between the almond butter and peanut butter with a hint of banana.


2011 Canadian Weblog Awards

Before I get to the recipe, I wanted to share a bit of exciting news that I received this morning - the Ninjamatics 2011 Canadian Weblog Awards just announced their shortlist of nominees for blogs in a variety of categories, and I was so happy to find out that I made the top five for two categories - Best New Weblog and Best Weblog About Food and Drink!

Even if I don't make it any further to the final round, I'm honoured just to be chosen among all the other great blogs that were nominated! Congratulations to the other Canadian nominees on the shortlist!


Peanut Butter & Banana Oatmeal Cookies
Adapted from Food Doodles

1 cup rolled oats
2.5 tbsp shredded unsweetened coconut
1/2 tsp baking powder
1/4 tsp cinnamon
1/4 tsp salt
1 large ripe banana
2 tbsp each almond butter and peanut butter (or ¼ cup peanut butter)
1.5 tbsp canola oil
1/2 tsp vanilla
3/4 tbsp pure maple syrup
Handful of chocolate chips
Handful of raisins

Preheat oven to 350°.

In a large bowl combine all the dry ingredients (oats through to salt).

In a separate bowl, mash the banana. Add the nut butters, oil, vanilla and maple syrup and whisk until smooth. Add the wet ingredients to the dry ingredients and stir until all the dry ingredients are incorporated. Fold in the chocolate chips and raisins.

Line a large baking sheet with parchment paper or coat with baking spray. Scoop out the dough and drop cookies onto the baking sheet about 1” apart. Bake for 12-14 minutes, until they start to turn golden. Let cool on the baking sheet for a few minutes to help them firm up, then transfer to a wire rack to finish cooling.

Makes about 13 cookies (You may want to double the recipe for a bigger batch!) 


December 09, 2011

Vegan Eggnog Soft Serve


I've mentioned before that my new obsession this holiday season is So Nice Noel Nog. Other than drinking it straight from the carton, I've also used it in cookies and these scones, and now I have another delicious way to use it - creamy, Christmas-y soft serve!

This is another variation of the banana soft serve that has become very popular in the blog world. Not surprisingly, I'm not the first blogger to come up with an eggnog version - Peas and Thank You posted the perfect recipe last year so mine is based on hers, which you can find here.


I also thought that some graham cracker crumbs would be the perfect topping for my eggnog soft serve, but I didn't have any in my pantry at the time, so I ambitiously set out to make my own graham crackers from scratch....unfortunately, my attempt wasn't that successful - even though I checked on them in the oven early, they were already burnt and barely edible.

Luckily I managed to salvage a few of the least burnt crackers to crumble up and use for a topping, so it still worked out just how I was hoping!

Even though the base of the soft serve is a banana, the eggnog was definitely the dominant flavour, with a touch of cinnamon and nutmeg. This makes a great healthy holiday treat that is so easy to whip up for dessert or as a snack any time!


Vegan Eggnog Soft Serve
Adapted from Peas and Thank You

1 frozen banana
2.5 tbsp non-dairy egg nog (I used So Nice Noel Nog)
1/2 tsp agave syrup (I used a vanilla-flavoured one)
1/4 tsp pumpkin pie spice
pinch of nutmeg
cinnamon and graham crackers for topping

Chop up your banana and place in a food processor. Add the eggnog, agave, pumpkin pie spice and nutmeg. Process until the mixture is completely smooth. 

Transfer to a chilled glass or bowl and top with a sprinkle of cinnamon and crumbled graham crackers if desired.

Makes 1 serving.


This is linked to FaveDiet's December Blog Hop - you can vote for me here!

October 04, 2011

Thanksgiving Week - Day 3: Rosemary Sweet Potato Cornbread


For Day 3 of Thanksgiving Week, I wanted to include a recipe for a bread to serve with the meal. One of my favourite parts of our Thanksgiving dinner is always the basket of fresh bread on the table. In our family, we usually serve fluffy white dinner rolls and slices of artisan loaf, but I know that in other families, hearty biscuits and cornbread are a traditional part of the Thanksgiving spread.

With this in mind, and inspired by an amazing sweet potato cornbread that I recently tried at a restaurant, I set out to find a recipe for a vegan sweet potato cornbread that I could add to my Thanksgiving Week menu. Unfortunately, I didn't have much success in my search so I had to come up with my own version instead. I ended up using a recipe for rosemary sweet potato loaf that I saw on The Baking Duet and adapting it by leaving out the nuts and adding cornmeal.


The result was not quite the same as the restaurant version that I tried, but it still turned out great! This is a nice hearty loaf and is very dense. It has a slightly sweet taste and a nice crunchy crust from the cornmeal.

This is also a very healthy bread, since its made with whole wheat flour and its full of fruits and veggies - bananas, applesauce, sweet potato, and even carrots! (But don't worry, this doesn't taste like banana bread, the banana is just there for texture and moisture).

So if you're looking for a traditional dinner roll or biscuit recipe to serve with your Thanksgiving meal this year, this probably isn't the recipe for you....but if you're willing to try something new and interesting, I would recommend this sweet potato loaf! And don't leave out the branch of fresh rosemary on top of the loaf - it makes for a great presentation!


Rosemary Sweet Potato Cornbread
Adapted from The Baking Duet

1 lb of peeled and diced sweet potato
1/2 ounce fresh rosemary (about 1/2 of a bundle)
2/3 cup mashed ripe banana (about 2 bananas)
1/2 cup unsweetened applesauce
3/4 tsp baking soda, divided
1/2 tsp salt
1 1/4 cups whole wheat flour
3/4 cup medium grind cornmeal
1/4 cup grated carrots

Set aside a large sprig of rosemary and remove the leaves from the remaining sprigs.

Bring 1/2 cup water to a boil in a medium saucepan. Reduce heat to a simmer and add in the rosemary leaves. Let the leaves steep in the water for about 5 minutes.

Add the diced sweet potato to the pot, cover, and steam until potatoes are soft.

Meanwhile, mash the bananas with 1/4 tsp of the baking soda in a large bowl. Mix in the applesauce, salt, and remaining 1/2 tsp baking soda.

When the sweet potatoes are done cooking, drain and rinse off the rosemary, then mash the potatoes until they are creamy.

Add the mashed potatoes to the banana mixture. Stir in the flour and cornmeal, then fold in the grated carrots.

Pour the batter into a greased loaf pan (I used an 8x4 inch pan) and lay the reserved sprig of rosemary on top of the loaf.

Bake at 350°F for 50-60 minutes, until the crust is crisp and a toothpick inserted into the bread comes out clean.

Remove from oven and cool on a wire rack before slicing.


Makes 1 loaf.


Don't Miss:
Thanksgiving Week - Day 3 recipe on Once Upon a Cutting Board: Hearty Sweet Potato Braid - this is another option for your Thanksgiving bread that also uses sweet potato! 


LinkWithin

Related Posts Plugin for WordPress, Blogger...